How to make a Prissy Pink Princess Ribbon Wreath.
I decided to stray from my typical “clean and simple” style to go super feminine
with this Prissy Pink Princess Ribbon Wreath.
The wreath could also double as a princess crown. (If you’re into that kind of thing.)

Usually, when I start a project, I have an idea of how I want it to turn out.
This project, however, turned out completely different than my original plan.
I started with a basket of pink, white and red ribbons in various widths and styles.
I wanted to make a simple ribbon wreath and tie cut strips of ribbon to a wreath form.
I wasn’t happy with it, so I scratched that idea. (it’s a good idea to be flexible)

Here’s what I did instead:
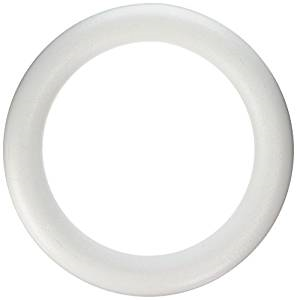
- Being resourceful, I used a 5 ½” lid from an extra-large Nesquik can for the base.
- Using the inside ridge as my guide, I cut away the inside.

- Because when I started this project, I was going to do something different, I spray painted the rim of the lid white.
- It’s still probably a good idea to do, depending on what kind of wreath you intend on making. (Unless you like the color blue.)

- Wrap and cover the rim of the lid with a 7/8″ White Grosgrain Ribbon*. To give the ribbon wreath a little more softness and size, I added a little bit of poly-fil under the ribbon while wrapping. Use a Hot Glue Gun* to glue the ribbon to keep the ribbon from moving. It took approximately two yards of ribbon to go around the edge of the lid.
- Wrap additional pink sheer ribbon around the white grosgrain ribbon.
*Disclosure: This blog uses ads and affiliate links. If you choose to make a purchase using one of the links, I receive a small commission (at no additional cost to you) that helps offset the costs of maintaining this blog. Thanks for your support!
Make ribbon rosettes flowers to go around the wreath in different sizes.
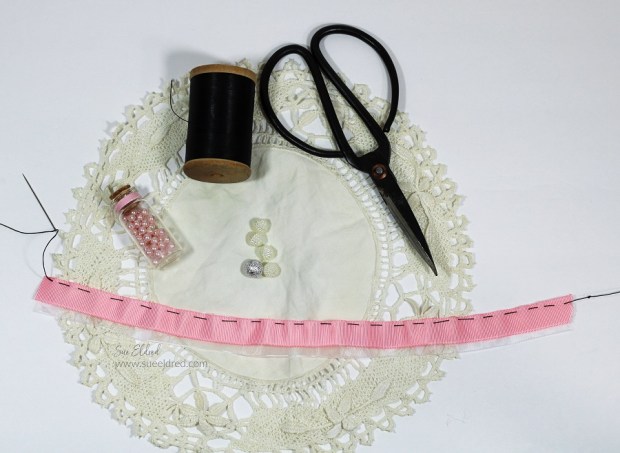
- For the larger rosette flowers, cut a 12″ piece of 7/8″ White Sheer Organza Ribbon* and a 12″ piece of 5/8″ Pink Grosgrain Ribbon*.
- Lay the 5/8″ Pink Grosgrain Ribbon* on top of the sheer ribbon and create a “running stitch” down one side of the ribbon.

- Gather the ends of the thread together and tie in a knot. Trim the ends. I use a heavy-duty sewing thread for the rosettes. It doesn’t break when I tighten them.
- Hot glue a fancy rhinestone button in the center of the rosette.
- Glue flower onto the wreath.
- To make smaller rosette flowers, use 6″ strips of 3/8″ satin or grosgrain ribbon. Create a “running stitch” like used in the larger rosette and tighten.
- Glue a small pearl bead in the center of the rosettes.
- Glue smaller rosettes around the larger rosette.
- Create small leaves by folding and scrunching green ribbon. Glue under the rosette flowers.
- Create strings of pretty beads anchored with additional flower rosettes to hang in the middle of the wreath.
- Cut a larger piece of ribbon for hanging the Prissy Pink Princess Ribbon Wreath.
- Create a ribbon bow for the top of the wreath. Glue a fancy rhinestone button onto the bow and glue it into place.
![]()
Disclosure: This is a sponsored post for Gwen Studios. I have been provided product in exchange for my creative ideas. The views and opinions are my own.
Materials Used: (*affiliate links)
- Gwen Studios 3/8″ Pink Satin Ribbon*
- Gwen Studios 3/8″ White Grosgrain Ribbon*
- Gwen Studios 3/8″ Pink Grosgrain Ribbon*
- Gwen Studios 5/8″ Pink Grosgrain Ribbon*
- Gwen Studios 7/8″ Pink Grosgrain Ribbon*
- Gwen Studios 7/8″ White Grosgrain Ribbon*
- Gwen Studios 7/8″ Pink Sheer Organza Ribbon*
- Gwen Studios 7/8″ White Sheer Organza Ribbon*
- Gwen Studios Sagebrush Green Satin Ribbon Tower*
- Large Nesquik Lid
- Poly-Fil*
- Xyron Multi-Stick Glue Gun*
- Beads
- Fancy Rhinestone Buttons
- Pink Twine
- White Spray Paint