Spring Mini Album (Scrapping My Stash)

Scrapping My Stash

Do you have an enormous amount of saved paper scraps?

Do you have a problem throwing them away?

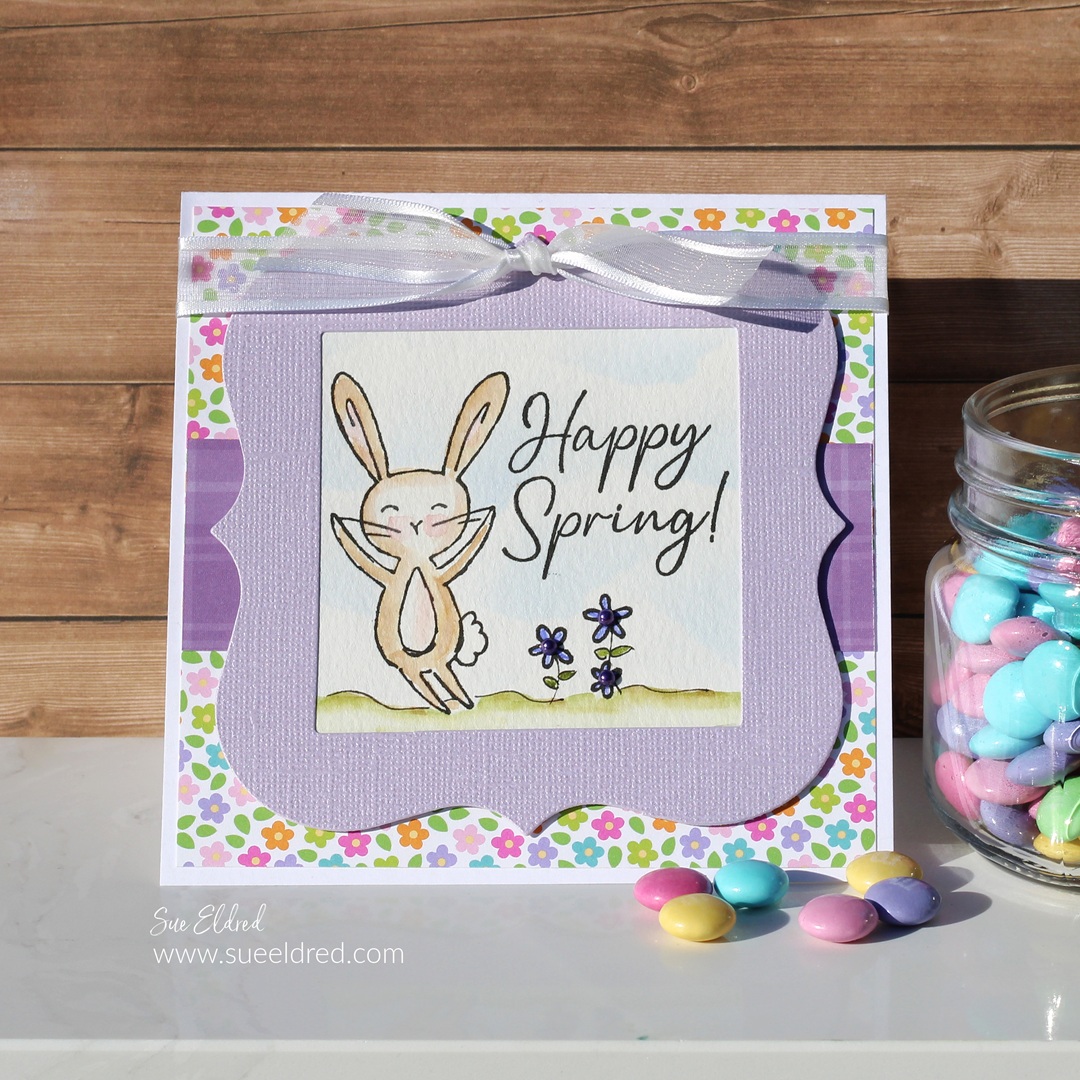
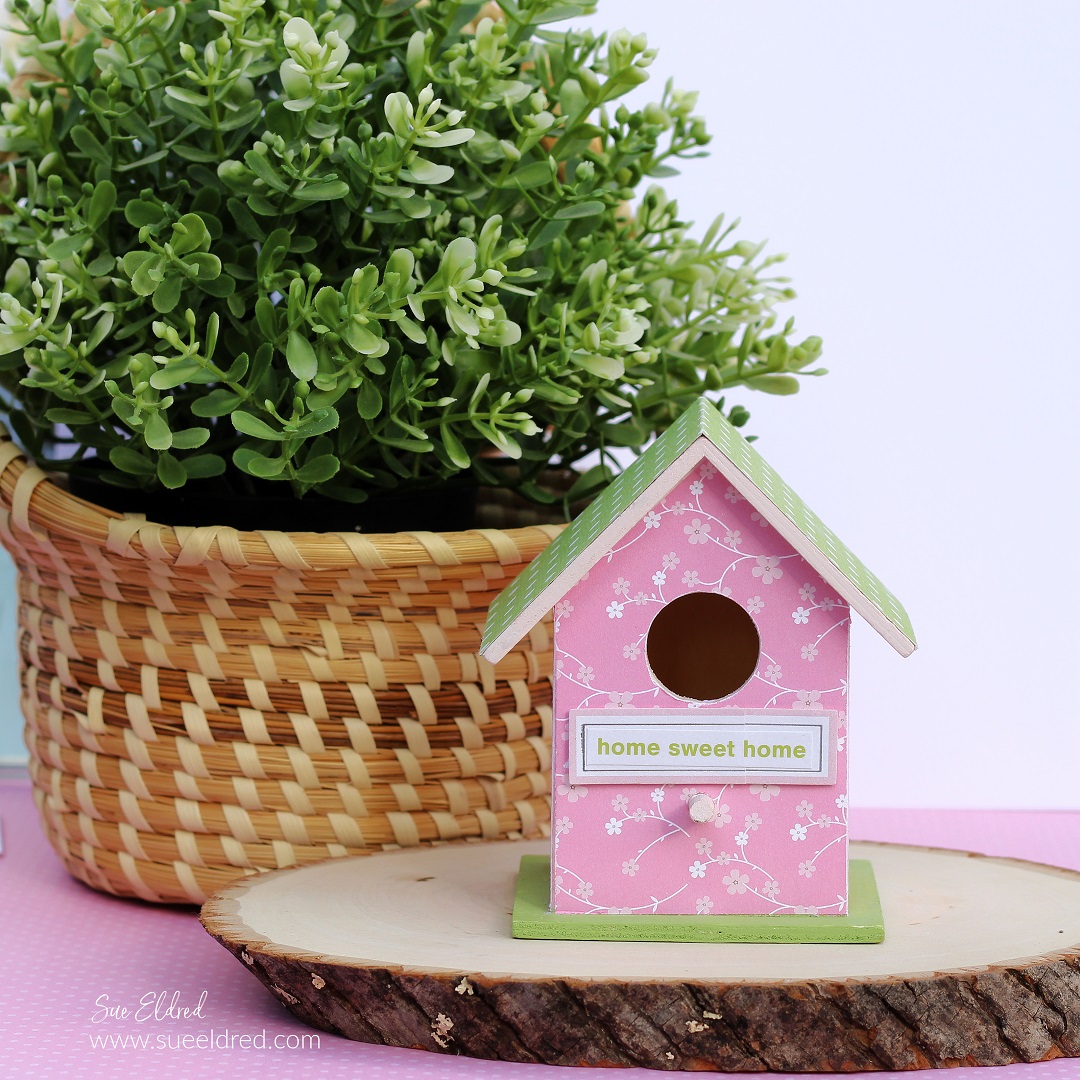
If you do, you may enjoy my Spring Mini Album.

It’s part junk journal and part bits and pieces.

During March Madness Basketball this past weekend,

I took the opportunity to play around in my studio.

The inspiration was a bag of paper scraps from the many

Spring Paper Collections I’ve saved.

With the excessive amount of paper I’ve collected and hoarded

over the years, I’m trying to use what I have.

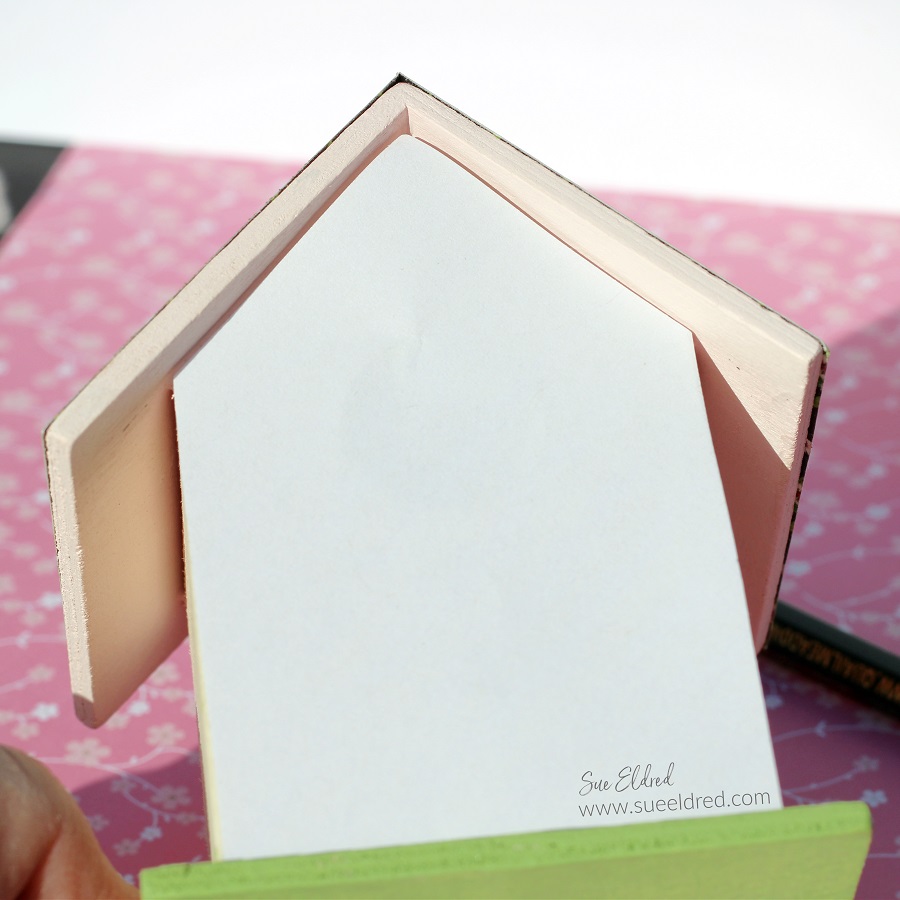
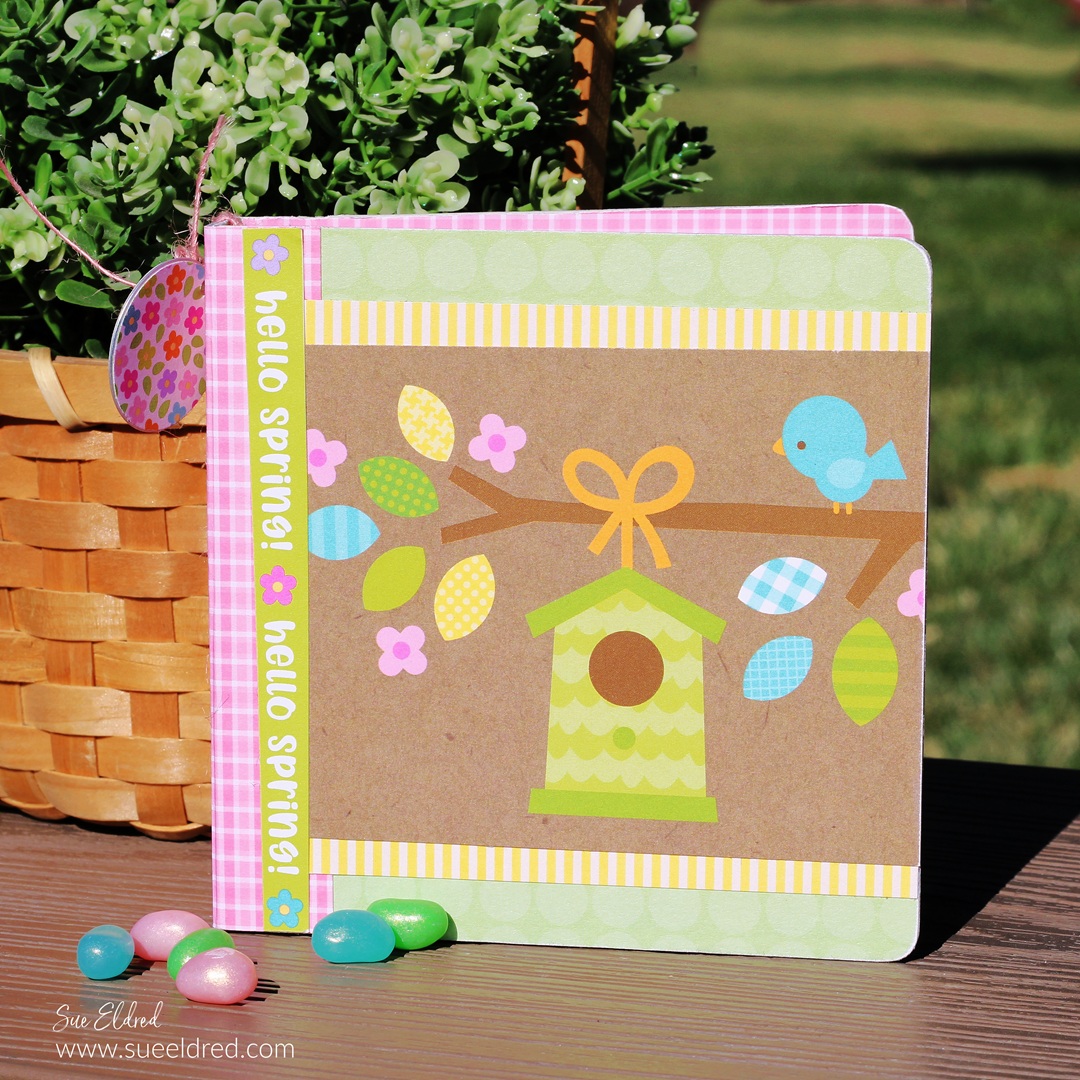
The Spring Mini Album measures 5″ x 5″ and uses the

Sizzix Mini Album by Eileen Hull*.

*Disclosure:  This blog uses ads and affiliate links.  If you choose to make a purchase using one of the links, I receive a small commission (at no additional cost to you) that helps offset the costs of maintaining this blog.  Thanks for your support!

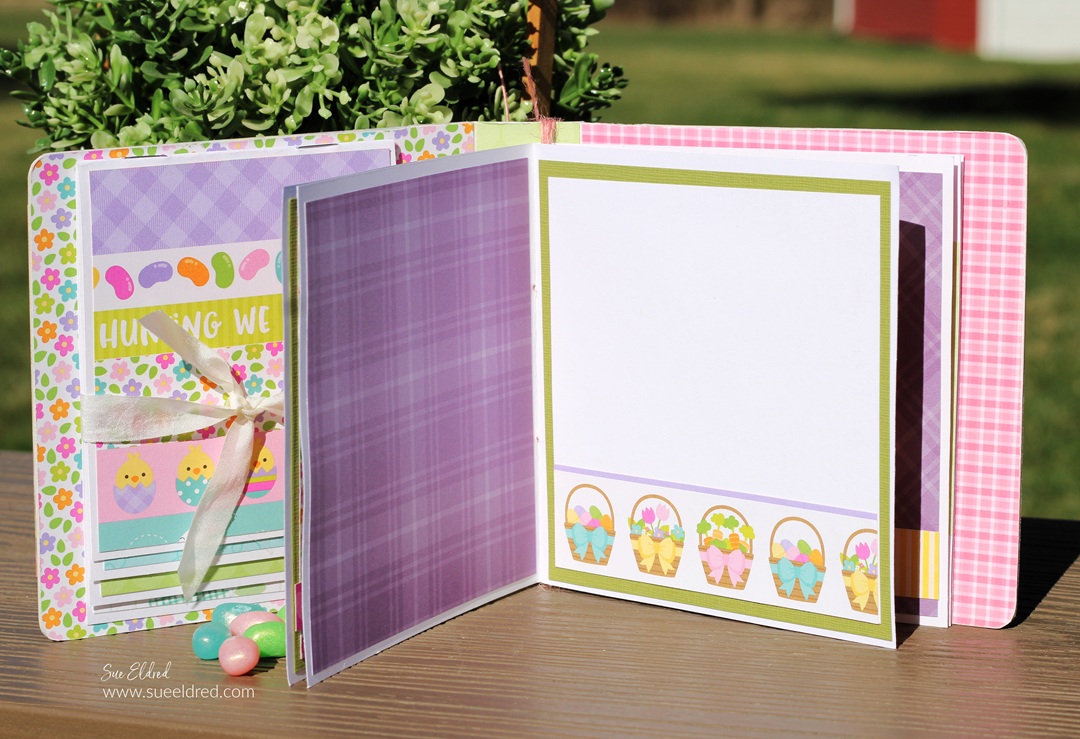
Inside the album, I created a “signature book” that I stitched

together using thin pink twine. I added it to the album by

wrapping the twine several times around the spine.

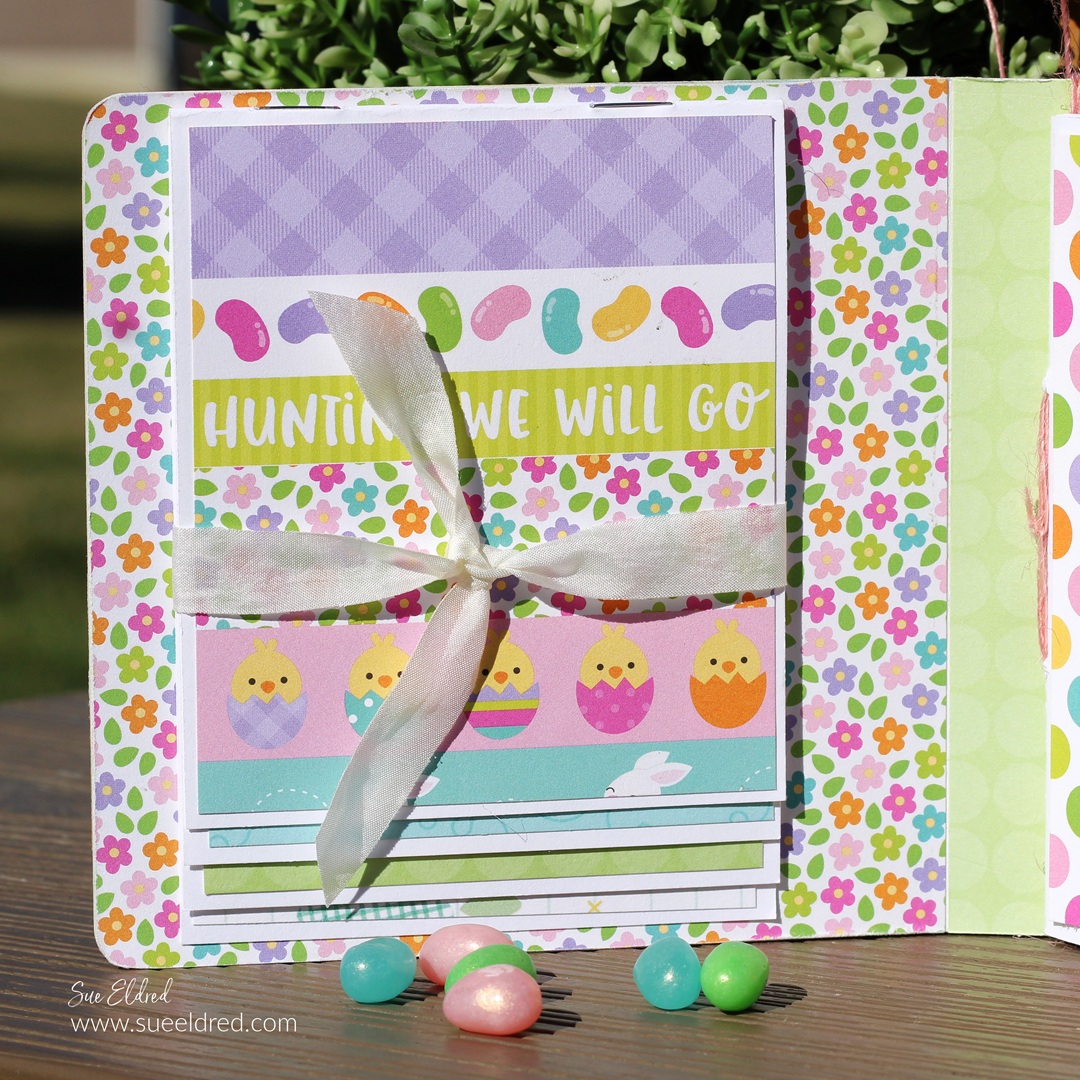
On the other side of the album,

I made a small waterfall album tied with a cream ribbon.

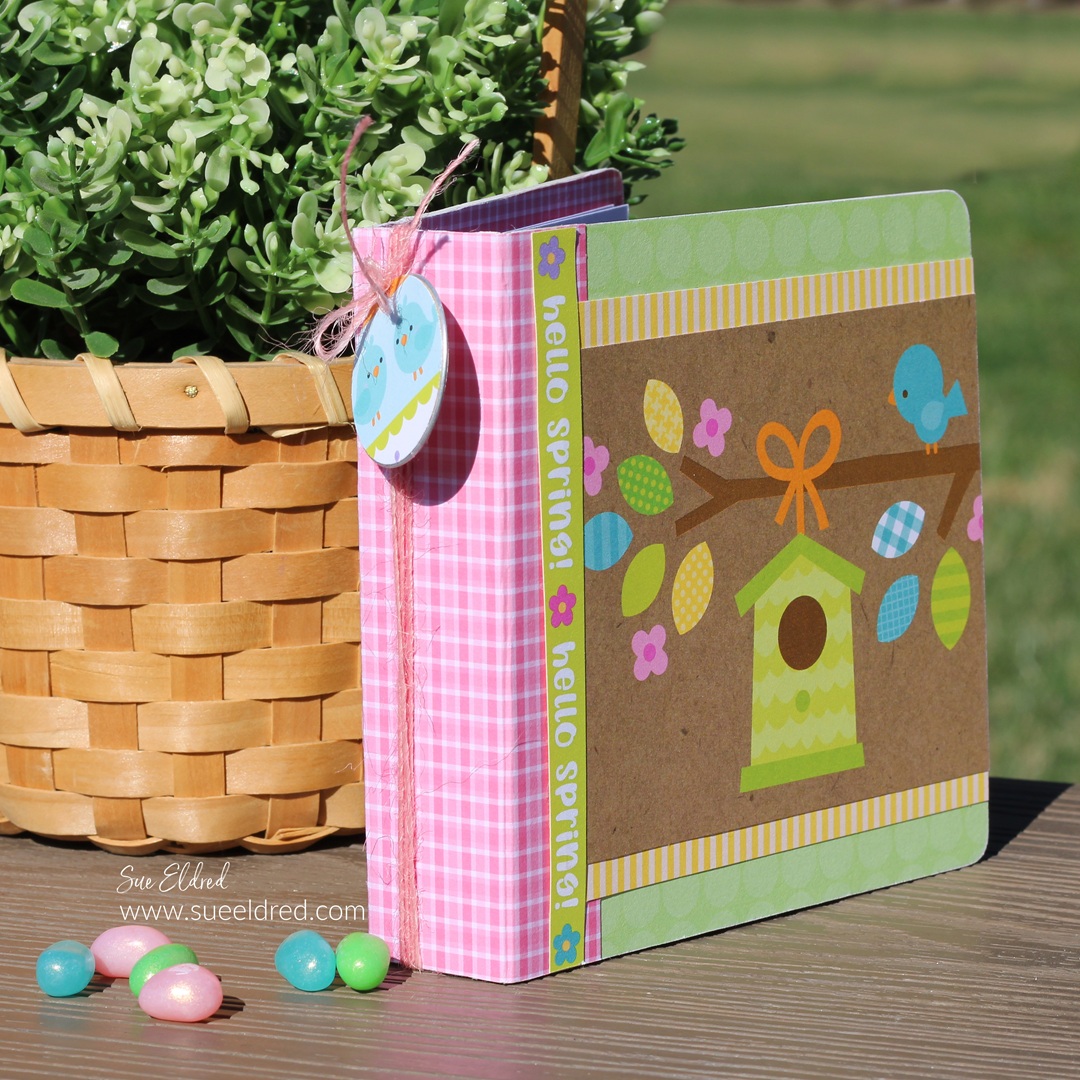
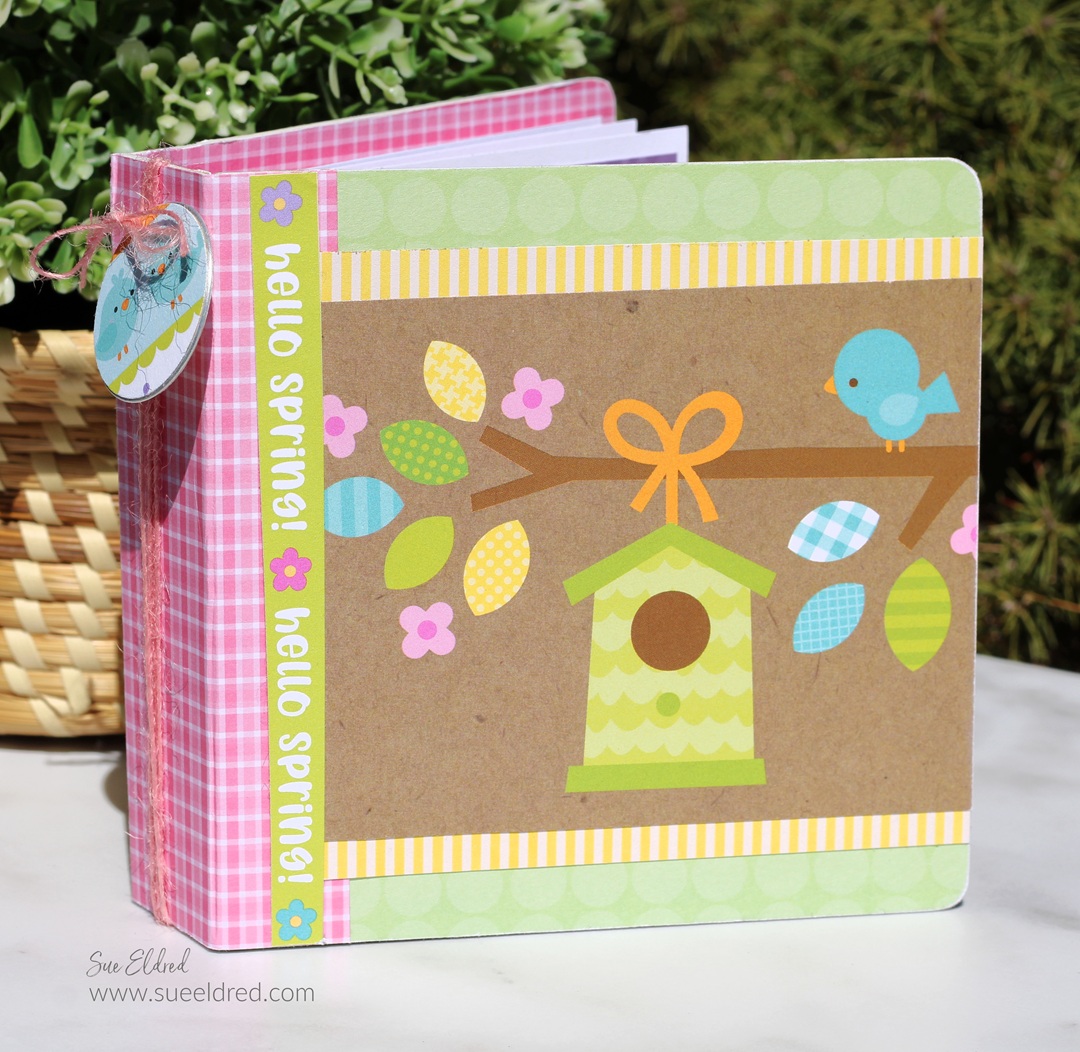
I made a small embellishment using a metal ring tag* and circles

cut from the scrapbook paper and attached it to the spine.

Eileen Hull Educator Logo

Disclosure:  This is a sponsored post.  As a member of the Eileen Hull Inspiration Team, I have been provided product in exchange for my creative ideas.  The view and opinions are my own.

Happy Spring Card

Don’t you just love Spring?

It makes my heart so happy.

Here’s a quick Spring water colored card made using Sizzix’s Spring Essentials Stamp Set*

Happy Spring!

FYI…The Sizzix’s Spring Essentials Stamp Set* is On Sale right now at Scrapbook.com!

*Disclosure:  This blog uses ads and affiliate links.  If you choose to make a purchase using one of the links, I receive a small commission (at no additional cost to you) that helps offset the costs of maintaining this blog.  Thanks for your support!

DIY Gold Bunny Silhouette Pillow & Treat Bag

DIY Gold Bunny Silhouette Pillow & Treat Bag

Add a little glam this Spring with this cute Gold Bunny Silhouette Pillow.

It’s an easy project to make.  Even if you’re a simple sewer, like me.

The Bunny reminds me of a Lindt Gold Foiled Chocolate Easter Bunny*,

and who doesn’t like that?

DIY Gold Bunny Silhouette Pillow & Treat Bag

Materials Used to Make the Gold Bunny Pillow:  (*affiliate links)

StyletechCraft products brought to you by ATSM Craft*

*Disclosure:  This blog uses ads and affiliate links.  If you choose to make a purchase using one of the links, I receive a small commission (at no additional cost to you) that helps offset the costs of maintaining this blog.  Thanks for your support!

DIY Gold Bunny Silhouette Pillow & Treat Bag

How to make the Gold Silhouette Bunny Pillow:

  • Choose your fabric.  Cut the fabric into two squares or rectangles of equal size.  (I cut my cream fabric to 14″ x 14″ to make a 12″ pillow.)
  • Place the two fabric pieces together right-side in.
  • Sew the edges together, leaving a 2-inch opening along one side.
  • Turn the pillow right-side out.
  • Fold the raw edges in and press them flat.
  • Using the Silhouette Cameo Electronic Die-Cutting Machine* and an SVG file from The Silhouette Store, I created a design for the pillow.
  • Cut the design using Gold Heat Transfer Vinyl* making sure to mirror the image.
  • Place the shiny side down on the cutting mat.
  • After you’ve cut the design, weed the excess material away from the design, leaving only the parts you want to transfer.
  • Position the design on your fabric.  Use an iron or a heat press to apply heat and pressure to the design, following the manufacturer’s instructions.
  • Peel off the transfer tape.
  • Stuff the pillow with Poly-Fil®* and sew the opening closed.

DIY Gold Bunny Silhouette Treat Bag

I knew a head of time that I wanted to make a couple of small treat bags.  I decreased the size of the bunny and cut it at the same time as the pillow design.

How to make the Bunny Treat Bag:

  • Cut a piece of gold polka dot fabric approx. 10″ x 14″.
  • On both ends of the fabric, fold down approx. 1″ and sew a seam across the top.  That should leave you with a 3/4″ pocket.
  • Fold the material in half and sew the remaining sides closed.
  • Trim excess material on the seams and turn the fabric inside out to reveal the bag.
  • Iron the gold HTV bunny on the front of the bag.  (see above directions)
  • Cut two small slits on the top pocket of the bag on each end.
  • Cut two 24″ pieces of gold ribbon.
  • Attach a small safety pin to the end of a piece of ribbon.  Thread the ribbon through the top of the bag, remove the safety pin, and knot the ribbon.
  • On the opposite end of the bag, thread the second piece of ribbon through.
  • Pull both ends of the ribbon to gather and close the bag.

DIY Gold Bunny Silhouette Treat Bag

With all the warm weather we’ve had lately, Spring Fever has hit me pretty hard.

I’ve completely rid my decor of anything resembling Winter.

I’m ready for Spring, Bunnies, and Flowers!

DIY Gold Bunny Silhouette Pillow & Treat Bag

“This is a sponsored post.  As a member of the StyleTechCraft Design Team I have been provided product and compensation in exchange for my creative ideas.  The views and opinions are my own.

“If Friends Were Flowers” Shelf Sitter

"If Friends were Flowers" DIY Mason Jar Shelf Sitter

DIY yourself A Happy Little Mason Jar Shelf Sitter.

As Spring turns into Summer, I get inspired to change my decor to happy colors.

I like to open the windows and let in the fresh air.

And…I love to bring in fresh blooms whenever I can.

Flowers make me HAPPY!

"If Friends were Flowers" DIY Mason Jar Shelf Sitter

The Wood Mason Jar Cut-Out…

Sometimes when I see an item at the store, I have a vision of what I want to do.

Sometimes it works out, and other times it does not.

This particular time was the latter.

When I first saw the wood mason jar with flowers cut out,

I saw it stained with only the flowers painted.

So, I stained the wood.

It might have been the stain I used, but I wasn’t pleased with the result.

"If Friends were Flowers" DIY Mason Jar Shelf Sitter

After letting it sit overnight, I decided a little acrylic paint might help.

So, I watered down my paints so they didn’t look too heavy and painted away.

While it isn’t what I originally had planned, it’s not too bad.

It’s bright and cheery.

"If Friends were Flowers" DIY Mason Jar Shelf Sitter

Doesn’t vinyl make everything just a little better?

For extra personality, I added vinyl lettering using my favorite StyletechCraft* adhesive vinyl.

Materials Used:    (*affiliate links)

StyletechCraft products brought to you by ATSM Craft*

*Disclosure:  This blog uses ads and affiliate links.  If you choose to make a purchase using one of the links, I receive a small commission (at no additional cost to you) that helps offset the costs of maintaining this blog.  Thanks for your support!

"If Friends were Flowers" DIY Mason Jar Shelf Sitter

  • I used a Silhouette Cameo Electronic Die Cutting Machine* with the “Monsoon Font” from The Silhouette Store to create the words.
  • Cut the words using StyleTech Craft Glossy Vinyl.
  • After cutting, remove the excess vinyl using a Vinyl Weeding Tool*.
  • Lay the transfer paper over the words.
  • Rub over the transfer paper with a vinyl scraper tool and lift the design from the white paper backing.
  • Lay the transfer paper onto the sign and rub over the design.  Remove the transfer paper.

"If Friends were Flowers" DIY Mason Jar Shelf Sitter

  • To make it a shelf sitter, I glued a small block, “borrowed” from the kid’s block basket, onto the back.
  • I painted the block with matching acrylic paint.

"If Friends were Flowers" DIY Mason Jar Shelf Sitter

Now that it’s finished, I think the shelf sitter would also make a cute Mother’s Day or Teacher’s gift.

So many possibilities.

Spring Tabletop Kit  New Products at Scrapbook.com!

Make it Spring with Dollar Store Birdhouses

Making it Spring with Dollar Store Birdhouses

How to make a cute little birdhouse for your Indoor Spring Decorations.

Made from an inexpensive Dollar Tree* wood birdhouse and scrapbook paper.

Making it Spring with Dollar Store Birdhouses

Materials Used:  (*affiliate links)

*Disclosure:  This blog uses ads and affiliate links.  If you choose to make a purchase using one of the links, I receive a small commission (at no additional cost to you) that helps offset the costs of maintaining this blog.  Thanks for your support!

Make it Spring with Dollar Store Birdhouse

Directions:

  • Paint the base of the birdhouse, the ridge, and the underside of the roof with acrylic paint.

Make it Spring with Dollar Store Birdhouse

  • Remove the perch from the birdhouse.
  • Paint the birdhouse perch with coordinating acrylic paint.

Make it Spring with Dollar Store Birdhouse

  • I purposely choose a birdhouse with a simple roofline. 
  • Measure and cut a piece of decorative scrapbook paper for the roof.
  • Place the paper into the 3″ Xyron Disposable Sticker Maker* design side up and gently pull it through. As the scrapbook paper goes through the sticker maker, it adds a layer of adhesive under the paper.
  • Rub and peel the protective coating from the paper. Place onto the top of the birdhouse. Rub over the paper to ensure that it is securely attached to the wood.

Make it Spring with Dollar Store Birdhouse

  • Create a template for cutting the paper. Lay a piece of copy paper with the point in the top corner of the birdhouse. Gently fold over the edges of the copy paper to make a crease line or use a pencil to trace around the edge.
  • Cut out the template.

Make it Spring with Dollar Store Birdhouse

  • It’s a good idea to lay the template onto the birdhouse to double-check the size.
  • Use the template and trace onto decorative scrapbook paper.  Cut along traced lines.
  • Place the paper into the 3″ Xyron Disposable Sticker Maker* design side up and gently pull it through.
  • Measure and repeat for all four sides.

Make it Spring with Dollar Store Birdhouse

  • Cut around the center hole and smooth using a nail file.
  • Re-poke the perch hole and reinsert the perch.

Make it Spring with Dollar Store Birdhouse

  • Add cute little word stickers to embellish the birdhouse.

Make it Spring with Dollar Store Birdhouse

Here are a few more Mini Birdhouses I created for Xyron last year.

They are so fun to make and decorate.

Make it Spring with Dollar Store Birdhouse

I made this one using a large wood birdhouse picked up at Michael’s Craft Store.

I covered it with paper from Echo Park’s Farmhouse Market Collection.

Hello Spring Banner

Hello Spring Banner 2537

Welcome Spring with a Cute Bunny Inspired Wreath.

Using a few inexpensive wood cut-outs from Dollar Tree I created a fun Spring Banner to hang

on my wreath.  With the help of my Xyron Creative Station*, it was quick and easy to make.

Hello Spring Banner 932

Materials Used:      (*affiliate links)

*Disclosure:  This blog uses affiliate links.  If you choose to make a purchase using one of the links, I receive a small commission (at no additional cost to you) that helps offset the costs of maintaining this blog.  Thanks for your support!

Hello Spring Banner 2403

Directions:

  • Put the paper design side up on the Xyron Creative Station* crank the handle to run the paper through the machine.  As it moves through the Xyron Creative Station it adds adhesive to the back side of the paper.  Easy to use and it doesn’t need any electricity.

Hello Spring Banner 2420

  • Lay wood cut-outs onto the adhesive side of the paper.
  • Cut around the shape with a craft knife.
  • Sand the rough cut edges of the shape with a sanding block*.  You can use an Emory board to get into small places to sand.

Hello Spring Banner 2464

  • String the finished wood pieces onto a piece of ribbon or twine.
  • I used the New Xyron Multi-Stick Glue Gun to add the flowers and leaves embellishments.
  • One of my favorite features of the New Xyron Multi-Stick Glue Gun is that you can add up to three glue sticks so that you don’t have to keep reloading while you work.
  • FYI…I also added a bit of hot glue strategically under the wood pieces to help keep them from twisting on the twine.
  • I used letters cut from StyleTechCraft adhesive vinyl to spell the word “Hello”.  You could also use chipboard letters or letter stickers.

Hello Spring Banner-2526

“This is a sponsored post for Xyron.  I have been provided product and compensation in exchange for my creative ideas.  The views and opinions are my own.

No Sew Bunny Gnome

No-Sew Bunny Gnome made using the New Xyron Glue Gun.

This Bunny Gnome was made using a couple of inexpensive girl socks from Dollar Tree.

The instructions for the Bunny Gnome are very similar to how I made the Valentine Gnome.

I filled the bottom of the sock with 1/3 cup of rice and filled the rest with poly-fil.

The top of the sock was tied tight with a piece of string and I added a small dab of glue from

my New Xyron Glue Gun to secure it.  I added a faux fur beard, a sock hat with a little

poly-fil added for shape and cute little felt ears.

No-Sew Valentine Gnome.   (click on picture for tutorial)

The Gnome is ready for Spring with his cute little felt ears and felt flowers.

*Disclosure:  This blog post uses affiliate links.  If you choose to make a purchase using one of the links, I receive a small commission (at no additional cost to you) that helps offset the costs of maintaining this blog.  Thanks for your support!

Xyron Mini Multi-Stick Glue Gun

Enabler Alert…

Xyron has come out with three New glue guns.  This one pictured above is what I used to create the No-Sew Bunny Gnome.  One of my favorite features is that you can add up to three glue sticks so that you don’t have to keep reloading while you work.  How cool is that?

 Disclosure:  “This is a sponsored post.  I have been provided product and compensation in exchange for my creative ideas.  The views and opinions are my own.”

Simple Spring Place Card

Simple Spring Place Card-Sue's Creative Workshop-www.sueeldred.com 3127

Add a little whimsy to your Spring Table with this cute little Bunny Place Card.

Simple Spring Place Card-Sue's Creative Workshop-www.sueeldred.com 3073

Make it personal, it’s fairly simple and very inexpensive to make. 

Simple Spring Place Card-Sue's Creative Workshop www.sueeldred.com 2903

For the Bunny Place Card…

I used inexpensive wood bunny cut-outs from Dollar Tree* and scrapbook paper.

Additional Materials Used:      (*affiliate links)

*Disclosure:  This blog uses affiliate links.  If you choose to make a purchase using one of the links, I receive a small commission (at no additional cost to you) that helps offset the costs of maintaining this blog.  Thanks for your support!’

Simple Spring Place Card-Sue's Creative Workshop www.sueeldred.com 2935

Directions:

Simple Spring Place Card-Sue's Creative Workshop www.sueeldred.com 2916

  • Lay wood piece onto scrapbook and give a gentle rub to make sure everything is stuck down.
  • Carefully cut around the shape with a craft knife*.
  • Sand the rough cut edges of the shape with a sanding block*.  You can use an emory board* to get into small places to smooth.
This image has an empty alt attribute; its file name is August2018_Scrapbook_00.jpg

Simple Spring Place Card-Sue's Creative Workshop-www.sueeldred.com 3095

Simple Spring Place Card-Sue's Creative Workshop www.sueeldred.com 3979

To make my bunny stand, I used a small wood piece cut from an old scrabble tray* and glued it onto the back using Dap Rapid Ruse All Purpose Adhesive*.

(You can find scrabble trays on Amazon*.  Another idea would be to use a small kids block*.)

Simple Spring Place Card-Sue's Creative Workshop www.sueeldred.com 3077

Now you’re ready to set the table using your good dishes and let the party begin.

Personally…I always considered these red toile dishes my “good” dishes and I only used them

for Holidays.  Now, as I’ve gotten older, I’ve decided to use them every day.

Make it Spring with Dollar Store Birdhouse

If you liked the Spring Place Card, you’ll also like Make it Spring with Dollar Store Birdhouses.


DON’T MISS A THING…MAKE SURE TO FOLLOW ME!

PIN ME↓↓↓

Simple Spring Place Card   Make it Spring with Dollar Store Birdhouse


Check out what’s new at acherryontop.com!

Cute Valentine/Spring Décor with Vinyl

Creating Cute Valentine/Spring Décor with StyleTechCraft Vinyl.

Did you ever get a song stuck in your head while working on a project?

I’m showing my age here, but this Karen Carpenter song kept going through my mind while

I was putting together the Bird on the Branch and, I just had to create the words to go with it.

“This is a sponsored post.  As a member of the StyleTechCraft Design Team I have been provided product and compensation in exchange for my creative ideas.  The views and opinions are my own.

I love creating projects for my home using vinyl. 

My favorite vinyl is the Glossy Craft Vinyl from StyleTechCraft.

There are so many great color choices to choose from.

Materials Used to make the Valentine Projects:              (*affiliate links)

*Disclosure:  This blog uses affiliate links.  If you choose to make a purchase using one of the links, I receive a small commission (at no additional cost to you) that helps offset the costs of maintaining this blog.  Thanks for your support!

Project Details:

  • I used a 5″ x 7″ decorative piece of chipboard that I’d had around for a while.
  • I cut a piece of woodgrain paper a little larger than the chipboard.  
  • Place the paper in the Xyron Creative Station* design side up through. As you turn the handle, it runs through the machine and adds a complete layer of adhesive onto the back of the paper.

  • Adhere the paper to the chipboard and cut away the excess using a craft knife and cutting mat.
  • Use a fine Sanding Block* to smooth out the edges of the chipboard.

  • I used my Silhouette Cameo Electronic Die Cutting Machine* and the “Bird on the Branch” SVG file to create my design.
  • I sized the image to fit onto my chipboard and cut the various layers of the red in three shades to make a cardinal.  
  • After weeding the excess vinyl from around my images, I transferred them onto the chipboard using the Clear Transfer Tape*.
  • After having the song stuck in my head, I decided to create a few words for my sign.
  • For added detail, I went around the edge of my sign with a Silver Leafing Pen*.

  • I cut an extra little cardinal to fit inside a small circle frame and added small red hearts on the top and bottom.
  • To complete my decorations, I added my small faux heart topiary to a reddish metal and added the words “choose happy” in Olive vinyl.

I have Cute Valentines Decorations that will take me into Spring.  (and maybe longer)

Spring Watercolor Bouquet Card

Spring Watercolor Bouquet

I love the soft look of a handmade water-colored card.

This card was made using the Hello Spring Stamp and Die Set from the Maker’s Movement.

Just for you…I’ve created simple step by step instructions on how to make the card.

How to make a Spring Watercolor Bouquet Card

Materials Used:                (*affiliate link)

*Disclosure:  This blog uses ads and affiliate links.  If you choose to make a purchase using one of the links, I receive a small commission (at no additional cost to you) that helps offset the costs of maintaining this blog.  Thanks for your support!

  • In the Hello Spring Stamp and Die Set, there are several stamps that have a coordinating die that matches the stamp.
  • Stamp a flower using blue ink onto a piece of watercolor paper.

  • Place the mask onto the stamped flower image and stamp a second flower image slightly overlapping the first flower.

  • By using the mask, you create the look of one flower behind the other.

  • Place masks on both of the stamped flower image.  Start adding the background images by stamping small pink flowers, ferns, and leaves.

  • Remove masks and watercolor the stamped flowers using a water-brush*.
  • I like to use dye ink to watercolor.  I apply the ink to a simple grid that I printed onto copy paper and laminated.   Dip the wet tip of the water-brush* into the ink and paint your images.  (You can also use a small paintbrush and water.)

  • After the painted images have dried, stamp the center of the flowers using small stamps from the Hello Spring Stamp and Die Set.

  • Cut frames using the Nested Stitched Rectangles Dies.
  • Adhere water-colored image, frames, and layers onto a 4 ½” x 5 ½” blue dot card.
  • Stamp another flower with blue ink onto watercolor paper.  Watercolor the flower as before.  Cut the flower out using the coordinating die and the Crossover II Fabric & Paper Cutting System*.
  • Mount onto the lower right corner of the card using a thin foam mounting square.
  • Stamp “Hello” onto a small white banner cut from the small banner die found in the Hello Spring set.  Trim banner to size and adhere under the raised flower.
  • Add a simple sheer ribbon to the top of the card to finish.

*FTC Disclosure… “This is a sponsored post for The Maker’s Movement.  I have been provided product and compensation in exchange for my creative ideas.  The views and opinions are my own.”

Save