Let it Snow Painted Canvas

A Simple DIY Holiday Canvas

Christmas came early for the Xyron Design Team  and I love a good present.

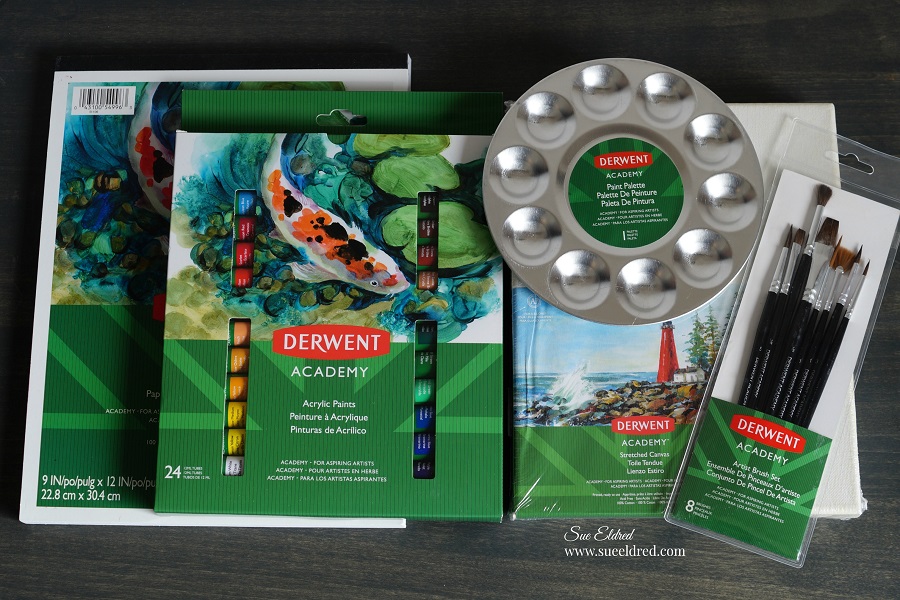
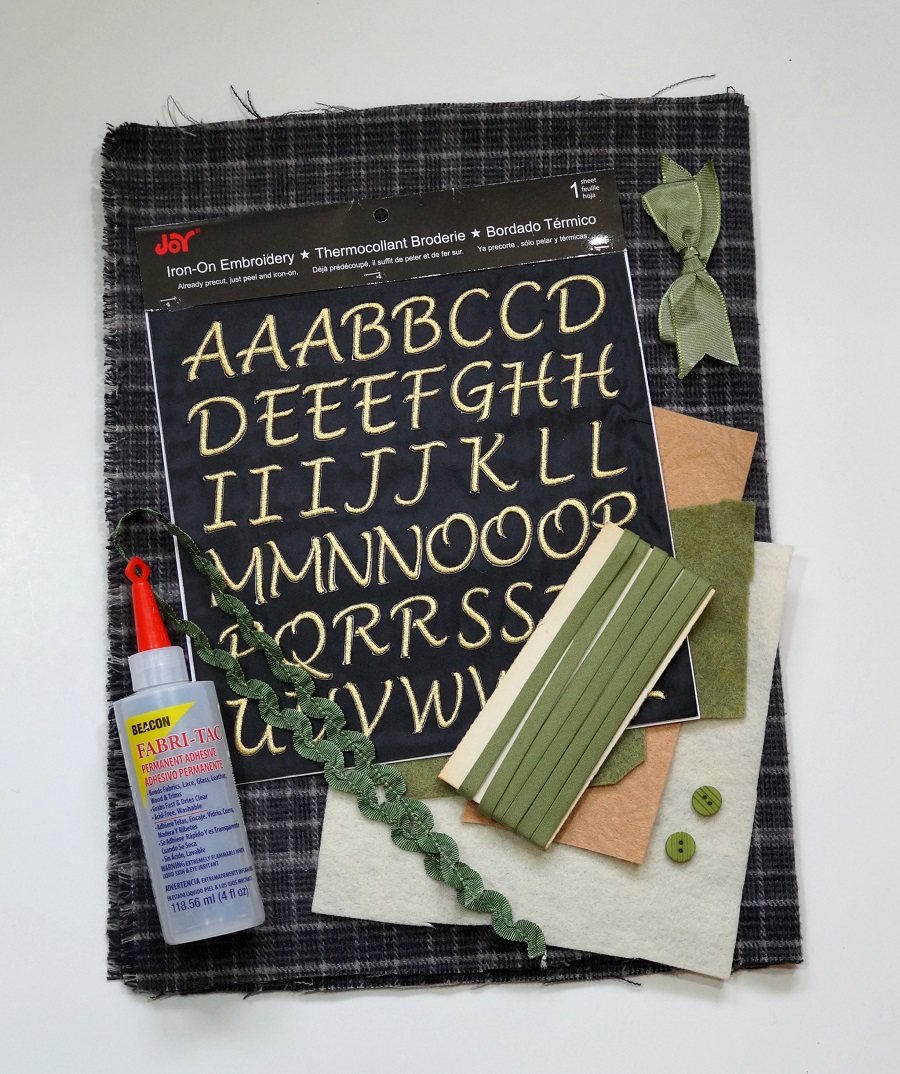
We all received a wonderful box of paints and supplies from Derwent Academy.

It’s been a while since I’ve painted with acrylics on canvas so I decided to keep it

simple and festive.

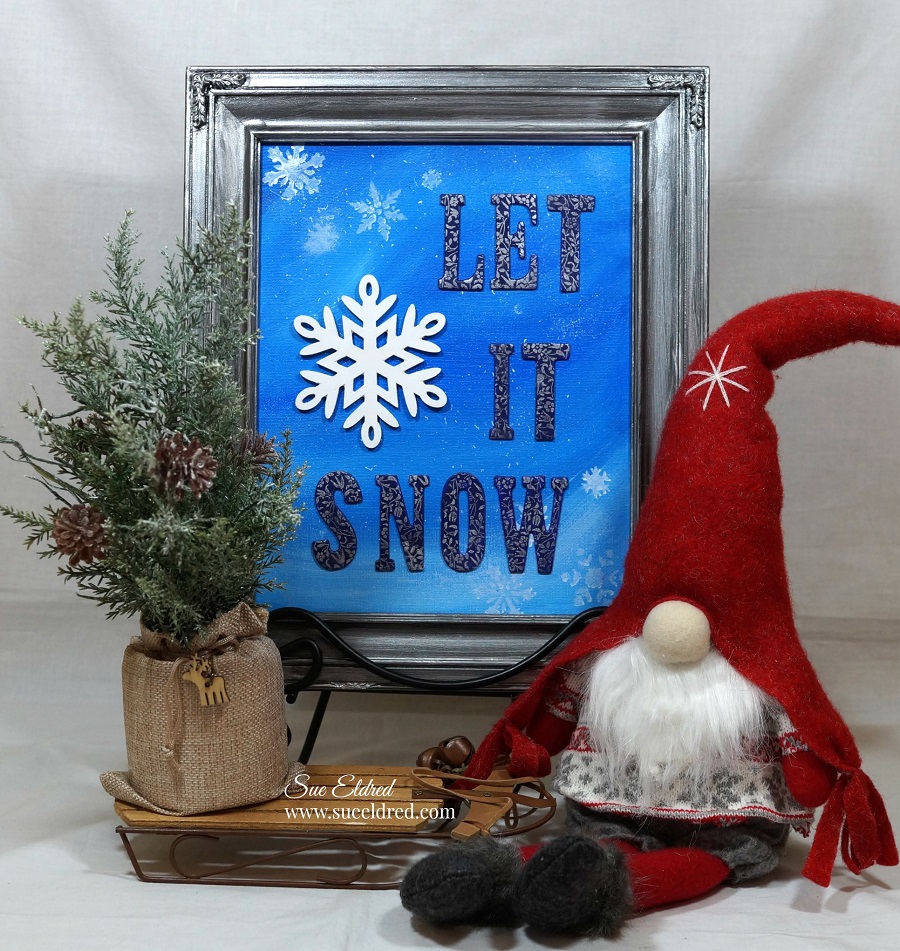
I painted my canvas with a mixture of Cerulean Blue, Phthalo Blue, Ultramarine Blue

and Titanium White.  I was going for a “snowy sky”.

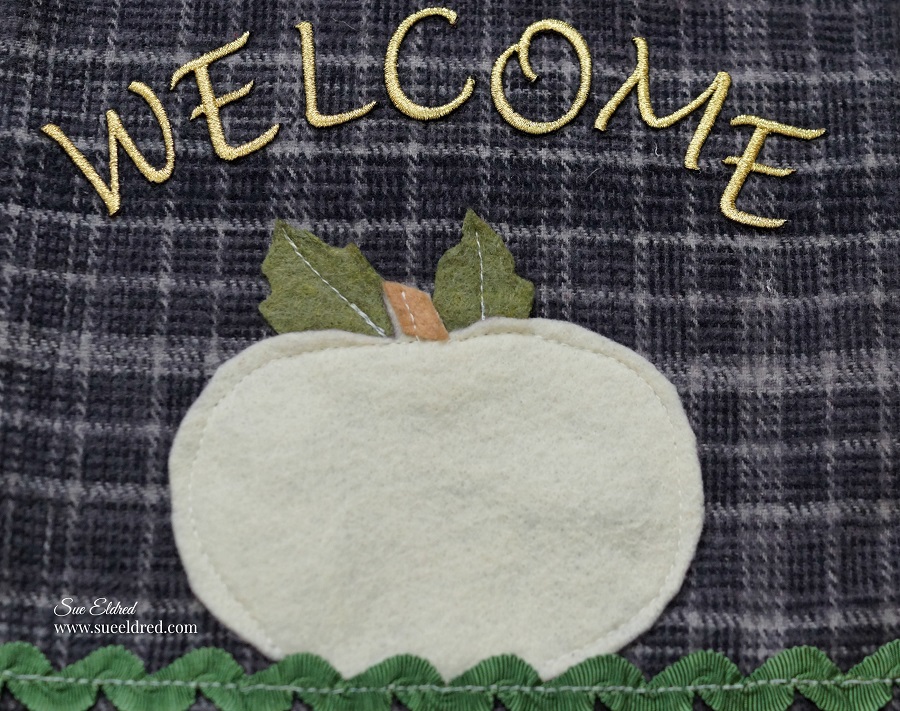
I added a few stenciled snowflakes on the corners and then splattered the canvas with

titanium white paint using an old toothbrush.   (I kept it really simple)

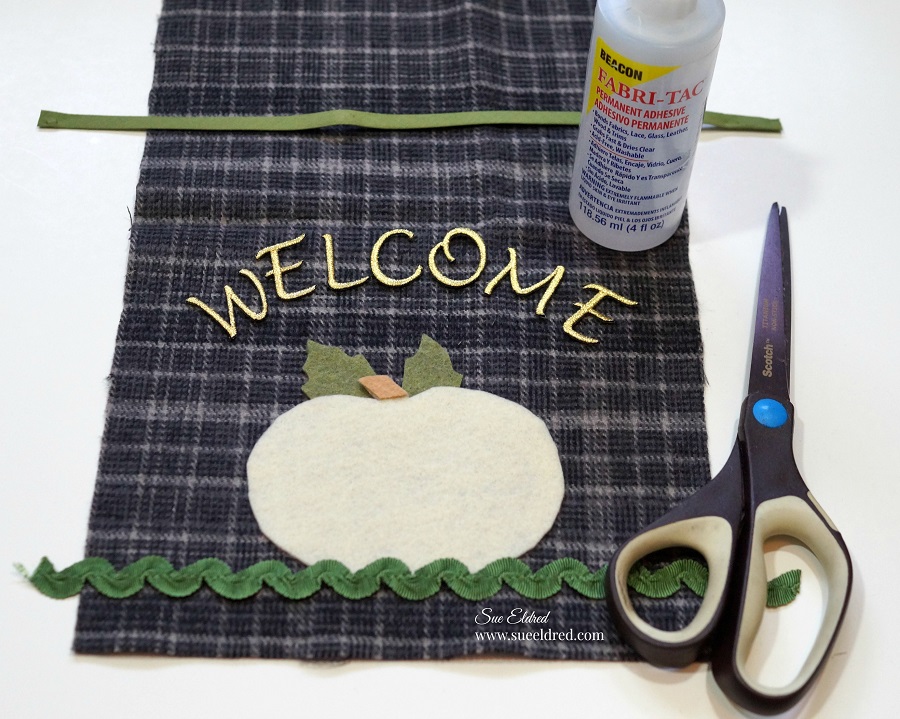
I used random chipboard letters and painted them with a mixture of Cobalt Blue and

Purple Violet to make them all match.

After the letters had dried, I stamped them with silver ink.

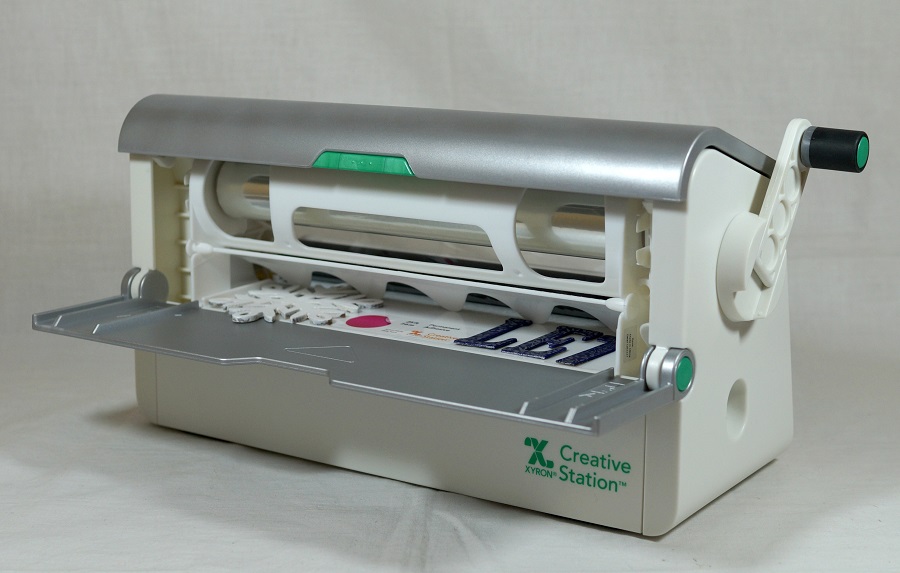
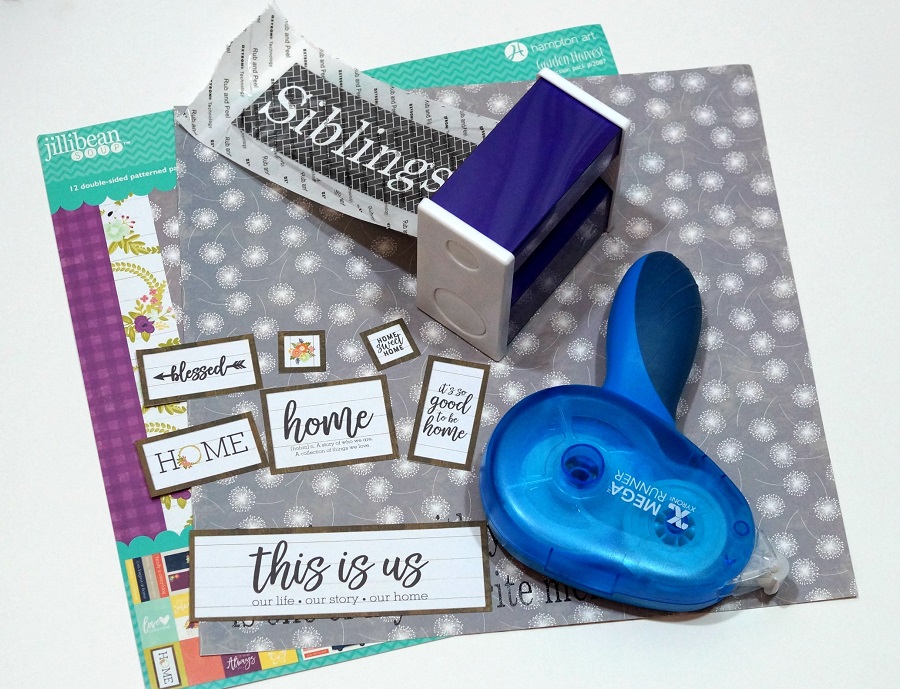
I used my Xyron 9″Creative Station* to add adhesive to the back of the chipboard letters

before adhering them to my canvas.  I even used it on the large white wood snowflake.

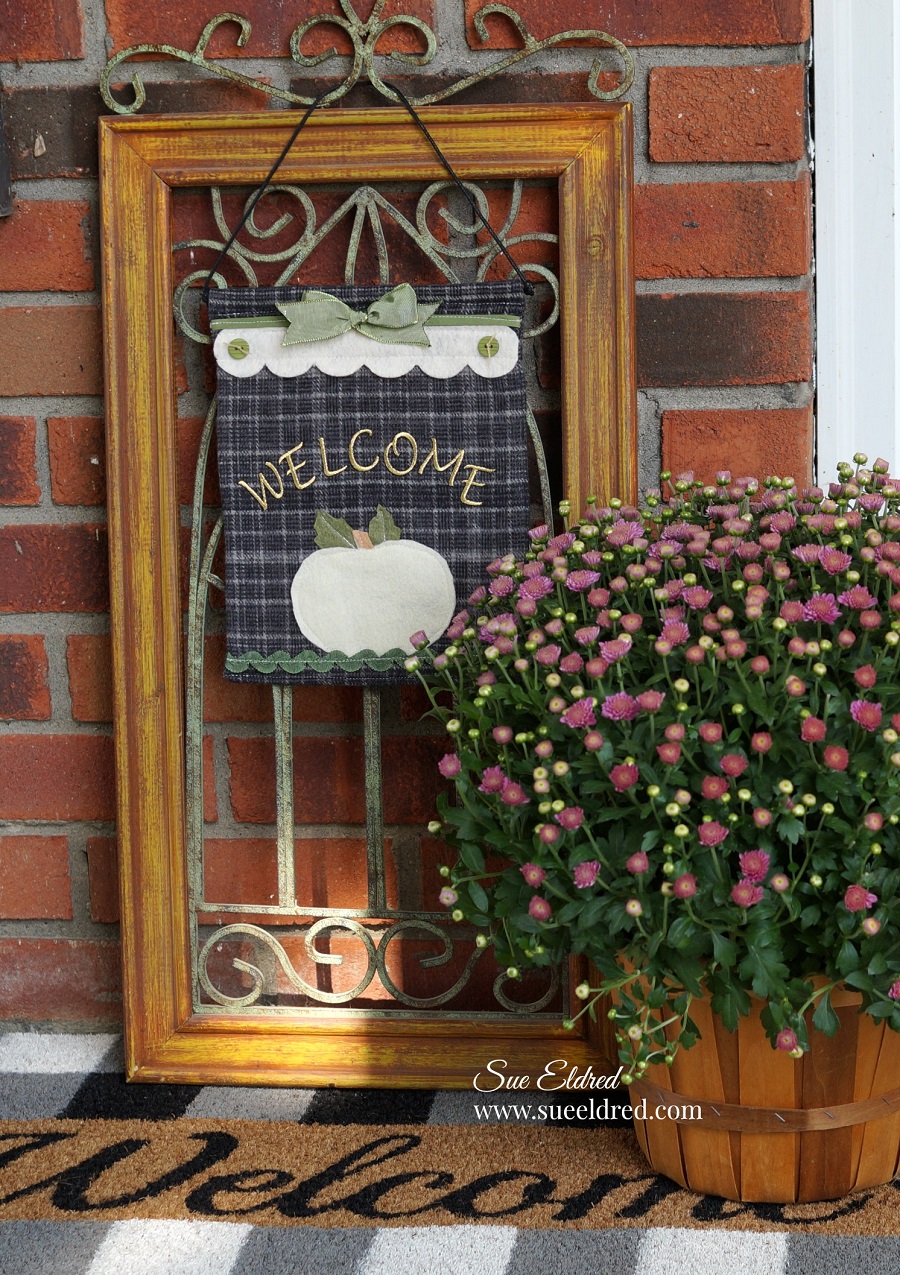
I added the canvas to an antiqued silver frame for a cute Holiday Decoration.

Here’s the Derwent links to the products I used:

“This is a sponsored post.  As a member of the Xyron Design Team I have been provided product and compensation in exchange for my creative ideas.  The views and opinions are my own.

Shop Your Fav Brands at Scrapbook.com

*Disclosure:  This blog uses affiliate links.  If you choose to make a purchase using one of the links, I receive a small commission (at no additional cost to you) that helps offset the costs of maintaining this blog.  Thanks for your support!

Deflecto in the Kitchen

Deflecto in the Kitchen…organizing the dreaded kitchen cabinet.

In an effort to tame the chaos (in my mind) during the holidays,

I like to find small problem areas around the house that I can work on a one at a time.

My kitchen cabinet next to my stove was one of those problems.

This is embarrassing to show.

I’m sure I’m not the only one who has a cabinet like this one.

It’s probably the most used cabinet in the kitchen and it showed.

With the help from my friends at Deflecto.  (design team perks)

I got the kitchen cabinet project started.

I asked Deflecto to send me several of the medium caddy compartments*

from the Stackable Caddy Organizer*  (yes, you can buy just the compartments)

The medium caddy compartments* were the perfect length to fit inside my cabinet.

FYI…there are three sizes of compartments that fit into the stacking caddy organizer.

Shop Your Fav Brands at Scrapbook.com

*Disclosure:  This blog uses ads and affiliate links.  If you choose to make a purchase using one of the links, I receive a small commission (at no additional cost to you) that helps offset the costs of maintaining this blog.  Thanks for your support!

The first thing I did was to completely empty the cabinet and wipe it down.

I tossed all the outdated spices and discarded old medicines.

I put like items together for easy grab and go.

I removed the lids from a couple of the clear compartments to use with taller items.  

I love that the compartments are stackable.   That helps eliminates wasted cabinet space.

These really do come in handy when cooking.

Take it a step further in your organizing by labeling all the bins.

The finished kitchen cabinet all clean and tidy.

It’s been a few weeks since I reorganized the cabinet and thanks to my new organizing

compartments it still looks great.

Here’s a short video I made on the Deflecto Stacking Caddy Organizer*.

You can find the Deflecto Stacking Caddy Organizer* on Amazon or ask for it

at your local craft store.

Want more organizing ideas? 

Check out this post on Organizing the Kids Craft Cabinet.


Don’t Miss a Thing…Make Sure to Follow me

“This is a sponsored post. As a member of the Deflecto Design Team I have been provided product in exchange for my creative ideas, views and opinions.” 


Christmas Magic Mini Tag Album

How to Create a Christmas Magic Mini Tag Album…

I decided to create a mini tag album using the left over paper and stickers from my

Creating A Miniature “Christmas Magic” Room with Graphic 45 and Xyron  project.

It’s a cute way to show off a few of your favorite holiday photos.  (It  also makes a nice gift.)

How to make a Christmas Magic Mini Tag Album                                 (*amazon affiliate link)

  • Create a chipboard tag by running two pieces of  Graphic 45 Christmas Magic* paper through the Xyron Creative Station*.  Cover both sides of the chipboard with the paper.
  • Cut Chipboard using a Tag die-cut to use as the front and back cover of the album.
  • Accent the edges of the covers using a Gold DecoColor Paint Pen*.
  • Create small tags by placing a sticker on a small piece of chipboard.  Add a coordinating piece of paper onto the back of the small tag.  Trim around tags.
  • Cut extra tag pages using the die-cut and Christmas Magic paper.

  • Embellish the cover with stickers, ribbon, wood snowflake, jingle bell and additional tags.
  • Add a medium sized book ring to hold the album together.

 Graphic 45 Christmas Magic 12×12 Collection Pack*

If you haven’t seen my Christmas Magic Mini Room you can see the full tutorial here.

Products Used:

XYRON 9″ Creative Station*                Graphic 45 Christmas Magic Collection Pack*

Shop Your Fav Brands at Scrapbook.com

*Disclosure:  This blog uses ads and affiliate links.  If you choose to make a purchase using one of the links, I receive a small commission (at no additional cost to you) that helps offset the costs of maintaining this blog.  Thanks for your support!

Shop Amazon Scrapbooking Supplies*

Happy Holidays Chalkboard Sign

How to Create a Happy Holidays Chalkboard Sign with a Simple Button Bow.

I really enjoy working with vinyl and love coming up with simple Holiday DIY projects.

The Happy Holidays Sign was one of the projects we created in last month’s Holiday Workshop.

For my sign, I used Styletech Craft’s Ultra Metallic Glitter Adhesive Vinyl in red, green and

white.  The Ultra Metallic Glitter Vinyl has a white backing which ensures the colors stay bright

and true no matter what surface you apply it too.

To start my project…                                                                                 (*amazon affiliate links)

  • I used a piece of Wood Hardboard*.  (it’s like a hole-less peg board) I cut mine 5 1/2 x 7 1/2″.
  • Drill two small 3/8″ holes in the top of the board to use for hanging the sign.
  • Paint the board using DecoArt Black Chalkboard Paint*.
  • Lightly sand the board using 3M Sandpaper, 220-Grit*.  This smooths the board and allows a little bit of the brown board to show through for a vintage look.
  • Wipe the board with a clean soft cloth.

*Disclosure:  This blog uses ads and affiliate links.  If you choose to make a purchase using one of the links, I receive a small commission (at no additional cost to you) that helps offset the costs of maintaining this blog.  Thanks for your support!

  • I applied the words on the chalkboard using Styletech Clear Vinyl Transfer Tape*.
  • I applied the word “Holidays” first and lined the word “Happy” over top.
  • Cut a small white snowflake using white ultra metallic vinyl and add onto the sign above the word happy.
  • Create a “Button Bow”  for the top of your “Happy Holidays Chalkboard Sign”.
  • Directions for “button bow” below.
  • Add twine to the two top holes for hanging.
  • Glue Button Bow onto the top of the “Happy Holidays Chalkboard Sign” using craft glue*.

“This is a sponsored post.  As a member of the StyleTechCraft Design Team I have been provided product and compensation in exchange for my creative ideas.  The views and opinions are my own.

Shop Your Fav Brands at Scrapbook.com

How to Make a Holiday Button Bow…

  • Fold ribbon in thirds.  (like your getting ready to tie a tie.)
  • Gather and wrap twine around the center of the ribbon a couple of times and tie tightly.
  • Add a jump ring to the jingle bell and add onto one end of the twine and tie.
  • Add button to both ends of the twine and tie to the center of the bow.
  • Trim the ends of the ribbon and twine.

Ask for Styletech Craft vinyl at your local craft store

or online at ATSMCRAFT and limited availability on Amazon.

StyleTechCraft Christmas Colors Bundle on Amazon*


Shop Amazon Scrapbooking Supplies*

Creating Holiday Tees with Personality

Creating fun and funny personalized tees for the Holidays are a snap with the help of

Joy® Embroidered Iron-on Letters.

My grandsons are good sports and will usually let me take their pictures for my projects.

We took this picture the day before Halloween.  They weren’t really into Christmas pictures.

In the picture, Nicholas is giving me his best “grinchy” face.

His mom said his shirt should read “Grandma made me do it”.

Here’s What You’ll Need:

*Disclosure:  This blog uses ads and affiliate links.  If you choose to make a purchase using one of the links, I receive a small commission (at no additional cost to you) that helps offset the costs of maintaining this blog.  Thanks for your support!

Directions:

  1. Wash t-shirt to remove any residue or sizing.
  2. Set iron to cotton setting or follow garment care label.
  3. Remove letters from sheet.
  4. Position letters with shiny side down.
  5. Cover letters with a fine cloth.
  6. With firm pressure iron cloth over the letters for 25 seconds.
  7. Turn t-shirt inside out and iron the back of the letters for 25 seconds.
  8. Allow to cool for one minute before handling.

You can find a wide selection of Joy® embroidered iron-on letters and alphabet sheets in different sizes at your local craft stores.  

“This is a sponsored post.  As a member of the Joy® Design Team I have been provided product and compensation in exchange for my creative ideas.  The views and opinions are my own.

Shop Your Fav Brands at Scrapbook.com

Shop Amazon Scrapbooking Supplies*


Holiday Candy Bar and Fillin Station

Create a Holiday Candy Bar for your next Party or Get-together.

Both kids and adults alike will get a kick out of coming up and sneaking a few pieces of candy.

To get the party started you’ll need at least one set of Deflecto Interlocking Tilt Bins*

and a variety of yummy holiday candy.

The bins can be stacked, attached side by side or used individually.

Make it into a “Holiday Fillin Station” with Clear Candy Tubes* for your guests to fill.

Just add ribbon, twine and tags and let your guests create the perfect party favor.

You can purchase the Deflecto Interlocking Tilt Bins* I used for the Holiday Candy Bar

in a set of 4 interlocking bins, available at Michael’s or on Amazon.

Deflecto Interlocking Tilt Bins*             (*affiliate link)

But don’t stop there…

Make sure to check out all the other great tilt bins and storage options available from

Deflecto Craft Solutions and create your own perfect storage.

“This is a sponsored post. As a member of the Deflecto Design Team I have been provided product in exchange for my creative ideas, views and opinions.”

Shop Amazon Scrapbooking Supplies*

Disclaimer:  This blog uses ads and affiliate links.  If you choose to make a purchase using one of the links, I receive a small commission (at no additional cost to you) that helps offset the costs of maintaining this blog.  Thanks for your support!

Simple Vintage Christmas Cards

Simple Vintage Christmas Cards

Last week-end at my annual Holiday Workshop we made several Christmas cards using the

“Simple Vintage Christmas” Collection from Simple Stories.

I’m a big fan of vintage Santa’s and fell in love with this collection.

It was so much fun to work with.

I was able to keep the cards fairly simple with only a few embellishments and ribbons

because the images were so beautiful.

I picked up the cute snowflake embellishments at Hobby Lobby.

This one I made into a gift card holder.

Simple Vintage Christmas is a great Holiday Collection.

Simple Stories Simple Vintage Christmas Collection Kit*

*Disclosure:  This blog uses ads and affiliate links.  If you choose to make a purchase using one of the links, I receive a small commission (at no additional cost to you) that helps offset the costs of maintaining this blog.  Thanks for your support!

Shop Your Fav Brands at Scrapbook.com

Shop Amazon Scrapbooking Supplies*

Yippee Hooray…a boys birthday card

A fun little card to celebrate a special guys 5th birthday.

The three boys on the card represents my three grandsons.

This week the Xyron Design Team has teamed up with Waffle Flower Stamps & Dies

for some fun projects.  Waffle Flower sent me this cute stamp set called “yippee”.

It’s a perfect stamp set to use for kids cards.

Here’s what I used on my card:                                   (*affiliate link)

  • I stamped a birthday celebration scene using the three boys to represent my three grandsons on white watercolor paper.
  • I colored the stamped image in using my art markers.

There are so many cute kids and components with this stamp set.

  • I used a silver paint marker to edge around the stamped image to make it stand out more.
  • The card and layers were quickly put together using my xyron tape runner.
  • Wrap a couple strands of green and blue twine around the card front and tie with a bow.

A simple little card perfect for celebrating all your special days.

“This is a sponsored post.  As a member of the Xyron Design Team I have been provided product and compensation in exchange for my creative ideas.  The views and opinions are my own.

Shop Your Fav Brands at Scrapbook.com

*Disclosure:  This blog uses affiliate links.  If you choose to make a purchase using one of the links, I receive a small commission (at no additional cost to you) that helps offset the costs of maintaining this blog.  Thanks for your support!

Sew Simple Fall Welcome Banner

Sew Simple Fall Welcome Banner…

Welcome your guests all season long with this easy to make Fall Welcome Banner.

To make the Fall Welcome Banner you’ll need:

  • Two pieces of 8″ x 12″ plaid flannel
  • JoyⓇ Gold Iron-on Embroidered Letters
  • Felt:  Cream, Green and Tan
  • Beacon Fabri-Tac Permanent Adhesive*
  • Various Trims and Buttons
  • Sewing Machine
  • Iron
  • Bamboo Skewer

Directions:

  • Cut simple pumpkin shape out of cream felt.  You can find several simple pumpkin images online that you can trace onto the felt.
  • Cut a pumpkin stem from tan felt and leaves from green felt.
  • Glue shapes and trim onto flannel with fabric glue*.

    • Top stitch around pumpkin and trims on flannel using the sewing machine.

    •  Place second piece of flannel over the decorated piece and sew together leaving space for turning the right side out.  Sew banner closed.
    • Set iron to cotton setting, approx. 350°.
    • Iron banner to flatten.
    • Position letters with shiny side down onto flannel.
    • Cover letters with a clean soft cloths, with a firm pressure iron cloth over letters for 25 seconds.
    • Turn flannel over and iron the back of the letters for 25 seconds.
    • Create a small pocket by folding and sewing down top of banner.
    • Insert a bamboo skewer or small wood dowel on top of banner for hanging.

Joy® iron-on, embroidered letters and number sheets are available in a variety of sizes, colors, and fonts at your local craft stores.

“This is a sponsored post.  As a member of the Joy® Design Team I have been provided product and compensation in exchange for my creative ideas.  The views and opinions are my own.

Shop Your Fav Brands at Scrapbook.com

*Disclosure:  This blog uses ads and affiliate links.  If you choose to make a purchase using one of the links, I receive a small commission (at no additional cost to you) that helps offset the costs of maintaining this blog.  Thanks for your support!

Jillibean Soup and Xyron-Siblings Layout

Growing up with you is one of my favorite memories.

This is me with my crazy, wonderful siblings.    (I’m right smack dab in the middle.)

The five of us have been through a lot together.  Especially the last year.

I’m  so glad we have each other to count on.

Even though we drive each other crazy from time to time, there’s a real closeness and love.

This picture was taken last August when the whole family got together for one last

picnic at our family home.

Home… A story of who we are.  A collection of things we love.

That caption from the collection about brought a tear to my eye.

I’m a little nostalgic when it comes to home right now.

Down the hall in my family home was a very large collection of photos.

The pictures covered both sides of the hall walls.  It was like a very big scrapbook.

No one was left out.   (even if you didn’t like the picture)

A collection of everyone they loved.

For my Siblings Layout…here’s what I used:               (*affiliate links)

When you have a lot of little pieces to stick onto a layout I like to use a combination

of my Xyron 3″ Sticker Maker* and my Xyron Mega Runner*.

The Xyron Sticker Maker is real easy to use.  Just place the paper, design side up, into the end of the sticker maker and pull the paper through.  Rub the protective covering and peel back to expose sticker.

This week the Xyron and Jillibean Soup Design Teams have joined forces for one amazing blog hop.  Make sure to join us each day on Facebook for awesome inspiration and a chance to win some cool prizes on both pages.  (make sure to visit both!)

“This is a sponsored post.  As a member of the Xyron Design Team I have been provided product and compensation in exchange for my creative ideas.  The views and opinions are my own.

Shop Your Fav Brands at Scrapbook.com

*Disclosure:  This blog uses affiliate links.  If you choose to make a purchase using one of the links, I receive a small commission (at no additional cost to you) that helps offset the costs of maintaining this blog.  Thanks for your support!