
How to Create a Happy Holidays Chalkboard Sign with a Simple Button Bow.
I really enjoy working with vinyl and love coming up with simple Holiday DIY projects.
The Happy Holidays Sign was one of the projects we created in last month’s Holiday Workshop.

For my sign, I used Styletech Craft’s Ultra Metallic Glitter Adhesive Vinyl in red, green and
white. The Ultra Metallic Glitter Vinyl has a white backing which ensures the colors stay bright
and true no matter what surface you apply it too.

To start my project… (*amazon affiliate links)
- I used a piece of Wood Hardboard*
. (it’s like a hole-less peg board) I cut mine 5 1/2 x 7 1/2″.
- Drill two small 3/8″ holes in the top of the board to use for hanging the sign.
- Paint the board using DecoArt Black Chalkboard Paint*
.
- Lightly sand the board using 3M Sandpaper, 220-Grit*
. This smooths the board and allows a little bit of the brown board to show through for a vintage look.
- Wipe the board with a clean soft cloth.
*Disclosure: This blog uses ads and affiliate links. If you choose to make a purchase using one of the links, I receive a small commission (at no additional cost to you) that helps offset the costs of maintaining this blog. Thanks for your support!

- I cut the words “Happy” and “Holidays” using my Silhouette Cameo Wireless Cutting Machine*
and the red and green vinyl.

- I applied the words on the chalkboard using Styletech Clear Vinyl Transfer Tape*
.
- I applied the word “Holidays” first and lined the word “Happy” over top.
- Cut a small white snowflake using white ultra metallic vinyl and add onto the sign above the word happy.
- Create a “Button Bow” for the top of your “Happy Holidays Chalkboard Sign”.
- Directions for “button bow” below.
- Add twine to the two top holes for hanging.
- Glue Button Bow onto the top of the “Happy Holidays Chalkboard Sign” using craft glue*
.
![]()
“This is a sponsored post. As a member of the StyleTechCraft Design Team I have been provided product and compensation in exchange for my creative ideas. The views and opinions are my own.

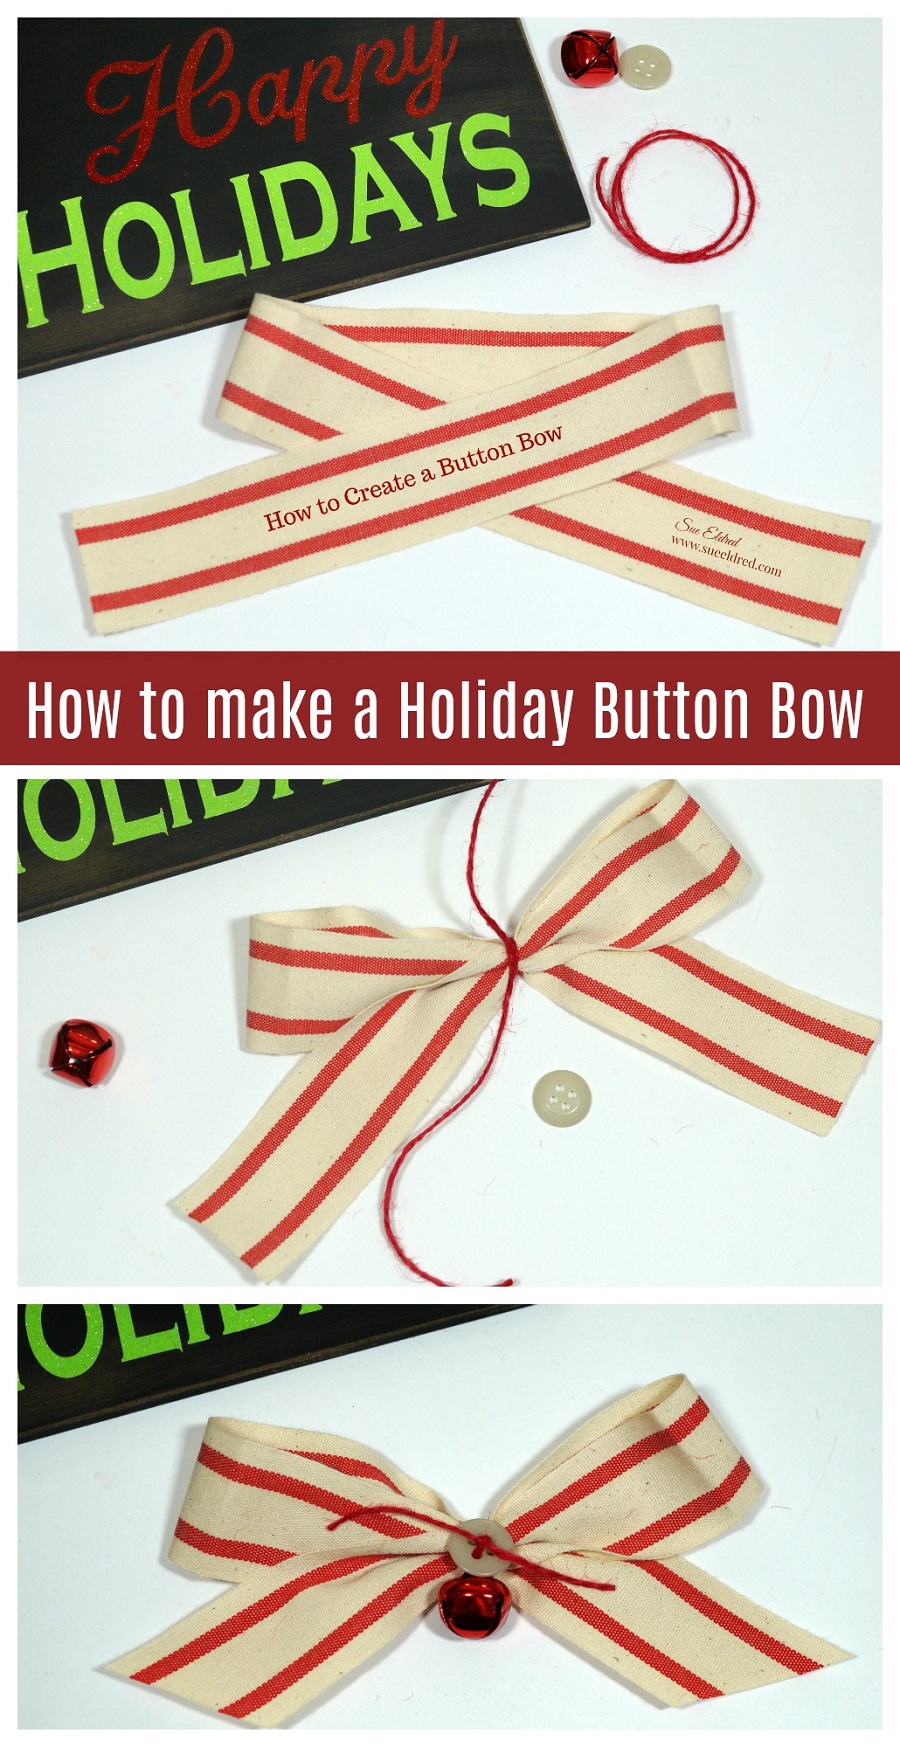
How to Make a Holiday Button Bow…
- Fold ribbon in thirds. (like your getting ready to tie a tie.)
- Gather and wrap twine around the center of the ribbon a couple of times and tie tightly.
- Add a jump ring to the jingle bell and add onto one end of the twine and tie.
- Add button to both ends of the twine and tie to the center of the bow.
- Trim the ends of the ribbon and twine.
Ask for Styletech Craft vinyl at your local craft store
or online at ATSMCRAFT and limited availability on Amazon.

StyleTechCraft Christmas Colors Bundle on Amazon*


This turned out really cute.
Thank you Penny.