Creating a Holiday Planner…
It’s never too early to start thinking about the Holidays.
So…when Xyron asked me to do a Christmas in July project using the Xyron Holiday Bundle,
of course, I said YES!
To be honest, my first thought was to run over to my local scrapbook store
and buy something new to use in my project.
Christmas is my weakness, and I have so much leftover from previous years.
I decided to “Scrap my Stash” instead. In the end, I used paper from 3-4 different collections.
(I’m so proud of my self-control.)
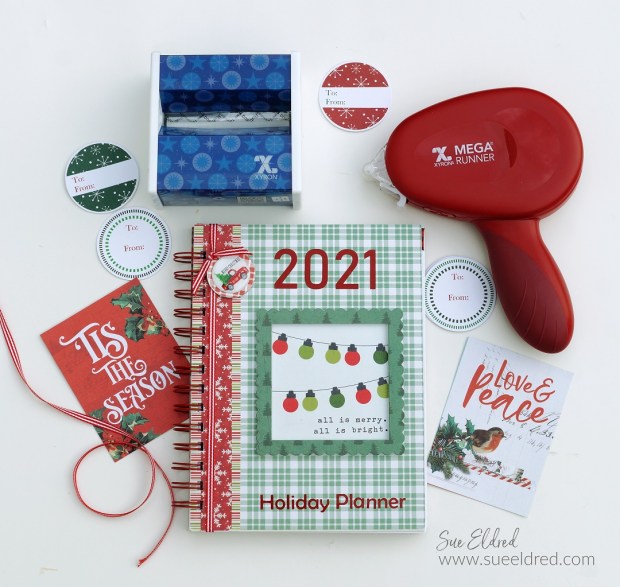
My Holiday Planner measures 6″ x 8″.
It is big enough to write in but small enough to grab and go.
![]()
“This post is sponsored for Xyron. I have been provided product and compensation in exchange for my creative ideas. The views and opinions are my own.

Materials Used:
- Xyron Mega Tape Runner*
- 3″ Xyron Disposable Sticker Maker*
- Xyron 9″ Creative Station*
- Xyron Adhesive Eraser*
- Assorted Christmas Scrapbook Paper, Ribbon and Embellishments
- Two Pieces of 6″ x 8″ Chipboard*
- White Extra Fine Sanding Block*
- Cardstock
- Bind it All or The Cinch Binding Machine*
- 3/4″ Red Binding Coil
- Heavy Duty Paper Cutter*
- Craft Mat and Craft Knife
- Frame Die from The Maker’s Movement
- 1 1/4″ Circle Punch*
- 1 1/4″ Metal Rimmed Tag*
- Crossover II Fabric & Paper Die-Cutting System*
- 3-D Foam
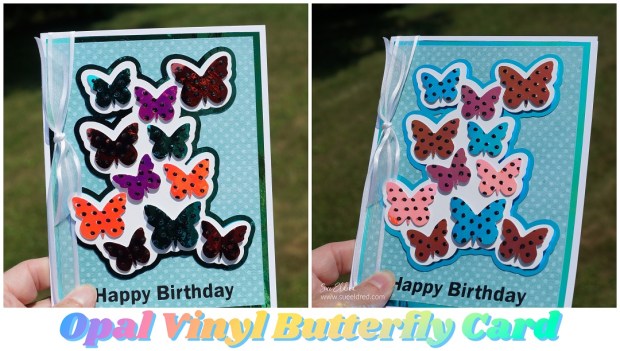
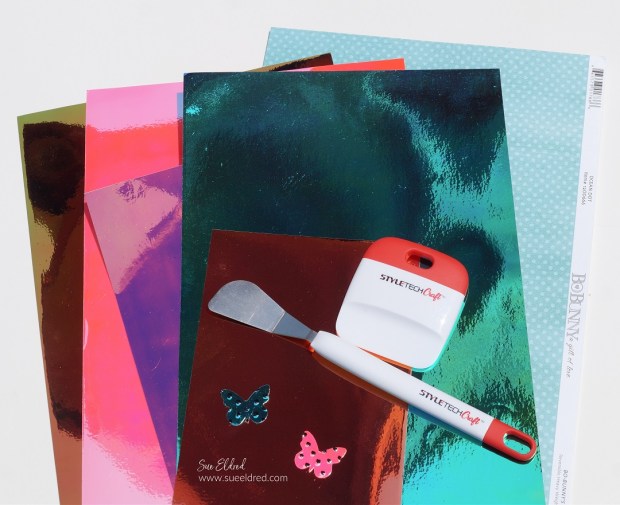
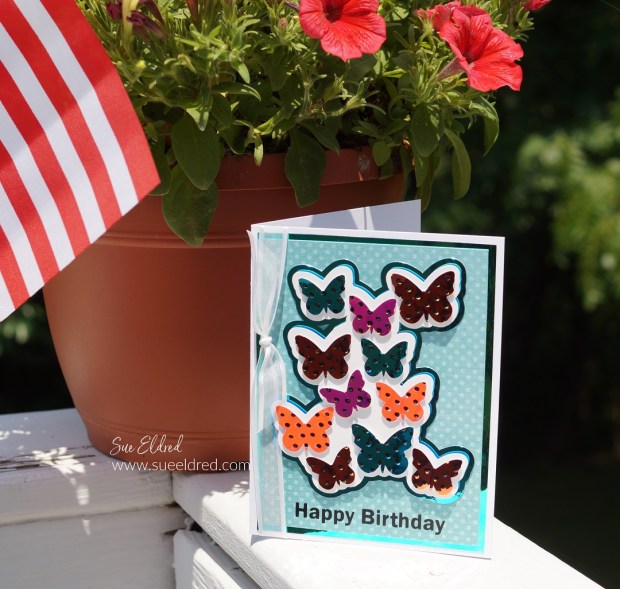
- StyleTechCraft Adhesive Red Craft Vinyl*
- Silhouette Cameo Electronic Die-Cutting Machine*

*Disclosure: This blog uses ads and affiliate links. If you choose to make a purchase using one of the links, I receive a small commission (at no additional cost to you) that helps offset the costs of maintaining this blog. Thanks for your support!

DIY Planner Details:
- Cut two 6″ x 8″ pieces of decorative paper for the front cover and two 6″ x 8″ pieces for the inside front and back covers.
- Lay the paper into the Xyron 9″ Creative Station* design side up. Crank the handle of the Creative Station* to run it through the machine. As it goes through the machine it adds a complete layer of adhesive to the back of the paper. No electricity needed, easy to use.
- Peel the decorative paper from the protective liner and place it onto a 6″ x 8″ piece of chipboard. Cover the front and back sides of the chipboard.
- I love using the Xyron 9″ Creative Station* when I make albums. I get complete coverage and everything lays smooth, no wrinkles.
- I like to use a craft mat and craft knife to trim away any excess paper.
- A sanding block is great for smoothing out the edges of the covered chipboard.

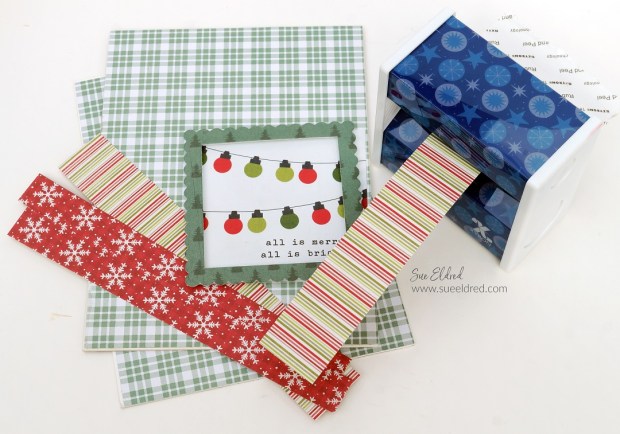
- Cut decorative strips to add the front and back of the planner. If you’ve never made a planner/album like this, you’ll want to give particular thought to the placement of the strips on the back cover to make sure they line up with the front of the planner.
- I used coordinating decorative scrapbook paper to create a frame for the front of my planner using the frame die from The Maker’s Movement.


- The Xyron Disposable 3″ Sticker Maker* is a great way to add adhesive to small pieces. Just insert, pull, rub and peel. So Easy to Use!

- I created several different types of pages using a word program for the inside of the planner.
- As you can see, it doesn’t have to be anything fancy.
- Once you get your cover finished and your inside pages created, you’ll want to bind it all together using a binding machine. I used an old Bind it All Machine. You can also use The Cinch Book Binding Machine*.

November and December are the crucial days when planning the Holidays.
I printed out two calendar pages from SaturdayGift.com and sized them to fit in my planner.
On the inside of the front cover, I created a pocket for lists and coupons.

Christmas Gift List
I am that person. I write down everything I buy for Christmas.
If you want to know what I bought you five years ago for Christmas, ask me.

Christmas Card List
Do you still send Christmas Cards?
I love getting and sending Christmas Cards over the Holidays. (sometimes I even make them)
I don’t get as many or send as many as I used to, but I love hanging them on display.

A great way to be prepared for the Holiday Cookie Exchange.
Creating pockets are a great way to keep organized and the perfect place for
blank Holiday recipe cards.

Favorite Family Recipes…
I have several family favorite recipes that I make every year.
Several years ago, I typed them all up and saved them on my computer.
It was easy to reprint them and add them to this year’s Holiday Planner.
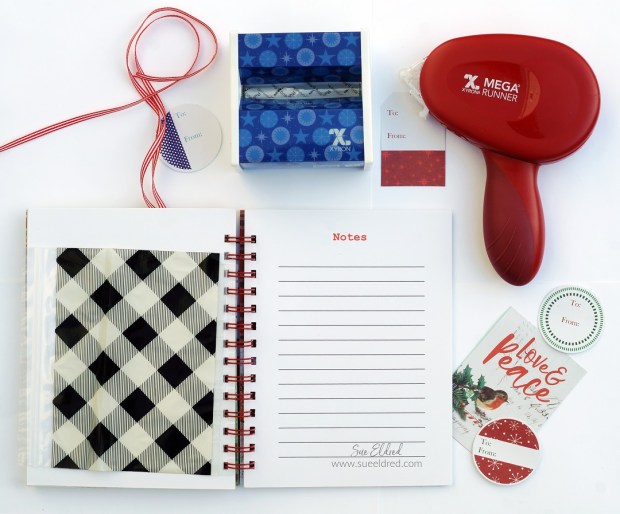
Notes and Stuff…
These pages are for writing down special memories, tips of things that worked that’ll you’ll want
to remember for the next holiday get-together, or the other room mom’s phone number.
There’s so much that we need to remember during the holidays.
And don’t forget to save those receipts for easy returns.
I added a thick buffalo plaid zipper bag in my planner to hold those receipts.

Jingle All The Way…
Create another pocket in the back to tuck in pictures and invitations.
I can never have too many pockets to help keep me organized.
The nice thing about Christmas in July is that by the time the Holidays do arrive,
I’ll be almost ready.