
Just Scootin’ in to say Hello…
Don’t you just love getting “snail mail”?
It’s so nice when I open my mailbox and see something other than a bill or advertisement.

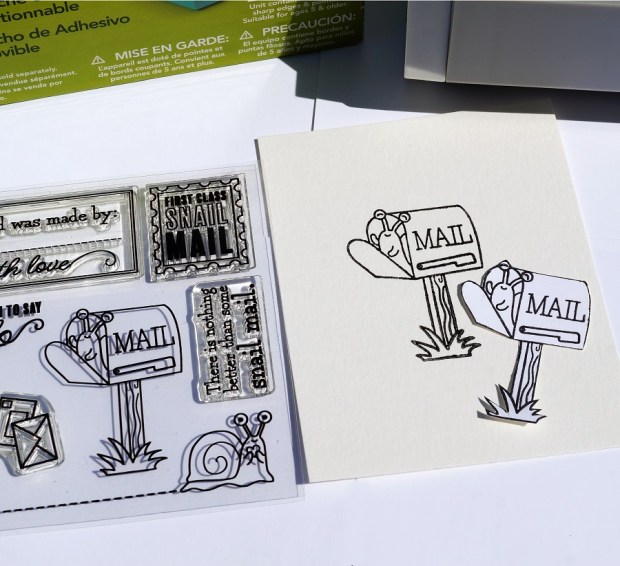
The Snail Mail card was made using the Snail Mail Stamp Set from The Maker’s Movement.
I used simple masking and background techniques that anyone can do to make the card a little more fun.
(see below for complete instructions)

Disclosure: This is a sponsored post for The Maker’s Movement. I have been provided product and compensation in exchange for my creative ideas. The view and opinions are my own.

Directions:
- Stamp the “mailbox” on white Watercolor Paper* using a Black VersaFine Permanent Ink Pad*.
- I like to use watercolor paper and stamp the image with permanent black ink. The watercolor paper helps the inks and markers blend smoothly.
*Disclosure: This blog uses ads and affiliate links. If you choose to make a purchase using one of the links, I receive a small commission (at no additional cost to you) that helps offset the costs of maintaining this blog. Thanks for your support!

Creating a Mask for your stamped images…
To keep your image crisp and clean while creating your background you’ll want to create a mask.
- Without re-inking, the “mailbox” stamp, stamp the image onto a piece of scrap paper. This lighter impression keeps the ink to a minimum and prevents it from getting onto your fingers when working with the mask.
- Place the stamped copy into the Xyron Create-A-Sticker Mini* with a Repositionable Cartridge* design side up.
- Turn the knob of the machine to run the paper through it. As it goes through the machine it adds a layer of repositionable adhesive to the paper.

- Cut nice and tight around the stamped image – this cut-out now becomes your “mask”.
- Remove the protective backing and place the mask directly over the stamped image.

Masking the Sun…
- Punch or cut a circle from scrap paper. (set aside the punched circle to use as a mask)
- Use the open circle cutout as a template to create the sun. Place the circle cutout over the masked/stamped mailbox. Using a yellowish/golden inkpad and an Ink Blending Tool*, gently rub the ink onto the paper. Be careful not to let the paper slip.
- Take the punched circle and place it in the Xyron Create-A-Sticker Mini* (with repositionable cartridge) to make a mask that will fit over your “inked sun”.
- Place mask over the Sun.

Creating the Grass Background…
- Stamp the “snail with dotted lines” in black ink over the base of the mailbox image. You can leave the dotted line straight, or you can easily position the dotted line of the stamp to make it curvy.
- Stamp a second snail to create a mask. (You will only need to cut out the snail, not the dotted lines.)
- Place the snail mask over the stamped snail image.
- Use scissors to cut a wavy line on a piece of scrap paper to create your “grass background template”.
- Starting at the top of the “curvy line”, use an Ink Blending Tool* and green ink and rub the ink down on the paper. Continue moving the template down the paper and adding more grass lines.

Creating the cloudy sky background…
- As a reminder…you should have masks on the Sun, Mailbox, and Snail.
- To make light and fluffy clouds, you’ll need a piece of scrap paper with a torn edge.
- Place the torn edge at the top of the stamped watercolor paper. Gently rub blue ink onto the paper with the Ink Blending Tool*.
- Adjust the torn paper slightly and move down the paper and ink to create more clouds. Continue inking clouds until you reach the grass line.

- Remove the masks from the sun, mailbox, and snail.

- I used a variety of light and dark Tombow Dual Brush Art Markers to color in my image.
- Because I use Watercolor Paper* and stamped the image with the Versa Fine Black Inkpad* I can easily blend the markers without the outline ink bleeding.


Decorated Envelopes for the Win!
I rarely decorate my envelopes.
I thought this card called for a little extra fun on the outside.
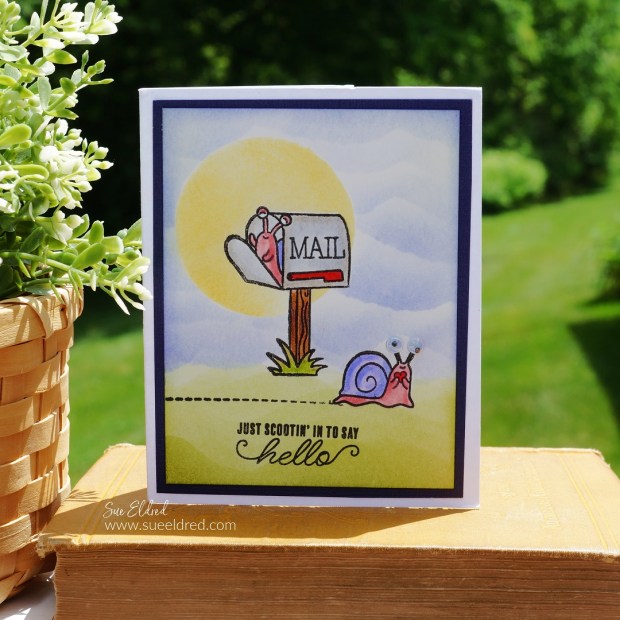
And for a little extra fun, I added googly eyes to the snail on this card.


Love it 🥰