Design Challenge with Little B…

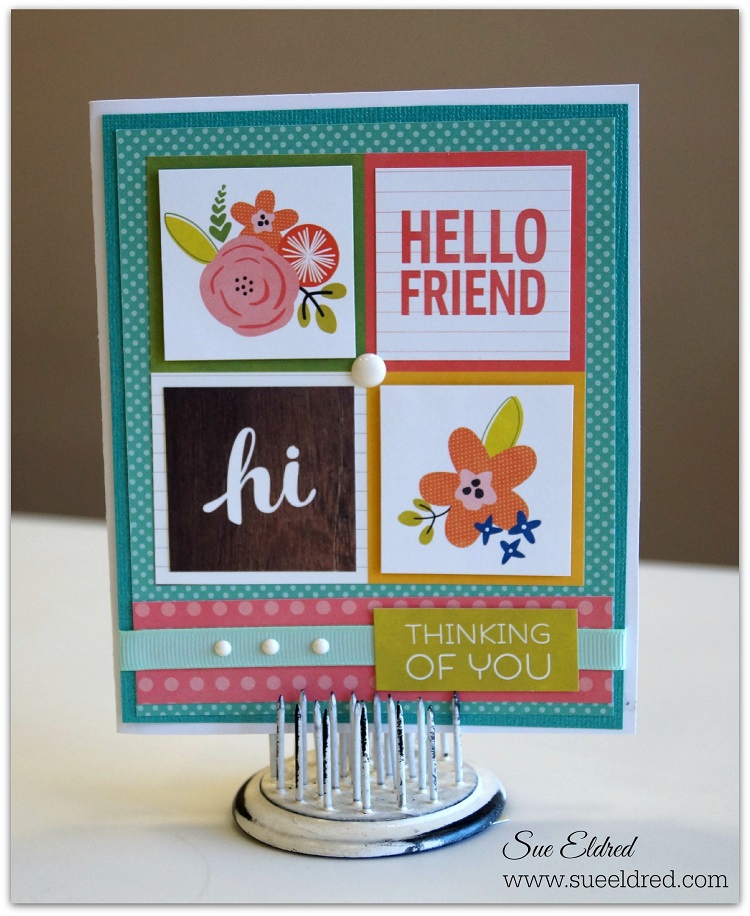
I played a little hooky from all the projects on my never ending “To Do” list…

and did a little card-making (just for fun).  Thanks in part to a wonderful box of goodies

that I received from the good people at Little B LLC, the sponsor of this month’s

Designer Craft Connection’s Manufacturer Challenge.

(make sure to check out the great giveaway prize at the bottom of this post)

Graphic 45 and Little B Butterfly Card 91

My Butterfly Card uses mini dimensional butterflies from Little B

and scrapbook paper from Graphic 45’s Rare Oddities Collection.

To create the division between the butterflies,

I used a really thin Black and White Striped Decorative Tape

Little B Wedding Card 082

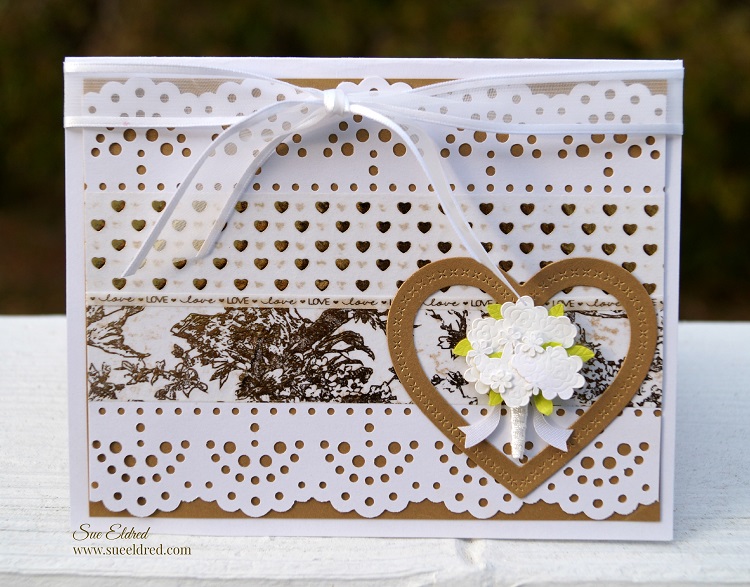
This Simple little card uses all kinds of Little B goodies.

Directions:

  1. Using the Lace Doily Punch, punch both sides of a white cardstock layer.                        (Approx. 4 1/4″ x 5 1/4″)
  2. Add Gold Foil Hearts and Gold Foil Toile tapes to the center of the punched cardstock.
  3. Add a thin strip of Gold Foil Love on top of the seem between the two previous tapes.
  4. Layer white cardstock onto a piece of gold cardstock and adhere to a white card base.
  5. Using three of the smaller layering heart dies, cut and emboss a small heart frame.
  6. Adhere the heart frame onto the bottom right corner of the card.
  7. Using a small Wedding bouquet from the Bride and Groom stickers, stick bouquet onto the center of the heart frame.
  8. Tie white sheer ribbon around top of the card.

Finished Card Size:  4 1/2″ x 5 3/4″


Little B img-logo

♥ Thank You Little B LLC for generously providing the dies, punches, dimensional stickers,

and decorative tapes used on these cards.   (You are awesome!)


DCC Little B Giveaway

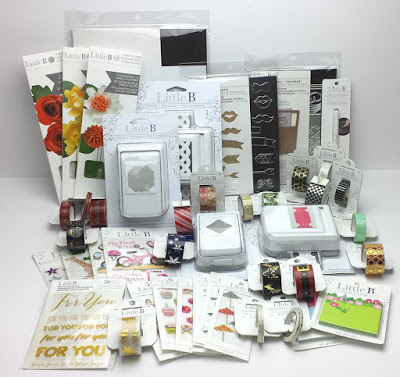
Little B LLC is so awesome they’re giving away this prize package to one lucky winner.

To enter to win leave a comment on this post and/on the other designers’ blogs

and “like” the Little B LLC Facebook page… that’s all there is to it.

The more you comment the better your chances are to win!  Open to residents of US and Canada only.

Contest ends 10-29-15.

Check out the Designer Craft Connection Blog for participating Designer projects.


Sue’s Holiday Workshop 2015

Workshop Info Collage

Please join me for a fun day of Holiday Crafting.

Sue’s Holiday Workshop

Saturday, November 7th

10:00 a.m. to 3:00 p.m.

at St. Marks Lutheran Church in Washington, IL

Cost is $45

(Includes lunch, door prizes and most supplies.)

We will be making:

  • Holly Jolly Flip Album
  • Mini Ribbon Wreath Ornament*
  • Handy Purse Size Holiday Planner
  • Mini Desk Calendar
  • Cards, Tags and more

Contact me at:  suesholidayworkshop@yahoo.com to sign up or for more information.

Holly Jolly Flip Book Sneak PeekMini Desk Calendar 9703 2Santa Card 9865

(Click on picture for a larger view)

*The Mini Ribbon Wreath Ornament will be featured in Craft Ideas Magazine’s Holiday Issue…

so you only get a sneak peek.


Kaisercraft “Home for Christmas” Card Class

New Christmas Card Class…

I will be teaching “Home for Christmas” at The Paper Forest in Washington, Illinois.

Home for Christmas Class

Home for Christmas

We will be making a set of Christmas cards featuring the “Home for Christmas” collection from Kaisercraft.  Come have fun, get in the holiday spirit and maybe pick up a new technique or two!

The Paper Forest

Thursday, November 12 from 5:30-7:30

Cost:  $22.00

Contact The Paper Forest http://www.thepaperforest.com or call 309-745-3440 to sign up for the class.

Warm Wishes 9720 Have a Holly Jolly Christmas 9721 Love Joy & Peace 9726 Merry Christmas Poinsettia 9731

Kindness Matters

Kindness Matters.  All Day.  Every Day. 

This card was made using Art Play Paintables and Blender Basics.

I water colored the image using a waterbrush and a variety of inks from markers and inkpads.

Happy Friday Everyone!

Shop Your Fav Brands at Scrapbook.com

*Disclosure:  This blog uses ads and affiliate links.  If you choose to make a purchase using one of the links, I receive a small commission (at no additional cost to you) that helps offset the costs of maintaining this blog.  Thanks for your support!

Art Play Paintables

The other day while I was procrastinating…

I decided to get out my Art Play Paintables and do a little water coloring.

I love these fun sheets from Adorn It call Art Play Paintables.

So many wonderful images to fill in.

Great for watercolors, color pencils and markers.

You know… I think I need to take more time to just play.

Happy Friday!

Spellbinder’s Captivating Squares Class

Spellbinder's Captivating Squares Card Class

There is still a few spots open for Saturday’s Captivating Squares class at The Paper Forest.

In the class we will be using Spellbinders dies and Kaisercraft’s Rustic Harmony Collection

to make these four cards.

The Paper Forest in Washington, IL

Saturday, April 18th from 1:00-3:00 p.m.

Cost of the Class:  $22.00

Students Bring:  tape runner, scissors, foam mounting squares, Vintage Photo Ink, Ink Applicator

Contact The Paper Fores to sign up.

Simply Beautiful Handmade Flower

Learn how to make a Simply Beautiful Handmade Flower in a few easy steps.

To make the flower you’ll need:      (*affiliate link)

Disclosure:  This blog uses affiliate links.  If you choose to make a purchase using one of the links, I receive a small commission (at no additional cost to you) that helps offset the costs of maintaining this blog.  Thanks for your support!

Directions:

  1. Punch 3 daisies from each one of the punches for a total of 12 punch outs.
  2. Using the end of a pencil or skewer, round each of the petals up.
  3. Turn the punched shaped over and press down into the center.
  4. Glue two of the largest flowers together slightly off centered.  Add the third flower.
  5. Continue adding and gluing the next size flower and glue on top.  Repeat with the third size.
  6. Pinch the smallest flowers up tight and stagger and glue onto the center of the flower.
  7. Spray the finished flower with Glimmer Mist until you get the desired shade of color.
  8. Once the flower is dry add a small adhesive pearl in the center of the flower.
  9. Create card using Captivating Squares shapes and layers misted with Glimmer Mist

*FTC Disclosure… “This is a sponsored post.  I have been provided product in exchange for my creative ideas.  The views and opinions are my own.”

Happy Cards for a Happy Day…

Yesterday was such a lovely Spring day. 

The sun was shining, the birds were singing.

My teenage son wanted to go out with me for dinner!

You know… a “Happy” kind of day.

So a good day deserves some “Happy Day” cards.

Smile 3895

Cards to make you “Smile”. 

Hello Friend 03902

Happy Birthday 3889

Let's make a memory 3906

And… if you like these cards and would like to make a set for yourself, we will be making these cards in my “Happy Day Cards” class that I’ll be teaching in May at The Paper Forest.

Happy Day Cards

Enjoy life’s little moments with cards made from the Happy Days Collection from Pebbles Inc.

Saturday, May 30th

10:30-12:30

Cost:  $20.00

Contact The Paper Forest at 309-745-3440 for more information or to sign up.

Supplies Needed:  Scissors, Paper Trimmer, Tape Runner, Foam Mounting Squares


Fave Crafts 2015 Best Blogger Contest: Baby Girl Tag

This sweet “Baby Girl” tag was made with the products I received after the

2015 Blogger Networking Event at the Craft and Hobby Association Show in January.

The tag is also my submission into Fave Crafts Best Craft Blogger Contest 2015.

(Needless to say, I’ll be shamelessly asking you for your vote at the end of the post.)

Little B Baby Tag 1488 2

Baby Girl Tag

Designed by Sue Eldred

Little B: (littlebllc.com)

  • 100366 Honeycomb Punch
  • 100434 Silver Foil Pink Harlequin Decorative Tape
  • 100418 Pull Flowers Chrysanthemum
  • 100146 Footprints Dimensional Sticker Embellishments
  • 100395 Party Dies

Additional Supplies:

  • Large White Tag 3 1/2” x 6 1/4”
  • Cardstock: White, Pink
  • Large White Button (Buttons Galore and More)
  • Fabri Tac Adhesive (Beacon Adhesives)
  • Tape Runner
  • Thin 3-D Foam Squares (Scrapbook Adhesives by 3L)
  • 5/16 Hole Punch
  • Silver Ribbon (Offray)
  • Computer Generated Font.

Directions:

  1. Punch a 3 1/2” pink cardstock border using the Honeycomb punch.
  2. Add a 3 1/2” strip of decorative tape onto a piece of white cardstock. Trim a very thin border on each side of the tape. Add decorative trim tape piece onto center of the Honeycomb border.
  3. Adhere border on the bottom of the tag.
  4. Cut 12” from the White Pull flowers trim. Fold trim in half and pull strings as directed to create flower.
  5. Add small pink feet stickers to a large white button. Glue embellished button to the center of the flower. Glue flower onto center of the tag.
  6. Create a pink banner from the Party Dies. Add to top of the top using thin foam mounting squares.
  7. Print out the letters: B A B Y using a computer and printer onto white cardstock.
  8. Punch out each letter using a 5/16th hole punch. Add the letters onto the banner with small thin mounting squares.
  9. Tie top of the tag with silver ribbon.

Little B LLC Baby Girl Tag

Confession:  I’m not sure if you noticed or not… 

I did not use a plain white strip under the washi tape on the first picture on this post.

You can see the honeycomb underneath.  I like it better with the white strip.  It’s a little crisper.

I tried retaking the picture of the tag over 100 times.  That one was my favorite.  (so I stuck with it)

Best Blogger Craft 2015

After the favecrafts 2015 Blogger Networking Event at the Craft and Hobby Association Show in January, bloggers received a sample of new products from participating sponsors of that party.  The projects created from these brands and samples are simply amazing! You’re getting the first look at these exclusive projects made with new products hot in the craft market.

They need your help determining which project to crown Best Blogger Craft of 2015! You can only vote once. Voting ends March 10th, 2015 midnight CST.

I submitted this tag as part of Fave Crafts Favorite Blogger Contest.

Please check out all the entries.  (feel free to “vote” for me, if you’d like)

ADORNit Blog Hop and Giveaway

Have you seen ADORNit’s Art Play Paintables Collection by Lindsay Ostrom?

These papers are a card makers dream.

All these wonderful images without having to buy a ton of stamps.

The papers are perfect for coloring with color pencils, markers or painting

with water colors or inks.

I like to watercolor with my inks and markers and a waterbrush.

If my inks have a flexible lid, I squeeze color into the lid and use that as my palette.

If not, I dab the ink onto a non-porous surface and paint away.

(These cards were created for and sponsored by Adorn It.)