Simple Water Colored Posies

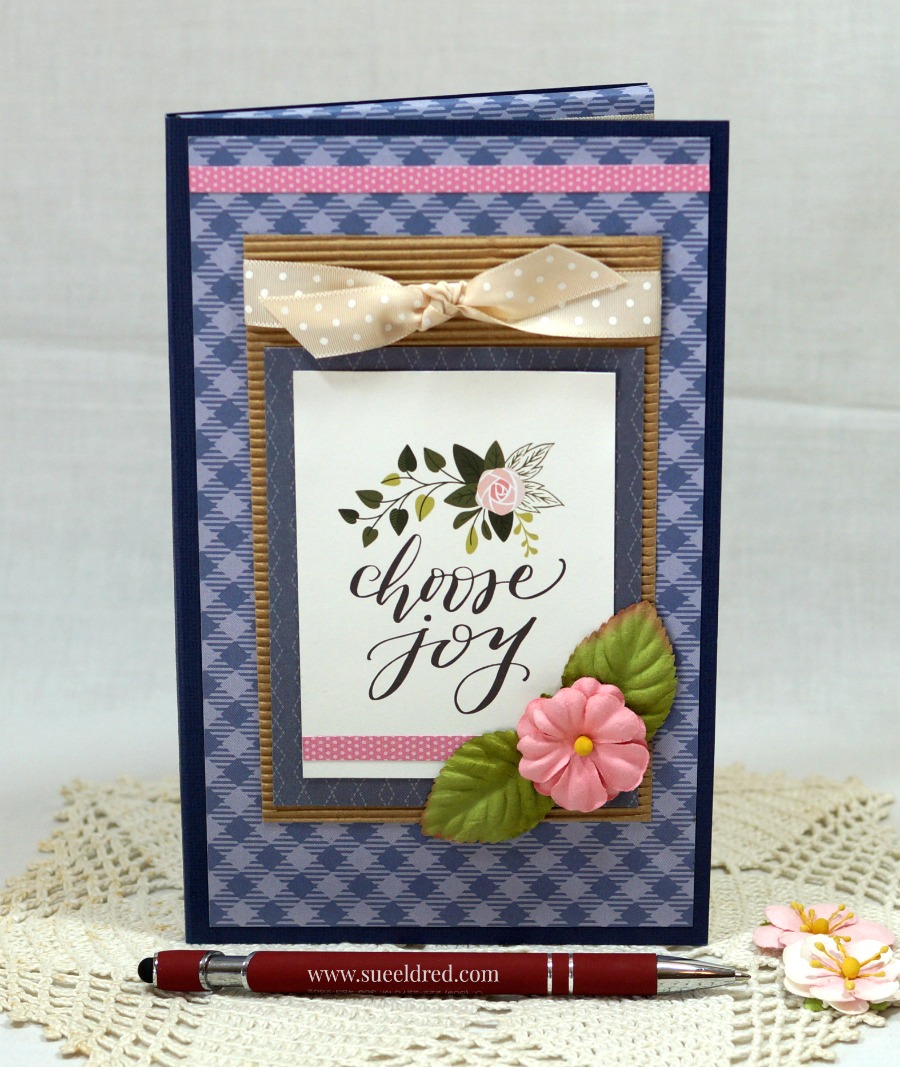
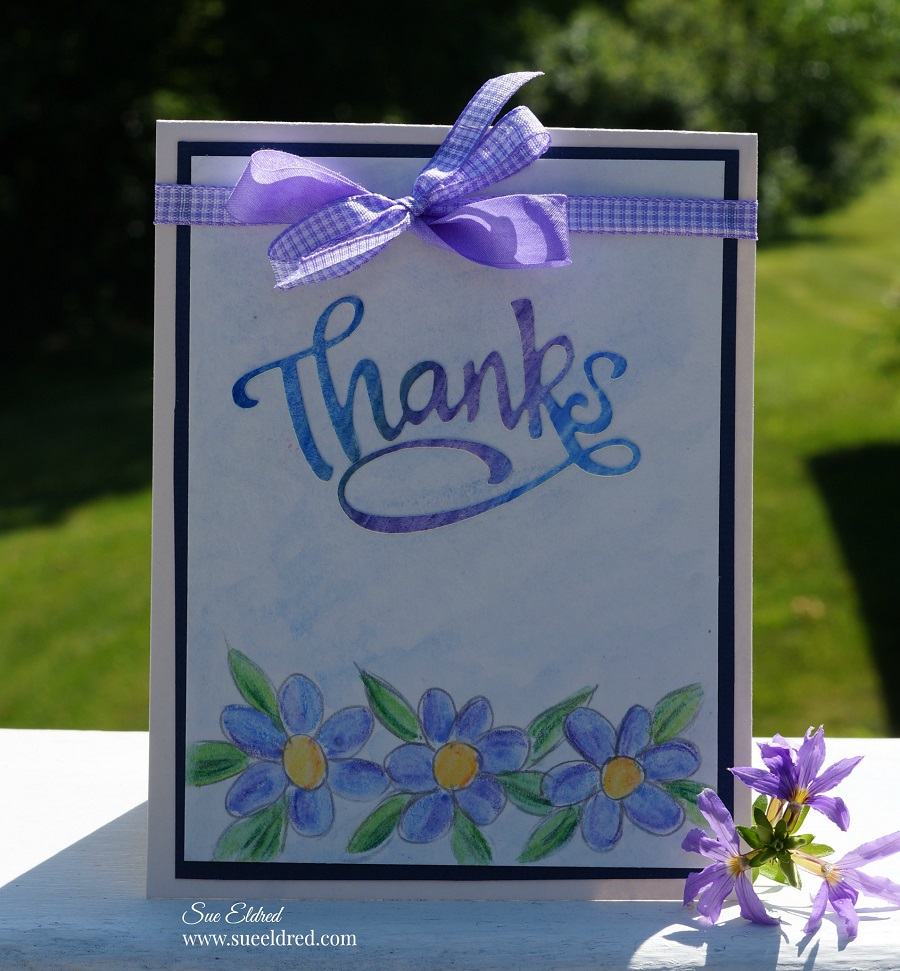
Simple Water Colored Posies Card

My love of water color started in my High School Art class.

Unfortunately for me, I’m not very good at drawing.

Except simple little objects.

For my Xyron Design Team project this week…

Derwent Academy sent us some awesome goodies to play with.

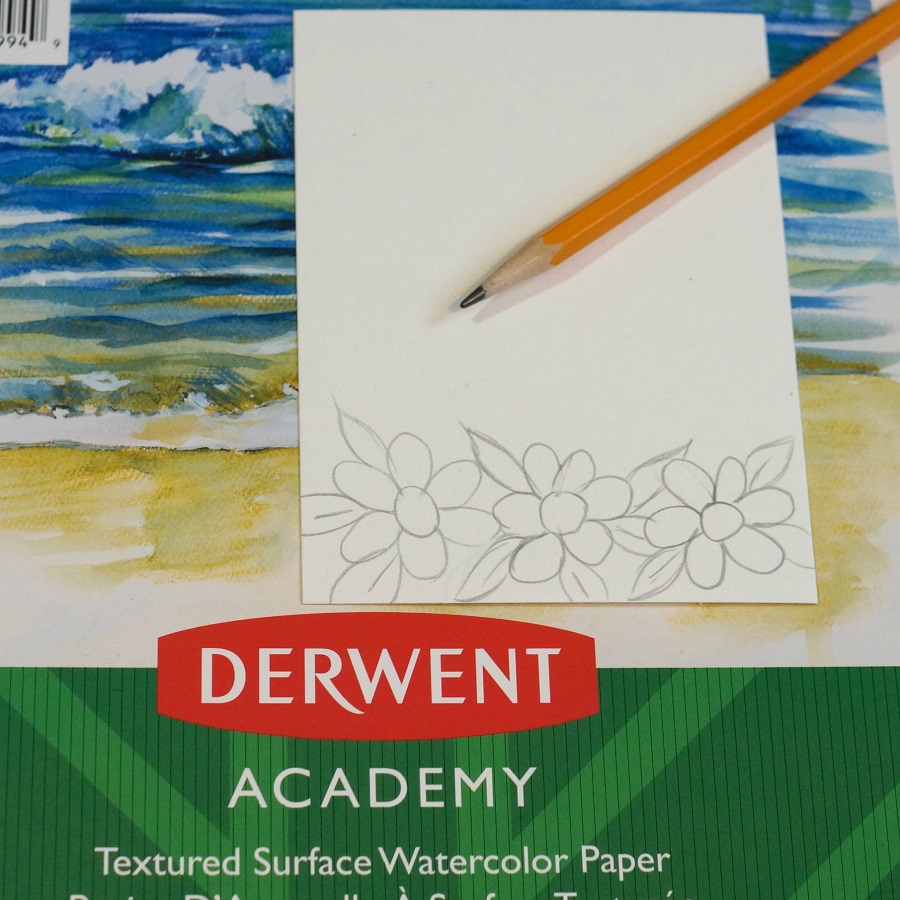
For my card…I cut the watercolor paper to 3 ¾” x 5″ and drew simple little flowers

on the bottom.  (Can’t get much easier than this.)

I colored in my flowers and leaves using the water color pencils.

I used the lighter pencil first and then added a little shading with the darker pencil.

You don’t have to fill the entire image.

Use a wet paint brush and go over pencil marks to blend the colors.

For my Words…I took a small piece of the water color paper and did a scribble background

with the blues and purple water color pencils.

Blend the colors together with a wet paintbrush.

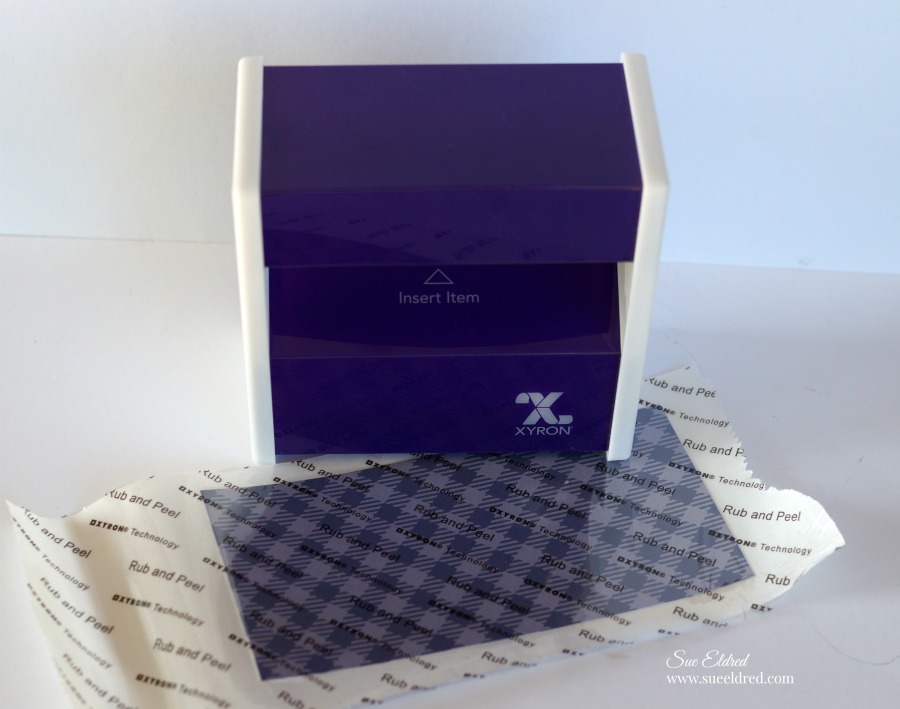
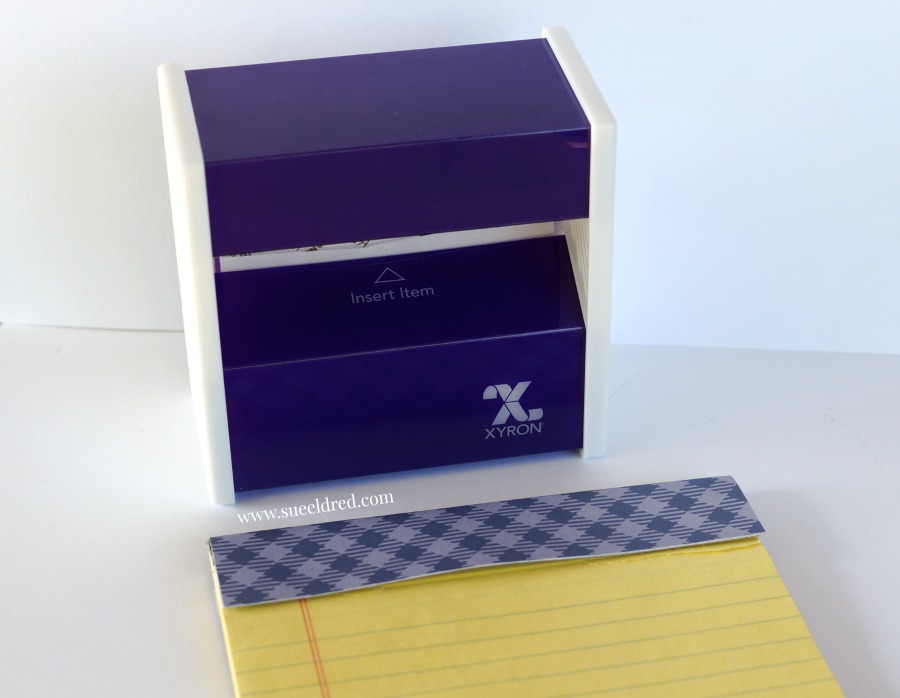
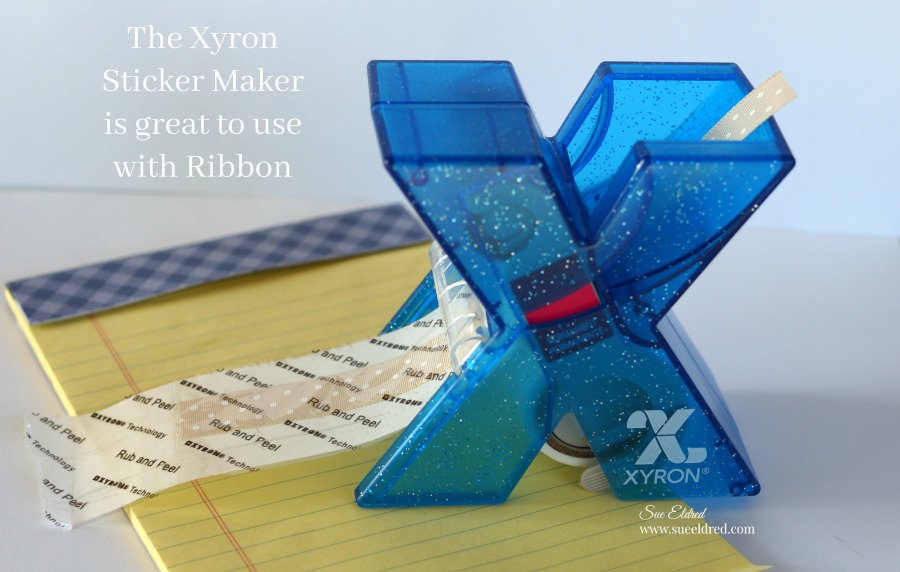
After the paper was completely dry, I inserted it into my Xyron 3″ Sticker Maker*.

The Xyron Sticker Maker* is great to use when cutting out small dies.

It adds complete adhesive and makes the perfect little word sticker.

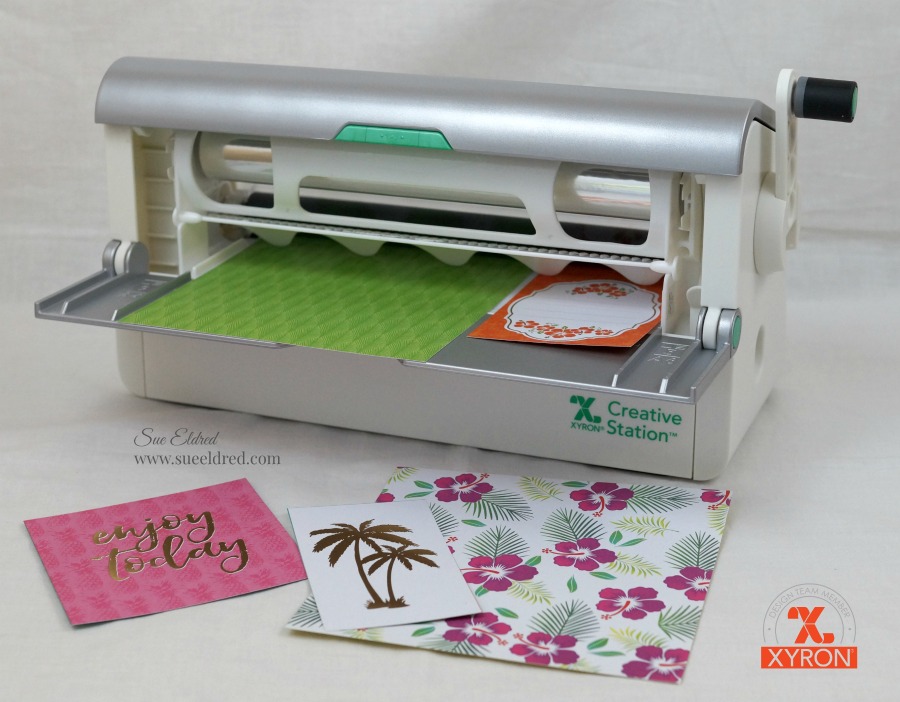
I used my Xyron Creative Station* to add adhesive to the back of my layers.

That way, I don’t have to worry about any warpage on my watercolored layer.

A simple bow finishes off this simple watercolored card.

“This is a sponsored post.  As a member of the Xyron Design Team I have been provided product and compensation in exchange for my creative ideas.  The views and opinions are my own.

*Disclosure:  This blog uses affiliate links.  If you choose to make a purchase using one of the links, I receive a small commission (at no additional cost to you) that helps offset the costs of maintaining this blog.  Thanks for your support!

How to Create a Beaded Bridal Pouch

A Gift for that special Bride…

Create a special pouch for the Bride-to-be to keep her wedding day jewelry safe while in

transport.  Personalize it with Joy Iron On Embroidered letters.

To make the Bridal Pouch here’s what you’ll need:

Shop Your Fav Brands at Scrapbook.com
Directions:
  1. Fold over one end of the felt approx. 4″.
  2. Sew along the edge of each side to create the pouch.
  3. Iron the beaded trim onto the opposite end of the felt by laying a fine cloth over the trim and ironing over it for 25 sec.
  4. Cut excess felt around the top of the beaded trim to create a scalloped edge.
  5. Position the letters spelling “Bride” onto the front of the pouch with the shiny side down.
  6. Cover letters with a fine cloth.
  7. With firm pressure iron cloth over the letters for 25 seconds.
  8. Turn flap of the pouch over and iron the back for an additional 25 seconds.
  9. Add Velcro to the flap to keep the pouch closed.

You can also use the beaded-iron on trim to make into a bracelet, belt or headband.

For the beaded bracelet…

  • Measure the size of your wrist.
  • Cut a piece of  felt approx. 3/4″ longer than your trim.
  • Arrange trim onto felt so that only one end has the extra felt.
  • Lay a clean soft cloth over trim and iron onto the felt.
  • Cut excess felt around the beaded trim to create a scalloped edge.
  • Add hook and loop tabs* to the end of the felt.

This project was sponsored by Joy SA.

Shop Handmade – The Wedding Store

*Disclaimer:  This post uses ads and affiliate links.  If you choose to make a purchase using one of the links, I receive a small commission (at no additional cost to you) that helps offset the costs of maintaining this blog.  Thanks for your support!

Cheery Little Birthday Card

A Cherry Little Birthday Card

Who doesn’t love receiving a Cheery Little Birthday Card?

I know I do.

This week the Xyron Design Team is all about Lawn Fawn…

and I had a blast.  I loved using their dies to make this fun card.

Here’s what I used:                     (*affiliate link)

*Disclosure:  This blog uses affiliate links.  If you choose to make a purchase using one of the links, I receive a small commission (at no additional cost to you) that helps offset the costs of maintaining this blog.  Thanks for your support!

  • When working with small dies, I like to run the paper through my Xyron 3″ Sticker Maker*.
  • Rub and peel the top cover off the paper.

  • Run the paper and die through your die cutter for the perfect little sticker.
  • Just the perfect amount of adhesive and so easy to use.

  • Look how cute this terra cotta pot turned out.
  • Ink the edges of the paper pieces with Vintage Photo Ink* for a realistic looking pot.

The card was so easy to put together using the Xyron Sticker Maker* for all my little pieces.

A really fun card to make.

A special thank you to Lawn Fawn for sending the dies and paper used on this project.

“This is a sponsored post.  As a member of the Xyron Design Team I have been provided product and compensation in exchange for my creative ideas.  The views and opinions are my own.

Celebrate with Matte Removable Vinyl

Create Festive Door Decals for the 4th of July!

I was decorating and getting the house ready for our 4th of July Pool Party…

when I got the idea to use my new Matte Removable Vinyl to create 4th of July door decals.

They were super simple to make and they add a fun festive touch.

To make my 4th of July Door Decals…

  • I cut the vinyl letters and number using my Silhouette Cameo 3*.
  • I cut additional small white stars to stick onto the blue number.
  • I easily transferred everything onto my door using the Vinyl Transfer Tape*.

I put one onto the backdoor heading into the pool area and the other onto the door leading

into the house from the garage.

Because family don’t use the front door!

I also used the vinyl to jazz up the plain metal tin to hold cutlery.

Did you know that this vinyl will remove cleanly for up to two years?

This vinyl  film is great for decorating a kid’s room, a classroom or just about anywhere

you just  need a temporary graphic.

And, with 27 colors available, it’s not hard to find the perfect color for whatever you can

dream up!

“This is a sponsored post.  As a member of the Tape Technologies Design Team I have been provided product and compensation in exchange for my creative ideas.  The views and opinions are my own.

Shop Your Fav Brands at Scrapbook.com

*Disclosure:  This blog uses ads and affiliate links.  If you choose to make a purchase using one of the links, I receive a small commission (at no additional cost to you) that helps offset the costs of maintaining this blog.  Thanks for your support!

Scootin by with Newton’s Nook and Xyron

Scootin’ by to say hello!

This week the Xyron Design Team teamed up with Newton’s Nook for some fun inspiration.

And…a great chance to win some goodies for you.  (see below)

Click on each of the links below to leave your comments all week for a chance to win a Xyron Mega Runner and a $25 Newton’s Gift Card.

XYRON FACEBOOK

NEWTON’S NOOK BLOG


For my project, I picked out this cute little Newton Scoots by” stamp set and matching dies.

I also picked out the Floral Lace Stencil* to use on the background.

I used my stencil brush and a light blue dye inkpad to create the subtle background.

Using my Xyron Creative Station* made quick work in putting all my layers together.

I’ll be honest…this was the first time I’ve used a stamp and matching die set.

I love how clean it looks.  Super Easy to use.  No messy fussy cutting needed!

“This is a sponsored post.  As a member of the Xyron Design Team I have been provided product and compensation in exchange for my creative ideas.  The views and opinions are my own.

*Disclosure:  This blog uses affiliate links.  If you choose to make a purchase using one of the links, I receive a small commission (at no additional cost to you) that helps offset the costs of maintaining this blog.  Thanks for your support!

Home is Where the Heart is Stitched Sampler

Celebrate special occasions with a personalized stitched sampler.

A great gift idea for a wedding, anniversary or new home.

Home is where the Heart is products used:                      (*affiliate link)

*Disclosure:  This blog uses ads and affiliate links.  If you choose to make a purchase using one of the links, I receive a small commission (at no additional cost to you) that helps offset the costs of maintaining this blog.  Thanks for your support!

Create custom numbers to match the project by spraying numbers with glimmer mist. 

Allow numbers to fully dry before using .

Directions:

  1. Cut a shapes using the picture above.
  2. The flowers were made using a simple hand drawn flower shape and traced onto the felt.
  3. Add red ink to the tips of the cream flowers with a stencil brush.
  4. Machine stitch the gray scalloped square onto the tan square
  5. Machine stitch the roof onto house and machine stitch onto the gray scalloped square.
  6. Iron numbers onto the center of the red heart.
  7. Arrange and adhere smaller pieces onto house using fabri tac glue.
  8. Hand stitch smaller pieces and buttons into place using needle and thread.
  9. Add finish piece into a shadow box frame.

Look for Joy® iron-on embroidered alphabet letter sheets at your local craft store.

“This is a sponsored post. As a member of the Creating with Joy Design Team I have been provided product and compensation in exchange for my creative ideas.  The views and opinions are my own. 


Tropical Vacation Mini Album

Who’s ready for a Tropical Vacation?  

Many, many years ago, I met my sweetie while visiting the island of Oahu.

Twelve years ago we went back.  (I’m thinking we’re long overdue.)

I need a tropical vacation!

This week, the Xyron Design Team teamed up with Die Cuts with a View.

I received the Electric Jungle Paper Pad, a bright and colorful collection.  

For my project, I decided to make a mini album.  I’m not sure if I’ll use the really old, kind of old

or wait until I get new pictures to place inside the album.  (hint, hint!)

Tropical Vacation Mini Album Supplies Used:                     (*affiliate links)

*Disclosure:  This blog uses affiliate links.  If you choose to make a purchase using one of the links, I receive a small commission (at no additional cost to you) that helps offset the costs of maintaining this blog.  Thanks for your support!

  • Cut paper to fit the pages of the chipboard album.
  • Lay decorative scrapbook paper (design side up) on the  *Xyron Creative Station, 9″ crank the handle to run the paper through the machine.  As it moves through the Xyron Creative Station it adds adhesive to the back side of the paper.
  • Easy to use and it doesn’t need any electricity.
  • I like using the Xyron Creative Station* when making mini books because you get complete coverage, no wrinkling, no bubbles!

  • Once the pages are covered with the paper, use a craft knife and cutting mat to trim around the edges of the chipboard.
  • Use the XYRON Adhesive Eraser* to remove any extra adhesive from the edges.
  • Gently sand away rough cut edges on the paper using a extra fine sanding block.
  • Because the chipboard is tan and the core of the paper is white, I inked the edges of the pages with a light tan ink and a ink blending tool.
  • I created thick tags by using a tag cut from the paper pad and adhering it onto a small piece of chipboard.  I used a gold calligraphy paint marker to create a gold border around the edge of the tag.
  • The “Palm Tree” and “Relax” on the front of the mini album both have chipboard underneath to create added dimension.

“This is a sponsored post.  As a member of the Xyron Design Team I have been provided product and compensation in exchange for my creative ideas.  The views and opinions are my own.

Translucent Vinyl Suncatcher

When I received the Translucent Vinyl from Tape Technologies,

I knew it would be perfect for making a Suncatcher.

The translucent vinyl comes in several great colors to choose from.

To make my Suncatcher I used a framed glass sample I rescued from the garbage.

You could also use a small frame and glue the glass into the frame.

To create my shapes I used my Silhouette Cameo*and Jillibean Soup’s Floral Mandala cut file.

*Disclosure:  This blog uses ads and affiliate links.  If you choose to make a purchase using one of the links, I receive a small commission (at no additional cost to you) that helps offset the costs of maintaining this blog.  Thanks for your support!

I used the Vinyl Transfer Tape* to overlay the blue onto the pink.

I then transferred both images onto the glass to create the Suncatcher.

To create a little more sparkle I added adhesive rhinestones onto the glass.

Shop Your Fav Brands at Scrapbook.com

“This is a sponsored post. As a member of the Tape Technologies Design Team I have been provided product in exchange for my creative ideas, views and opinions.”

Ask for Self Adhesive Glitter Vinyl Sheets- by Styletech from Tape Technologies* at your local Scrapbook Store.

How to make a DIY Memo Pad Holder

How to Make a DIY Memo Pad Holder…

I’m a list maker.

I make lists for things to do, groceries to buy, photos to edit, ideas, gardening…

I’m actually using the “Choose Joy” Memo Pad Holder as I sit and write this post.

The Choose Joy Memo Pad Holder with its sweet florals reminds me of everything summer.

And speaking of summer…it’s going to be a busy one.  (which means more lists)

DIY Memo Pad Holder Supplies Used:      (*affiliate link)

How to make a DIY Memo Pad Holder…

  • Cut cardstock to measure 8 ¼” x 10 ½”.
  • Score the cardstock at 5 1/8″ and 5 3/8″

  • Cut a 5″ x 2 ½” piece of decorative scrapbook paper to go around the top of the memo pad.
  • Place the paper, design side up, into the end of the Xyron 3″ Sticker Maker* and pull the paper through.  Rub the protective covering and peel back to expose sticker.
  • I use the XYRON Adhesive Eraser* to remove any extra adhesive from the edges.

  • Align paper on the top of the memo pad band and wrap around to the back of the pad.

Did you know that you can use the Xyron Sticker Maker with ribbon?

  • Run ribbon though the Xyron 1.5-inch Sticker Maker*.
  • Center and adhere onto the middle of the scrapbook paper border.  Wrap extra ribbon around back of the memo pad.

  • Use the Xyron Mega Runner* to adhere the notepad onto the inside cover.
  • On the other side of the inside cover, create a pocket using coordinating paper and embellishments.
  • Add adhesive to three sides of the pocket and adhere inside cover.  Perfect place for receipts and additional lists.

Embellish front cover with an inspirational quote, ribbon and flowers.

(a cute picture of the kids would be nice too)

XYRON MEGA RUNNER GIVEAWAY…

Xyron is giving me a Xyron Mega Runner to give away to one lucky blog reader.

It’s super simple to enter.

Leave a comment on my blog mentioning the Xyron Mega Runner by 5-31-18 to be eligible.

One entry per day.  US and Canada Only (color may vary)

“This is a sponsored post.  As a member of the Xyron Design Team I have been provided product and compensation in exchange for my creative ideas.  The views and opinions are my own.”

*Disclosure:  This blog uses affiliate links.  If you choose to make a purchase using one of the links, I receive a small commission (at no additional cost to you) that helps offset the costs of maintaining this blog.  Thanks for your support!

Splatter Painting

Splatter Painting

When you get an opportunity to look absolutely ridiculous…

have a little fun and make a really big creative mess, well…you just need to take it!

Last year at the Creativation Show, there was a clear acrylic booth set up called

the “Splatter Room”.  As the name suggests, splatter painting is extremely messy.

So…dressed in a hazmat suit and goggles,

I went to town choosing paint and splattering it all over my canvas.

Oh, what a glorious mess! 

It was so much fun and the highlight of my day.

The Shimelle “Box of Crayons” collection from American Crafts was the perfect collection

for my crazy, colorful pictures taken on my Splatter Day.

Last Saturday, National Scrapbooking Day, I spent my day divided between playing with

paper and playing in the dirt.  (I do love a glorious mess.)

The “let’s be friends” card was another project that I made using the “box of crayons” collection

and my Xyron Tape Runner*.

“This is a sponsored post. As a member of the Xyron Design Team I have been provided product and compensation in exchange for my creative ideas.  The views and opinions are my own.”

*Disclosure:  This blog uses affiliate links.  If you choose to make a purchase using one of the links, I receive a small commission (at no additional cost to you) that helps offset the costs of maintaining this blog.  Thanks for your support!

American Crafts… Shimelle “box of crayons” collection.