How to make a Farmhouse Garden Sign

How to make a Farmhouse Garden Sign

How to make a Personalized Farmhouse Garden Sign.

The “Garden sign” is a quick and easy Dollar Tree project.

Now that garden season is upon us, my mind is distracted with all things gardening.

I will start planting next week, and I can’t wait.

In anticipation of this year’s garden, I created a garden sign

using an inexpensive galvanized banner purchased at Dollar Tree*.

I made it with a traditional red, white, and blue color scheme.

How to make a Farmhouse Garden Sign

Materials Used:  (*affiliate links)

StyletechCraft products brought to you by ATSM Craft*

*Disclosure:  This blog uses ads and affiliate links.  If you choose to make a purchase using one of the links, I receive a small commission (at no additional cost to you) that helps offset the costs of maintaining this blog.  Thanks for your support!

How to make a Farmhouse Garden Sign

Directions:

Buy Your Crafting Supplies Now at Dollar Tree starting at $1.25!

How to make a Farmhouse Garden Sign

There are so many great colors of StyleTechCraft Glossy Craft Vinyl to choose from.

How to make a Farmhouse Garden Sign

How to make a Farmhouse Garden Sign

  • Remove the vinyl from its white protective layer and place onto the banner.
  • Rub over the vinyl with the scraper tool to transfer the vinyl onto the banner.
  • Gently lift the transfer paper from the vinyl.

FYI…the transfer paper is reusable.

How to make a Farmhouse Garden Sign

  • Line up the second layer over the first.

How to make a Farmhouse Garden Sign

  • Gently remove transfer paper from the banner.
  • Allow the vinyl to cure for 72 hours before using.

How to make a Farmhouse Garden Sign

The vinyl on the sign will hold up to the weather and looks great in my garden.

“This is a sponsored post.  As a member of the StyleTechCraft Design Team I have been provided product and compensation in exchange for my creative ideas.  The views and opinions are my own.

DIY Gold Bunny Silhouette Pillow & Treat Bag

DIY Gold Bunny Silhouette Pillow & Treat Bag

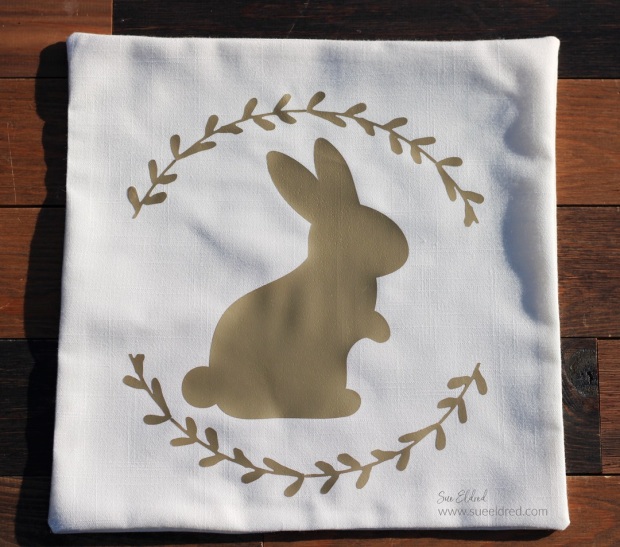
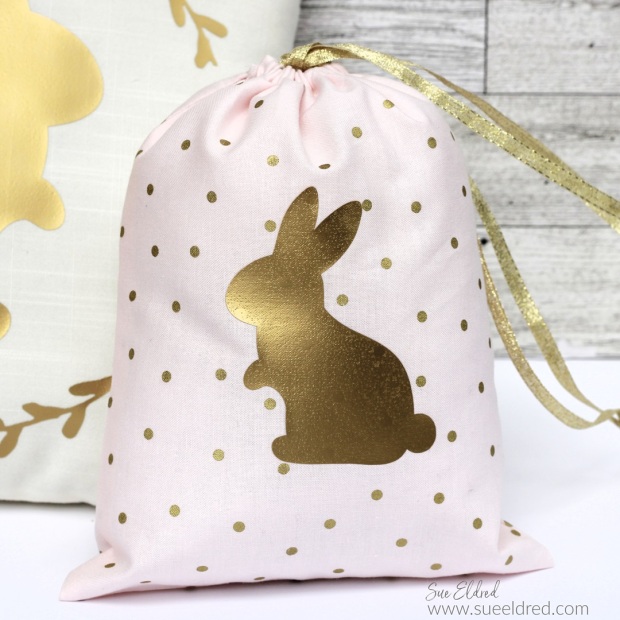
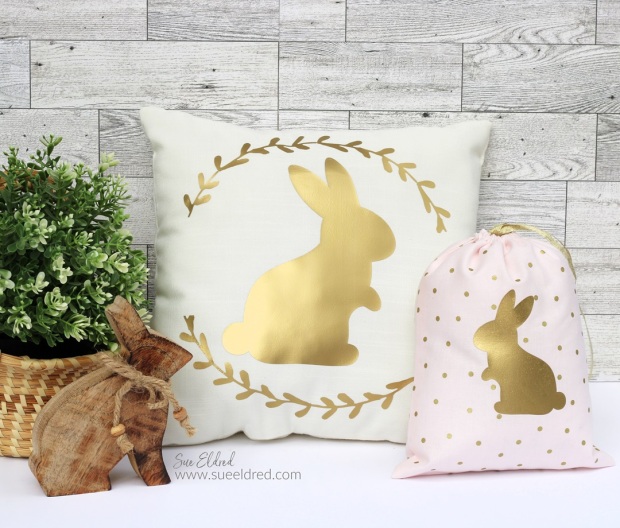
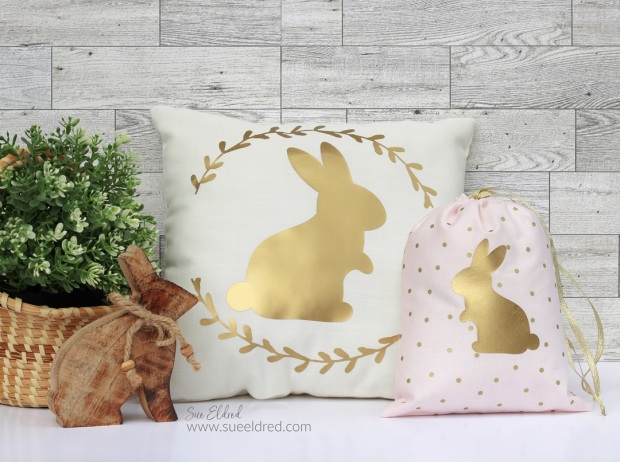
Add a little glam this Spring with this cute Gold Bunny Silhouette Pillow.

It’s an easy project to make.  Even if you’re a simple sewer, like me.

The Bunny reminds me of a Lindt Gold Foiled Chocolate Easter Bunny*,

and who doesn’t like that?

DIY Gold Bunny Silhouette Pillow & Treat Bag

Materials Used to Make the Gold Bunny Pillow:  (*affiliate links)

StyletechCraft products brought to you by ATSM Craft*

*Disclosure:  This blog uses ads and affiliate links.  If you choose to make a purchase using one of the links, I receive a small commission (at no additional cost to you) that helps offset the costs of maintaining this blog.  Thanks for your support!

DIY Gold Bunny Silhouette Pillow & Treat Bag

How to make the Gold Silhouette Bunny Pillow:

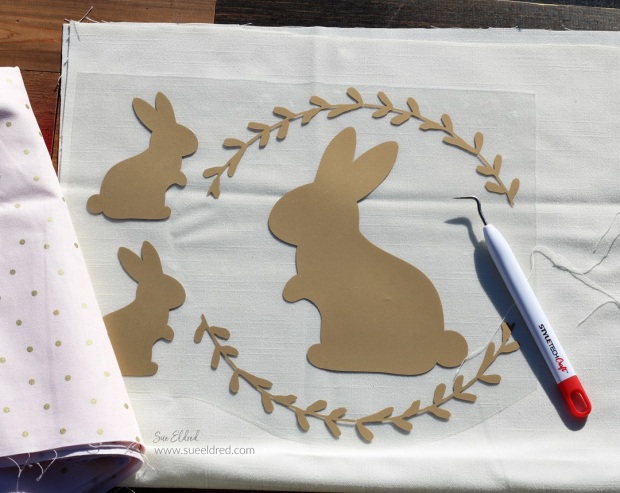
  • Choose your fabric.  Cut the fabric into two squares or rectangles of equal size.  (I cut my cream fabric to 14″ x 14″ to make a 12″ pillow.)
  • Place the two fabric pieces together right-side in.
  • Sew the edges together, leaving a 2-inch opening along one side.
  • Turn the pillow right-side out.
  • Fold the raw edges in and press them flat.
  • Using the Silhouette Cameo Electronic Die-Cutting Machine* and an SVG file from The Silhouette Store, I created a design for the pillow.
  • Cut the design using Gold Heat Transfer Vinyl* making sure to mirror the image.
  • Place the shiny side down on the cutting mat.
  • After you’ve cut the design, weed the excess material away from the design, leaving only the parts you want to transfer.
  • Position the design on your fabric.  Use an iron or a heat press to apply heat and pressure to the design, following the manufacturer’s instructions.
  • Peel off the transfer tape.
  • Stuff the pillow with Poly-Fil®* and sew the opening closed.

DIY Gold Bunny Silhouette Treat Bag

I knew a head of time that I wanted to make a couple of small treat bags.  I decreased the size of the bunny and cut it at the same time as the pillow design.

How to make the Bunny Treat Bag:

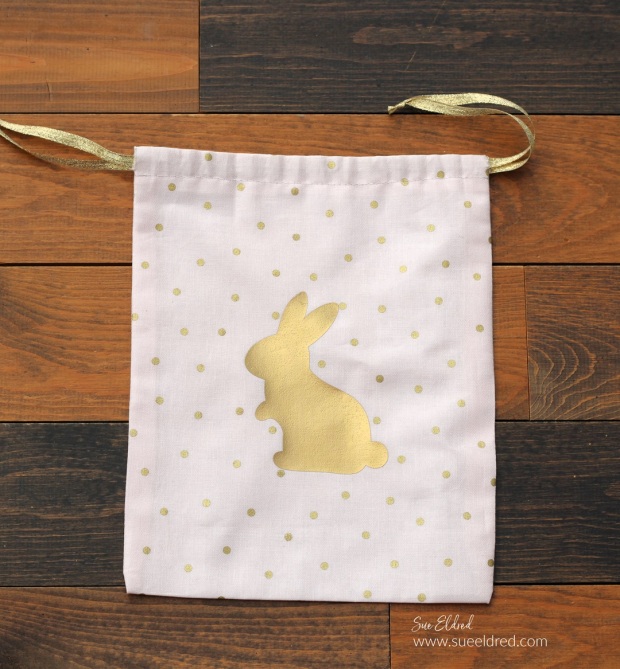
  • Cut a piece of gold polka dot fabric approx. 10″ x 14″.
  • On both ends of the fabric, fold down approx. 1″ and sew a seam across the top.  That should leave you with a 3/4″ pocket.
  • Fold the material in half and sew the remaining sides closed.
  • Trim excess material on the seams and turn the fabric inside out to reveal the bag.
  • Iron the gold HTV bunny on the front of the bag.  (see above directions)
  • Cut two small slits on the top pocket of the bag on each end.
  • Cut two 24″ pieces of gold ribbon.
  • Attach a small safety pin to the end of a piece of ribbon.  Thread the ribbon through the top of the bag, remove the safety pin, and knot the ribbon.
  • On the opposite end of the bag, thread the second piece of ribbon through.
  • Pull both ends of the ribbon to gather and close the bag.

DIY Gold Bunny Silhouette Treat Bag

With all the warm weather we’ve had lately, Spring Fever has hit me pretty hard.

I’ve completely rid my decor of anything resembling Winter.

I’m ready for Spring, Bunnies, and Flowers!

DIY Gold Bunny Silhouette Pillow & Treat Bag

“This is a sponsored post.  As a member of the StyleTechCraft Design Team I have been provided product and compensation in exchange for my creative ideas.  The views and opinions are my own.

Buffalo Plaid Valentine Heart

How to make a Buffalo Plaid Valentines Heart Door Hanger-Sue's Creative Workshop www.sueeldred.com 4085

How to Make a Buffalo Plaid Door Hanger for Valentine’s Day.

An inexpensive Valentine’s Day project using items found at Dollar Tree*

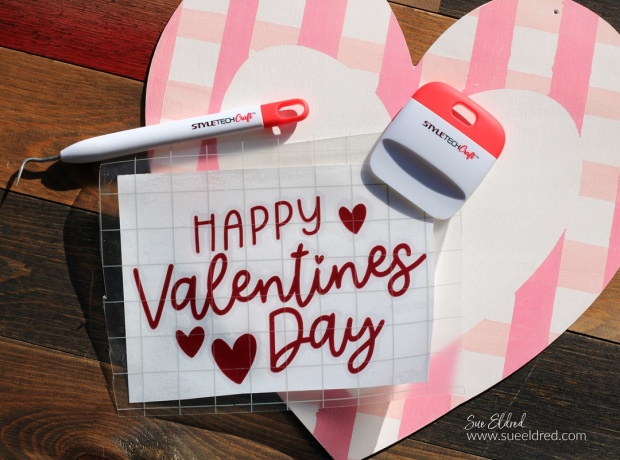
and my favorite StyleTechCraft adhesive vinyl.

StyletechCraft products brought to you by ATSM Craft*

*Disclosure:  This blog uses ads and affiliate links.  If you choose to make a purchase using one of the links, I receive a small commission (at no additional cost to you) that helps offset the costs of maintaining this blog.  Thanks for your support!

How to make a Buffalo Plaid Valentines Heart Door Hanger

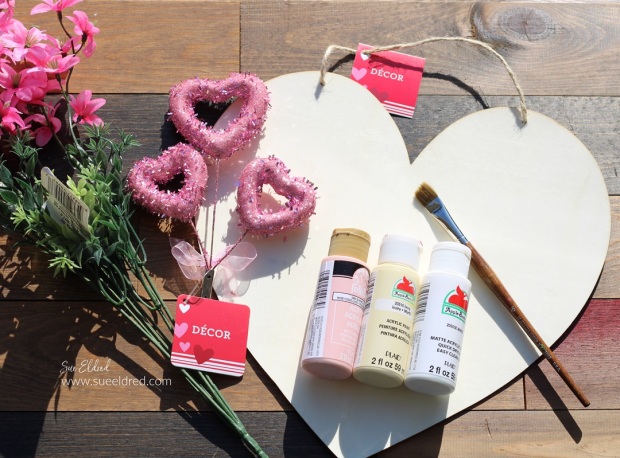
Materials Used:  (*affiliate links)

Buy Your Crafting Supplies Now at Dollar Tree starting at $1.25!

*Disclosure:  This blog uses ads and affiliate links.  If you choose to make a purchase using one of the links, I receive a small commission (at no additional cost to you) that helps offset the costs of maintaining this blog.  Thanks for your support!

How to make a Buffalo Plaid Valentines Heart Door Hanger

Directions:

  • Remove the twine hanger from the wood heart.
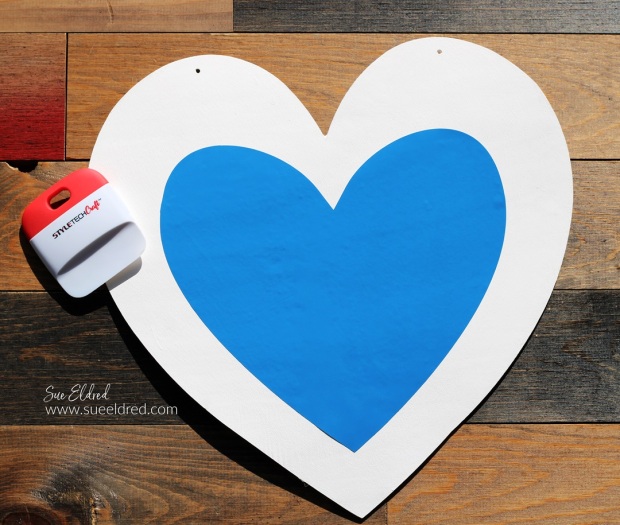
  • Paint the heart with acrylic paint.  I used white.
  • I created a large heart mask for the center of the wood heart using StyleTechCraft Matte Removable Vinyl*.  
  • Press down the edges of the mask so that paint can’t get under the mask.

How to make a Buffalo Plaid Valentines Heart Door Hanger

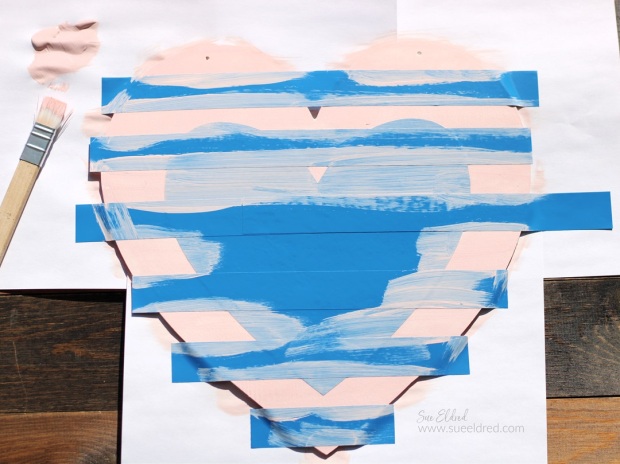
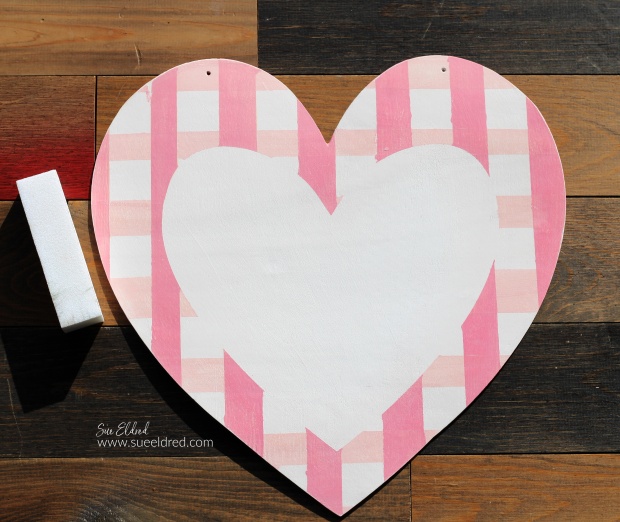
  • Cut 1″ strips of Removable Vinyl*.  Lay the strips across the wood heart.
  • Rub your finger over the vinyl strips to make sure that they are secure and have no gaps.
  • Paint inside the stripes with a thin coat of acrylic paint.  Be careful not to apply the paint too thick.   Only one thin coat of paint is needed.
  • Remove the vinyl strips.
  • Allow the paint to fully dry before continuing to the next step.

How to make a Buffalo Plaid Valentines Heart Door Hanger

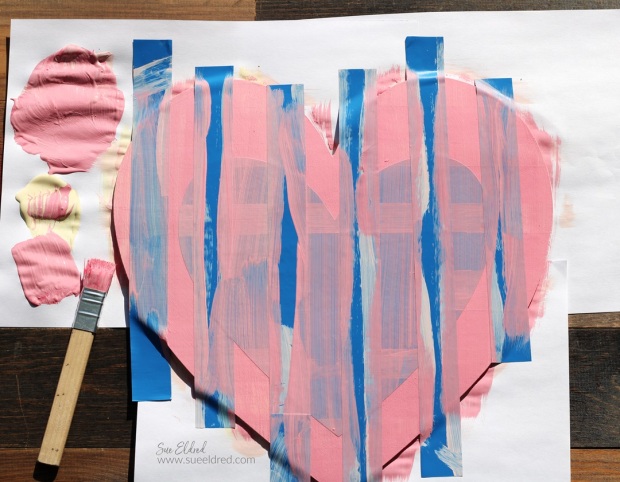
  • Next, add strips of removable vinyl vertically over the heart.
  • Make sure the tape is flat with no gaps.
  • Paint over the heart with a thin coat a darker pink paint.
  • Carefully remove the tape.  Allow the paint to dry.

How to make a Buffalo Plaid Valentines Heart Door Hanger

  • Remove the strips and the heart mask.  Allow the paint to dry.
  • Lightly sand the wood heart. Sanding smooths the paint and helps to hide any little imperfections.
  • Wipe with a clean cloth.

How to make a Buffalo Plaid Valentines Heart Door Hanger

StyletechCraft products brought to you by ATSM Craft*

How to make a Buffalo Plaid Valentines Heart Door Hanger

How to make a Buffalo Plaid Valentines Heart Door Hanger

  • Hot glue faux flowers, glitter heart pick, and ribbon bow to the top of the heart.
  • Add ribbon to the top two holes for hanging.
  • Hang the Wood Heart on a Door or add it to the center of a Wreath.

“This is a sponsored post.  As a member of the StyleTechCraft Design Team I have been provided product and compensation in exchange for my creative ideas.  The views and opinions are my own.

Santa’s Letter Box

Santa's Letter Box using Sizzix Slotted Box die

Create a Holiday Mailbox for letters to Santa using the Sizzix Slotted Treat Box Die by Eileen Hull*.

A fun project to make for Christmas!

Santa's Letter Box using Sizzix Slotted Box die by Eileen Hull.

To say I have a lot of Holiday Scrapbook paper would be a understatement!

Paper crafters have a tendency to “save” their special scrapbook paper

for just the right project.

We also have a tendency to hoard said special paper.

Santa's Letter Box using Sizzix Slotted Box die by Eileen Hull.

Sometimes its fun to use what you have on hand.

I dug deep into my hoarded Graphic 45 Christmas Scrapbook paper

to make the Santa Letter Box.

One of my favorite tips…

  • Before I die-cut the mat board, I like to use the Xyron Creative Station* to add adhesive to the back of the paper.  It gives the paper a complete layer of adhesive with no bubbles.  It really is easy to use.

*Disclosure:  This blog uses ads and affiliate links.  If you choose to make a purchase using one of the links, I receive a small commission (at no additional cost to you) that helps offset the costs of maintaining this blog.  Thanks for your support!

Santa's Letter Box

When making the Santa Letter Box…

  • I adapted the box by adding 1″ strips of matboard* around the existing box lid. The extra strips allowed the box to have a lip that fits over the edge of the box.

Santa's Letter Box

  • I added three additional layers of graduated sized matboard to the lid for dimension using foam tape.
  • I glued thrifted gold cording around each layer to cover the Foam Tape*.
  • A wood knob painted red completes the lid.

Santa's Letter Box

For the base of the letter box, I used an old metal lamp base. 

(At least, that’s what I think it is.)

We found it in my Dad’s garage while cleaning it out a few years ago.

It’s fun to use old things in unusual ways.

Santa's Letter Box

The Santa Letter Box adds a little Christmas Magic to your Holiday Decorating.  

Materials Used:  (*affiliate links)

Eileen Hull Educator Logo

Disclosure:  This is a sponsored post.  As a member of the Eileen Hull Educator Team, I have been provided product in exchange for my creative ideas.  The view and opinions are my own. 

How to Create a “Merry” Holiday Banner

How to Create a Merry Holiday Banner

How to make a “Merry” Banner to add to your Holiday Decorations.

Now that the weather has turned cooler, I’m starting to plan my Holiday decorating.

If you love banners and quick and easy projects, this one’s for you.

How to Create a Merry Holiday Banner

Materials Used:  (*affiliate links)

*Disclosure:  This blog uses ads and affiliate links.  If you choose to make a purchase using one of the links, I receive a small commission (at no additional cost to you) that helps offset the costs of maintaining this blog.  Thanks for your support!

StyletechCraft products brought to you by ATSM Craft*

How to Create a Merry Holiday Banner

Directions:

  • Cut the scrapbook paper slightly larger than the wood banner pieces.
  • Place the scrapbook paper design side up in the Xyron Creative Station®*

How to Create a Merry Holiday Banner

  • Turn the handle of the Creative Station to run the paper through.  As it runs through, it adds complete adhesive covering on the underneath side of the paper.

How to Create a Merry Holiday Banner

How to Create a Merry Holiday Banner

How to Create a Merry Holiday Banner

  • Lay the Transfer paper over the vinyl and gently rub with a vinyl scraper tool.

How to Create a Merry Holiday Banner

How to Create a Merry Holiday Banner

  • Paint the wood beads with red and green acrylic paint.
  • String the banner and wood beads onto ribbon or twine.

I wanted to keep the banner pieces simple. 

But you could add Holiday Flowers and embellishments to make it special.

“This is a sponsored post.  As a member of the StyleTechCraft Design Team I have been provided product and compensation in exchange for my creative ideas.  The views and opinions are my own.

Mini Fall Charcuterie Board

How to make a Mini Fall Charcuterie Board

How to make a Stenciled Mini Fall Charcuterie Board

using StyleTechCraft removable vinyl.  This is my first attempt at

a Charcuterie Board, so, in true “Sue” fashion, I went miniature.

How to make a Mini Fall Charcuterie Board

I picked up this miniature cutting board at Hobby Lobby earlier this Season.

(With their fall sale it cost under $2.)

Materials Used:  (*Affiliate Links)

*Disclosure:  This blog uses ads and affiliate links.  If you choose to make a purchase using one of the links, I receive a small commission (at no additional cost to you) that helps offset the costs of maintaining this blog.  Thanks for your support!

StyletechCraft products brought to you by ATSM Craft*

How to make a Mini Fall Charcuterie Board

  • I like to use StyleTechCraft adhesive vinyl to customize everything I can.  It’s so fun and satisfying.  But there are a few instances where vinyl isn’t the only option.  Did you know you can use your cut files with vinyl to create custom stencils?
  • I used an SVG cut file, my Silhouette Cameo Electronic Die Cutting Machine*, and StyleTechCraft Matte Removable Vinyl* to create the perfect fall stencil for my mini cutting board project.

How to make a Mini Fall Charcuterie Board

  • I gave the cutting board and leaf a light sanding with fine-grit sandpaper.

How to make a Mini Fall Charcuterie Board

  • I rubbed Walnut Gel Stain* on both sides of the leaf.  It will make a great package tag.

How to make a Mini Fall Charcuterie Board

  • Lay the Transfer paper over the vinyl and gently rub with a vinyl scraper tool.  Make sure all the little inside letter pieces transfer.
  • Place the Vinyl Transfer Tape* and vinyl onto the wood pieces.  Rub over Vinyl Transfer Tape* and gently remove from the vinyl.

How to make a Mini Fall Charcuterie Board

  • Paint the inside area of the vinyl with Black Multi-Purpose Acrylic Paint*.  (You may need two coats.)
  • Carefully remove the vinyl from the wood.  Use a sharp point to remove the vinyl from the inside of the lettering.
  • Once the lettering is fully dry, lightly sand to smooth the design.

How to make a Mini Fall Charcuterie Board

The black paint makes it look like it has been wood burned.  (but it’s not!)

I debated back and forth whether to seal the wood or not.

I didn’t know if it mattered for use.

I used a Multi-Purpose Sealer* on both the board and the leaf.

I reasoned that the board is more decorative than it is utilitarian.

So, it was just a matter of preference.

Mini Fall Charcuterie Board

Wouldn’t it look cute with a mini loaf of pumpkin bread?  

Just wrap it up with a ribbon and add the Hello Fall Tag for an

adorable Fall Hostess Gift.

Or use it for a mini party for two.

Welcome Autumn Pillow

for another fun Fall Stenciled project click here.

“This is a sponsored post.  As a member of the StyleTechCraft Design Team I have been provided product and compensation in exchange for my creative ideas.  The views and opinions are my own.

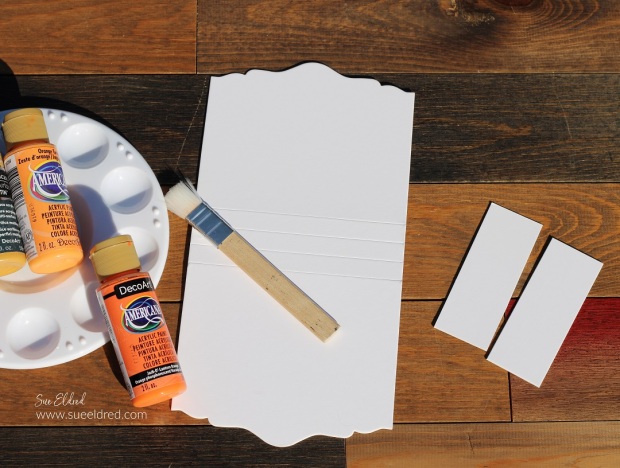
Make a Pumpkin Treat Box for your Favorite Trick or Treaters

How to make a Pumpkin Treat Box

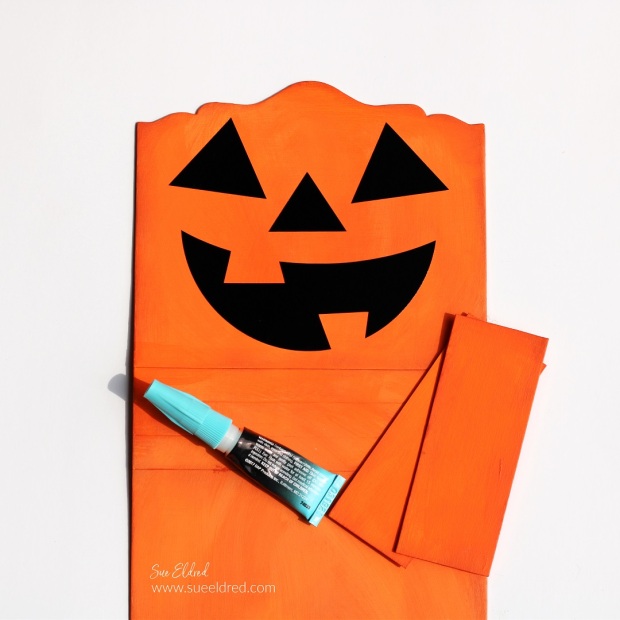
How to make a Pumpkin Gift Box

using the XL Card Caddy Die* from Sizzix and Eileen Hull.

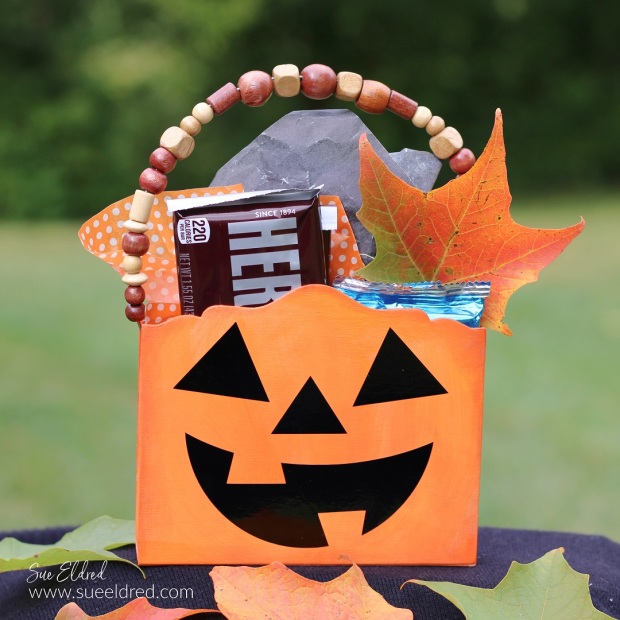
It’s a fun little Halloween Treat Box for your favorite Trick or Treaters.

Eileen Hull Educator Logo

Disclosure:  This is a sponsored post.  As a member of the Eileen Hull Educator Team, I have been provided product in exchange for my creative ideas.  The view and opinions are my own. 

How to make a Pumpkin Gift Box

Materials Used:       (*affiliate links)

*Disclosure:  This blog uses ads and affiliate links.  If you choose to make a purchase using one of the links, I receive a small commission (at no additional cost to you) that helps offset the costs of maintaining this blog.  Thanks for your support!

How to make a Pumpkin Gift Box using the XL Card Caddy Die from Sizzix and Eileen Hull.

Directions:

How to make a Pumpkin Gift Box using the XL Card Caddy Die from Sizzix and Eileen Hull.

StyletechCraft products brought to you by ATSM Craft*

How to make a Pumpkin Gift Box using the XL Card Caddy Die from Sizzix and Eileen Hull.

  • Adhere the sides to the card caddy base using Rapid Fuse Adhesive*.  The Die comes with scored side pieces that are perfect for putting the box together.  I wasn’t thinking and cut two pieces of matboard for my sides.  Both will work.  (the one that comes with the die would have been a lot easier)

How to make a Pumpkin Treat Box-Sue's Creative Workshop www.sueeldred.com 2459

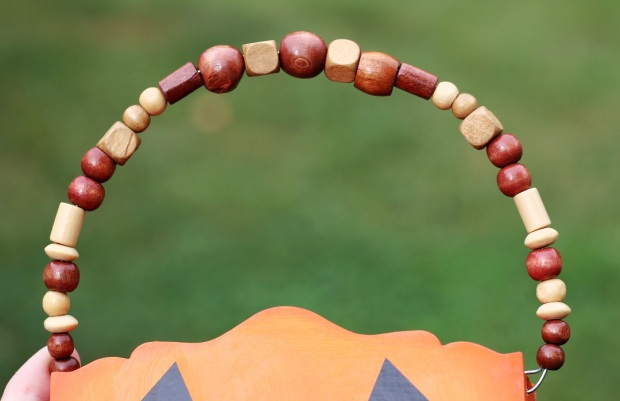
  • Create a handle for the pumpkin treat box using wire and small wood beads.
  • Punch a hole on both sides of the box and attach the handle.

Hello Fall Shadow Box Frame

Hello Fall Shadow Box Frame

How to make an Easy Fall Dollar Store DIY.

I can’t resist an Easy Fall Dollar Store Project,

while I’m sitting here hanging onto Summer for as long as I can.

Hello Fall Shadow Box Frame

Materials Used:  (*affiliate links)

StyletechCraft products brought to you by ATSM Craft*

*Disclosure:  This blog uses ads and affiliate links.  If you choose to make a purchase using one of the links, I receive a small commission (at no additional cost to you) that helps offset the costs of maintaining this blog.  Thanks for your support!

Hello Fall Shadow Box Frame

Directions:

  • Remove the picture hanger hardware and the twine hanger from the wood shadow box.
  • Paint the shadow box with Royal Ruby Metallic Paint*.
  • Lightly sand over the paint using an extra fine sanding block*.
  • I felt the Metallic Paint was a little too metallic for me, so I went over the paint with a light coat of walnut gel stain.  Wipe off the stain with a soft rag.

Hello Fall Shadow Box Frame

Hello Fall Shadow Box Frame

Hello Fall Shadow Box Frame

Add Fall Embellishments to the bottom of the shadowbox frame.

The shadow box frame makes a cute little shelf sitter to add to

your Fall Decorations.

“This is a sponsored post.  As a member of the StyleTechCraft Design Team I have been provided product and compensation in exchange for my creative ideas.  The views and opinions are my own.
$1.50 Thrift Store Chair Make Over

$1.50 Thrift Store Chair Make Over

I can’t seem to pass up a good bargain thrift store chair.

I found this one last year when visiting my daughter in Wisconsin.

My daughter loves thrifting even more than me,

so, whenever we’re together, we like to check out her favorite Thrift Store.

This particular store always seems to have great bargains,

especially on furniture.

$1.50 Thrift Store Chair Make Over

I wasn’t necessarily looking for another chair,

but when I saw the $1.50 price tag,

I immediately did the “sit and wiggle” test.

The chair was smaller in size but sturdy. (just like me)

There were four chairs in all, so I picked the best one.

In retrospect, I should have taken them all.

I may have if I didn’t have to travel so far with them.

Bargain Thrift Store Chair Make Over

The chair covering was an ugly, dingy green fabric.

The wood was also grimy from years of use.

After removing the seat from the chair,

I gave the wood a light cleaning using Murphy’s Oil Soap*

and a soft rag.

I was careful not to remove all the great old worn patina.

Spring Baking Cups

*Disclosure:  This blog uses ads and affiliate links.  If you choose to make a purchase using one of the links, I receive a small commission (at no additional cost to you) that helps offset the costs of maintaining this blog.  Thanks for your support!

$1.50 Thrift Store Chair Make Over

After removing all the tack nails used to hold down the

fabric, I found this neat, brown patterned vinyl.

$1.50 Thrift Store Chair Make Over

After scrubbing the vinyl clean, I seriously contemplated

stopping at this point. The pattern wasn’t that bad.

But to match it with the other dining room chairs I was recovering,

I decided to go with the plain brown vinyl instead.

I purchased the brown vinyl with a 50% off coupon

at JoAnn Fabrics and foam on sale for 40% off.

It cost me under $5.00 for materials.

$1.50 Thrift Store Chair Make Over

If you were wondering…

I left the old vinyl underneath the new vinyl in case I ever change my mind.

I quickly covered it with the new vinyl using a

Staple Gun and Metal Staples*.

I love finding a little history when redoing a piece.

Underneath the chair in old handwriting, it says… “South end of the table.”

Makes you wonder why that bit of information was important.

$1.50 Thrift Store Chair Make Over

The chair currently sits next to the fireplace in the dining room.

It’s petite and easy to pull up when extra seating is needed.

Not a bad investment.

Amazon prime

Amazon Prime Days are July 11-12th.

Simple DIY Patio Side Table from Scraps

Simple DIY Patio Side Table from Scraps

How to make a Simple DIY Patio Side Table from Scraps.

I love a simple, easy, and inexpensive DIY project.

Add in a little recycling, and that makes me super happy.

Simple DIY Patio Side Table from Scraps

We recently had a new deck built using composite decking materials.

When I saw the leftover scraps, I asked them to save a few larger pieces

of the thick wood and composite fascia boards.

(FYI…Fascia boards are the large boards that go around the outside of the deck.)

I knew they would be perfect for a small bench or side table.

Simple DIY Patio Side Table from Scraps

The fascia board was the same width as the wood board.

So, I used the wood board scrap as it came.

I asked my husband to cut the fascia board the same length as the wood board.

Simple DIY Patio Side Table from Scraps

I stained the wood board using Varathane’s Carbon Grey Stain*

that I had left over from a previous project.

The wood is pretreated. So, I didn’t use a sealer on the wood.

I can always go back and do that later.

We screwed the composite fascia board onto the wood board using decking screws.

*Disclosure:  This blog uses ads and affiliate links.  If you choose to make a purchase using one of the links, I receive a small commission (at no additional cost to you) that helps offset the costs of maintaining this blog.  Thanks for your support!

Simple DIY Patio Side Table from Scraps

I went to a couple of yard sales searching for table legs that I could use,

I wanted it to be a complete recycling project.

After no luck, I purchased these black hairpin legs from Amazon*.

I love how they look, and they go perfectly with the black railing on my new deck.

Simple DIY Patio Side Table from Scraps

After marking and measuring the placement of the legs,

we predrilled the screw holes before screwing them onto the wood.

Simple DIY Patio Side Table from Scraps

The table went together in a few minutes.

I love using scraps to make something useful.

Simple DIY Patio Side Table from Scraps

This table is the perfect side table between a couple of chairs.

A great place to set a drink down.

It’s also sturdy enough to be used as a small bench for one.

Simple DIY Patio Side Table from Scraps

Even after spending $20 on the legs,

I still have a very inexpensive custom table.

As my daughter-in-law reminded me,

“you can easily spend $20 or more for a small patio table”.

Simple DIY Patio Side Table from Scraps

FYI…I found my Solar Lantern at Homegoods, but you can

easily find other great Solar Lanterns on Amazon*.

Shop the Look on Amazon:


Amazon prime

Amazon Prime Days are July 11-12th.