A Card for the Perfect Lazy Day.

Lazy Days Card

A card to celebrate the perfect Lazy Summer Day.

We just got back from vacation last weekend.

It feels like it’s taken me all week to get back to normal.

If it wasn’t so cool and then rainy this week, I would be that bear on a floatie.

If you asked me to describe the perfect summer day, it would most definitely include

floating in the pool with a drink in my hand.

Maker's Movement

Disclosure:  This is a sponsored post for The Maker’s Movement.  I have been provided product and compensation in exchange for my creative ideas.  The view and opinions are my own. 

Lazy Summer Days Card

Materials Used to make the Lazy Summer Day Card:    (*affiliate links)

*Disclosure:  This blog uses ads and affiliate links.  If you choose to make a purchase using one of the links, I receive a small commission (at no additional cost to you) that helps offset the costs of maintaining this blog.  Thanks for your support!

Lazy Days Card

Directions:

  • Stamp the bear image on tan cardstock with the Versa Fine Black Inkpad*.
  • .Align the bear die with the stamped image.  Place a small piece of washi tape (or a removable tape) to hold the die in place while die-cutting.  
  • Run the stamped image and die through the Mini Maker Die-Cutting Machine to cut out the bear image.

Lazy Days Card

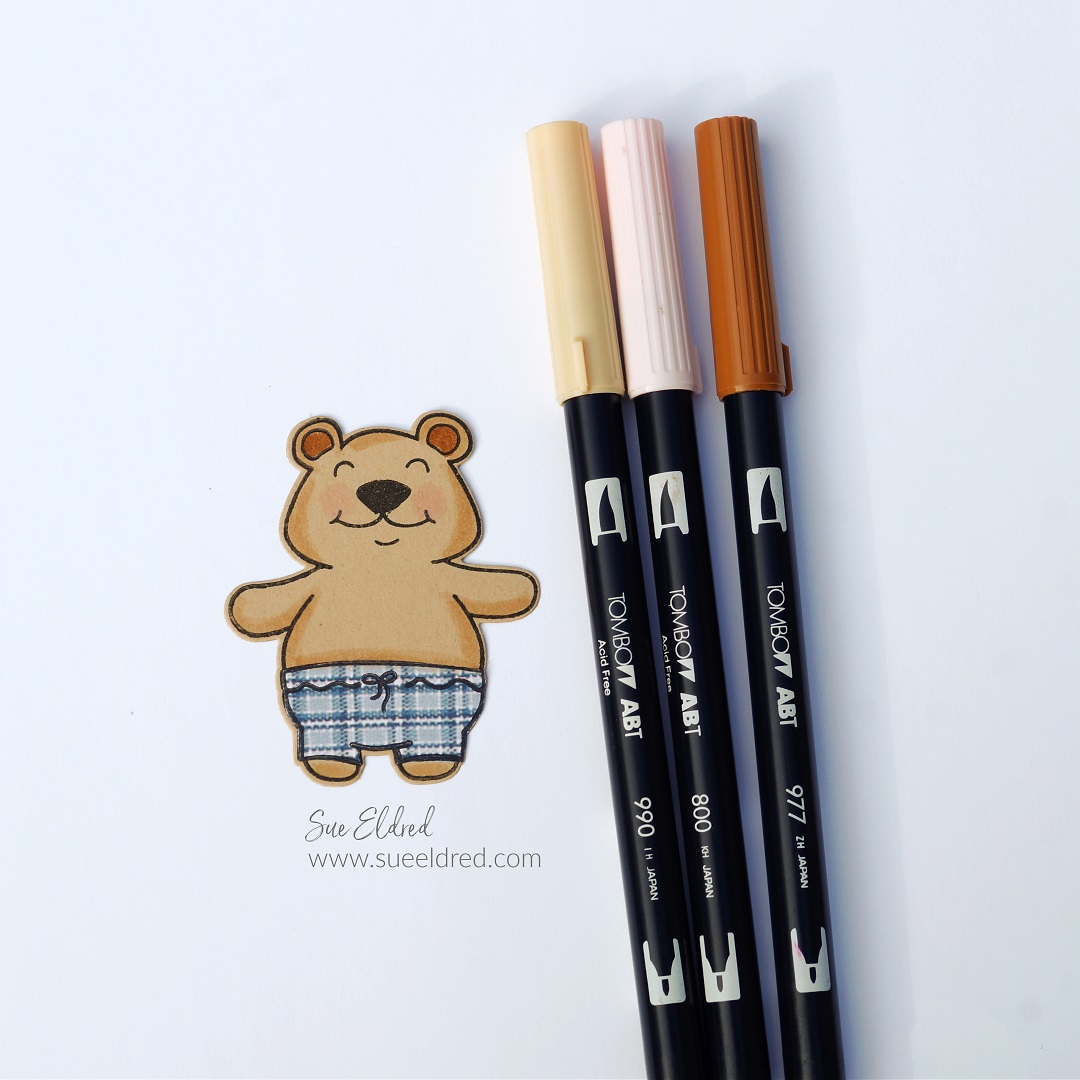
I thought plaid swim shorts were needed for this “cool” bear. 

  • Stamp the swim trunks onto a small piece of plaid paper and run it through the Xyron Create-A-Sticker Mini* to add adhesive onto the back. 
  • Cut the swim trunks out and stick directly onto the die-cut bear. (it’s so easy to add personality)
Lazy Summer Days Card

  • Use the Tombow Art Markers to add rosy cheeks, shadows, and definition to the stamped image.

Shop Tombow

Lazy Summer Days Card

Additional Card Details:

  • I thought the “Sea Shore” paper looked like a pool liner, so I added it as the base to my card.
  • The white frame on the card was die-cut using the Round Rectangle Die Set.
  • The Sun was die-cut using the center of the pool float.
  • I stamped the words “feelin’ hot” onto white cardstock and cut it out using the smallest of the nested banner die.
  • I used thin foam mounting squares under the clouds, banner, bear, and drink to add dimension to the card.
  • The finished card measures 4 ¾” x 6″.

Grand Canyon Adventure & “Roughin’ It” Shadowbox Frame

In January, after the Creativation Show in Phoenix, we took a little mini vacation.

We had decided earlier to visit Sedona and in a spur of the moment decision

decided to take a day trip to the Grand Canyon.

Neither of us had been and it was on our bucket list.

The day was beautiful and the views were AMAZING!

If you ever get the opportunity to visit the Grand Canyon, I suggest you go.

You won’t be disappointed.

For my Xyron Design Team Project this week, we partnered up with Paper House Productions.

I picked the Paper House Productions Great Outdoors Camping Kit*.        (*affiliate link)

I knew it’d be perfect for my Grand Canyon pictures.

Interesting Fact… I’ve never camped a day in my entire life. (and proud of it)           

Even it you don’t go camping, you’ve got to admit this Great Outdoors Washi Tape Set is cute.

“My idea of roughing it is a bad hotel room!”

This what I tell people whenever they talk about camping.  (it’s not for me)

To make the “ROUGHIN’ IT” shadow box frame…

Products Used:     (*affiliate link)

Directions…

  1. Remove the glass from the shadowbox frame to create a ledge for adding small found treasures.  (removing glass is optional…just a personal preference)
  2. Print the saying “My idea is…”  onto one of the scenic papers from the “Great Outdoors” kit and cut it to 6″ x 6″.  For extra dimension, I used my  Xyron Mega Runner* to adhere the layer onto green mat-board.
  3. Cut a 9″ x 9″ green gingham background from the paper crafting kit and adhere the printed paper to the center of the green gingham background.
  4. Use the 4″ x 4″ “ROUGHIN’ IT” square from the “Great Outdoor Tags” scrapbook paper and adhere it onto mat-board for extra dimension.  Adhere to center of the printed scenic square.
  5. Add the 3D tent sticker over the tent pictured in the “roughin’ it square” .
  6. Add 3D lamp and leaf to embellish.
  7. Insert into shadow box frame.

“This is a sponsored post. As a member of the Xyron Design Team I have been provided product and compensation in exchange for my creative ideas.  The views and opinions are my own.”

*Disclosure:  This blog post uses affiliate links.  If you choose to make a purchase using one of the links, I receive a small commission (at no additional cost to you) that helps offset the costs of maintaining this blog.  Thanks for your support!

How to make a last minute gift bag from a 12″ x 12″ piece of scrapbook paper.

love-at-christmas-gift-bag-sues-creative-workshop

It’s getting to be crunch time… Need a cute little gift bag?

This gift bag measures 4″ x 6′ and is made from one 12″ x 12″ piece of double sided

scrapbook paper.   (The paper used on my bags are from Paper House Productions.)

How to make a last minute Gift Bag…

  • Cut paper to 8 ¼” x 11 ¾”.
  • Score the top of the paper ¾”.
  • Score the bottom of the paper 1 ½”.
  • Score the paper at ¾”, 4 ¾”, 5 ½”, 6 ¼”, 10 ¼” and 11″

  • Fold paper along score lines using mountain and valley folds.
  • Make cuts as indicated on the diagram below.
  • Fold over the top scored section to expose the reverse side of the double sided paper.
  • Glue the top 1/2″ scored section down first before assembling the rest of the bag.

  • Glue sides together and then glue bottom flaps.
  • Punch holes on the top of the newly assembled bag.
  • Cut white sheer ribbon in half.  Insert into holes, tie not on the inside of the bag.
  • Embellish your bag with additional images and tag.

*Disclaimer:  This post uses ads and affiliate links.  If you choose to make a purchase using one of the links, I receive a small commission (at no additional cost to you) that helps offset the costs of maintaining this blog.  Thanks for your support!

Shop Amazon Scrapbooking Supplies*

Little League Champs

Watching Little League Baseball games are fun…

When they move up from tee ball to coach pitch, it’s a really big jump.

They go from playing in the dirt to actually making some good plays.

Watching the growth from the first games to the last is amazing.

This adorable group of 6 year olds made it all the way to the final championship.

And won 1st place.  I couldn’t be  prouder.

(FYI…My layout was made using paper and stickers from Paper House Productions.)

Shop Amazon Scrapbooking Supplies*

Disclaimer:  This blog uses ads and affiliate links.  If you choose to make a purchase using one of the links, I receive a small commission (at no additional cost to you) that helps offset the costs of maintaining this blog.  Thanks for your support!

For summer fun…click on Slimer ad below

Slimer

How to make a Relaxing Guy Card

I’ve always found making cards for a guy  to be tricky. 

Making feminine cards come easy to me.

For the upcoming summer season, I decided to make a “guy” card

that would make a perfect birthday, Father’s Day and even  Retirement.

To make the Relaxing Guy Card…

TIP:  Before removing the back off the 3D foam mounting squares.  Brush baby powder to the back of the stickers to remove the tackiness.  The stickers become like die cuts and will only stick where you want them too.


Materials Used:                                                                   (*affiliate link)

 
Directions:
  1. Cut a 4″ x 6″ piece of green scrapbook (dock on the lake) layer.  Add border sticker strip onto the top and bottom of the layer leaving approx. 1/8″ border.
  2. Adhere the green layer onto a 4 1/4″ x 6 1/4″ piece of brown scrapbook paper (day at the lake) and then onto a 4 1/2″ x 6 1/2″ piece of red (lake time) scrapbook paper.
  3. Create a 5″ x 7″ side fold card from the kraft cardstock.
  4. Adhere scrapbook layers onto kraft card.

5.  Create dimensional stickers by adding and layers stickers with 3D foam mounting squares.  Add stickers to the front of the card.

6.  Wrap twine around the left side of the card and tie with a knot.

Mini Tape Runners

*Disclaimer:  This blog uses ads and affiliate links.  If you choose to make a purchase using one of the links, I receive a small commission (at no additional cost to you) that helps offset the costs of maintaining this blog.  Thanks for your support!

How to make a Springtime Delights Resin Magnet

I have to admit, working with Resin intimidated me at first.

With a little practice, I found that it’s really not hard and you can get some amazing results.

Especially when you start small.    (Just make sure to read the package instructions)

My Springtime Delights magnet measures only 2″ x 2.

Materials:            (*affiliate link)

Directions:

Cut and glue a small piece of scrapbook paper to fit inside of tin.

Arrange 3D stickers inside of tin.  You may need to add extra glue under each sticker to make sure they stay in place.

Measure, Mix and pour the resin as directed in the product packaging.

Blow air onto the resin using a thin straw to help remove bubbles.

Allow plenty of drying time for the resin to cure before gluing magnet onto the back of the tin.

CreateForLess.com - Create More, Spend Less

*Disclaimer:  This post uses ads and affiliate links.  If you choose to make a purchase using one of the links, I receive a small commission (at no additional cost to you) that helps offset the costs of maintaining this blog.  Thanks for your support!

Craft Ideas Magazine: Dreams Come True Card

craft-ideas-magazine-spring-2017-sues-creative-workshop

The newest issue of Craft Ideas Magazine arrived in the mail this week.

Even though I knew it was going to be in there, it’s still exciting to see one of your cards in print.

My dreams come true card using paper and stickers from Paper House Productions

is on page 71.   With Spring Fever setting in big time this week, it was the perfect time to

receive the Spring Issue.

craft-ideas-spring-2017

Make sure to pick up an issue for yourself.

dreams-come-true-card-sues-creative-workshop

Dreams Come True

A simple and elegant card perfect for weddings.

Finished Card Size:  5” x 7”

Supplies Used:

  • P-2007 Love 12” Double Sided Scrapbook Paper  (Paper House Productions)
  • STCX-1001 Wedding Day Cardstock Stickers  (Paper House Productions)
  • STDM-0024 Just Married 3D Stickers  (Paper House Productions)
  • Cardstock: Kraft and Cream
  • 5/8” Sheer Ribbon
  • 3D Foam Mounting Square (Scrapbook Adhesives by 3L)
  • Double Sided Tape Runner

Tools:

  • Paper Cutter
  • Scissors

dreams-come-true-sues-creative-workshop

Directions:

  1. Cut the top left corner of the paper 4 ½ ” x 6 ½ ”. (“dreams come true”)
  2. Add the “lace” border sticker to the bottom of the paper.
  3. Embellish the bottom right corner with the leaves sticker and the 3D white flowers.
  4. Add a foam mounting square under the “heart” and add heart and 3D butterfly to the embellishments,
  5. Adhere onto a 4 3/4” x 6 3/4” kraft cardstock layer and then onto a cream 5” x 7” card.
  6. Add simple ribbon bow to top of the card.

dreams-come-true-close-up-sues-creative-workshop

My Creativation Adventure 2017

my-adventure-to-creativation-2017-sues-creative-workshop

It’s been a few weeks since the Creativation Trade Show in Phoenix…

and I’m finally getting around to sharing.

You might want to sit back and grab a cup of coffee.  (it’s a long one)

The Creativation Show was a fast, busy few days.

Getting the opportunity to see old friends, meeting in person online friends you’ve known for years.

creativation-friends

And the best part making new friends. 

Creativation, for me, is more than seeing the latest and greatest in the Creative Industry

(although that’s great too)

it’s about the opportunity to meet and network with people from all over the world.

When you’re at a show like this, you sit by a stranger on the convention bus and talk the whole way.

You go to lunch by yourself and instead of looking for a empty table, you sit with a group or

a table of one and the conversations flow.  That’s where we share ideas and inspiration.

We ask… “what did you see that excited you?”

During one of those conversations I heard someone say this is where our “tribe” is.

cactus-3984

(The cactus in front of my hotel.)

This was my first trip to Phoenix and the first time this Midwest gal saw cactus this large.

Can you tell I was impressed?

I wish I would of been able to see more of Phoenix, it poured the first evening I was there

and the sun didn’t come out until the last day.  Most of the time, it really didn’t matter as it was

dark outside when I left and it was dark when I got back to the hotel.

I didn’t even notice the mountains out my hotel window until the second day.

sue-working-the-deflecto-booth

I left the hotel before 7:00 on Saturday morning to take a class before working all day

in the Deflecto booth.  We made mini desk calendars using Deflecto’s 3″ x 4″ clear acrylic

frames, paper from Paper House Productions “One Big Happy Family” collection and cute

little calendars from Taylored Expressions.

Also in the booth was the “Caddy Challenge”.   ↓

deflecto-caddy-challenge-3970

Each challenger was given two empty caddies and a variety of craft supplies.

Every caddy container had to have at least one craft item and put back into the caddy,

each layer had to be locked and put on the base.

The whole thing was timed and the timer stopped when the caddy was lifted.

It was so much fun watching how competitive it became.  (there were Visa gift cards at stake)

Co-worker against co-worker, friend against friend, husband against wife.

deflecto-caddy-landing-page-cha-2017-02

SO…What’s NEW at Deflecto?

An interlocking wheel base for the craft caddy and the Interlocking Marker Organizer.

deflecto-caddy-landing-page-cha-2017-03

Right next to the Deflecto Booth were my good friends at

Canvas Corp Brands, 7Gypsies and Tattered Angels.

canvas-corp-brands-7gypsies

So many new things there.  They introduced their new line called “Architextures”.

I can’t wait to get my hands on all that vintage inspired goodness.

7-gypsies-new-architextures-books-ledgers-sues-creative-workshop

Coming Soon from Canvas Corp Brands… Relics and Artifacts.

A lot of mixed media potential.

canvas-corp-brands-relics-and-artifacts-sues-creative-workshop

On Sunday afternoon, I got to hang out in the Paper House booth where I helped attendees make

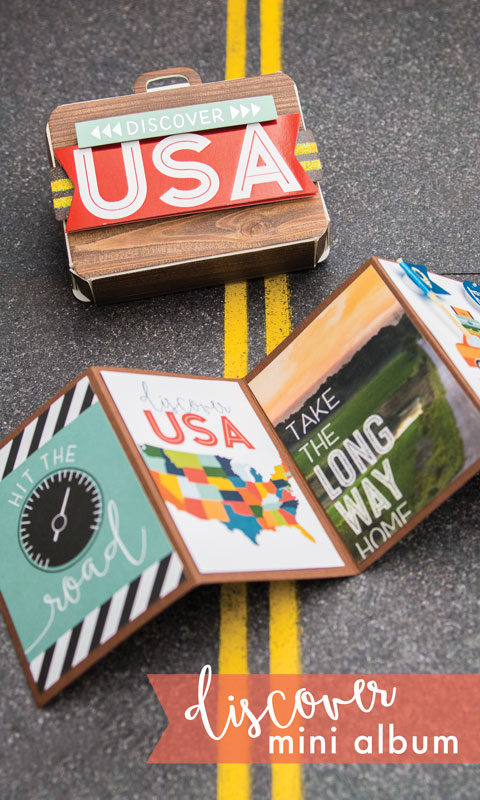
the Discover USA travel mini book project.  I’m so lucky to work in such a fun industry.

For full Discover USA project instructions click here.

paper-house-miti-at-creativation

Monday was the last day of the show and a half day for me.

After working in the booths all day on Saturday and Sunday,

I decided I needed to take some time to do something fun.

splatter-painting-4001

DecoArt, 3M and Pinspiration had a clear acrylic booth set up called the “Splatter Room”.

Dressed in a hazmat suit and goggles…

I went to town choosing paint and splattering onto a 12″ x 12″ canvas.

Oh, what a glorious mess.  It was the highlight of my day.

After painting and splattering…

I walked the show floor, taking pictures and making connections.

I always wish that I would have taken more pictures and maybe even a video or two.

Time at these shows go fast and I needed to make the most of that time.

Below are a few of the booths that I remembered to take pictures of.  (Enjoy!)

tim-holtz-suitcase-display-sues-creative-workshop

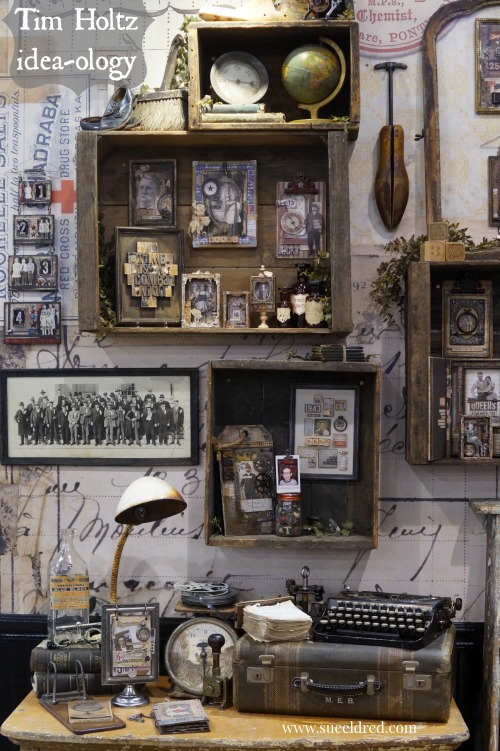
Probably one of the most photographed booths is the Tim Holtz Idea-ology booth.

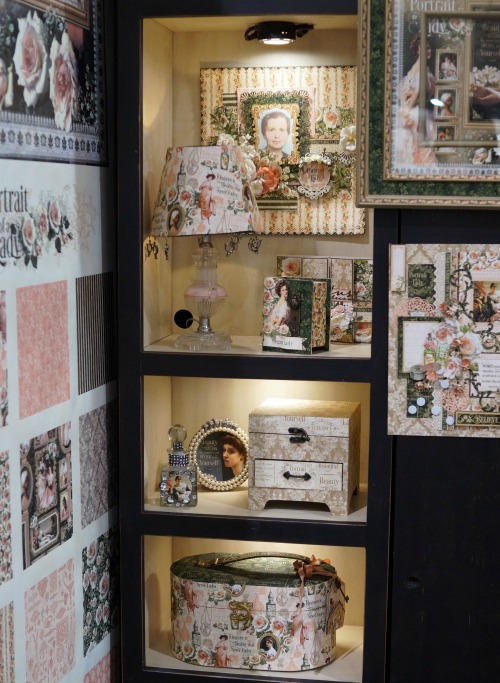
For Vintage lovers this is serious eye-candy.

tim-holtz-idea-ology-booth-samples-sues-creative-workshop-3959

tim-holtz-idea-ology-booth-samples-sues-creative-workshop

tim-holtz-ideaolgy-booth-samples-sues-creative-workshop-3962

rebekah-meier-designs

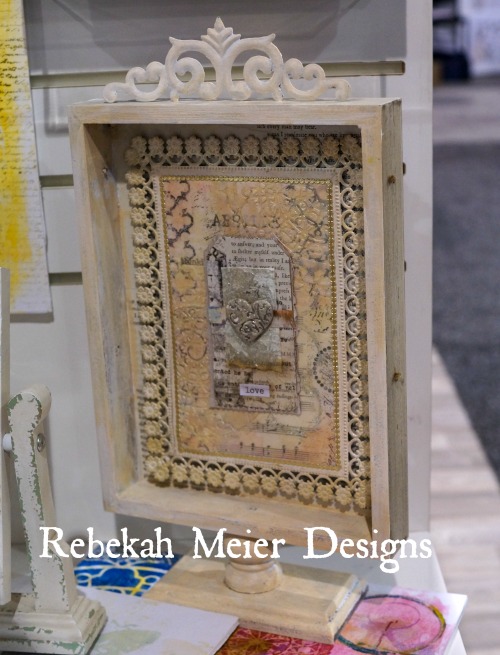
Lovely Mixed Media from Rebekah Meier Designs.

sizzix-jen-long-in-bloom-creativation-2017-sues-creative-workshop

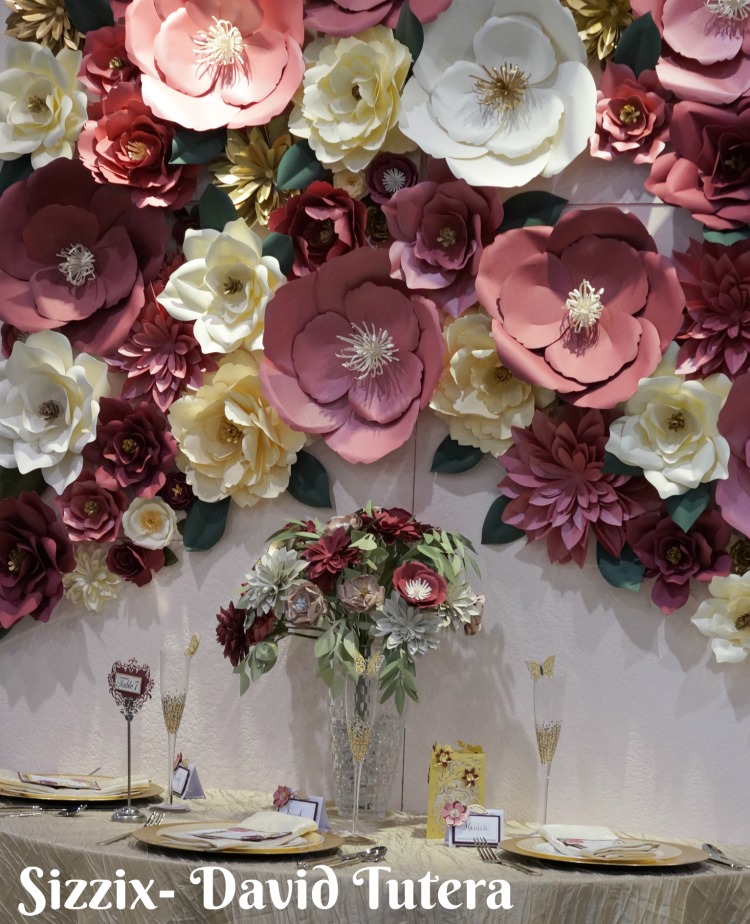
Somehow my camera setting got changed and I didn’t get a lot of sharable pictures of the Sizzix booth.

sizzix-david-tutera-creativation-2017-sues-creative-workshop

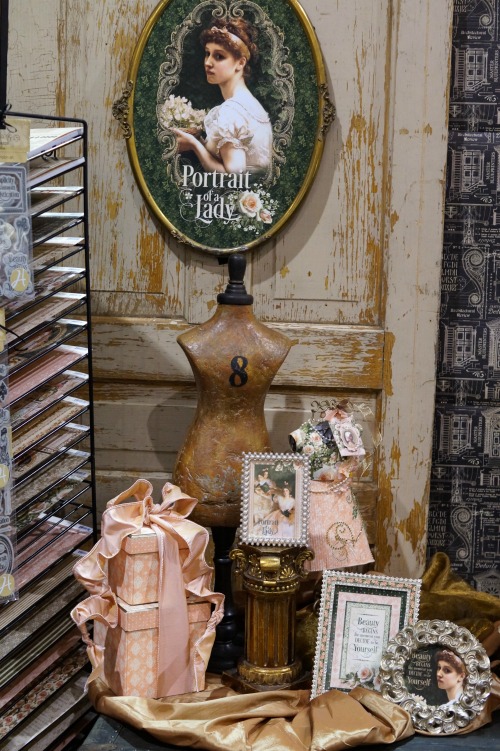
And the always impressive Graphic 45 Booth.  ↓

graphic-45-booth-samples-4037

graphic-45-booth-samples-4035

graphic-45-booth-samples-4030

graphic-45-booth-samples-4036

graphic-45-album-4049

graphic-45-booth-samples-4046

Of all the wonderful things I saw, do you want to know what impressed me the most?

Let me start by saying, I’ve been a stamper for 20 years and it takes a lot to impress me…

the clear animated stamps from Uchis Design did just that.  (it’s the simple things)

Below is the business card they gave me.

I hoped you enjoyed my adventure to Creativation.

I just want to say…

I am very thankful that I have the opportunity to work with all the wonderful and talented people

and companies in the Creative Industry.  I am one lucky girl.

Discover USA Mini Album

roadtripsuitcase

No matter what part of the country you visit, Paper House Production’s

New Discover USA collection has you covered.  I used this new collection along with

Eileen Hull’s adorable suitcase die from Sizzix, for a cute little make and take project

in the Paper House Productions booth at Creativation.

destinations-suitcase-back-sues-creative-workshop

It’s a fun project that could be used with Vacation Memorabilia or even as a going away present for someone getting ready to retire and travel the good ole’ USA.

Products Used:            (*affiliate link)

*This post uses Affiliate links.  If you choose to make a purchase from using one of the links, I will receive a small commission that helps offset the cost of running this blog.  Thanks!

 destinations-suitcase-inside-sues-creative-workshop-3115
Directions: 
  1. Cut a 6″ x 12″ piece of  P-2123 “woodgrain” scrapbook paper.
  2. Run the paper woodgrain side up through the Xyron Creative Station using permanent adhesive.
  3. Adhere paper onto the mat board.
  4. Die-cut covered mat board using the suitcase die and Big Shot Machine.
  5. Fold each piece along score lines.
  6. The larger of the four pieces is the suitcase body.  Using extreme double sided tape, adhere and secure the four corner pieces.
  7. The next largest piece is the lid.  Apply extreme double sided tape to the flap.  Place the lid over the opening of the suitcase body and slide into position.  Adhere the flap.
  8. Attach the closure flap at the top of the lid using extreme tape.  Leave approximately twice the thickness of the mat board used between the hinge of the flap and the top edge of the lid.  The lightly folded tab will press against the inside of the suitcase to keep it closed.
  9. Attach the handle and embellish with the 3D stickers.destinations-mini-album-inside-sues-creative-workshop
  10. Cut a piece of brown cardstock 3 3/4″ x 11″.  Using a score board and the scoring tool, score the cardstock lengthwise 2 3/4″, 5 1/2″ and 8 1/4″.  Fold along score lines to create a mini accordion book.
  11. Choose one of the Discover USA tag 12″ double sided scrapbook paper.  Cut tags just slightly smaller than 2 3/4″ x 3 3/4″
  12. Adhere tags onto the mini book using the tape runner and embellish with 3 D stickers.

destinations-suitcase-and-mini-album-sues-creative-workshop

Creativation…Here I come

cha

In just one more day…

I’ll be heading out to (hopefully sunny) Phoenix to the Creativation Show

to see the latest and greatest in the Craft and Hobby Industry.

I’m a little excited to say the least.

The last time I attended a Winter Show, I got stranded in Los Angeles for two extra days

while the Midwest was pummeled with snow.  (good thing snows not in the forecast)


I will be working in the Deflecto booth all day on Saturday doing make and takes

and in the Paper House Productions on Sunday afternoon.

I will also have time for a few classes, walking the show floor and taking pictures.

Next week, after I have time to process it all, I’ll share my experience here with you.