
“bloom where you are planted”
A little Inspiration for my Summer Flowers…
I’m not sure if it’s a subliminal message or a direct request. (to my plants that is)
BLOOM!
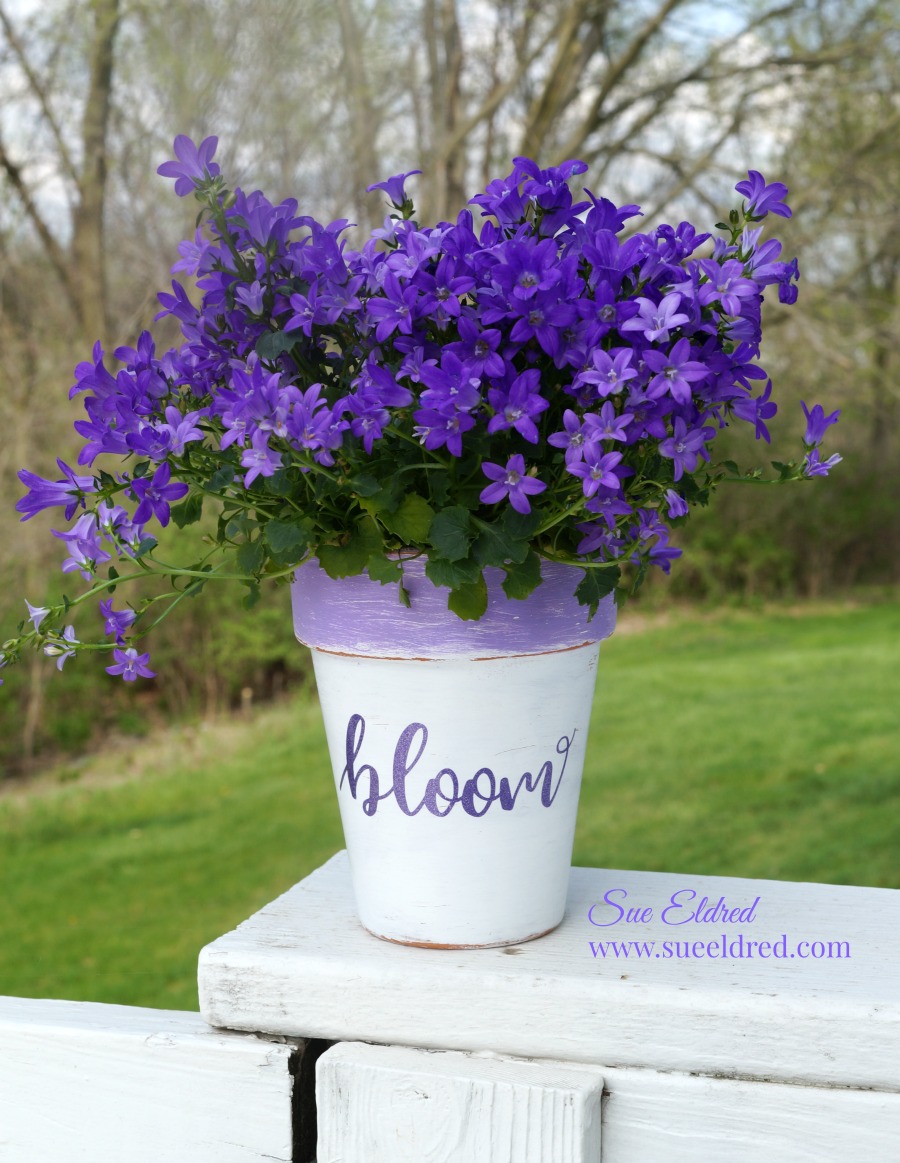
I picked up these beautiful purple flowers over the week-end and decided to spruce up a couple
of plain pots into something special.
FYI…the name of the plant with Campanula, a partial shade loving perennial.

How to make a DIY Bloom planter… (*affiliate link)
- Clay Pot*
- White Deco Art Outdoor Living Paint*
- DecoArt Americana Acrylic Paint, Purple Cow*
- Deco Art Americana Decor Angle Flat Brush, 1-Inch*
- Very Fine Sandpaper*
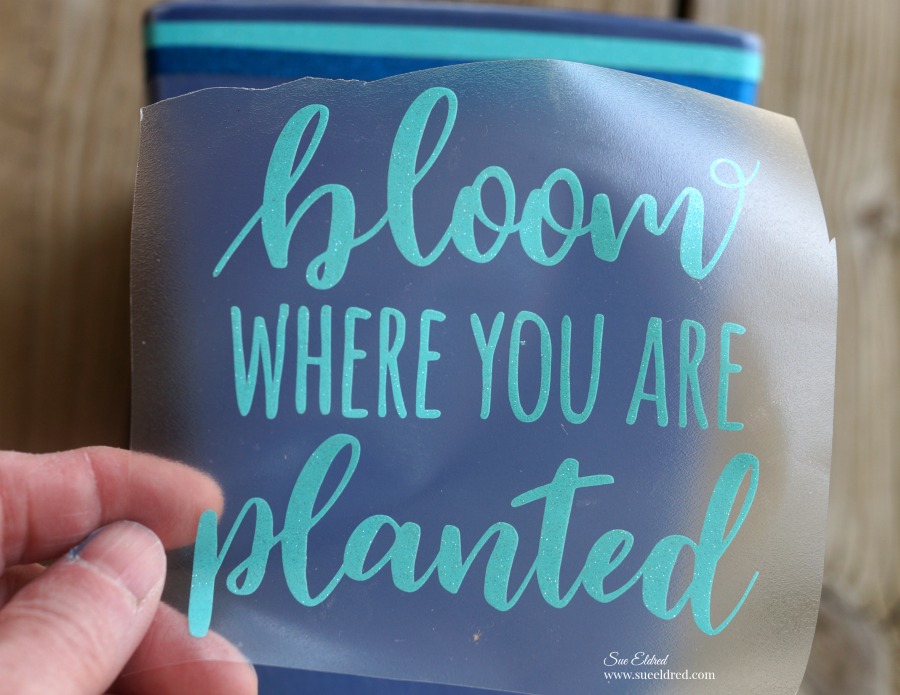
- Stylemark: Purple Ultra Metallic Glitter Vinyl
- Vinyl Transfer Tape*
.
- Silhouette Cameo*
- Paint terra cotta pot with 2 coats of white paint.
- Brush a thin layer of purple paint along top band. (no need to be perfect)
- Lightly sand pot for a distressed look.
- Using a cut file and the Silhouette Cameo*
, cut the saying out of the purple glitter vinyl.
- Apply the saying onto the pot using transfer paper. Smooth into place and remove transfer paper.

*Disclosure: This blog uses ads and affiliate links. If you choose to make a purchase using one of the links, I receive a small commission (at no additional cost to you) that helps offset the costs of maintaining this blog. Thanks for your support!
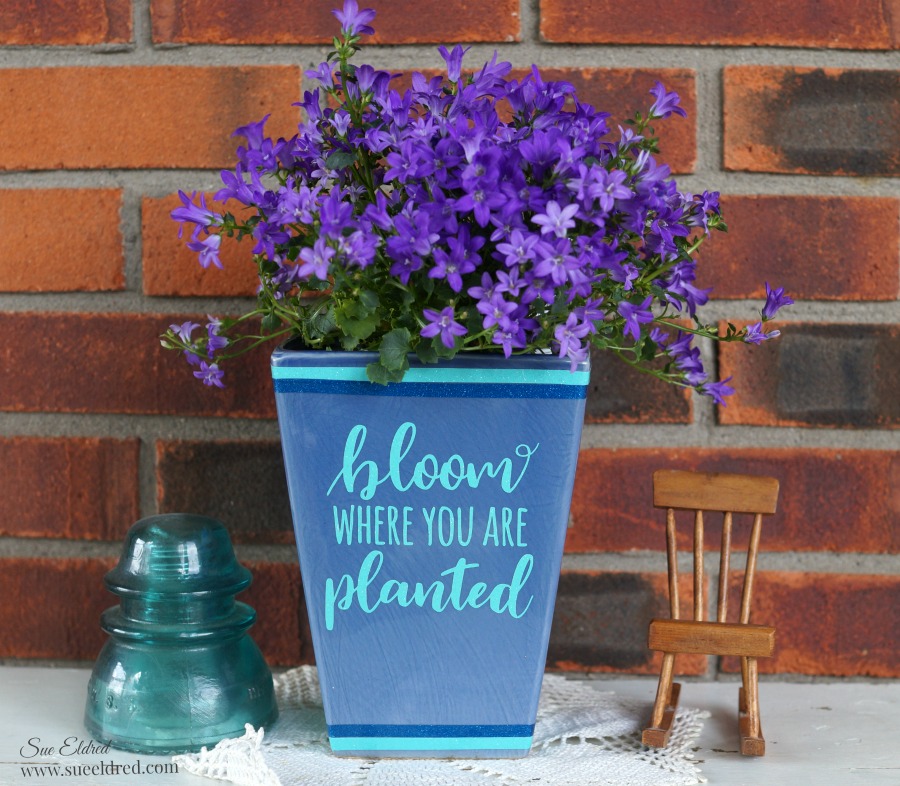
The blue ceramic planter was plain and simple until I added stripes using the glitter vinyl,
and applied the light blue glittered vinyl words using a Vinyl Transfer Tape*.
Perfect decorative accent for my summer front porch. (or a great gift idea)


Don’t Miss a Thing…Make Sure to Follow me

Ask for Self Adhesive Glitter Vinyl Sheets- by Styletech from Tape Technologies* at your local Scrapbook Store.
![]()
“This is a sponsored post. As a member of the StyleTechCraft Design Team I have been provided product and compensation in exchange for my creative ideas. The views and opinions are my own.


