Sweet Baby BOO!

My sweet little grandson will be celebrating his first Halloween soon…

Inspired by our newest game, I decided to make him a cute little shirt to wear.

With the help of Iron-on Embroidered letters from Joy making the shirt was super easy.

  • prewash cotton t-shirt
  • set iron to cotton setting
  • position letters with shiny side down on garment
  • cover letters with a fine cloth
  • with firm pressure iron cloth over the letters for 25 seconds
  • turn shirt inside out and iron the back of the letters for 25 seconds
  • allow to cool for 1 minute before cooling

Isn’t he adorable?

Looking at this picture, I’m thinking really big googly eyes would look cute inside the “O’s”.

My “Sweet Baby Boo” shirt was created for and sponsored by Joy SA.

*Disclaimer:  This post uses ads and affiliate links.  If you choose to make a purchase using one of the links, I receive a small commission (at no additional cost to you) that helps offset the costs of maintaining this blog.  Thanks for your support!

Try Amazon Prime 30-Day Free Trial

Elegant Monogram Wedding Tag

 Create a Custom Monogram Wedding Tag for that special couple.

You’ll be sure to impress.

Monogram Wedding Tag Products used:              *affiliate links

There’s a lot of dimension on this tag. 

  • I used white letters which are dye-able. I mixed a drop of ink into a mini spray bottle filled with water and spritzed the letters to tint them.
  • Emboss your cardstock, trim part of it into a tag shape, and punch a circle from another part. Glue the letters onto the circle – use the couple’s last name in the center and their first names on the sides.
  • Die-cut a decorative border for the circle. Use the foam squares to adhere the circle to the tag and embellish with a mini flower and trim.
  • You can find Joy® embroidered, iron-on numbers and letters on sheets or individually in a variety of fonts, colors and sizes at your local craft store.

The Monogram Wedding Tag was created for and sponsored by Joy®.

Disclaimer:  This blog uses ads and affiliate links.  If you choose to make a purchase using one of the links, I receive a small commission (at no additional cost to you) that helps offset the costs of maintaining this blog.  Thanks for your support!

Join Amazon Kindle Unlimited 30-Day Free Trial

Grateful for Fall Frame

Grateful for Fall Frame.

When the days and nights start to get a little cooler… I start looking for simple ways to bring

Fall into my home.  One simple way is by adding beautiful graphics found on scrapbook paper

and adding it into a frame.

I made my “Grateful for Fall” frame using the Deflecto 5″ x 7″ Beveled Edge Acrylic Frame* 

and beautiful fall paper from Authentique Bountiful Collection*.  (*affiliate link)

After cutting and matting the fall graphics from the Authentique Bountiful Collection*,

I added resin acorns to the metal knobs with Zots Adhesive Dots*.

Simple Fall Decorating.  (and a simple reminder to be grateful)

“This is a sponsored post. As a member of the Deflecto Design Team I have been provided product in exchange for my creative ideas, views and opinions.”

Zots Adhesive Dots

*Disclaimer:  This post uses ads and affiliate links.  If you choose to make a purchase using one of the links, I receive a small commission (at no additional cost to you) that helps offset the costs of maintaining this blog.  Thanks for your support!

Try Amazon Prime 30-Day Free Trial

Saturday Morning Memo Board

Making Saturdays Special..

Make family time more special with this cute memo board.

Now that the kids are starting to head back to school, weekends are more important than ever.

It’s nice just being together.

Whether I post a reminder about a fun event or a special note to say “I love you,”

this memo board helps me remember that Saturdays should be a little more laid back –

just the way I like it.

To make the Memo board I used…                     (*amazon affiliate link)

Directions:

  1.  Measure and cut the cork tiles to fit inside the frame.
  2. Because my frame was deep, I cut a piece of foam board the same size.  I glued the cork tiles to the foam board using liquid glue.

3.  Lay fabric over cork to determine letter placement.  Gently slide cork from underneath fabric and iron letters.

4. Spray the cork with adhesive and smooth the fabric over it.

5. Tap in a few tack nails inside the back of the frame to hold everything in place.

This project was created for and sponsored by Joy, SA.

Shop Amazon Scrapbooking Supplies*

Disclaimer:  This blog uses ads and affiliate links.  If you choose to make a purchase using one of the links, I receive a small commission (at no additional cost to you) that helps offset the costs of maintaining this blog.  Thanks for your support!


Tie Dyed Emoji Socks

Looking for a fun Summer project to do with the kids?

How about one of a kind Tie-Dyed Emoji socks?

This kids are going to love this!

To make the Tie-Dyed Emoji Socks this is what you’ll need…

I tried three different ways to dye my socks.

  • First, I just squirted dye directly onto the socks.  (red and blue pair)
  • Next, I rubber banded two socks together.  (yellowish pair)
  • Then, I tried rubber banding the socks separately.  (purplish  pair)

I think I like the socks rubber banded together best.  (yellowish pair)

To Dye the Socks…

  1. Add water to the pre-measured squirt bottles.
  2. Rubber-band socks and apply dye.
  3. Let set for 6-8 hours, then rinse – waiting is the hardest part!
  4. Make sure to wear gloves!  (I didn’t)
  5. Wash and Dry socks.

6.  Iron On Emoji patches on opposite sides of the socks.    Very COOL Socks!

The Tie-Dyed Emoji Socks were created for and sponsored by Joy.

Disclaimer:  This blog uses ads and affiliate links.  If you choose to make a purchase using one of the links, I receive a small commission (at no additional cost to you) that helps offset the costs of maintaining this blog.  Thanks for your support!

Shop Amazon Scrapbooking Supplies*

DIY…Christmas Chalkboard

DIY…Christmas Chalkboard

Christmas in July…

Last week it was so hot that when I went out at 9:00 in the evening to water my flowers it

was hard to breath.  It was so hot that our unheated pool felt like bath water.

Summer’s in full swing and vacation (for me) is fast approaching.

And with all the things I could or should be doing, I felt like making a Christmas Chalkboard.

It’s not too early?  Is it?

The Christmas Chalkboard is really easy to make…

and would be a wonderful gift for those of you thinking ahead.

And if you’d like…you could make it a two sided chalkboard and really get creative.


Here’s how I made the Christmas Chalkboard…  

Disclaimer:  This blog uses ads and affiliate links.  If you choose to make a purchase using one of the links, I receive a small commission (at no additional cost to you) that helps offset the costs of maintaining this blog.  Thanks for your support!

Sharing the Adornit Love…

As my time as an Adornit Ambassador comes to a close at the end of this month…

I wanted to make them a card to let them know how I feel.

Working with them the last few months has been a fun and positive experience.

Thanks, Adornit for the opportunity to work with your wonderful products.

FYI…the card was made with Adornit’s Flamingo Fever Collection.)

Try Amazon Prime 30-Day Free Trial

Disclaimer:  This blog uses ads and affiliate links.  If you choose to make a purchase using one of the links, I receive a small commission (at no additional cost to you) that helps offset the costs of maintaining this blog.  Thanks for your support!

How to Create an Easy Pickled Finish with Vintage Effect Wash

How to create an Easy Pickled Finish with Vintage Effect Wash from Deco Arts.

I had this unfinished wood tote that I wanted to use the new Vintage Effect Wash on.

My first thought was to just give the tote a cool white wash using the paint.

But after further thought and a little experimentation, I decided to warm up the look by

staining it with a Walnut Gel Stain first.  I love the way it turned out.

This would make a great garden tool holder, picnic caddy, or my favorite…a Craft Tote.

DIY Pickled Crate

Supplies Used:                (*affiliate link)

 Directions:

  1. Lightly sand the wood crate if necessary.
  2. Paint or brush crate with DecoArt Americana Walnut Gel Stains Paint*.
  3. Rub off excess stain with soft clean rag.  Allow stain to dry.
  4. Apply Decoart Vintage Effect Wash Grey* onto crate with brush allowing the stain to show through.   Wipe with clean soft rag if necessary.  (It’s that easy!)
  5. If desired, add stenciling onto the crate.
  6. Apply a sealer to protect the finish.

The Love Beyond Words Pickled Crate was sponsored by DecoArts.

Try Amazon Prime 30-Day Free Trial

Disclaimer:  This blog uses ads and affiliate links.  If you choose to make a purchase using one of the links, I receive a small commission (at no additional cost to you) that helps offset the costs of maintaining this blog.  Thanks for your support!

Painting Basics

Architextures Vintage Market Collage

Vintage Market Collage

I had so much fun playing around with the 7 Gypsies Architext Paper Pad*

It’s my new favorite.  It reminds me of going to the Flea Market with my daughter.

So much Vintage Goodness.

The project was basically put together with paper, glue and chipboard.

To begin…I glued the background paper to a thick piece of chipboard for stability.

I can easily add it to an 8″ x 8″  frame later if I want too.

I added several layers of chipboard on the back of each of the images to give dimension.

I also aged each piece by rubbing Vintage Photo Distress Ink* to the edges using a

Ink Blending Tool*.    (*amazon affiliate link)

My favorite piece is the vintage crate.  I added the second layer of chipboard with three small

strips, so that I could leave an opening on the top to add dried flowers from last years garden.

So realistic, it looks like a teeny tiny crate.  I just love it.


                  7 Gypsies Architextures Paper Pad

The Architextures™ Paper Collection was inspired by the all the wonder of found objects, displays, signs, sayings, artwork, creative bliss and sheer beauty found at vintage fairs, flea markets, salvage yards, barn sales, antique shops, old book stores, garage sales, market days and more.

Such a fun collection.  Makes me want to go treasure hunting.

Notice the 7 Gypsies Mini Library Drawer* in the background of the picture?    (so stinkin cute)

The Vintage Market Collage was sponsored by Canvas Corp Brands.

Shop Your Fav Brands at Scrapbook.com

Disclaimer:  This blog uses ads and affiliate links.  If you choose to make a purchase using one of the links, I receive a small commission (at no additional cost to you) that helps offset the costs of maintaining this blog.  Thanks for your support!


Guest Room Closet Make-Over equals More Crafty Storage

When your grown child moves out and gets married…

sometimes it takes awhile years to get all the crap stuff out of their old room.

After my daughter got married, I decided to make her room into a Guest Room.

Every time they’d make the trip back home,  I’d guilt her into taking a little bit

more of her stuff home.

Eventually, I stacked all the remaining stuff neatly in the closet.

When my her little brother entered his teen years and would clean his room…

Where do you think it went?  You guessed it, in the Guest Room closet.

This year I finally decided to claim that space for my own.

Have I ever mentioned that I’m a spoiled crafter?

With all the wonderful things I receive in being part of a design team…

I have a lot of stuff that just won’t fit into my 8″ x 10″ office/workshop space.

After a lot of purging and last month’s Neighborhood Garage Sale…

the last of the junk is mostly gone and I’m finally finished.  (for now at least)

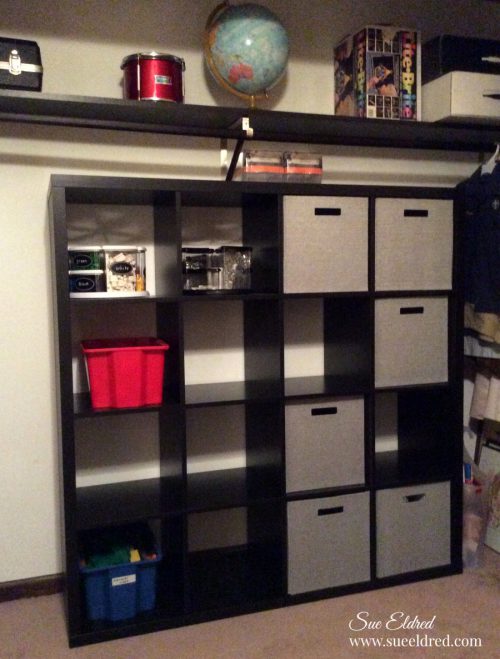
The first thing I did was after emptying the closet was to add this large

IKEA Kallax Bookcase Room Divider*.  (amazon affiliate link)

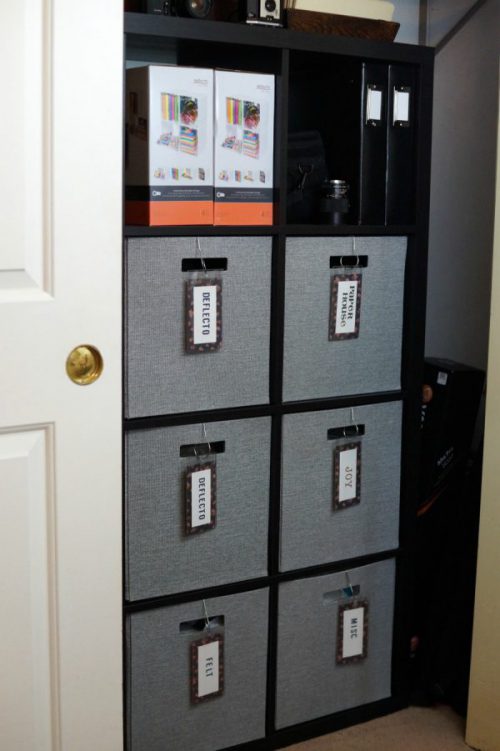
I forgot to take into consideration the upper shelf brackets when measuring the closet

to make sure the cubby unit would fit.  So…instead of just moving the ugly old metal shelf,

we added a nice wood shelf to match.  This picture was taken while my husband still had

the doors removed.  (sorry about the blurry picture)  The doors we’re such a pain to put

back on that I never got a finished picture of the closet with the doors off.

We also got 6 of these Threshold 13″ Fabric Cube Storage Bin* from Target.

I love using bins.  Everything’s neatly contained and it looks pretty.

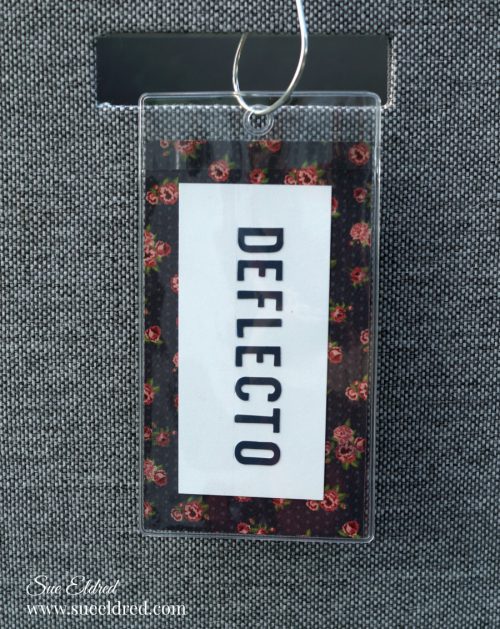
I labeled each bin using these Small Flexible Pouches* and Pear Clips* from Deflecto.

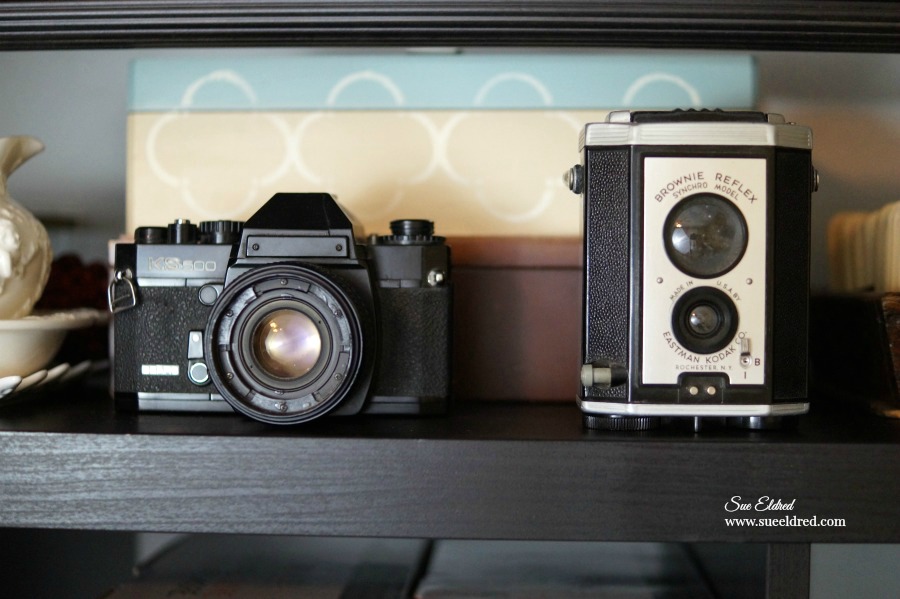
Besides all the extra storage…I now have room for finished albums, camera bag and more.

The space on the side of the unit I use for storing my lighting equipment and tripod.

We also purchased two sets of drawer inserts for the Ikea Kallax Bookcase Room Divider.

(Ikea Insert with 2 drawers, black brown*)  I love having the drawer inserts for smaller items.

You may have noticed there’s still a few toys left in the closet.  (always a work in progress)

I used the Deflecto Rotating Carousel Organizer* for my Lego storage.  (the boys love it)

For now, the Guest Room Closet is done.  I will admit that this has been a several month

process.  It feels so good to have my extra stuff organized and easy to find.

 “This is a sponsored post. As a member of the Deflecto Design Team I have been provided product in exchange for my creative ideas, views and opinions.”

Shop Amazon Scrapbooking Supplies*

Disclaimer:  This blog uses ads and affiliate links.  If you choose to make a purchase using one of the links, I receive a small commission (at no additional cost to you) that helps offset the costs of maintaining this blog.  Thanks for your support!