Fall Sunflower Get Well Card

Fall Sunflower Get Well Card

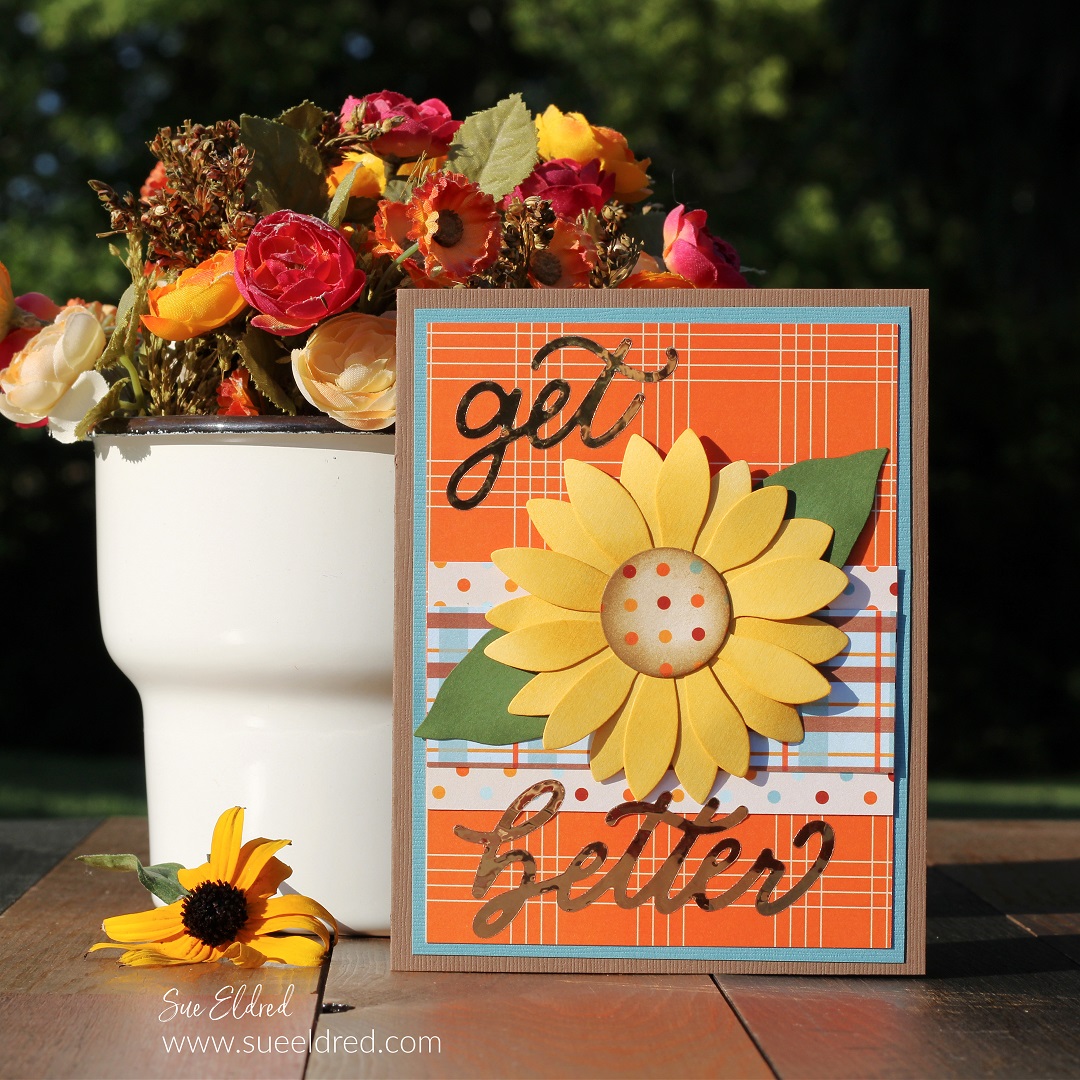
A Bright and Cheery Card to brighten someone’s day.

This simple Get-Well card uses dies and paper from The Maker’s Movement.

Maker's Movement

Disclosure:  This is a sponsored post for The Maker’s Movement.  I have been provided product and compensation in exchange for my creative ideas.  The view and opinions are my own. 

Fall Sunflower Get Well Card

Materials Used:  (*affiliate links)

*Disclosure:  This blog uses ads and affiliate links.  If you choose to make a purchase using one of the links, I receive a small commission (at no additional cost to you) that helps offset the costs of maintaining this blog.  Thanks for your support!

Fall Sunflower Get Well Card

Directions:

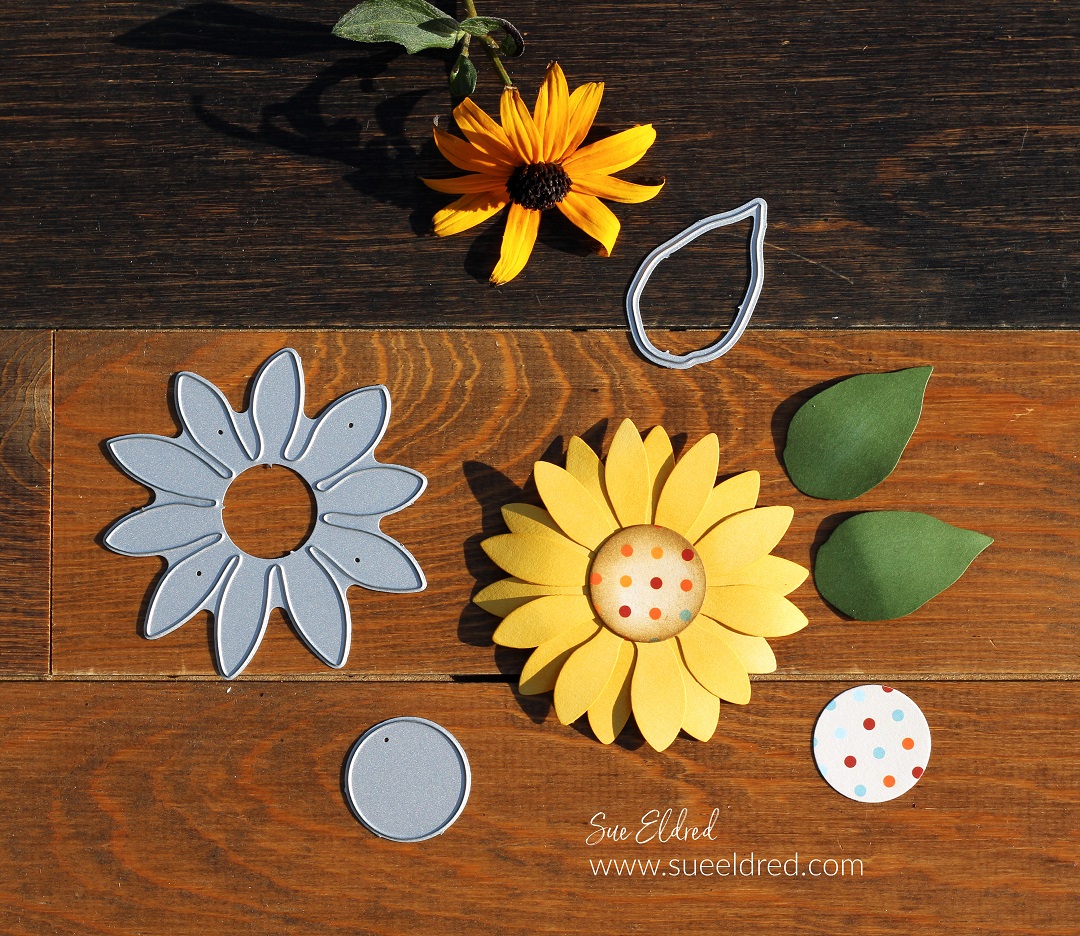
  • Die-cut the pieces for the flower out of cardstock. You will need two flowers cut from the large flower die.
  • Ink the cardstock flower with yellow ink to give the petals a little color variation and depth.

Fall Sunflower Get Well Card

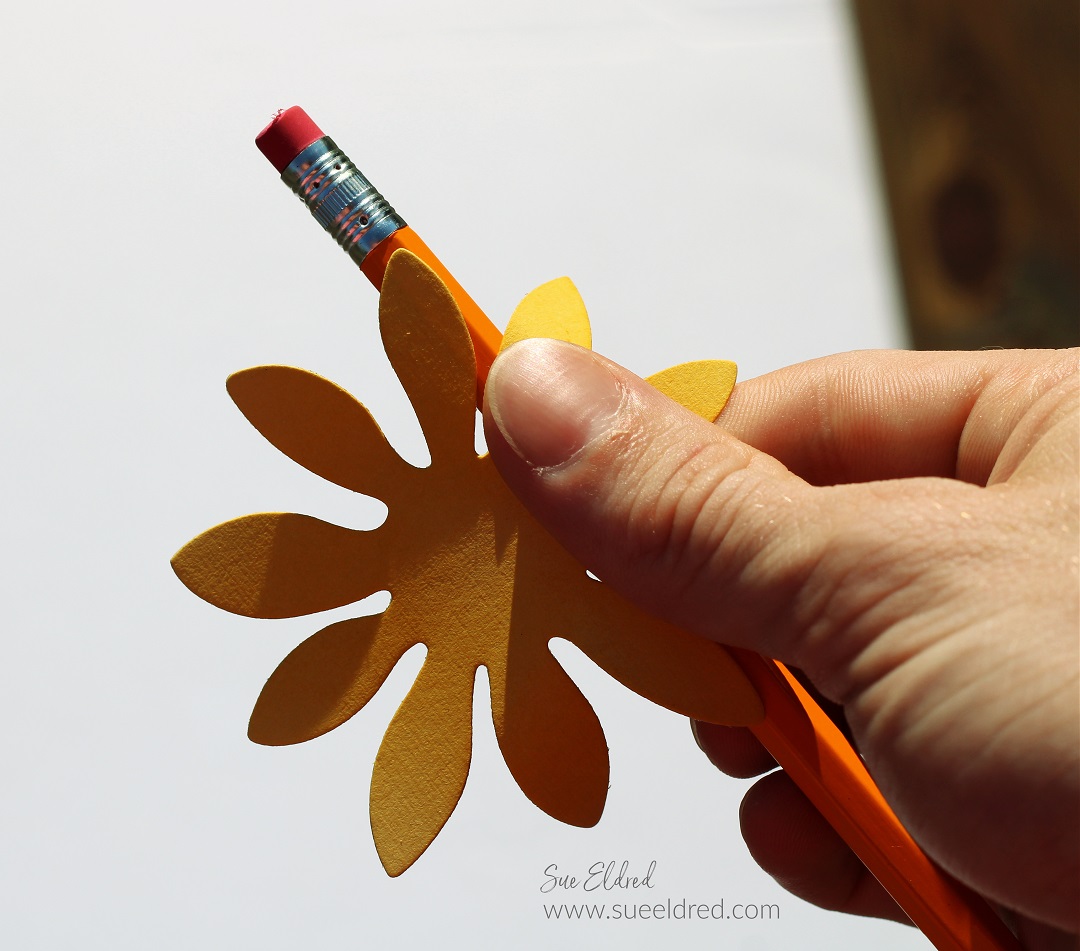
  • Use the side of a pencil to gently round the edges of the petals.

Fall Sunflower Get Well Card

  • Glue the center of the flowers together using Tombow Mono Aqua Liquid Glue*.
  • Instead of a brown center for the sunflower, I cut a circle using polka dot paper from the Autumn Breeze Paper Pad.

Fall Sunflower Get Well Card

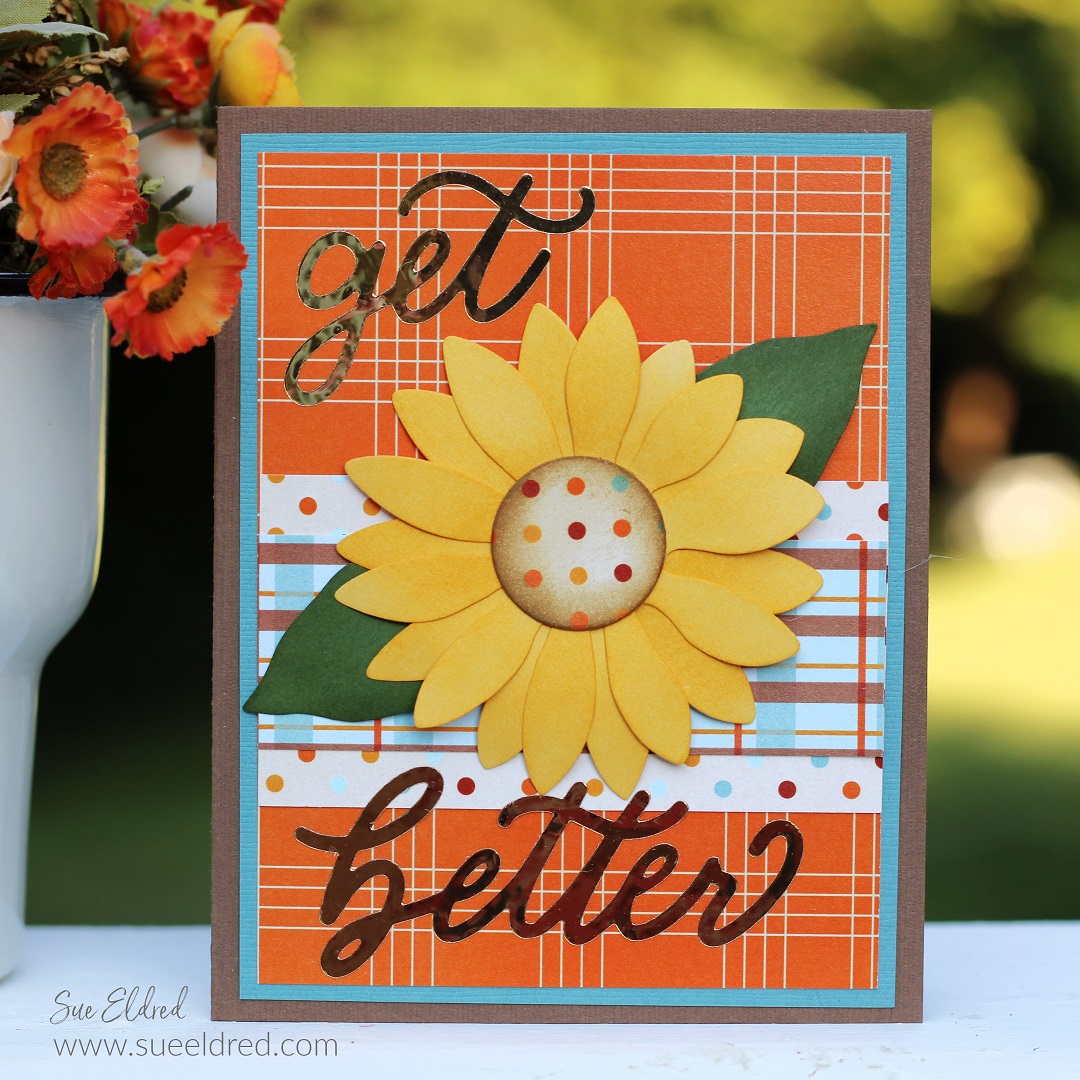
  • Die-cut the words “get better” using StyleTechCraft Gold Chrome Adhesive Vinyl*and the Get Better Die Set.
  • The card uses simple layers using the Autumn Breeze Paper Pad.
  • Finished Card Size 4 1/4″ x 5 1/2″.

StyletechCraft products brought to you by ATSM Craft*

Super Mario Bros. Inspired Bedroom

Super Mario Bros. Inspired Bedroom

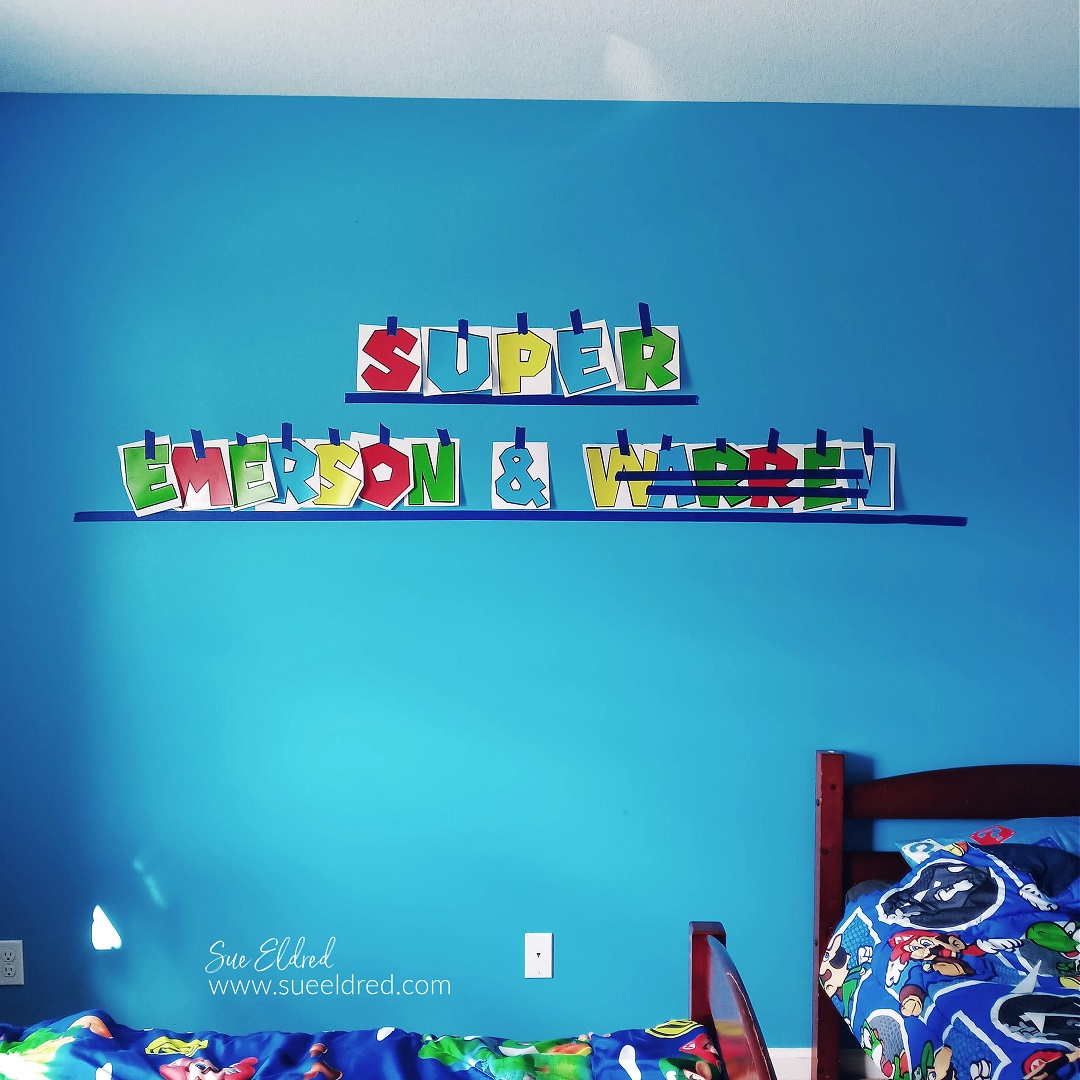
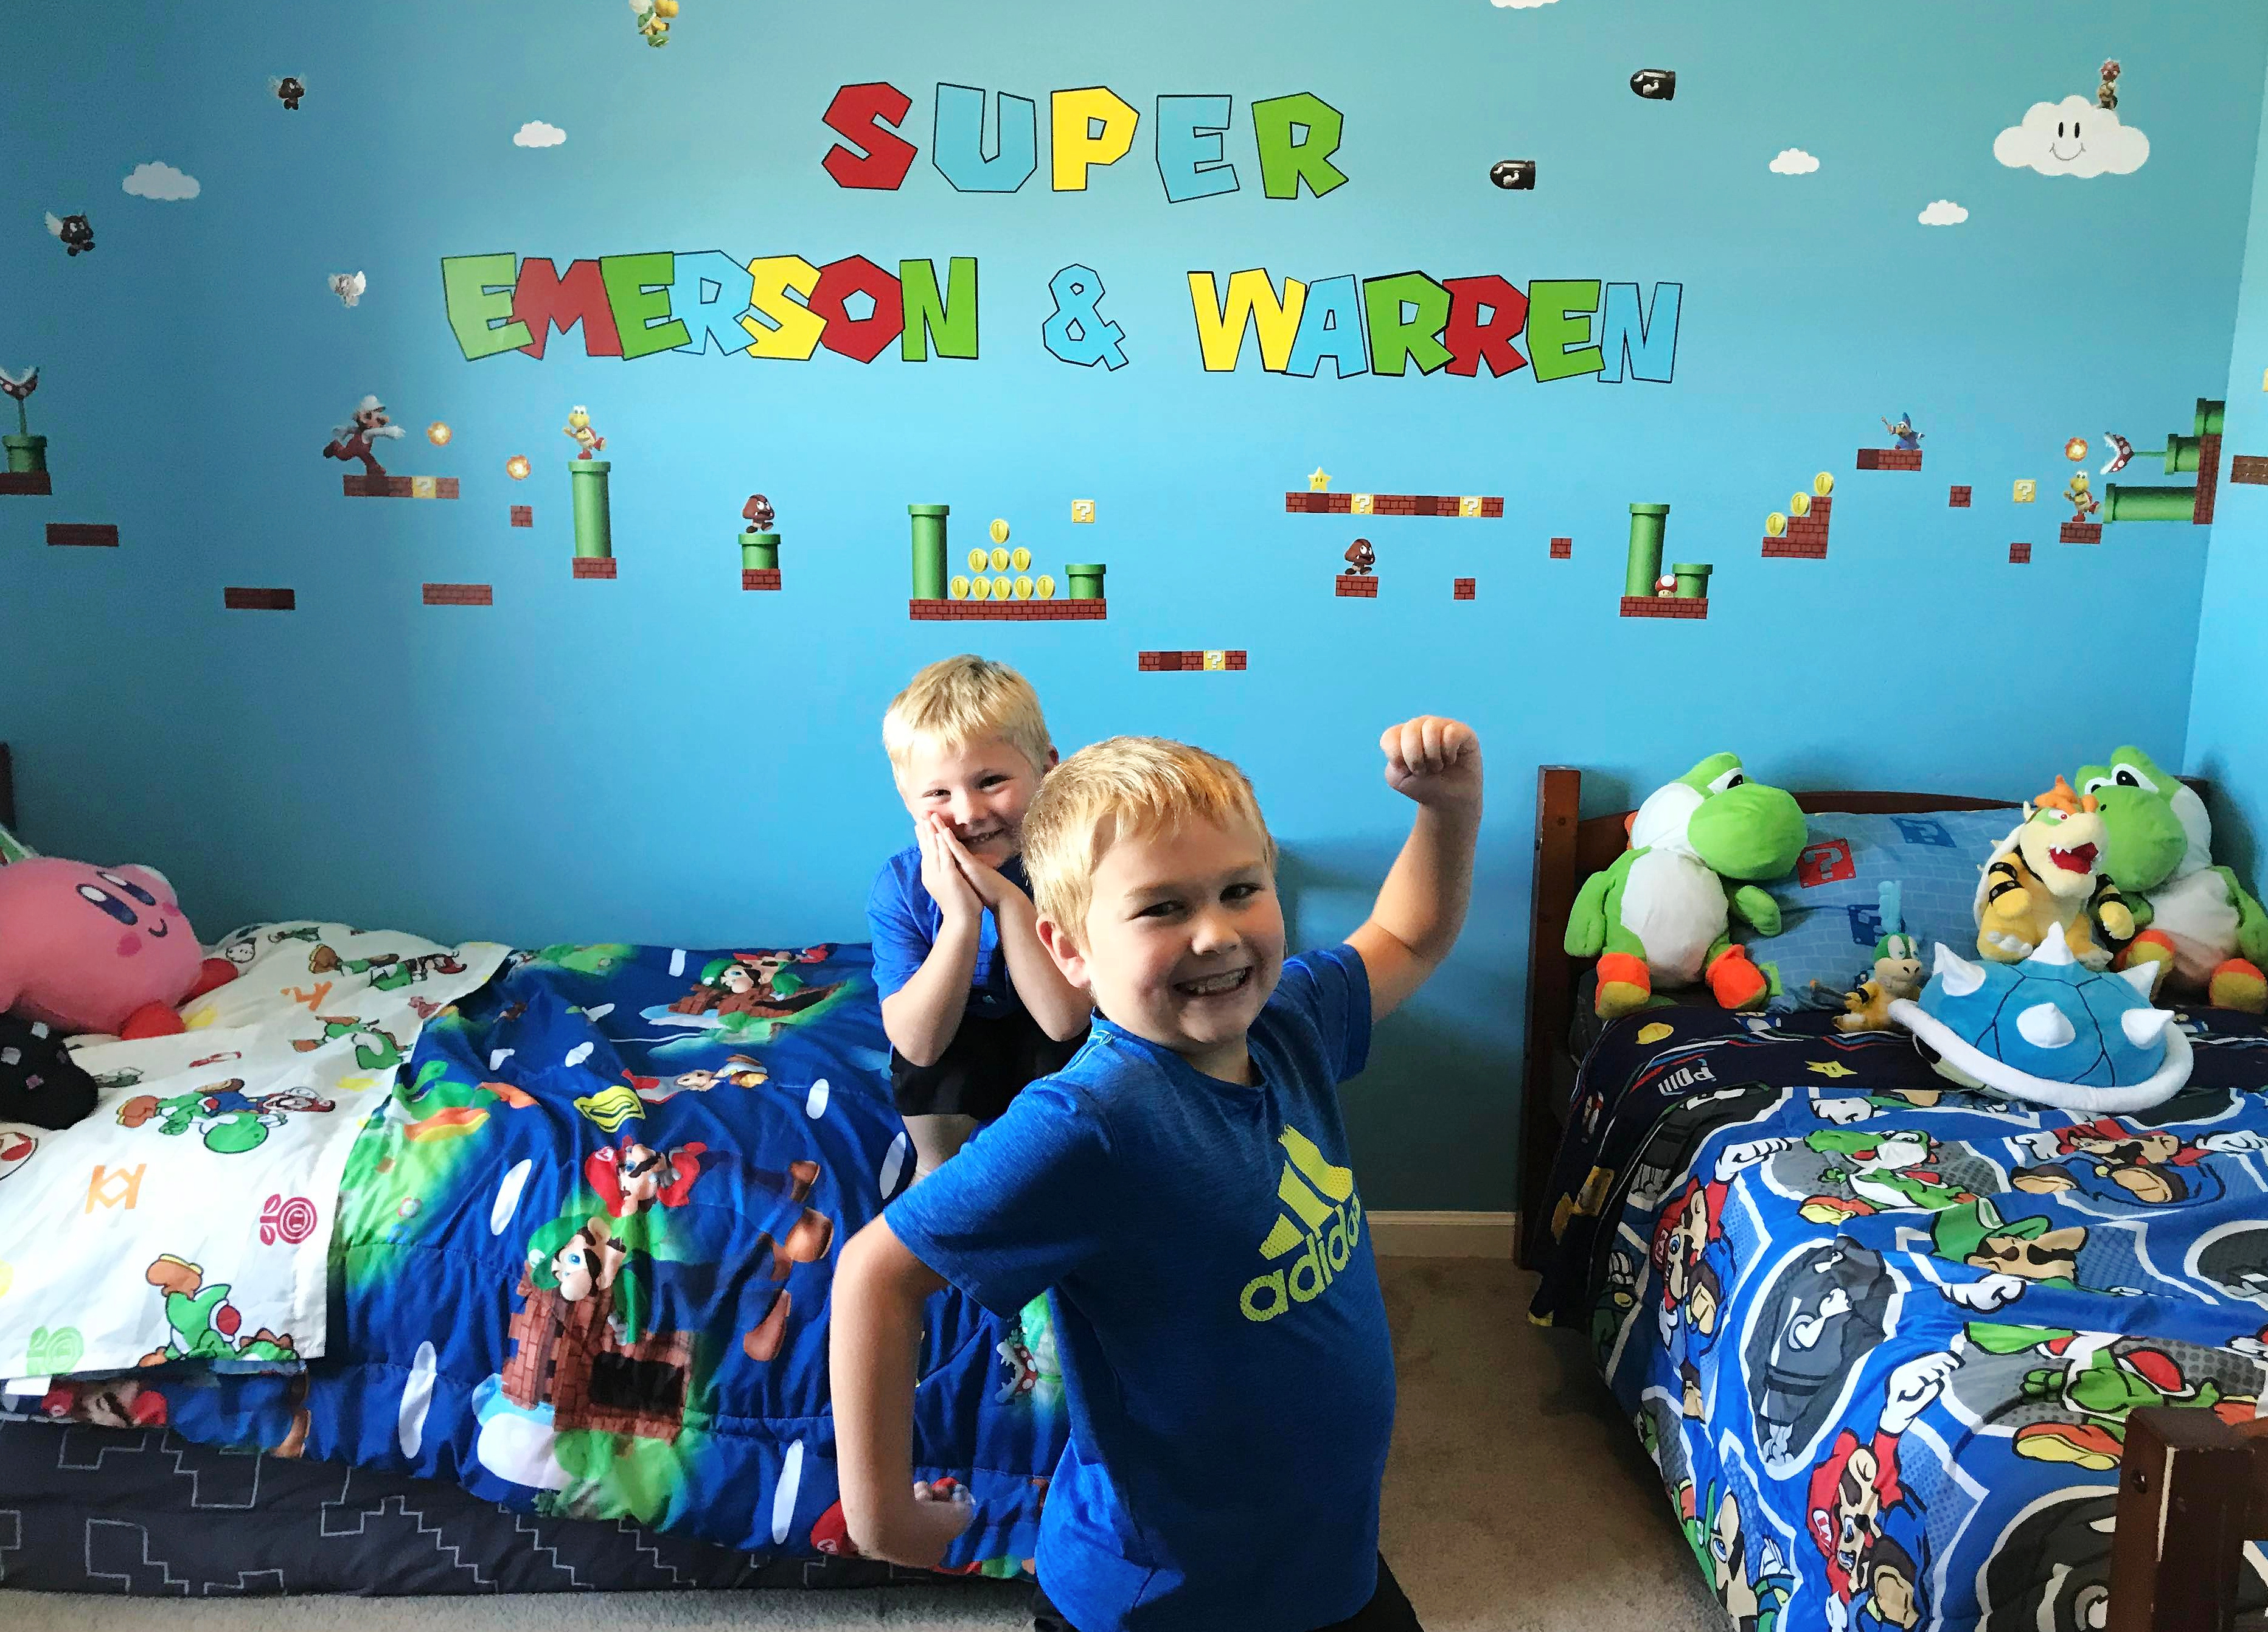
A bedroom makeover for a couple of boys obsessed with all things Super Mario Bros.

Super Mario Bros. Inspired Bedroom

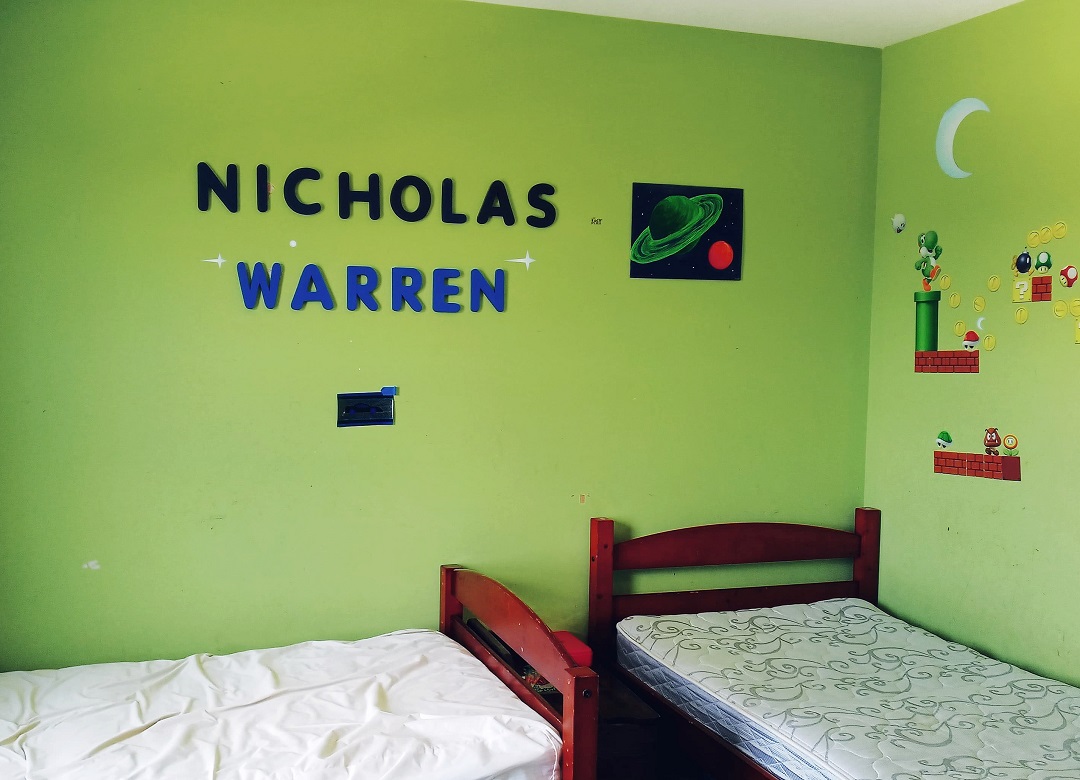
Bedroom Makeover-Before

My daughter-in-law has been hard at work transitioning her oldest son into his new tween room

and the younger boys into a new bedroom together.

Since the boys are obsessed with all things Super Mario Bros.,

she decided to create a Super Mario Bros. Inspired Bedroom.

She had everything planned out but only needed help with one thing.

She wanted super large letters for the wall.  (She figured I was the person to ask.)

Super Mario Bros. Inspired Bedroom

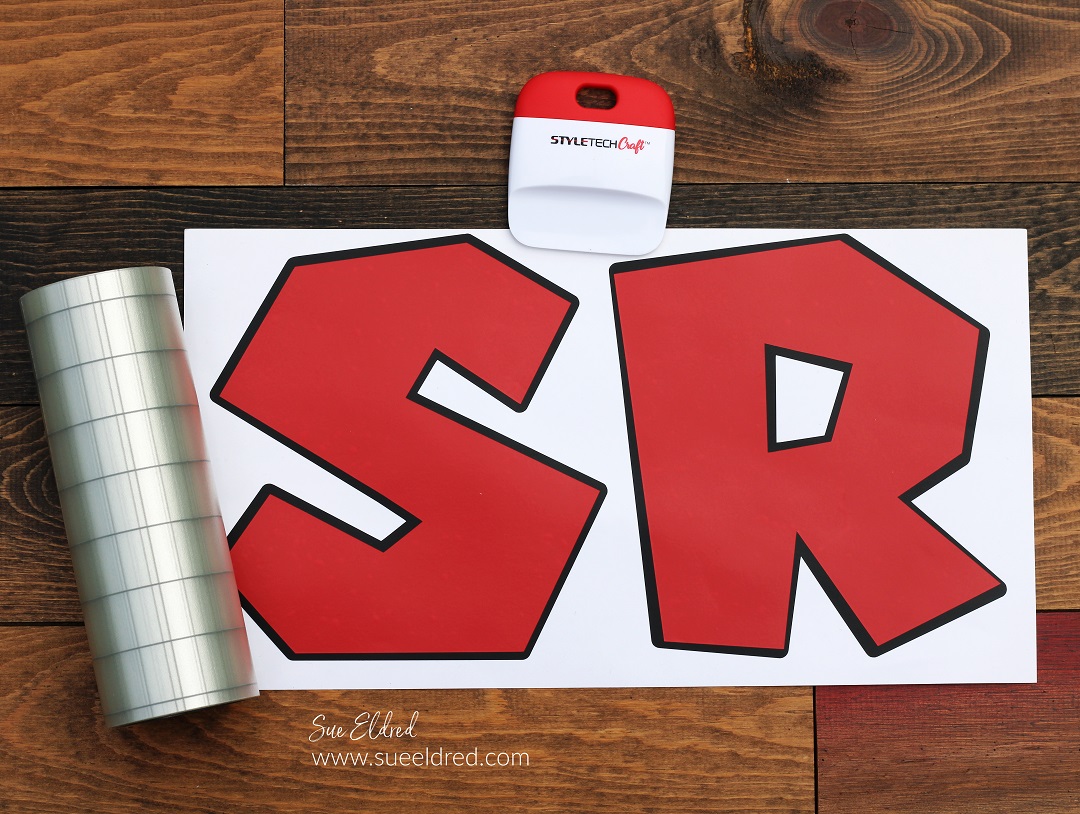
To make the Super Mario Bros. inspired letters…

Super Mario Bros. Inspired Bedroom

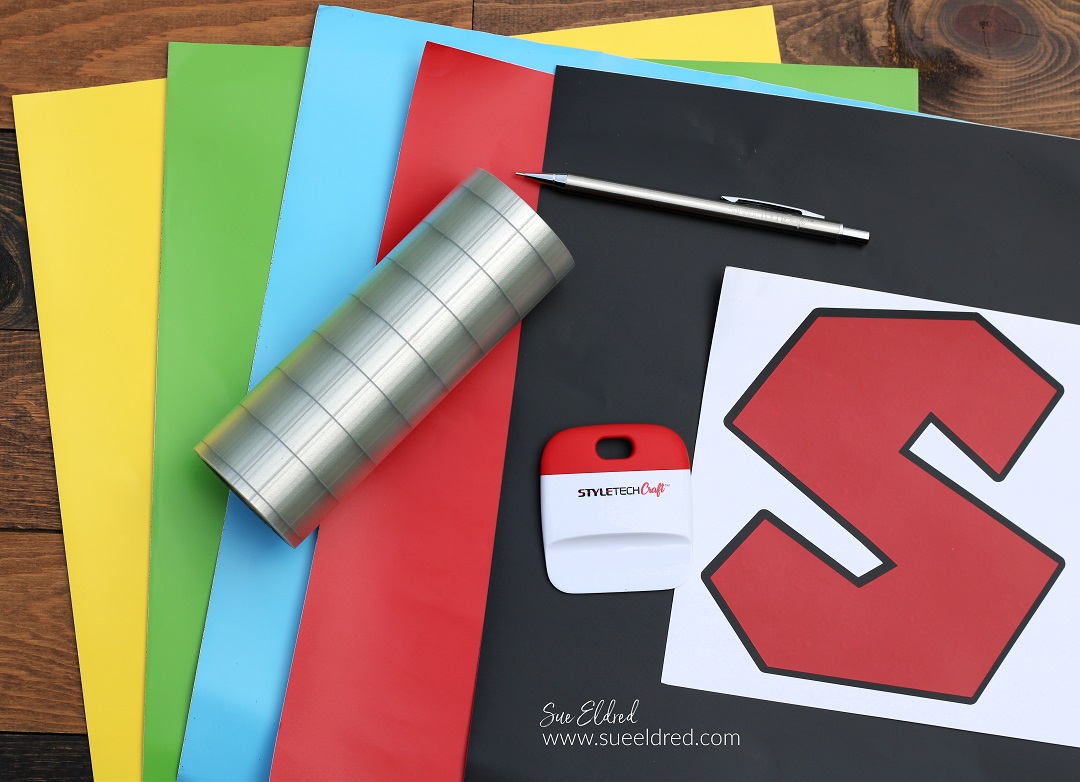
Products used to make the letters:

StyletechCraft products brought to you by ATSM Craft*

*Disclosure:  This blog uses ads and affiliate links.  If you choose to make a purchase using one of the links, I receive a small commission (at no additional cost to you) that helps offset the costs of maintaining this blog.  Thanks for your support!

Super Mario Bros. Inspired Bedroom

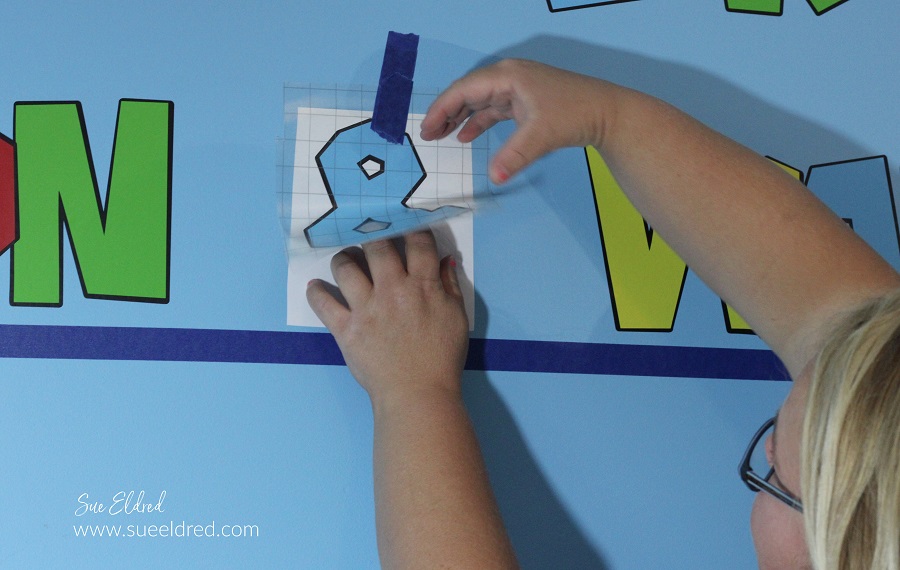
  • Place the cut vinyl letters onto the slightly larger black letters using the Vinyl Transfer Tape*.

Super Mario Bros. Inspired Bedroom

  • The room was painted “Big Sky Country” with Dutch Boy’s Duraclean Paint, in eggshell.
  • Use a strip of removable blue painter’s tape* as a guide to place the letters.
  • Leave the paper backing on the back of the black letters.  Cut around the letters and place them on the wall with the blue painter’s tape*.

Super Mario Bros. Inspired Bedroom

  • Gently rub over the letters with the vinyl scraper tool to ensure the letters have stuck to the vinyl transfer tape.
  • Carefully peel up the transfer tape, keeping the transfer tape in place, and remove the paper backing from the letter.
  • Rub over the letter to help it stick to the wall.

Super Mario Bros. Inspired Bedroom

For even more Super Mario Bros. Fun…

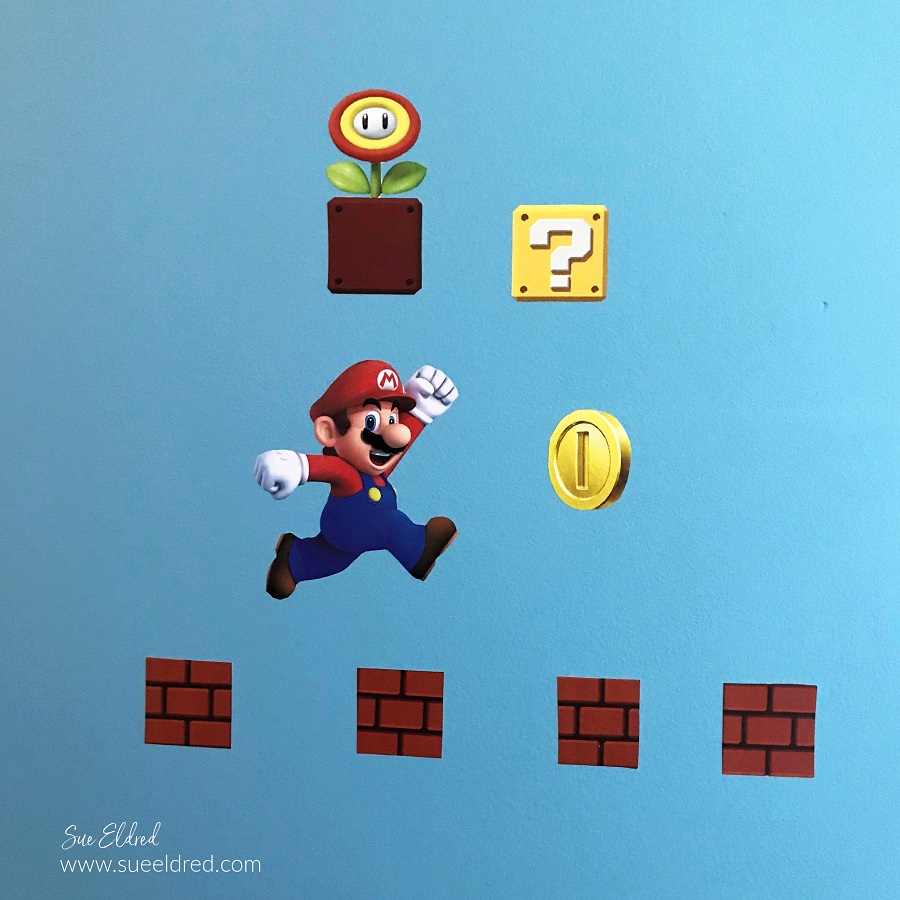
  • My daughter-in-law used decals and Super Mario Bros. characters hand cut from the wallpaper to create the decorations around the room.
  • She trimmed the white outline off the decals and cut out by hand the characters from the wallpaper.
Super Mario Bros. Inspired Bedroom

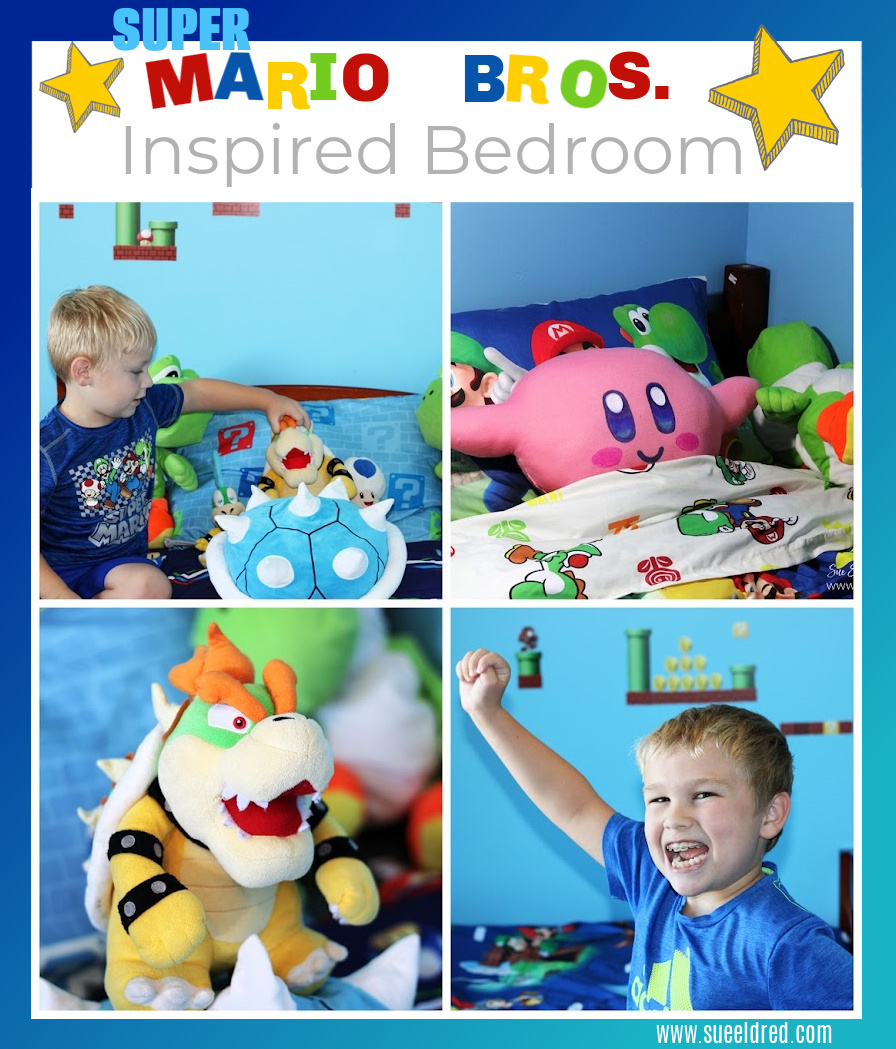
Super Mario Bros. Bedroom-After

Super Mario Bros. Bedroom

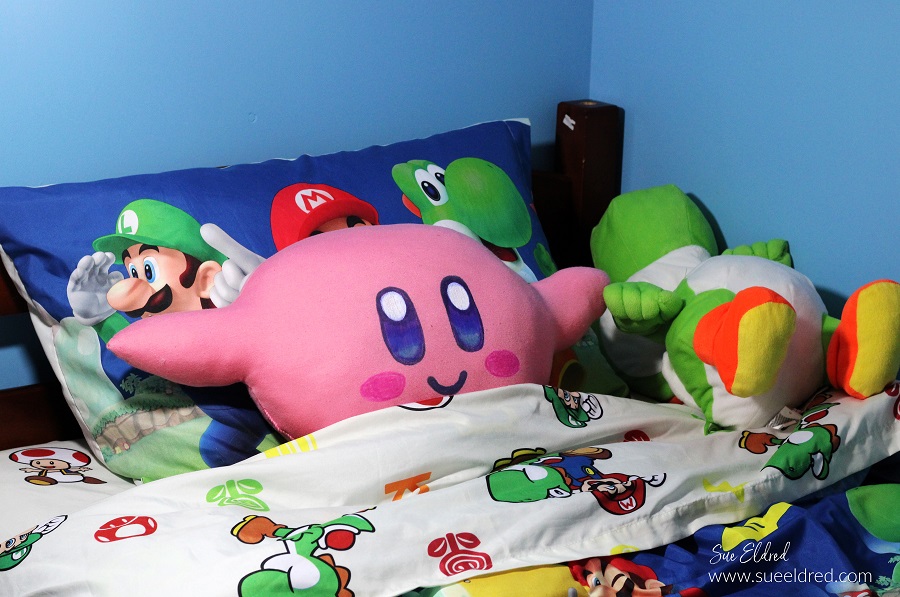
  • The room wouldn’t be complete without Super Mario Bros. Comforters*, Pillows, and of course their favorite “stuffies”.  (Unbelievably, I know quite a few of their names.)

Super Mario Bros. Bedroom

I was there when the boys saw the finished room for the first time.

One of them exclaimed “it’s like a whole level of Super Mario World”.

They were a little excited!  (Good Job, Mom!)

Click on pictures below for the products used to create the Super Mario Bros. Inspired Bedroom.


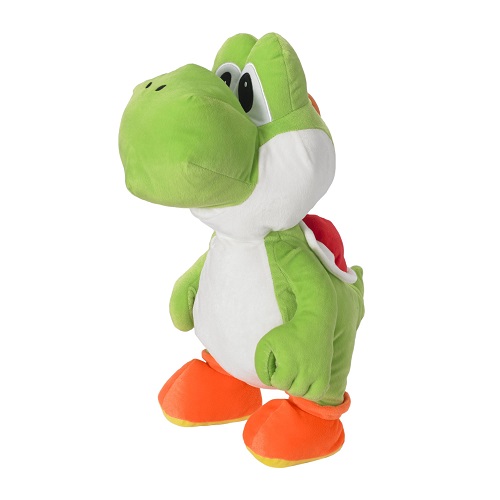
Yoshi Pillow Buddy

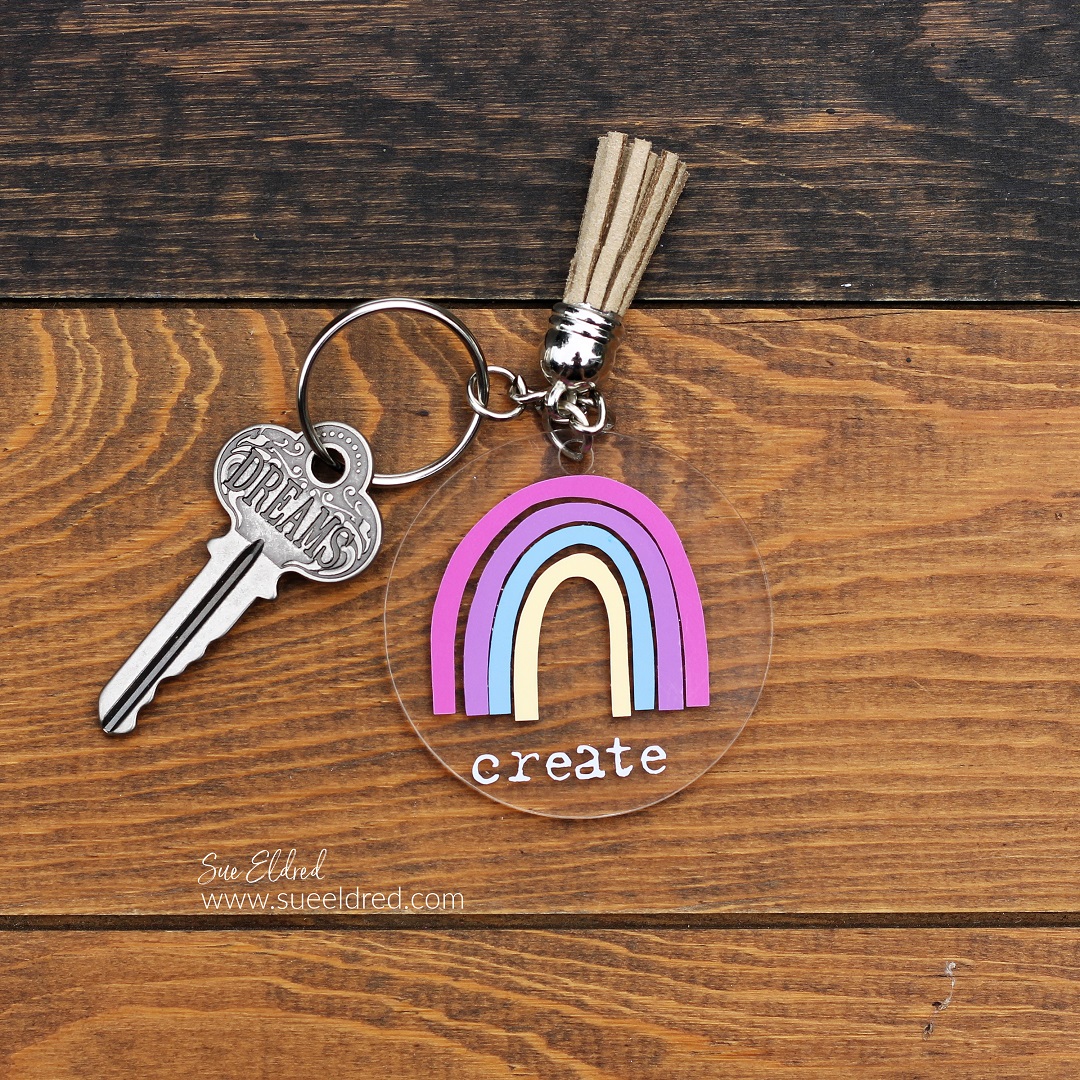
Rainbow Keychain with StyleTechCraft Sun Changing Vinyl

DIY Rainbow Keychain with StyleTechCraft Sun Changing Vinyl

My 11-year-old grandson has been after me for quite a while to make more “How To” videos.

The other night, we sat up the camera and I had him create the Rainbow Acrylic Keychain

that I made for the Namta Show in Orlando.

The keychain uses StyleTechCraft Sun Changing Vinyl*.  (which is a very fun vinyl to use)

He not only created the project in the video, but he edited the whole video himself.

I think he did a great job.

“This is a sponsored post.  As a member of the StyleTechCraft Design Team I have been provided product and compensation in exchange for my creative ideas.  The views and opinions are my own.
Here’s the link to the video:

To make the Rainbow Keychain we used:

StyletechCraft products brought to you by ATSM Craft*

*Disclosure:  This blog uses ads and affiliate links.  If you choose to make a purchase using one of the links, I receive a small commission (at no additional cost to you) that helps offset the costs of maintaining this blog.  Thanks for your support!
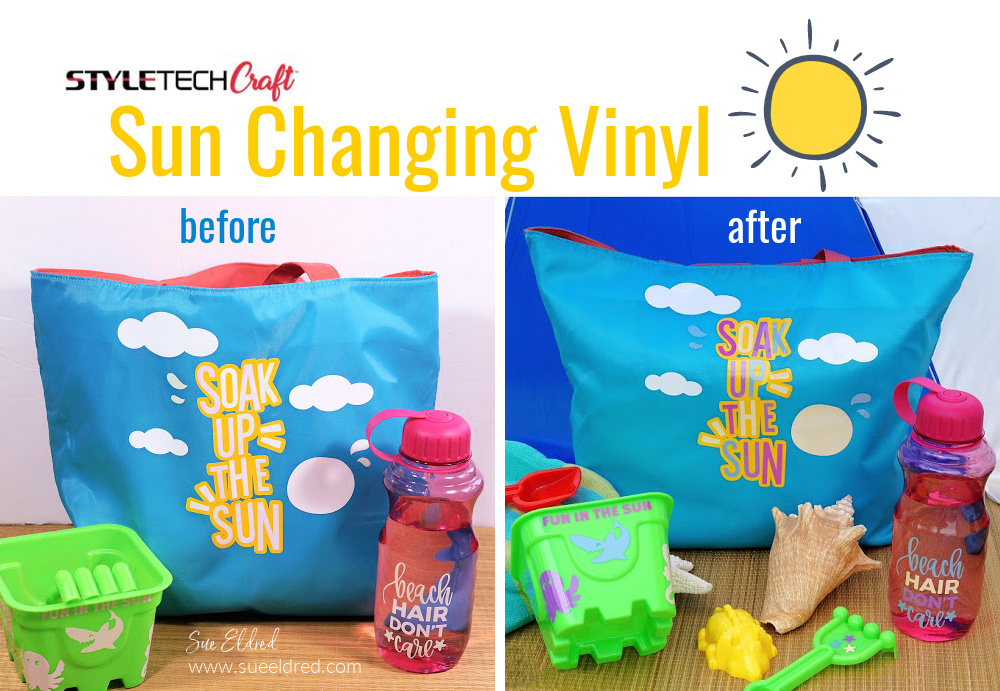
Ready for the Beach with Sun Changing Vinyl

For another fun project using Sun Changing Vinyl click here.

Rae Dunn Inspired Thrift Store Makeover

Rae Dunn Inspired Thrift Store Makeover

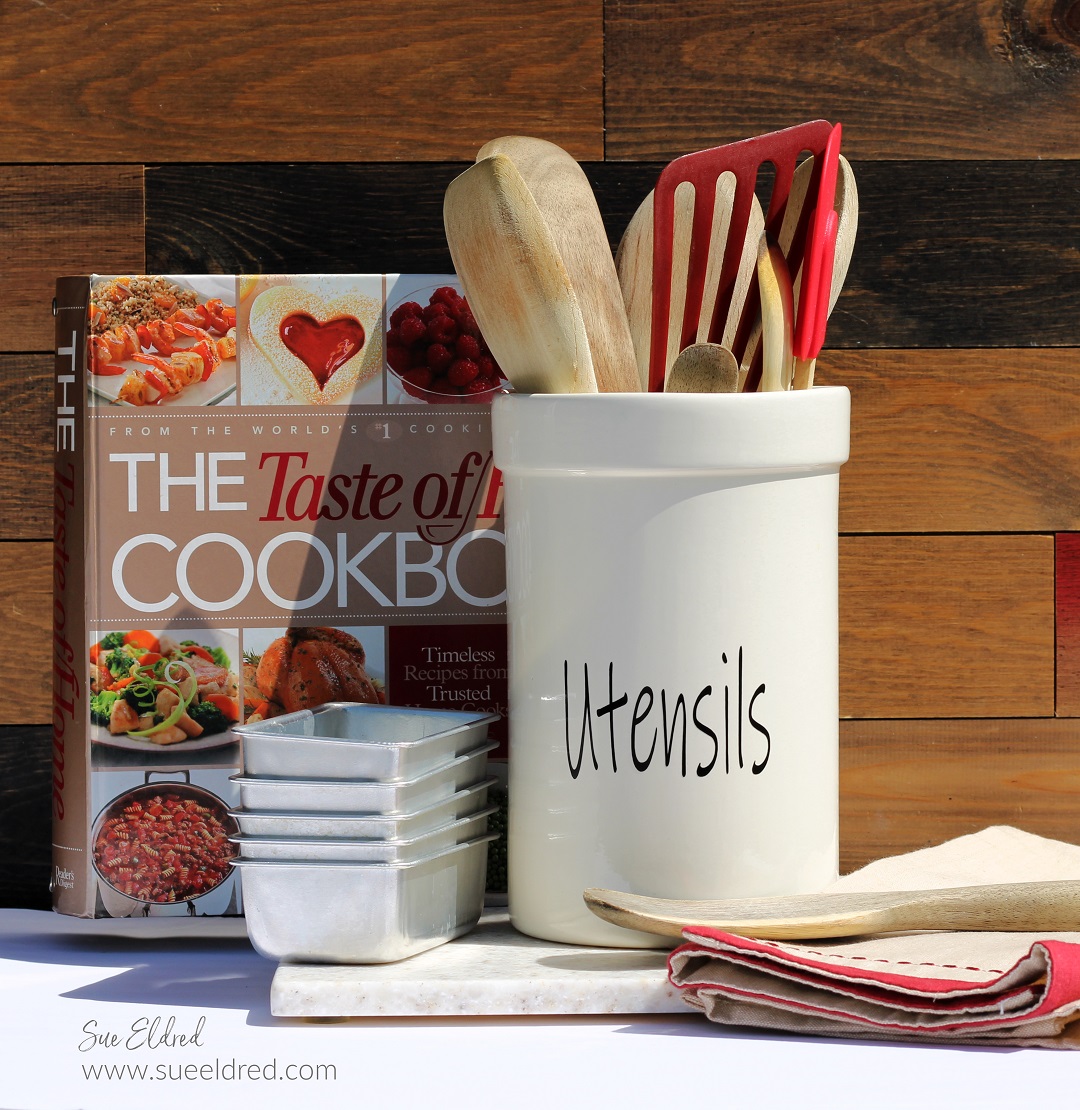
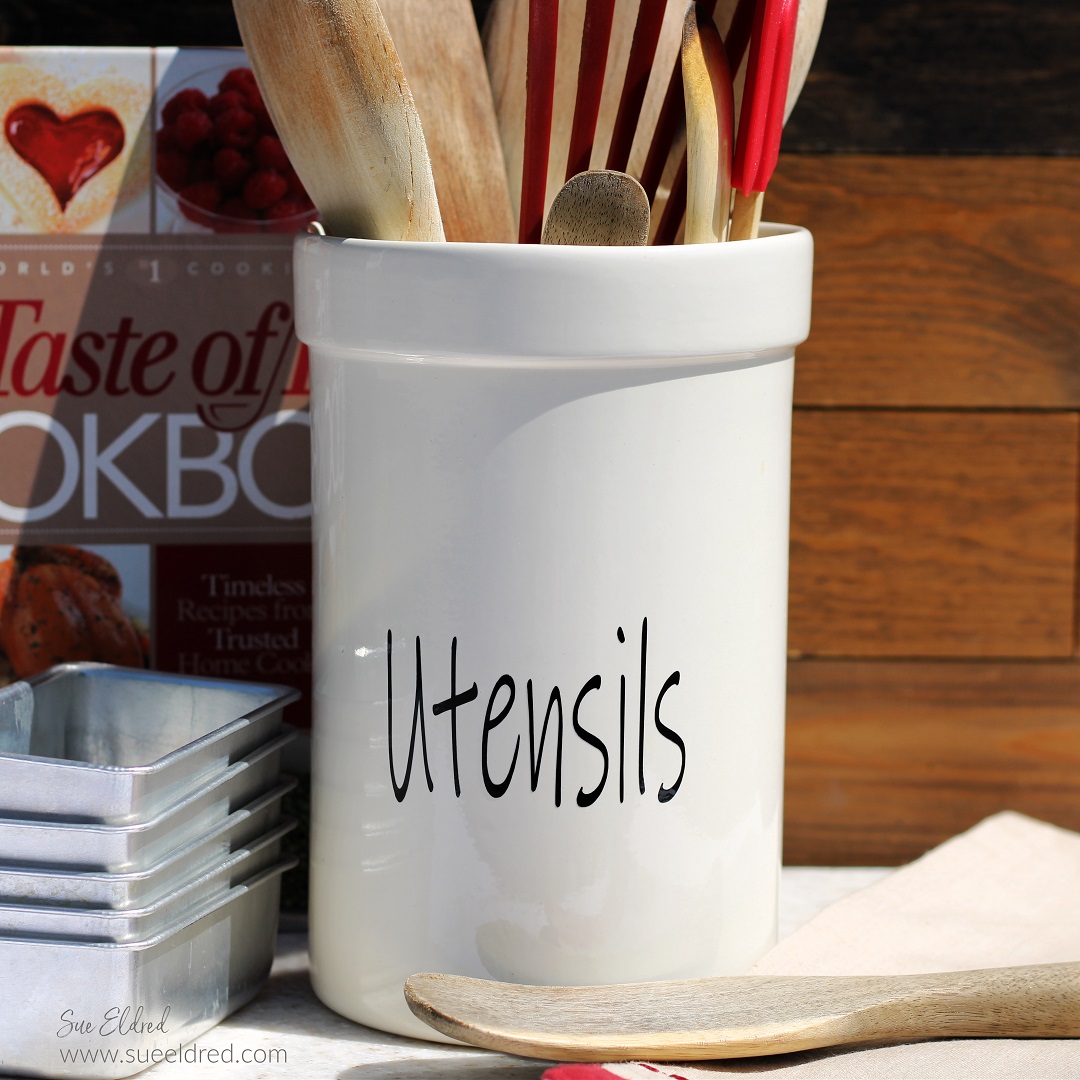
Rae Dunn Inspired Utensil Holder

I’ve been looking for the perfect utensil holder ever since we did our kitchen makeover in 2018.

I was looking for just the right one.  None of the ones I found were what I was looking for.

Rae Dunn Inspired Thrift Store Makeover

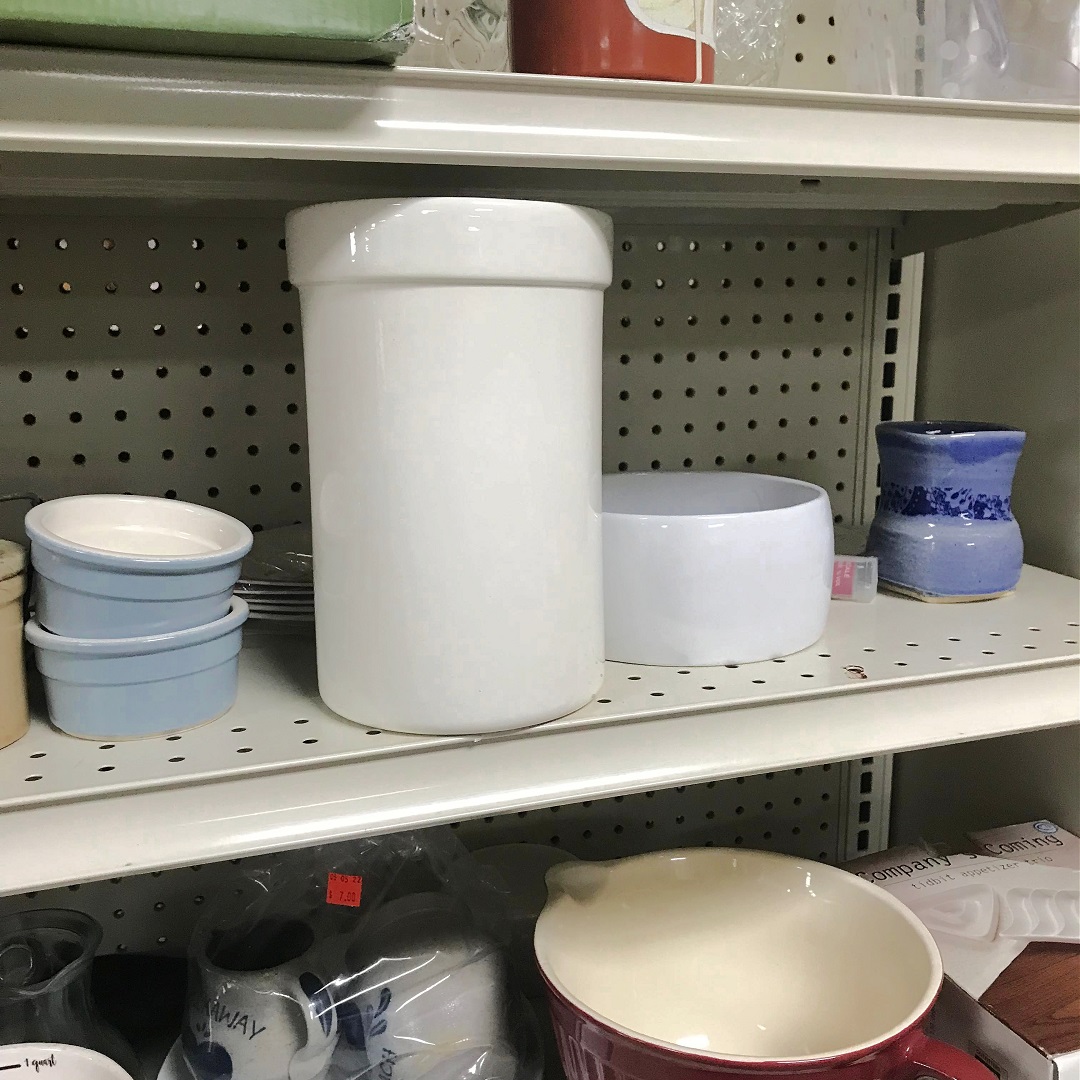
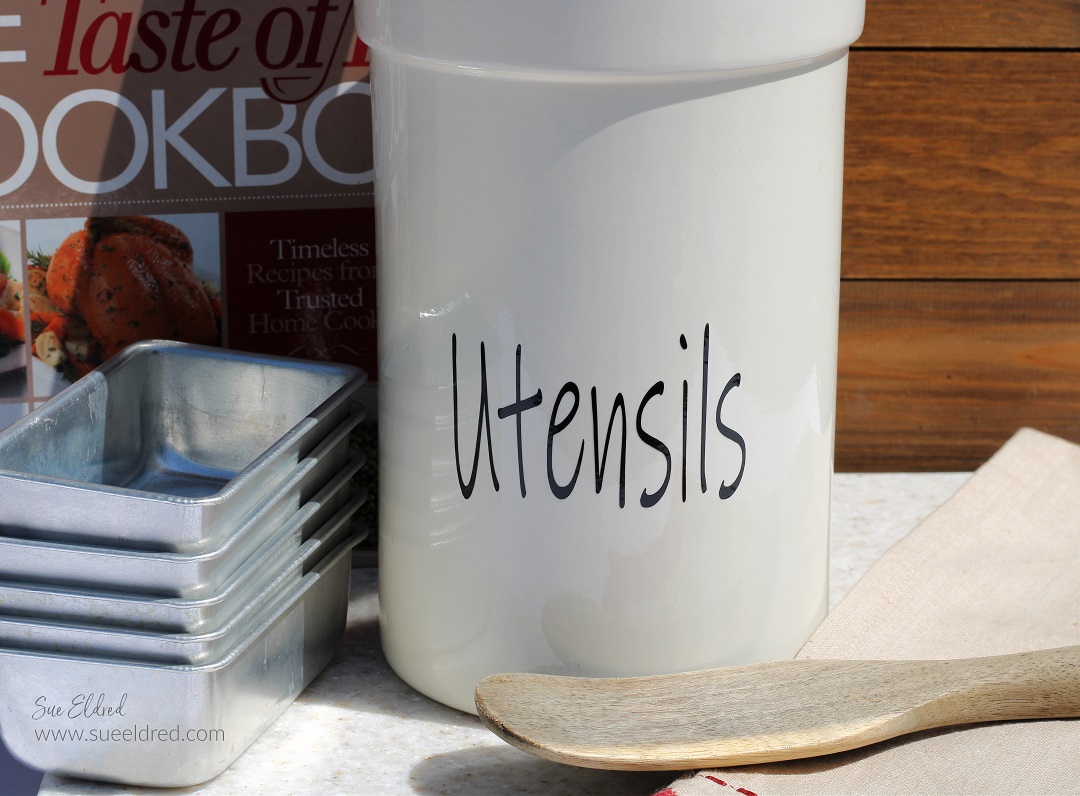
I found this canister sitting on a thrift store shelf in Wisconsin for only $1.50.

I thought, what the heck.  Not much of a gamble if it doesn’t work.

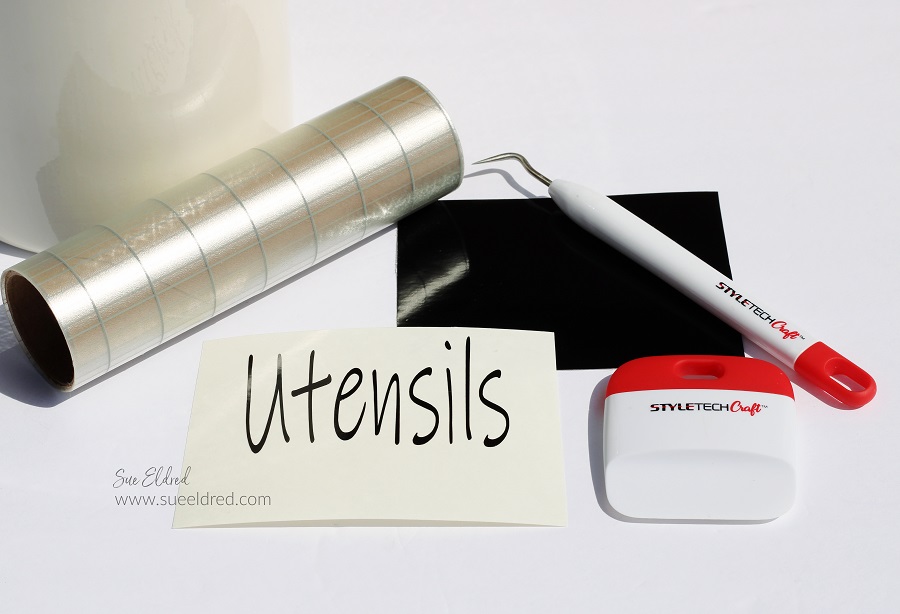
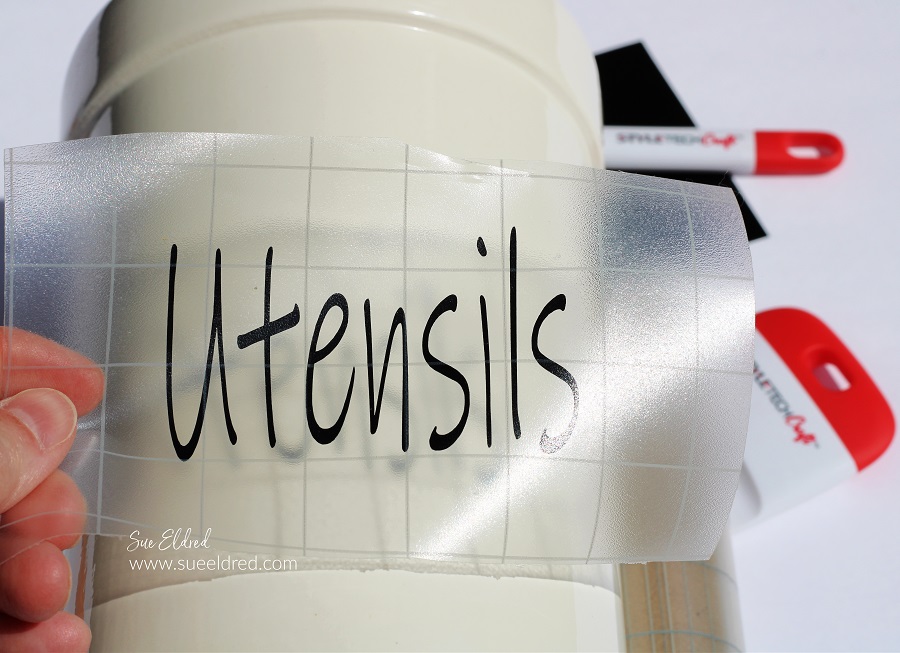
All I needed was a little bit of StyleTechCraft Black Glossy Vinyl* to make it complete.

Rae Dunn Inspired Thrift Store Makeover

I used the “ink-free” font on my Silhouette and stretched the word to make it longer,

giving it the classic Rae Dunn-inspired tall skinny handwritten font.

The word “utensils” is approx. 2″ x 3.

Materials Used:  (*affiliate links)

StyletechCraft products brought to you by ATSM Craft*

*Disclosure:  This blog uses ads and affiliate links.  If you choose to make a purchase using one of the links, I receive a small commission (at no additional cost to you) that helps offset the costs of maintaining this blog.  Thanks for your support!

Rae Dunn Inspired Thrift Store Makeover

Directions:

Rae Dunn Inspired Thrift Store Makeover

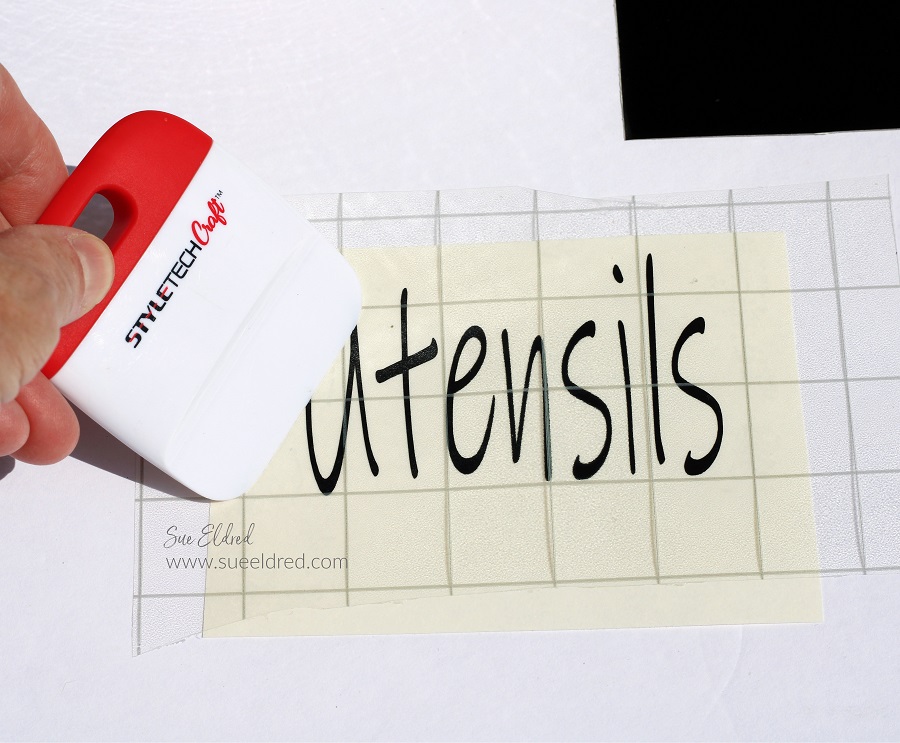
  • Remove vinyl from the white backing.
  • Use StyleTechCraft Vinyl Transfer Tape* to adhere the vinyl onto the front of the canister.
  • Gently rub the transfer paper and remove it from the canister.

Rae Dunn Inspired Thrift Store Makeover

Quick and Easy to do. (and it looks great on my counter)

Rae Dunn Inspired Thrift Store Makeover

Some of the simplest projects are the most satisfying.

“This is a sponsored post.  As a member of the StyleTechCraft Design Team I have been provided product and compensation in exchange for my creative ideas.  The views and opinions are my own.

Patriotic Banner for the 4th of July

Patriotic Banner for the 4th of July

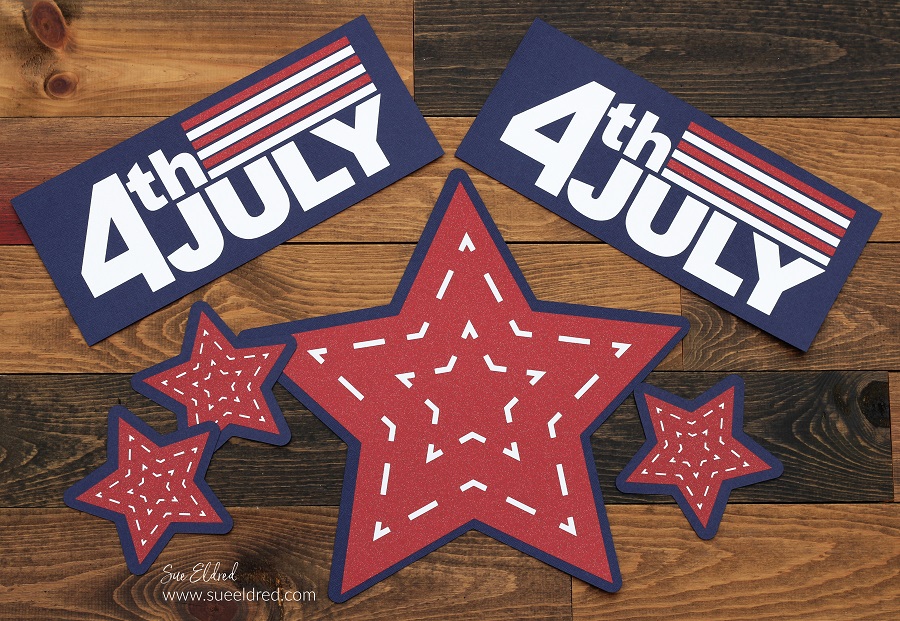
A Patriotic Red White and Blue Banner for your next 4th of July Get Together.

Is the Family getting together for the 4th?

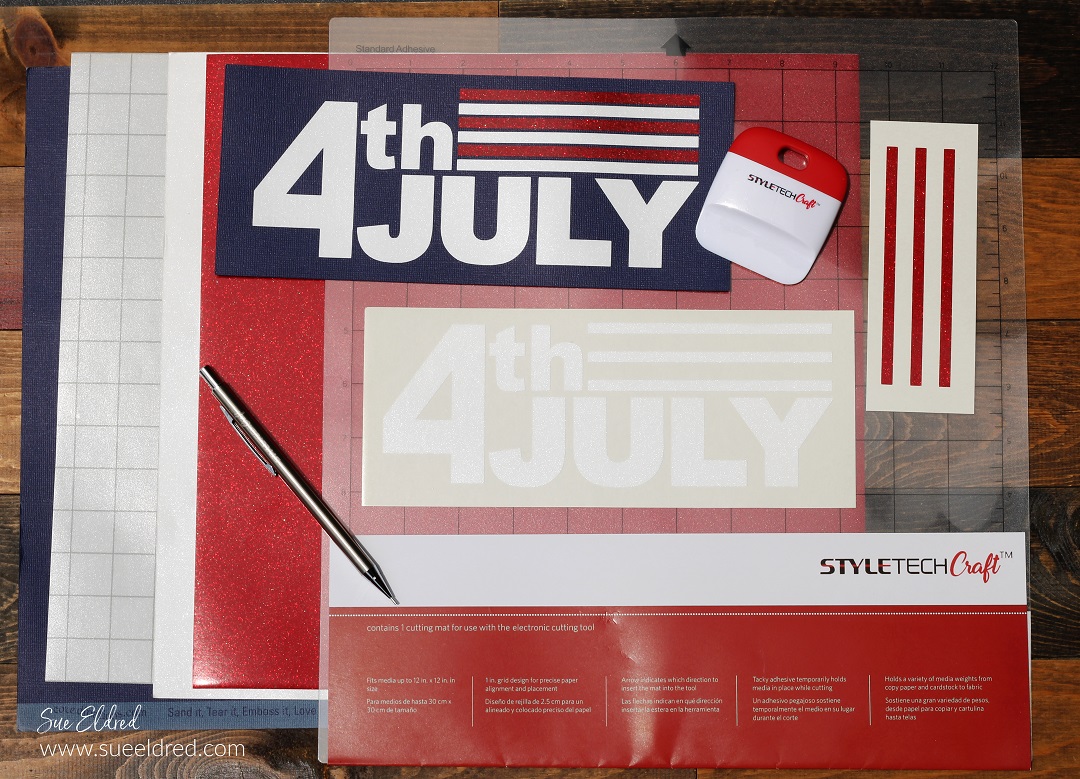
Get the party started with a simple 4th of July Banner using StyleTechCraft Red and White

Glitter Vinyl, Navy Cardstock, and a Silhouette Cameo Electronic Die Cutting Machine*.

“This is a sponsored post.  As a member of the StyleTechCraft Design Team I have been provided product and compensation in exchange for my creative ideas.  The views and opinions are my own.

Patriotic Banner for the 4th of July

Materials Used:

StyletechCraft products brought to you by ATSM Craft*

*Disclosure:  This blog uses ads and affiliate links.  If you choose to make a purchase using one of the links, I receive a small commission (at no additional cost to you) that helps offset the costs of maintaining this blog.  Thanks for your support!

Patriotic Banner for the 4th of July

  • To make the banner pieces, I used 4th of July SVG files (from the Silhouette Store) and a Silhouette Cameo Electronic Die Cutting Machine*.
  • Cut the base of your banner pieces using Navy Cardstock.
  • For extra Sparkle and Shine, cut the inside banner layers using Red and White Ultra Metallic Adhesive Vinyl from StyleTechCraft.

Patriotic Banner for the 4th of July

  • Use a hole punch to add holes in the top of the banner pieces.
  • Thread the banner pieces and plain wood beads* onto a piece of twine.

Patriotic Banner for the 4th of July

Patriotic Banner for the 4th of July

Set out the chairs and fire up the grill, and you’re on your way to a great 4th of July Celebration.

A Mother’s Day Plate for Mom.

A Mother's Day Plate for Mom

A quick and easy Mother’s Day project with StyleTechCraft Adhesive Vinyl.

Remember when we were in grade school, and we painted clay pots for Mother’s Day?

Mom always said the best gifts were from the heart.

So, this year, show Mom just how much you love her with an upgraded handmade gift.

Quick and Easy Mother's Day Plate for Mom-Sue's Creative Workshop www.sueeldred.com 3181

This project can be made by anyone with an electronic die-cutting machine.  

I picked up the red plate at Dollar Tree* to match my kitchen.  (This one’s for me.)

With the vinyl supplies that I already had on hand, I’ve invested $1.25 so far.

Here’s what I used: 

*Disclosure:  This blog uses ads and affiliate links.  If you choose to make a purchase using one of the links, I receive a small commission (at no additional cost to you) that helps offset the costs of maintaining this blog.  Thanks for your support!
Mother's Day Plate for Mom

  • To begin, wipe the surface of the plate with the alcohol to remove any oils.

Mother's Day Plate for Mom

StyletechCraft products brought to you by ATSM Craft*

Mother's Day Plate for Mom

Check out this New Weeding Tool From StyleTechCraft*.

It looks like a retractable pencil, but with a nice pointy end.

It is so easy to use.  A real game changer when it comes to weeding vinyl.

Mother's Day Plate for Mom

  • Lay the transfer paper over the vinyl image.
  • Rub over the transfer paper with a vinyl scraper tool.
  • Remove vinyl from the white backing.

Mother's Day Plate for Mom

  • Use StyleTechCraft Vinyl Transfer Tape* to adhere the vinyl onto the front of the plate.
  • Gently rub the transfer paper and remove it from the plate.
  • It is best to Hand Wash Plate Only.

Mother's Day Plate for Mom

A last minute, quick and easy Mother’s Day Plate for Mom.

If you’re that overachiever kid, you can add a plate hanger or stand.

“This is a sponsored post.  As a member of the StyleTechCraft Design Team I have been provided product and compensation in exchange for my creative ideas.  The views and opinions are my own.

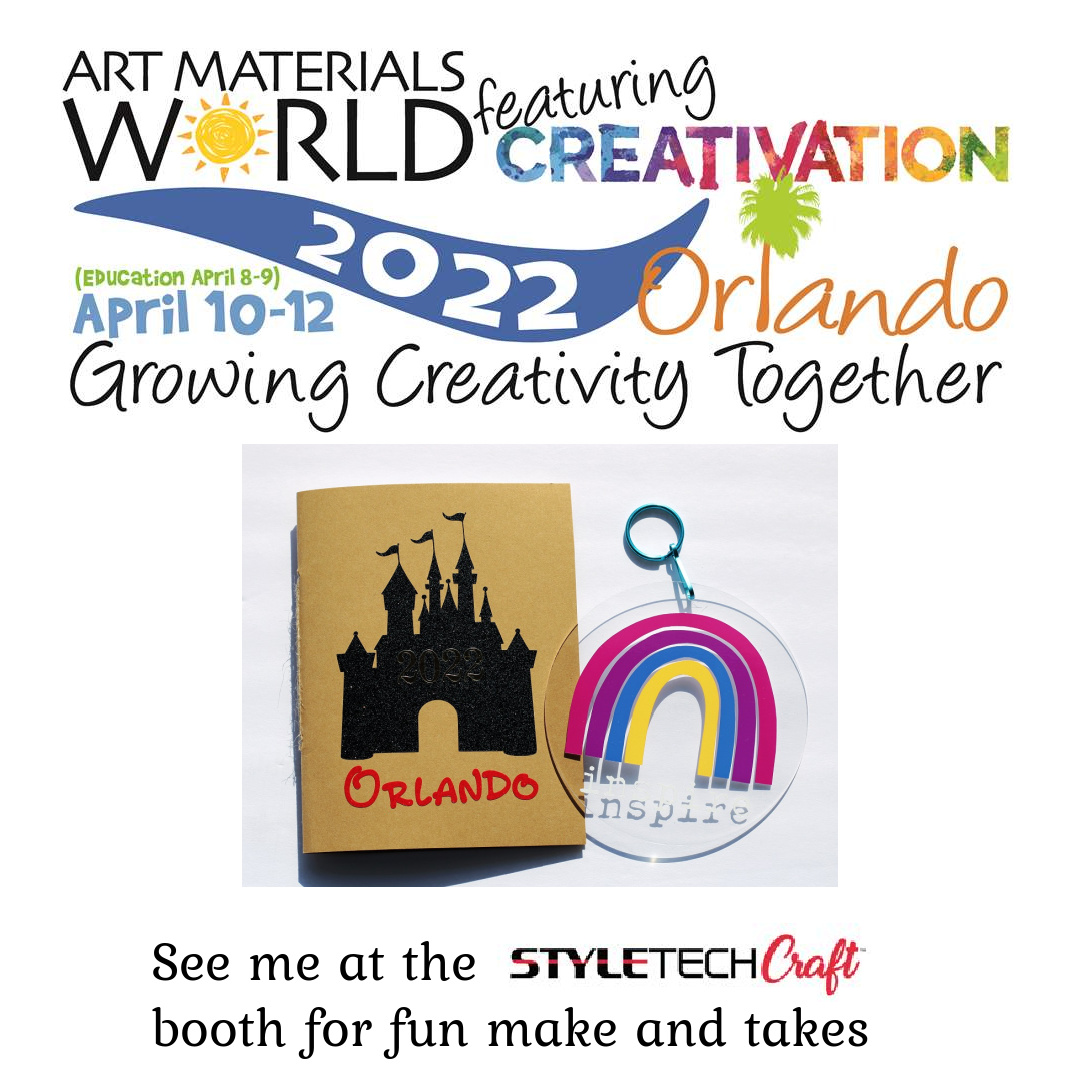
My Namta 2022 Experience in Orlando

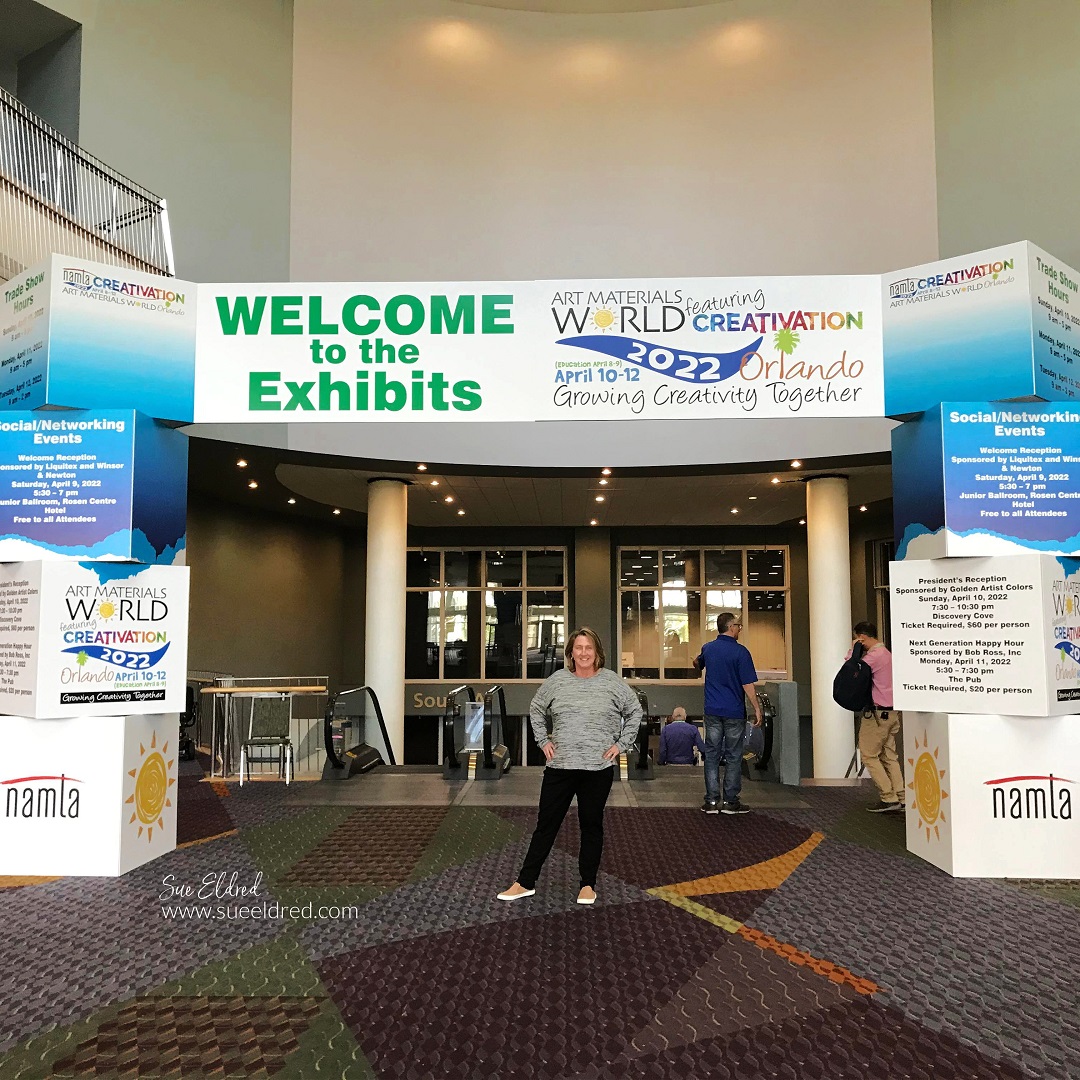
Namta 2022 Orlando

It’s been a couple of weeks since the start of the Namta Show in Orlando,

and I wanted to share my experience and the few pictures I took

while everything was still fresh in my mind.

Namta 2022 Orlando

This particular show was kind of a new one for everyone.

Last year the Creativation Show merged with the National Art Materials Trade Show

for one awesome show in Orlando, Florida.  With travel being restricted in some areas,

the show was a little smaller than normal.  That didn’t seem to bother attendees, because

everyone was excited to be together in person.  Besides, being in sunny Florida was a plus.

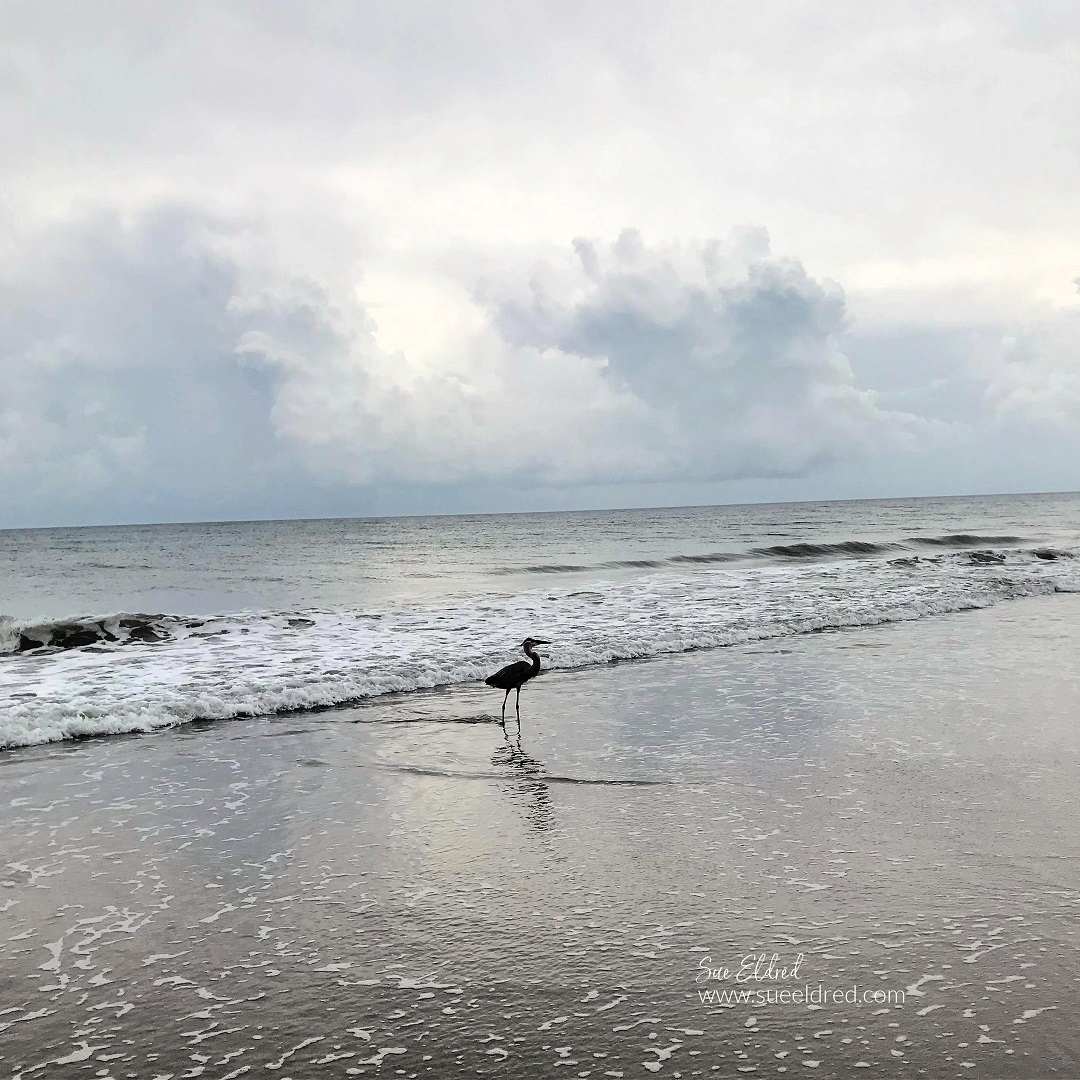
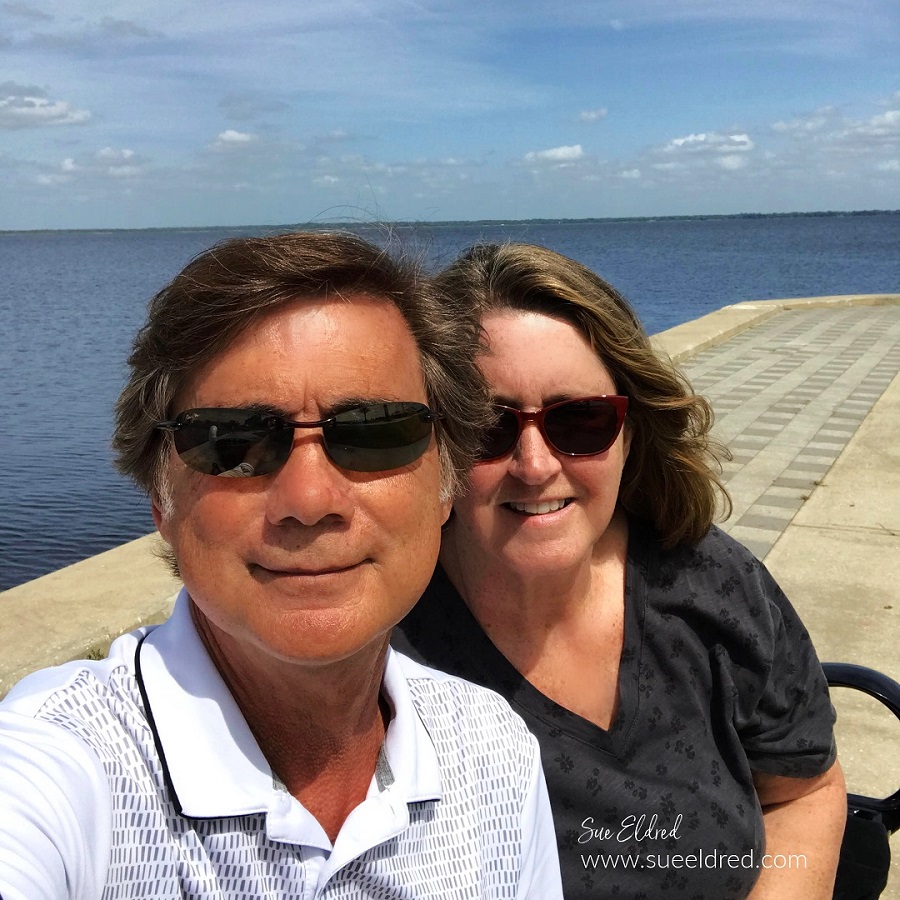
Melbourne Beach, Florida

Some people took an extra day or two and visited Disney

or one of the other Orlando attractions.  I brought my hubby with me,

and we flew in a few days early and went to Melbourne Beach.

The week we were in Florida was a milestone birthday for my husband.

We (He) didn’t think it was fair for me to be in Florida without him on his birthday.

We soaked up a little Vitamin Sea, and we experienced our first Beach Wedding

from the comforts of our beach chairs.  I teared up; I always do.  (Too bad we weren’t invited.)

Namta 2022 Orlando

The Namta Show was a 3-day trade show. 

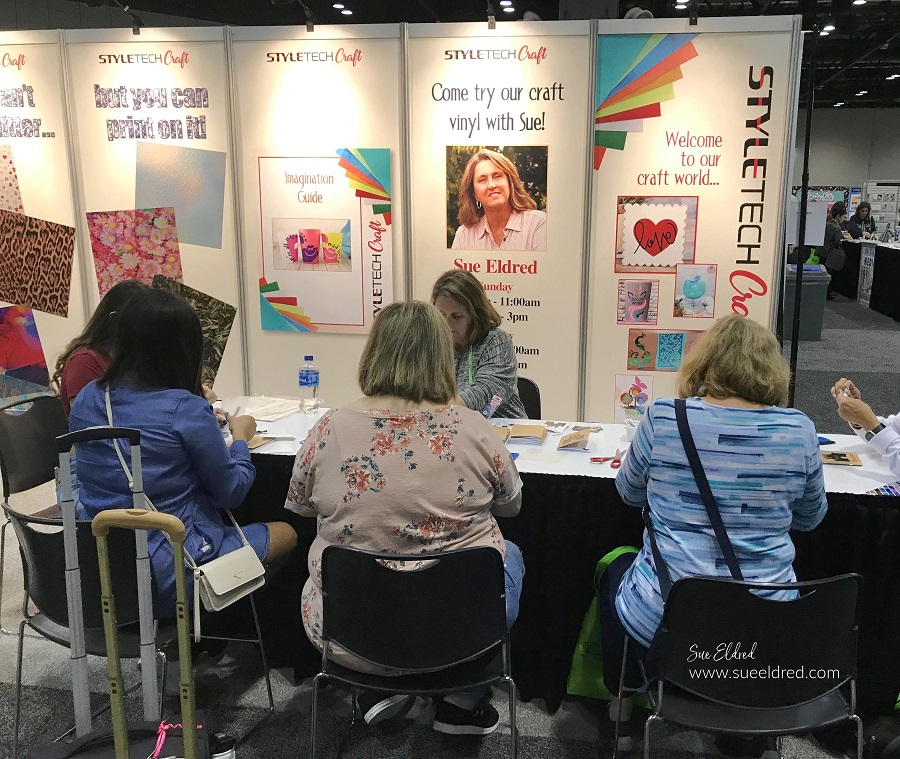
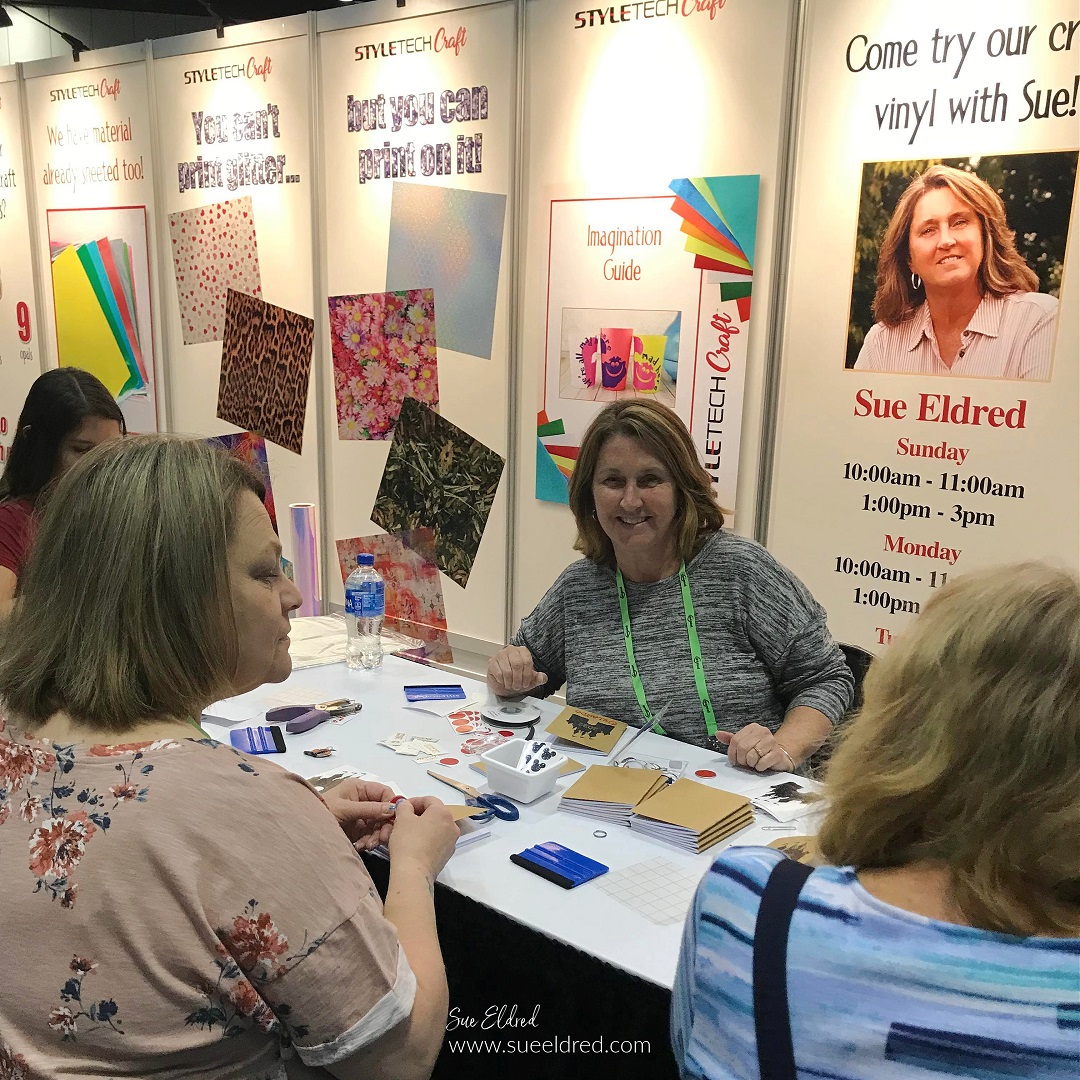
I worked each day in the StyleTechCraft booth doing Make and Takes while my husband golfed.

(A Win/Win in our books!)

Namta 2022 Orlando

Each day was a new project using StyletechCraft* adhesive vinyl.

Would you believe I get paid to play?  (I’m so lucky to have such a great job!)

As always, I talk too much and forget to take pictures.

Being at the show with all my industry friends is like a big family reunion.

And because of the pandemic, we haven’t seen each other in a couple of years.


Styletech Craft products brought to you by ATSM Craft

*Disclosure:  This blog uses ads and affiliate links.  If you choose to make a purchase using one of the links, I receive a small commission (at no additional cost to you) that helps offset the costs of maintaining this blog.  Thanks for your support!

Namta 2022 Orlando

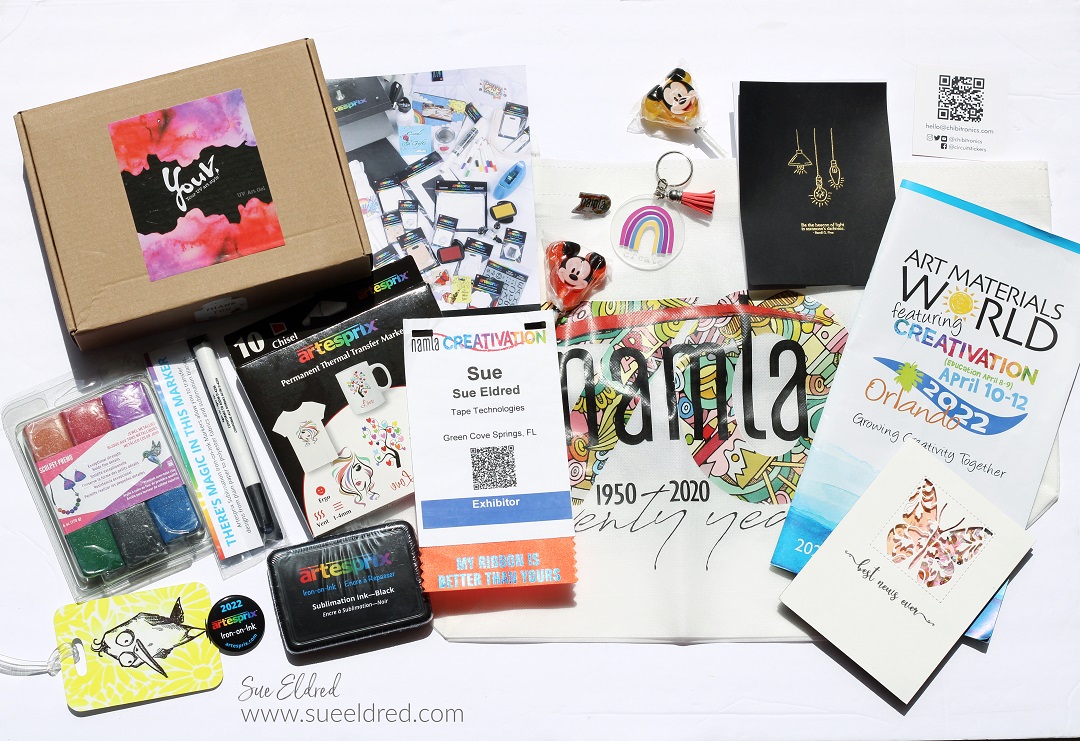
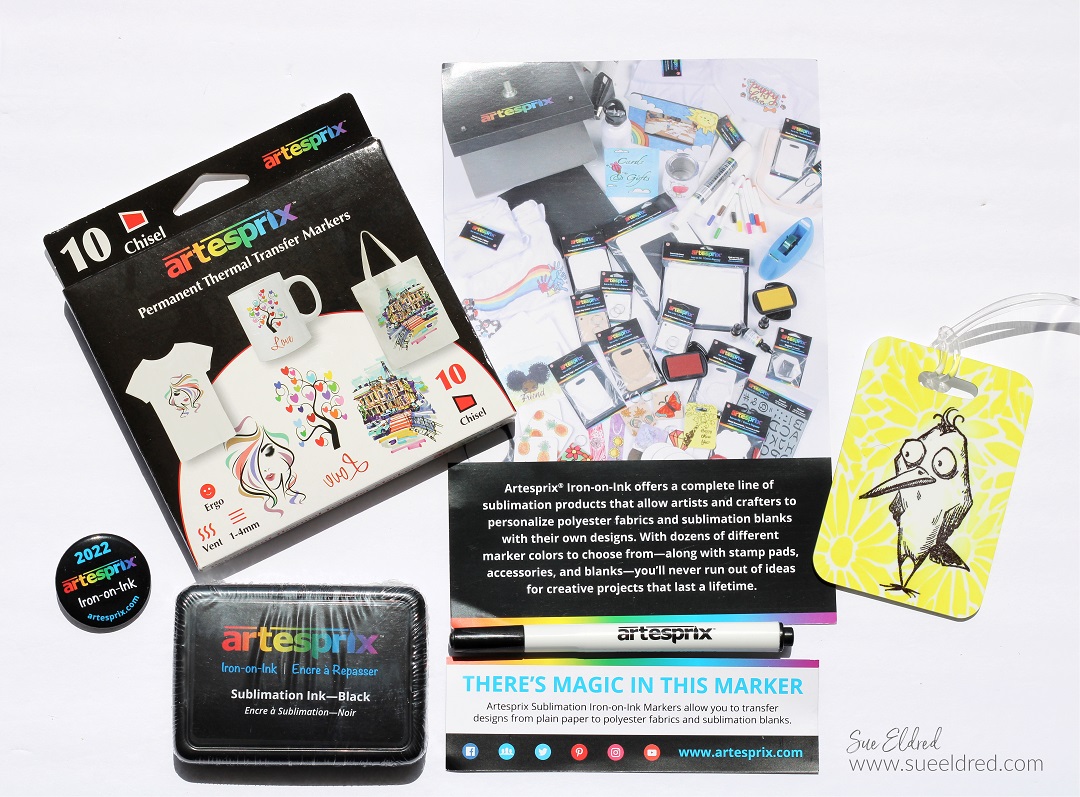
Across the aisle from the StyleTechCraft Booth was the Artesprix Booth.

They were demoing their sublimation markers* and inkpads*.

I was excited to be able to watch a demo as this is new to me.

They were so generous; they gave me markers and inks to try out.

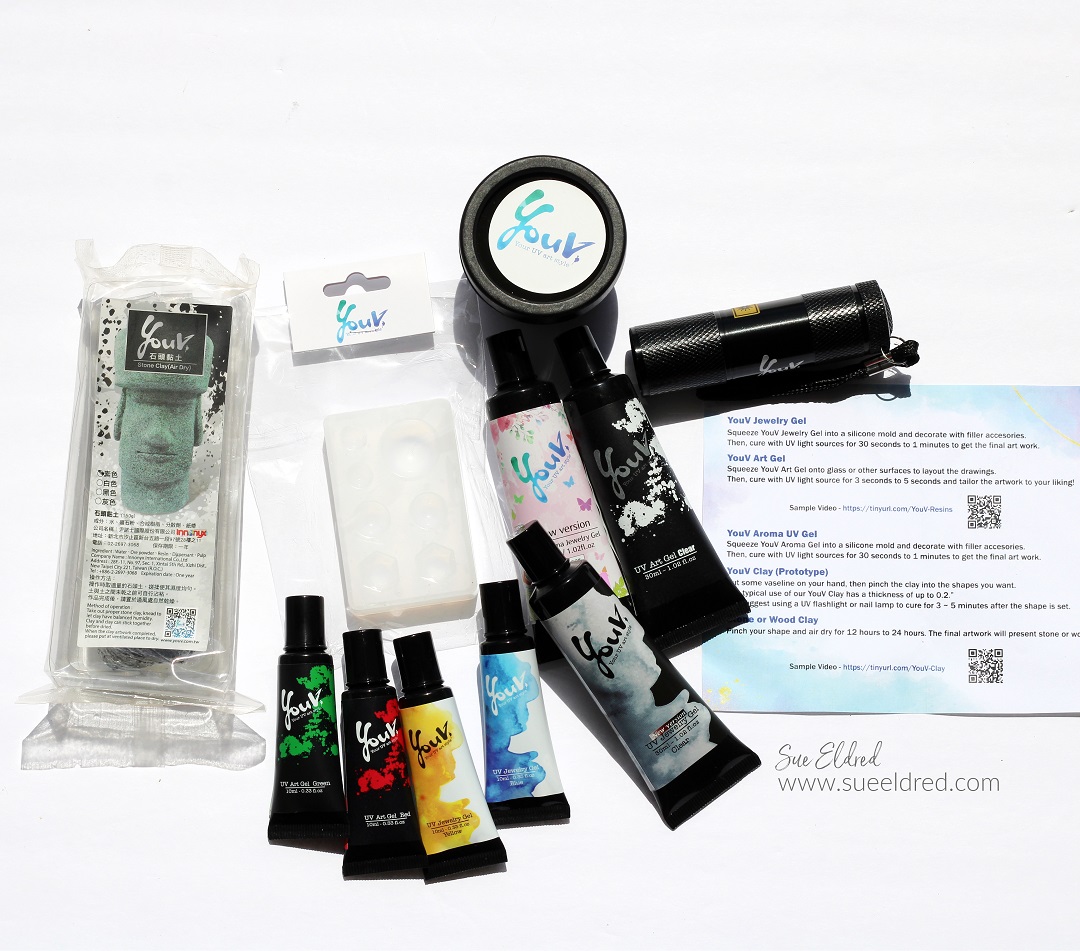
Namta 2022 Orlando-YouV-Sue's Creative Workshop www.sueeldred.com 3047

A new booth at the show this year was the YouV Art booth.

They have different types of resin that doesn’t need to be mixed.

And it cures with a UV light in just a matter of minutes.

They made it so easy to use.  I can’t wait to play with this.

I see a new video in my future.

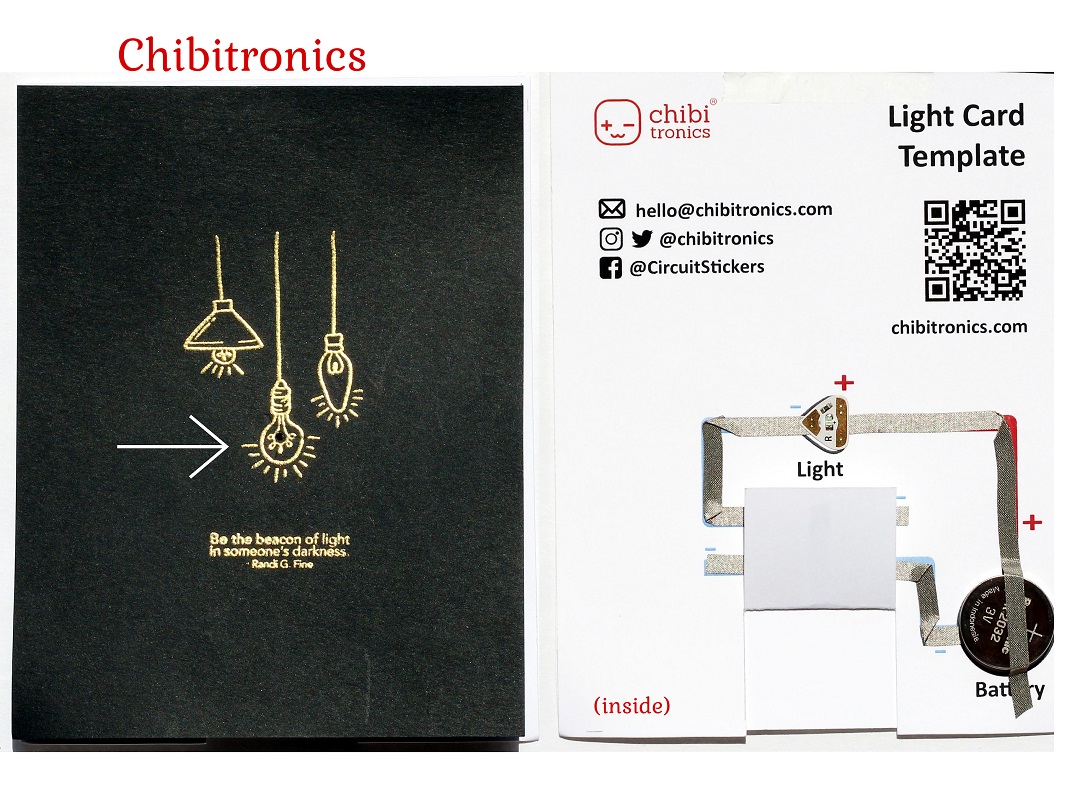
Namta 2022-Orlando-Chibitronics-Sue's Creative Workshop www.sueeldred.com

I thought the Chibitronics booth was so cool,

even though I’m not a technical person.

I learned how to make an easy card using simple circuitry.

The lightbulb on the front the card lights up.  So many possibilities.

It’s very educational.  I can see my grandsons loving making light up cards.

Hmmm….maybe another video.

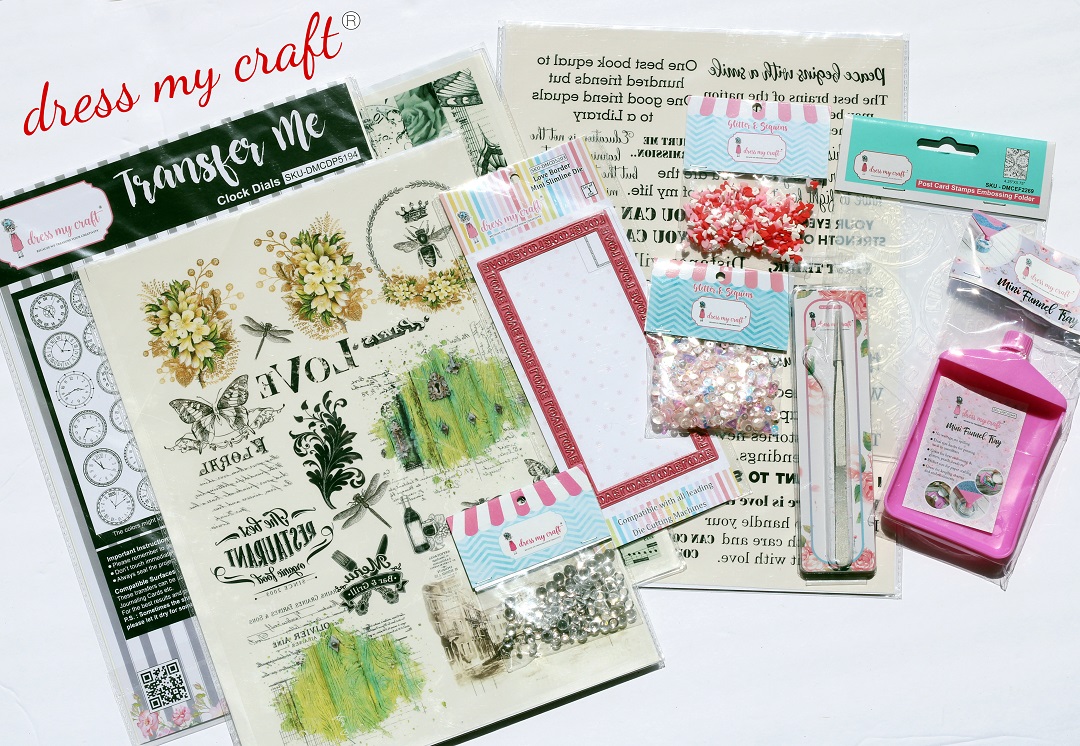
Namta 2022-Orlando-Dress My Crafts-Sue's Creative Workshop www.sueeldred.com 3059

Several companies were not able to attend in person this year

and they gave several designers new products to try out.

Dress My Crafts was one of those companies that spoiled us with samples.

They even gave us extra to give away. Watch for a GIVEAWAY later this week.

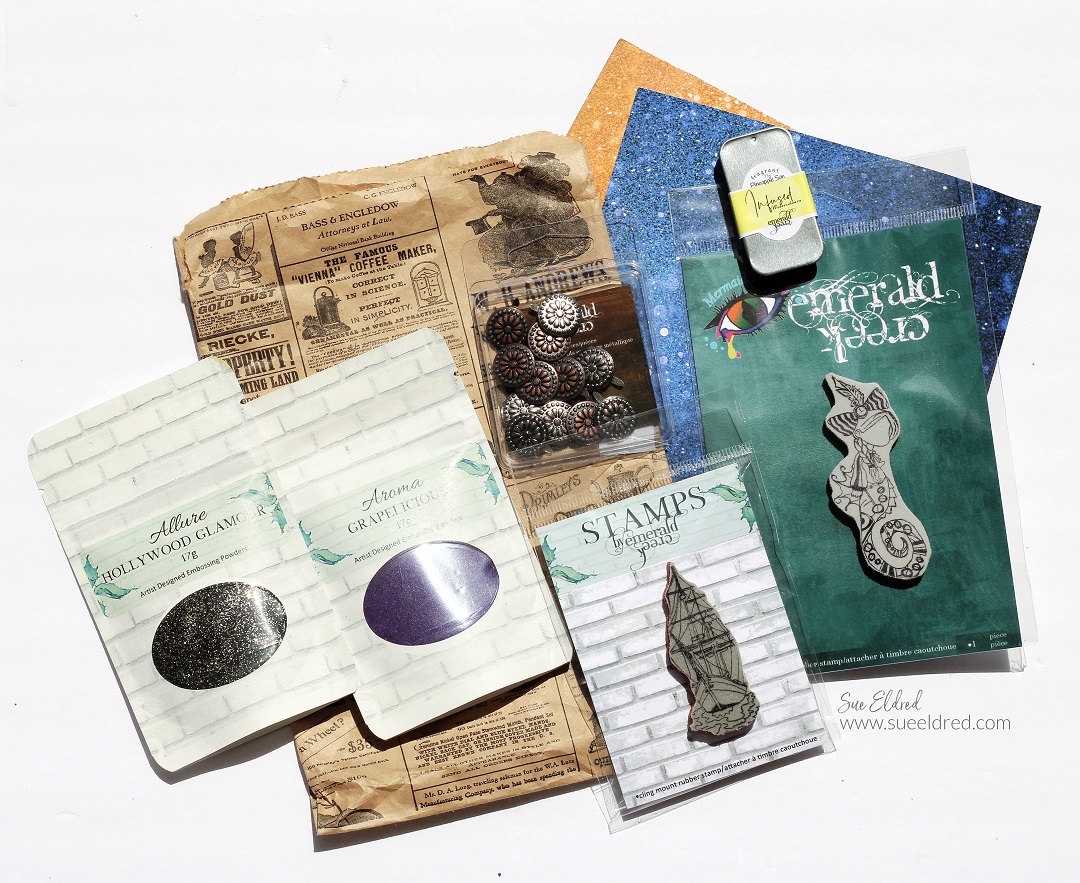
Namta 2022-Orlando-Emerald Creek-Sue's Creative Workshop www.sueeldred.com 3086

I received some embossing powders and stamps from Emerald Creek.

I have a few ideas for those embossing powders.

With names like Hollywood Glamour and Grapelicious, how can they not be great.

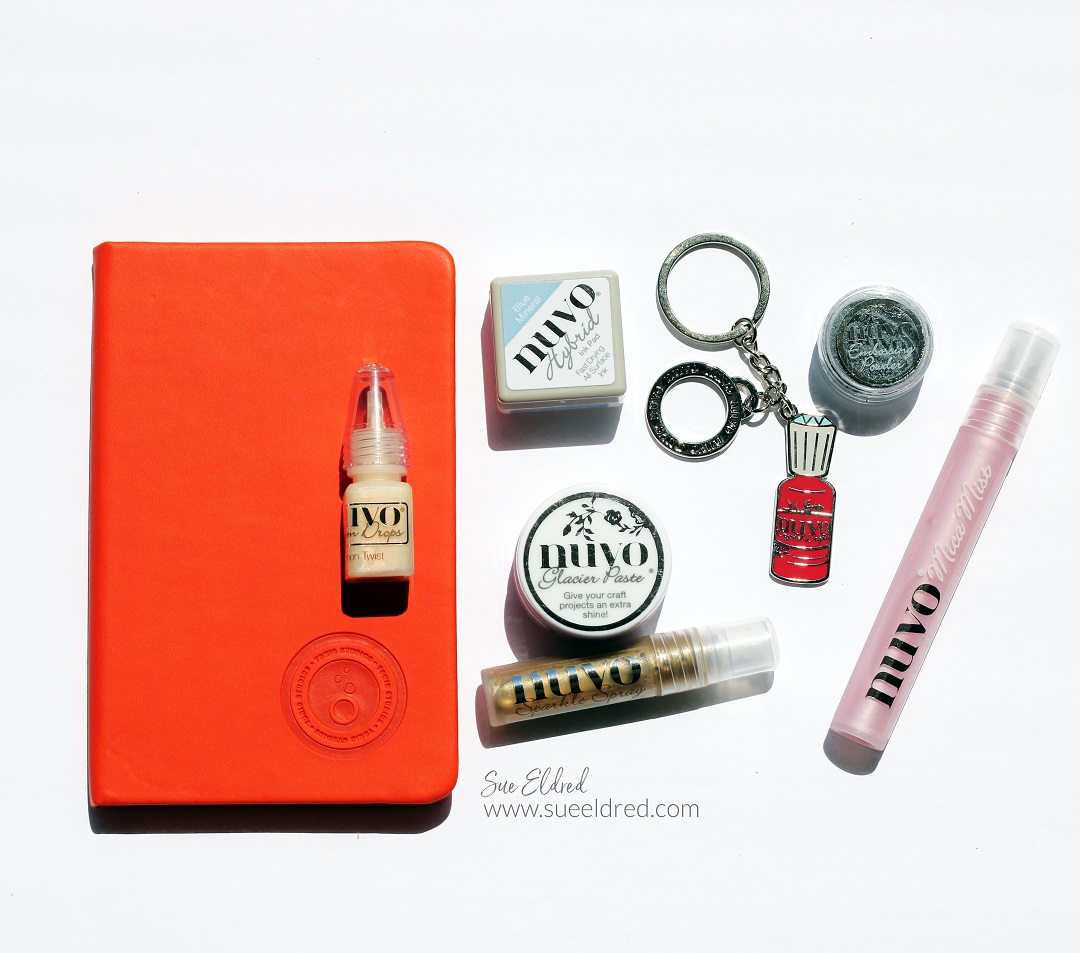
Namta 2022 Orlando

I also received New Nuvo Products from Tonic Studios,

inks, mists, embossing powder, pearls and glacier paste.

All great products for paper crafting and cardmaking.

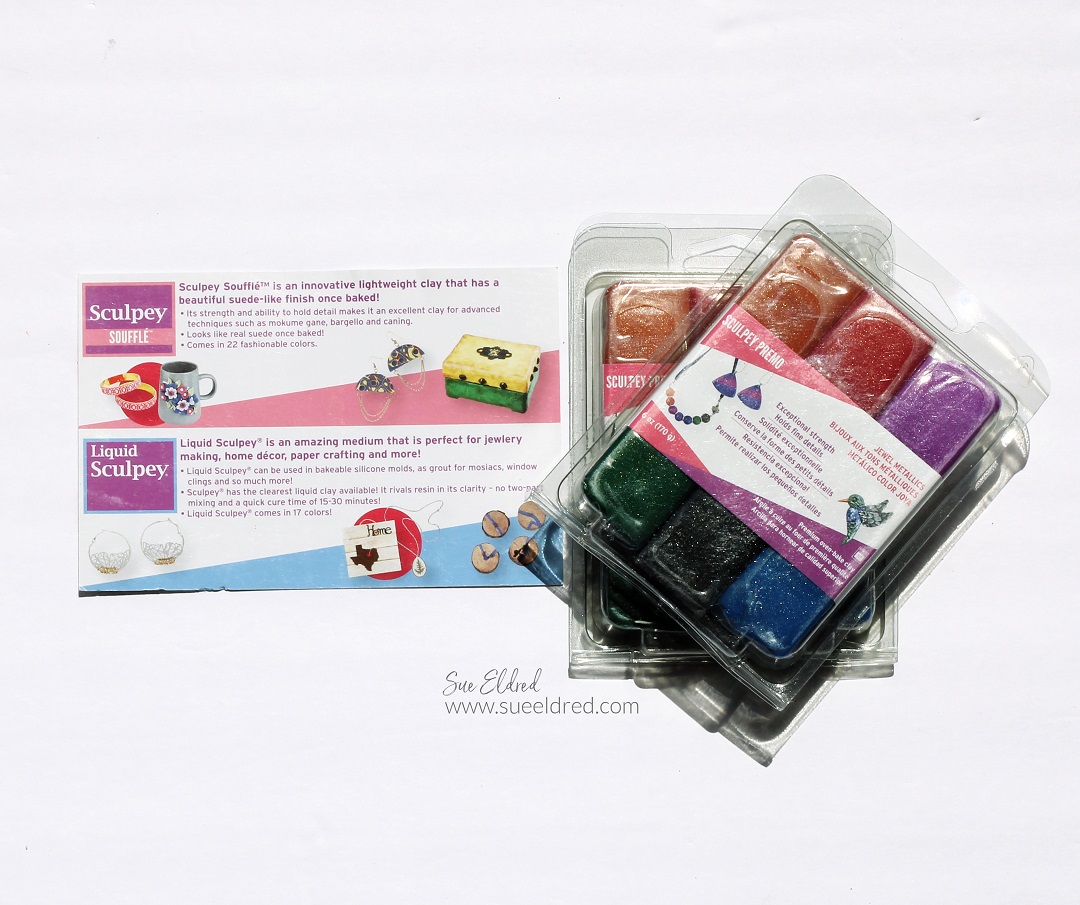
Namta 2022 Orlando

I’ll admit, it’s been a while since I’ve played with Sculpey Clay*.  

Thanks to a generous gift from Sculpey,

I think a playdate is in order with my boys and this fun clay.

Namta 2022 Orlando

The week included a great company dinner at Paddlefish in Disney Springs.

And a relaxing last day in Historic downtown Sanford enjoying some good Greek food.

I enjoyed seeing so many good friends, making a few new ones

and creating new connections.

All in all, the Namta Show was a very good experience.

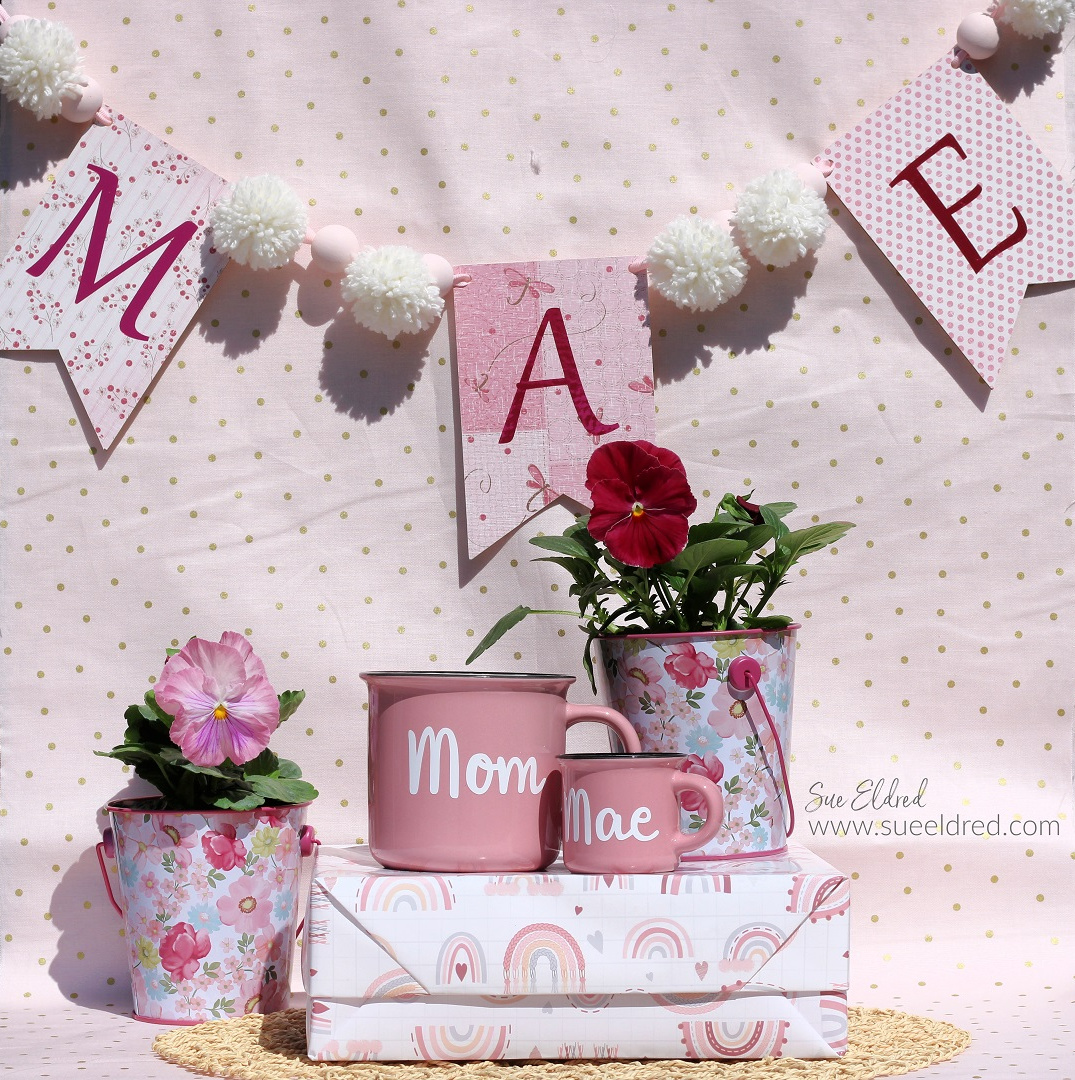
Mae’s Baby Shower Banner

Mae's Baby Shower Banner

Mae’s Baby Shower Banner

This past weekend we held a baby shower for my daughter

and soon-to-be granddaughter Mae.

The theme was April Showers Brings Mae Flowers.

My daughter gave me full permission to do “my thing.”

Everything was pink and flowery. (I had fun.)

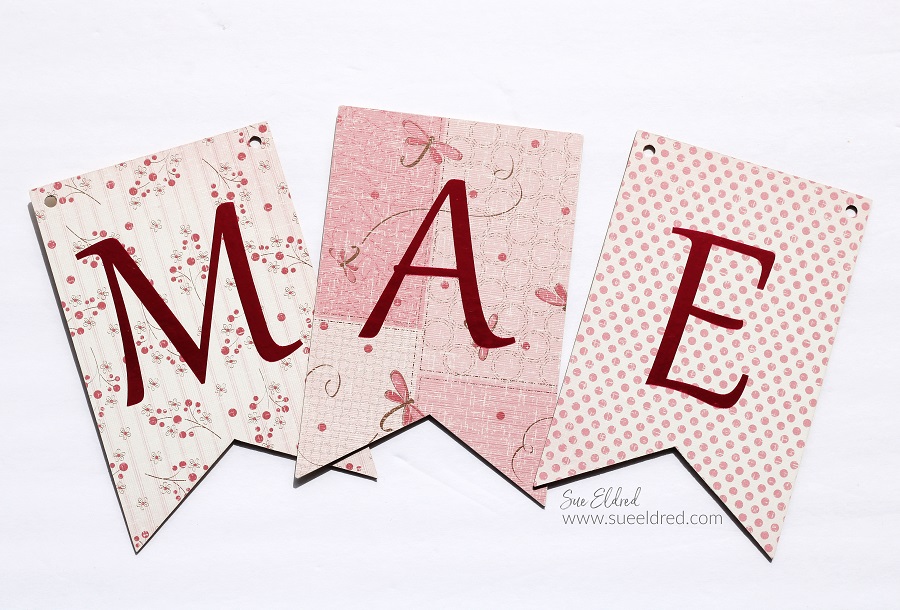
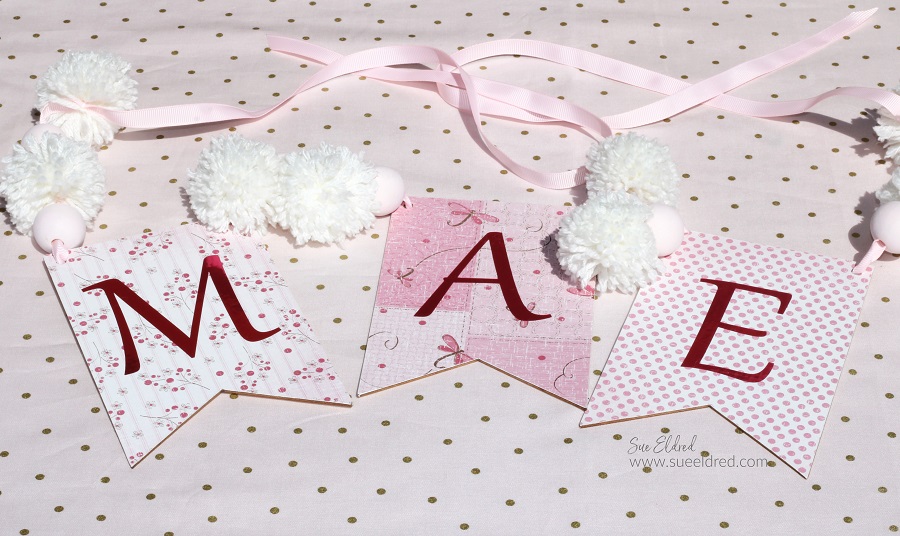
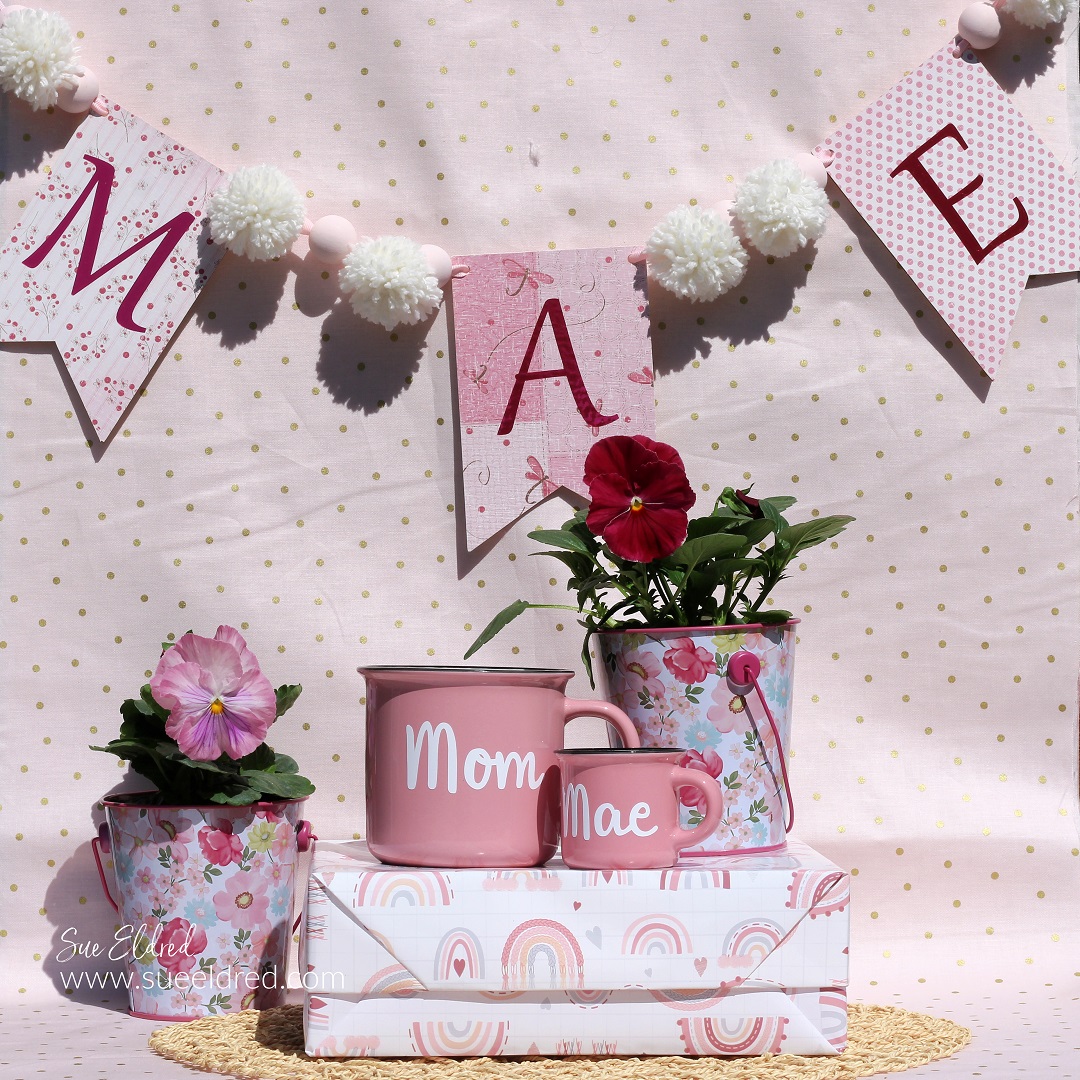
One of the decorations that I made was a banner with my granddaughter’s name.

It was a simple project that we used along with a few balloons and giant rosettes

to create a place to take photos.

Mae's Baby Shower Banner

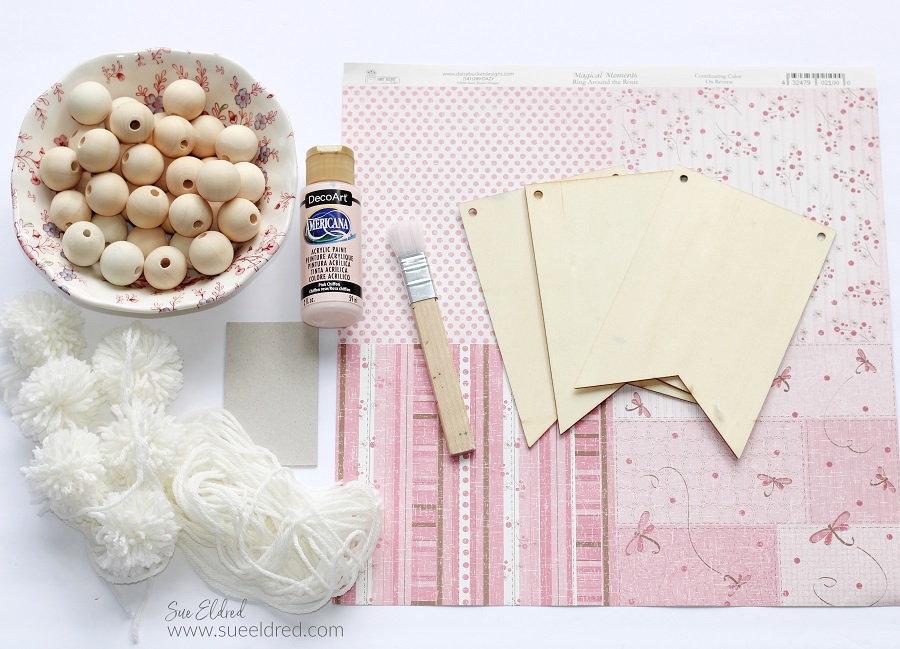
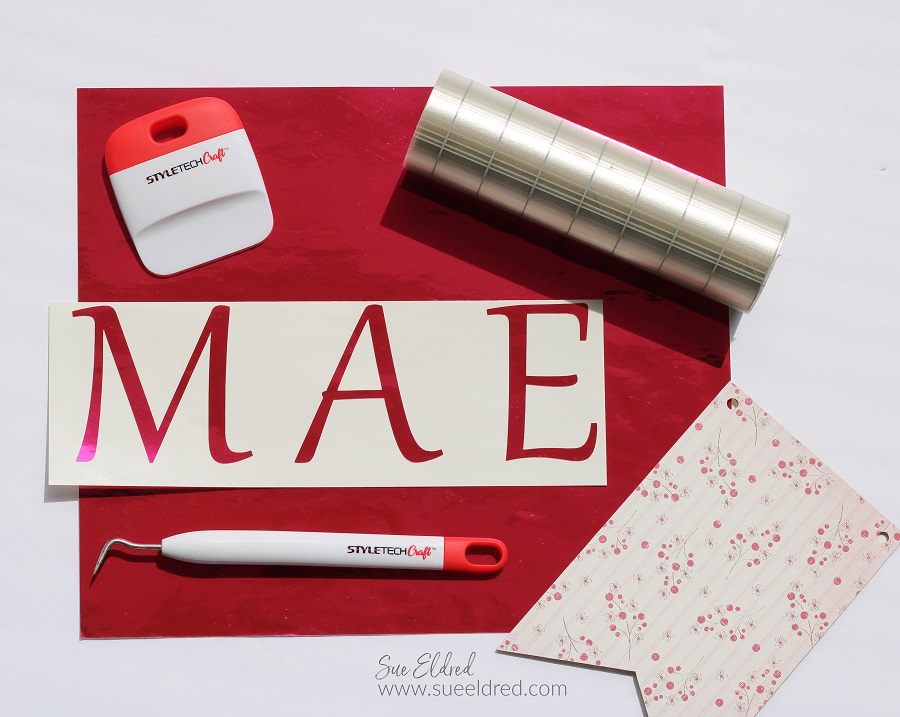
If you’re interested in making a banner for your next party here’s what I used: 

*Disclosure:  This blog uses ads and affiliate links.  If you choose to make a purchase using one of the links, I receive a small commission (at no additional cost to you) that helps offset the costs of maintaining this blog.  Thanks for your support!

Mae's Baby Shower Banner

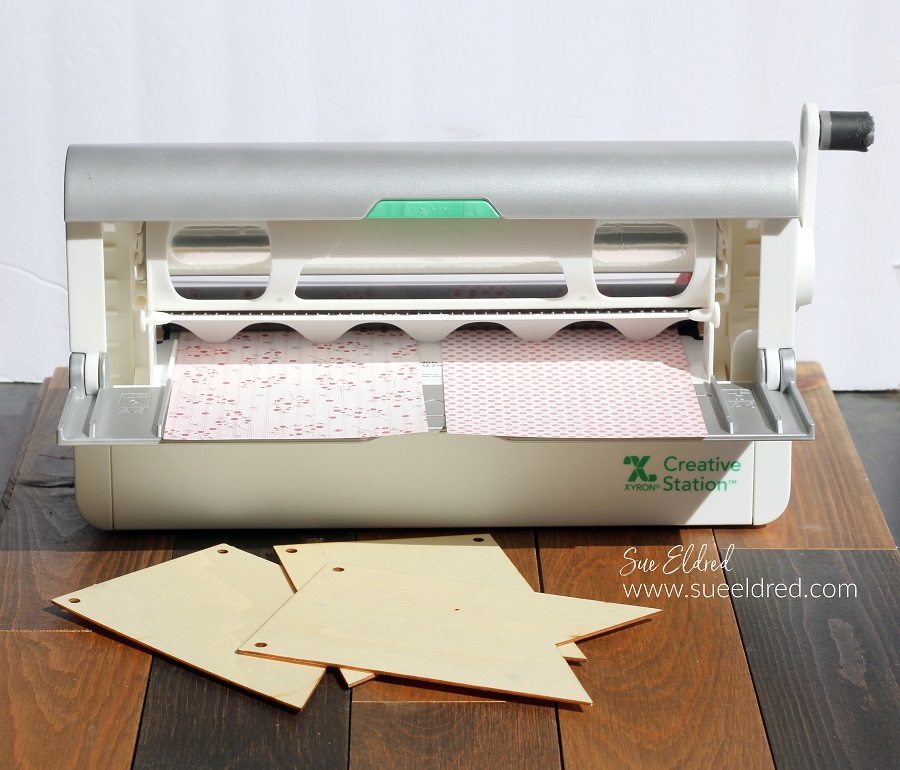
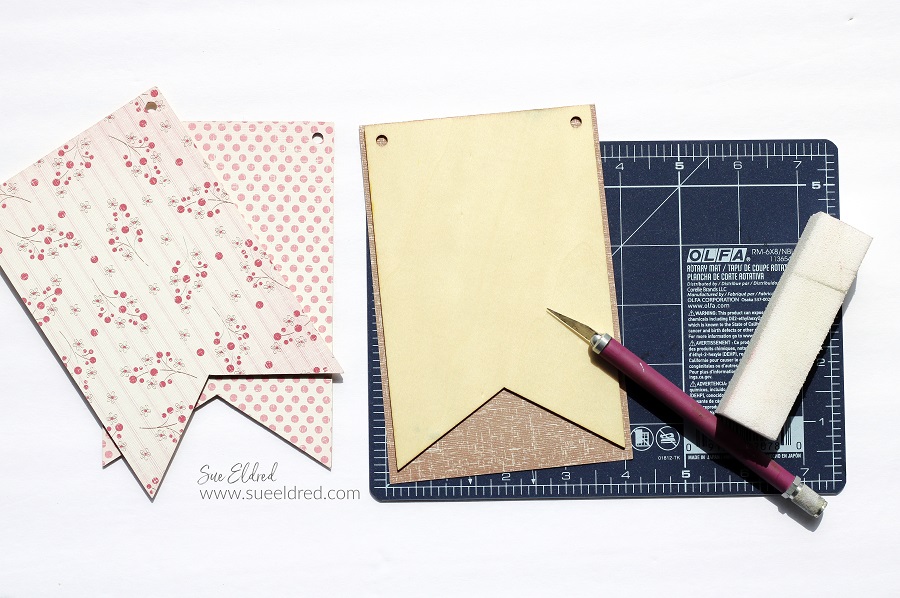
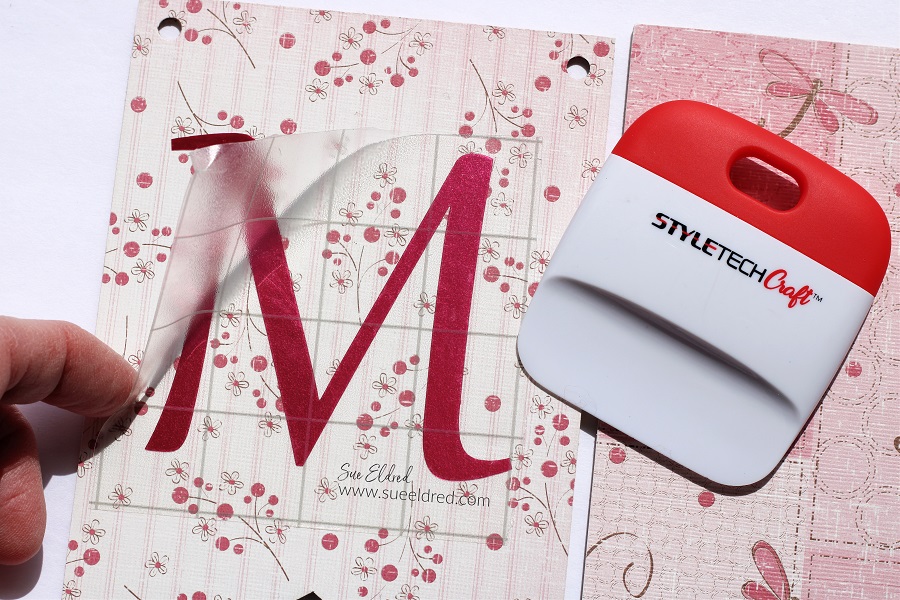
  • Cut the scrapbook paper slightly larger than the wood banner pieces.
  • Place the scrapbook paper design side on the Xyron Creative Station®*
  • Turn the handle of the Creative Station to run the paper through.  As it runs through, it adds complete adhesive covering on the underneath side of the paper.

Mae's Baby Shower Banner

Mae's Baby Shower Banner

Mae's Baby Shower Banner

Mae's Baby Shower Banner

I wanted to keep the banner pieces simple. 

But you could add all kinds of flowers and embellishments to make it special.

Mae's Baby Shower Banner

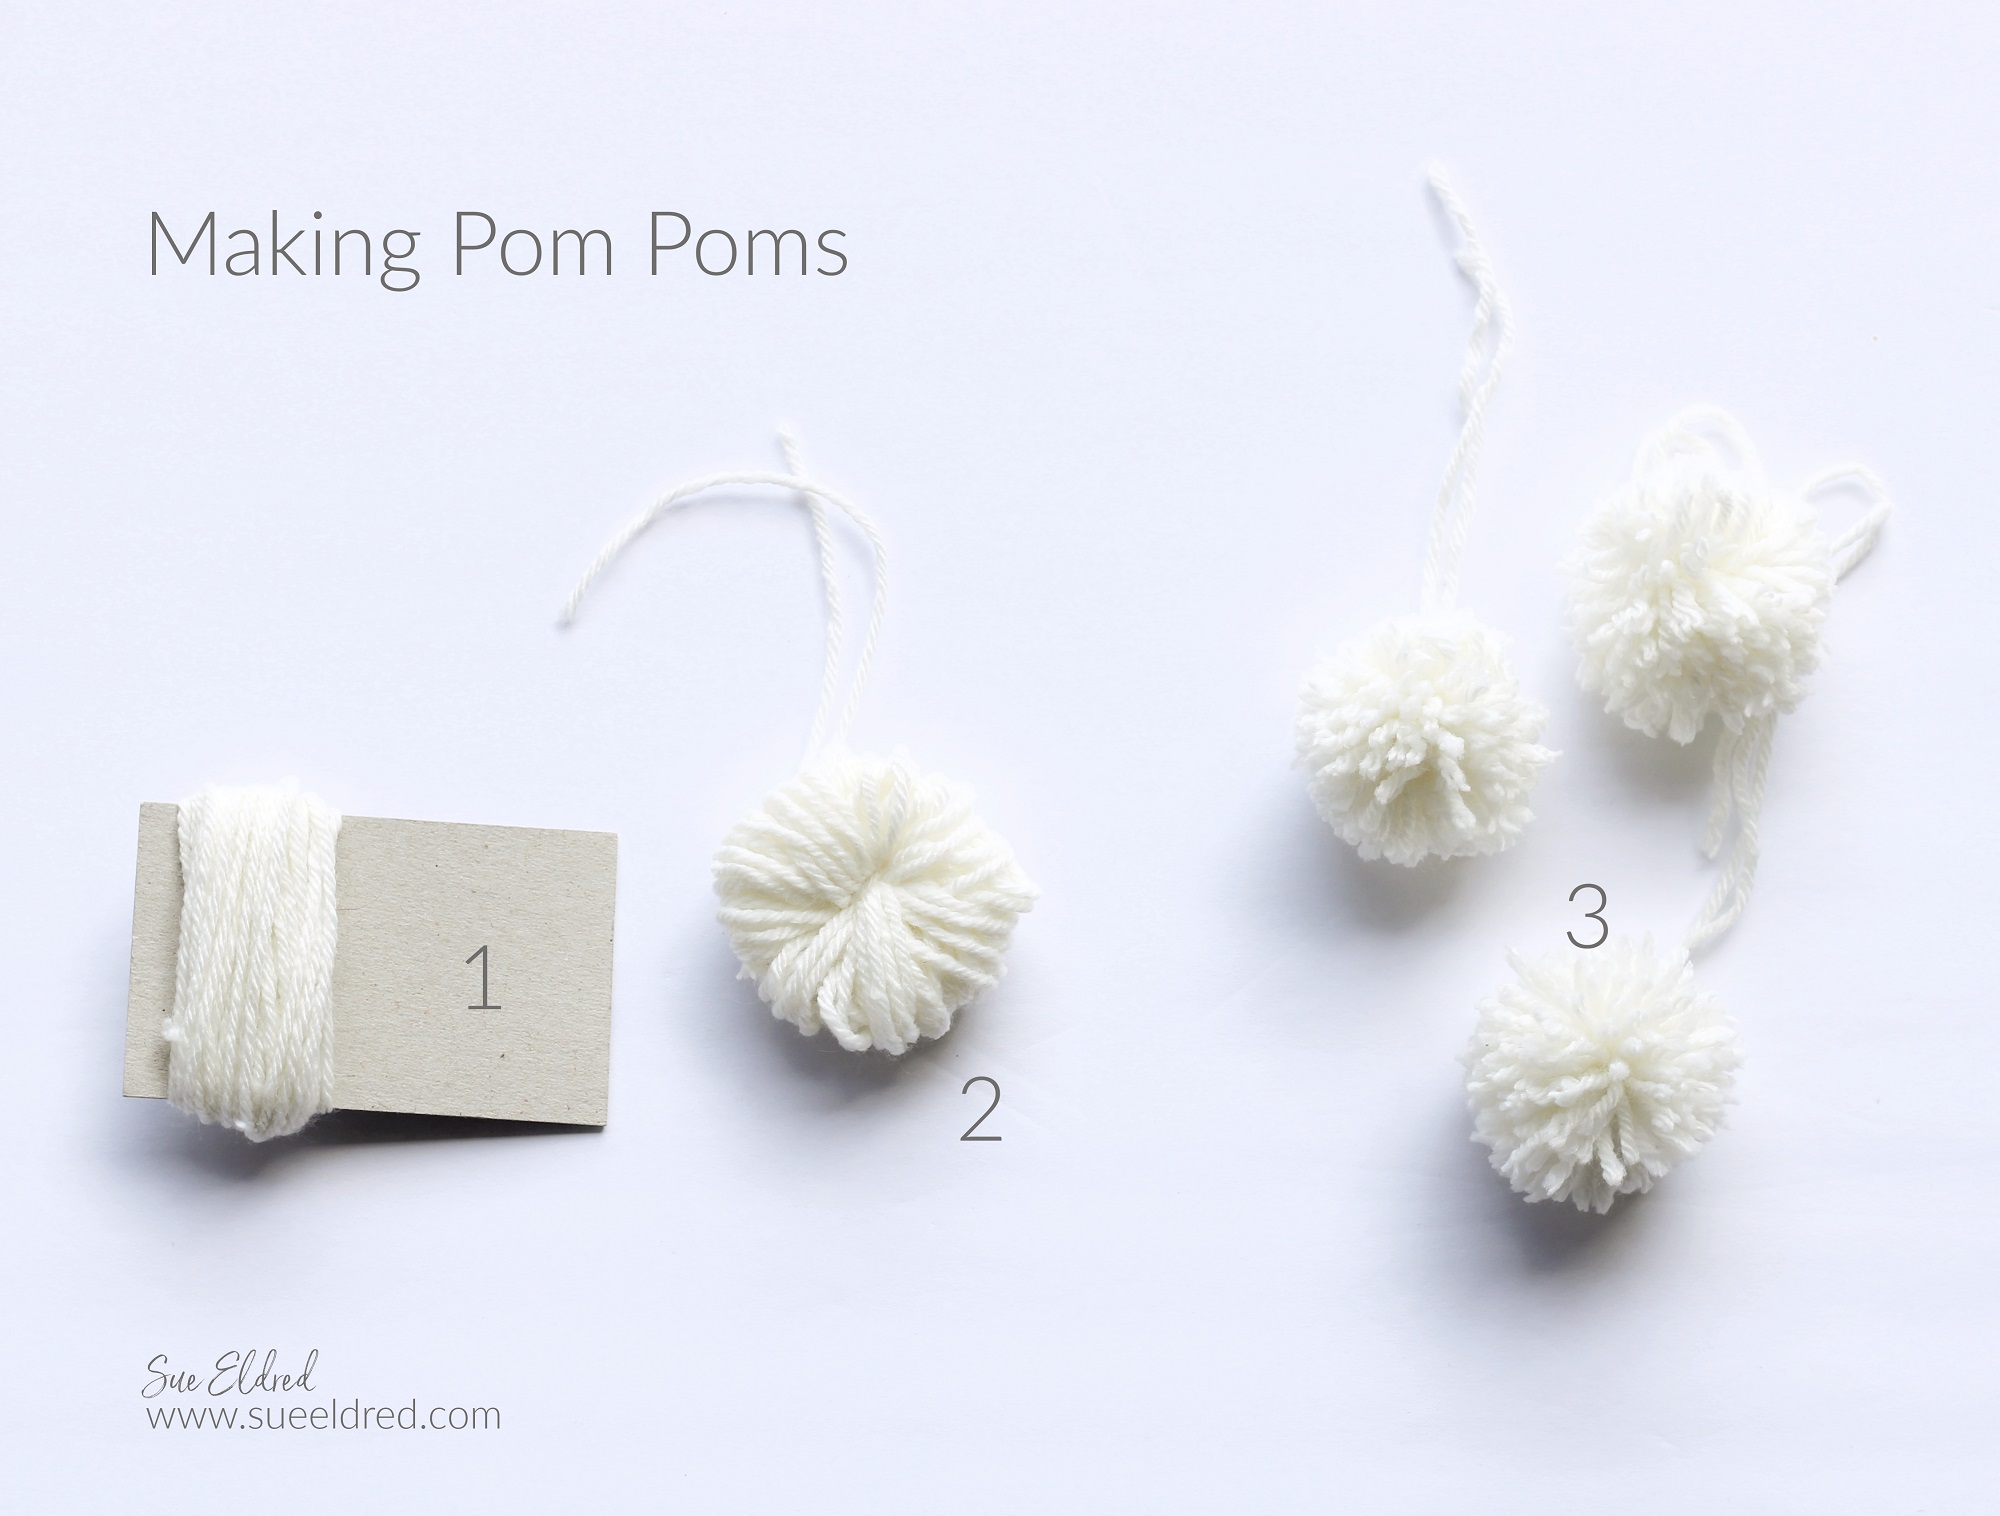
How to make small pom-poms:

  1. Cut a small piece of matboard or cardboard approx. 2 inches. Loosely wrap the yarn around the matboard 50 times.
  2. Slide the wrapped yarn off the matboard and tightly tie the middle of the loops with a second piece of yarn.
  3. Cut all the loops with a pair of scissors. (Leave the second piece of yarn long.) Give the pom-pom a shake. Then the fun part, give the pom-pom a haircut, trimming all the ends the same size.

Mae's Baby Shower Banner

  • I added the banner pieces and wood beads onto a long piece of pink ribbon.
  • I spread the banner pieces to make room and tied the pom-poms directly onto the ribbon. Trim the long strings of the pom-poms.

Mae's Baby Shower Banner

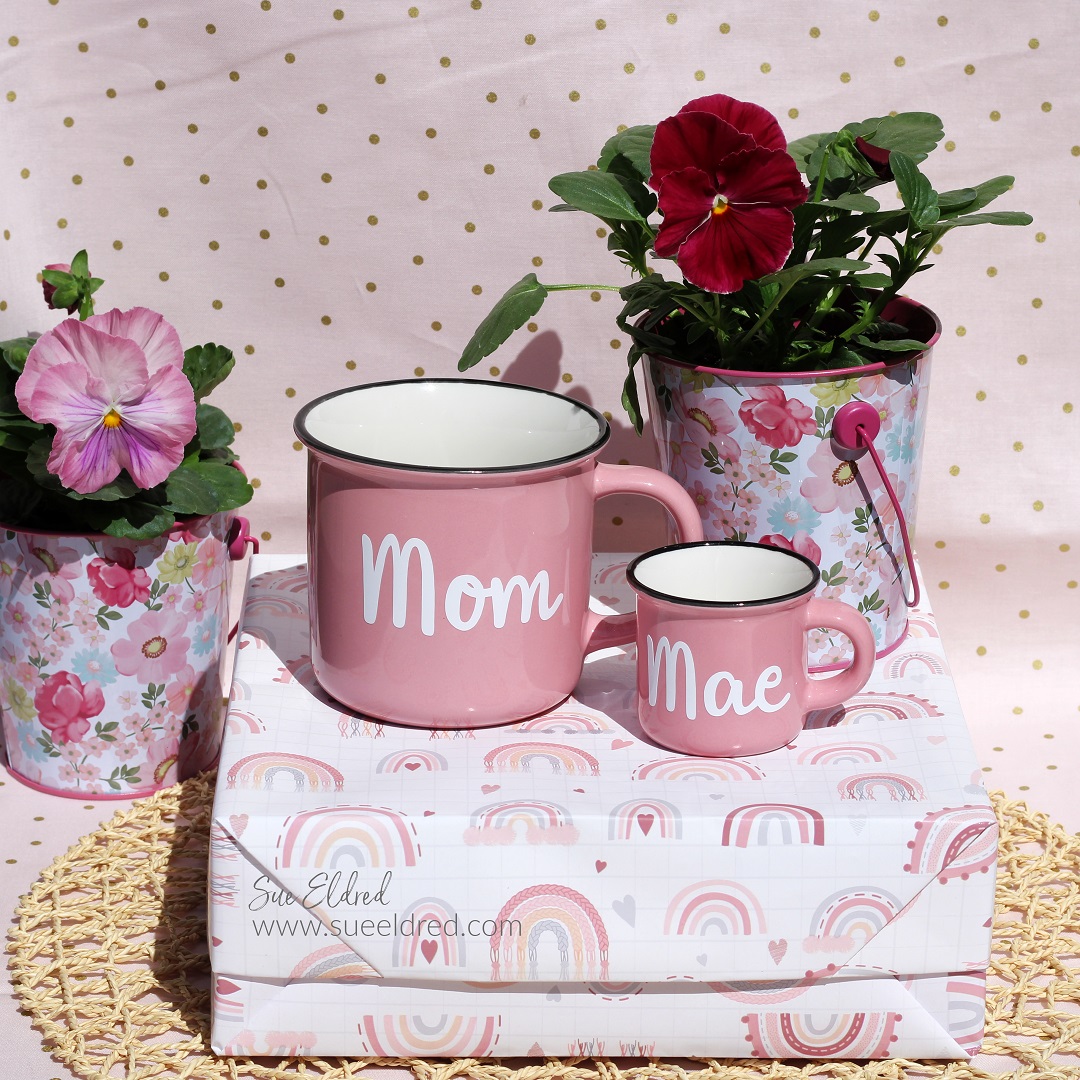
I found these Cute Floral Pails* at Dollar Tree* and filled them with pansies. 

They were the perfect addition to our Spring themed baby shower.

Mae's Baby Shower Banner

I picked up these cute pink mugs at Hobby Lobby and used StyleTechCraft White Glossy Vinyl

to make the words for the Mom and Mae cups.

I used the Mom mug during the shower to hold pink cutlery.

It was so much fun planning this party.

I’ll be sharing more details of the shower soon.

“This is a sponsored post.  As a member of the StyleTechCraft Design Team I have been provided product and compensation in exchange for my creative ideas.  The views and opinions are my own.

My Lucky Mug

My Lucky Mug

Everyone’s Irish on St. Patrick’s Day.

Whether you’re toasting with green beer or a minty green shake,

Make St. Patrick’s Day a little more special with StyleTechCraft vinyl.

My Lucky Mug made with StyleTechCraft Vinyl.

I love ♥ adding vinyl to everyday items.

I found these clear mason jar mugs at Dollar Tree* and decided to pick up a

few to create a little St. Patrick’s Day fun.

Did you know, Dollar Tree* is the perfect place for finding

inexpensive glassware to make any occasion special?

Buy Your Crafting Supplies Now at The Dollar Tree!

My Lucky Mug made with StyleTechCraft Vinyl.

Materials Used:     (*affiliate links)

*Disclosure:  This blog uses ads and affiliate links.  If you choose to make a purchase using one of the links, I receive a small commission (at no additional cost to you) that helps offset the costs of maintaining this blog.  Thanks for your support!

To create my Lucky Mug…

I used a cute “Lucky Rainbow” image from the Silhouette Store

and a variety of StyleTechCraft vinyl and cut it using my

Silhouette Cameo Electronic Die Cutting Machine*.My Lucky Mug made with StyleTechCraft Vinyl.

Happy St. Patrick’s Day!