Sue’s Storage Tips for Craft Vinyl Storage

Sue's Tips for Craft Vinyl Storage

Are you looking for an easy way to sort and store your vinyl sheets?

I’ve been making projects with StyleTechCraft’s Adhesive Vinyl for the past five years.

I am a member of their Design Team; they are an extremely generous company to work with.

Because of their generosity, I have accumulated a lot of vinyl.

Sue's Vinyl Storage Tip

I have tried a few different ways to organize my vinyl,

I always found myself spreading everything out to find the exact style and color I needed.

I needed a solution that would adapt to the way I work.

“This is a sponsored post.  As a member of the StyleTechCraft Design Team I have been provided product and compensation in exchange for my creative ideas.  The views and opinions are my own.

Sue's Vinyl Storage Tip

I find that it’s easier to sort the vinyl according to the type of vinyl.

I created broad categories that would fit my vinyl.

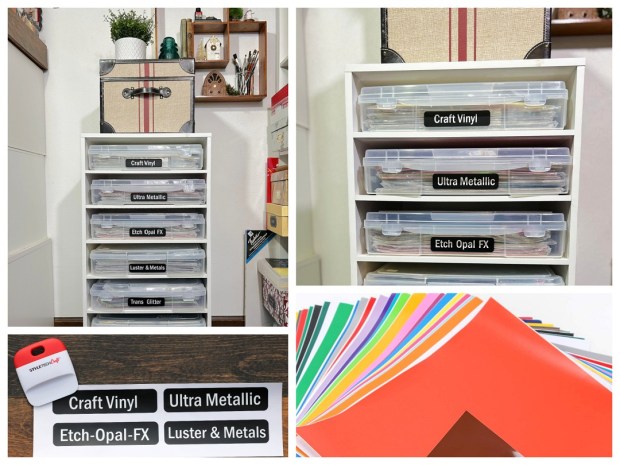
I found the Clear IRIS Scrapbook Paper Storage Boxes*

and the Modular Storage Rack at Michael’s Craft Store.

Vinyl is heavier than regular scrapbook paper and needs a heavy-duty storage cabinet. 

Having open shelves makes it easy to find exactly what style I’m looking for.

*Disclosure:  This blog uses ads and affiliate links.  If you choose to make a purchase using one of the links, I receive a small commission (at no additional cost to you) that helps offset the costs of maintaining this blog.  Thanks for your support!

Sue's Vinyl Storage Tip

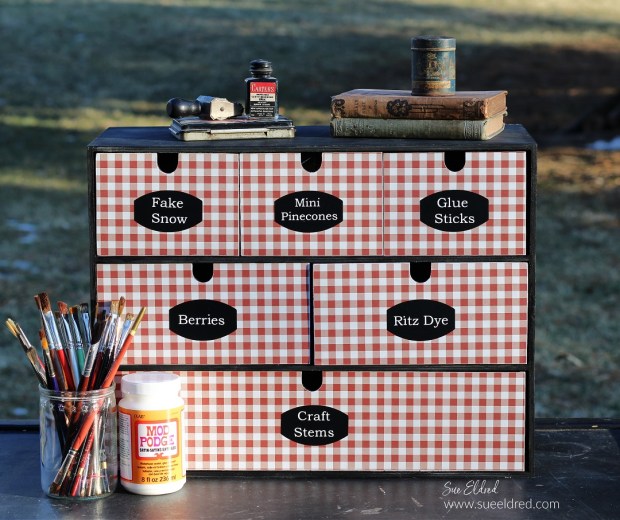
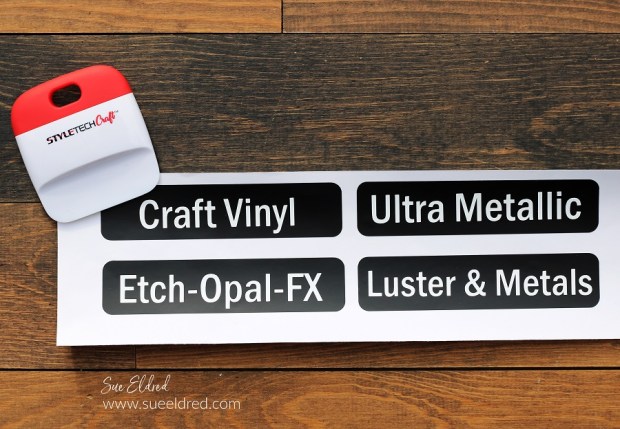
Creating Labels for the Iris Boxes

I have been wanting to label my boxes for a while.  I finally took the time this week to do it.
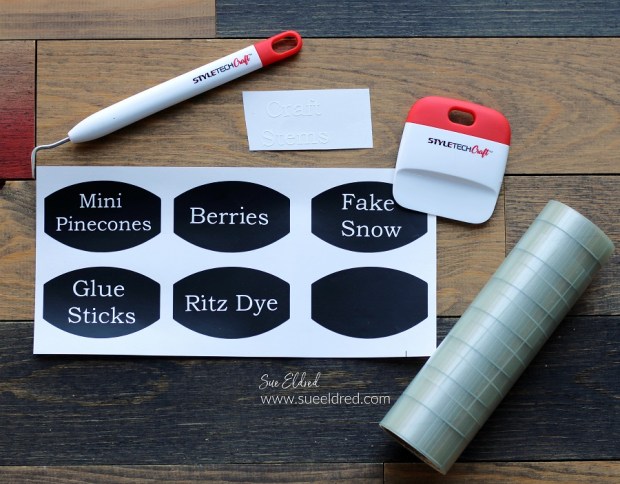
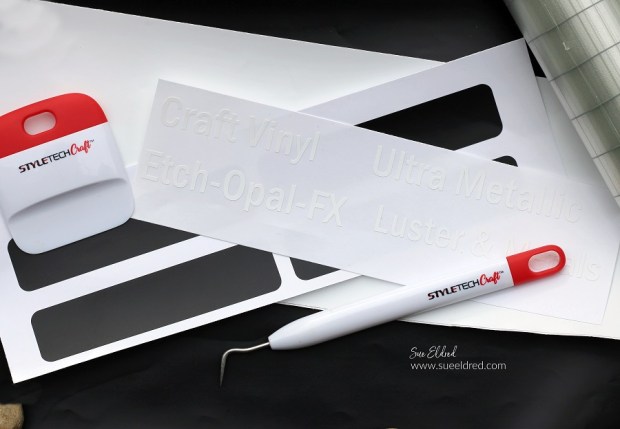
Sue's Vinyl Storage Tip

  • Cut a piece of Vinyl Transfer Tape* to fit over the vinyl words.  Gently rub over the transfer paper using the squeegee tool.  Lift the transfer tape to remove the vinyl from the white liner.

Sue's Vinyl Storage Tip

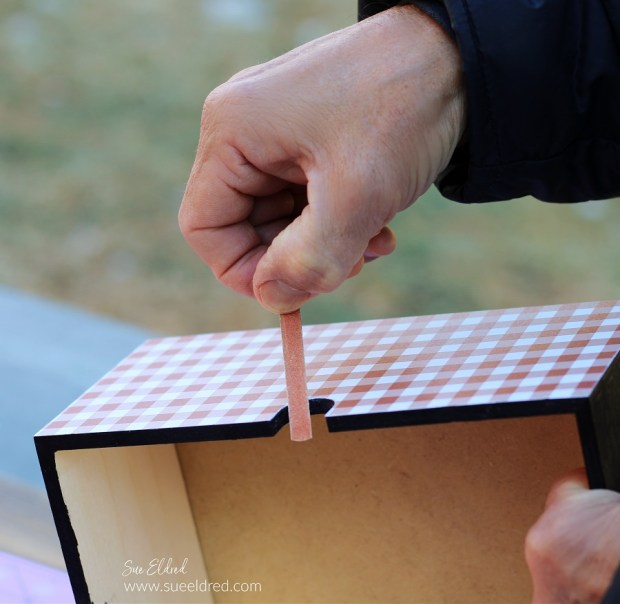
  • Place letters onto the black label.
  • Gently rub over the vinyl transfer tape using the squeegee tool to make sure all the image has transferred.

Sue's Vinyl Storage Tip

  • Use the transfer tape to pick up the label and adhere it onto the front of the IRIS box*.

Sue's Vinyl Storage Tip

My office assistant, Dexter, walked into my shot as I was taking pictures.

He’s not a lot of help, but he sure is cute.

Sue's Vinyl Storage Tip

In my office/workshop, I have a counter dedicated to my Silhouette Cameo.

It’s nice to have it out and not in the way.

Sue's Vinyl Storage Tip

Under the Silhouette Cameo is a drawer full of StyleTechCraft Vinyl Transfer Tape* and vinyl tools.

I love having everything easily accessible and at my fingertips.

StyletechCraft products brought to you by ATSM Craft*

Materials Used:     *affiliate links

Crafty IKEA Cabinet Makeover

Crafty IKEA Cabinet Makeover

Give a basic IKEA storage cabinet a little personality with a crafty makeover.

I’m a little bit of a neat freak.  I geek out when I find a good storage piece.

I found this IKEA Moppe Mini Storage Chest* on a recent IKEA trek.

The mini cabinet was the perfect solution to replace an old decrepit plastic one.

“This is a sponsored post.  As a member of the StyleTechCraft Design Team I have been provided product and compensation in exchange for my creative ideas.  The views and opinions are my own.

Crafty IKEA Cabinet Makeover

If you don’t have an IKEA store close, you can get the IKEA Moppe Cabinet*

on Amazon for a bit more.

The IKEA MOPPE mini chest with drawers is a true classic with its many drawers

and timeless style.  It’s made of untreated wood that you can paint and

decorate as you like, over and over again.

Crafty IKEA Cabinet Makeover

Here’s what I used Used:   (*affiliate links)

*Disclosure:  This blog uses ads and affiliate links.  If you choose to make a purchase using one of the links, I receive a small commission (at no additional cost to you) that helps offset the costs of maintaining this blog.  Thanks for your support!

Crafty IKEA Cabinet Makeover

Directions:

  • Lightly sand the surface of the cabinet with a Sanding Block* to smooth away any rough spots.
  • Paint the cabinet and drawers with Classic Black Deco Art Americana Decor® Satin Enamels*.
  • You may need to give it a second coat. (I didn’t paint the inside of the cabinet or drawers.)
  • Lightly sand over the paint to smooth the grain of the cabinet.
  • Wipe the cabinet with a clean, soft rag to remove any dust.

Crafty IKEA Cabinet Makeover

Crafty IKEA Cabinet Makeover

Crafty IKEA Cabinet Makeover

  • I used Red Gingham Paper* to cover the front of my cabinet. The red gingham matches the decor in my craft room and is a simple pattern to match. (This is important if you want to line up your design.)
  • Brush a coat of Mod Podge Satin Decoupage Glue* over the drawer front. Make sure to get the Mod Podge to the edges of the drawer.
  • Lay the paper onto the drawer and smooth. Allow the Mod Podge to dry.

Crafty IKEA Cabinet Makeover

  • Place the drawer onto a cutting mat and cut away the excess paper using a craft knife.

Crafty IKEA Cabinet Makeover

  • Sand away any rough-cut edges using a sanding block on the edge of the drawers.

Crafty IKEA Cabinet Makeover

  • A small nail file is great for getting into small to reach places.

Crafty IKEA Cabinet Makeover

Place the labels onto the drawer fronts and fill them with all your goodies.

Crafty IKEA Cabinet Makeover

Don’t judge me for my weird categories.

Crafters have a lot of random stuff to store, and this cabinet holds a lot of stuff.

Crafty IKEA Cabinet Makeover

You could use wallpaper, stencils, metal hardware to customize this into the perfect organized cabinet.


Don’t Miss a Thing…Make Sure to Follow me

Vintage School Desk Make-Over Before and After-Sue's Creative Workshop


Let’s talk about Marker Storage

Happy National Craft Week!

Saturday was National Card Making Day and now we have National Craft Week?

Be still my crafty little heart.   (I thought every week was craft week.)

Since we’re talking all things “crafty” this week, I’d like to ask you a personal question.

How do you store your markers?

When it comes to markers, we all have our opinions and preference on which are our favorite.

Lately, I’ve been curious on how everyone stores their markers and what works best for you.

I started rubber stamping in the mid 90’s and slowly built up quite a collection of Art Markers.

Personally, I have been using Tombow Markers for over 20 years and some markers in my

collection are almost as old.   (and they still works)

Up until recently my marker storage system was just about as old as my collection.

A wobbly little holder (with a slight lean) and an extra basket for the overflow.

It worked but it wasn’t quite as efficient as I wanted it to be.

Recently, I started doing a lot more cardmaking and using my markers again.

That’s when I requested the Expandable Marker Accordion* from Deflecto.

It is the ultimate in marker storage and portability!

It has 80 slots that hold markers, but, because my Tombow and Marvy markers

are skinnier than Copic markers, I can easily put two markers in each slot.

Disclosure…“This is a sponsored post.  As a member of the Deflecto Design Team I have been provided compensation and product in exchange for my creative ideas.  The views and opinions are my own.

The Expandable Marker Accordion* comes with a clear lid that easily snaps in place and a

handle that makes it easy to take your markers with you to classes and crops.

It keeps everything secure.

And…depending on your work space

you can use it in a straight line, a U shape, as a cube or in my favorite, a zig zag pattern.

Whatever combination works best for you and the project that you’re working on.

Not just another marker holder…

Let’s talk another option.

Maybe you’re just starting out your marker collection or you need a little more flexibility with

your marker storage, you might like Deflecto’s Interlocking Marker Organizer*.

This little marker holder can be used solo or because it has a interlocking design it can be

connected to additional units making it perfect whether you use it upright or horizontal.

And the best part…

The Interlocking Marker Organizer* also fits into the Deflecto Stackable Caddy Organizer.

You can fit six marker organizers into the Stackable Caddy for the Ultimate Grab and Go.

So many great options to fit your crafting style.

Disclosure:  This blog uses affiliate links.  If you choose to make a purchase using one of the links, I receive a small commission (at no additional cost to you) that helps offset the costs of maintaining this blog.  Thanks for your support!

Sue and Nick’s Deflecto Craft Caddy Challenge

Deflecto Craft Caddy Challenge…

When I worked in the Deflecto Booth last January at the Creativation Show,

each day of the show Deflecto held a Craft Caddy Challenge.

The challenge was to see who could fill their craft caddy the fastest.

It quickly became extremely competitive.  (but fun!)

The challenge looked like so much fun, I decided to create one of my own.

Of course, I wanted to race someone closer to my own speed.

Nick enjoyed the caddy challenge so much that when my nieces came over to swim later,

he challenged them.  He was a lot faster by then.

Here’s a quick video I made last year showing all the features of the caddy.


The Deflecto Caddy Organizer* is made by Deflecto Craft Solutions are available at Amazon

and now in Target Stores.

 “This is a sponsored post. As a member of the Deflecto Design Team I have been provided product in exchange for my creative ideas, views and opinions.”

Shop Amazon Scrapbooking Supplies*

Disclaimer:  This blog uses ads and affiliate links.  If you choose to make a purchase using one of the links, I receive a small commission (at no additional cost to you) that helps offset the costs of maintaining this blog.  Thanks for your support!

Cupcake Stand or Craft Supply Storage?

Cupcake Stand or Craft Supply Storage 3310

Deflecto Craft Solutions has several new items debuting at CHA this week in Anaheim, California.

(CHA being the annual Craft and Hobby Association Trade Show.)

One of my favorites products being shown is this Three Tier Desert Stand.

Acrylic Stand and Supplies

The stand features adjustable heights and a easy knock down compact design for storage.

It is perfect for holding cupcakes and even comes with little holes to insert cake pops.  (Pretty Clever.)

The Cupcake Stand will be available January 2016 through local art, craft and educational stores.


Because I don’t make a lot of cupcakes, I decided to use mine for storage instead.

tracing circles

This is what I used to personalize the stand:

  1. Trace each of the tiers onto the back of the kraft paper.
  2. Loosely cut around each circle.
  3. Liberally apply the glue-stick onto the back of the paper around and inside the circle.
  4. Lay tier onto the glued circle and trim excess paper with craft knife.
  5. Smooth paper onto tier.
  6. Cut out the center channels of the tiers with a craft knife.

Washi Tape Border

Apply washi tape around the outside lip.

decorated stand with out paint

Assemble stand and fill craft supplies.  (or maybe even your favorite cupcakes)


“This is a sponsored post. As a member of the Deflecto Design Team I have been
provided product in exchange for my creative ideas, views and opinions.”

This post uses Amazon links if you choose to purchase from Amazon, I get a very small commission.