
Give a basic IKEA storage cabinet a little personality with a crafty makeover.
I’m a little bit of a neat freak. I geek out when I find a good storage piece.
I found this IKEA Moppe Mini Storage Chest* on a recent IKEA trek.
The mini cabinet was the perfect solution to replace an old decrepit plastic one.
![]()
“This is a sponsored post. As a member of the StyleTechCraft Design Team I have been provided product and compensation in exchange for my creative ideas. The views and opinions are my own.

If you don’t have an IKEA store close, you can get the IKEA Moppe Cabinet*
on Amazon for a bit more.
The IKEA MOPPE mini chest with drawers is a true classic with its many drawers
and timeless style. It’s made of untreated wood that you can paint and
decorate as you like, over and over again.

Here’s what I used Used: (*affiliate links)
- IKEA Moppe Cabinet*
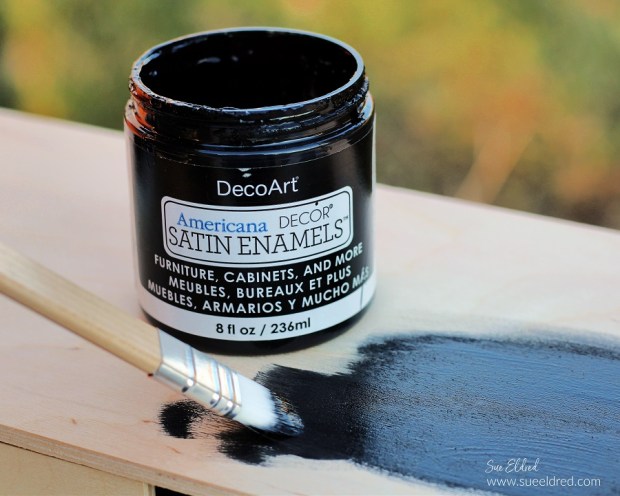
- Classic Black Deco Art Americana Decor® Satin Enamels*
- Mod Podge Satin Decoupage Glue*
- Mod Podge Decoupage Brush*
- Red Gingham Paper from Simple Stories*
- Craft Knife* and Cutting Mat*
- Sanding Block*
- Emory Board or Nail File*
- StyleTechCraft Matte Black Removable Vinyl*
- StyleTechCraft White Matte Removable Vinyl*
- Silhouette Cameo Electronic Die Cutting Machine*
- StyleTechCraft Vinyl Transfer Tape*
- StyleTechCraft Vinyl Tool Kit*

*Disclosure: This blog uses ads and affiliate links. If you choose to make a purchase using one of the links, I receive a small commission (at no additional cost to you) that helps offset the costs of maintaining this blog. Thanks for your support!
Directions:
- Lightly sand the surface of the cabinet with a Sanding Block* to smooth away any rough spots.
- Paint the cabinet and drawers with Classic Black Deco Art Americana Decor® Satin Enamels*.
- You may need to give it a second coat. (I didn’t paint the inside of the cabinet or drawers.)
- Lightly sand over the paint to smooth the grain of the cabinet.
- Wipe the cabinet with a clean, soft rag to remove any dust.
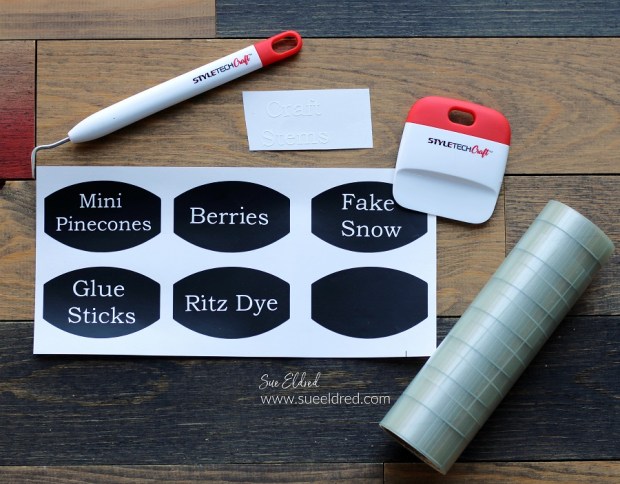
- I created labels using my Silhouette Cameo Electronic Die Cutting Machine* and StyleTechCraft Matte Removable Vinyl*.
- The drawer labels are removable. Which makes it easy to add a new drawer label as the contents change.

- The letters are cut from StyleTechCraft White Matte Removable Vinyl* and placed on a black oval label using StyleTechCraft Vinyl Transfer Tape*.


- I used Red Gingham Paper* to cover the front of my cabinet. The red gingham matches the decor in my craft room and is a simple pattern to match. (This is important if you want to line up your design.)
- Brush a coat of Mod Podge Satin Decoupage Glue* over the drawer front. Make sure to get the Mod Podge to the edges of the drawer.
- Lay the paper onto the drawer and smooth. Allow the Mod Podge to dry.

- Place the drawer onto a cutting mat and cut away the excess paper using a craft knife.

- Sand away any rough-cut edges using a sanding block on the edge of the drawers.
- A small nail file is great for getting into small to reach places.
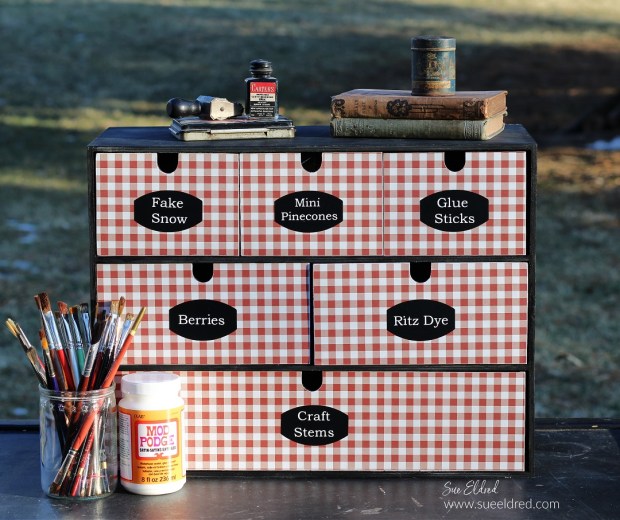
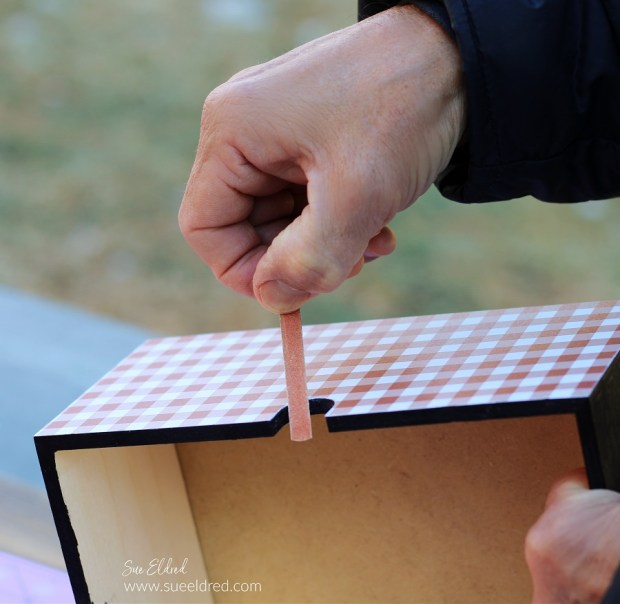
Place the labels onto the drawer fronts and fill them with all your goodies.

Don’t judge me for my weird categories.
Crafters have a lot of random stuff to store, and this cabinet holds a lot of stuff.

You could use wallpaper, stencils, metal hardware to customize this into the perfect organized cabinet.
Don’t Miss a Thing…Make Sure to Follow me


Very cute!