DIY Christmas Blocks from Wood Scraps

Quick and Easy Christmas Decorations using Wood Scraps, Vinyl and Stencils.

Got any old wood scraps lying around?

My Dad used to keep a box of old wood scraps for the kids to build and play with.

I grabbed a few of the worn out blocks for my holiday projects.

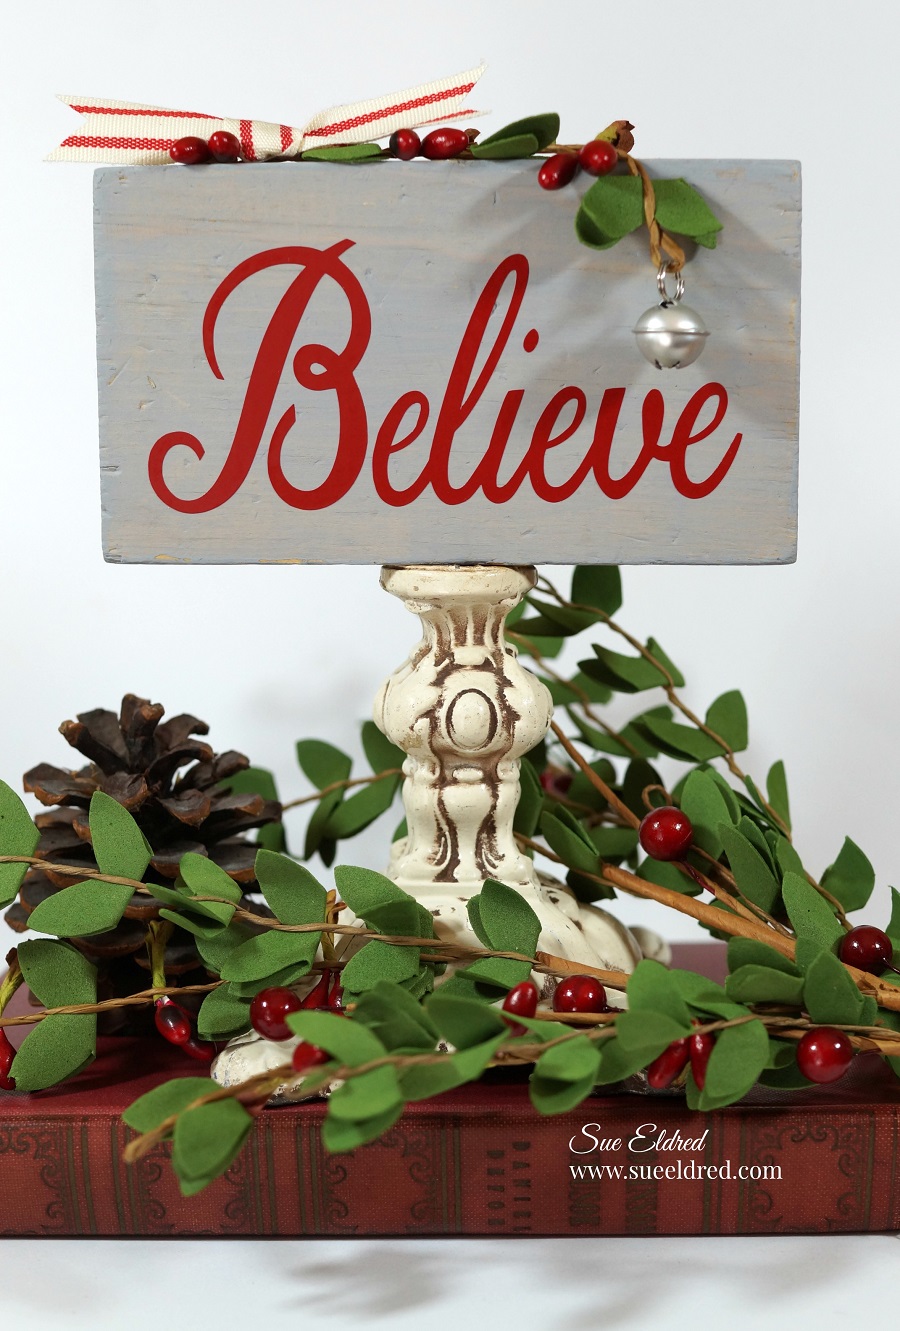
To make the Holiday Blocks…

Shop Your Fav Brands at Scrapbook.com

*Disclosure:  This blog uses ads and affiliate links.  If you choose to make a purchase using one of the links, I receive a small commission (at no additional cost to you) that helps offset the costs of maintaining this blog.  Thanks for your support!

  • Use Vinyl Transfer Tape* to pick up and apply the word directly onto the block of wood.
  • Rub over the letters using a vinyl scraper tool to remove bubbles and help the vinyl cling to the wood surface better.
  • Remove transfer tape.

  • Tie a simple ribbon around holiday berries and glue it to the top of the painted wood block using a quick dry glue*.
  • I placed the block onto an old vintage metal base scrounged and saved from my Dad’s garage.  (I love reusing cool old vintage junk.)
  • The Stag and Merry Christmas images were also created using my Silhouette Cameo and applied the same way as the Believe block.)

really simple Holiday Décor.

StyleTechCraft Christmas Colors Bundle on Amazon*

If you don’t have access to an electronic die cutter you might want to try a little DIY stenciling.

  • The “Believe” wood block was painted with red acrylic paint and stenciled using the Believe stencil from DecoArts and a stencil brush*  

Another quick and easy Holiday DIY.

Need Stencils?  I have several DecoArts Stencils in my Etsy Shop.

“This is a sponsored post.  As a member of the StyleTechCraft Design Team I have been provided product and compensation in exchange for my creative ideas.  The views and opinions are my own.


Don’t Miss a Thing…Make Sure to Follow me

Creating A Miniature “Christmas Magic” Room with Graphic 45 and Xyron

How to Create A Miniature Christmas Room…

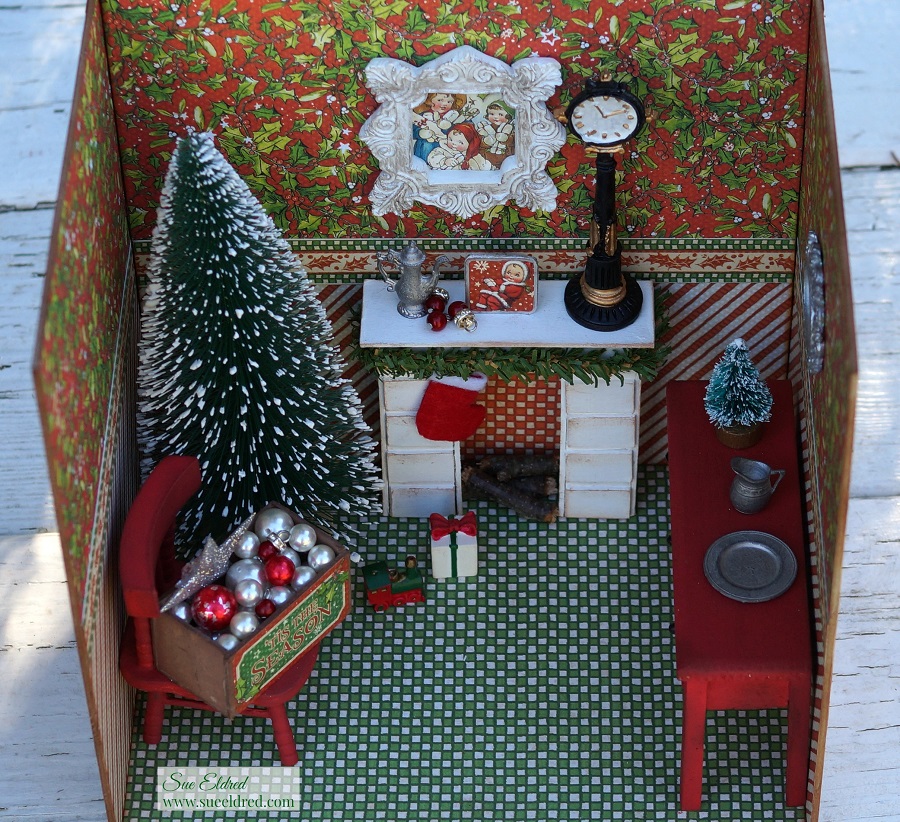
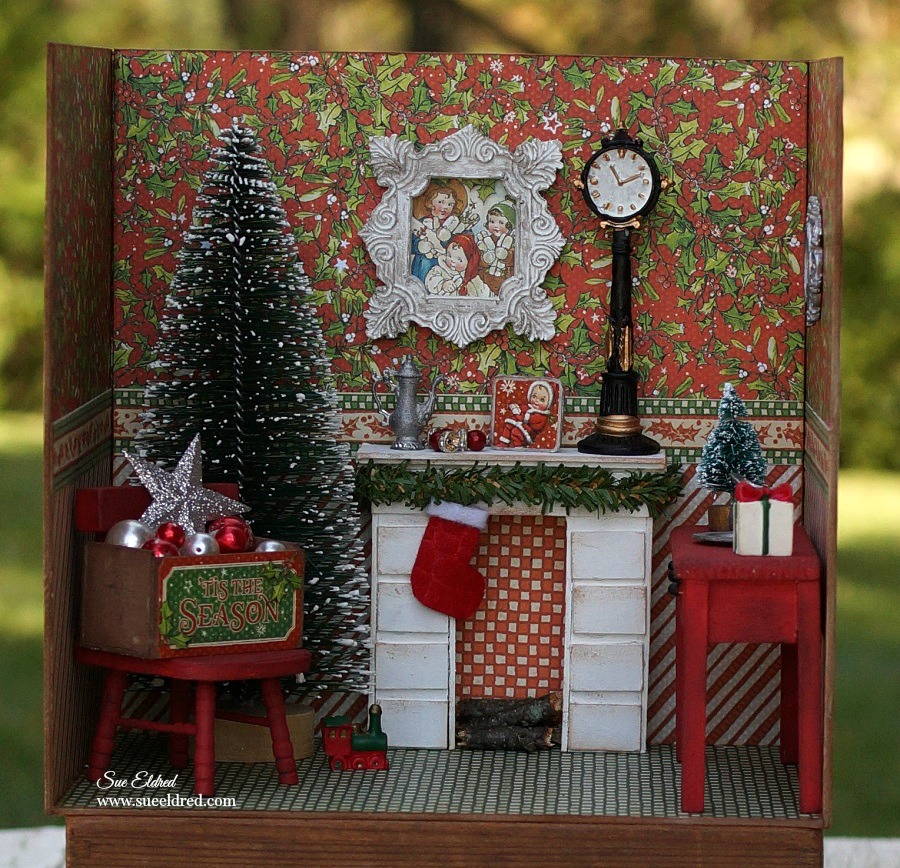
Graphic 45 Christmas Magic…Decorating the tree.

I knew as soon as I started working with Xyron that one day I would make a miniature room.

When I got the opportunity to work with Graphic 45’s “Christmas Magic” Collection,

I knew the time had come.  (Graphic 45 and Xyron are the perfect combination.)

Here’s What I used to make my Miniature Christmas Magic Room:            (*affiliate link)

*Disclosure:  This blog uses affiliate links.  If you choose to make a purchase using one of the links, I receive a small commission (at no additional cost to you) that helps offset the costs of maintaining this blog.  Thanks for your support!

How to make a miniature Christmas Magic Room…

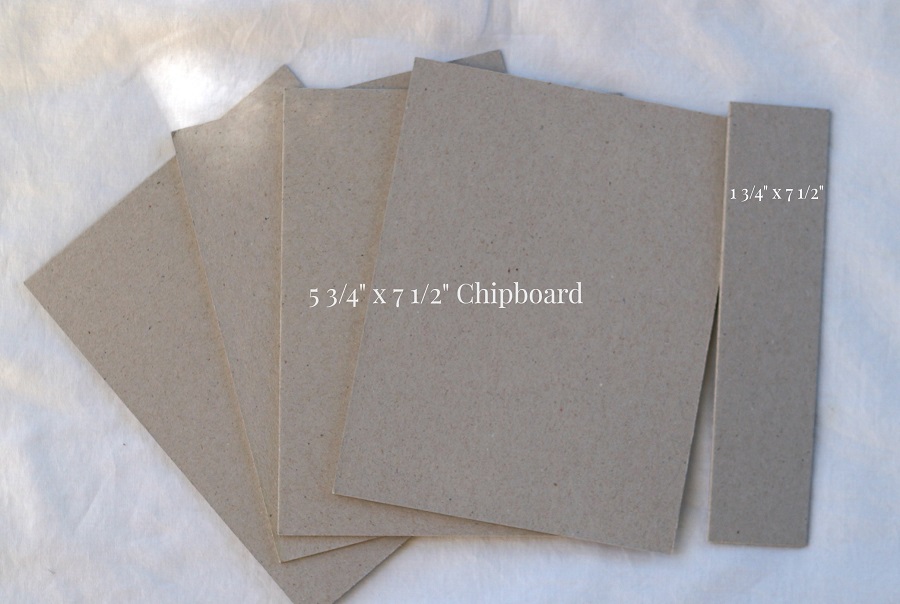
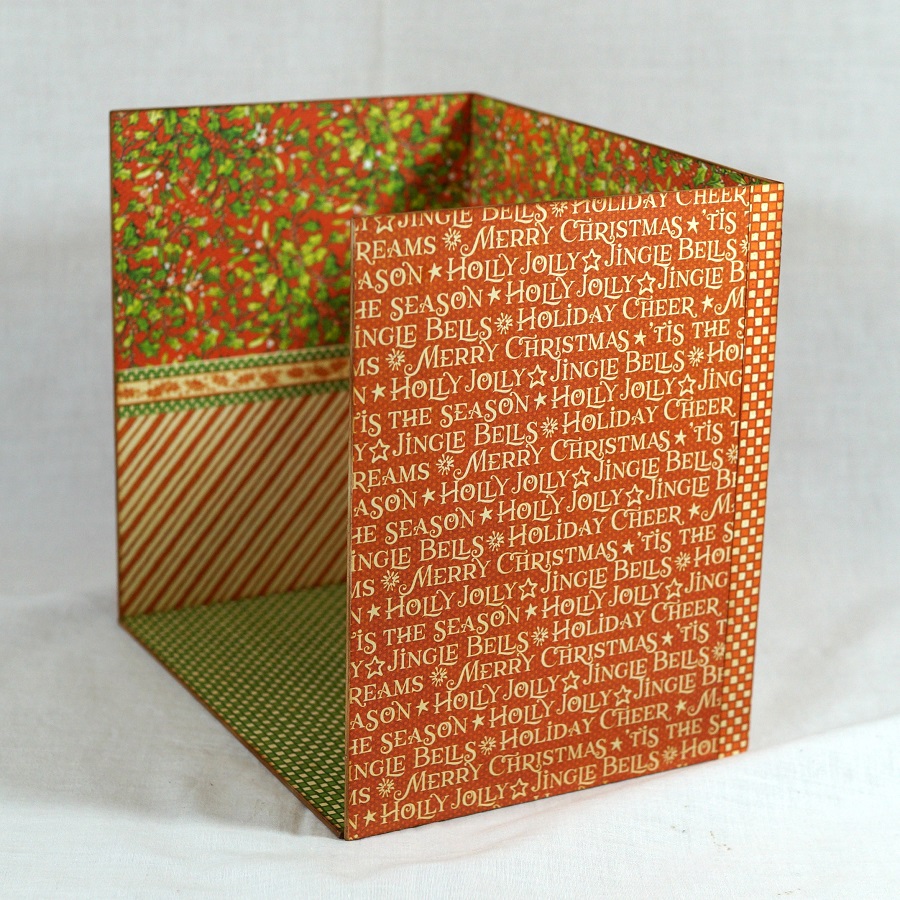
  • My Christmas Room is 7 1/2″ wide, 7 1/2″ tall and 5 1/2″ deep.  I used 5 3/4″ x 7 1/2″ chipboard pieces.  (that’s what I had on hand)  You could use a 7 1/2″ x 7 1/2″ piece of chipboard for the back wall instead of piecing it together like I did.

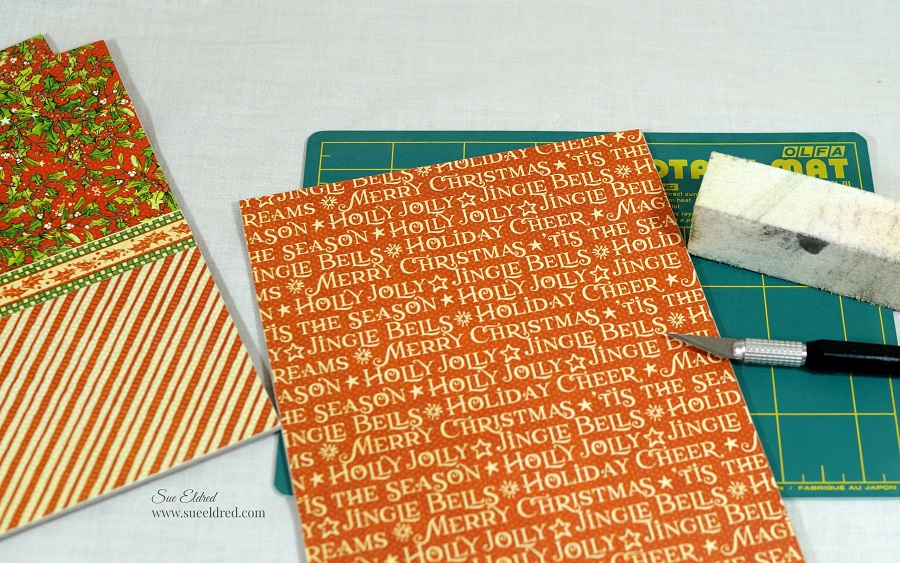
  • I cut paper for my walls into 3 3/4″ strips.
  • I cut a small strip of paper for my decorative border.
  • I ran each of my strips through the Xyron Creative Station*.
  • Adhere paper to the chipboard.

The Creative Station is perfect for projects like this.  I wanted complete adhesive coverage on every corner and edge of the paper.  (No wrinkles, no bubbles, easy to use.)

  • I cut my paper slightly wider than I need so I can trim the edges with a craft knife.
  • Gently sand edges with a extra fine sanding block for the perfect edge.

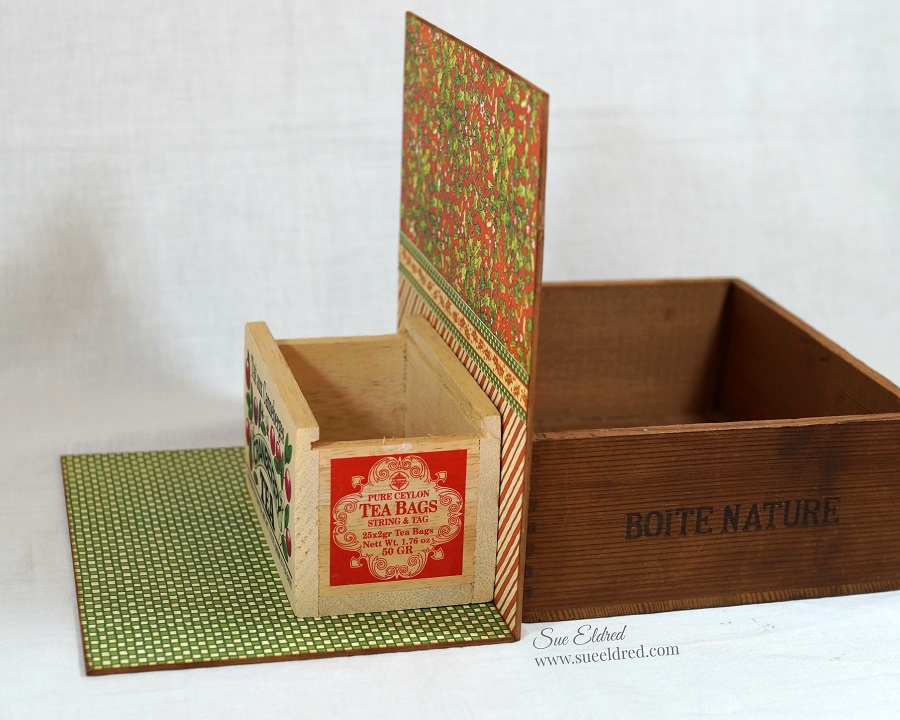
  • Glue the walls together using a good craft glue.  I used wood boxes to hold my wall up while the glue dried.  (If you have a better idea I’d love to hear it.)

  • I covered the back of my room with coordinating paper and added small strips of paper on the back corners for added support.

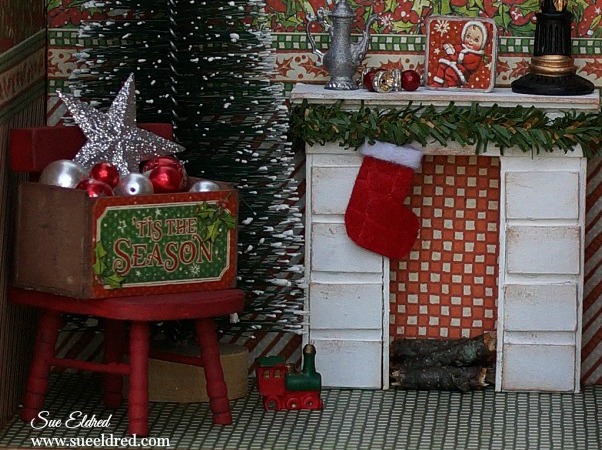
  • I made a small fireplace out of chipboard.  (I needed a place to hang my stocking)
  • Paint the fireplace with white paint.  Give it a vintage feel by rubbing a little ink on the edges.

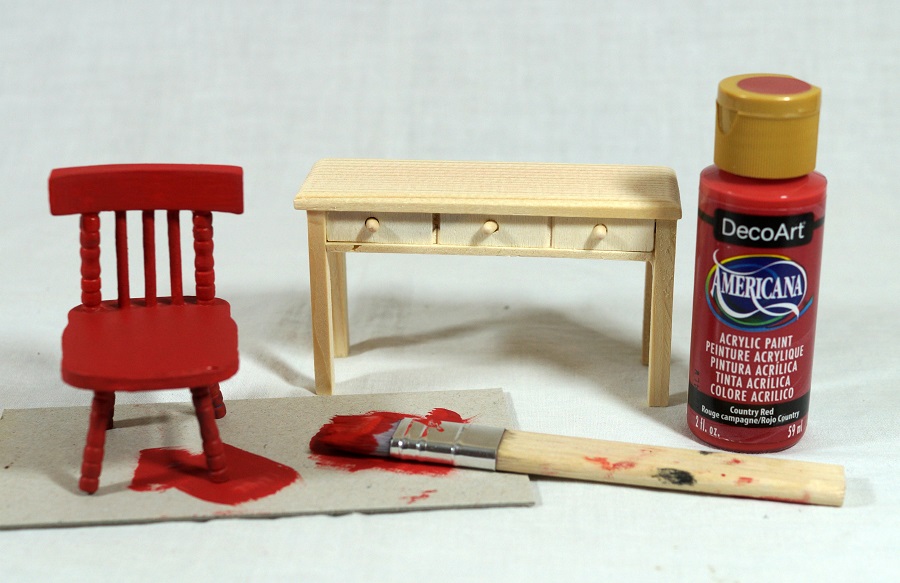
  • I purchased inexpensive unfinished doll furniture at the Dollar Tree* and painted it red.
  • For a vintage look add ink to the edges of the furniture.

  • I used stickers from the collection kit to make little framed art.

  • I made a small little crate to hold my “ornaments” out of chipboard and painted it brown.  I added a small “tis the season” sticker on the front.

  • I created a small picture using a sticker and chipboard and a small felt stocking to add to the mantel.

I have spent way to much time rearranging the furniture and playing with it.

It was a real labor of love.  (and I loved every minute of it)

“This is a sponsored post.  As a member of the Xyron Design Team I have been provided product and compensation in exchange for my creative ideas.  The views and opinions are my own.

Dollar Store Pumpkin Makeover

I love the look of heirloom pumpkins and those cute little white pumpkins called “baby boo”.

But…I always have a hard time finding them.

This year, I decided to make my own.

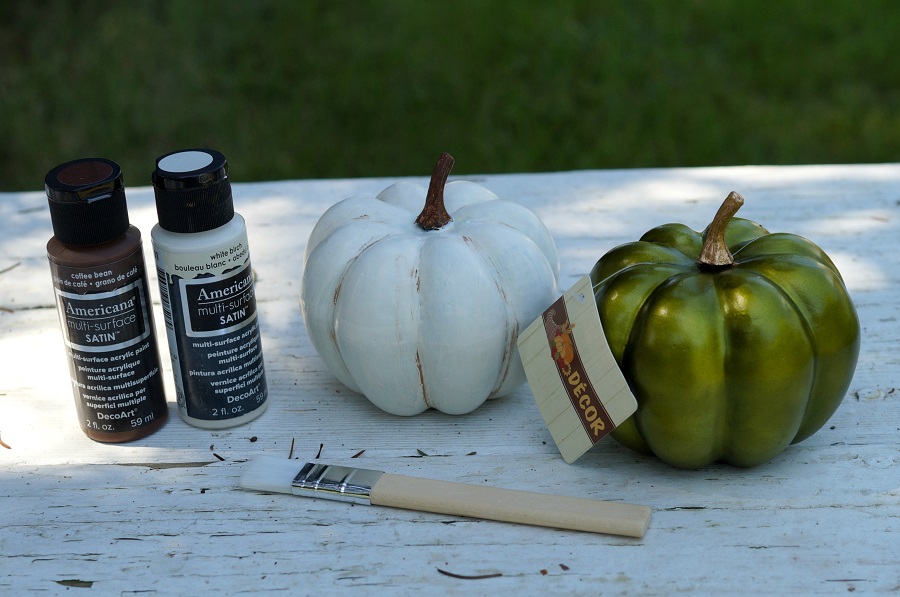
I found these cute little 4″ metallic pumpkins* at my local Dollar Tree*.

At $1.00 each, I couldn’t pass them up.

I painted the pumpkins with Americana Multi-Surface Satin Acrylic Paint in White Birch*.

It took 4-5 coats.  In hindsight, I wish I would have left a little green showing through.

I used Americana Multi-Surface Satin Acrylics Paint in Coffee Bean* to paint the stem and

accent the grooves of the pumpkin.  To make it look more realistic, I used a baby wipe to

strategically wipe off some of the extra brown paint.

I really please with the way they turned out.

Best part is… they won’t spoil and I can reuse them year after year.

Shop Your Fav Brands at Scrapbook.com

*Disclaimer:  This post uses ads and affiliate links.  If you choose to make a purchase using one of the links, I receive a small commission (at no additional cost to you) that helps offset the costs of maintaining this blog.  Thanks for your support!

Save

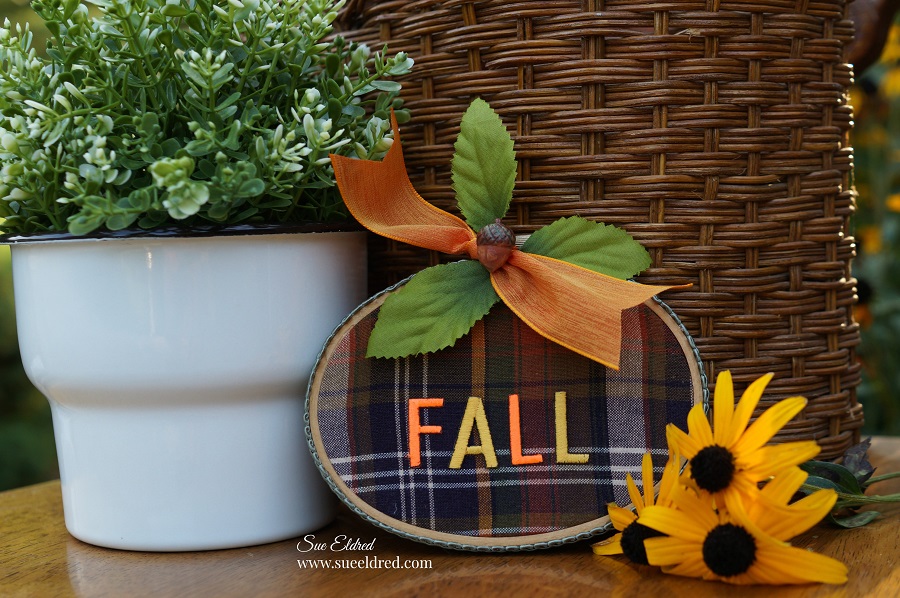
How to create an Embroidery Hoop Pumpkin…

How to Create an Embroidery Hoop Pumpkin

A Quick and Easy Fall Decoration.

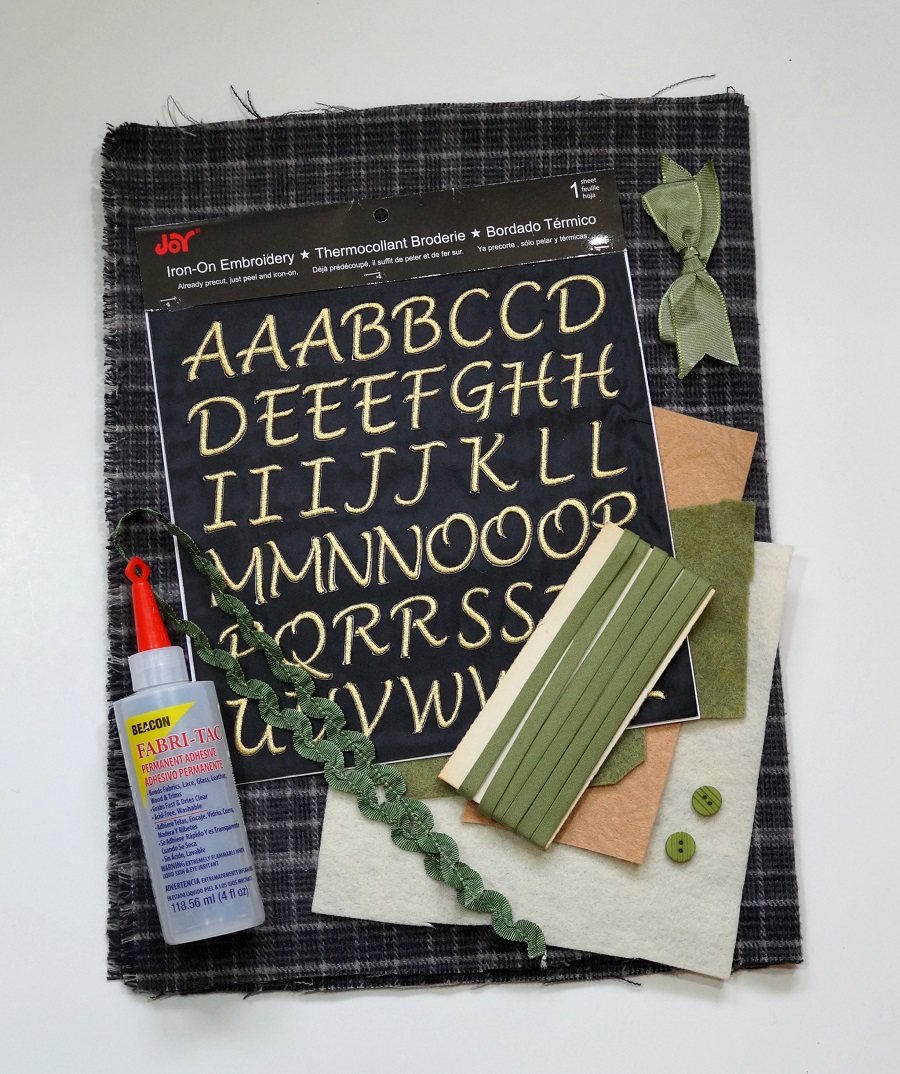
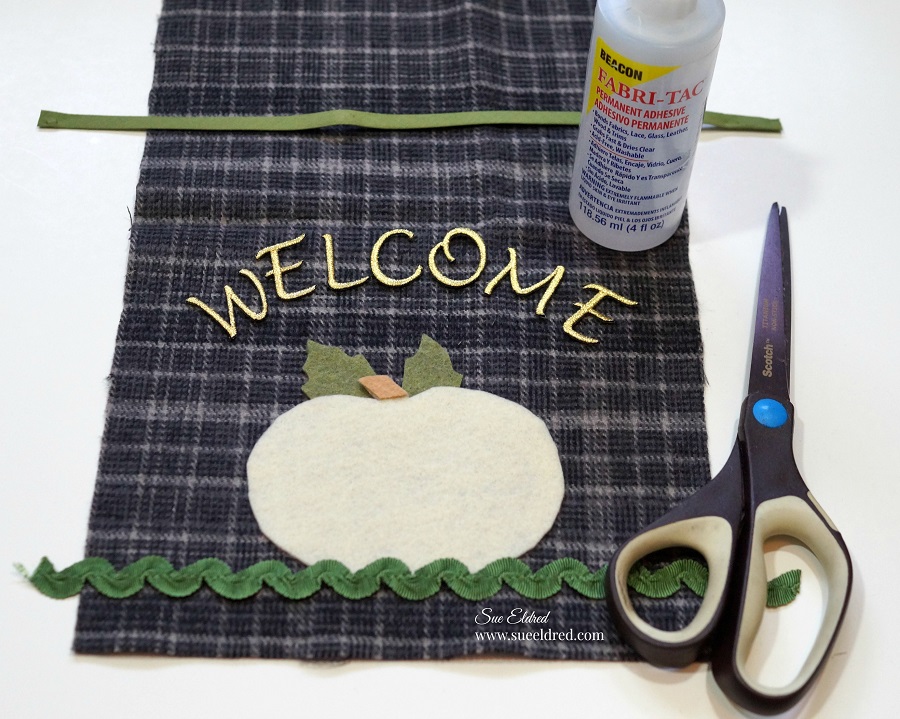
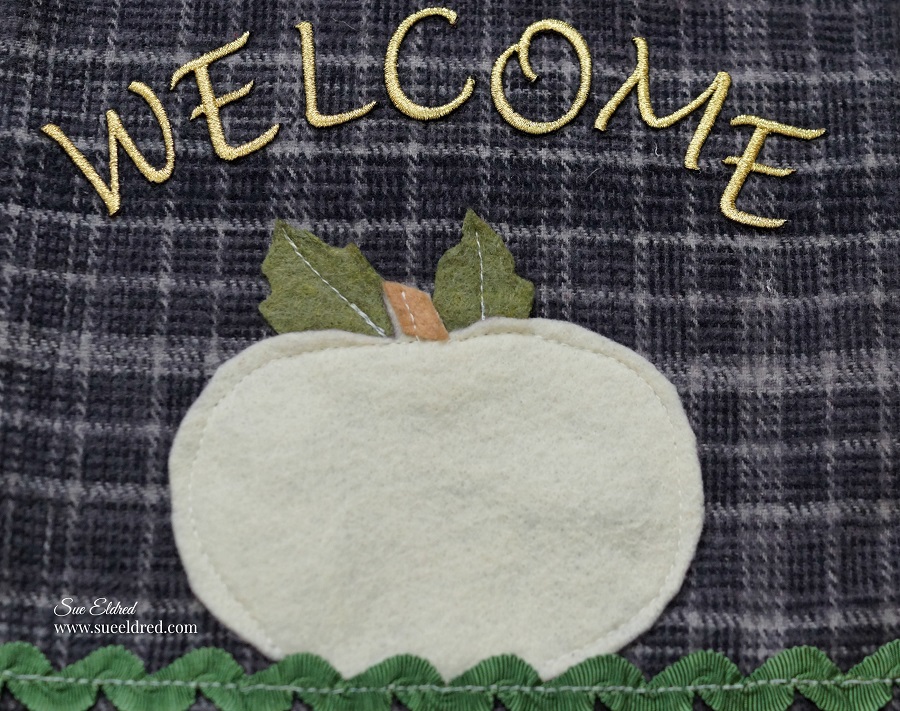
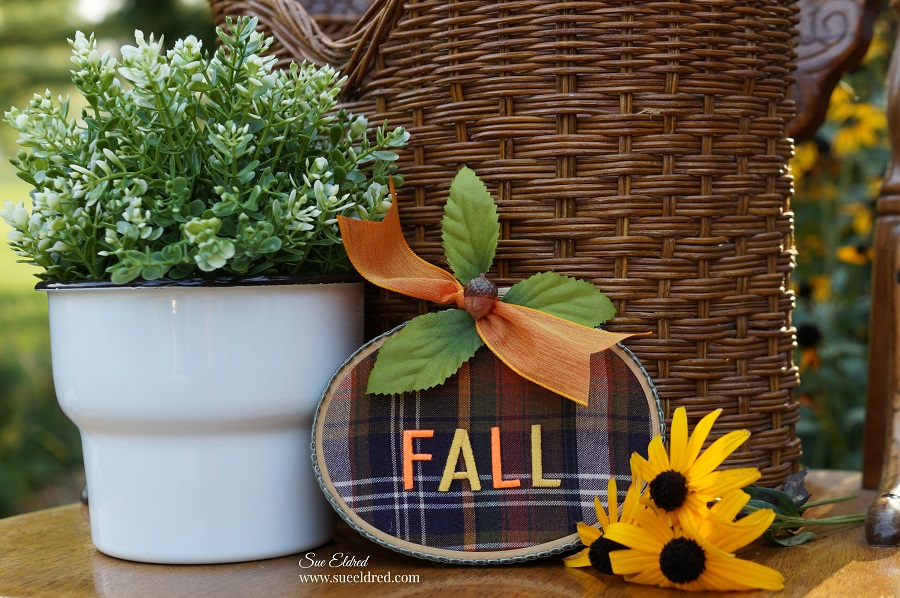
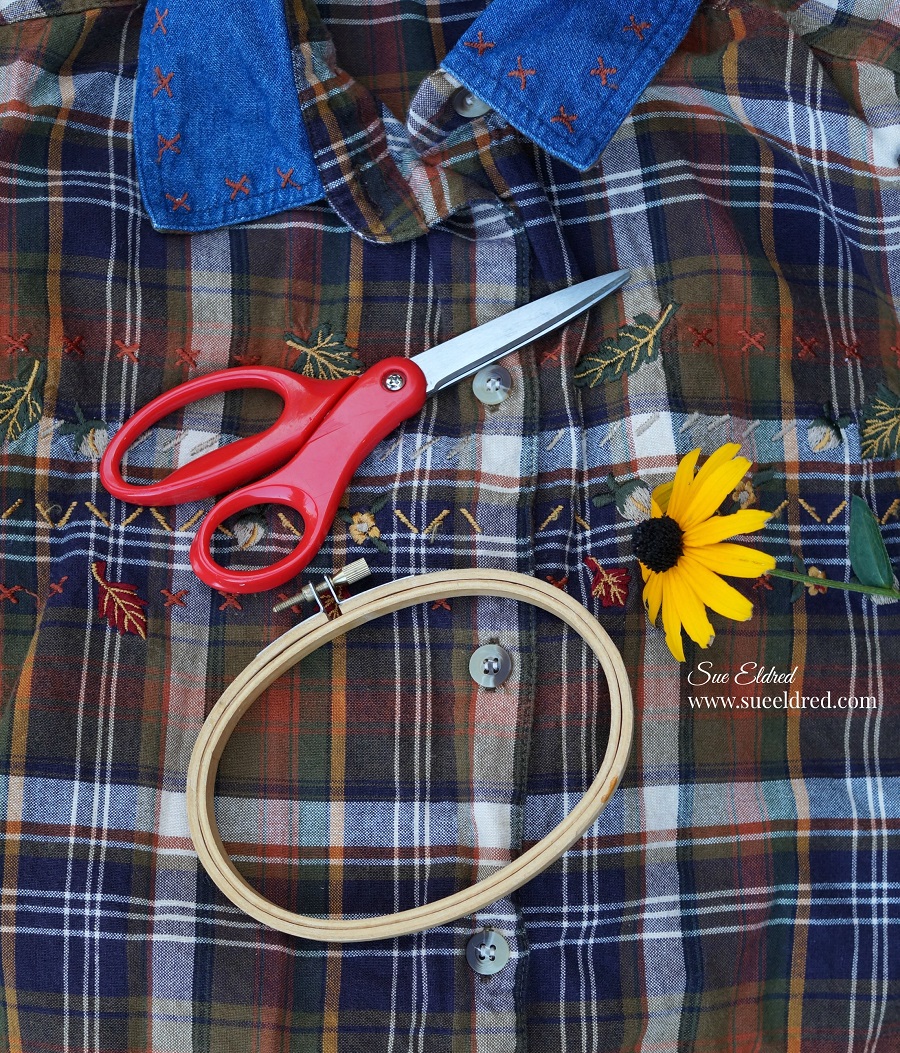
What do you get when you find an outdated plaid Fall shirt, a small oval embroidery hoop

and then you add a few simple embellishments and some Joy Iron On Embroidered Letters?

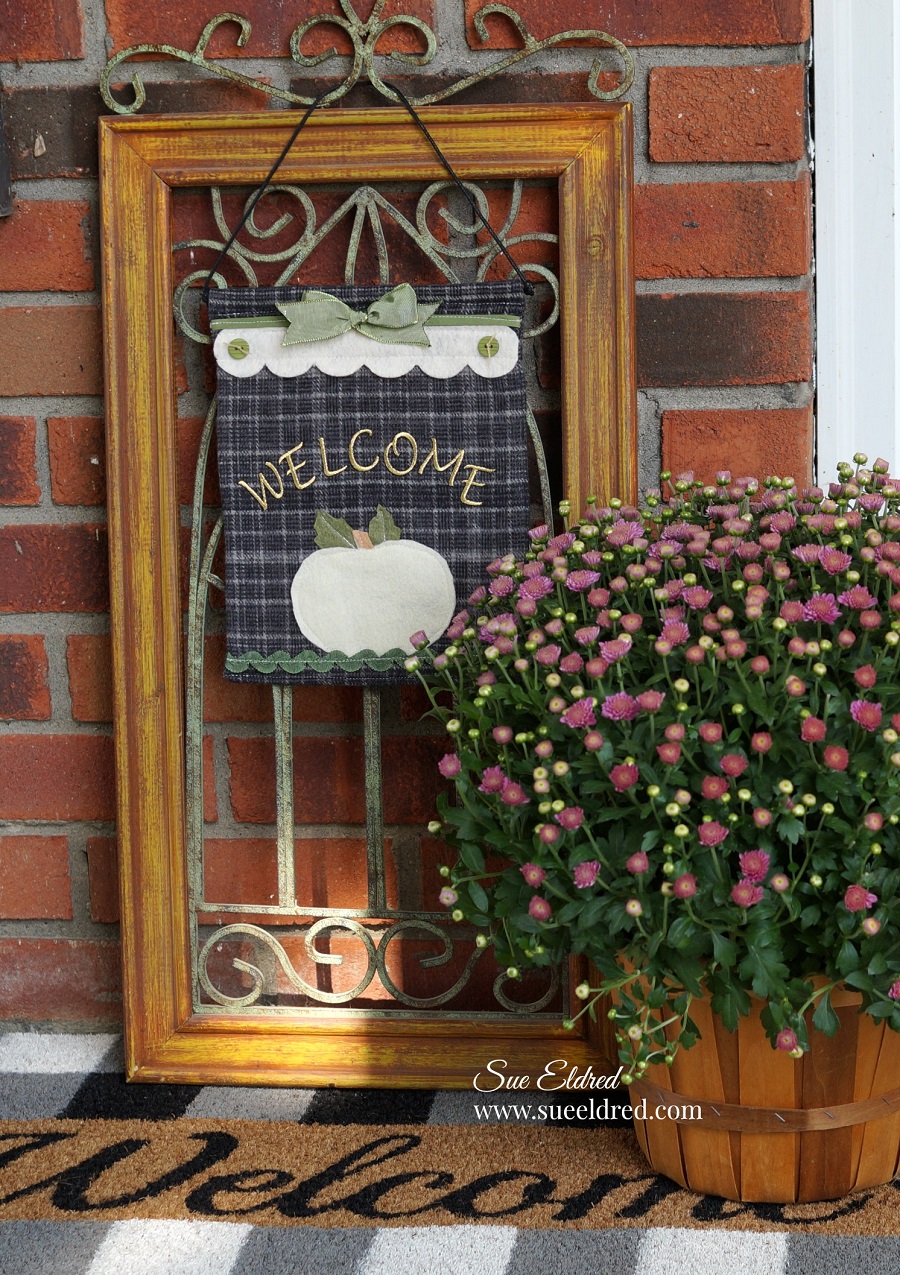
You get a cute little Fall Pumpkin and A Quick and Easy Fall Decoration.

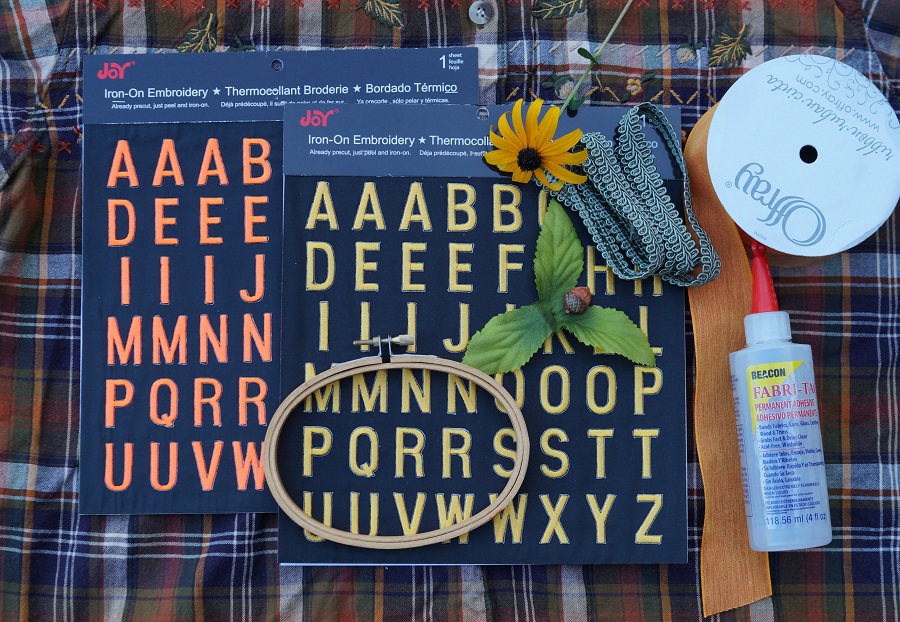
For my Embroidery Hoop Pumpkin I used:            (*affiliate link)

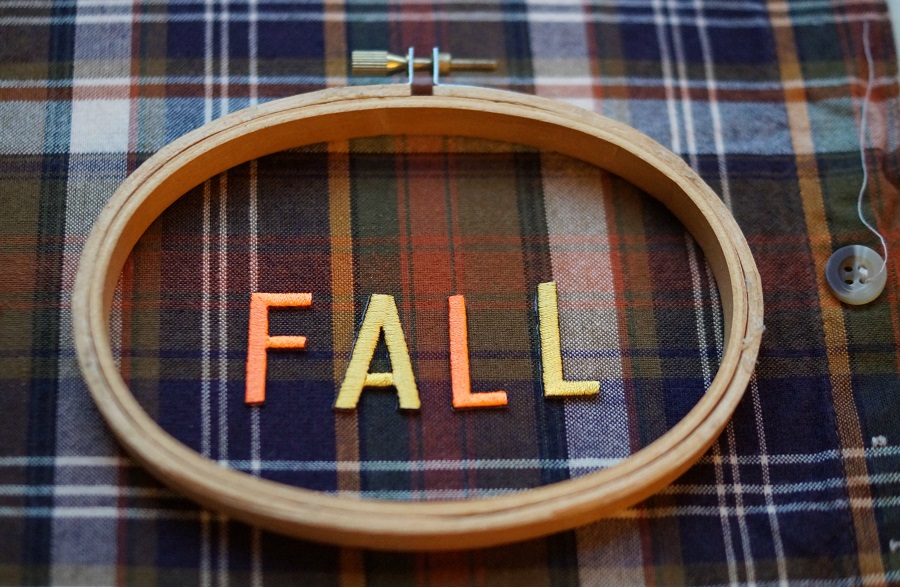
  • Lay the embroidery hoop onto the fabric first and  then place the letters inside the hoop to help you figure the best placement.

  • Set Iron to cotton setting, approx. 350 degrees, or follow garment care label.
  • Position letters with shiny side down onto fabric.
  • Cover letters with a fine cloth.  With a firm pressure, iron cloth over letters for 30 seconds.
  • Turn fabric over and iron the back for another 30 seconds.

  • Loosen the screw on the top of the embroidery hoop and insert fabric making sure to keep the letter alignment straight.  (re-tighten screw)
  • Trim excess fabric from outside of embroidery hoop.
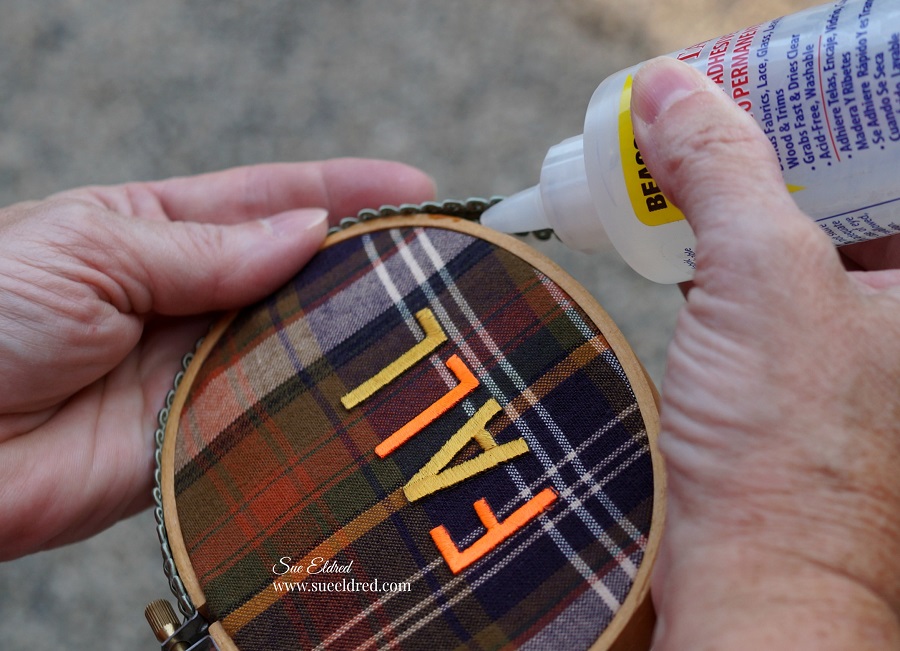
  • Glue the green braided trim around the outside of the embroidery hoop.

  • Tie ribbon and leaves to the top of the frame.
  • Glue small acorn embellishment onto ribbon.
  • Super cute and simple to make.

“This is a sponsored post.  As a member of the Joy® Design Team I have been provided product and compensation in exchange for my creative ideas.  The views and opinions are my own.

Shop Your Fav Brands at Scrapbook.com

*Disclosure:  This blog uses ads and affiliate links.  If you choose to make a purchase using one of the links, I receive a small commission (at no additional cost to you) that helps offset the costs of maintaining this blog.  Thanks for your support!

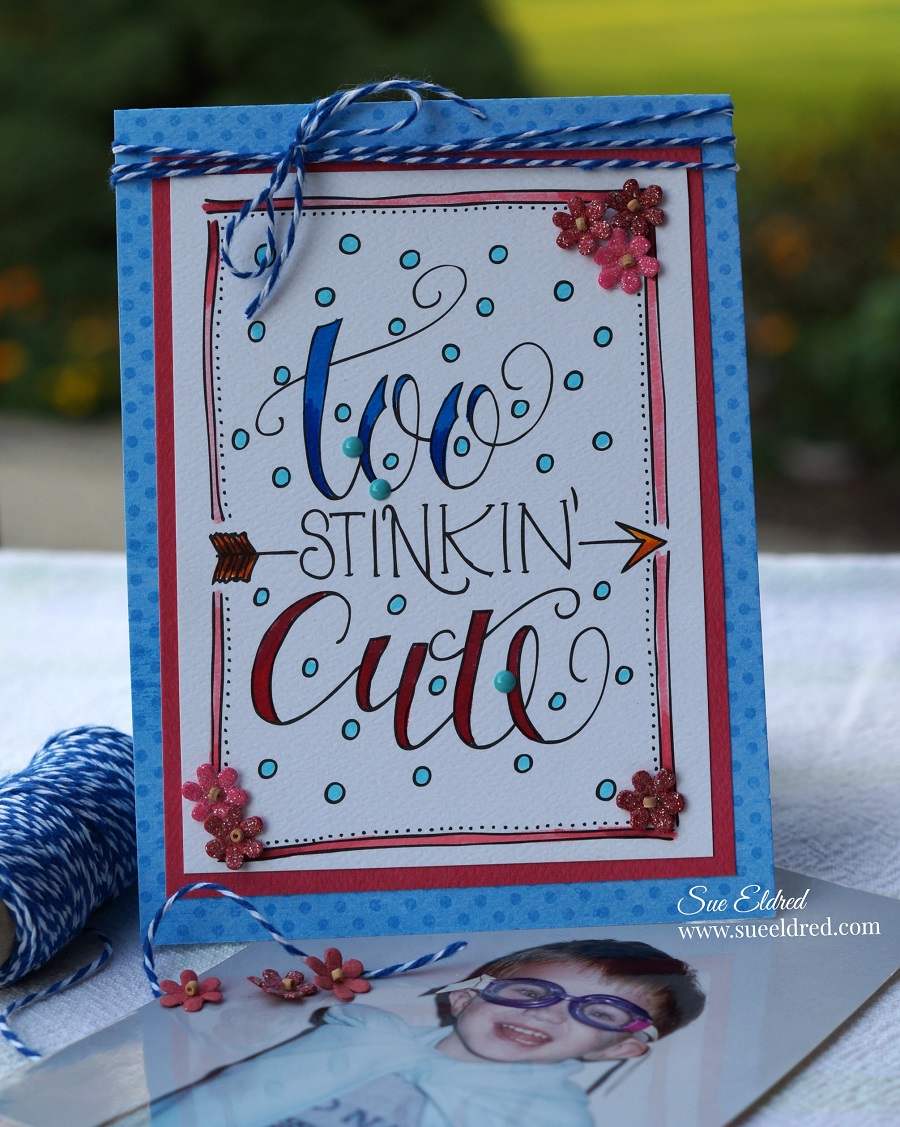
Too Stinkin Cute with Xyron and Derwent Markers

Clean and Simple Card made with Xyron and Derwent Markers.

You know that look on a kids face when he knows he being “super cute”.

This Super Hero picture of my son taken when he was 3 is one of my all time favorites.

He knew he was being “so stinkin cute”!

I always love getting new things to play with and try.

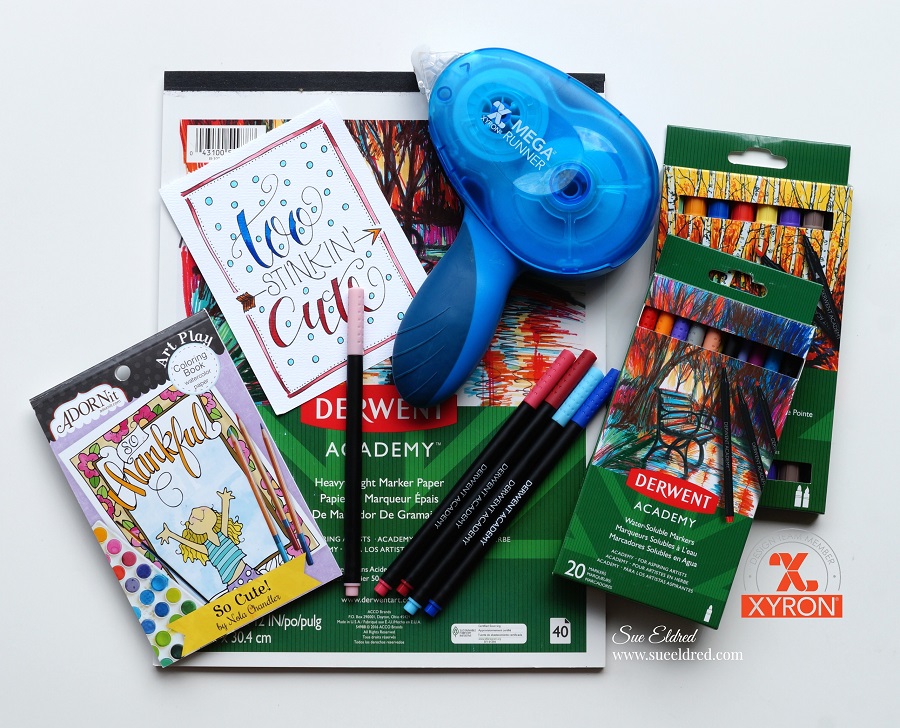
This month the Xyron Design Team was sent Derwent Markers and Paper to play with.

To Make my Card…

I used a small coloring sheet from a mini coloring book for adults as my card base.

I simply colored in the words with my Derwent Markers for a quick and easy layered card.

But… Because I’m a perfectionist and my coloring skills are adequate at best,

I embellished my card with a few small flowers, twine and enamel dots.

(No mistakes… just more opportunities for embellishments.)

Here’s what else I used to make my Clean and Simple Card:

“This is a sponsored post.  As a member of the Xyron Design Team I have been provided product and compensation in exchange for my creative ideas.  The views and opinions are my own.

*Disclosure:  This blog uses affiliate links.  If you choose to make a purchase using one of the links, I receive a small commission (at no additional cost to you) that helps offset the costs of maintaining this blog.  Thanks for your support!

Personalizing My Ikea Finds for the Kitchen…

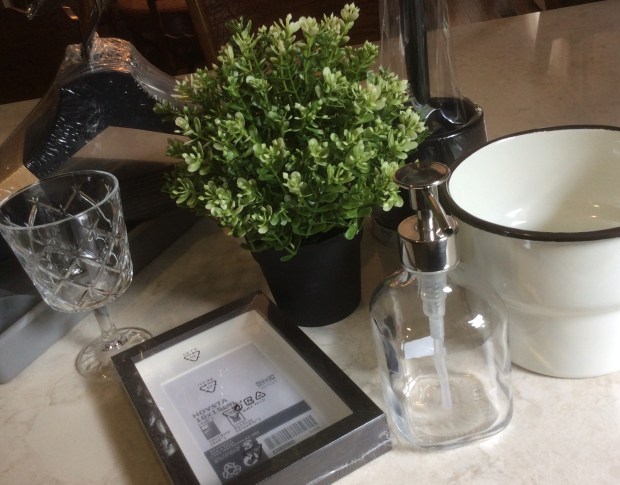
Personalizing My IKEA finds for the kitchen…

When you live 3 hours in any direction from the nearest IKEA,  you make your husband

stop anytime you’re close.
5278042B-6B77-4667-85CE-66B09D4BA3BF

Since I didn’t have advance notice to prepare and my husband only has the patience to

go around once.  I just grabbed without real purpose.

I really wish I would have bought more, a return trip is needed.

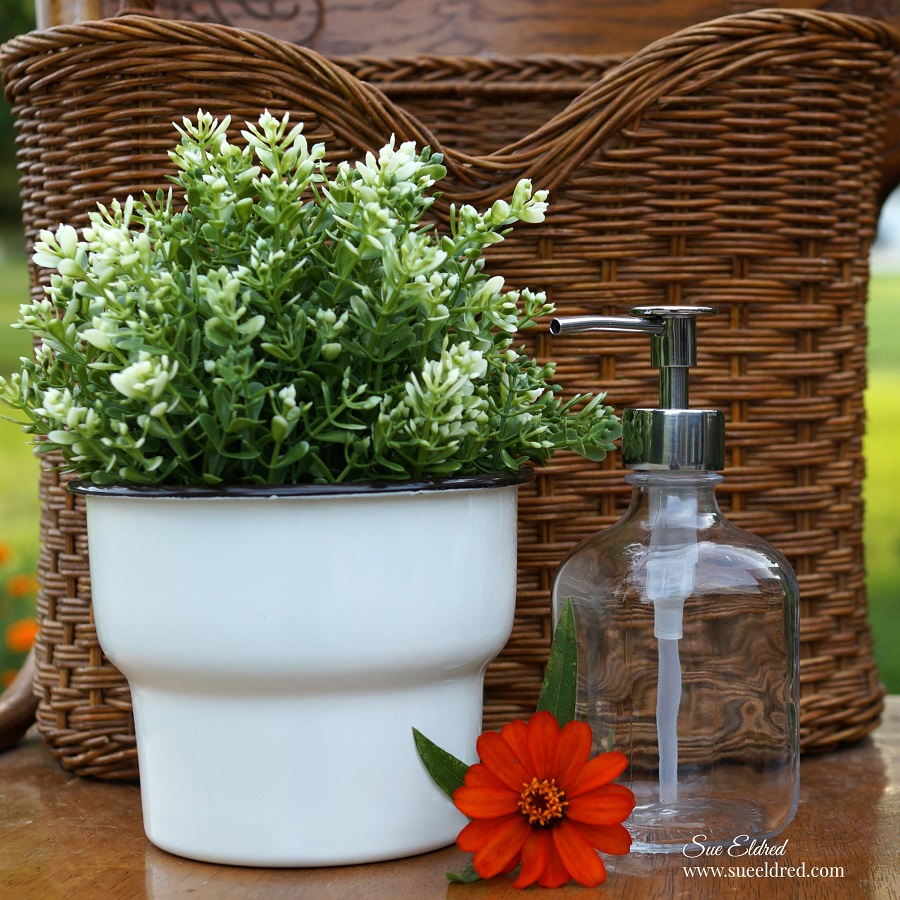
Here are the plain Ikea finds before being personalized!

This summer, we’ve been working on updating our kitchen.

It’s been a slow process.

Recently we had a kitchen sink dilemma…which halted choosing a backsplash tile.

For a distraction…a couple cute little DIY projects were in order.
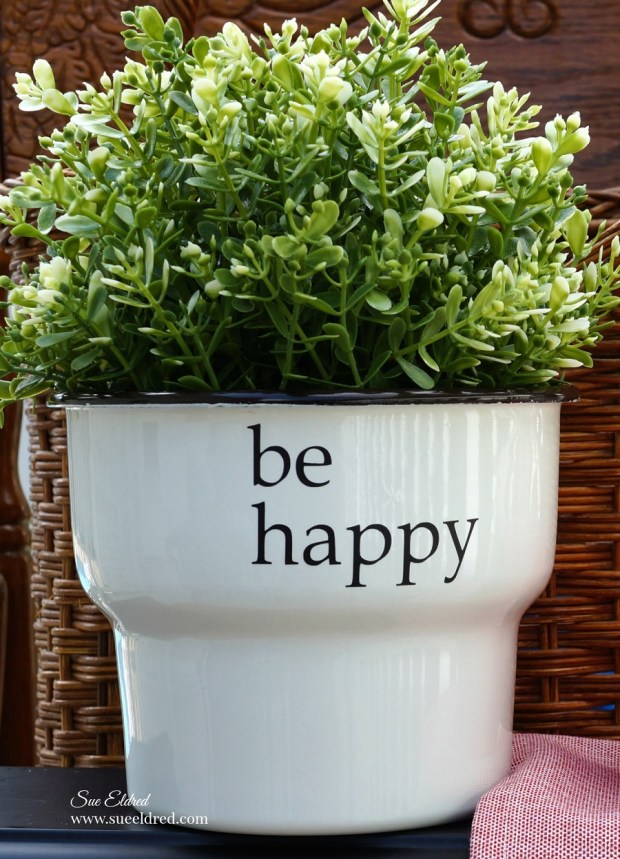
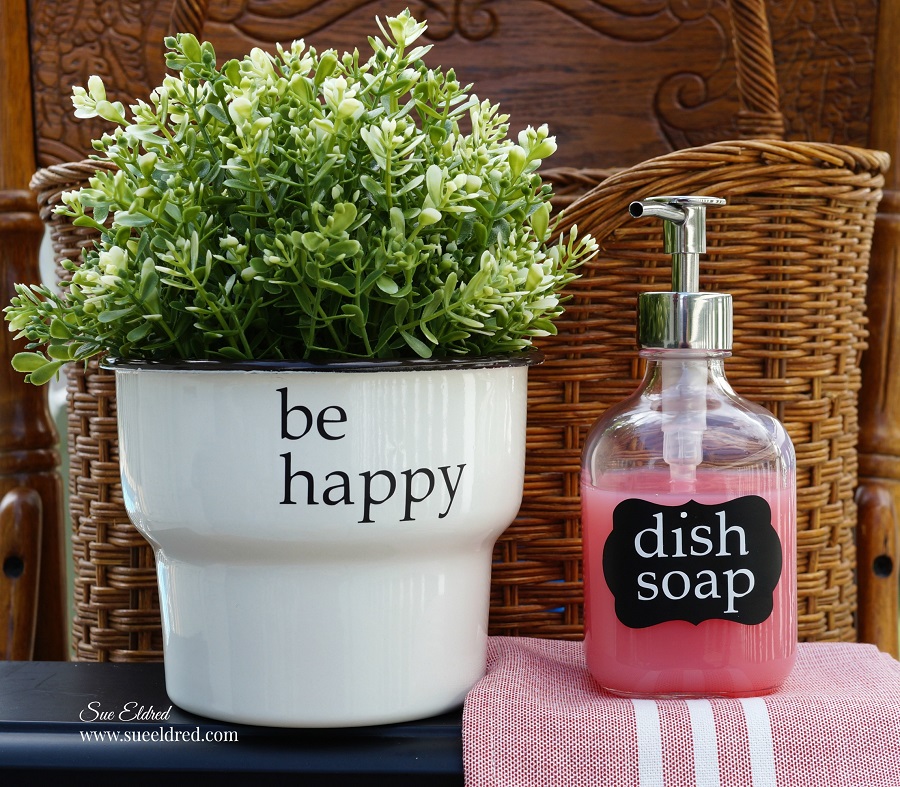
A “Rae Dunn” inspired planter.

I love working with vinyl.  For my “Rae Dunn” inspired planter,

I used a Silhouette Cameo Electronic Die Cutting Machine*to create the words “be happy”

out of Matte Black Removable Adhesive Vinyl* from StyletechCraft.  (*affiliate links)

I simply applied the words onto my planter using Vinyl Transfer Tape*.

So easy to do.

Removable vinyl makes it easy to change out my words with the seasons.

Did you know that this vinyl will remove cleanly for up to two years?

This vinyl film is great for decorating a kid’s room, a classroom or just about

anywhere you just need a temporary graphic.

And, with 27 colors available, it’s not hard to find the perfect color

for whatever you can dream up!

I have dish soap issues.

I like to keep it handy, but, hate the way the regular sized

plastic bottle looks on the counter.

I usually buy the smaller bottles.  (just slightly better)

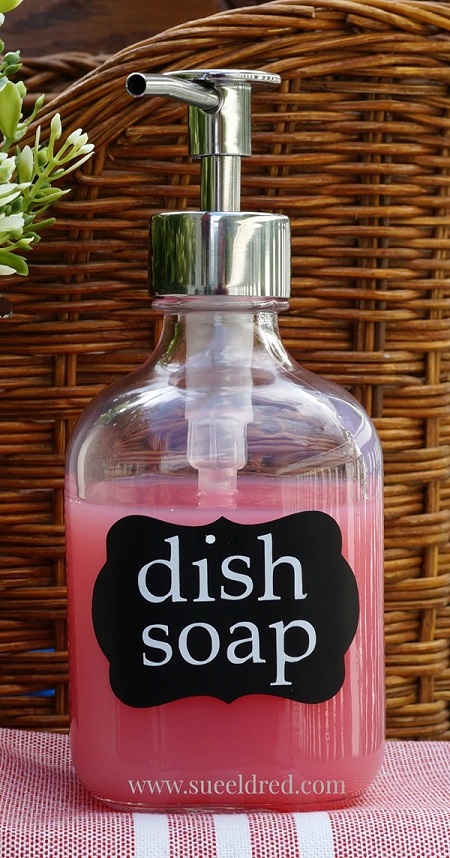
Solution… I picked up the cute soap dispenser during my last trip to IKEA

and also personalized it with the Silhouette Cameo Electronic Die Cutting Machine*.

This time I created a small label using Matte Black Removable Adhesive Vinyl*  

and words using Matte White Removable Adhesive Vinyl*.

It looks so much better than plastic soap bottles.

Fingers crossed, I’ll be sharing the kitchen project soon!

“This is a sponsored post.  As a member of the Tape Technologies Design Team I have been provided product and compensation in exchange for my creative ideas.  The views and opinions are my own.

Shop Your Fav Brands at Scrapbook.com

*Disclosure:  This blog uses ads and affiliate links.  If you choose to make a purchase using one of the links, I receive a small commission (at no additional cost to you) that helps offset the costs of maintaining this blog.  Thanks for your support!

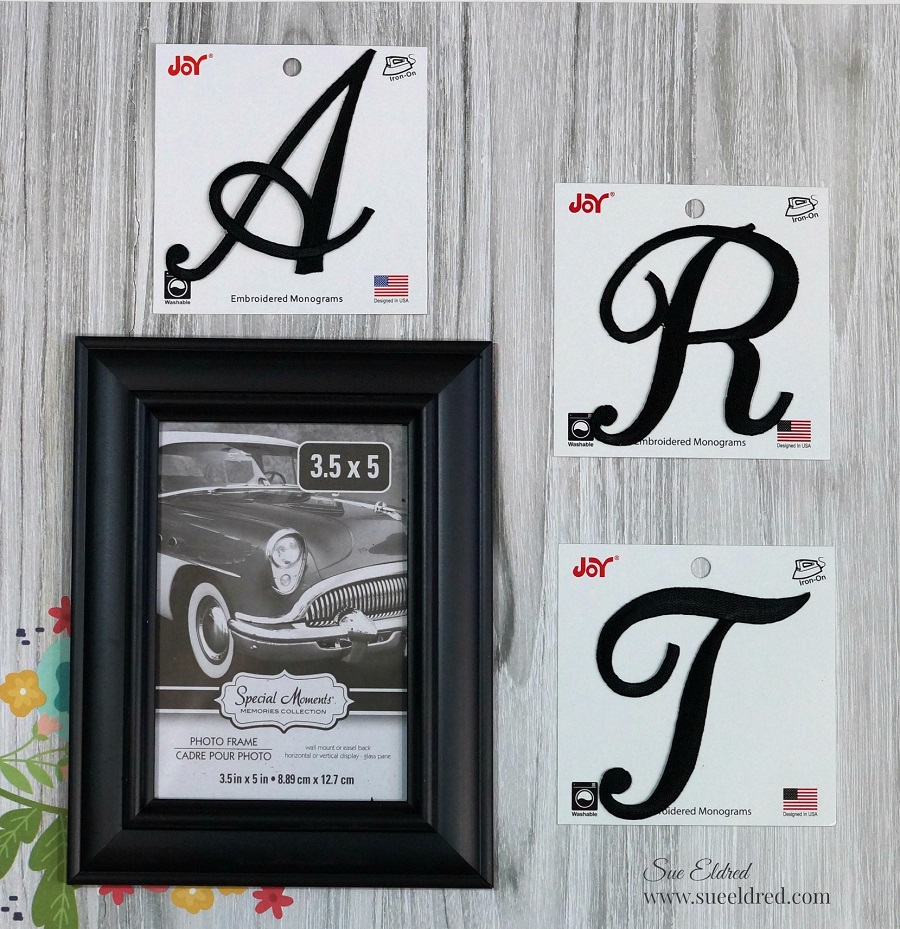
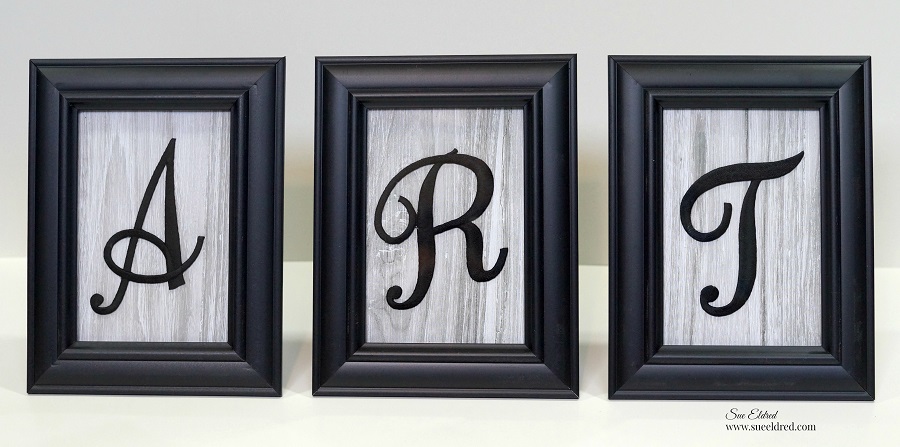
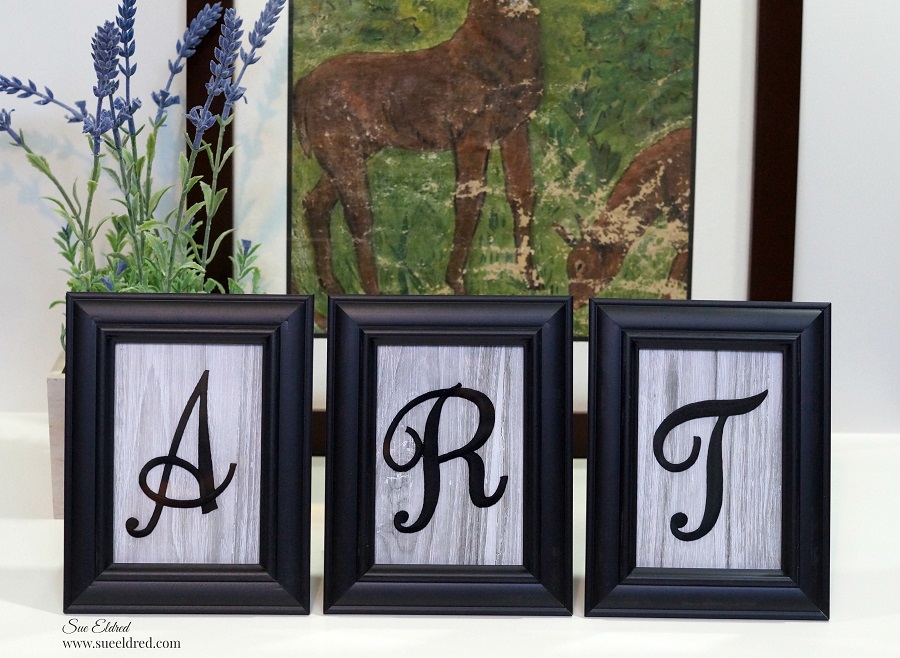
Creating Word Art with Monograms

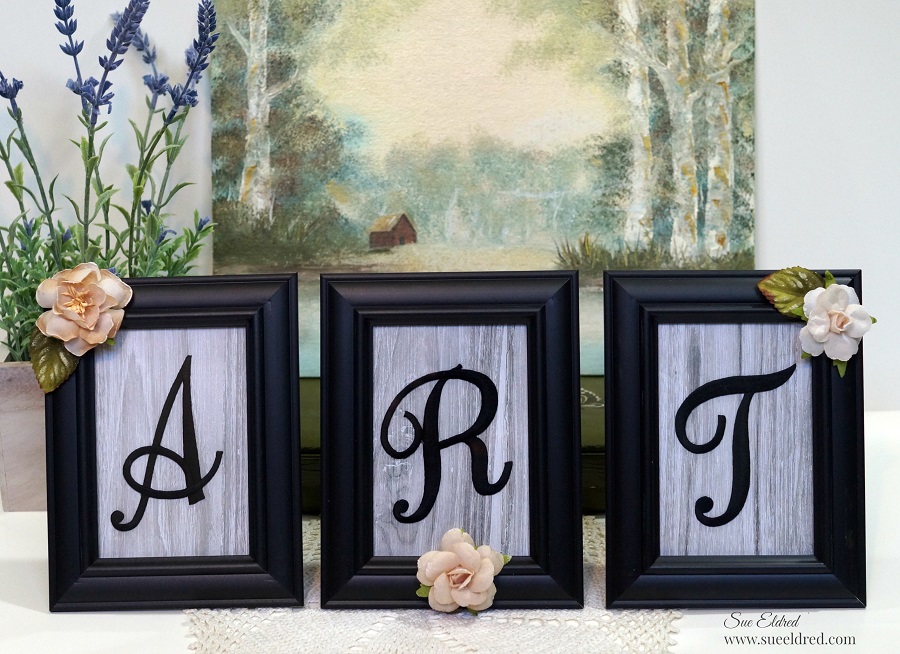
Create Personalized Word Art for your home with framed Monograms.

A Quick and Easy DIY Home Décor project to make using Joy Embroidered Monogram letters.

Here’s what I used:

*Disclaimer:  This post uses ads and affiliate links.  If you choose to make a purchase using one of the links, I receive a small commission (at no additional cost to you) that helps offset the costs of maintaining this blog.  Thanks for your support!
  • Cut the paper to fit inside frame.
  • Glue monogram letters to paper.
  • Insert into frame.
  • Glue flowers to outside of frame.


Try creating a custom wall display using the word “FAMILY”.

Additional sizes of embroidered monograms are available for endless word fun.

You can find Joy Iron-On letters at your favorite craft stores!

This project was sponsored by Joy SA.

Shop Your Fav Brands at Scrapbook.com

Shop Amazon Scrapbooking Supplies*

Painted Happiness Pillow

Happiness Pillow…

One of my favorite childhood memories was the summer I was cast as Lucy in the library’s

production of  “You’re a Good Man Charlie Brown”.

My favorite song was “happiness is”.  At the end of the show we all held hands and sang.

Still makes me happy.

When it comes to using Joy Iron-on letters…

I’ve dyed them, inked them and even misted the letters, I never thought about painting them.

Joy White Embroidered Iron On Letters are great for creating any color you can imagine.

They even work great with acrylic paint.

To Make the Happiness Pillow you’ll need…                            (*affiliate link)

*Disclosure:  This blog uses affiliate links.  If you choose to make a purchase using one of the links, I receive a small commission (at no additional cost to you) that helps offset the costs of maintaining this blog.  Thanks for your support!
  • Paint each letter to create a rainbow of H-A-P-P-I-N-E-S-S.
  • Allow letters to fully dry.

  • Insert cardboard into pillow blank.
  • Add Fabric Medium to acrylic paint white and light blue paint.
  • Paint directly onto the canvas pillow.
  • Allow paint to fully dry.
  • Set Iron to cotton setting, approx. 350 degrees, or follow garment care label.
  • Position letters with shiny side down onto pillow
  • Cover letters with a fine cloth.  With a firm pressure, iron cloth over letters for 30 seconds.
  • Turn pillow over and iron the back for another 30 seconds.
  • Position Embroidered Floral Applique and iron onto pillow the same as the letters.
  • Allow to cool for 1 minute before handling.
  • Insert pillow form or add Polyfil.

Shop Your Fav Brands at Scrapbook.com

Look for Joy® iron-on embroidered letters and numbers at your favorite craft store. They’re available in different sizes, colors and fonts, suitable for every occasion.

“This is a sponsored post.  As a member of the Joy® Design Team I have been provided product and compensation in exchange for my creative ideas.  The views and opinions are my own.

Shop Amazon Scrapbooking Supplies*

BTS Vinyl Pouch

BTS Pouch made with StyleTech Vinyl…

A little BTS project to make with the bigger kids.

I wanted my project to be bright, fun and colorful so I used

Styletech Fluorescent Craft Vinyl from Tape Technologies.

How to make the BTS Vinyl Pouch…                                                           (*affiliate link)

  • Cut two pieces of self adhesive vinyl 4 1/2″ x 8″.
  • Cut a piece of cardstock the same size.
  • Using Vinyl Transfer Tape*, apply vinyl onto cardstock.  Turn cardstock over and add second piece of vinyl onto the back of the cardstock.
  • Smooth out any air bubbles with Bone Folder*.
  • Trim vinyl and cardstock piece to 4″ x 7 1/2″.
  • Score vinyl using a Scoring Board* 2 3/4″ and 5 1/2″.  Fold pouch on creases.
  • Cut 1″ strips of vinyl.
  • Cut vinyl to size and score 1/2″ down the strip.  Use strips to cover sides of pouch.
  • Cut additional strips to decorate pouch.
  • Cut small flowers using Sizzix Triplits Dies ~ Flower 2* to embellish.
  • Add Doodlebug Adhesive Enamel Sprinkles* in center of flower.

  • Punch small hole in top corner and add book ring.
  • On the inside add a piece of hook and loop tape.
  • Use a corner round punch to round the corners of the flap.

For more fun, try making a larger pencil pouch.

“This is a sponsored post.  As a member of the Tape Technologies Design Team I have been provided product and compensation in exchange for my creative ideas.  The views and opinions are my own.

Shop Your Fav Brands at Scrapbook.com

*Disclosure:  This blog uses ads and affiliate links.  If you choose to make a purchase using one of the links, I receive a small commission (at no additional cost to you) that helps offset the costs of maintaining this blog.  Thanks for your support!