Climbing on the “Really Big Rocks” with Warren

Climbing on the really big rocks with Warren 6062

On a warm afternoon in March, I got the chance to play with Warren outside all by himself.

We played basketball for a little while and then he was off to climb on the “really big rocks”. 

Under the tree, in our front yard we have a grouping of big rocks.

When your a two year old little boy it’s the perfect place to climb.

It was such a beautiful day, we played outside for over an hour.
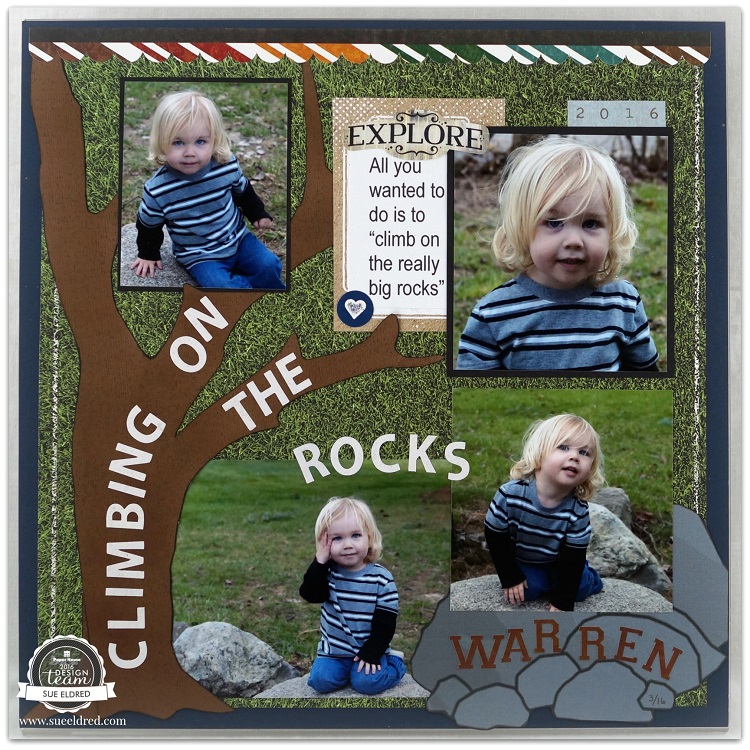
Warren Climbing on the Rocks 6076

I mixed a variety of Paper House Collections to create this fun layout.

From the Faith Collection to Sports and Travel.  They all work well with each other.

Climbing on the rocks close up 6082

I cut a tree silhouette out of brown cardstock and rubbed Tim Holtz Distress Ink in Vintage photo

and outlined the tree with a black marker to give it some dimension.

I printed the rocks clip art onto grey cardstock and cut out.
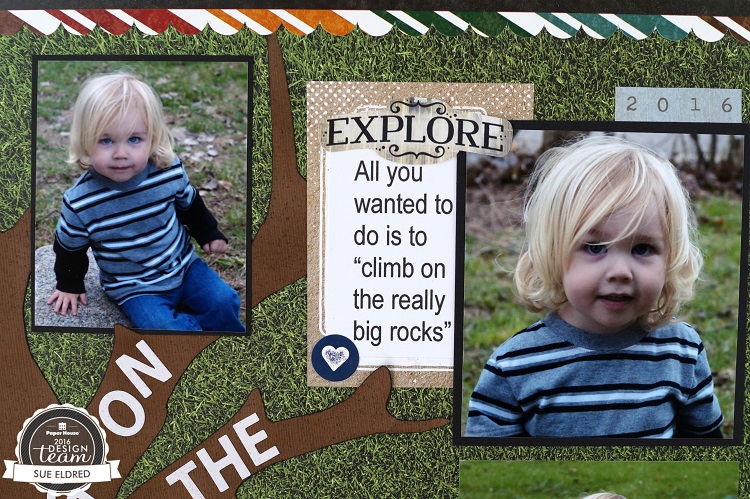
Climbing on the rocks 06083

Here’s what I used for my layout:
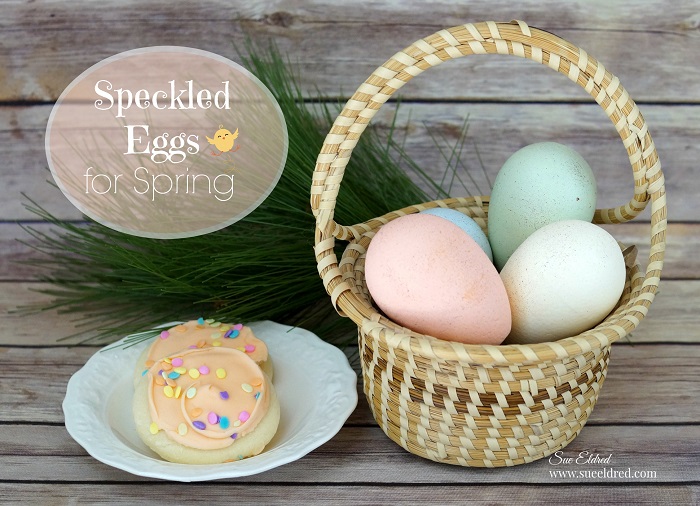
Speckled Eggs for Spring

Speckled Eggs for Spring 4927

Now that I only have a teen-ager at home, we don’t do the dyed eggs anymore.  (he’s no fun)

But… I still needed some soft pastel hued Speckled Eggs for Spring.

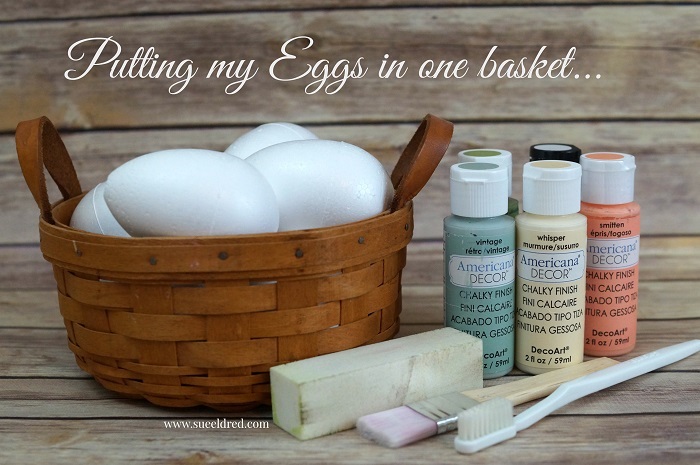
Putting my eggs in one basket 4847

So… I grabbed a few of my Smoothfoam Eggs.

I gave the eggs a light sanding to remove the ridge and painted them with a soft chalky finish.

Like the name suggests, these eggs have a smooth finish making them perfect for painting.

The best way to paint an egg 4895

The best way to paint an egg…

Use a small glass or candle votive to hold the egg.  Paint one half of the egg at a time.

Speckled Eggs Close Up 4943

I especially like the look of speckled eggs, so I grabbed an old toothbrush for speckling.

  • Speckled the eggs by lightly rubbing the old toothbrush into brown paint and gently flicking the paint onto the eggs.
  • Make sure to wear an apron to protect your clothing.  Flicking can be quite messy.

This project was created for and sponsored by Smoothfoam™, The Crafters Foam.

Stitched Sampler

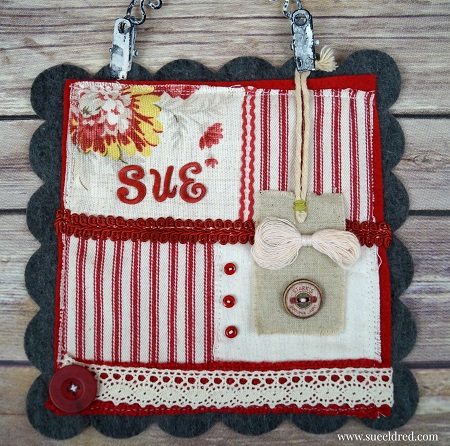
Stitched Sampler

I hate throwing anything away that might possibly be used on a project later.

In an effort to make room and not become a hoarder,

I actually threw these little scraps of fabric away.   (It was hard, I love these prints.)

But…Only minutes later, while I was making a permanent home for my new sewing machine

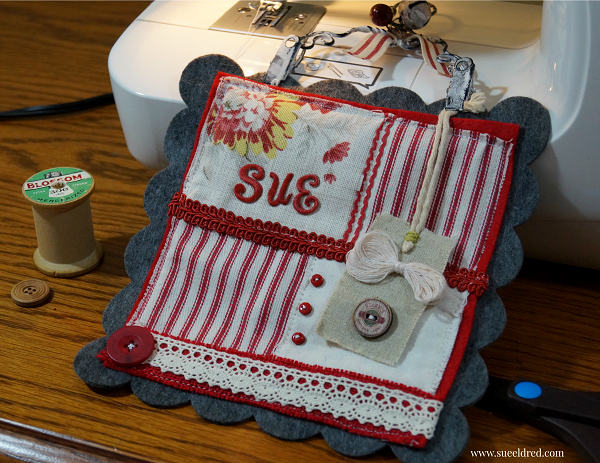
that I got for Christmas,  (thanks Nick and Bonnie) I got the idea to make a stitched sampler.

What a great use for little pieces of fabric.

Now, bear in mind that this is my first real project on my new machine.

Stitched Sampler Close Up

I misted the iron-on embroidered letters from Joy SA and the white decorative trim with

Tattered Angels Ruby Slipper Chalkboard Mist Paint and stitched to my hearts desire.

I cut a large die-cut square out of premium gray felt using my Accu-cut machine.

I’m pretty please with the way it turned out.

Stitched Sampler 3584

This project was created for and sponsored by Joy SA.

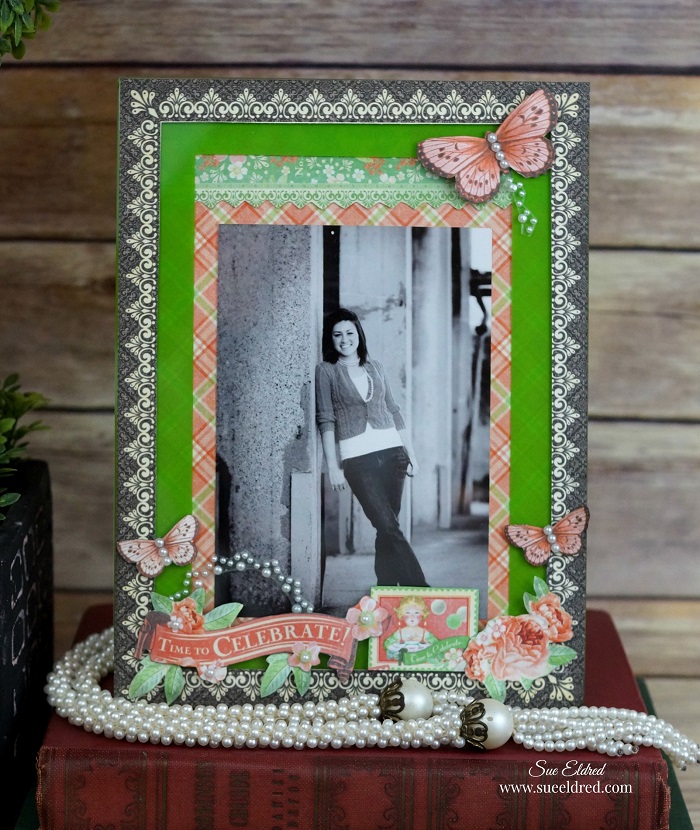
Graphic 45… A Time to Celebrate Frame

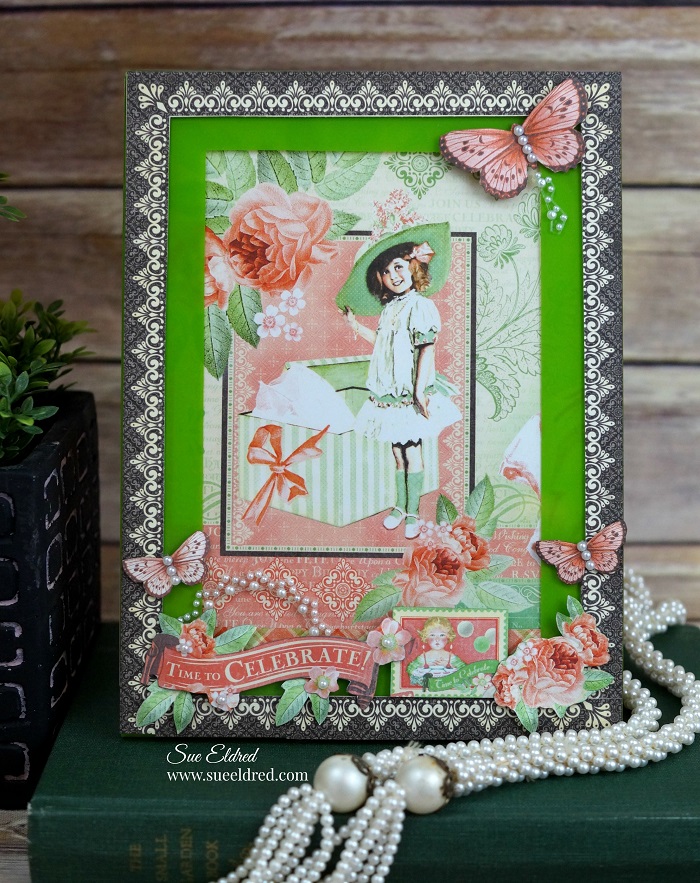
Time to Celebrate 4599

I have a hard time resisting the beautiful patterns of Graphic 45 paper and love using

it in my creations whenever possible. The other day, while I was shopping at my local

Scrapbook Store  I picked up a few sheets of the “Time to Celebrate Collection”.

I thought it would be perfect for a Spring Frame I wanted to make.  I couldn’t decide on

which way I wanted to go with the frame so I created two looks for the same frame.

Time to Celebrate Frame 4709

For a slightly more contemporary look….

I used a older black and white picture of my daughter.  (I love the contract.)

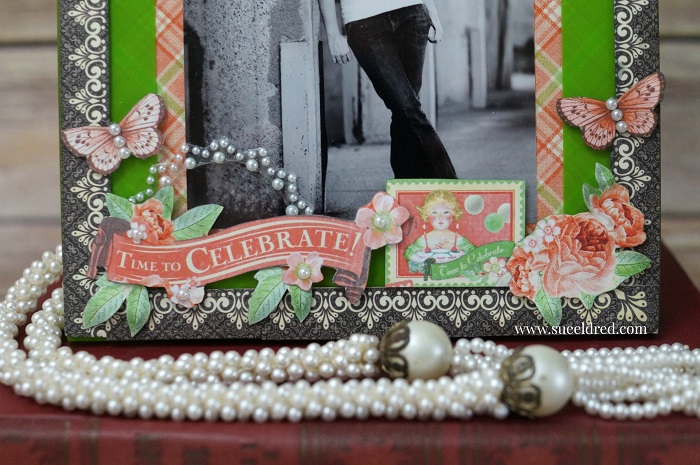
Time to Celebrate Frame Close Up 4835

There’s a bit of fussy cutting involved with this frame.

I used the border on the Time to Celebrate paper to create a border around my green frame.

Then, I started cutting out the butterflies and flowers, giving them slight bends with my fingers

before layering them onto the frame with foam mounting squares.

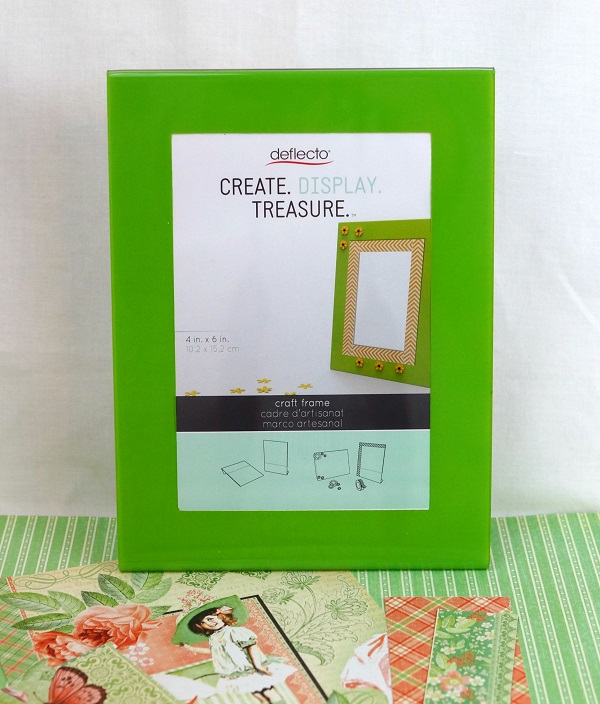
The finished frame is 6″ x 8″ and is made to hold a 4″ x 6″ picture.

Green Craft Frame 2

Here’s what I used:

Deflecto Craft Frame, Green Border, 4x 6 Inches (69574CR)

I used two sheets of paper from Graphic 45’s “Time to Celebrate” collection.


Graphic 45 Time To Celebrate Paper Pad, 12 by 12-Inch(available on Amazon*)


“This is a sponsored post. As a member of the Deflecto Design Team I have been
provided product in exchange for my creative ideas, views and opinions.”

*This post uses Amazon Affiliate links.  I am an Amazon Affiliate


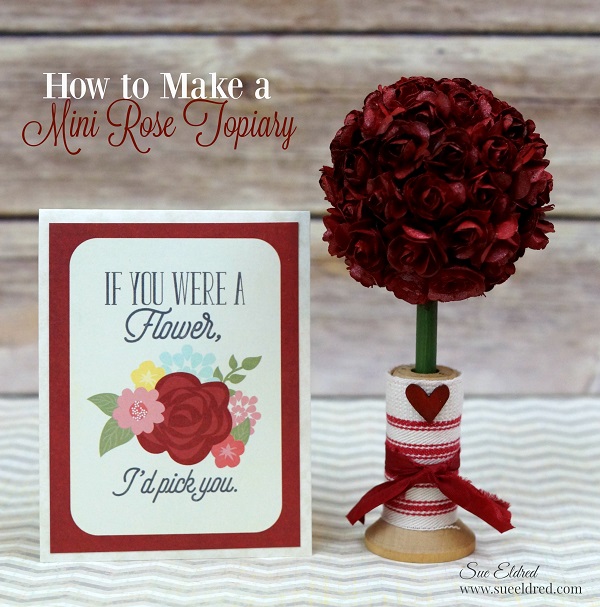
How to Make a Mini Rose Topiary

How to Make a Mini Rose Topiary 04034

Maybe it has something to do with my short stature, but, I have always had a thing for

miniatures.  My momma always told me “Good things come in small packages”.

(which I whole-heartily believed)

The Mini Rose Topiary is a project that can be easily adapted to make larger topiaries.

I just happen to like mine mini.

How to make a Mini Rose Topiary

How to make a Mini Rose Topiary

Here’s what I used:                                                                    (*affiliate link)


Directions:

  1. Spray Roses and small wood heart with the Mistable Paint.   Allow plenty of time to dry.
  2. Paint the 2″ Smoothfoam Ball  and the wood dowel with the green acrylic paint.
  3. Poke hole into the end of the 2″ ball.  Squirt a little glue in the hole and insert the painted dowel.
  4. Starting at the top of the ball.  Glue roses, one by one, onto the ball with a fast drying glue until covered.  After the rose ball is formed, you may want to go back and re-mist the flowers for additional coverage.
  5. Cover the wood spool with the ticking material and glue the end in place.  Tie a small piece of crinkle ribbon around the ticking and glue the wood heart on top.
  6. Insert rose topiary into the small wood spool.

TIP:  Try making a topiary using larger Smoothfoam balls and silk flowers inserted into a pail, vase or containers.

The Mini Rose Topiary was created for and sponsored by Smoothfoam™ The Crafter’s Foam.

"Painting

*Disclaimer:  This post uses ads and affiliate links.  If you choose to make a purchase using one of the links, I receive a small commission (at no additional cost to you) that helps offset the costs of maintaining this blog.  Thanks for your support!


How to Create a Wedding Memories Card Box

I am honored to have had my Wedding Memories Card Box featured as a special project in

DIY Wedding Magazine’s Holiday Issue.

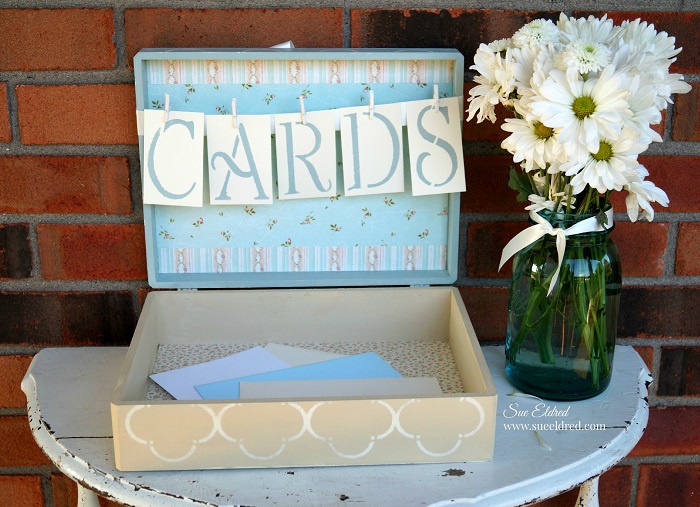
Wedding Memories Keepsake Cards Box 1

The Wedding Memories Cards Box is a dual-purpose box to hold cards at the Reception

and then to be used later to store the Wedding Memories to be cherished for years to come.

Wedding Memories Card Box 8032

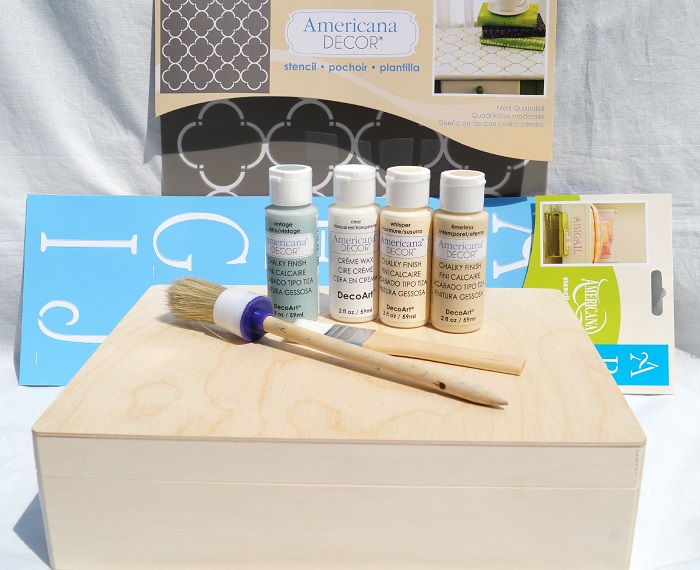
I started with a plain wood box from Walnut Hollow and Chalky Finish Paint from Deco Art to create a soft timeless finish.

Supplies Used:    (*amazon affiliate links)

Finished Size: 9” x 12” x 3 1/2”

Wedding Memories Card Box Collage

Directions:

  1. Paint the top portion of the cornice box with “Vintage” Chalky Finish paint and the bottom portion of the box with “Timeless” Chalky Finish paint. (Inside and out)
  2. Lightly sand the box to smooth out the finish.
  3. Position “Mod Quatrefoil” stencil over the top of the box. Secure the stencil in place with the painter’s tape to prevent slipping. Use stipple brush to apply “Whisper” Chalky Finish paint inside open stencil areas.
  4. Remove stencil.
  5. Position and stencil “Mod Quatrefoil” pattern onto the sides of box.
  6. Allow paint to dry for a few hours and lightly sand over the stenciled area to give a slightly worn look.
  7. Apply clear crème wax onto the inside and outside of the box.
  8. Wait one hour and buff box using a soft, clean rag.
  9. Measure and apply decorative paper onto the inside of the box.
  10. Tie a long length of Antique White Satin ribbon around the top of the box, tying a bow on the top.
  11. Cut cream cardstock into five 2 1/4” x 3 1/2” pieces.
  12. Stencil the letters to spell “CARDS” onto cream cardstock using the 3” Simple Script Alphabet.
  13. On the inside of the box: Clip the letters onto the ribbon using the mini clothespins.

Wedding Memories Card Box closed

This project was sponsored by Deco Arts and Walnut Hollow. 

Shop Handmade – The Wedding Store

Disclaimer:  This blog uses ads and affiliate links.  If you choose to make a purchase using one of the links, I receive a small commission (at no additional cost to you) that helps offset the costs of maintaining this blog.  Thanks for your support!

add a little LOVE in the bathroom

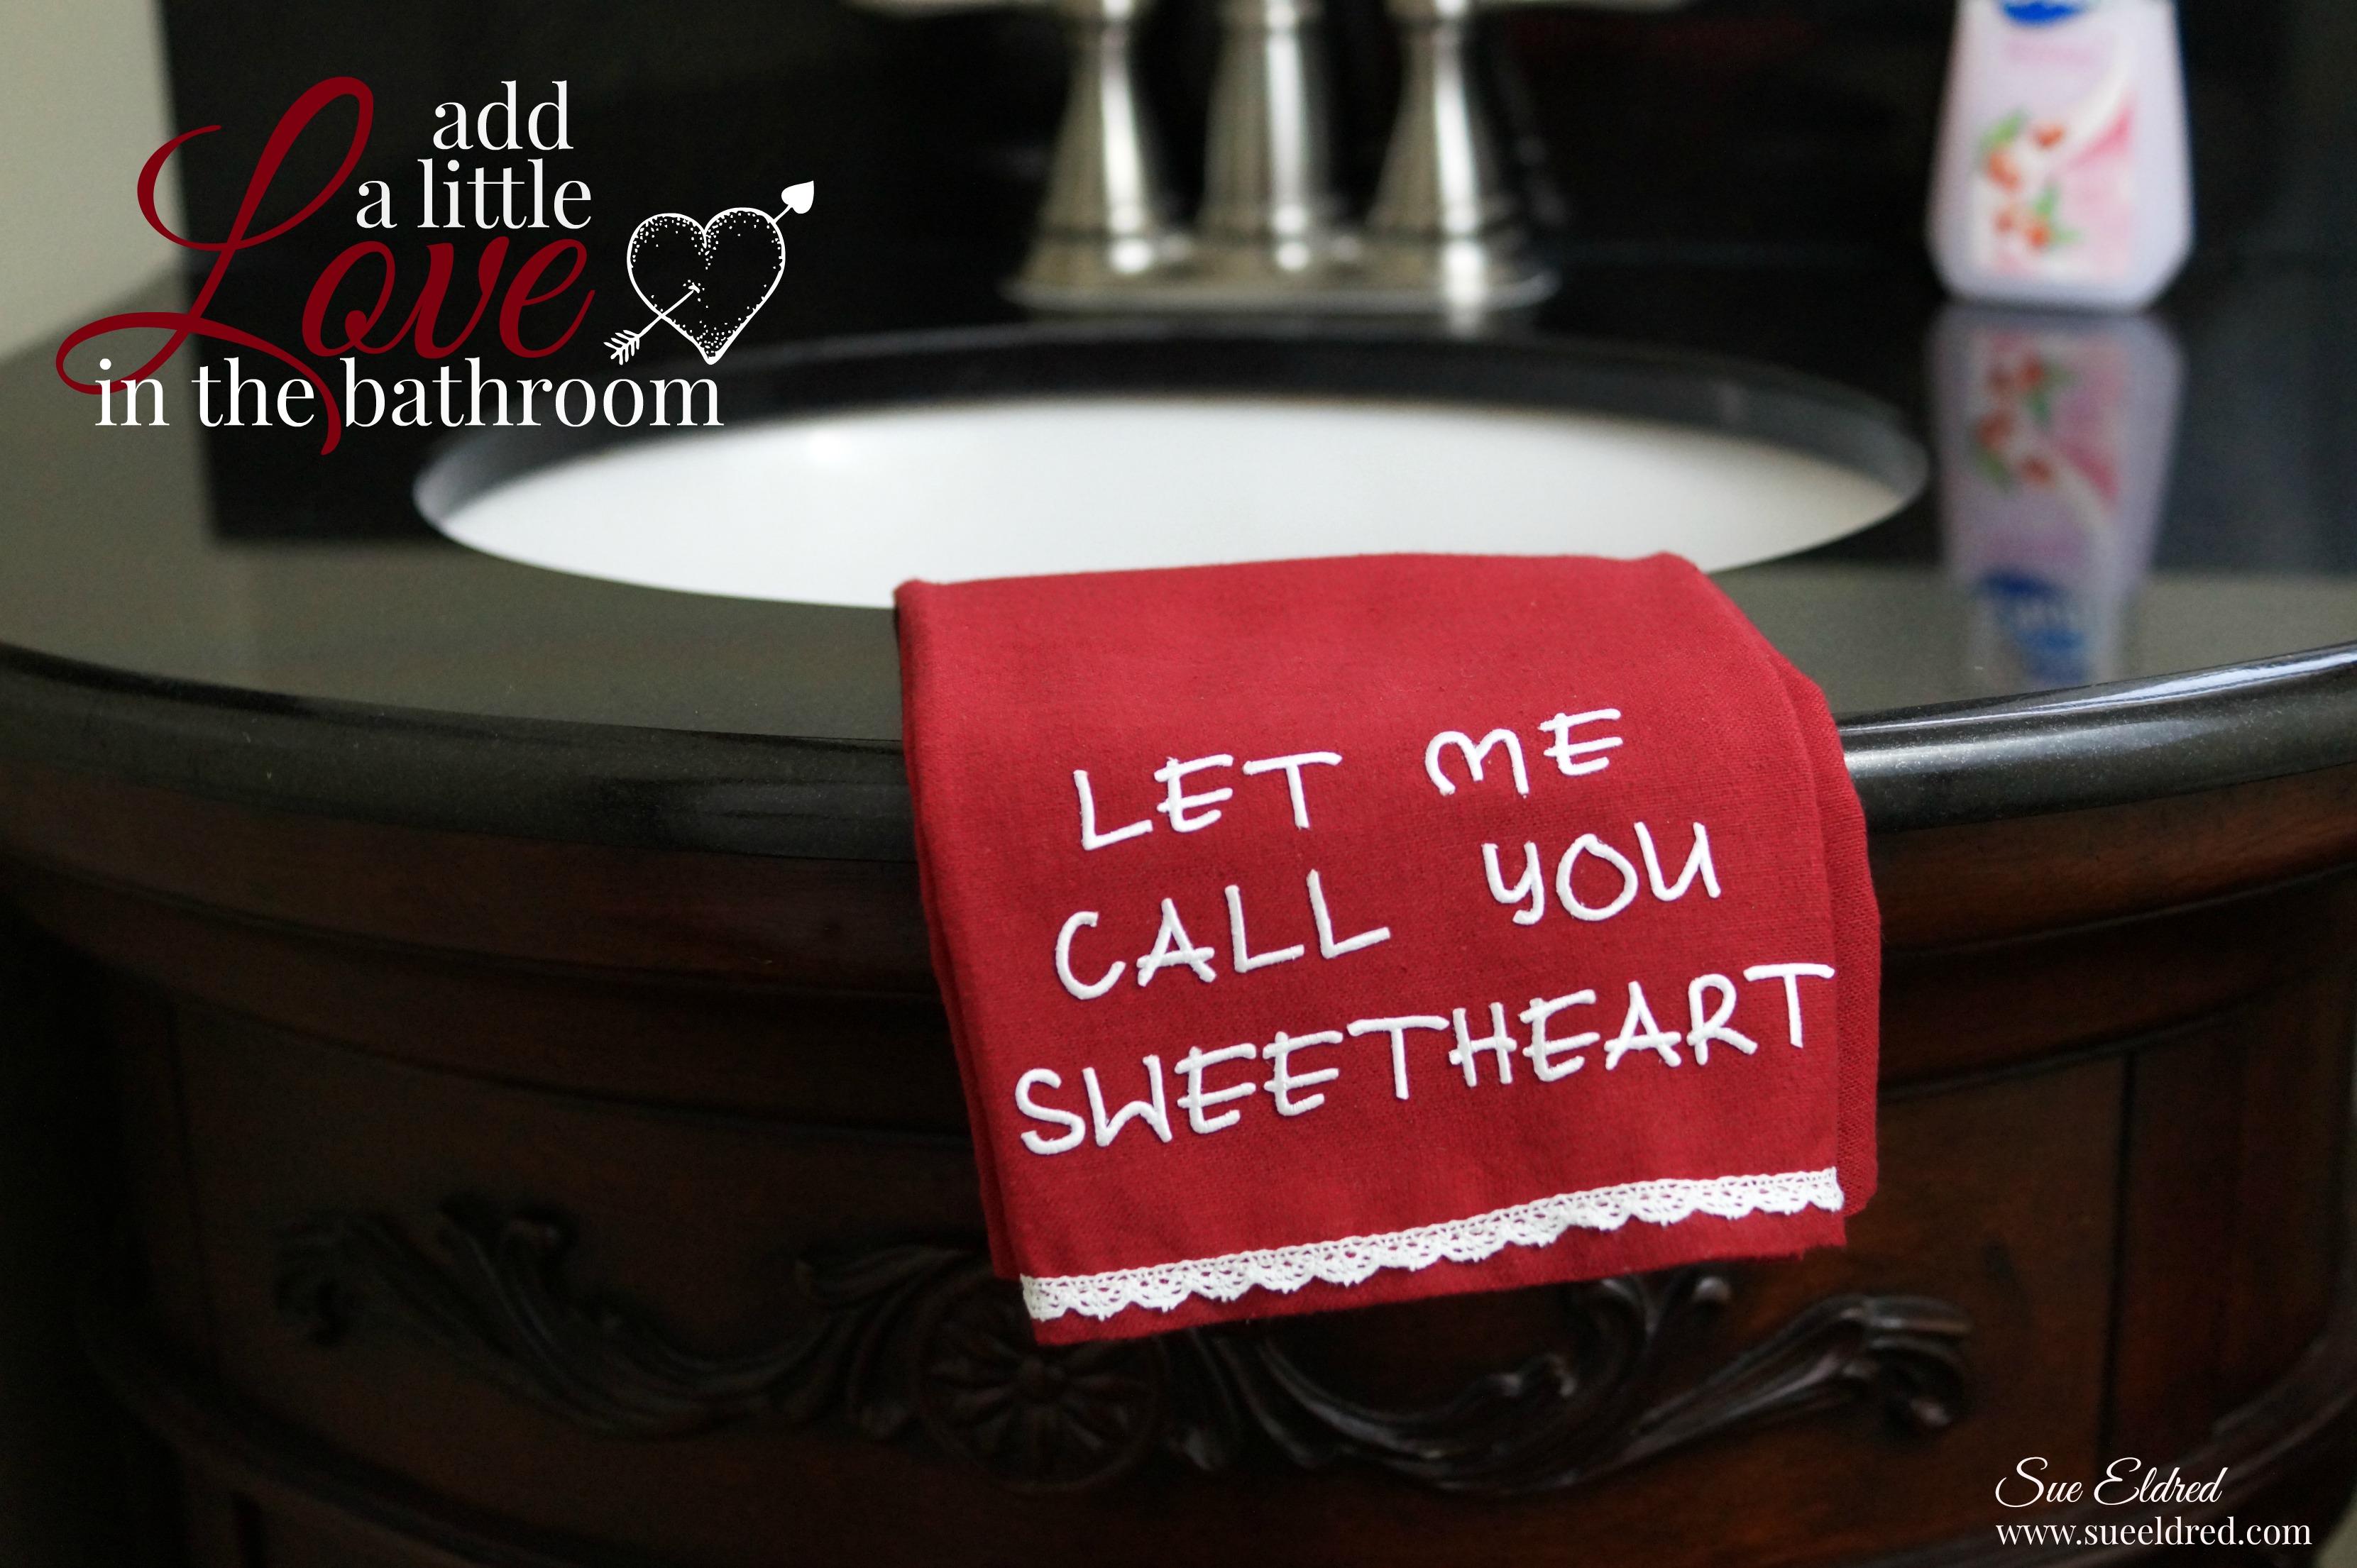
Add a little love in the bathroom 3442

When I was little, my Grandma B loved to sing the song “Let me Call You Sweetheart” to us kids.

It’s a sweet song endeared to my heart.

So… while decorating the house for Valentine’s Day, I thought I’d show my family a little love

by adding a cute embellished hand towel in the powder room.

A perfect way to let them how much they’re loved.

Let me call you sweetheart towel supplies

It’s easy! Use mini Joy embroidered letters to iron-on your message and then sew on a simple lace trim.


This project was created for and Sponsored by Joy S.A. Inc.

DIY Etching on a Mirror

Etched Mirror 4197

It all started with an inexpensive gold mirror that my daughter didn’t want anymore.

I had spray painted it red and left it like that for a couple of years.  (it was o.k.)

I took it off the shelf, while cleaning the other day, and decided it needed an immediate update.

Of course, I had to stop cleaning.  (when inspiration strikes)

Etched Mirror Collage

This is how I etched my mirror…                                                                       (*affiliate links)

  • I removed the mirror from the frame.  I gave the red frame a light sanding and then painted it with Tattered Angels Decor and DIY Paint, Ebony*.
  • I cut an oval mask using etchall etchmask*  vinyl and centered it on the mirror.  Make sure to burnish the vinyl to get out air bubbles and to make sure the all edges all down.
  • Apply a thick coat of etchall Etching Crème* over the sides of the mirror using the squeegee.  It’s important to get an even coat of etching crème to achieve a consistent even etch.  (remember more is better)
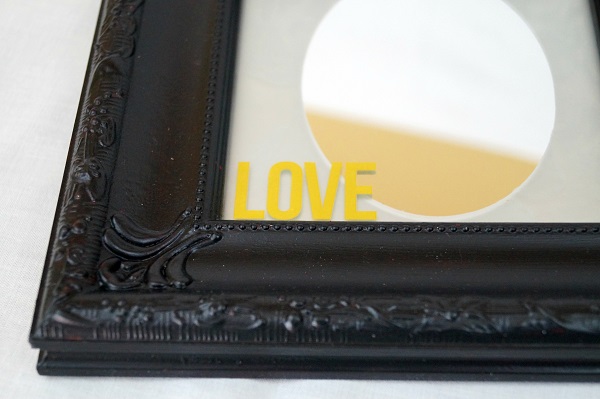

  • Wait 15 minutes.  Scrape excess etching crème from the mirror and return the extra etching crème back into the bottle. (it’s reusable)
  • Rinse mirror with warm water to clean.
  • Remove mask and dry.
  • Return the mirror back into the frame.  Apply the gold “love” rub-on onto the mirror.

Frosted Mirror Close UP 3711

New to Etching?  You might want to check out the video on the Etchall getting started page.

The Etched Mirror project was created for and sponsored by Etchall®.

*Disclosure:  This blog uses ads and affiliate links.  If you choose to make a purchase using one of the links, I receive a small commission (at no additional cost to you) that helps offset the costs of maintaining this blog.  Thanks for your support!

Shop Your Fav Brands at Scrapbook.com

Love You?

True story…

I occasionally submit cards and projects to various magazines for publication.

In return I sometimes get a small check.

Usually, the check comes several months later after I’ve completely forgotten all about it.

Love You Check Stub 3997

So…when I opened this check and saw the handwritten note on the stub,

I thought (gee) that’s kind of a personal message.

It had me scratching my head…

That was until I remembered the name of the card.  (silly me)

Craft Ideas Winter 2015-2016

My “Love Ya” Card was featured in Crafts Ideas Winter Edition.

Art Play Paintables Love You Card

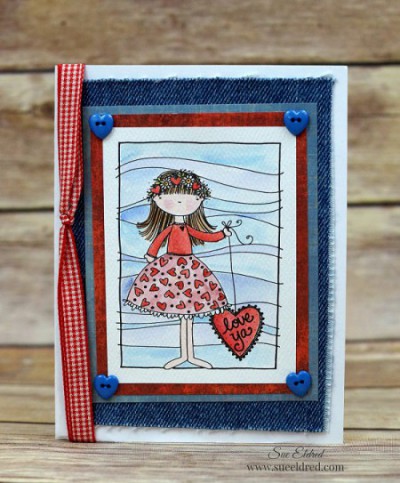
“Love Ya” Card…

A sweet card for Valentine’s Day or any day you want to spread a little love.

Materials List:

  • Waterbrush
  • AdornIt Art Play Paintables: 22646 Love You Paintable
  • AdornIt Blender Basics: 22480 Blue Chevron 12 x 12
  • AdornIt Blender Basics: 22504 Red Chevron 12 x 12
  • Denim Fabric (Canvas Corp Brands)
  • Red and White Gingham Ribbon
  • Tim Holtz Distress Inks: Fired Brick, Victorian Velvet, Stormy Sky
  • Tombow Markers: #969 Chocolate, #553 Mist Purple, #850 Flesh, #800 Baby Pink
  • 1/8” Score Tape
  • Mini Glue Dots
  • Piece of Acetate

On the card, I used a simple watercolor technique that uses ink from markers and inkpads and uses a small piece of acetate as the palette. By scribbling directly onto the piece of acetate with the marker or by applying the ink directly from the pad, I have a variety of rich color to watercolor with. I simply color in the image using the water-brush.

Directions:

  1. Cut “love you” image from the Art Play Paintable Sheet leaving a thin white border.          (approx. 2 3/4” x 3 3/4”)
  2. Give the background of the image a light watercolor wash using ink from the Stonewashed Adirondack inkpad and the #553 Mist Purple marker.
  3. Watercolor the girl’s hair using the #969 Chocolate marker. Color in the face with #850 Flesh marker. Highlight the cheeks with #800 Baby Pink marker. Watercolor the leaves with Peeled Paint ink and color the center of the flower with #993 Chrome Orange.
  4. Watercolor the skirt with Victorian Velvet inkpad and the top and hearts with Fired Brick ink.
  5. Adhere image onto a 3 1/4” x 4 1/4” piece of the Red Chevron plain side.
  6. Adhere those layers onto a 3 1/2” x 4 1/2” Blue Chevron layer.
  7. Cut a piece of denim fabric 4” x 5 1/4”, adhere onto a 4 1/2” x 5 3/4” card using scoretape. Adhere layers onto denim using score-tape.
  8. Add four heart buttons to each side of the layers using mini glue dots.
  9. Tie a red gingham bow around the front of the card.

You & Me Valentine’s Frame

Valentine's Frame

With Valentine’s Day right around the corner…

I wanted to share a simple little project that’s really quick and easy to put together.

A Valentine’s Frame using the You & Me Collection from Simple Stories.

This cute little frame, from Canvas Corp Brands, is only 6″ x 6″ and I love how versatile

it is to decorate.  The larger section is perfect for a 4″ x 6″ picture and if white’s not your

style it’s available in wood stained.  I added dimension to the frame by adding

cubes made from cardstock behind the “love you lots” and “pail of flowers”.

I dressed it up by gluing on metal corners from Tim Holtz.

Click on the pictures below for ordering information.  (affiliate links)


Disclaimer:   This post uses affiliate links.  If you choose to place an order using one of the links, I will get a small commission that helps maintain the cost of running this blog.  Thanks!