DIY Color Changing Mugs

How to make color changing mugs.

DIY Color Changing Mugs.

How to take ordinary mugs from the Dollar Store and create a colorful surprise for your Summer table.

A fun project using StyleTechCraft’s Cold Color Changing Vinyl.

How to make color changing cups.

For this project, I’m thinking Summer and a nice ice-cold mug of Strawberry Lemonade.

How to use color changing vinyl on glassware.

Materials Used:

*Disclosure:  This blog uses ads and affiliate links.  If you choose to make a purchase using one of the links, I receive a small commission (at no additional cost to you) that helps offset the costs of maintaining this blog.  Thanks for your support!

StyleTechCraft's Cold Color Changing Vinyl.

Directions:

StyleTechCraft's Cold Color Changing Vinyl.

  • Cut a piece of Vinyl Transfer Tape* to fit over the vinyl image.  Gently rub over the transfer paper using the squeegee tool.

DIY Color Changing Mug

  • Remove the vinyl from the white liner, center the image on the front of the mug.
  • Gently rub over the Vinyl Transfer Tape* to make sure all the image has transferred.  Remove the transfer tape.

StyleTechCraft's Cold Color Changing Vinyl

The flower pattern on the mug (before changing) has a subtle etched glass appearance.   

DIY Color Changing Mugs

Imagine their surprise when the pattern changes right before their eyes.

A fun complement to Summer.

What would you make with color changing vinyl?

“This is a sponsored post.  As a member of the StyleTechCraft Design Team I have been provided product and compensation in exchange for my creative ideas.  The views and opinions are my own.

Crafting Beach Vibes

A few fun projects using the Beach Vibes stamp and die sets from The Maker’s Movement.

(If I can’t get to the beach, I might as well bring the beach to me.)

I am really loving the Beach Vibes Stamp and Die Set.  So many cute images to use.

*FTC Disclosure… “This is a sponsored post for The Maker’s Movement.  I have been provided product and compensation in exchange for my creative ideas.  The views and opinions are my own.”

Before I ever start creating my projects…

I stamp the images onto watercolor paper* and practice coloring.

It’s a great way to decide the best marker color to use.

Using watercolor paper* makes it easy to blend the markers.

Tip…I start with the darker colored marker and finish coloring the image with a complimentary lighter-colored marker, blending the colors as I go.

FIY…I have my markers stored in the  Expandable Marker Accordion* from Deflecto.

Beach Vibes Frame

Using the Crossover II Die Cutting Machine*, I was able to easily line up the coordinating die

to the colored image to cut out.  I added a few extra dots to my colored image before mounting

the Sandcastle to the corner of the frame.

Tip…I used blue painters tape and masked part of the “beach vibes” stamp and stamped the words one at a time.

Life is Better in the Sun…

I may complain a little bit when it gets super humid, but I would trade the snow and cold for a warm summer day anytime.

Tip…The background on this card is super simple to create.  Using an ink blending tool and several colors of dye ink, rub the ink onto the watercolor paper.  Spray the paper with water and dry the paper with a hairdryer.  (Easy Peasy)

The Sandcastle stamp also makes a perfect Ice Castle for a cute little princess. 

  • I stamped the Sandcastle on watercolor paper*.  I had fun coloring the castle in purples and blues and blending the colors.
  • I added a thin layer of white liquid applique* to the castle to look like snow. I let the liquid applique dry before heating it with a Heat Tool* to raise it.
  • To make the castle extra frosty, I painted the castle with Clear Glitter Glue*.
  • I framed the Ice Castle with a white scallop frame cut from the MOD287 Nested Square Frame Set.  (It makes a perfect little gift tag.)

*Disclosure:  This blog uses ads and affiliate links.  If you choose to make a purchase using one of the links, I receive a small commission (at no additional cost to you) that helps offset the costs of maintaining this blog.  Thanks for your support!

Sweet Summer Flower Stand Card

Sweet Summer Flower Stand Card

It’s always a good day when I get to buy flowers.  

I stopped by the Garden Center this morning to pick up a few more.  (can you have too many?)

I LOVE FLOWERS!

I was so excited when I got the opportunity to make a sample for Maker’s Movement using

the new Lemonade Stand Stamp and Die Set.  It is so versatile. 

It makes a cute little Lemonade Stand, Flower Stand, and Fall Cider Stand.  

*FTC Disclosure… “This is a sponsored post for The Maker’s Movement.  I have been provided product and compensation in exchange for my creative ideas.  The views and opinions are my own.”

Here’s what I used to make the Sweet Summer Flower Stand:            (*affiliate link)


*Disclosure:  This blog uses ads and affiliate links.  If you choose to make a purchase using one of the links, I receive a small commission (at no additional cost to you) that helps offset the costs of maintaining this blog.  Thanks for your support!

Building the Flower Stand

  • When clearing out my mom’s paper collection, I found this woodgrain cardstock.  I never knew what to use it for until I made this card.  Now I wish I could tell you where to find it.
  • The flower stand die has three sizes of dies to use as the board to build the stand.
  • I adhered two pieces of paper together to create thickness.  Run paper and dies through the Crossover II die-cutting machine to cut the shape.
  • I used basic building construction to make my stand.
  • For the awning, I die-cut two pieces.  (one striped, one blue floral)  Cut two sections from the blue floral and adhere to the striped awning piece.

Super Simple Watercolor Background

  • The key to the background is to use watercolor paper.
  • A simple swish with a wet brush and blue watercolor paint to create the background.

Lots of Dimension and Details

  • What makes this card special is all the little details.
  • I used a lot of foam dots behind the various pieces to create a lot of dimension.
  • I doubled up the foam dots under the awning and sign.

I loved the way the card turned out.   I will be making a Cider Stand for fall soon.

Shop Now!

Patriotic Themed Summer Party

Celebrate the Red, White, and Blue!

No matter if your party is big or small.

It’s easy to throw together a Red, White, and Blue Patriotic Themed Summer Party.

Gather up some hotdogs, burgers, and brats for the perfect Summer BBQ Get-Together.

Here are a few Ideas to make the Summer Holidays fun and special.

Grab and Go Party Ware.

Bring Deflecto to your next party.

I used a Deflecto Stackable Caddy Organizer* to hold my tableware and condiments

for easy grab and go.

Disclosure:  “This is a sponsored post. As a member of the Deflecto Design Team I have been provided product and compensation in exchange for my creative ideas, views and opinions.”

Bold Stripes and Bright Stars

Every party needs a few yummy desserts.

The 3 Tier Dessert Stand* from Deflecto is perfect for displaying cupcakes and other goodies.

It is easy to put together and folds flat for compact storing.

All three tiers on the stand have holes for holding cake pops.

They were the perfect size for inserting small flags and the handmade banner for the top.

How to make the Banner…

  • Cut two bamboo skewers 6″ each.  Wrap the ends with decorative washi tape.  The washi tape helps keep the skewers securely in place when inserting in the stand.
  • Die-cut or hand-cut 5 banners out of decorative scrapbook paper.
  • Tie a piece of blue and white twine on each end of the bamboo skewers.
  • Fold banners and adhere to the twine.
  • Apply letter stickers on the front of the banners.
  • I used red glitter vinyl and my silhouette die-cutting machine to create the words USA to apply to my banners.
  • Stick on each side of the top tier in the holes made to hold cake pops.

Little details make everything more festive.

Don’t forget to make a few star picks to stick into the cupcakes.

This is a fun project that the kids can help you make.

  • Create the picks by punching or die-cutting several blue and red stars.
  • Add adhesive to the back of the star and place a toothpick in the center.
  • Adhere a second star on the back.
  • For quick and easy work, I used the Xyron Create-A-Sticker* to add adhesive to the stars.
  • Decorative the stars with additional small foil stars.

Add a touch of Vintage Americana with blue Ball mason jars. 

They are great for storing straws, and they also make great drinking glasses.

And when the sun starts going down, don’t forget the sparklers and glow in the dark novelties.

Summer Fun Party Decorations Ideas:

I found most of my supplies at Michael’s Craft Store, Dollar Tree and Walmart.

←PIN ME

Products Used for your convenience…

*Disclosure:  This blog uses ads and affiliate links.  If you choose to make a purchase using one of the links, I receive a small commission (at no additional cost to you) that helps offset the costs of maintaining this blog.  Thanks for your support!

Save

The Pool is Calling Drink Holder

It feels like Summer is here now that the pool is officially open.

A few more bright and sunny days, and I’ll be ready to jump in.

Who am I kidding?  I’m either under the umbrella or on my pool float relaxing.

And since we’re not allowed to have glass items by the pool, (my rule) I made myself

a cute drink container using an expensive stainless steel tumbler found at Dollar Tree*.

*Disclosure:  This blog uses affiliate links.  If you choose to make a purchase using one of the links, I receive a small commission (at no additional cost to you) that helps offset the costs of maintaining this blog.  Thanks for your support!

For my drink holder, I used Iridescent Opal Vinyl* from StyleTechCraft to create the words.

I love the way the Opal Vinyl shimmers and changes with the light.

StyleTechCraft Opal Vinyl* comes in nine different colors for a lot of fun options.

While taking pictures of the products for this post, one of the pieces flew into the pool.

I thought it was ironic, so I took a picture.  (opal vinyl holds up in water)

Here’s what I used to create my drink holder:            (*affiliate links)

StyletechCraft products brought to you by ATSM Craft*

Directions:

  1. Wipe the surface of the tumbler with the alcohol wipe to remove any oils.
  2. Use the Silhouette Electronic Die Cutting Machine to cut the words “the Pool is Calling!” out of Opal and White Craft Vinyl
  3. The cut file I used came with an outline for the word “Pool”.  I cut it out of white glossy craft vinyl to make the word “Pool” stand out.
  4. Use a small piece of transfer paper, place onto the individual letters that spell the word “Pool”.  Place letters one by one on the white outline.
  5. Cut a piece of transfer paper slightly larger than the white vinyl outline.
  6. Apply transfer tape over the outline. Give the transfer tape a gentle rub.
  7. Apply the word “Pool” onto the tumbler.
  8. Apply additional words onto the tumbler.
  9. Allow the vinyl to cure on the tumbler for 4 days before using. (Hand wash Only)

“This is a sponsored post.  As a member of the StyleTechCraft Design Team I have been provided product and compensation in exchange for my creative ideas.  The views and opinions are my own.

Grand Haven

When you can’t get to the ocean a trip to the lake is the next best thing.

I love the sounds of the ocean, toes in the sand with not a care in the world.  (I really do!)

Sometimes it’s just not in the cards.  When that happens, the lake is a pretty close second.

We took a few days to unwind, relax and enjoy the scenery.

We’ve been to several towns around Lake Michigan but this was our first trip to Grand Haven.

It’s a pretty little place with a quaint downtown and plenty of great places to eat.

On Sunday night we happened upon a free concert downtown by the water

and then on Monday night a free musical water light show.

For a small town there’s a lot to do.

On Tuesday, I didn’t quite have my fill of water so we stopped in South Haven on our way home

for a bite to eat and another lighthouse to explore.

South Haven Lighthouse.

I could sit and watch the sailboats for hours.  Not a bad way to recharge the old batteries.  (I almost got my recommended dose of vitamin sea.)

*Disclosure:  This blog uses ads and affiliate links.  If you choose to make a purchase using one of the links, I receive a small commission (at no additional cost to you) that helps offset the costs of maintaining this blog.  Thanks for your support!

Nick’s New Swim Team Jacket

Nick joined the swim team this summer and I couldn’t be more proud of him.

I got to watch him at a few of the swim meets and was so impressed on his abilities.

He’s always loved being in water and has really become quite the swimmer.

I’m not sure I’d make it across the width of the pool let alone the length.

He even swims the 100 meter race.  (4 lengths of the pool for us non-swimmers)

Not bad for an 8 year old.

He’s so proud of his swim gear.  (Isn’t he handsome?)

But…his new Super Cool Swim Team Jacket didn’t come with the option for personalization.

Joy® Embroidered Iron-On Monogram letters to the rescue.

For his Swim Team Jacket we used:

  • One Super Cool New Swim Team Jacket

  • Joy® Baby Monogram Iron On Embroidered Letters

  • Iron and pressing cloth

Directions:

  1. Check Garment care label before choosing which setting to set your iron.

  2. Remove letters from sheet.  Position letters with shiny side down on jacket.

  3. Cover letters with fine cloth.  With firm pressure iron cloth over the letters for 25 seconds.

  4. Turn jacket inside out and iron the back of the letters for 25 seconds.

  5. Allow to cool for 1 minute before handling.

Joy® iron-on embroidered letters and appliqués can be found at your local craft stores!

“This is a sponsored post.  As a member of the Joy® Design Team I have been provided product and compensation in exchange for my creative ideas.  The views and opinions are my own.

Shop Your Fav Brands at Scrapbook.com

*Disclosure:  This blog uses ads and affiliate links.  If you choose to make a purchase using one of the links, I receive a small commission (at no additional cost to you) that helps offset the costs of maintaining this blog.  Thanks for your support!

Quick and Easy Summer Mini Album

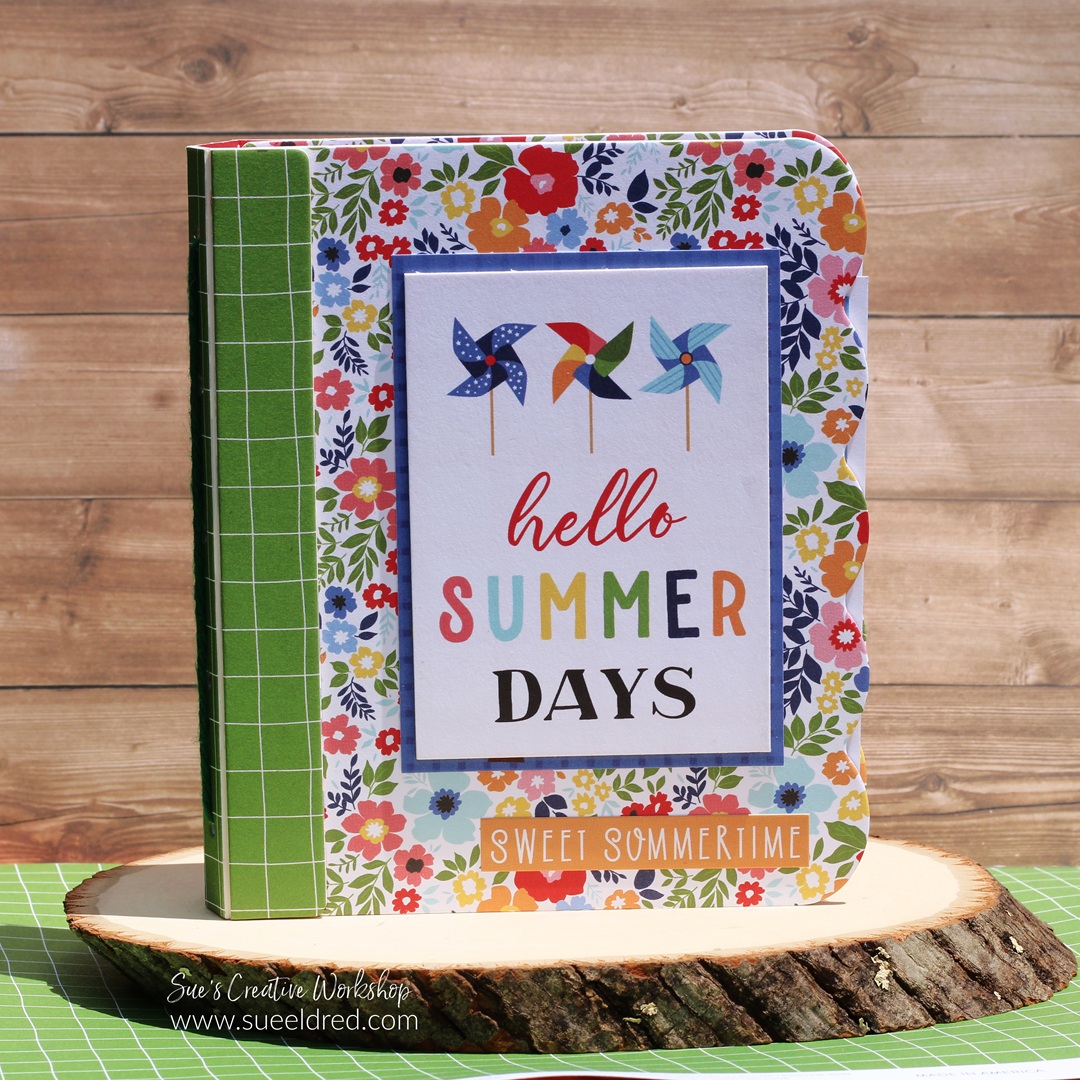
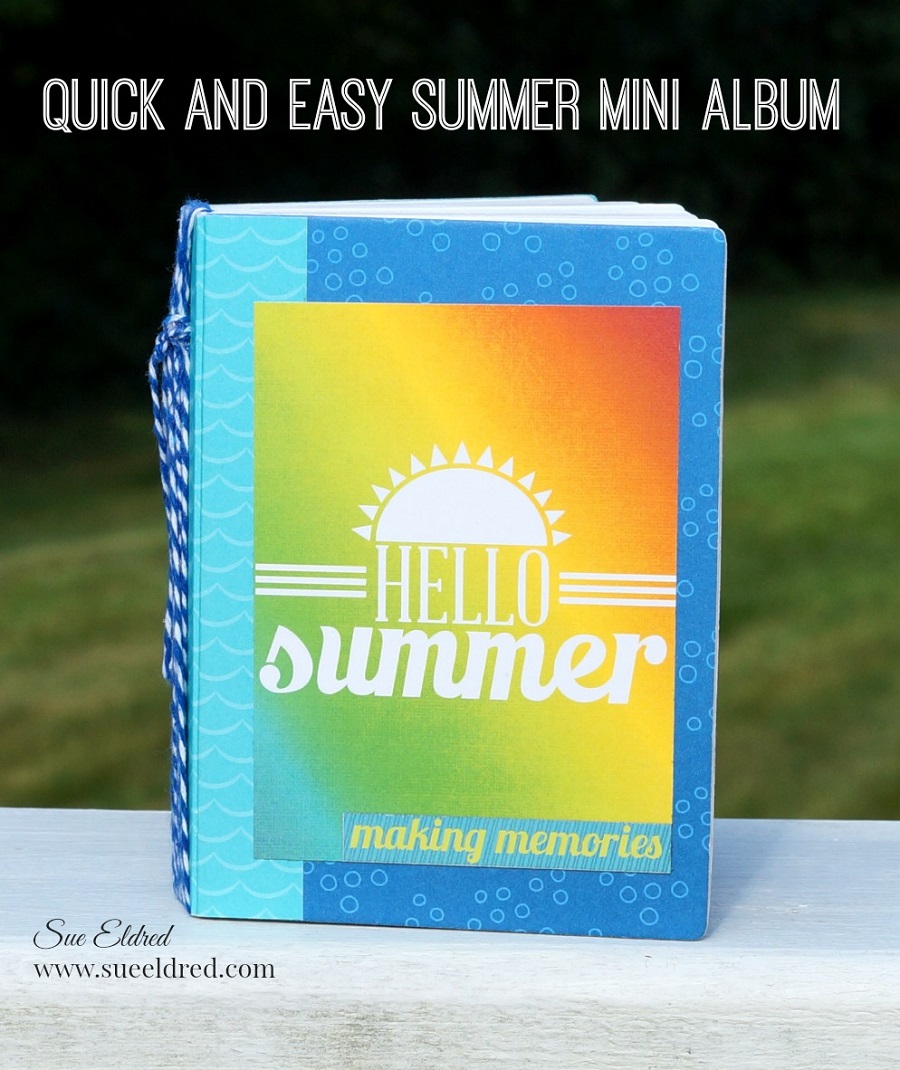
Quick and Easy Summer Vacation Mini Album

You don’t have to take an expensive Summer Vacation to have fun when your a kid.

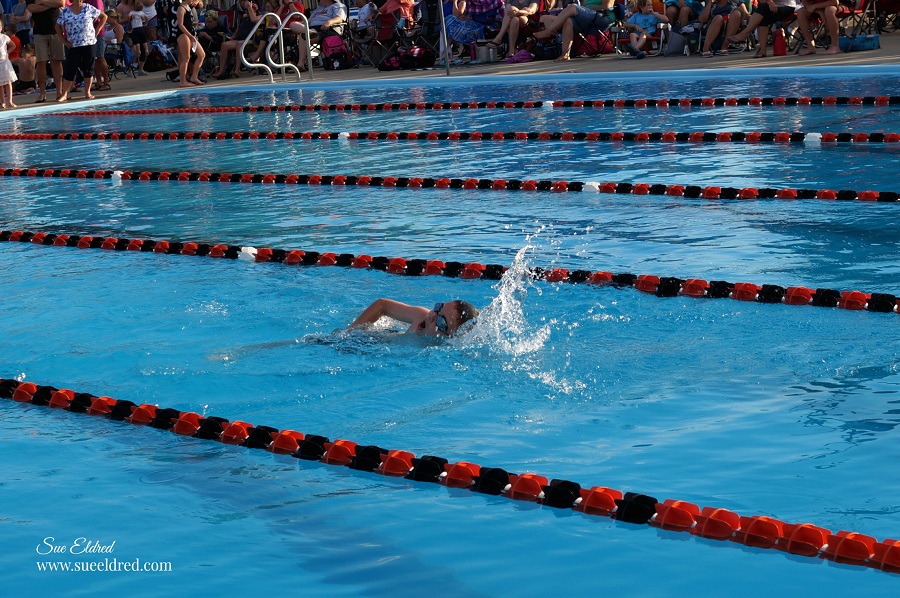
Between Baseball games, Swim Lessons, Swim Team, Carnivals, Pie Eating Contests,

Fireworks, Drive In Movies, Swimming, Summer Reading Program, Mini Gardens,

Tie-Dyeing and just playing outside….there’s always something to do.

Because we have so many great pictures, I decided to make my grandsons a

Summer Vacation Mini Album to remember all the good times they’ve had this summer.

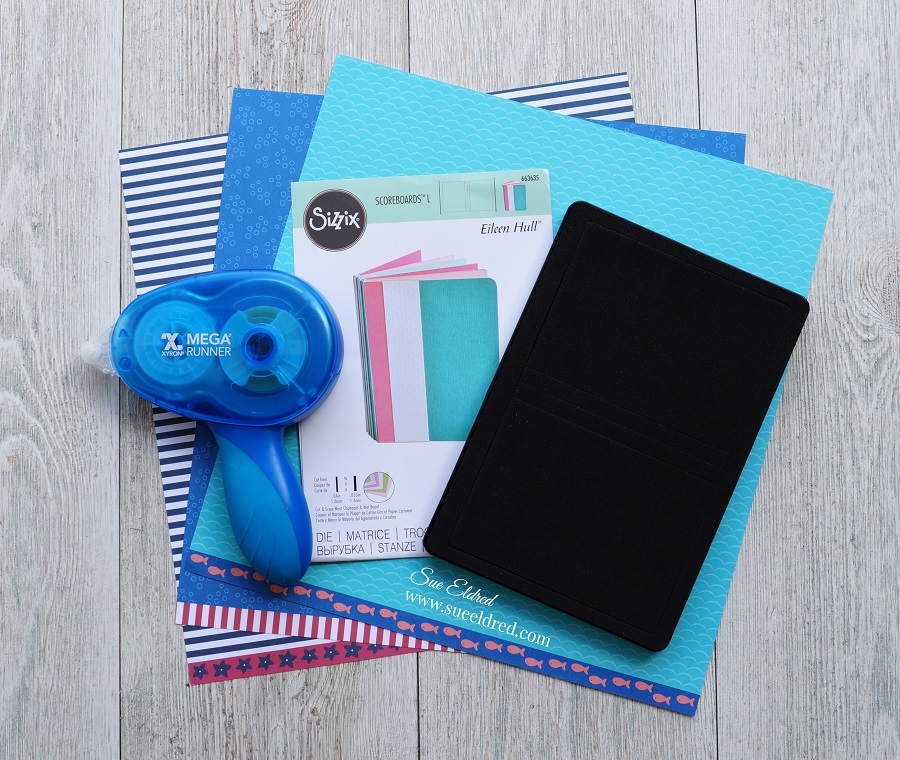
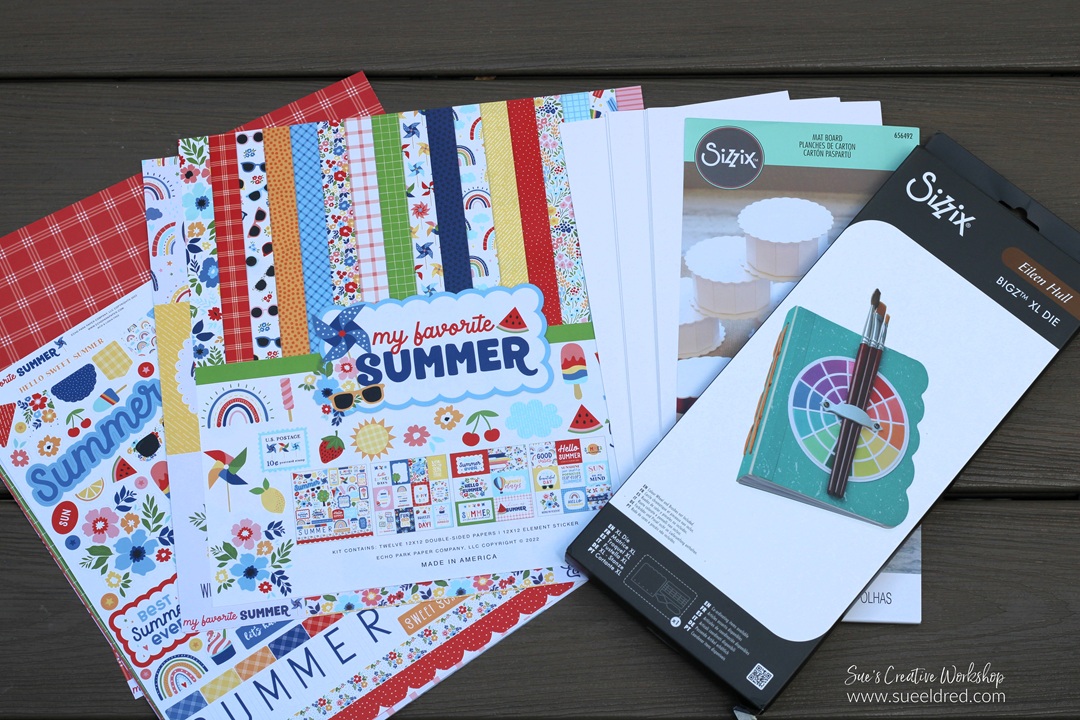
To Create my Summer Vacation Mini Album I used:                            (*affiliate links)

*Disclosure:  This blog uses ads and affiliate links.  If you choose to make a purchase using one of the links, I receive a small commission (at no additional cost to you) that helps offset the costs of maintaining this blog.  Thanks for your support!

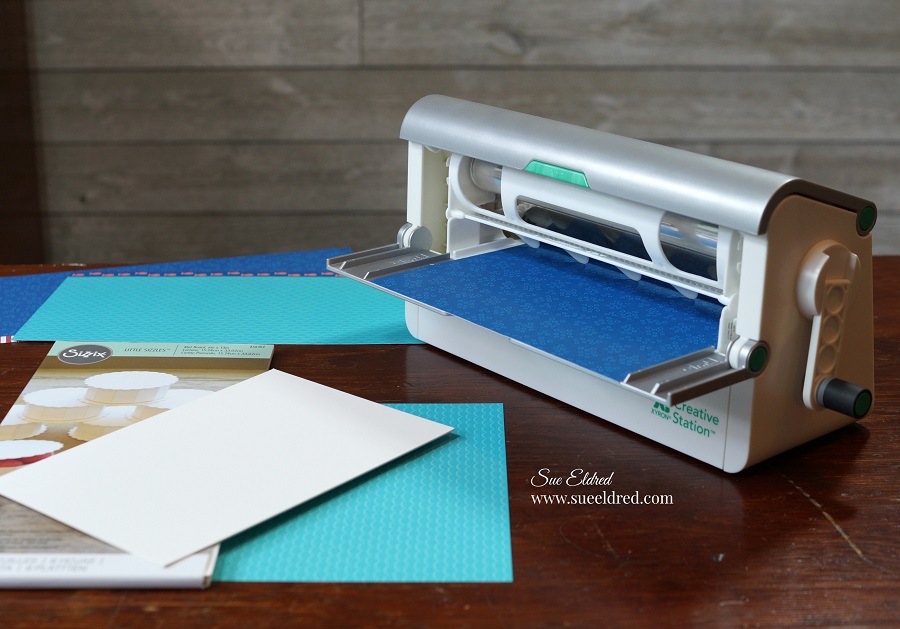
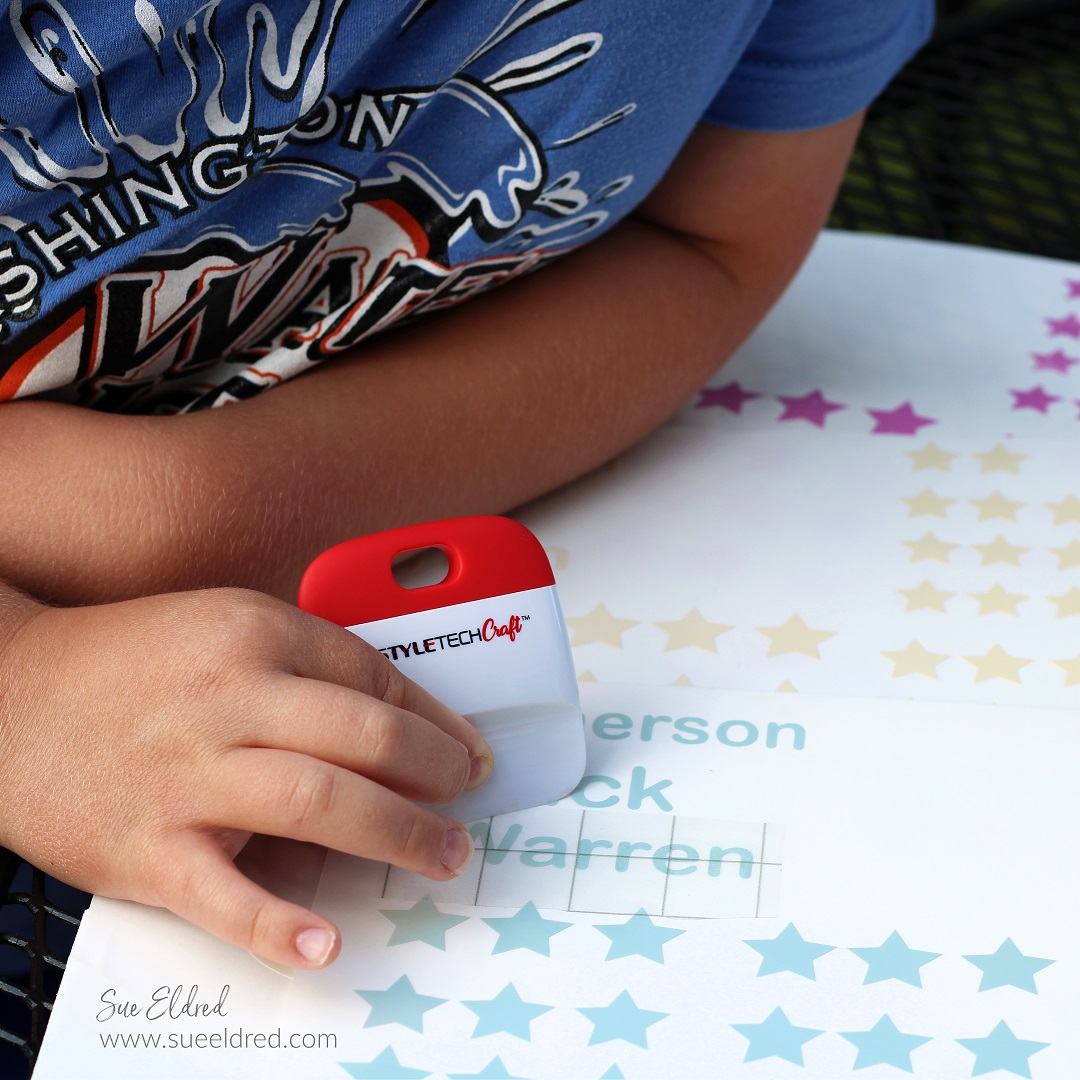
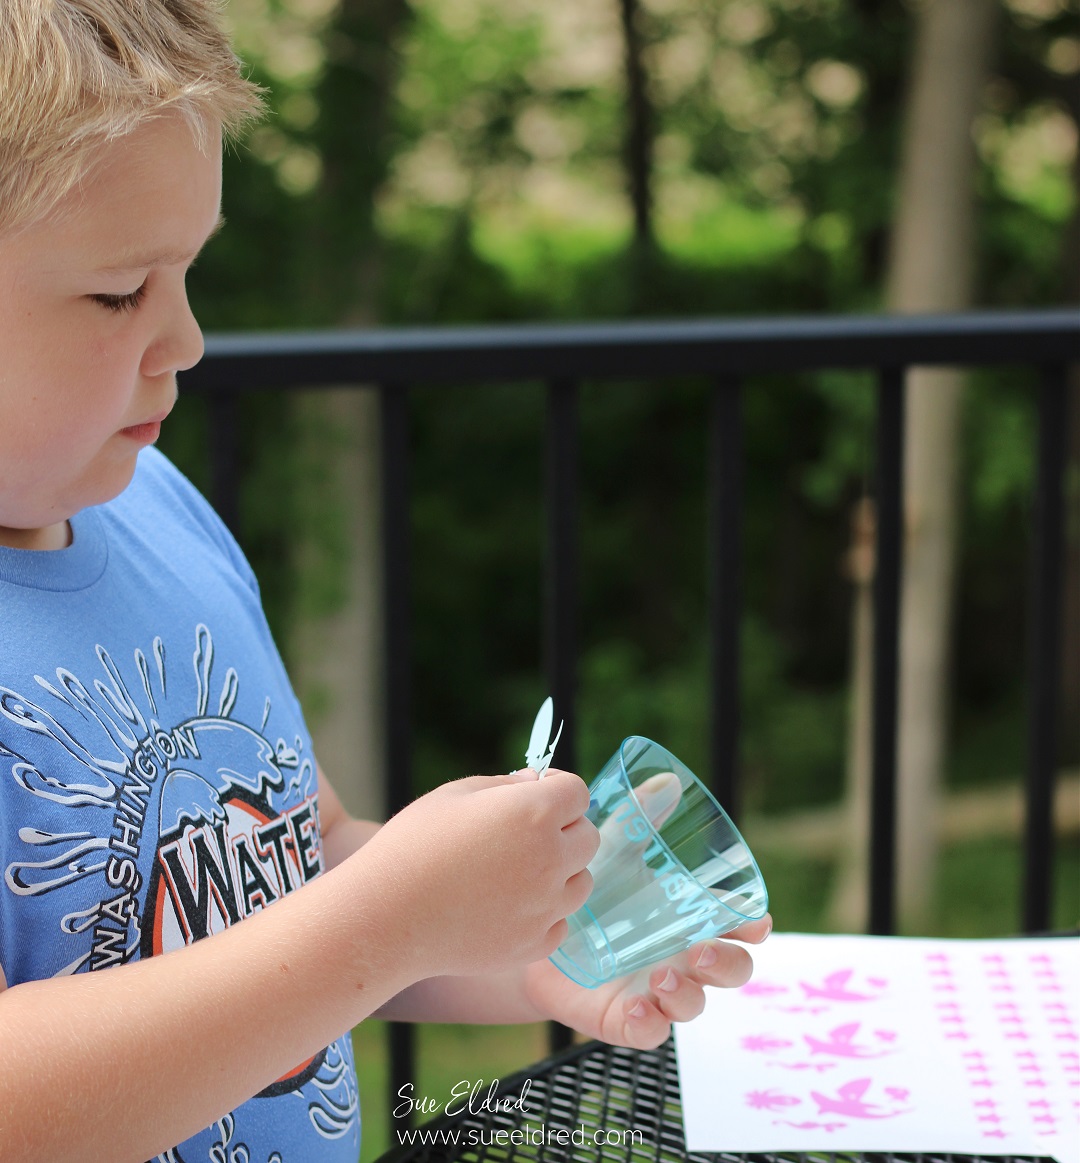
With the help of my Xyron Creative Station* putting the album together was super easy.

  • Cut two 6″ x 8-1/2″pieces of decorative scrapbook paper for the front and inside of the cover.
  • Lay decorative scrapbook paper (design side up) on the  Xyron Creative Station* crank the handle to run the paper through the machine.  As it moves through the Xyron Creative Station it adds adhesive to the back side of the paper.
  • Easy to use and it doesn’t need any electricity.
  • I like using the Xyron Creative Station* when making mini books because you get complete coverage, no wrinkling, no bubbles!

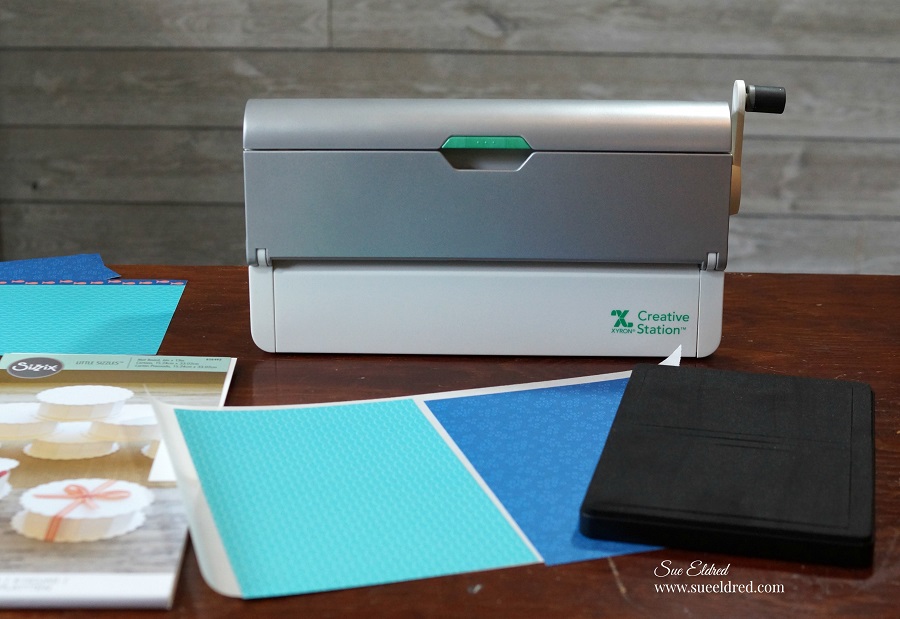
  • Cut a piece of mat board 6″ x 8-1/2″.
  • Adhere the decorative paper on each side of the mat board.

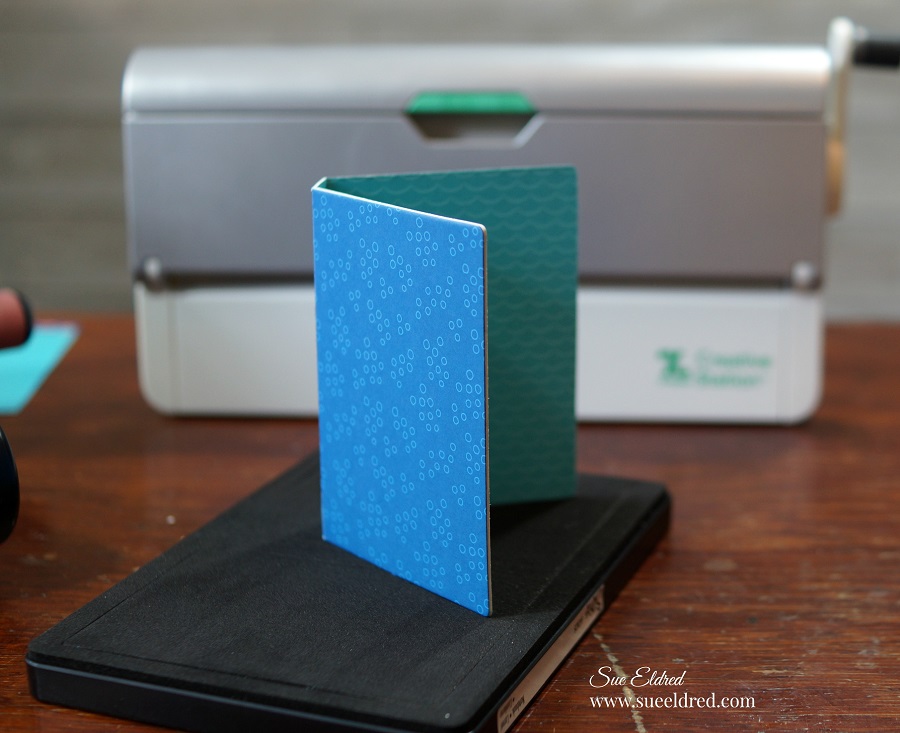
  • The notebook die creases the center of mat board as it goes through the Big Shot Die Cutting Machine making it easy to fold the cover for your mini album.

  • Cut a 2 1/4″ x 5″ strip of decorative paper to use for the spine and run it through the Xyron Creative Station*.
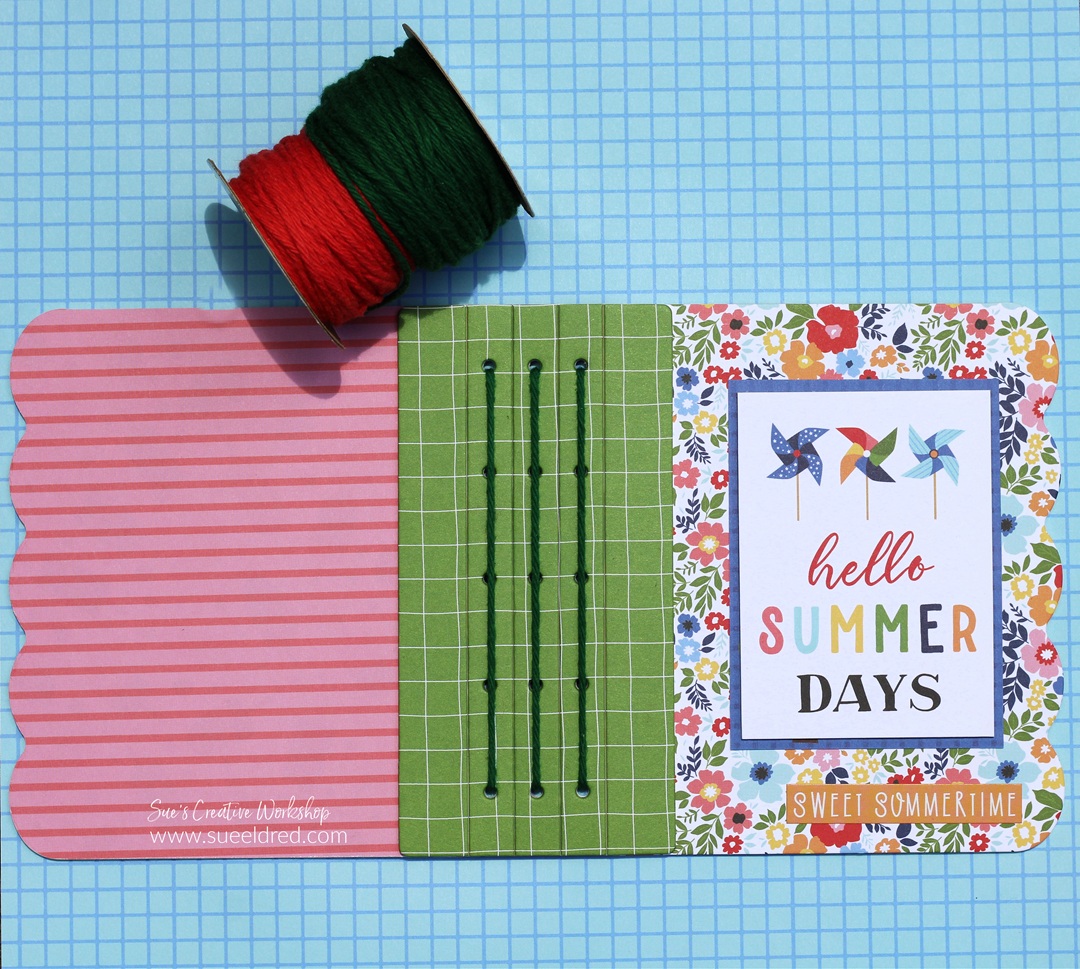
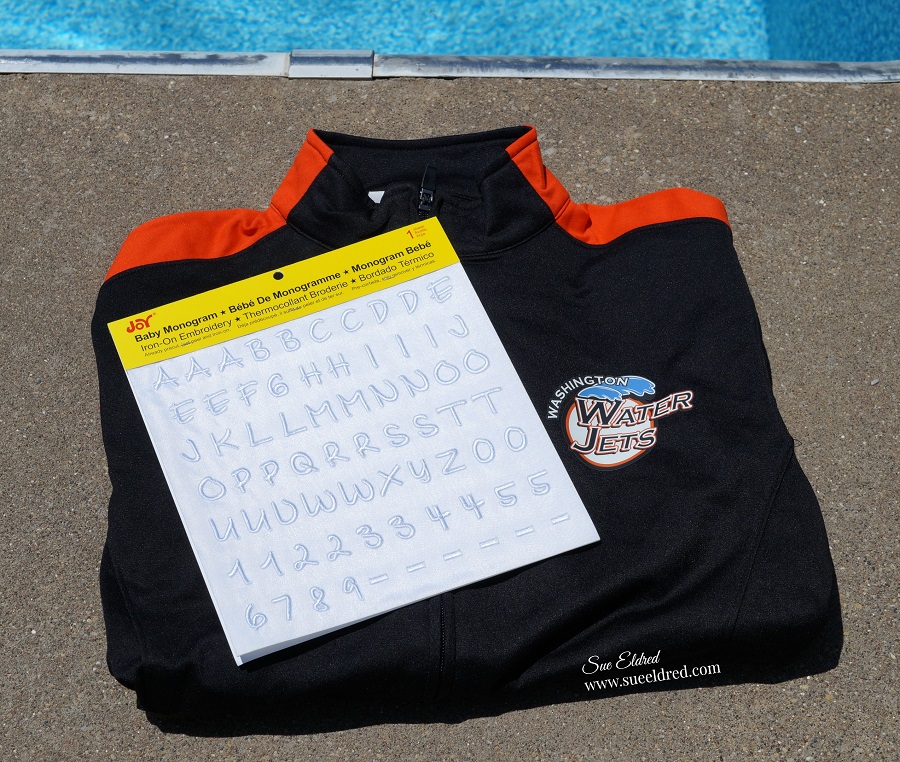
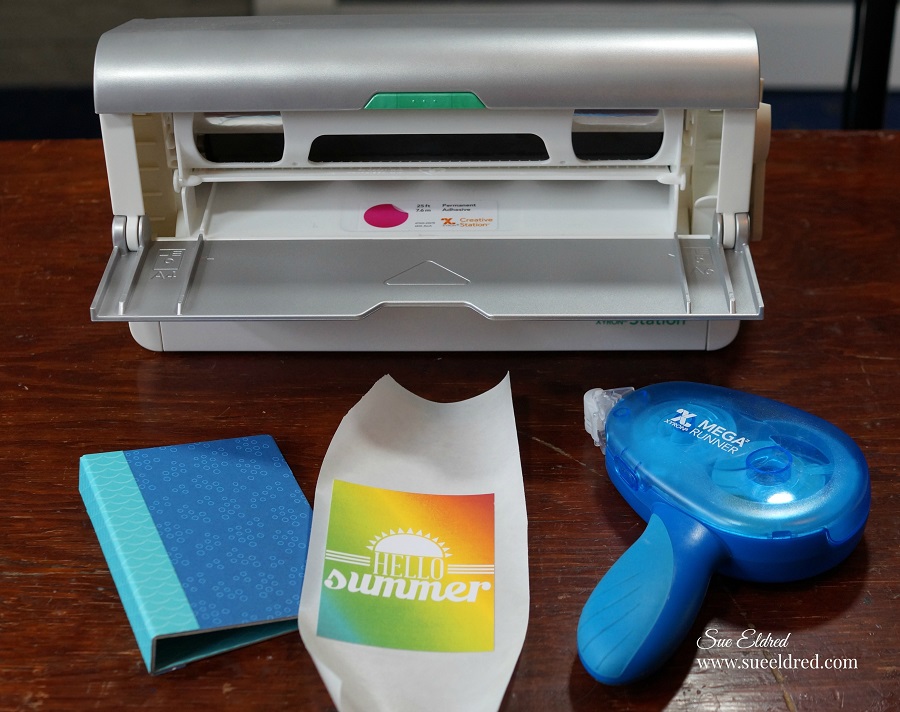
  • The small “hello summer” graphic is from an old Bo Bunny collection that I hoarded and never used.  It was perfect for this album.  (sorry I don’t think you can find it anymore)

  • Cut 5 white cardstock pages using the notebook die.
  • Crease the cardstock on the center score lines.
  • Using blue and white twine, wrap the twine around the inside creases and around the outside of the book cover to secure the pages.
  • I did one page at a time tying the twine in a knot on the outside after each page.

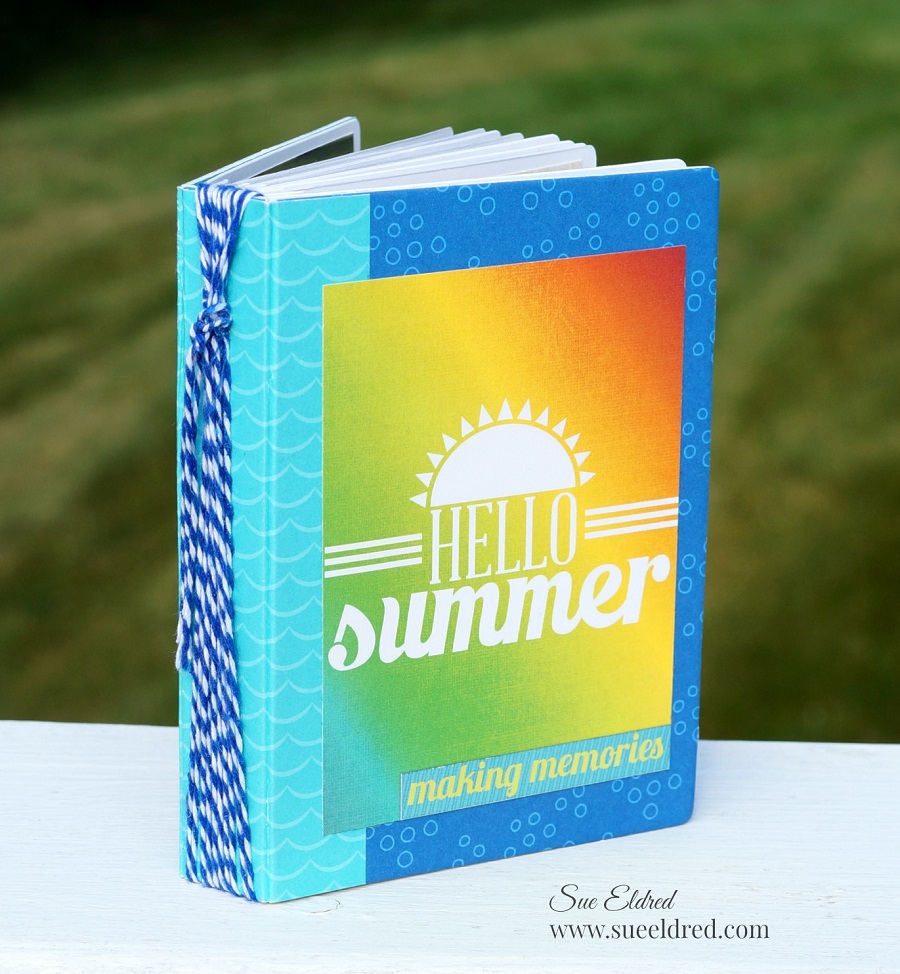
  • After I had all my pages together, I tied all the piece of twine together in one knot on the spine and let the ends of the twine hang loose.

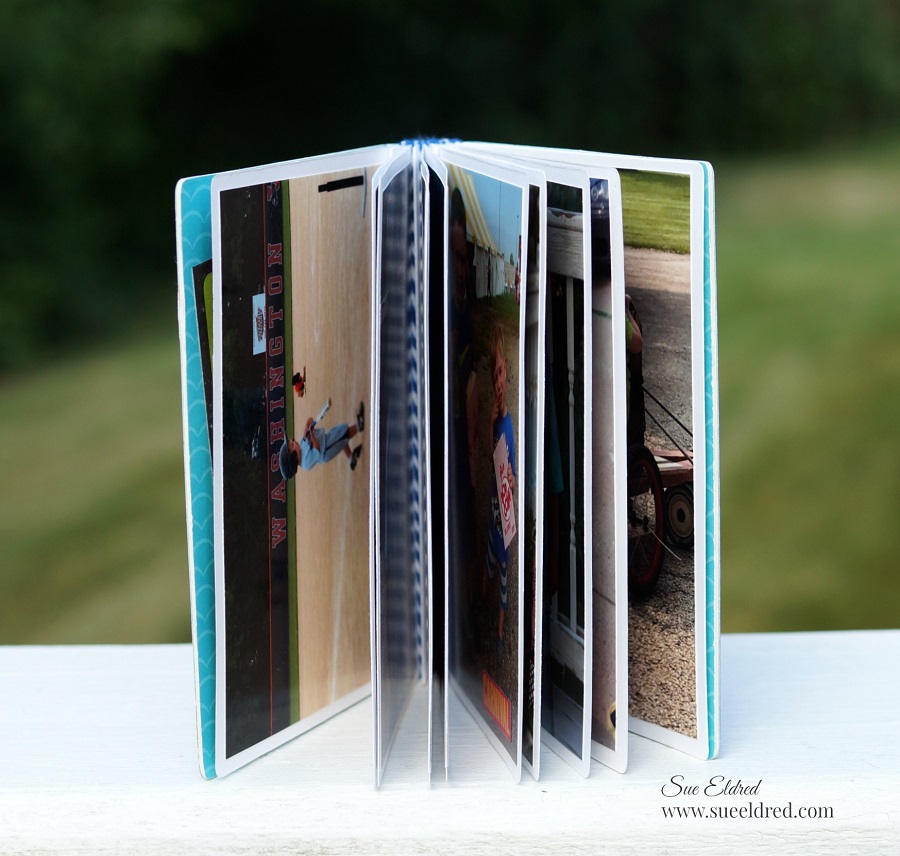
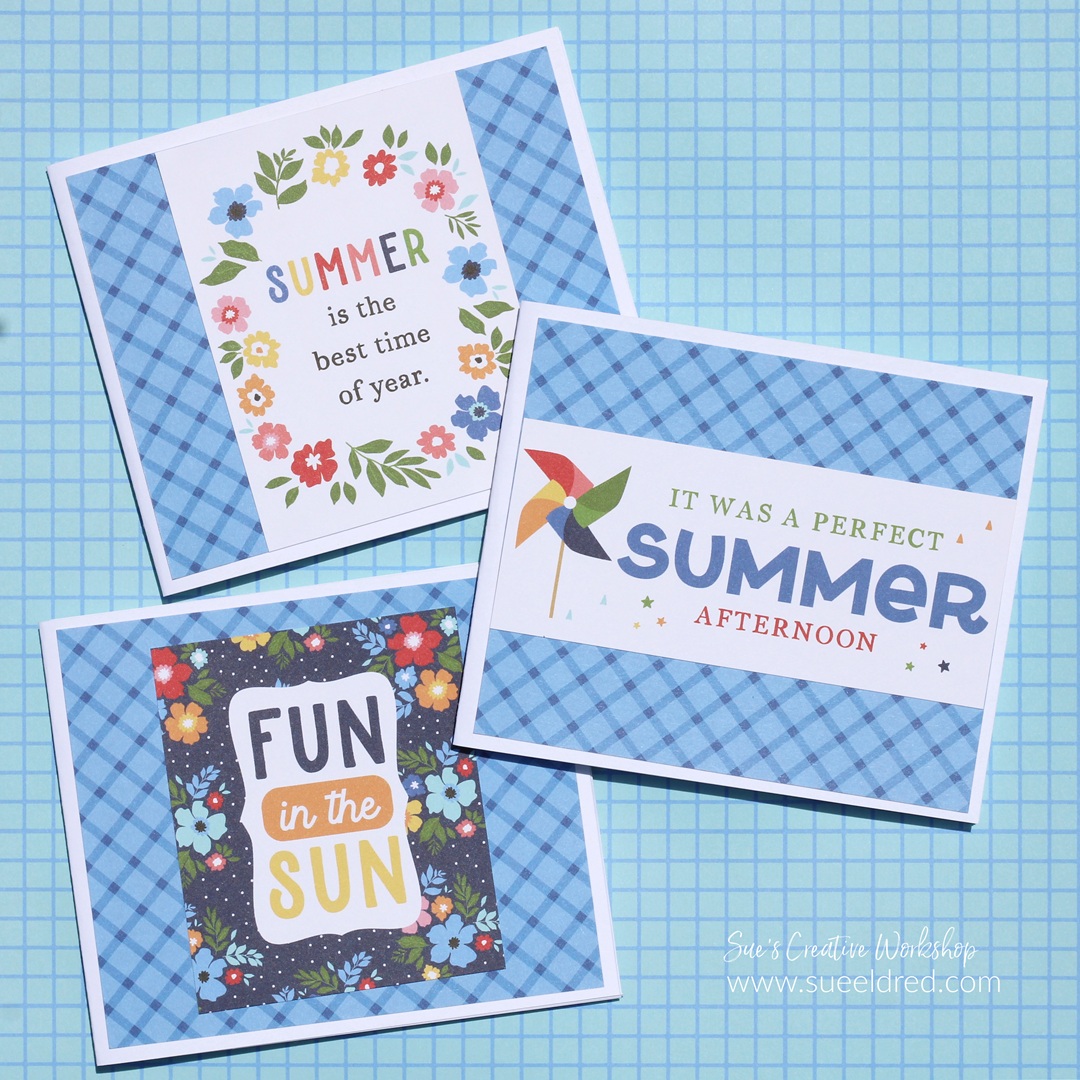
I wanted this Summer Mini Album to be all about the pictures. 

There are no fancy embellishments or special pages inside this album.

(just lots of fun pictures of my boys)

The hardest part about making this album was choosing which pictures I wanted to use.

I printed my pictures 4″ x 5.3″ instead of the usual 4″ x 6″.

I cut each picture 3 1/4″ x 4 3/4″ which left a nice white border around my picture when added

to the album.  I used my Xyron Mega Runner* to add adhesive on the back of the pictures.

I had all 21 pictures added to my album in no time.  (one on the inside back cover)

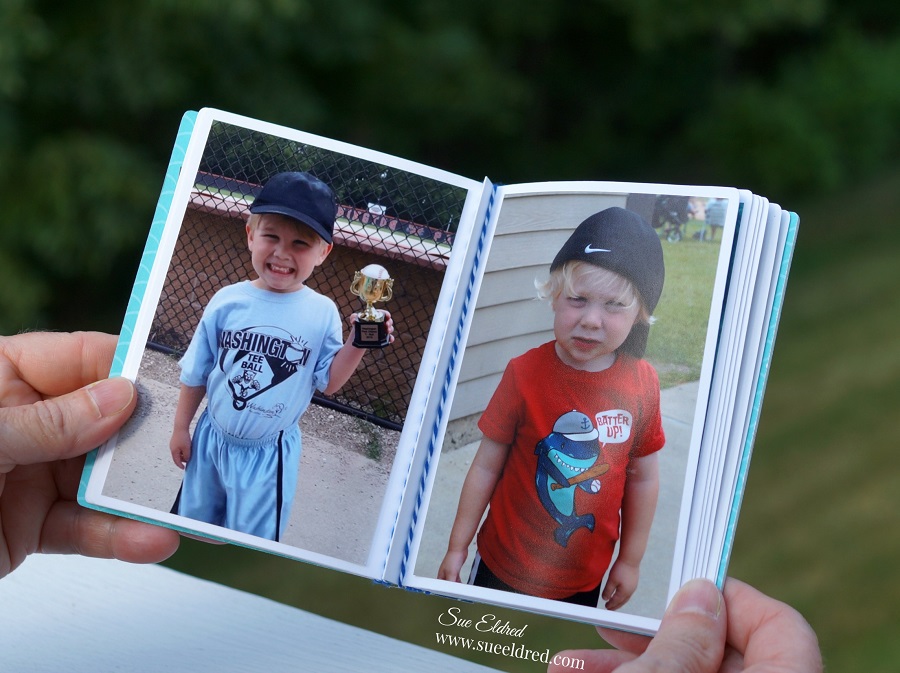
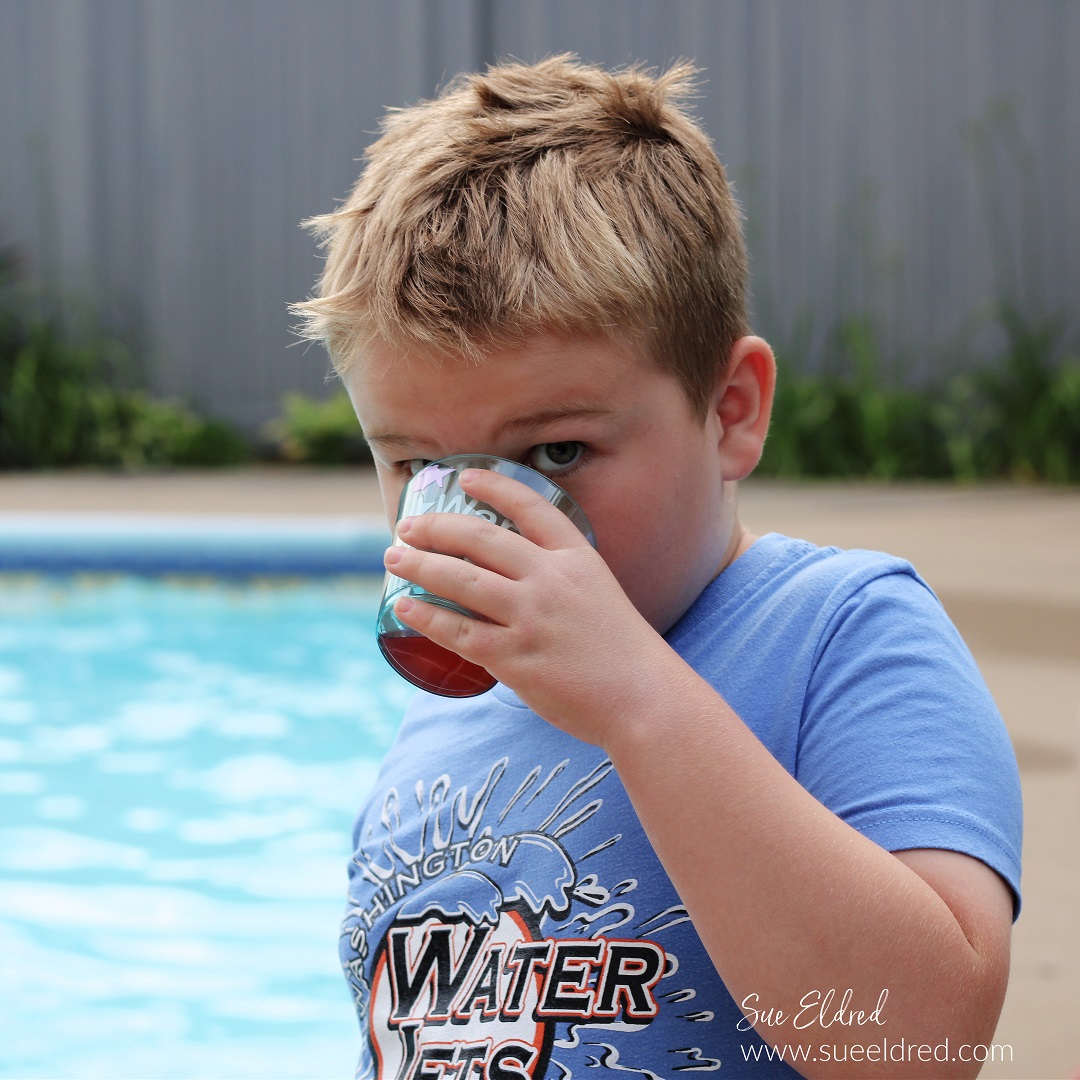
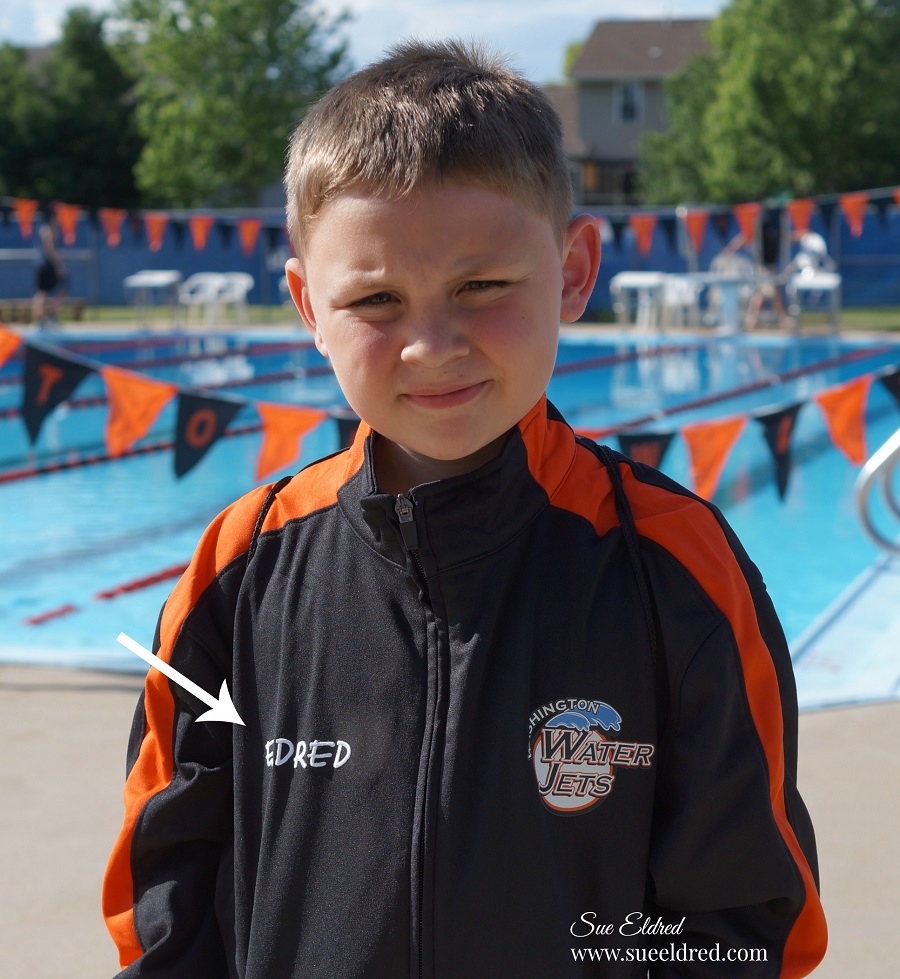
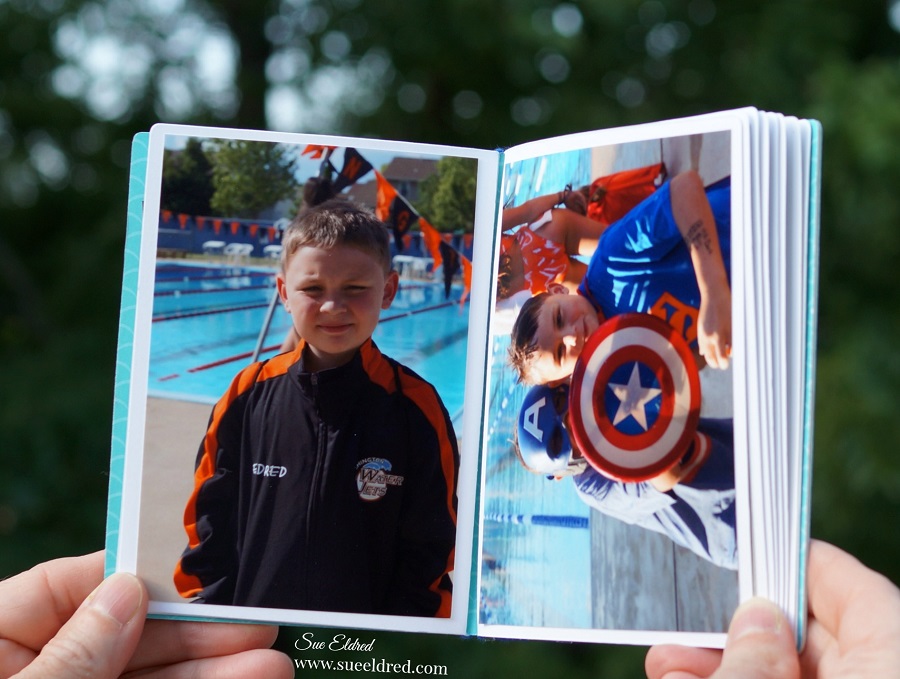
These are three busy little boys. 

They’ve had a great summer so far and they still have another month to go before school starts. 

Who says summer is about lazy days.  

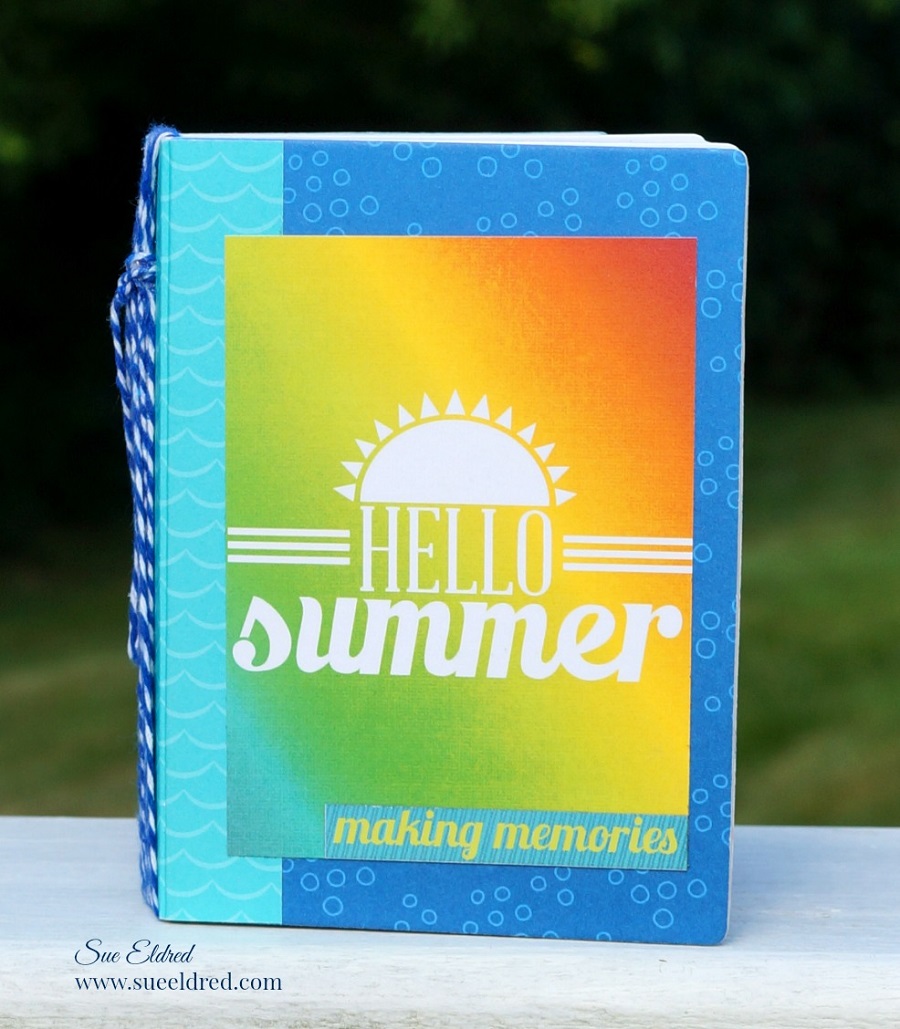
The Summer Vacation Mini Album measures 3 3/4″ x 5″.

“This is a sponsored post.  As a member of the Xyron Makers Program I have been provided product and compensation in exchange for my creative ideas.  The views and opinions are my own.

A Kid Sized Makeover

Mini Park Bench before

Mini Park Bench Makeover

Tucked away beside my porch, next to my hydrangeas, was a wobbly, forgotten little park bench.

It had been left out all winter and hadn’t weathered very well.

I picked up the little bench a few years ago at a yard sale when it was still in good shape.

The bench has nice metal frame and a cute jungle theme inset. 

I knew with a little tender loving care the bench could be almost as good as new.

I carefully took the bench apart and gave it a light sanding to get rid of the rust and grim.

I painted the frame with Rust-Oleum Dark Gray Paint and Primer*.

*Disclosure:  “This is a sponsored post.  I have been provided product in exchange for my creative ideas.  The views and opinions are my own.”  This blog uses ads and affiliate links.  If you choose to make a purchase using one of the links, I receive a small commission (at no additional cost to you) that helps offset the costs of maintaining this blog.  Thanks for your support!

Learn More

DecoArt Color Stain

I had a difficult time choosing which color I wanted to use so I created a color sample board.

In the end I went with white.    (bird poop doesn’t show up as much on white)

The wood slats were painted with DecoArt White Americana Decor Color Stain*.

DecoArt Color Stain has a semi-transparent, satin sheen for enhancing wood, concrete, terra cotta, and other surfaces that can be displayed indoors or out. Once cured, there is no reason to add an additional polyurethane or other sealant on top. The water-based formula makes cleanup simple while still offering a durable finish.

And because little details count…I also painted the screws.

Do you like how I used a long reach hole punch to make holes in my box for the screws to sit?

Finished Park Bench  (well almost)

The white color stain paint* allows the wood grain to show through giving my bench

a “worn look” with out being worn out.   (It’s hard to see by the pictures.)

When my husband got home and looked at the bench he thought the animals looked a little flat.

So…I rubbed DecoArt Champagne Ice Metallic Lustre™ Wax* on the metal to make them stand

out.  I added a little metallic lustre™ wax* on the bench frame as well.

DecoArt generally recommends using a Multi-Purpose Spray Sealer* if you plan to keep a piece

with Metallic Lustre outside.

Shop Your Fav Brands at Scrapbook.com

He was right, it really makes a difference.

I placed the bench in the shade under the maple tree in the front yard.

All I need is a couple pint sized buddies to come over and enjoy it with me.

For your Convenience these are Products Used on my Kid Sized Make-over…

Click on picture links for purchasing options through Amazon.


Don’t Miss a Thing…Make Sure to Follow me

If you liked this post you might like to read  A Trash to Treasure Love Story

Shop Your Fav Brands at Scrapbook.com

Gnome Gardening with Kids

Gnome Gardening with Kids

One of our favorite Summer traditions is creating our annual Gnome Gardens.

The boys and I look forward to making them every year.

I started the tradition of Gnome Gardening several years ago when Nick was only 3.

You can see our first garden here.

To create our gardens we use a variety of containers and objects we’ve picked up along the way.

For the plants, we use succulents and flowers that won’t grown too big.

I like using Asparagus Ferns to mimic trees.

As mini gardens grow in popularity… there several places you can find accessories

for your gardens.  We like to get something new for our gardens every year.

This year we added items picked up at  Dollar Tree*.

*Disclosure:  This blog uses ads and affiliate links.  If you choose to make a purchase using one of the links, I receive a small commission (at no additional cost to you) that helps offset the costs of maintaining this blog.  Thanks for your support!

This is Nick’s 6th year making Gnome Gardens so he’s pretty proficient with his garden.

Check out last years garden.  (always an adventure)

This is Warren’s 3rd year making a Gnome Garden.  

He lets me help him.   (maybe that’s why his is my favorite)

His garden is all about the house placement.

You can see Warren’s first Gnome Garden here.

I love seeing how much they’ve grown from their first gardens.

The extra credit award goes to my daughter-in-law (the boys mom). 

She found this little gnome house at Dollar Tree* and repainted it with a Mario inspired look.

The tiny Camper and firepit was from last years garden and is available at Leisure Arts, Inc.

Leisure Arts Mini Garden Supplies…        (*affiliate link)

This year was Emerson’s turn for his first Gnome Garden.

He always wants to do everything his big brothers are doing.

Water bottles are a great item to have when Gnome Gardening. 

It helps the boys control how much water goes on the garden, and they’re fun too.

This little stinker sprayed me as I stuck my head out the window for a quick pic.

(I may have sprayed him first.)

Creating mini Gnome Gardens is a fun and memorable project to make with kids.

We always have a good time.

It gives them something to take care of all summer long.

And…it adds a little whimsy to my front porch.

To create a Gnome Garden you’ll need:

  • Container for your garden. I like finding unusual items like the top of a broken wagon. It adds a little extra whimsy to the garden.
  • Good Potting Soil
  • Small Garden Tools
  • Gnome or Fairy Figures
  • Rocks, Twigs and other found objects
  • Store Bought Accessories such as the gnome houses
  • Succulents
  • Annuals that won’t grow too big or tall
  • I like to use Asparagus Ferns to mimic trees
  • Water Bottle
  1. Start the Gnome Garden by adding potting soil to your container.
  2. Allow the kids to loosen up the soil before adding plants.
  3. Small gardening tools are also fun to have.
  4. Add plants to the container before adding accessories.
  5. I like to add the largest plants first near the back of the container.
  6. Allow the kids to add their special pieces to the garden.
  7. Give the garden a good spray of water using the water bottles.

A Special Thanks to Leisure Arts, Inc. for providing the Mini Garden Supplies. 

Gnome kits