
A few fun projects using the Beach Vibes stamp and die sets from The Maker’s Movement.
(If I can’t get to the beach, I might as well bring the beach to me.)
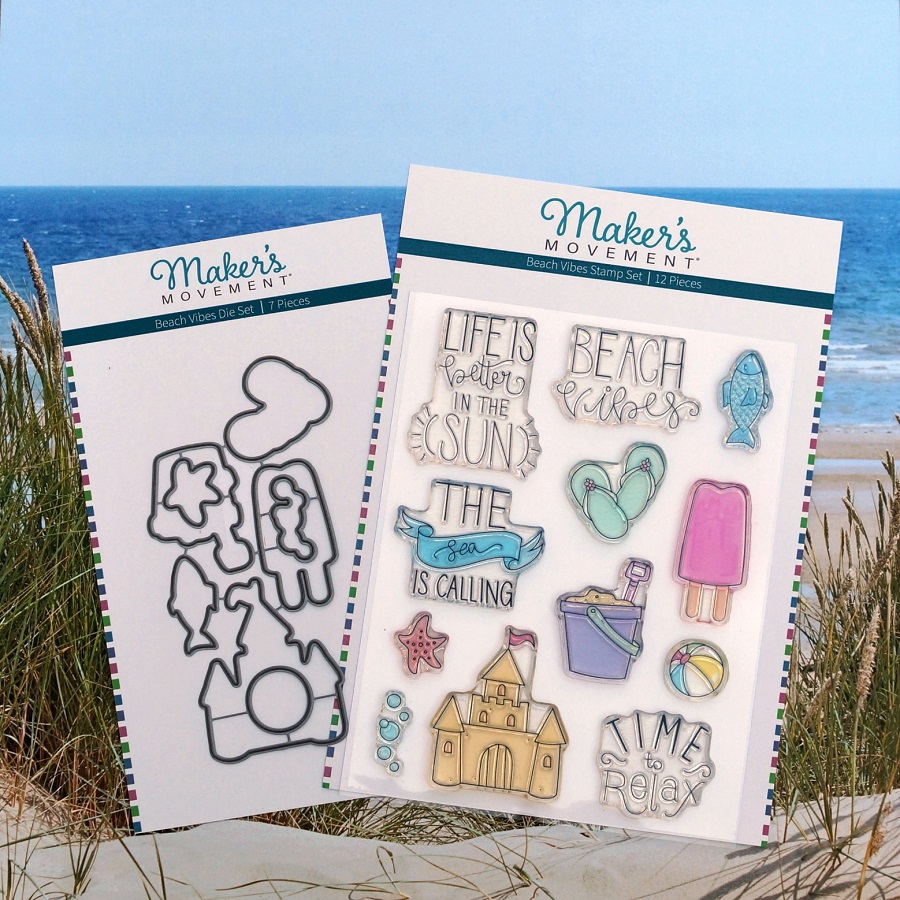
I am really loving the Beach Vibes Stamp and Die Set. So many cute images to use.

*FTC Disclosure… “This is a sponsored post for The Maker’s Movement. I have been provided product and compensation in exchange for my creative ideas. The views and opinions are my own.”

Before I ever start creating my projects…
I stamp the images onto watercolor paper* and practice coloring.
It’s a great way to decide the best marker color to use.
Using watercolor paper* makes it easy to blend the markers.
Tip…I start with the darker colored marker and finish coloring the image with a complimentary lighter-colored marker, blending the colors as I go.
FIY…I have my markers stored in the Expandable Marker Accordion* from Deflecto.

Beach Vibes Frame
Using the Crossover II Die Cutting Machine*, I was able to easily line up the coordinating die
to the colored image to cut out. I added a few extra dots to my colored image before mounting
the Sandcastle to the corner of the frame.
Tip…I used blue painters’ tape and masked part of the “beach vibes” stamp and stamped the words one at a time.
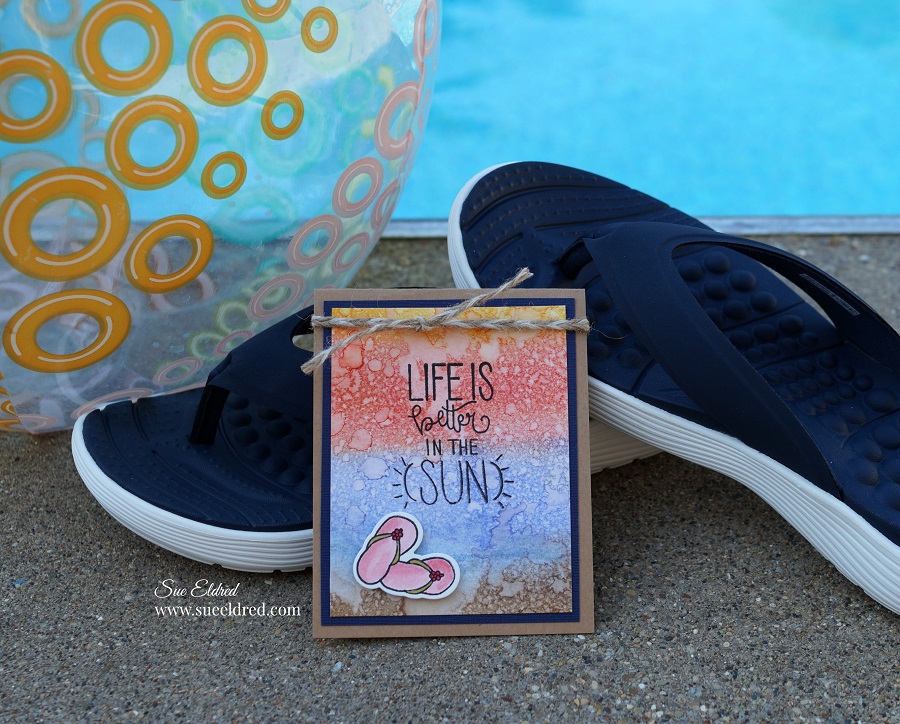
Life is Better in the Sun…
I may complain a little bit when it gets super humid, but I would trade the snow and cold for a warm summer day anytime.
Tip…The background on this card is super simple to create. Using an ink blending tool and several colors of dye ink, rub the ink onto the watercolor paper. Spray the paper with water and dry the paper with a hairdryer. (Easy Peasy)
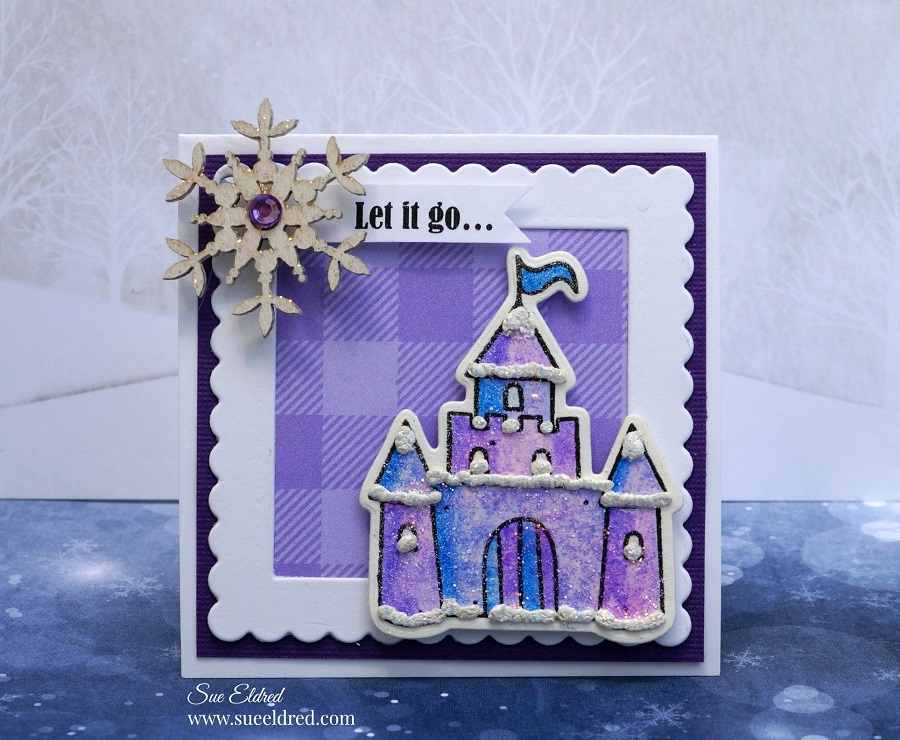
The Sandcastle stamp also makes a perfect Ice Castle for a cute little princess.
- I stamped the Sandcastle on watercolor paper*. I had fun coloring the castle in purples and blues and blending the colors.
- I added a thin layer of white liquid applique*
to the castle to look like snow. I let the liquid applique dry before heating it with a Heat Tool* to raise it.
- To make the castle extra frosty, I painted the castle with Clear Glitter Glue*
.
- I framed the Ice Castle with a white scallop frame cut from the MOD287 Nested Square Frame Set. (It makes a perfect little gift tag.)

*Disclosure: This blog uses ads and affiliate links. If you choose to make a purchase using one of the links, I receive a small commission (at no additional cost to you) that helps offset the costs of maintaining this blog. Thanks for your support!
