
DIY Graduation Cap Card and Gift Card Holder
How to make personalized graduation cards for the special people in your life.
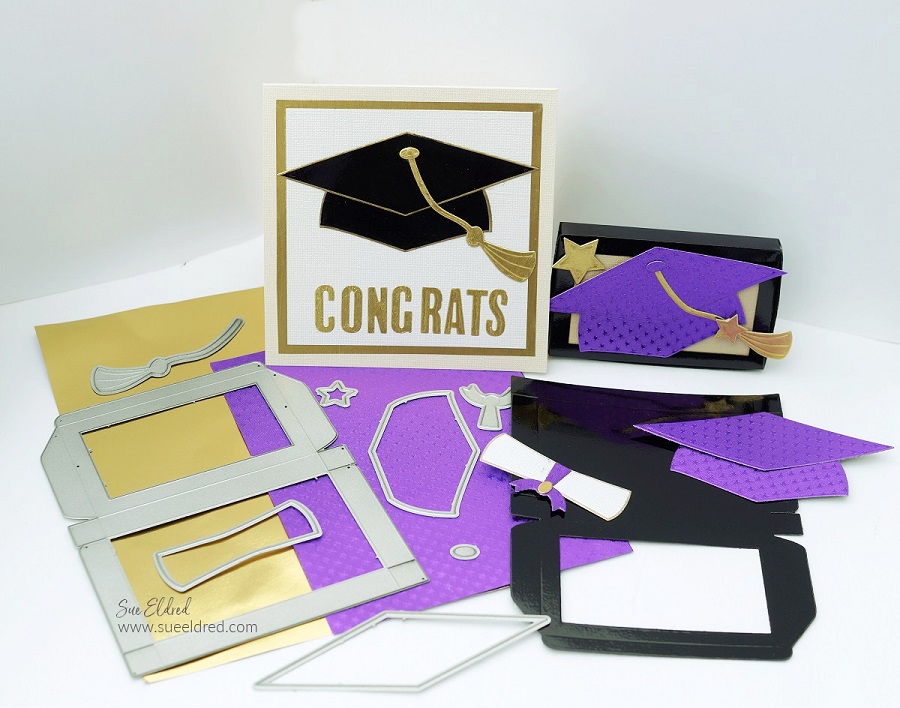
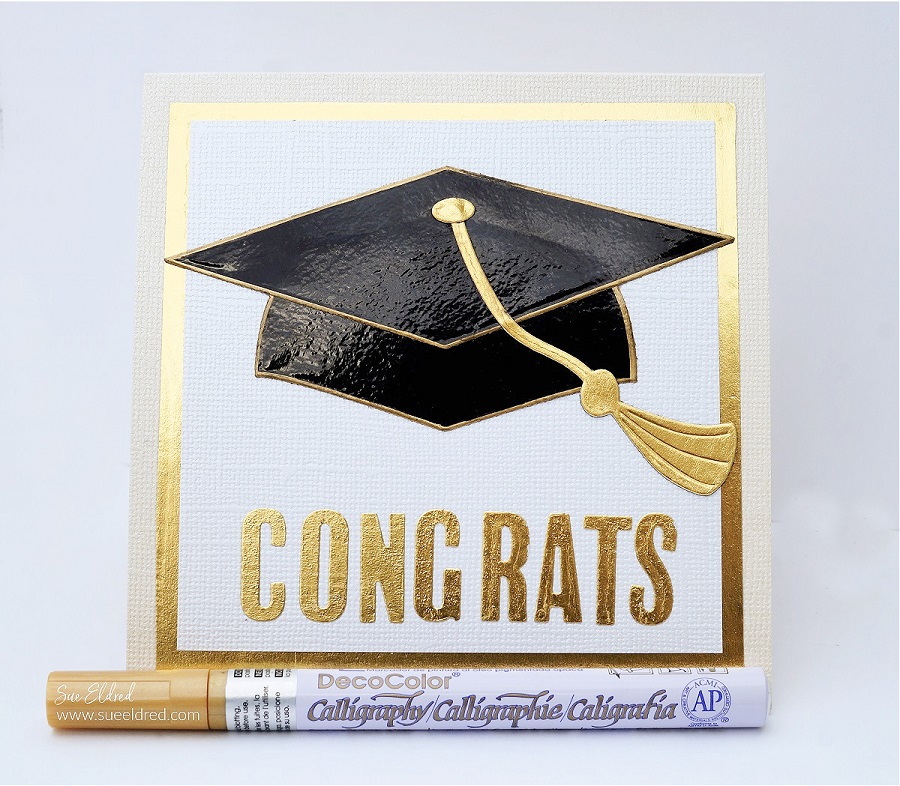
For the Graduation Card and Card Holder…
I used The Maker’s Movement NEW Graduation Cap Die Set and the NEW Donut Box Gift Card Holder Die Set.
If you are a Card maker/Paper Crafter, make sure to check out all NEW RELEASE Stamp & Die Sets now available. So many cute sets! (and I promise, I will have more on the donut box later)
Disclosure: This is a sponsored post for the Maker’s Movement. I have been provided product and compensation in exchange for my creative ideas. The view and opinions are my own.
Additional Materials Used: (*affiliate link)
- Graduation Cap Die Set
- Donut Box Gift Card Holder Die Set
- M12210 Alphabet Die Set
- Crossover II Fabric & Paper Cutting System*
- Black Glossy Cardstock*
- Foiled Paper by Rinea*
- Xyron Creative Station*
- Xyron 5″ Permanent Adhesive Cartridge*
- Marvy Gold Chisel Tip Calligraphy Pen*
- Xyron Tape Runner*
- Cardstock
*Disclosure: This blog uses affiliate links. If you choose to make a purchase using one of the links, I receive a small commission (at no additional cost to you) that helps offset the costs of maintaining this blog. Thanks for your support!
Directions:
- The pieces for the Graduation Cap were die-cut out of Black Glossy Cardstock* and edged in gold using a Gold Chisel Tip Calligraphy Pen*.
- The gold layer for the card is Rinea Foiled Paper which was adhered to the card base using a Tape Runner*.
- The tassel and button on the cap were made using the gold foiled paper adhered to cardstock and then die-cut.

- I used the Xyron Creative Station* to add adhesive to the back of the foiled paper.
- This picture is when I used the Xyron Creative Station* to add adhesive to the purple foiled paper for the gift cardholder.
- I also added adhesive to the gold foiled paper used to create the letters on the front of the card.
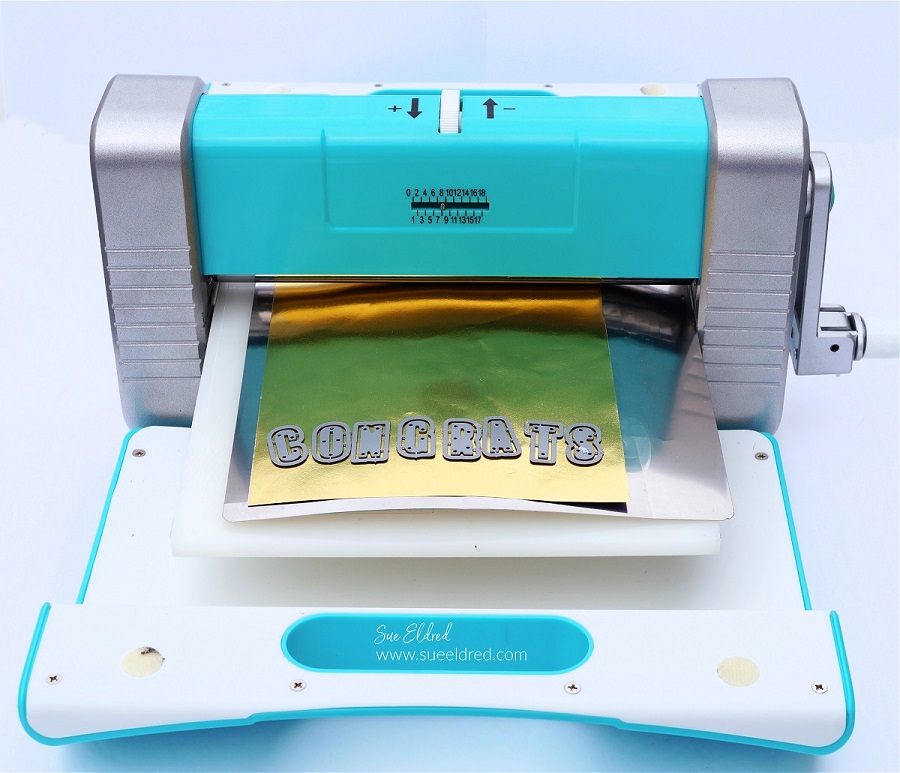
- Die-cut the gold foiled paper (with adhesive added to the back) using the alphabet die and Crossover II Die-Cutting System*.
- The adhesive on the back of the foil makes the letters stickers and easy to adhere.
LETTER ALIGNING TIP…If you’re a perfectionist like I am and want to align the letters as straight as possible. Use Gridded Transfer Paper* to help you line up the letters. Place the front of the foiled letters on the adhesive side of the transfer paper, remove the backing off of the foiled paper and transfer the letters onto the front of the card.

To Make the Graduation Cap Gift Card Holder:
- To make my gift card personal, I chose to make my graduation cap purple to honor the school colors of this year’s graduate.
- Add adhesive to the back of the foiled paper using the Xyron Creative Station*. (see previous picture)
- Die-cut the pieces of the graduation cap using the Crossover II Die-Cutting System*.
- Die-cut the base of the gift card holder out of black glossy cardstock and the New Donut Box Die.
- Fold the box on the score lines and adhere to side tabs to create the box.
- Adhere a small piece of paper on the inside of the box to finish creating the lid.
- Adhere the Graduation Cap pieces onto the top of the box. If you would like a little dimension, add 3D Adhesive Foam Squares to the back of the cap before adding it to the box.

- Add a little personality on the inside of the box with graduation-themed scrapbook paper.
- Insert candy, gift card, or cash for a graduation gift they’re sure to love.

