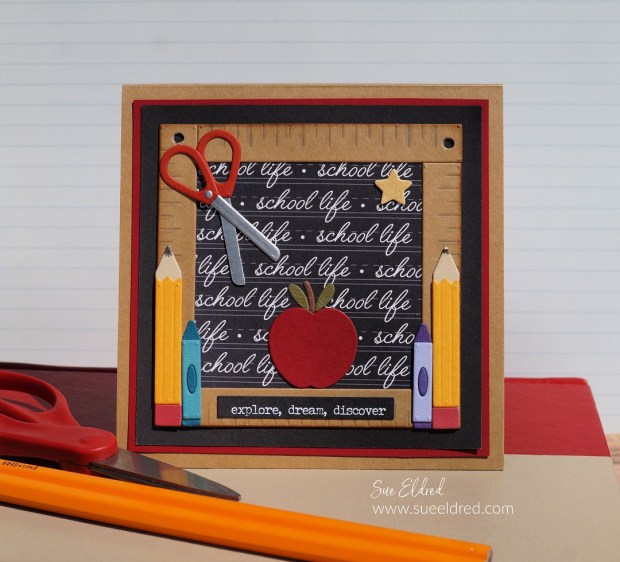
Start their year off right with a card made with Back to School Mini Essentials.
Perfect for both Students and Teachers.
The mini essentials would make great embellishments for a scrapbook page.
The small ruler frame would look great with this year’s back to school picture.

Disclosure: This is a sponsored post for The Maker’s Movement. I have been provided product and compensation in exchange for my creative ideas. The view and opinions are my own.

Die-Cutting Tips…
- For better results with dies that have grooves, use thick or double-layered cardstock.
- I adhered two pieces of cardstock together using the Xyron Create-A-Sticker Mini*.
- I also added a second layer of adhesive to the cardstock before cutting the pieces out using the Mini Maker Die Cutting Machine.
- You will want to run it through and then back again to make sure that all layers have been cut.
- Each little die-cut piece becomes a sticker which makes it easy to put all the parts together.

This is a great way to use up small scraps of cardstock.
Products Used: (*affiliate link)
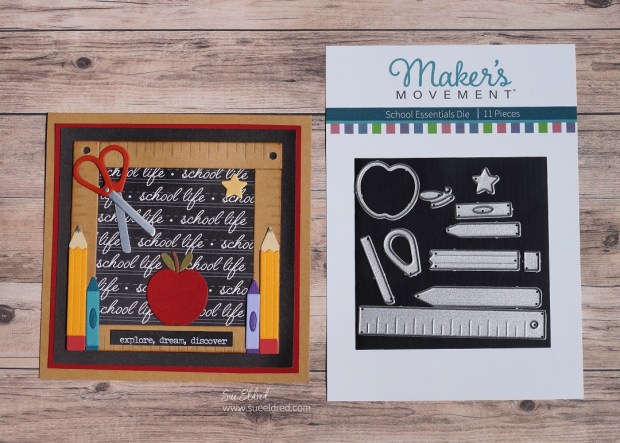
- M12463 School Essentials Die Set
- Mini Maker Die-Cutting Machine
- Xyron Create-A-Sticker Mini*
- Xyron Tape Runner*
- Simple Stories School Life Paper Collection: #14904 Honor Roll*
- TH93245 Tim Holtz Idea-ology Small Talk Occasions*
- Cardstock
- Versa Fine Black Inkpad*
- Acrylic Stamping Block*
- Vintage Photo Distress Ink*
- Ink Blending Tool*
*Disclosure: This blog uses ads and affiliate links. If you choose to make a purchase using one of the links, I receive a small commission (at no additional cost to you) that helps offset the costs of maintaining this blog. Thanks for your support!

This was a fun card to make.
I combined the “Backpack to School Die Set” with the “School Essentials Die Set”
to make this sweet pink “girly” back to school card.
The greeting “I hope you have an amazing day” from the Food Truck Stamp Set says it all.
How to Make the Backpack Card:
- Die-cut the backpack pieces out of the floral/green plaid paper using the Mini Maker Die Cutting Machine.
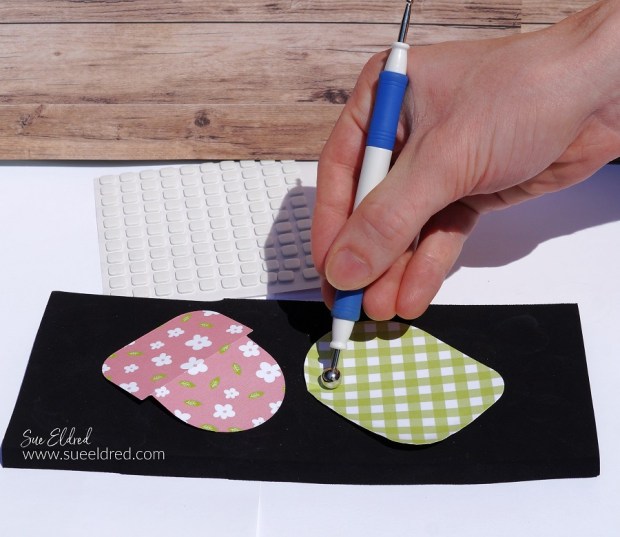
- To shape the die-cut pieces, place the shape on the molding mat* and press down with the large-ball stylus*. Move the stylus around in small circular motions to soften the paper. The die-cut shape will begin to curl, giving it dimension.
- Use the light gray marker on the edges of the paper to cover the white paper core and give the pieces a shadowing.
- Assemble the backpack using small thin foam squares.
- Die-cut and assemble pencils and the ruler using pencils from the School Essentials Die Set.
- Die-Cut a white cardstock frame using the Round Rectangle Die Set.
- Tuck the small floral bits into the backpack along with a ruler and pencils and adhere them in place.
- Assemble the card using coordinating paper layers.


Tuck the card in her backpack and help make her day amazing.
Products Used: (*affiliate links)
- M12456 Back Pack to School Die Set
- M12463 School Essentials Die Set
- Mini Maker Die-Cutting Machine
- M12340 Food Truck Stamp Set
- M12173 Round Rectangles Die Set
- Xyron Create-A-Sticker Mini*
- Photo Play Paper-Baskets of Bunnies Paper Collection-Spring Buddies*
- #12517 Simple Stories-Simple Vintage Garden District-Floral Bits
- Large Ball Stylus*
- Molding Mat*
- Small Thin 3D Foam Squares from Scrapbook Adhesives by 3L*
- N75 Tombow Marker
- Cardstock


