
Creating Bookmarks for Book Lovers and Readers…
Besides crafting, reading is one of my favorite hobbies.
Sitting and reading is a luxury for me. Never enough time.
Just one more page…
I love getting lost in a good book. My problem is once I start reading,
I can’t seem to put the book down until I finish reading it.
Forget about work, dinner, or dishes.

Combining my two hobbies…
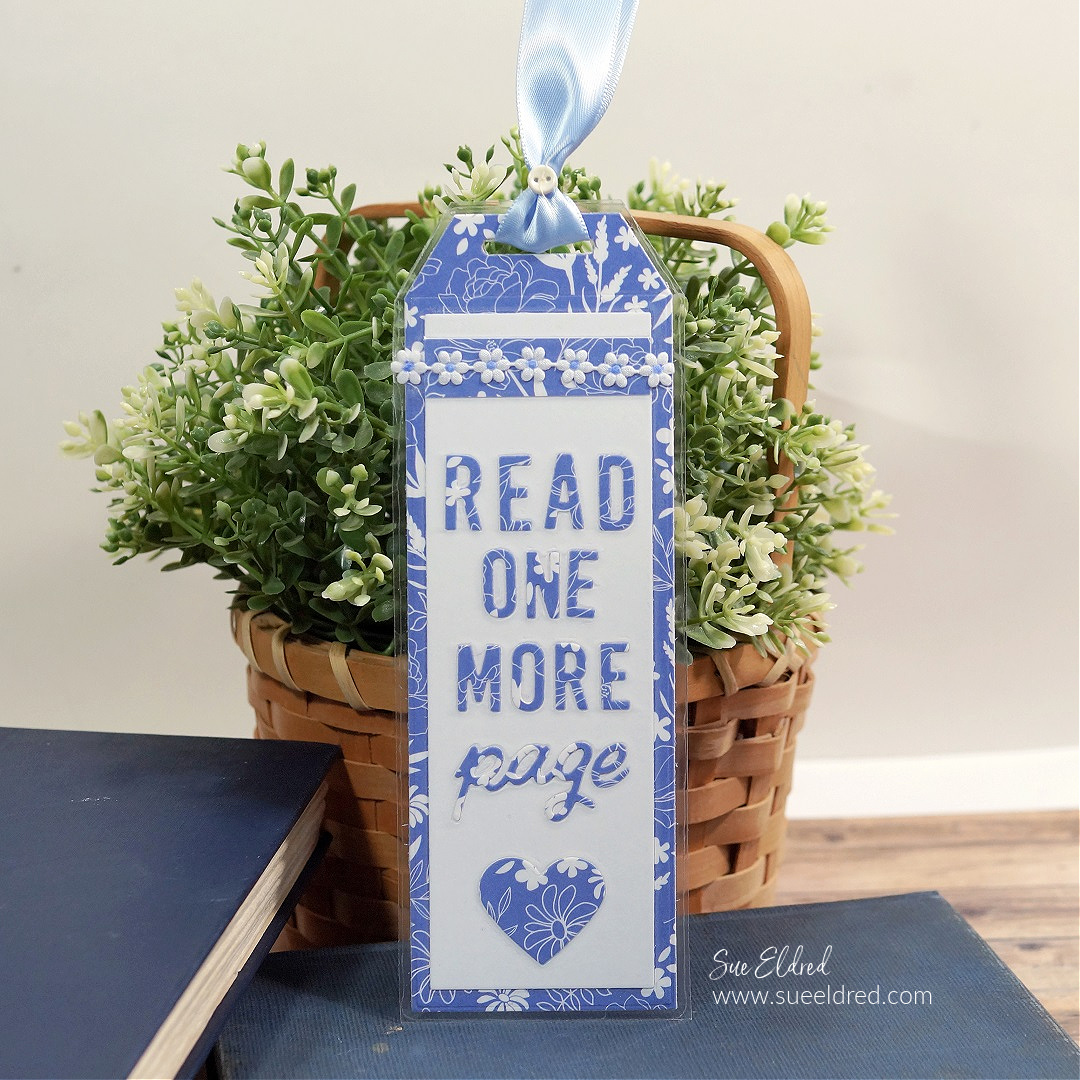
I created bookmarks using the New Bookmark Die Set from The Maker’s Movement.
Disclosure: This is a sponsored post for The Maker’s Movement. I have been provided product and compensation in exchange for my creative ideas. The view and opinions are my own.

Materials Used: (*affiliate links)
- Bookmark Die Set
- Slimline Essentials Die Set (heart die)
- Mini Maker Die Cutting Machine
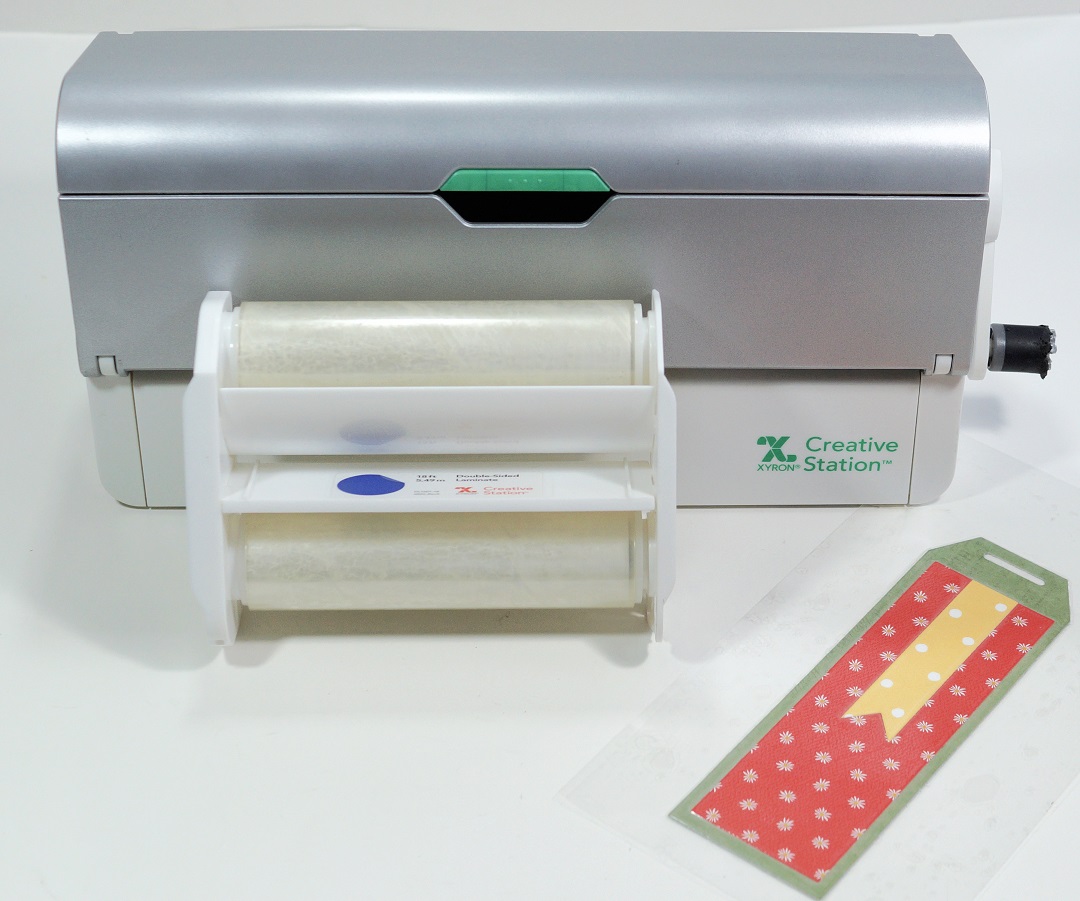
- Xyron Creative Station*
- 5″ Xyron Double-Sided Laminate Refill for the Xyron Creative Station*
- Xyron Tape Runner*
- Misc. Scrapbook Paper
- StyleTechCraft Adhesive Craft Vinyl*
- StyleTechCraft Clear Gridded Transfer Tape*
*Disclosure: This blog uses ads and affiliate links. If you choose to make a purchase using one of the links, I receive a small commission (at no additional cost to you) that helps offset the costs of maintaining this blog. Thanks for your support!
Directions:
- Cut out the layers of the bookmark using the bookmark die.
- Adhere them together using a tape runner*.
- Using the Xyron Creative Station* with a double-sided Laminating cartridge, place the bookmark base in the machine. Crank the handle to run it through the machine. The Creative Station adds clear laminating onto both sides of the bookmark.


- Trim the bookmark with scissors leaving a 1/8″ border of lamination.
- Reopen the top slot of the book mark with scissors or a craft knife.

- On the red bookmark, I used StyleTechCraft Adhesive Craft Vinyl* for the front of the bookmark.
- I cut the words using the Mini Maker Die-Cutting Machine and the vinyl.
- To help line the words up straight, I used a clear-gridded transfer tape* to apply to letters.
To make the letters on the blue bookmark… place a piece of scrapbook paper through the Xyron Creative Station* with a permanent adhesive cartridge* to add adhesive to the back of the scrapbook paper. Once the letters were die-cut, they became little letter stickers.

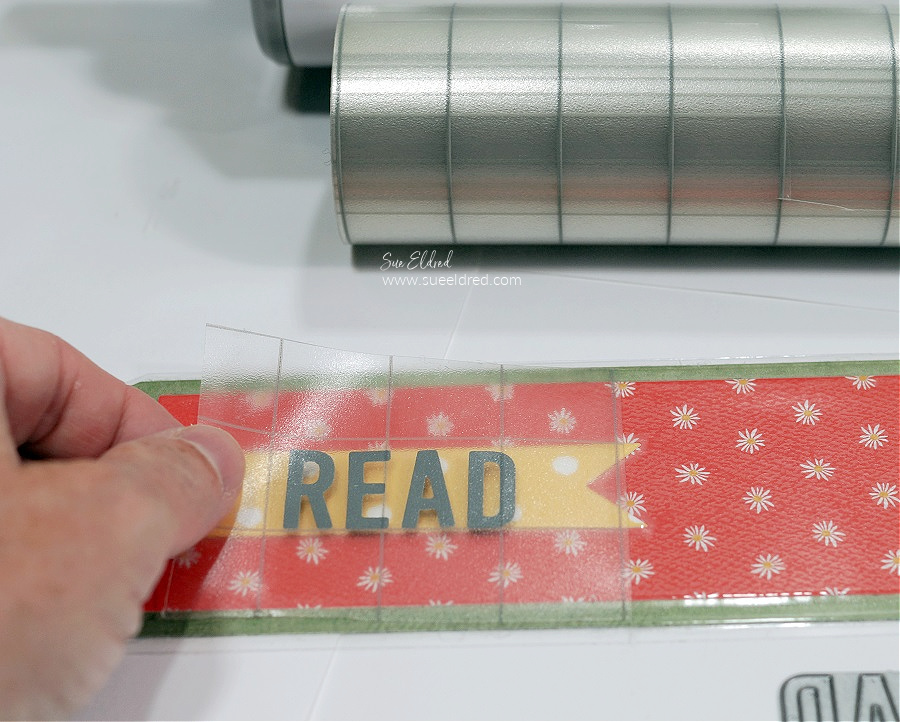
- Place the vinyl onto the bookmark, and rub over the transfer paper to make sure the vinyl sticks to the lamination. (You can use a vinyl scraper tool.)
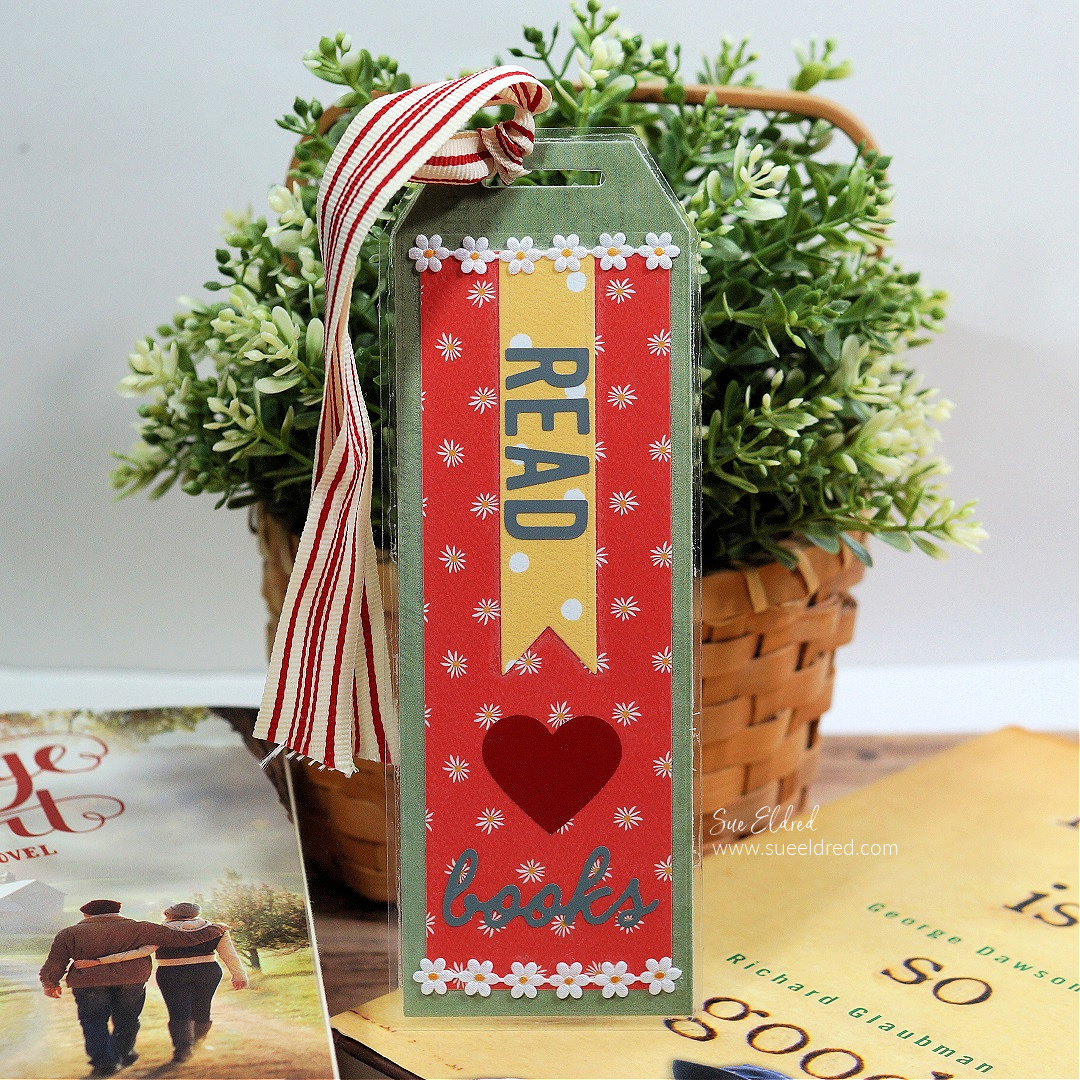
Add ribbon and trim to create the perfect bookmark for your favorite book lover.

