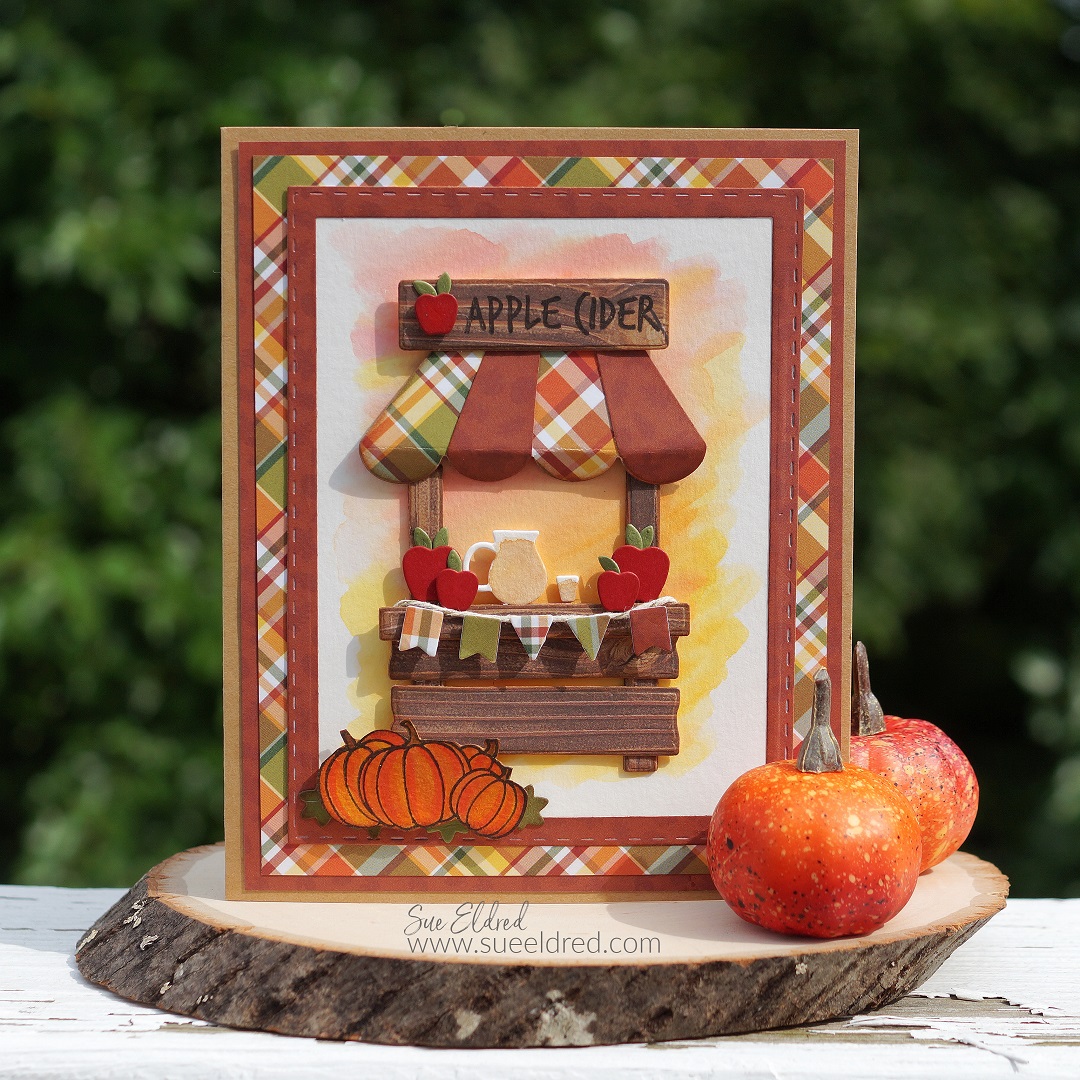
One of my favorite fall memories is taking my family to Tanner’s Apple Orchard.
At Tanners, we would pick apples, find the best pumpkin,
get lost in the corn maze, pet the animals, and play games.
Before we left, we’d always go into their store.
Once inside the little store, they had a giant barrel with a spigot for pouring yourself a
cup of free cider. Even though there was a “one per customer” sign, hardly anyone had
just one taste. (especially my son)
One of my favorites was the Apple Cider Donuts that we’d eat on the car ride home.
Good Memories!

How to make the Apple Cider Stand Card…
with the Lemonade Stand Stamp and Die Set from The Maker’s Movement.

*FTC Disclosure… “This is a sponsored post for The Maker’s Movement. I have been provided product and compensation in exchange for my creative ideas. The views and opinions are my own.”
Materials Used: (*affiliate link)
- MSD221 Lemonade Stand Stamp and Die Set
- MOD203 Nested Stitched Rectangles Die Set
- MOS204 Home for the Holidays Stamp Set (pumpkins)
- Crossover II Fabric & Paper Cutting System*
- GNT2263 PhotoPlay Paper “Fall Blessings” 12″ x 12″ Paper*
- 3D Foam Squares by Scrapbook Adhesives by 3L*
- Ranger DIS-19527 Tim Holtz Distress Ink Pad, Vintage Photo*
- Ink Blending Tool*
- Versa Fine Black Inkpad*
- Acrylic Stamping Block*
- Inkpads
- Waterbrush*
- Watercolor Paper*
- Xyron Tape Runner*
- Tombow Art Markers: #933, #913, #905, #977

*Disclosure: This blog uses ads and affiliate links. If you choose to make a purchase using one of the links, I receive a small commission (at no additional cost to you) that helps offset the costs of maintaining this blog. Thanks for your support!

Simple Watercolor Background
- The key to the background is to use watercolor paper.
- Stamp a small square using the inkpads onto a piece of something non-porous like a plastic lid. (you can also use watercolor paint)
- Add a tiny bit of water to the ink to dilute the color and brush on a simple swish with a wet brush to create the background. I like to use a waterbrush.

Building the Flower Stand
- I used woodgrain scrapbook paper to create the boards of the cider stand.
- The cider stand die has three sizes of “board dies” to cut and build the stand.
- I adhered two pieces of paper together to create thickness. Run the paper and the dies through the Crossover II die-cutting machine to cut the shape.
- I used basic building construction to make my stand.
- For the awning, I die-cut two pieces. (one plaid, one rust) Cut two sections from the rust die-cut and adhere to the striped awning piece.

Lots of Dimension and Details
- What makes this card special is all the little details.
- I used Vintage Photo Distress Ink to the edges of my pieces to make them look more realistic.
- I used a lot of foam dots behind the various pieces to create a lot of dimension.
- I doubled up the foam dots under the awning and sign.

My Cider Stand needed pumpkins.
- I used the pumpkin stamp from the “Home from the Holidays Stamp Set”.
- Stamp the pumpkin using black ink onto a marigold color cardstock.
- Using the Tombow Markers, color in the image. I like to go lightest to darker.

Last Summer, I made one of my favorite cards, the “Sweet Summer Flower Stand” card using
the Lemonade Stand Stamp and Die Set. I’ve wanted to make a Cider Stand Card every since.
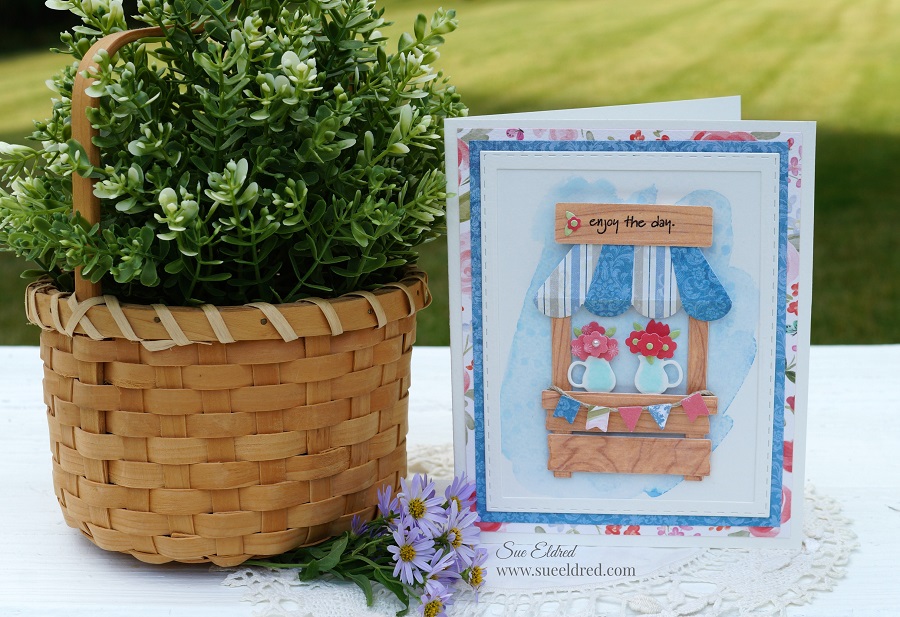 The Sweet Summer Flower Stand Card.

