You Color My World Card…
There are people in this world that bring sunshine and color into everyone’s life.
My goal is to be one of those people.
It’s not always easy, but it sure is worth it.
As I always told my kids, you have the power to change someone’s day just by your smile.
In the famous words of Buddy Elf, “I like Smiling. Smiling’s my Favorite”.

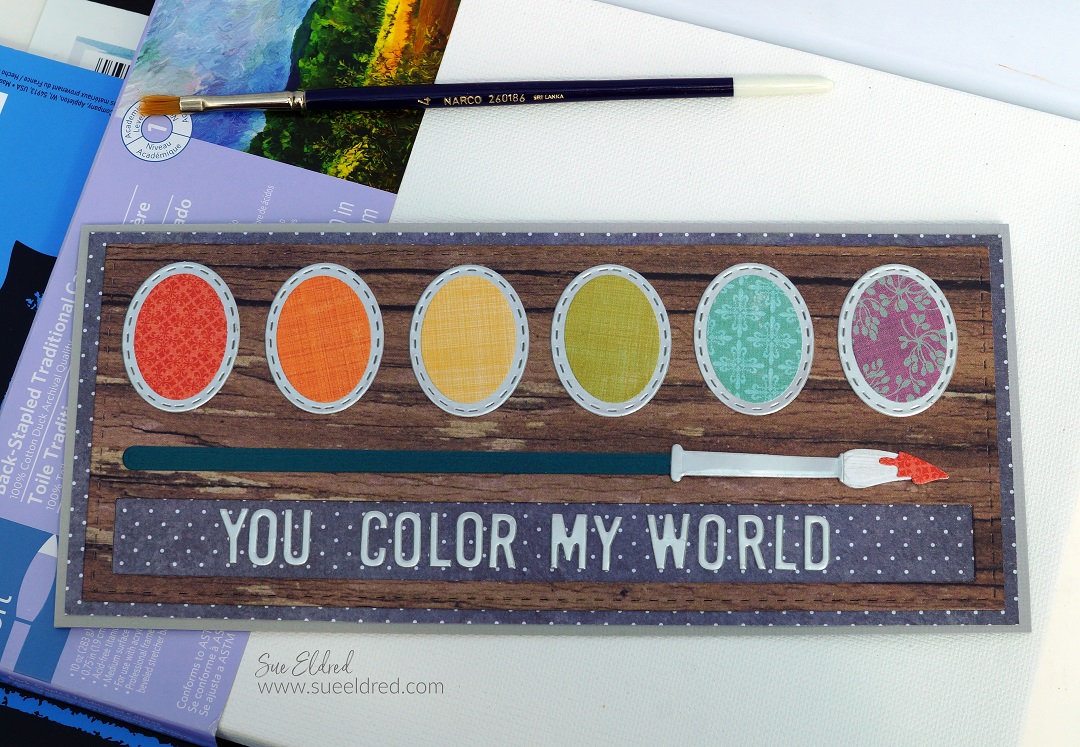
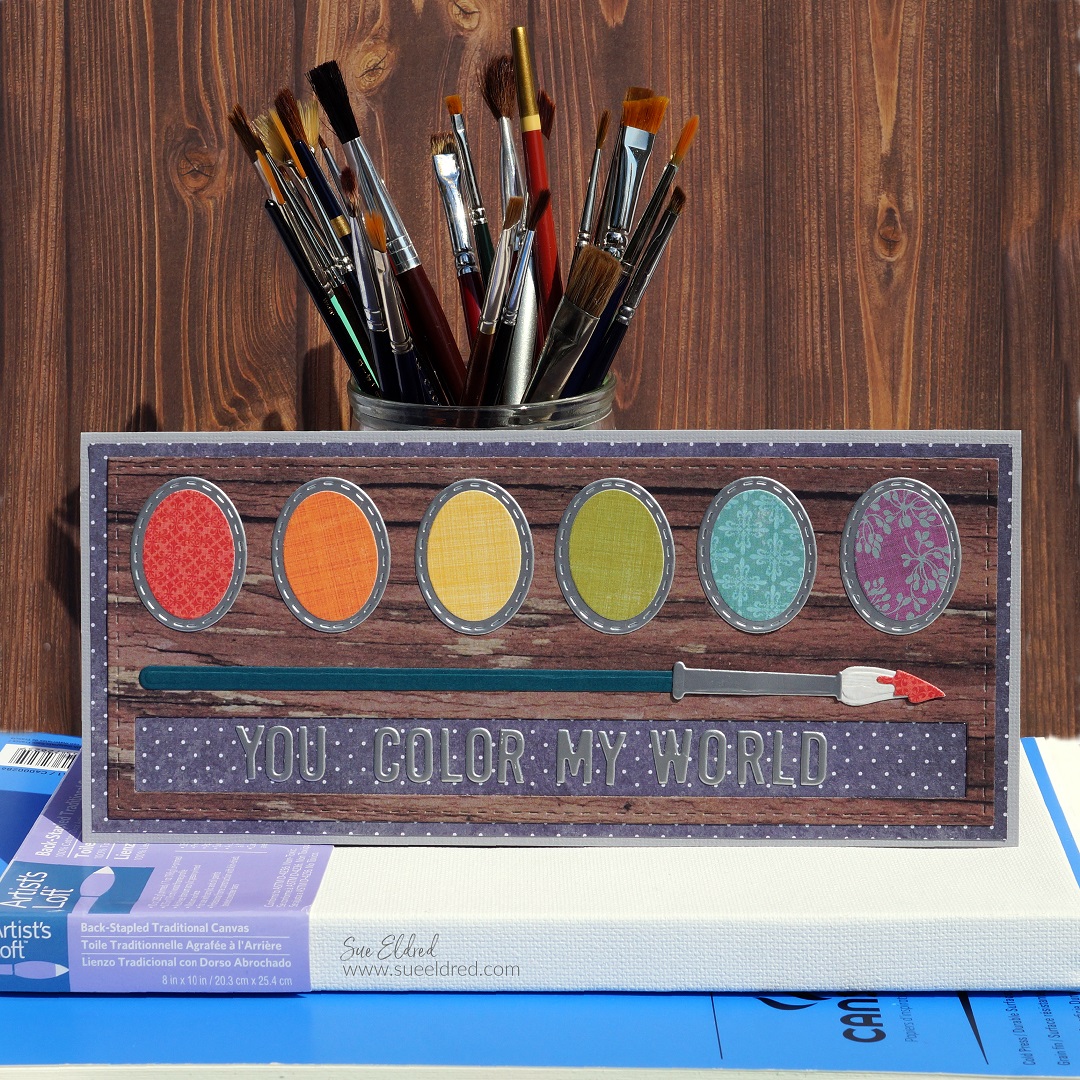
The “You Color My World” card mimics a Watercolor Paint Set.
For this card, I wanted a little more upscale look than traditional primary colors.
I made my watercolor paint using rich colors and patterns on a wood-look base.
I used the Color My World Slimline Die Set die set from The Maker’s Movement.

Disclosure: This is a sponsored post for The Maker’s Movement. I have been provided product and compensation in exchange for my creative ideas. The view and opinions are my own.

Materials Used: (*Affiliate Links)
- M12401 Color My World Slimline Die Set
- Crossover II Fabric & Paper Cutting System*
- Xyron Create-A-Sticker Mini*
- Xyron Tape Runner*
- StyleTechCraft Clear Gridded Vinyl Transfer Tape*
- Cardstock
- Patterned Paper

*Disclosure: This blog uses ads and affiliate links. If you choose to make a purchase using one of the links, I receive a small commission (at no additional cost to you) that helps offset the costs of maintaining this blog. Thanks for your support!

Directions:
- Die-cut the base of the card, using the slimline die set, out of wood-look scrapbook paper using the Cross Over II Die-Cutting System.
- Die-cut the paint pieces out of patterned paper.
- Die-cut the “paint pods” out of silver cardstock.
- I like to run the paper through the Xyron Create a Sticker Mini before die-cutting to make the pieces into stickers. It makes assembling all the parts so much easier.
- Assemble all the pieces onto the layered cardstock base.

The trick to applying the letters…
- Make the letters into stickers. I ran silver cardstock through the Xyron Create-A-Sticker Mini* before die-cutting to add adhesive on the back of the paper. Once die-cut, the letters became little stickers. So much easier than trying to glue them into place.
- To help line the words up straight, I used a clear-gridded transfer tape* to apply to letters.
- Place the letters onto the transfer tape backward using the lines of the grid as your guide.

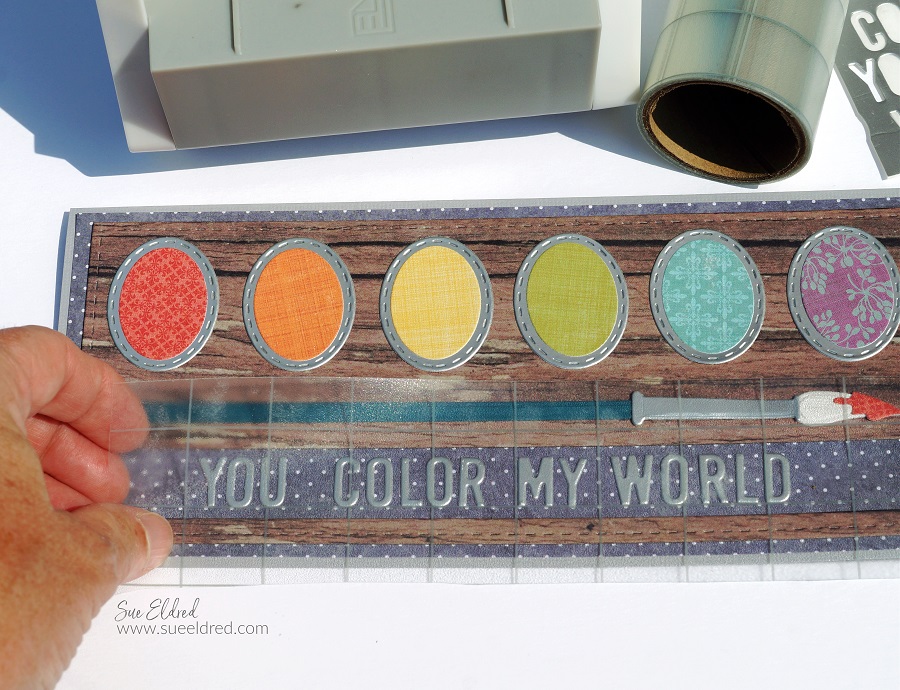
- Place the transfer tape onto the front of the card. Rub over the transfer paper to make sure the letters stick to the card. (You can use a vinyl scraper tool.)
- Gently pull back one end of the transfer paper and remove.