Create an elegant Holiday serving stand…
using random thrift store dishes and a Dollar Store candlestick.
Imagine this filled with yummy deserts and treats.
*Disclaimer: This post uses ads and affiliate links. If you choose to make a purchase using one of the links, I receive a small commission (at no additional cost to you) that helps offset the costs of maintaining this blog. Thanks for your support!
Here’s what you’ll need to get started: (*affiliate link)
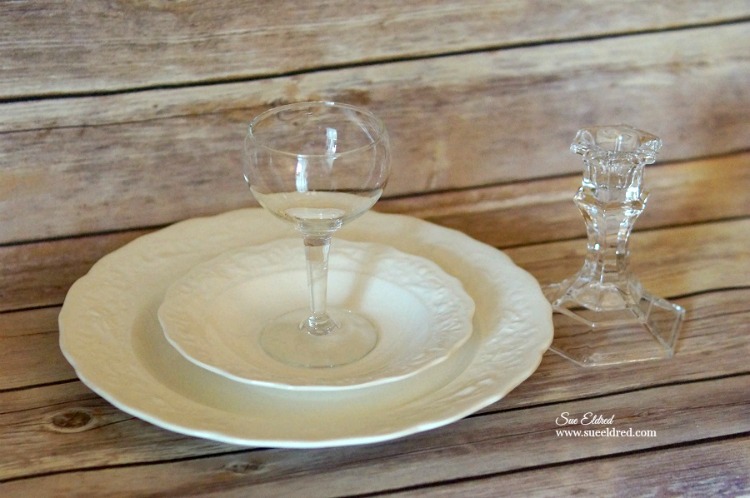
- Three Plates: one small, one medium, one large
- Glass Candlestick Holder*
- Glass Cordial
- Jingle Bells*
- Beacon Glass, Metal & More Premium Permanent Glue, 2-Ounce*
- Rubbing Alcohol
- Soft Cloth
Directions:
- Clean and dry dishes. Wipe areas where adhesive will be applied with rubbing alcohol to remove any oil left on glass from handling.

- Run a thin line of adhesive on the top of the glass candlestick and adhere to the bottom of the medium plate. Let dry.

- Place jingle bells into glass cordial. Run thin line of adhesive on top of glass cordial. Adhere to bottom of the smallest plate. Let dry.


- Adhere bottom of glass cordial to center of the medium plate.
- Adhere bottom of glass candlestick to top center of largest plate.

TIP… Use as three separate pieces or adhere together to create one elegant serving stand.