A Cup of Attitude

After I finished personalizing my new cup, I proudly ran downstairs to show it to my husband.

“I don’t get it”  was his response.

It’s a cup of Attitude”, I replied.  (I still don’t think he got it.)

I’m generally a very sweet and nice person.  

But sometimes…if you could only hear the snarky comments rolling around in my head,

you just might think otherwise.  I keep it to myself most of the time.  (or at least I try)

The struggle is real.

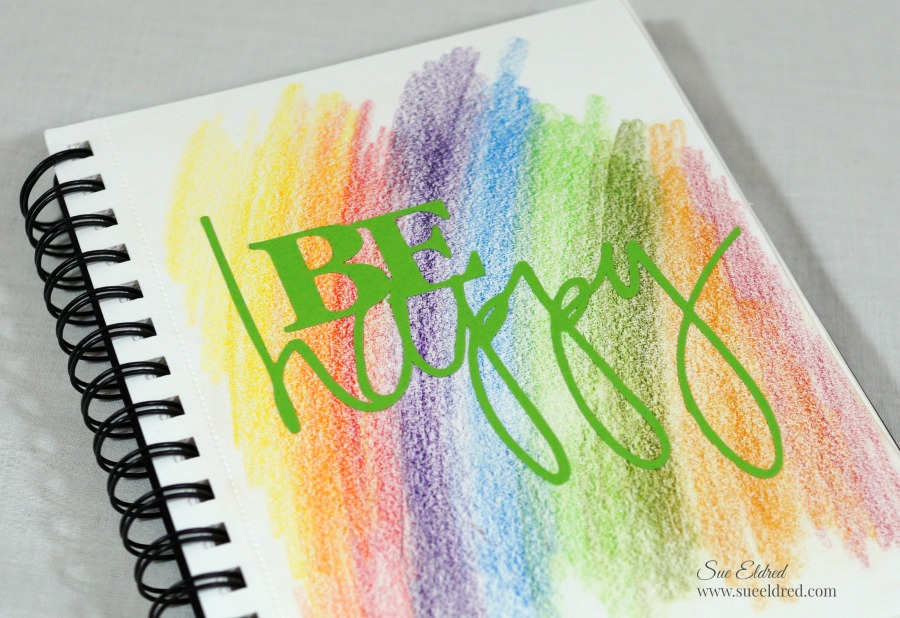
To personalize my cup…                              (*affiliate links)

  •  I used my Silhouette Cameo* to cut out a cute saying from Jillibean Soup out of translucent

Self Adhesive Glitter Vinyl Sheets- by Styletech from Tape Technologies*

  • I picked up the plain white cup at Dollar Tree* for only $1.00.  (*affiliate link)

Dollar Tree is the perfect place to find inexpensive glassware to personalize with vinyl.

Directions:

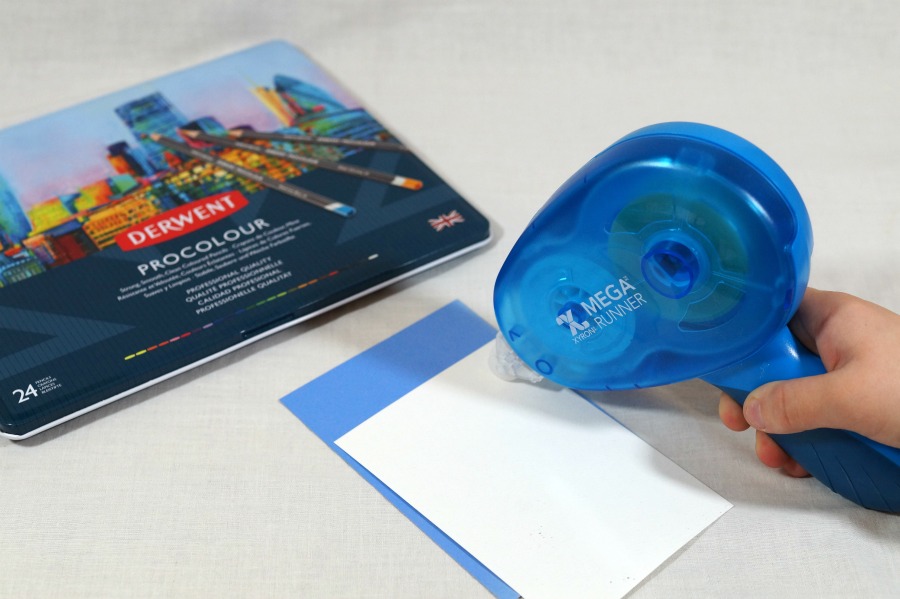
  • Clean the cup with warm soapy water to remove any grease or residue.
  • Apply the hot pink glittered  vinyl words onto the cup using a Vinyl Transfer Tape*.
  • Next, add the gray glittered vinyl words.
  • The Vinyl Transfer Tape*  makes it easy to line up the words.
  • Wait 4 days for the adhesive to fully cure before using the cup.
  • It is recommended to hand wash only.  (I have put mine in the dishwasher, just saying.)

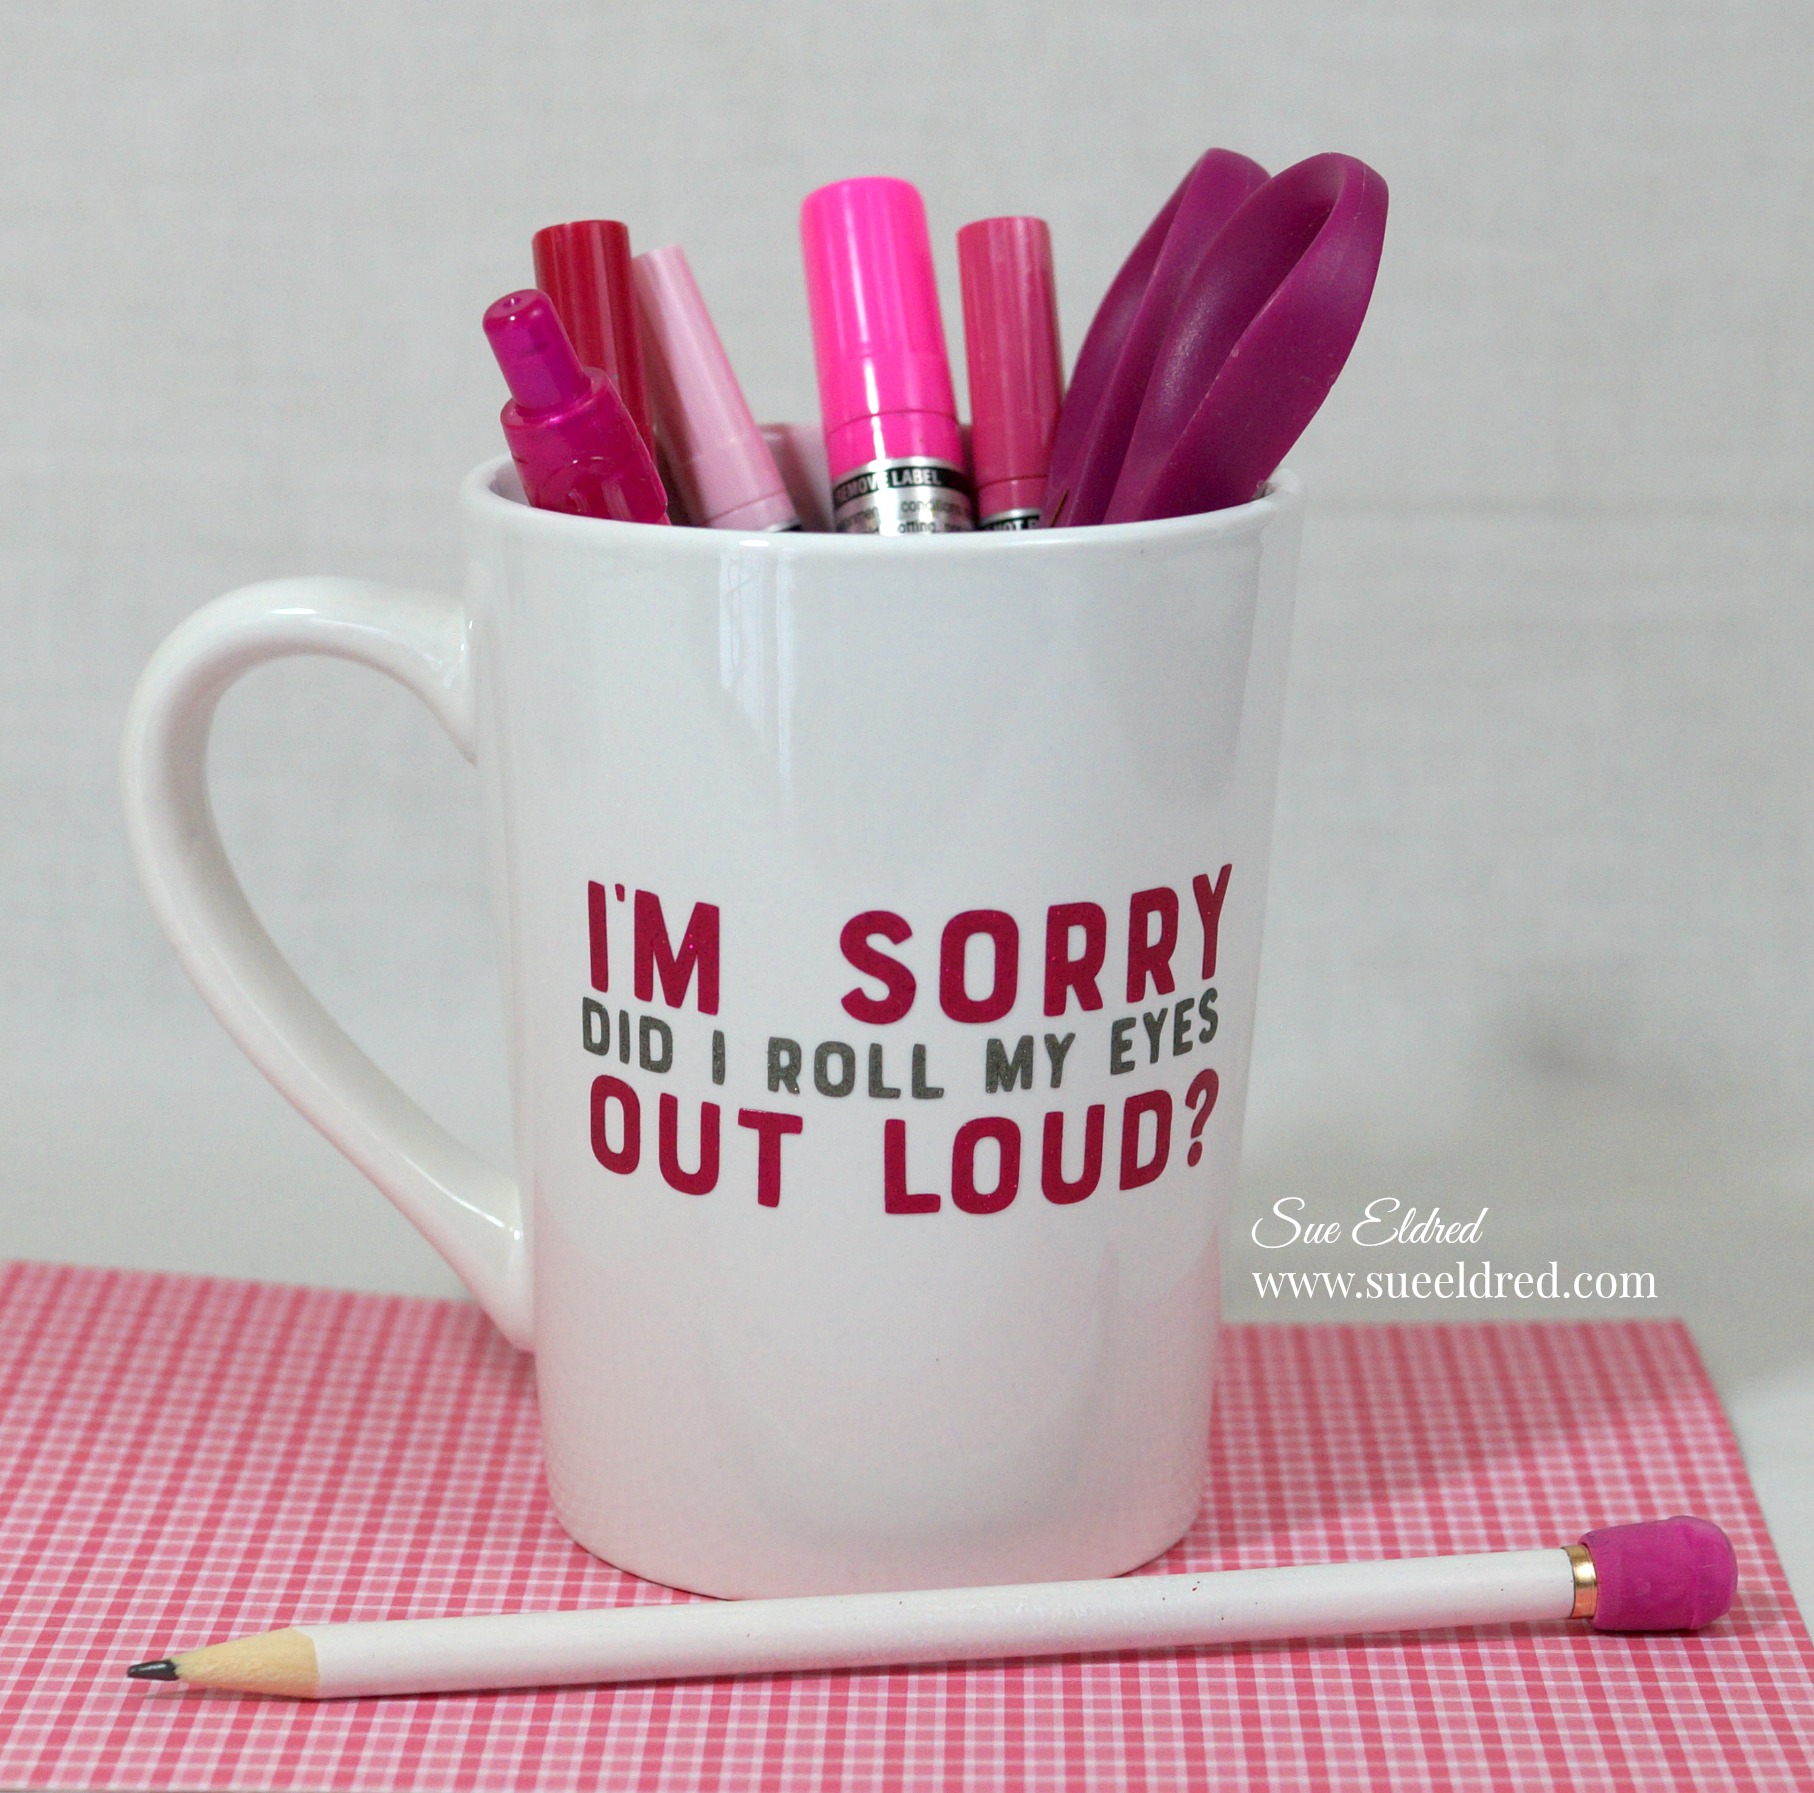
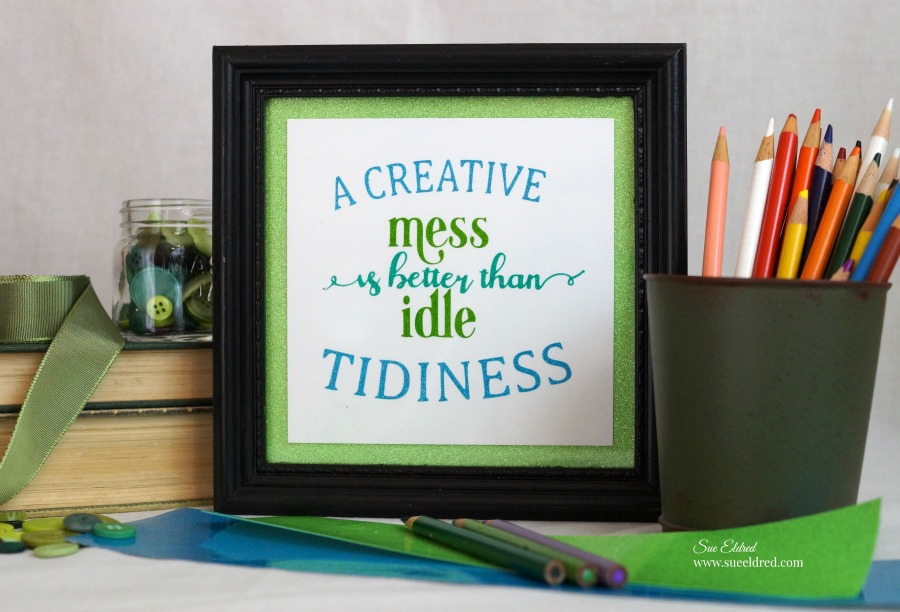
If you need to keep your attitude a little more subdued…

the cup also makes a great pen holder.

Shop Your Fav Brands at Scrapbook.com

“This is a sponsored post. As a member of the Tape Technologies Design Team I have been provided product in exchange for my creative ideas, views and opinions.”

*Disclosure:  This blog uses ads and affiliate links.  If you choose to make a purchase using one of the links, I receive a small commission (at no additional cost to you) that helps offset the costs of maintaining this blog.  Thanks for your support!

Shop Amazon Scrapbooking Supplies*

a boy and his cars…

I have this sweet boy in my life that loves cars.

Hotwheels to be exact.  (he’s very brand loyal)

Whenever he walks in my house he puts out his hand to show me the car of the day.

“Grandma, I have a new car to show you, you’re going to love this”…

This one’s Split Vision.  He’s aerodynamic and he goes really fast.”

I imagine he’s going to be a Race Car Driver or something equally cool when he gets older.

This kid always has a car with him wherever he goes.

I watched him at his big brother’s Spring Concert roll his car along the bleachers,

checking to see if it would fit under the boot heel of the guy sitting next to me.

To him… everything’s a potential ramp or tunnel.

For my Deflecto Design Team project this month, I decided to “think like he does” and make

a Deflecto 12″ x 12″ Clear Craft Picture Frame* into a “super cool” ramp for my grandson.

(*Affiliate Link)

I gave the Deflecto Frame* a light sanding with an extra fine sanding block to help the paint

adhere better.  Then, I painted the frame with Rust-Oleum Chalkboard Black Spray Paint*.

I used my Silhouette Cameo* and Glitter Vinyl* from Tape Technologies to create

the words and stripes for “our” new ramp.

Shop Your Fav Brands at Scrapbook.com

And… because you always need more storage for your cars.

I made him a new car box using a Deflecto Stackable Cube Organizer*.

“This is a sponsored post. As a member of the Deflecto Design Team I have been provided product in exchange for my creative ideas, views and opinions.”

*Disclosure:  This blog uses ads and affiliate links.  If you choose to make a purchase using one of the links, I receive a small commission (at no additional cost to you) that helps offset the costs of maintaining this blog.  Thanks for your support!

Shop Amazon Scrapbooking Supplies*

Coloring with Derwent and Xyron

I recently received a special box of Derwent Procolour Colored Pencils* to try out along with

the Derwent Big Book*.  As soon as I got them, I couldn’t wait to try them and scribble in my

new sketch book.  I have used several different brands of colored pencils through the years and

I was impressed by the smooth clean lines and easy blending.


Happy with my scribbling…I decided to keep the page and add the words “Be Happy”.

This would be a great start to a scrapbook layout.


I also used my new Derwent Procolour Colored Pencils* to color in a page from a

Mini Coloring Book* for grown-ups.  I adhered the coloring page to cardstock using my

Xyron Mega Runner* for a quick and easy card.

 “This is a sponsored post. As a member of the Xyron Design Team I have been provided product and compensation in exchange for my creative ideas.  The views and opinions are my own.”

*Disclosure:  This blog post uses affiliate links.  If you choose to make a purchase using one of the links, I receive a small commission (at no additional cost to you) that helps offset the costs of maintaining this blog.  Thanks for your support!

“Dyeing” for Spring

Welcome Spring with all your beautiful flowers, warmer days and everything renewed.

My Welcome Spring Banner turned into a real labor of love.

I began this project with the idea of using fun pink and purple hand cut felt flowers.

After I cut all the flowers and leaves, I decided to dye the embroidered letters.

The letters turned out so soft and delicate, I needed something softer for the flowers.

So…more flowers and more dyeing!  (make sure to read all the instructions below.)

I could of kept things simple and glued all the flowers in place, but noooo…

instead at the last minute I committed myself to stitching the entire thing.

Let me tell you…I’m not a stitcher!    (But, I am pretty satisfied by the way they turned out.)

To make the Welcome Spring Banner you’ll need:

  1. Add several drops of dye ink to each misting bottle.
  2. Remove letters from backing sheet and place on a Non Stick Craft Mat* or (wax paper).
  3. Spritz the letters with both blue and green ink for a variegated look.  Allow the ink to soak into the letters then dab away excess ink and water with a paper towel.  Let dry.

Look at how beautiful the letters dried.  ↓

4.  Create simple, hand drawn flowers (small, medium and large), circle and leaf patterns onto plain white paper.  Cut then trace around the patterns onto white felt.  Cut out.

5.  Spray the leaves green, set aside then spray the flowers and circles one color at a time.  Allow them to dry overnight.

6.  Layer the circle, small flower and large flower on top of each other then stitch in place.  Use a small amount of glue to hold the pieces in place while you stitch.

I love how the ink pooled at the edges of the pink flowers!

7.  To create the banner shape, fold a 10″ x 14″ piece of white felt in half lengthways.  Cut diagonally across the bottom from the center fold to a point about 3″ up from the bottom corner on the outer edges.  Stitch the flowers to the banner using a button at the center of each one.  Tuck leaves underneath the outer edges of the flowers then stitch in place.

8.  Set iron to cotton setting, approx. 350°, or follow garment care label.  Position letters with shiny side down on felt, then iron the letters in place as shown.  Cover letters with a fine cloth.  With firm pressure, iron cloth over the letters for 30 seconds.  Turn banner over and iron the back of the letters for 30 seconds.

9.  Use a sewing machine to stitch the banner to backing material, then stitch trim in place across the top and around the bottom edge if desired.

 If you need to finish your banner in less time, glue the flowers, leaves and trim in place, then use a fusible interfacing to adhere the felt banner to a backing.

Look for Joy® iron-on embroidered alphabet letter sheets at your local craft store.

My “Welcome Spring” banner was created for and sponsored by Joy SA.

Shop Your Fav Brands at Scrapbook.com

*Disclaimer:  This post uses ads and affiliate links.  If you choose to make a purchase using one of the links, I receive a small commission (at no additional cost to you) that helps offset the costs of maintaining this blog.  Thanks for your support!

Try Amazon Prime 30-Day Free Trial

DIY Bloom Floral Plaque

Bloom into Spring with this DIY Bloom Floral Plaque.

I admit it…I’m an adhesive snob.

There’s nothing worse than spending hours on a project and then it  comes undone

from using the wrong adhesives.

I tell people all the time “not all adhesives are created equal”.

That’s one reason why I was so excited to be on the Xyron 2018 Design Team.

Xyron has Good Adhesive!

The DIY Bloom Floral Plaque is the first of many projects to come using Xyron.

DIY Bloom Floral Plaque Products Used:    (*Affiliate Links)

*Disclosure:  This blog post uses affiliate links.  If you choose to make a purchase using one of the links, I receive a small commission (at no additional cost to you) that helps offset the costs of maintaining this blog.  Thanks for your support!

How to make a DIY Bloom Floral Plaque…

  • Lay a piece of a 8 1/2″ x 8 1/2″ piece of decorative scrapbook paper (design side up) on the Xyron Creative Station, 9″* crank the handle to run the paper through the machine.  As it moves through the Xyron Creative Station it adds adhesive to the back side of the paper.
  • Easy to use and it doesn’t need any electricity.

       You get complete coverage, no gluing, no wrinkling, no bubbles!

  • Lay Wood Flower Shaped Plaque onto the adhesive side of the paper.
  • Carefully cut around the wood shape with a craft knife and craft cutting mat.

  • Gently sand away rough-cut edges on the paper using an extra fine sanding block.

  • I used my electronic die cutting machine and cut files to create pieces for my background.  The Xyron Creative Station* is great for adding adhesive to the back of intricate pieces.

  • After the layers are adhered together, I use the XYRON Adhesive Eraser* to remove any extra adhesive from the edges of my pieces.  Remember to use a gentle touch.

The XYRON Adhesive Eraser* is one of my favorites must have tools.  I keep it on my desk at all times.

I think every paper crafter should carry one in their supply box.

  • For added detail…use a gold paint pen to edge around the outside of the Wood Flower Shaped Plaque and the decorative scrapbook paper oval.

  • My Xyron Creative Station* makes quick work of assembling all the pieces of my DIY Bloom Floral Plaque.
  • Finish embellishing the plaque with a few paper flowers glued into place with craft glue.

 “This is a sponsored post. As a member of the Xyron Design Team I have been provided product and compensation in exchange for my creative ideas.  The views and opinions are my own.”

Make it Personal

Re-purpose a canvas bag and make it personal!

Last year I received a really nice, large and sturdy canvas bag from a event I attended.

While I really do appreciate all the sponsor’s named on that bag…

I knew I use it more if I made it personal.

With Joy Iron-on Embroidered letters personalizing it was a snap…

choosing from the large variety of colors and fonts available wasn’t quite as easy.

Step one…  Remove the sponsor’s iron-on transfer logo with a

XYRON Adhesive Eraser (*affiliate link).

While this may not work for every type of bag, it worked great on this one.

Making it Personal…

  • Set dry iron to cotton setting.
  • Surface of fabric to which letters are to applied should be clean.
  • Cover Letters with a lightweight or sheer pressing cloth.
  • Using firm pressure, iron over letters for 30 seconds.
  • Turn item over, iron on back for 30 seconds.
  • Allow to cool before handling.

Joy® iron-on, embroidered letters are available in a variety of fonts, sizes and colors. White letters can also be colored with dye, paint, markers and more to create custom colors!

“Make it Personal”  was created for and sponsored by Joy SA.

Shop Your Fav Brands at Scrapbook.com

*Disclaimer:  This blog uses ads and affiliate links.  If you choose to make a purchase using one of the links, I receive a small commission (at no additional cost to you) that helps offset the costs of maintaining this blog.  Thanks for your support!

Shop Amazon Scrapbooking Supplies*

A Creative Mess…

 A Creative Mess is better than idle Tidiness.

I love this saying, it fits me to a tee.

I do like a neat and tidy craft space, but when I’m working on a project, it’s a complete mess.

To create the words…

I created the saying using a design file on my Silhouette CAMEO 3 Wireless Cutting Machine*

using 12″ x 12″ Adhesive Glitter Vinyl Sheets by StyleTech*.  I laid all three of my vinyl colors

down on the cutting mat at the same time and cut my saying with one pass of my machine.

Styletech Craft products brought to you by ATSM Craft 

Disclosure:  This blog uses affiliate links.  If you choose to make a purchase using one of the links, I receive a small commission (at no additional cost to you) that helps offset the costs of maintaining this blog.  Thanks for your support!

I Love Square Frames and a Good Bargain…

I found this 90’s framed print at a garage sale for 25¢ and painted it black.  

I added my words onto a piece of white cardstock using transfer paper.   I adhered the white

cardstock onto an extra piece of glitter vinyl and inserted it into the frame.

A Quick and Easy, Thrifty Home Décor piece for my Crafty Space.

“This is a sponsored post.  As a member of the StyleTechCraft Design Team I have been provided product and compensation in exchange for my creative ideas.  The views and opinions are my own.

Together… Mini Flip Album

Together is my Favorite Place to Be…

This cute little flip album is one of the “make and take” projects that I taught

in the Deflecto Craft Solutions Booth at Creativation in January.

Shop Your Fav Brands at Scrapbook.com

“Together is my Favorite Place to Be” Supplies Used…          (*affiliate link)

Directions:

  1. Make two marks on the top of the frame approximately 3/4″ in on each side.  The marks need to be approx. 1/2″ down from the top of the frame.  (If the holes go down too far the pages won’t flip correctly.)  Drill two holes in the top of the frame with a 3/16″ drill bit.
  2. For the mini album cover…Adhere a 3/4″ x 4 3/4″ scrapbook paper strip onto the top of the corrugated paper leaving a 1/8″ margin on the top.  Adhere the 3″ x 4″ journaling card (cut from the scrapbook paper) onto a 3 1/2″ x 4 1/2″ piece of blue scrapbook paper layer, add those layers onto the corrugated paper and then onto a 4″ x 6″ black cardstock layer.
  3. Using the drilled holes on the craft frame as a guide, mark the cover and the kraft cardstock pages and punch two holes on the top.
  4. Mark and punch holes into a piece of 4″ x 6″ decorative scrapbook paper and insert into frame.
  5. Attach cover and pages to the craft frame with book rings.
  6. Tie ivory ribbon around cover.

“This is a sponsored post. As a member of the Deflecto Design Team I have been provided product in exchange for my creative ideas, views and opinions.”

*Disclaimer:  This blog uses ads and affiliate links.  If you choose to make a purchase using one of the links, I receive a small commission (at no additional cost to you) that helps offset the costs of maintaining this blog.  Thanks for your support!

Shop Amazon Scrapbooking Supplies*

Xyron 2018 Design Team

Sorry I haven’t posted much lately.

That stupid influenza bug had me sidelined and wiped out for the last couple of weeks.

It feels good to feel good again.

And now for some Exciting News…

It is such an honor to have been chosen by Xyron to be on their 2018 Xyron Design Team

and work along side these lovely and talented ladies.  It’s going to be a good year!

Rotating Embellishment Organizer

Being a paper crafter at heart, I sometimes wonder…

What’s your favorite way to embellish?

For me it’s flowers, twine, buttons and pearls.

My Rotating Embellishment Organizer also know as Deflecto’s Rotating Carousel Organizer*

is a great way to organize my “go to” embellishments.  (and it looks pretty too.)

The Deflecto Rotating Carousel Organizer with Nine Canisters*   (*affiliate link)

comes with three 6″ bins and six 3″ bins.


It is also available as a Rotating Carousel Organizer with Six 6″ Canisters*.

It’s a great way to organize your supplies.

“This is a sponsored post. As a member of the Deflecto Design Team I have been provided product in exchange for my creative ideas, views and opinions.”

*Disclaimer:  This blog uses ads and affiliate links.  If you choose to make a purchase using one of the links, I receive a small commission (at no additional cost to you) that helps offset the costs of maintaining this blog.  Thanks for your support!

Shop Amazon Scrapbooking Supplies*