Dollar Store Pumpkin Makeover

I love the look of heirloom pumpkins and those cute little white pumpkins called “baby boo”.

But…I always have a hard time finding them.

This year, I decided to make my own.

I found these cute little 4″ metallic pumpkins* at my local Dollar Tree*.

At $1.00 each, I couldn’t pass them up.

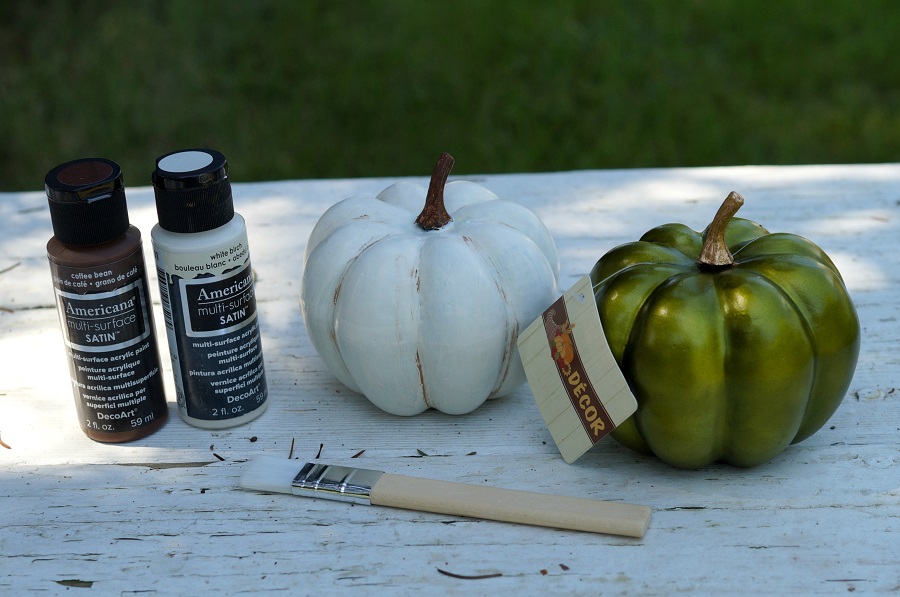
I painted the pumpkins with Americana Multi-Surface Satin Acrylic Paint in White Birch*.

It took 4-5 coats.  In hindsight, I wish I would have left a little green showing through.

I used Americana Multi-Surface Satin Acrylics Paint in Coffee Bean* to paint the stem and

accent the grooves of the pumpkin.  To make it look more realistic, I used a baby wipe to

strategically wipe off some of the extra brown paint.

I really please with the way they turned out.

Best part is… they won’t spoil and I can reuse them year after year.

Shop Your Fav Brands at Scrapbook.com

*Disclaimer:  This post uses ads and affiliate links.  If you choose to make a purchase using one of the links, I receive a small commission (at no additional cost to you) that helps offset the costs of maintaining this blog.  Thanks for your support!

Save

How to create an Embroidery Hoop Pumpkin…

How to Create an Embroidery Hoop Pumpkin

A Quick and Easy Fall Decoration.

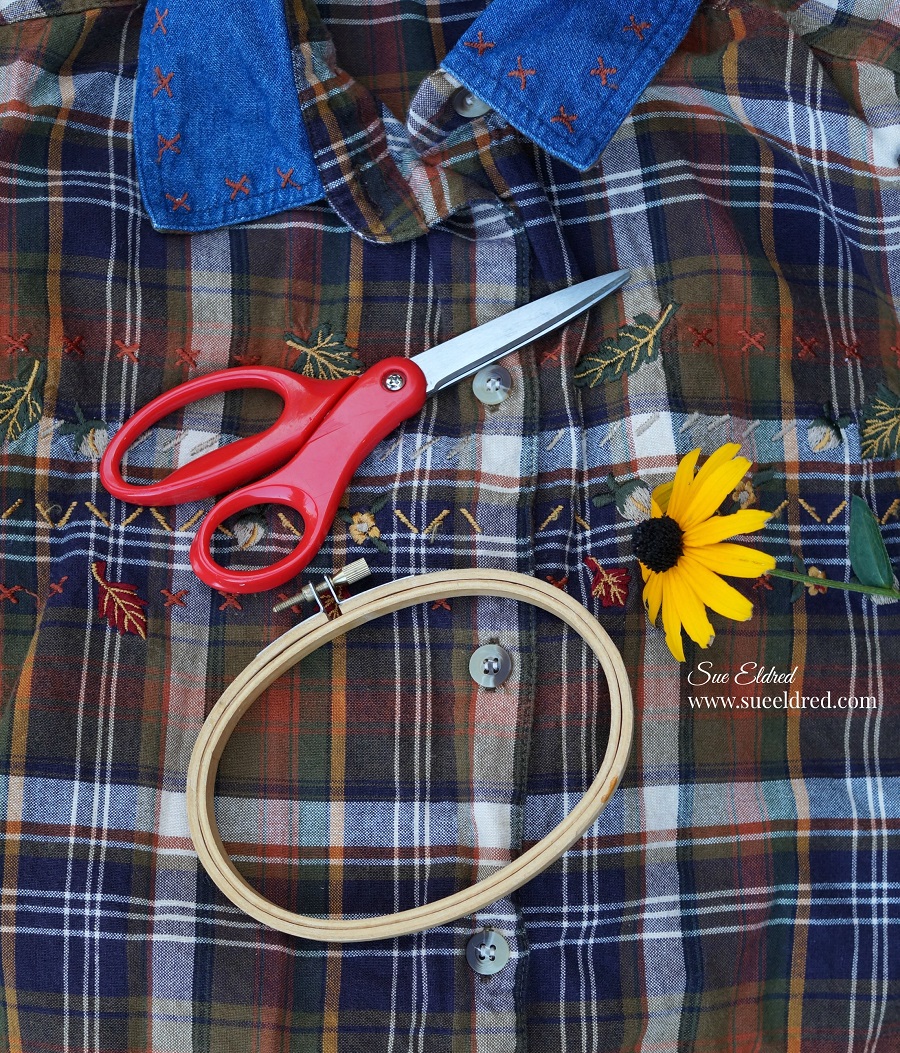
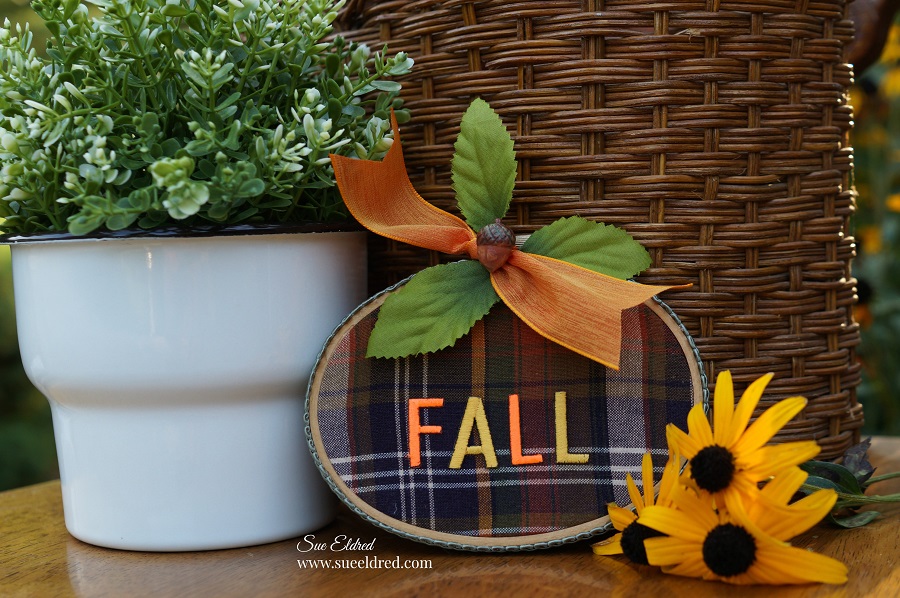
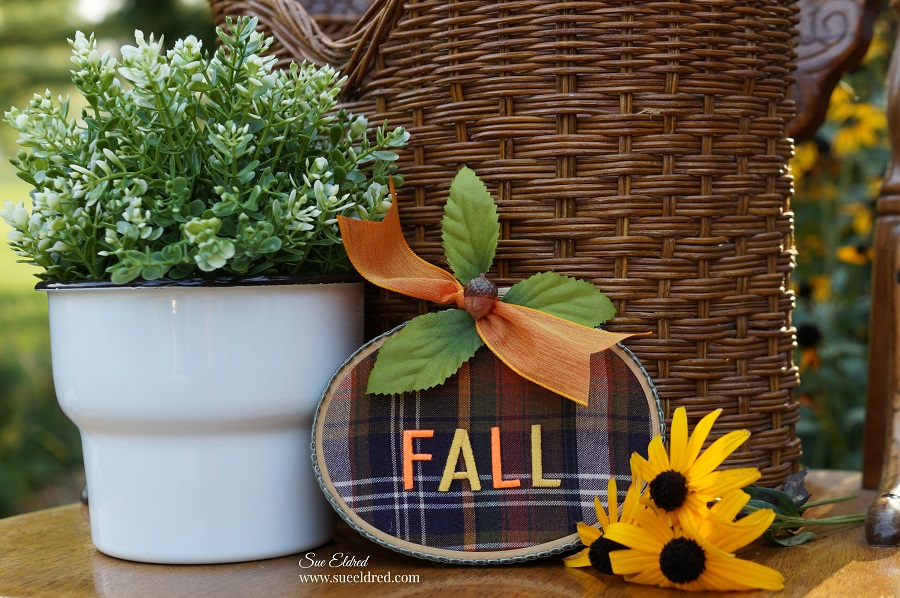
What do you get when you find an outdated plaid Fall shirt, a small oval embroidery hoop

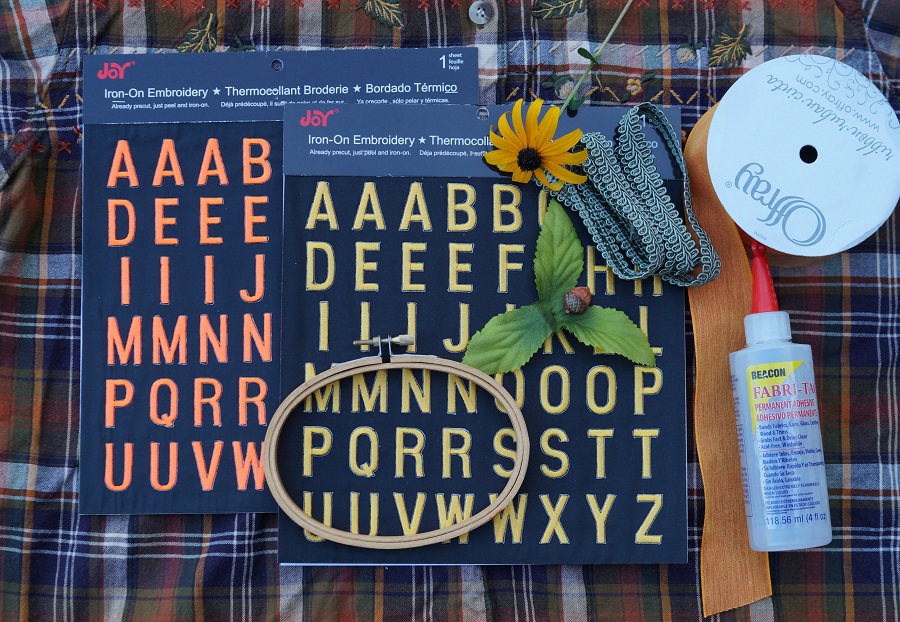
and then you add a few simple embellishments and some Joy Iron On Embroidered Letters?

You get a cute little Fall Pumpkin and A Quick and Easy Fall Decoration.

For my Embroidery Hoop Pumpkin I used:            (*affiliate link)

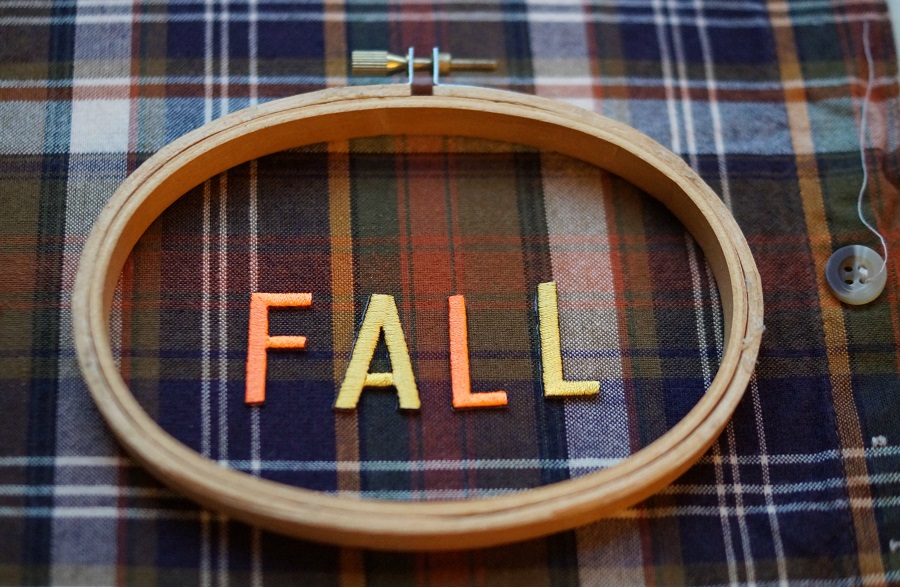
  • Lay the embroidery hoop onto the fabric first and  then place the letters inside the hoop to help you figure the best placement.

  • Set Iron to cotton setting, approx. 350 degrees, or follow garment care label.
  • Position letters with shiny side down onto fabric.
  • Cover letters with a fine cloth.  With a firm pressure, iron cloth over letters for 30 seconds.
  • Turn fabric over and iron the back for another 30 seconds.

  • Loosen the screw on the top of the embroidery hoop and insert fabric making sure to keep the letter alignment straight.  (re-tighten screw)
  • Trim excess fabric from outside of embroidery hoop.
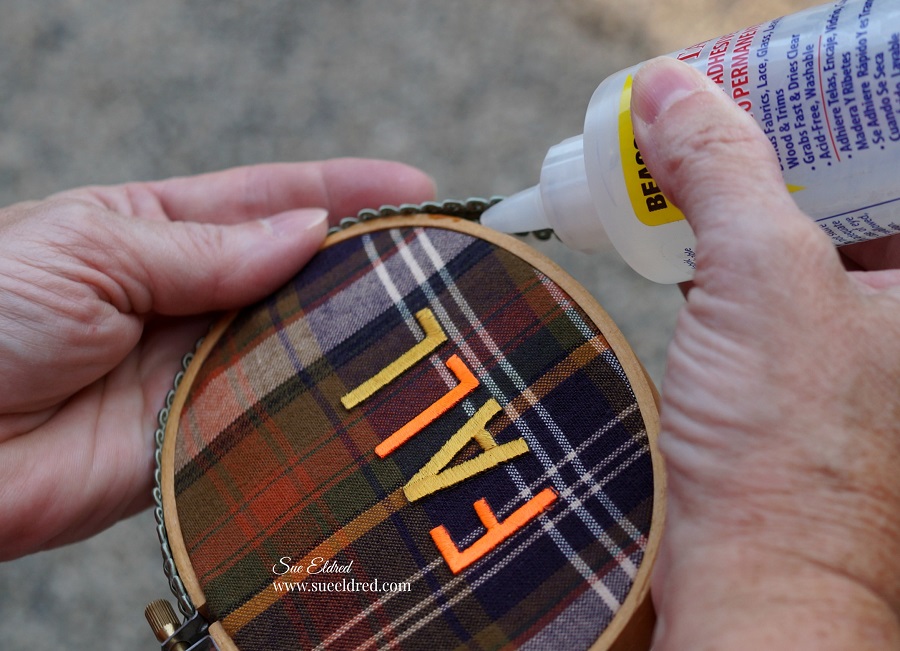
  • Glue the green braided trim around the outside of the embroidery hoop.

  • Tie ribbon and leaves to the top of the frame.
  • Glue small acorn embellishment onto ribbon.
  • Super cute and simple to make.

“This is a sponsored post.  As a member of the Joy® Design Team I have been provided product and compensation in exchange for my creative ideas.  The views and opinions are my own.

Shop Your Fav Brands at Scrapbook.com

*Disclosure:  This blog uses ads and affiliate links.  If you choose to make a purchase using one of the links, I receive a small commission (at no additional cost to you) that helps offset the costs of maintaining this blog.  Thanks for your support!

Personalizing My Ikea Finds for the Kitchen…

Personalizing My IKEA finds for the kitchen…

When you live 3 hours in any direction from the nearest IKEA,  you make your husband

stop anytime you’re close.
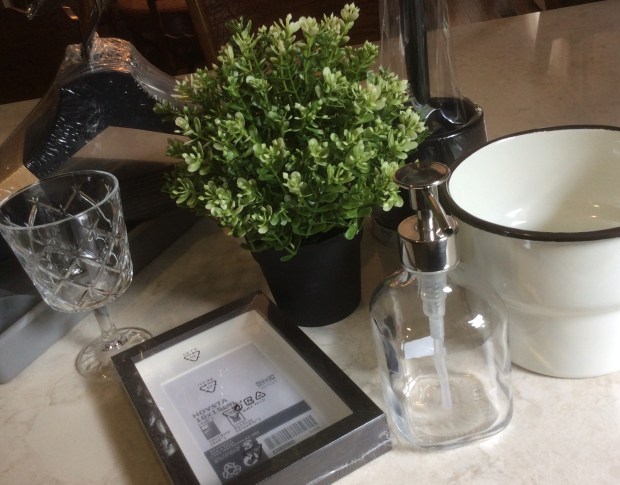
5278042B-6B77-4667-85CE-66B09D4BA3BF

Since I didn’t have advance notice to prepare and my husband only has the patience to

go around once.  I just grabbed without real purpose.

I really wish I would have bought more, a return trip is needed.

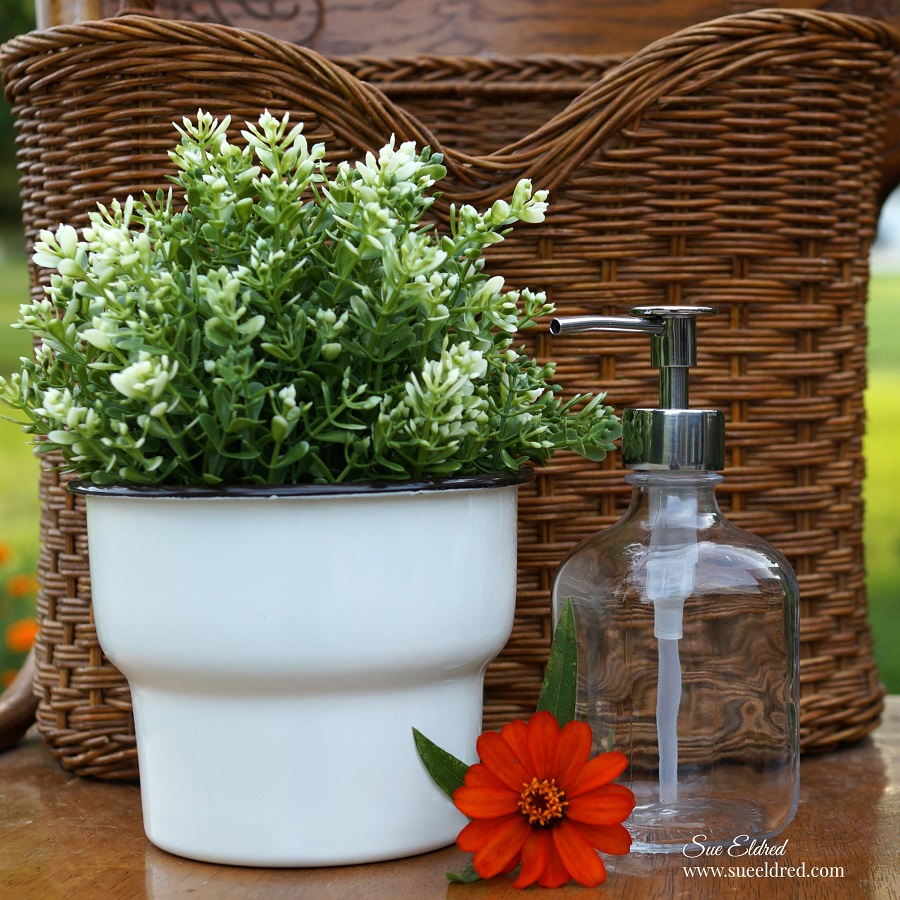
Here are the plain Ikea finds before being personalized!

This summer, we’ve been working on updating our kitchen.

It’s been a slow process.

Recently we had a kitchen sink dilemma…which halted choosing a backsplash tile.

For a distraction…a couple cute little DIY projects were in order.
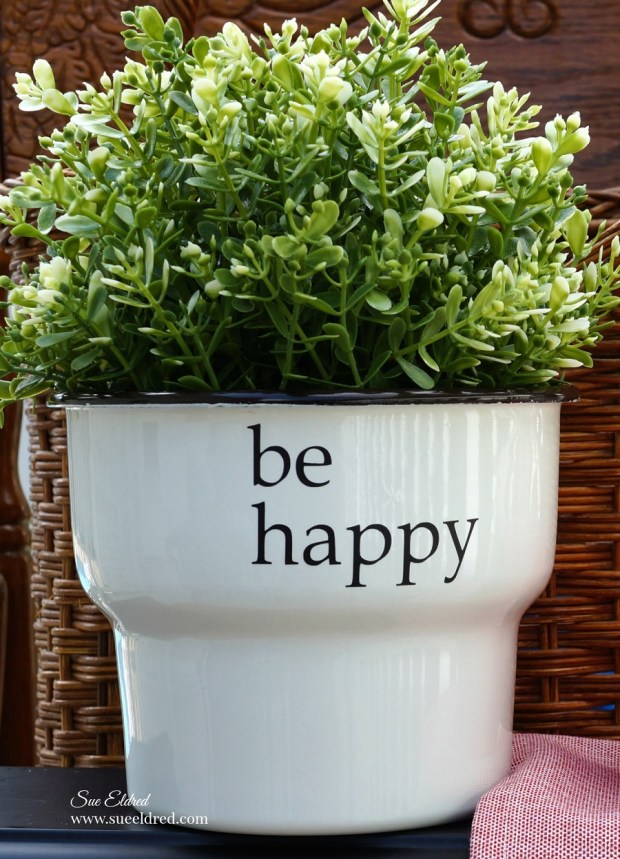
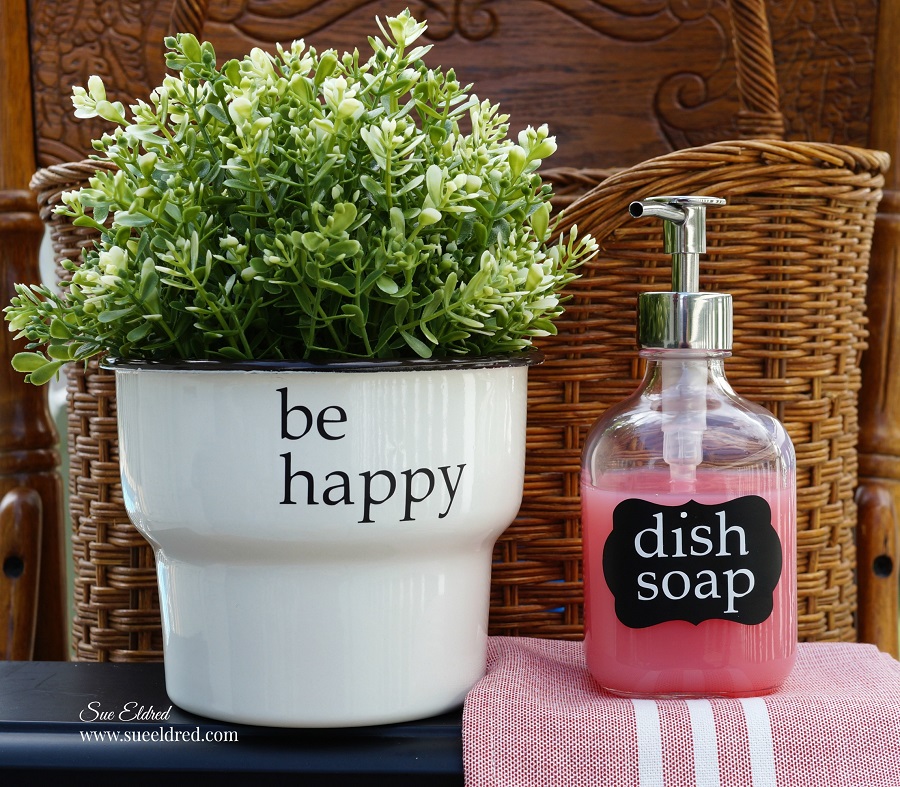
A “Rae Dunn” inspired planter.

I love working with vinyl.  For my “Rae Dunn” inspired planter,

I used a Silhouette Cameo Electronic Die Cutting Machine*to create the words “be happy”

out of Matte Black Removable Adhesive Vinyl* from StyletechCraft.  (*affiliate links)

I simply applied the words onto my planter using Vinyl Transfer Tape*.

So easy to do.

Removable vinyl makes it easy to change out my words with the seasons.

Did you know that this vinyl will remove cleanly for up to two years?

This vinyl film is great for decorating a kid’s room, a classroom or just about

anywhere you just need a temporary graphic.

And, with 27 colors available, it’s not hard to find the perfect color

for whatever you can dream up!

I have dish soap issues.

I like to keep it handy, but, hate the way the regular sized

plastic bottle looks on the counter.

I usually buy the smaller bottles.  (just slightly better)

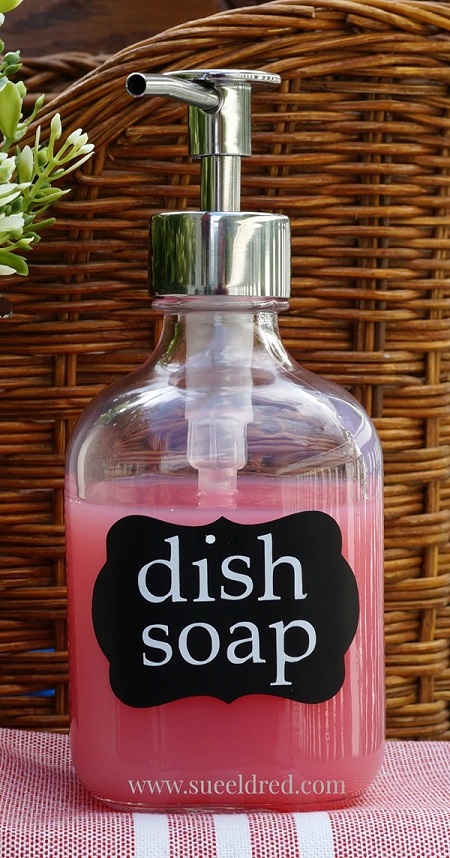
Solution… I picked up the cute soap dispenser during my last trip to IKEA

and also personalized it with the Silhouette Cameo Electronic Die Cutting Machine*.

This time I created a small label using Matte Black Removable Adhesive Vinyl*  

and words using Matte White Removable Adhesive Vinyl*.

It looks so much better than plastic soap bottles.

Fingers crossed, I’ll be sharing the kitchen project soon!

“This is a sponsored post.  As a member of the Tape Technologies Design Team I have been provided product and compensation in exchange for my creative ideas.  The views and opinions are my own.

Shop Your Fav Brands at Scrapbook.com

*Disclosure:  This blog uses ads and affiliate links.  If you choose to make a purchase using one of the links, I receive a small commission (at no additional cost to you) that helps offset the costs of maintaining this blog.  Thanks for your support!

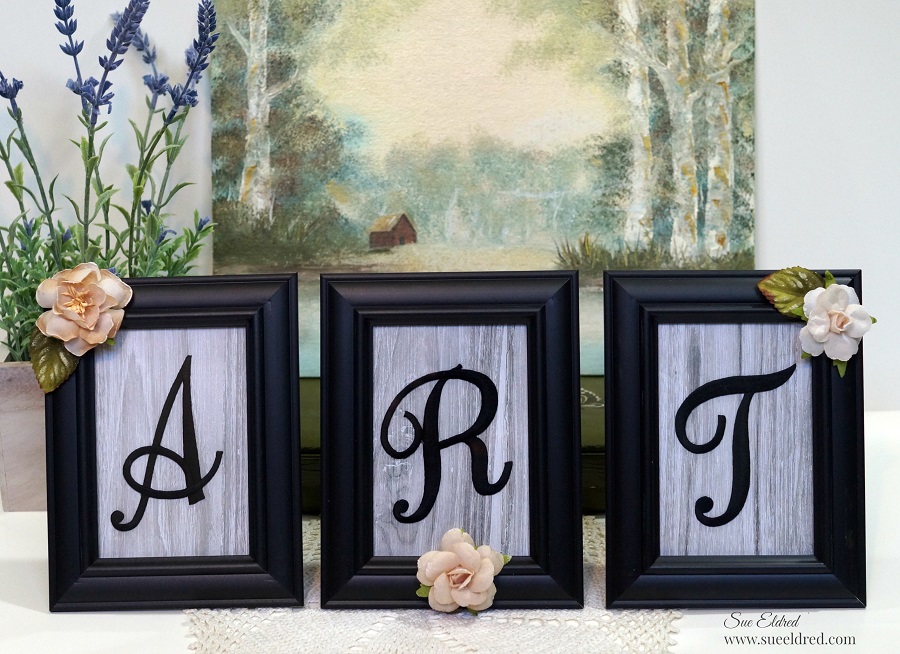
Creating Word Art with Monograms

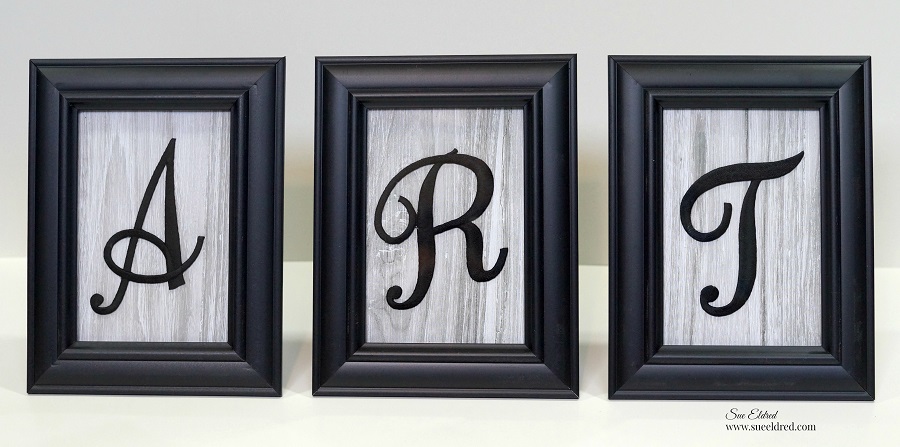
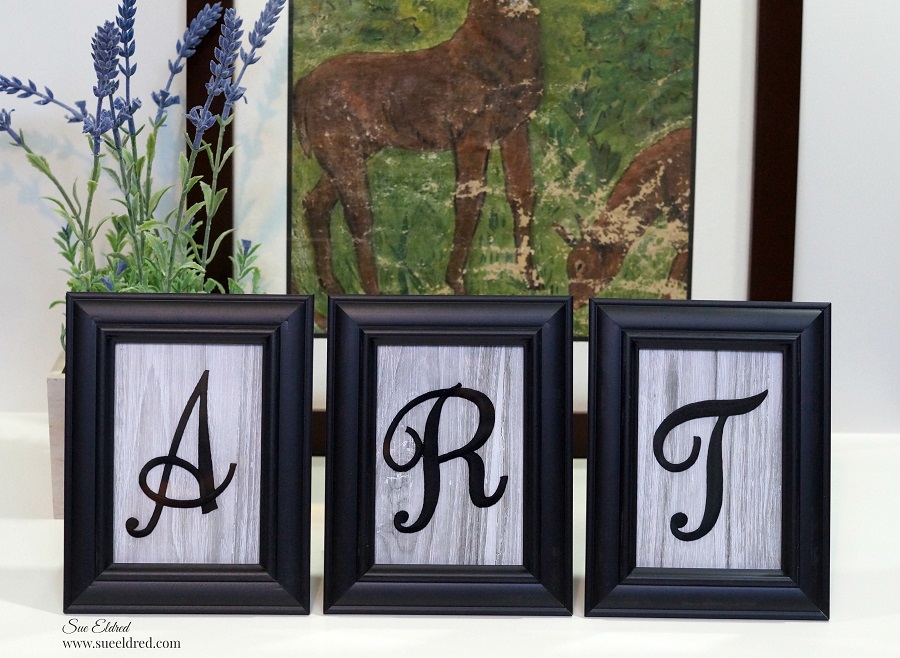
Create Personalized Word Art for your home with framed Monograms.

A Quick and Easy DIY Home Décor project to make using Joy Embroidered Monogram letters.

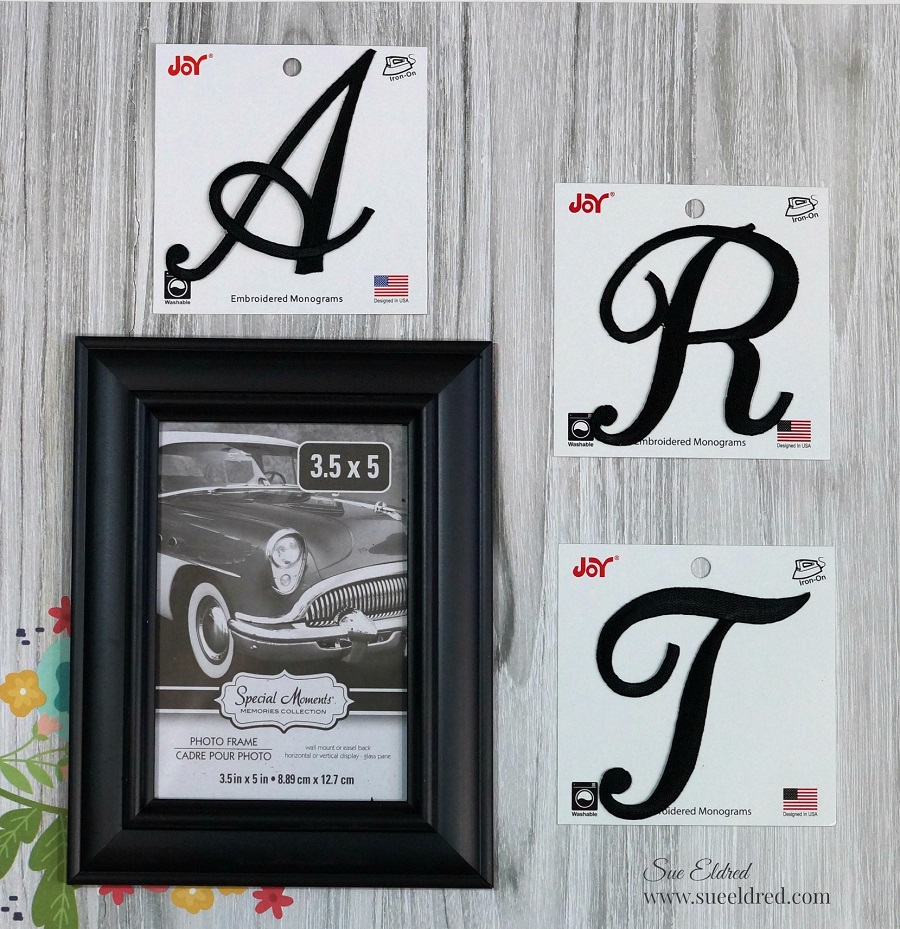
Here’s what I used:

*Disclaimer:  This post uses ads and affiliate links.  If you choose to make a purchase using one of the links, I receive a small commission (at no additional cost to you) that helps offset the costs of maintaining this blog.  Thanks for your support!

  • Cut the paper to fit inside frame.
  • Glue monogram letters to paper.
  • Insert into frame.
  • Glue flowers to outside of frame.


Try creating a custom wall display using the word “FAMILY”.

Additional sizes of embroidered monograms are available for endless word fun.

You can find Joy Iron-On letters at your favorite craft stores!

This project was sponsored by Joy SA.

Shop Your Fav Brands at Scrapbook.com

Shop Amazon Scrapbooking Supplies*

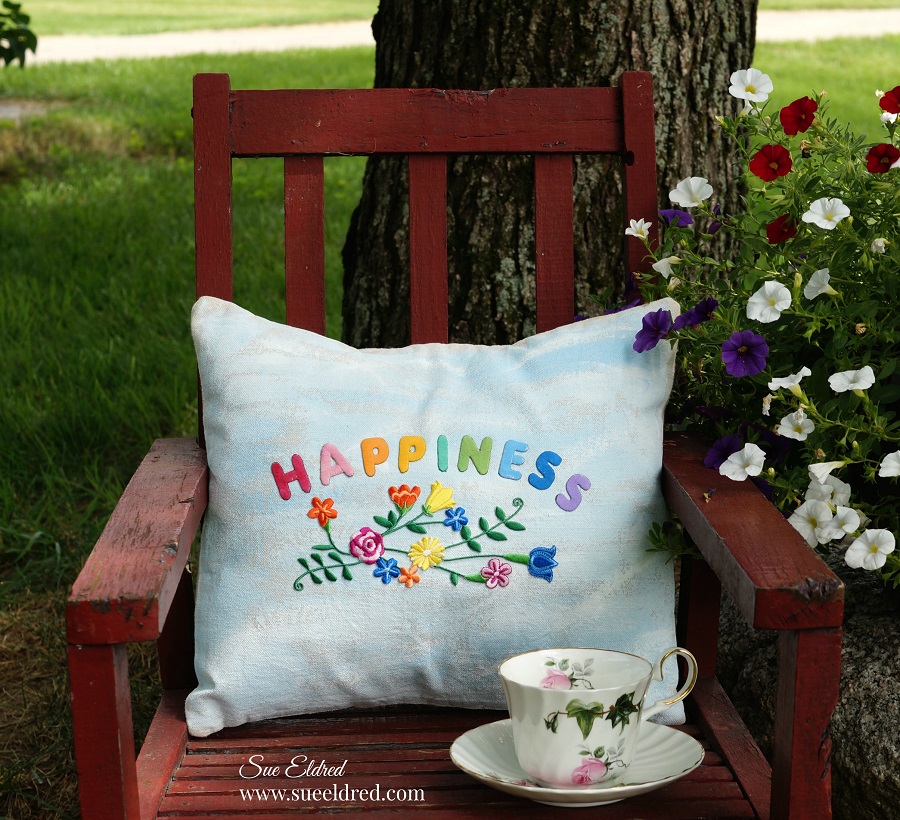
Painted Happiness Pillow

Happiness Pillow…

One of my favorite childhood memories was the summer I was cast as Lucy in the library’s

production of  “You’re a Good Man Charlie Brown”.

My favorite song was “happiness is”.  At the end of the show we all held hands and sang.

Still makes me happy.

When it comes to using Joy Iron-on letters…

I’ve dyed them, inked them and even misted the letters, I never thought about painting them.

Joy White Embroidered Iron On Letters are great for creating any color you can imagine.

They even work great with acrylic paint.

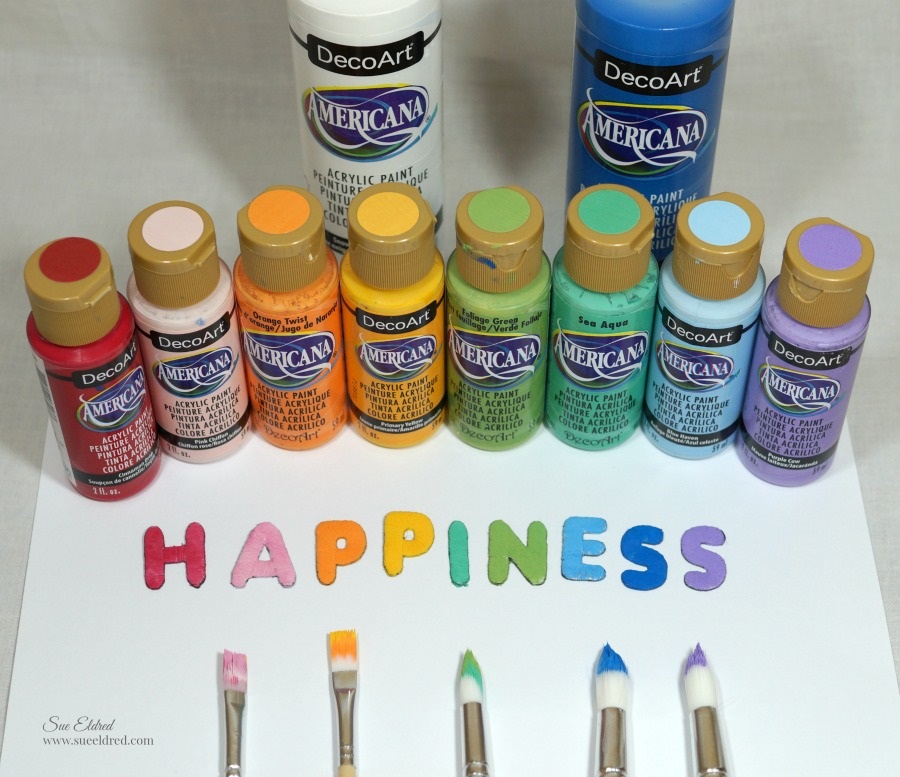
To Make the Happiness Pillow you’ll need…                            (*affiliate link)

*Disclosure:  This blog uses affiliate links.  If you choose to make a purchase using one of the links, I receive a small commission (at no additional cost to you) that helps offset the costs of maintaining this blog.  Thanks for your support!

  • Paint each letter to create a rainbow of H-A-P-P-I-N-E-S-S.
  • Allow letters to fully dry.

  • Insert cardboard into pillow blank.
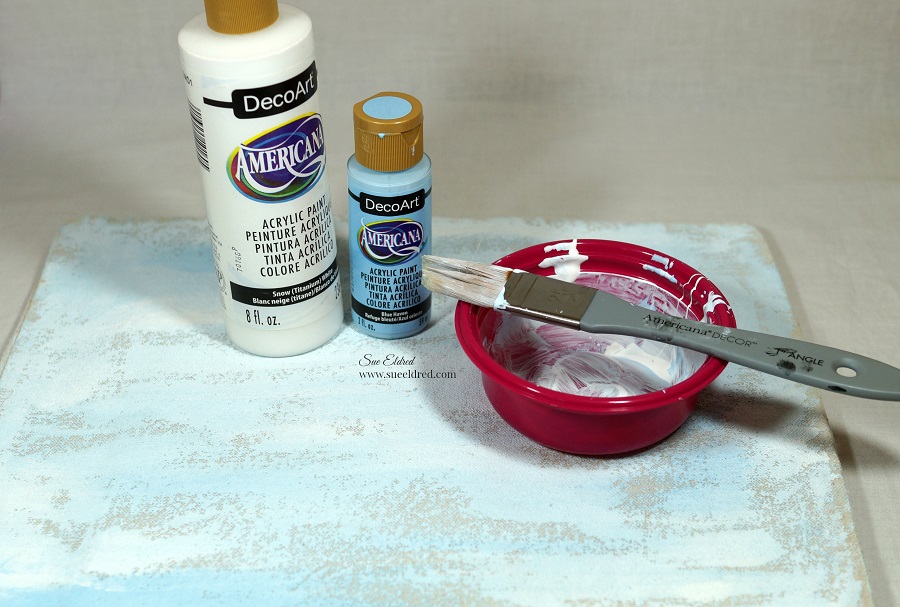
  • Add Fabric Medium to acrylic paint white and light blue paint.
  • Paint directly onto the canvas pillow.
  • Allow paint to fully dry.
  • Set Iron to cotton setting, approx. 350 degrees, or follow garment care label.
  • Position letters with shiny side down onto pillow
  • Cover letters with a fine cloth.  With a firm pressure, iron cloth over letters for 30 seconds.
  • Turn pillow over and iron the back for another 30 seconds.
  • Position Embroidered Floral Applique and iron onto pillow the same as the letters.
  • Allow to cool for 1 minute before handling.
  • Insert pillow form or add Polyfil.

Shop Your Fav Brands at Scrapbook.com

Look for Joy® iron-on embroidered letters and numbers at your favorite craft store. They’re available in different sizes, colors and fonts, suitable for every occasion.

“This is a sponsored post.  As a member of the Joy® Design Team I have been provided product and compensation in exchange for my creative ideas.  The views and opinions are my own.

Shop Amazon Scrapbooking Supplies*

Celebrate with Matte Removable Vinyl

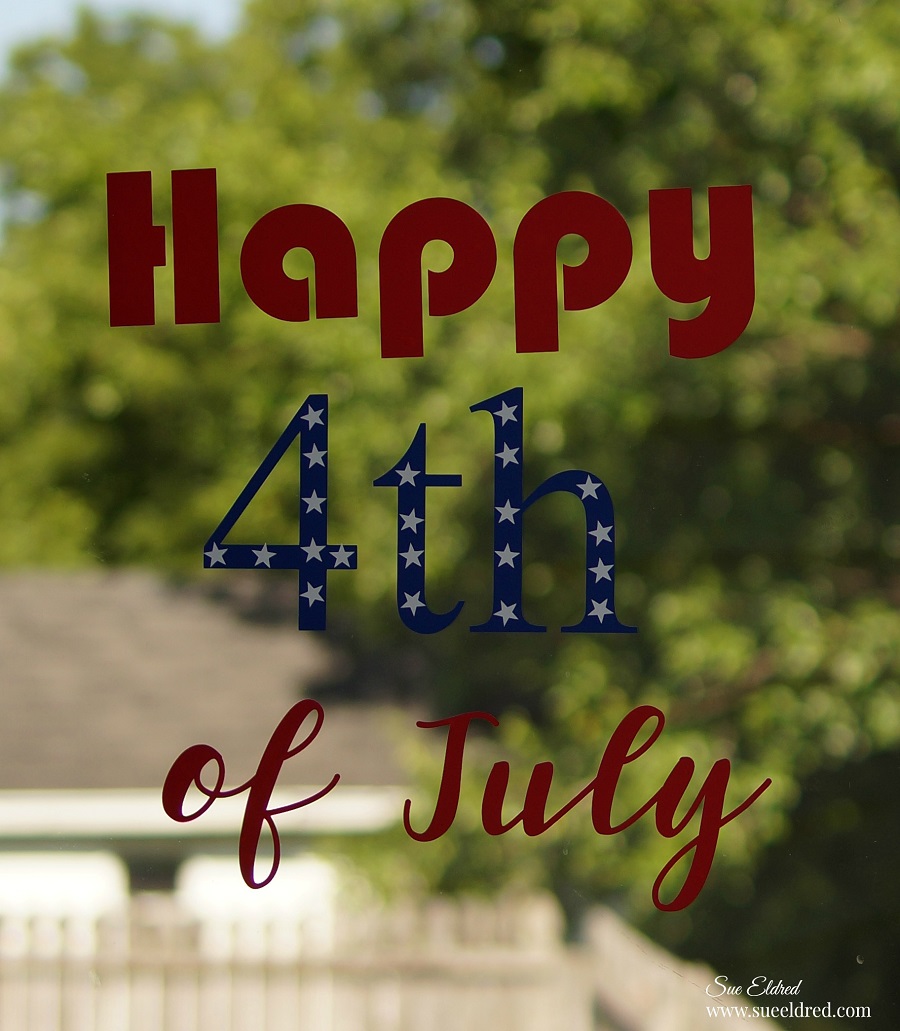
Create Festive Door Decals for the 4th of July!

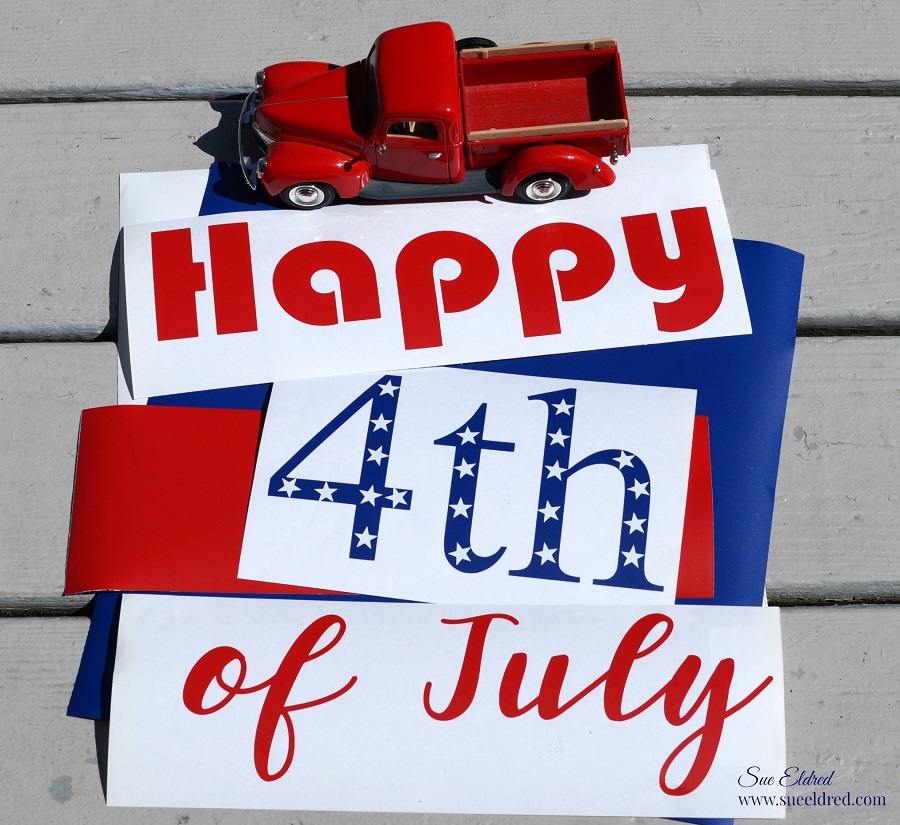
I was decorating and getting the house ready for our 4th of July Pool Party…

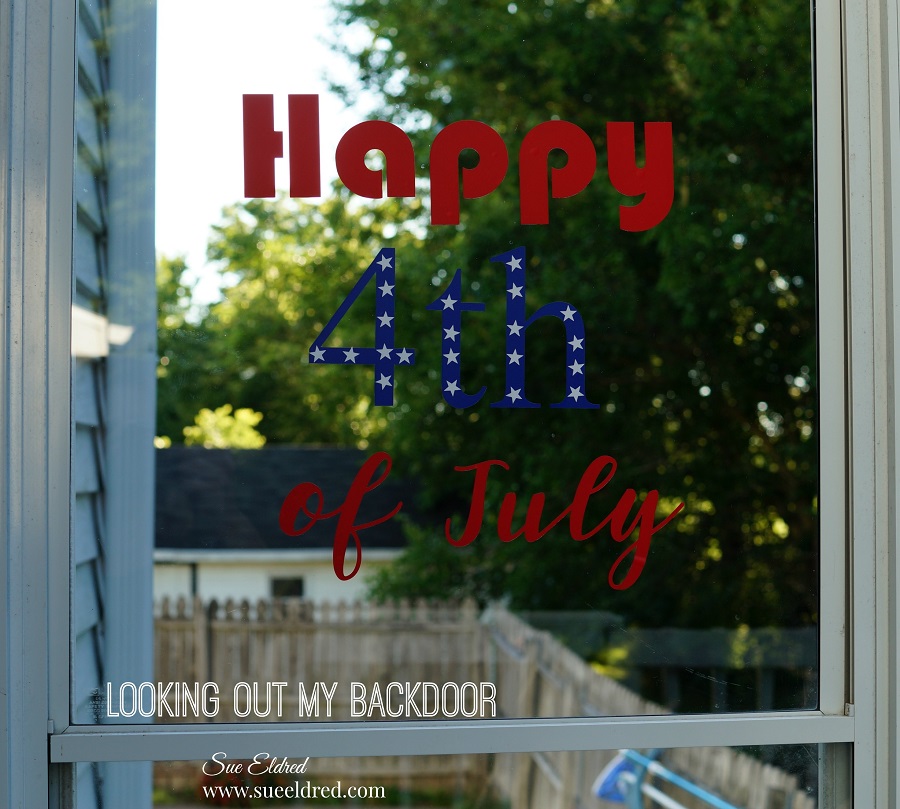
when I got the idea to use my new Matte Removable Vinyl to create 4th of July door decals.

They were super simple to make and they add a fun festive touch.

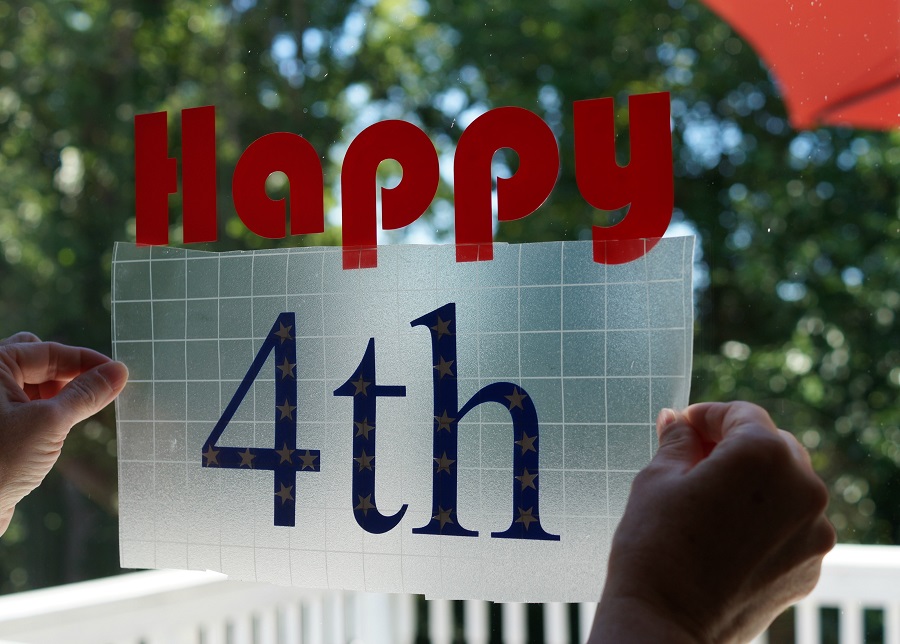
To make my 4th of July Door Decals…

  • I cut the vinyl letters and number using my Silhouette Cameo 3*.
  • I cut additional small white stars to stick onto the blue number.
  • I easily transferred everything onto my door using the Vinyl Transfer Tape*.

I put one onto the backdoor heading into the pool area and the other onto the door leading

into the house from the garage.

Because family don’t use the front door!

I also used the vinyl to jazz up the plain metal tin to hold cutlery.

Did you know that this vinyl will remove cleanly for up to two years?

This vinyl  film is great for decorating a kid’s room, a classroom or just about anywhere

you just  need a temporary graphic.

And, with 27 colors available, it’s not hard to find the perfect color for whatever you can

dream up!

“This is a sponsored post.  As a member of the Tape Technologies Design Team I have been provided product and compensation in exchange for my creative ideas.  The views and opinions are my own.

Shop Your Fav Brands at Scrapbook.com

*Disclosure:  This blog uses ads and affiliate links.  If you choose to make a purchase using one of the links, I receive a small commission (at no additional cost to you) that helps offset the costs of maintaining this blog.  Thanks for your support!
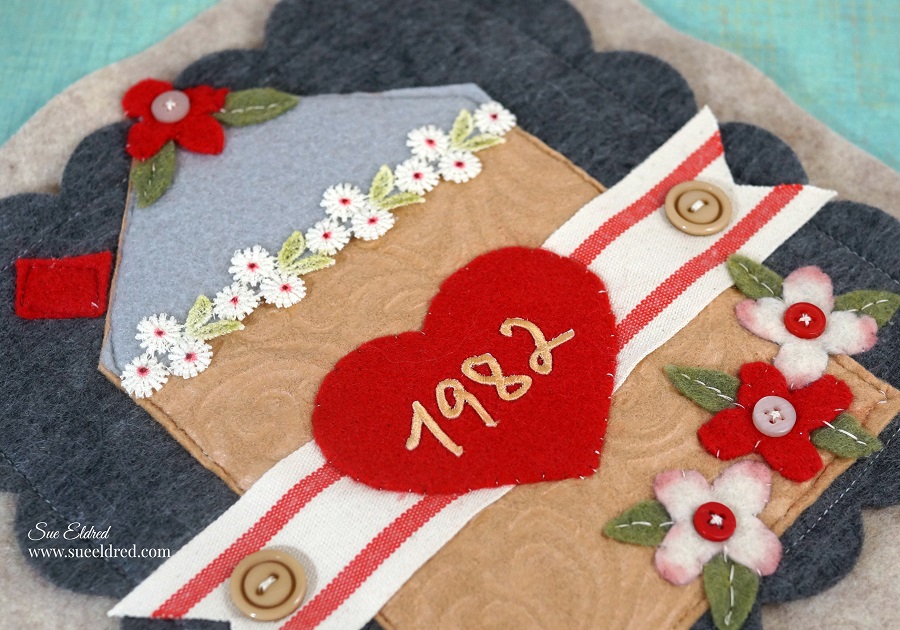
Home is Where the Heart is Stitched Sampler

Celebrate special occasions with a personalized stitched sampler.

A great gift idea for a wedding, anniversary or new home.

Home is where the Heart is products used:                      (*affiliate link)

*Disclosure:  This blog uses ads and affiliate links.  If you choose to make a purchase using one of the links, I receive a small commission (at no additional cost to you) that helps offset the costs of maintaining this blog.  Thanks for your support!

Create custom numbers to match the project by spraying numbers with glimmer mist. 

Allow numbers to fully dry before using .

Directions:

  1. Cut a shapes using the picture above.
  2. The flowers were made using a simple hand drawn flower shape and traced onto the felt.
  3. Add red ink to the tips of the cream flowers with a stencil brush.
  4. Machine stitch the gray scalloped square onto the tan square
  5. Machine stitch the roof onto house and machine stitch onto the gray scalloped square.
  6. Iron numbers onto the center of the red heart.
  7. Arrange and adhere smaller pieces onto house using fabri tac glue.
  8. Hand stitch smaller pieces and buttons into place using needle and thread.
  9. Add finish piece into a shadow box frame.

Look for Joy® iron-on embroidered alphabet letter sheets at your local craft store.

“This is a sponsored post. As a member of the Creating with Joy Design Team I have been provided product and compensation in exchange for my creative ideas.  The views and opinions are my own. 


Translucent Vinyl Suncatcher

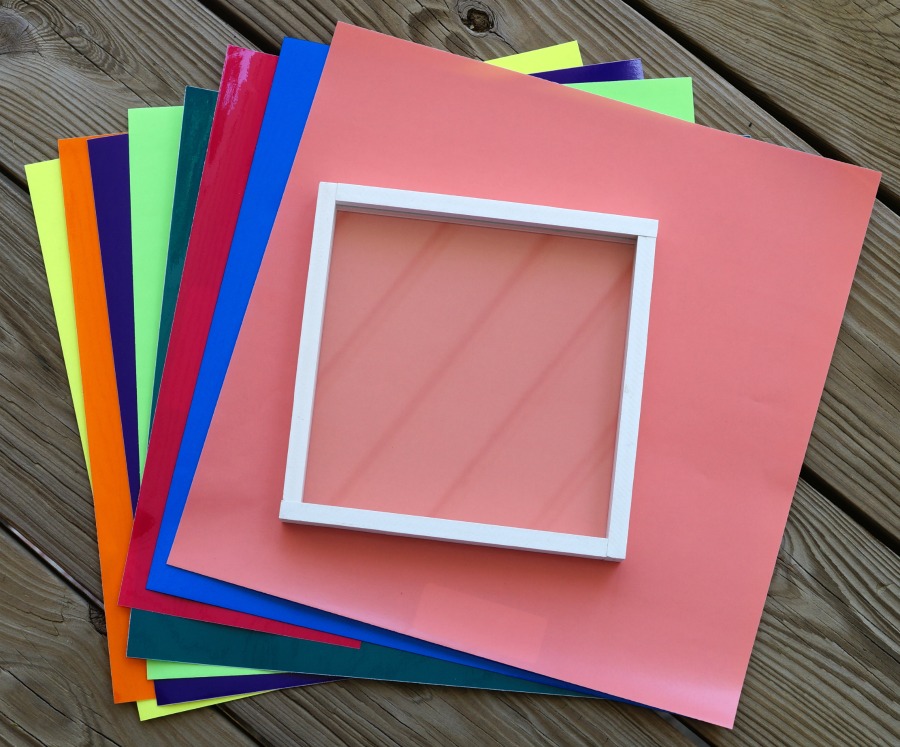
When I received the Translucent Vinyl from Tape Technologies,

I knew it would be perfect for making a Suncatcher.

The translucent vinyl comes in several great colors to choose from.

To make my Suncatcher I used a framed glass sample I rescued from the garbage.

You could also use a small frame and glue the glass into the frame.

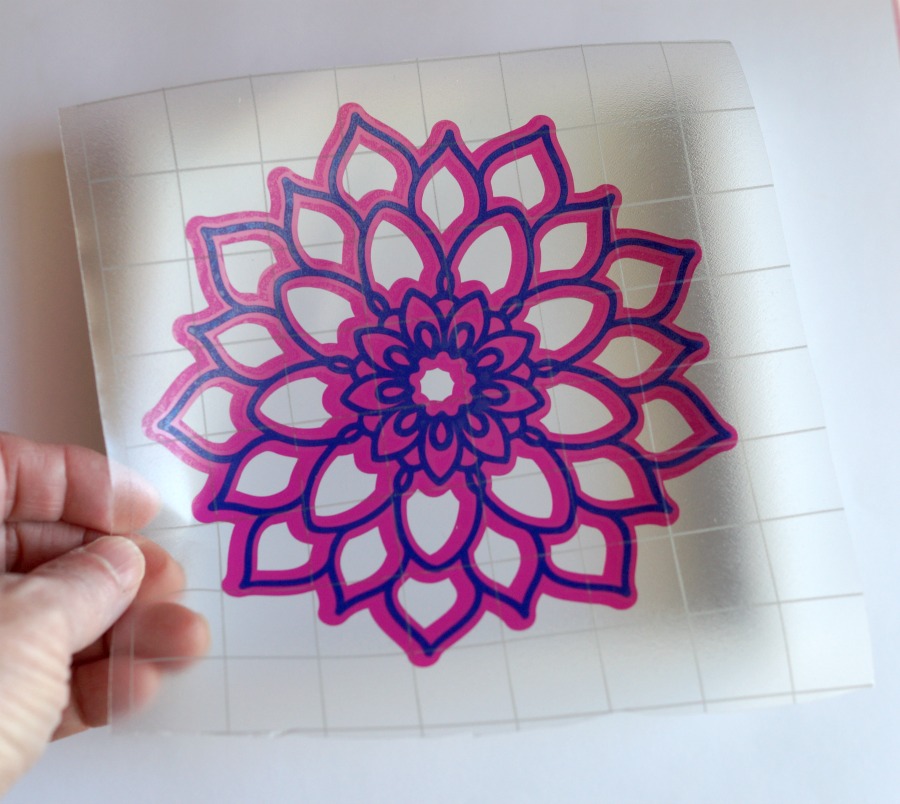
To create my shapes I used my Silhouette Cameo*and Jillibean Soup’s Floral Mandala cut file.

*Disclosure:  This blog uses ads and affiliate links.  If you choose to make a purchase using one of the links, I receive a small commission (at no additional cost to you) that helps offset the costs of maintaining this blog.  Thanks for your support!

I used the Vinyl Transfer Tape* to overlay the blue onto the pink.

I then transferred both images onto the glass to create the Suncatcher.

To create a little more sparkle I added adhesive rhinestones onto the glass.

Shop Your Fav Brands at Scrapbook.com

“This is a sponsored post. As a member of the Tape Technologies Design Team I have been provided product in exchange for my creative ideas, views and opinions.”

Ask for Self Adhesive Glitter Vinyl Sheets- by Styletech from Tape Technologies* at your local Scrapbook Store.

5 Creative Ideas for Beaded Iron On Trim

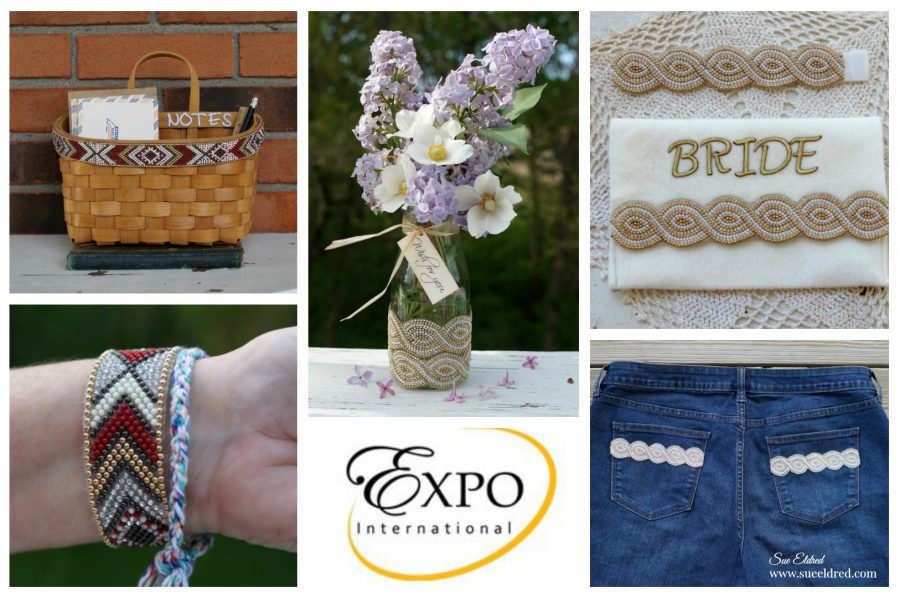
5 Creative Ideas for using Beaded Iron On Trim from Expo International.

When I received this selection of beautiful beaded trim from Expo International,

the creative wheels really started to spin.

I couldn’t narrow it down to just one project, so I created five.  (Lucky You!)

But why stop there…

Today, I’m participating with several other designers of Designer Craft Connections

for a fun Blog Hop using the trims from Expo International.

Every designer got something different, so it should be good.  (details below)

#1 Vases…

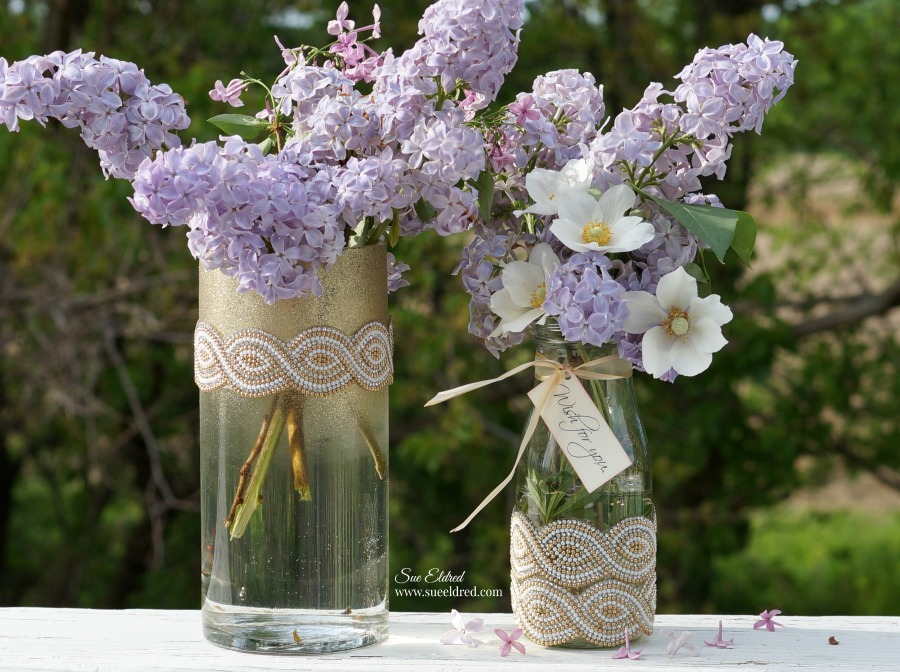
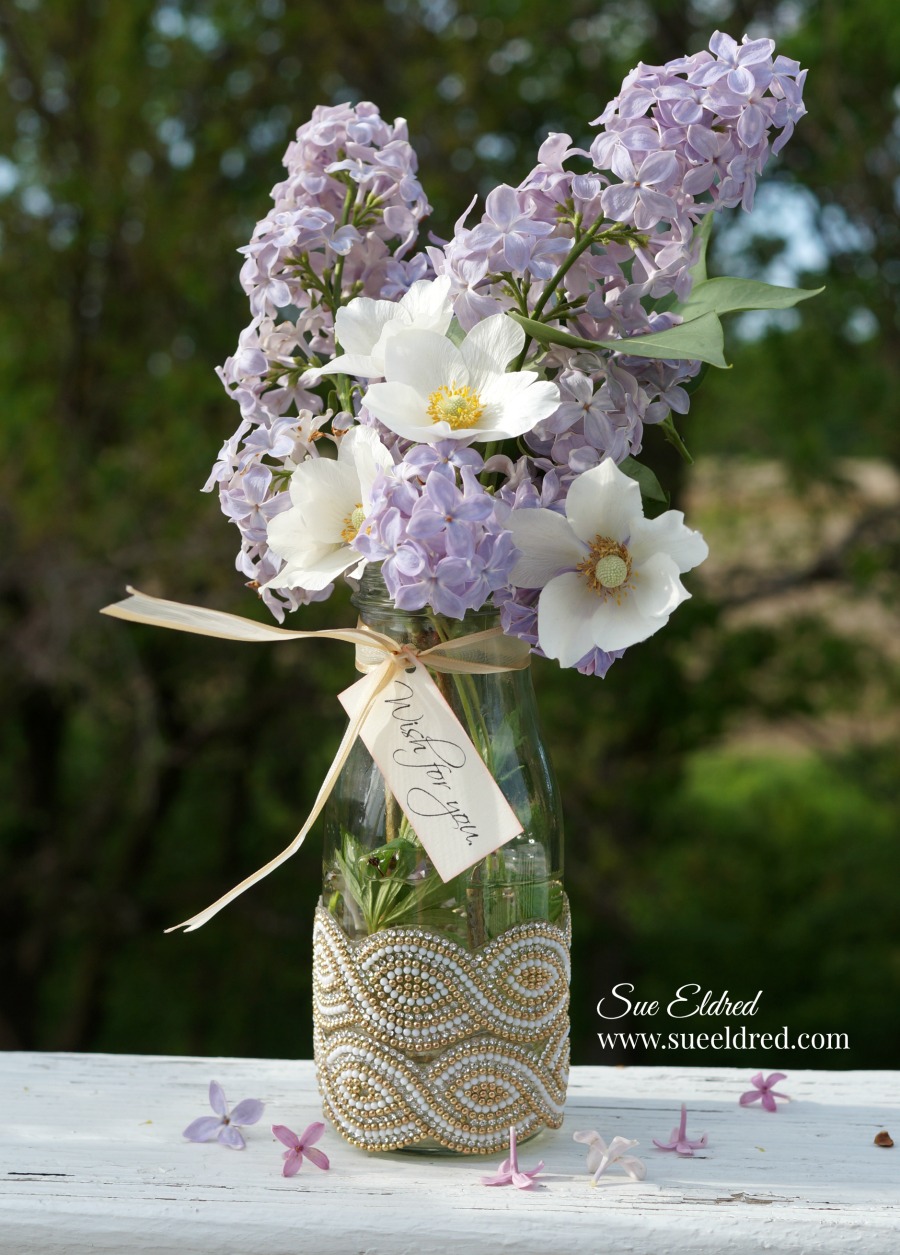
Turn a simple Dollar Tree* glass cylinder or empty cappuccino bottle in a Elegant Vase.

Spray the top of the Dollar Tree cylinder vase with Gold Glitter Spray Paint* and glue the trim onto the vase with Beacon Zip Dry Glue*.              (*affiliate link)

Try gluing  two or more pieces of beaded trim to the bottom of a empty jar or vase.

#2 Baskets

Embellish the band of a plain basket for a little extra style.

Add a even more personality by gluing iron embroidered letters.

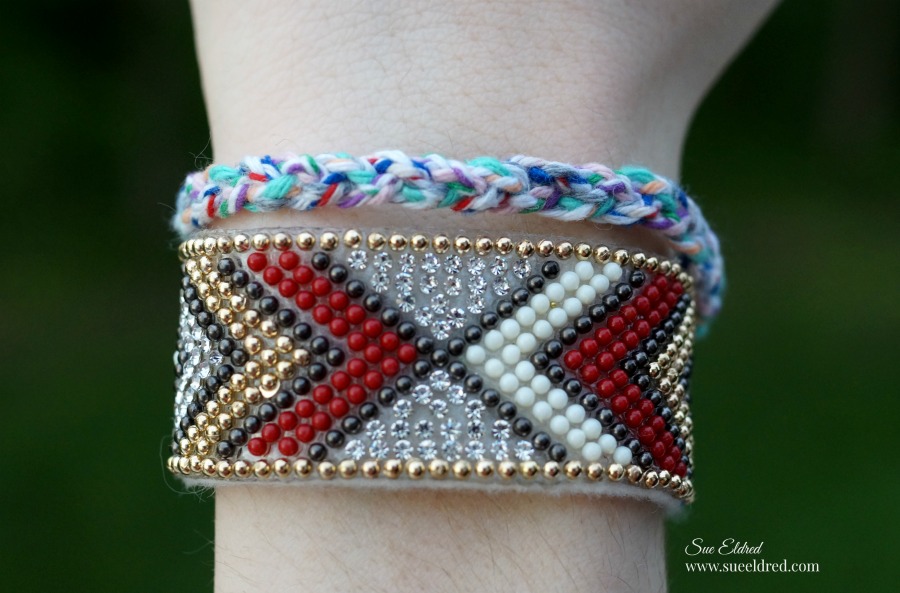
#3 Festival Bracelets

Have fun this summer with easy to make Festival Bracelets.

  • Measure the size of your wrist.
  • Cut a piece of denim or felt approx. 3/4″ longer than your trim.
  • Arrange trim onto fabric so that only one end has the extra fabric.
  • Lay a clean soft cloth over trim and iron on the fabric.
  • Add hook and look tabs* to the end of the fabric.

#4 Jazzed Up Pockets

Jazz up the pockets of jeans, shorts or jacket.

#5 Bridal Pouch

Create a special pouch for the Bride to keep the wedding day jewelry safe while in transport.

Personalize it with Joy Iron On Embroidered letters.

For more inspiration, hop on over the to Designer Craft Connection Blog.   And…while you’re there make sure to leave a comment for your chance to win your own treasure chest of trims.

Thank You Expo International for sponsoring this post.

*Disclosure:  This blog uses ads and affiliate links.  If you choose to make a purchase using one of the links, I receive a small commission (at no additional cost to you) that helps offset the costs of maintaining this blog.  Thanks for your support!

Shop Your Fav Brands at Scrapbook.com

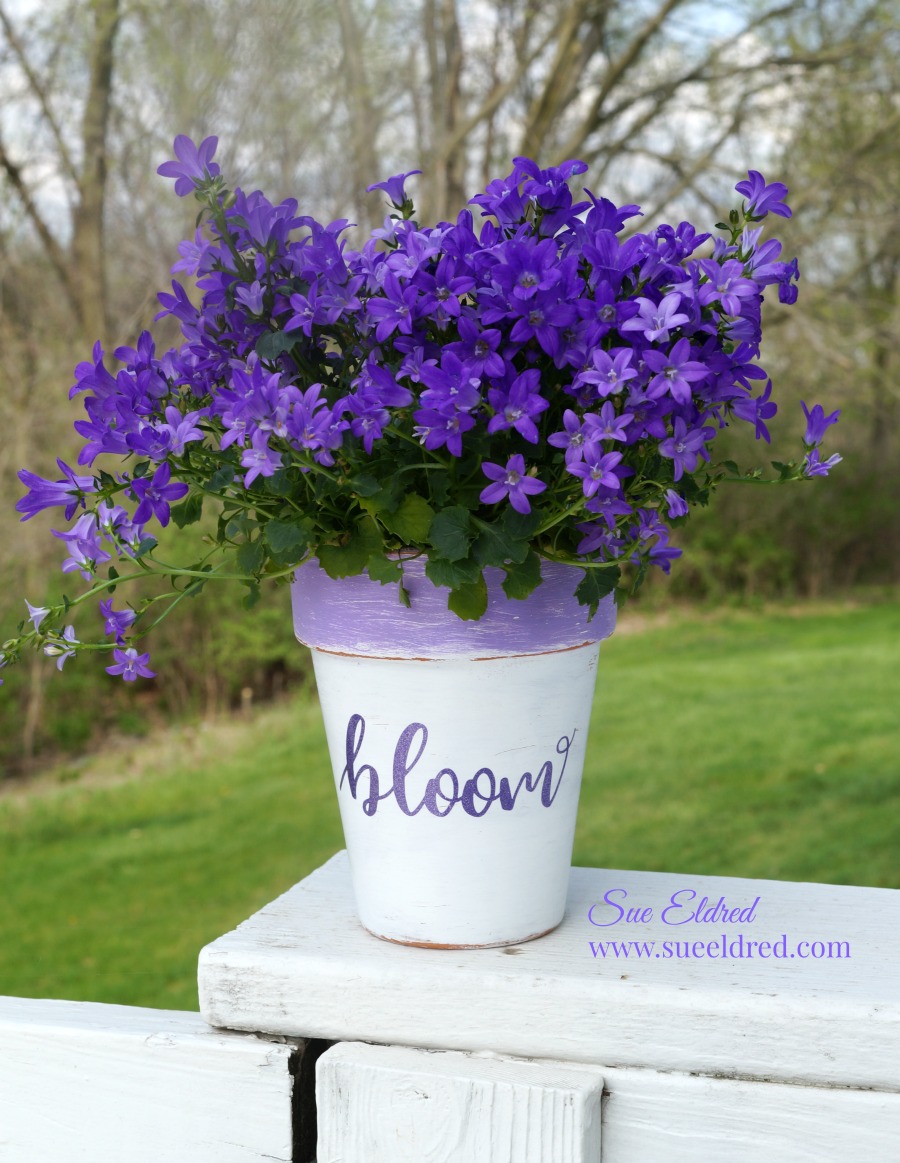
DIY Bloom Planters

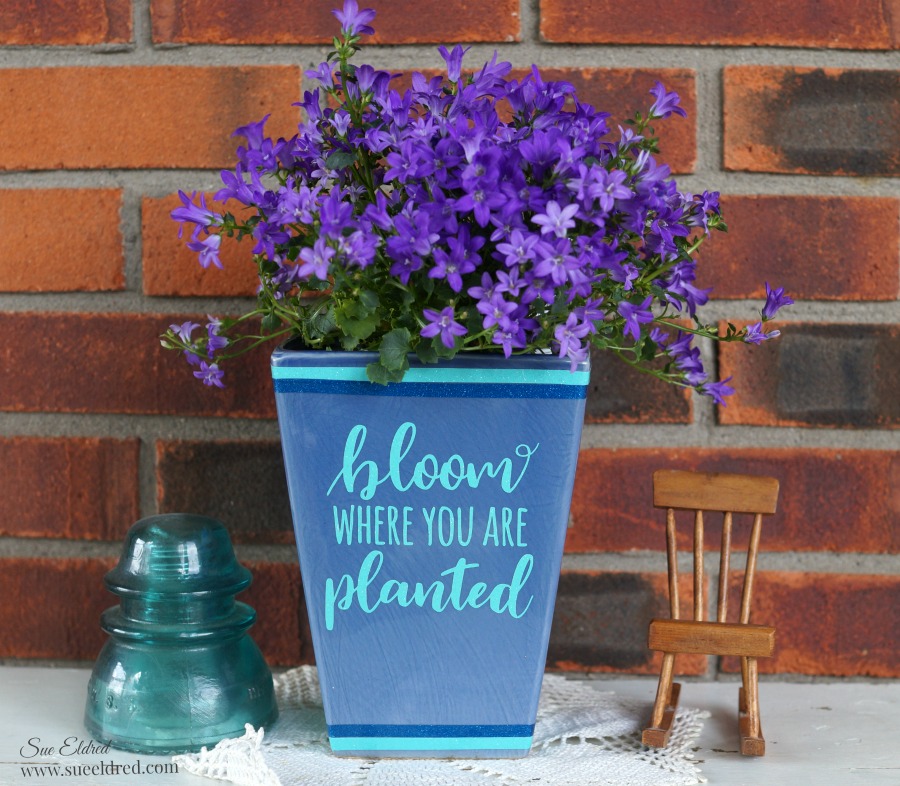
“bloom where you are planted”

A little Inspiration for my Summer Flowers…

I’m not sure if it’s a subliminal message or a direct request.  (to my plants that is)

BLOOM!

I picked up these beautiful purple flowers over the week-end and decided to spruce up a couple

of plain pots into something special.

FYI…the name of the plant with Campanula, a partial shade loving perennial.

How to make a DIY Bloom planter…              (*affiliate link)

  1.  Paint terra cotta pot with 2 coats of white paint.
  2. Brush a thin layer of purple paint along top band.  (no need to be perfect)
  3. Lightly sand pot for a distressed look.
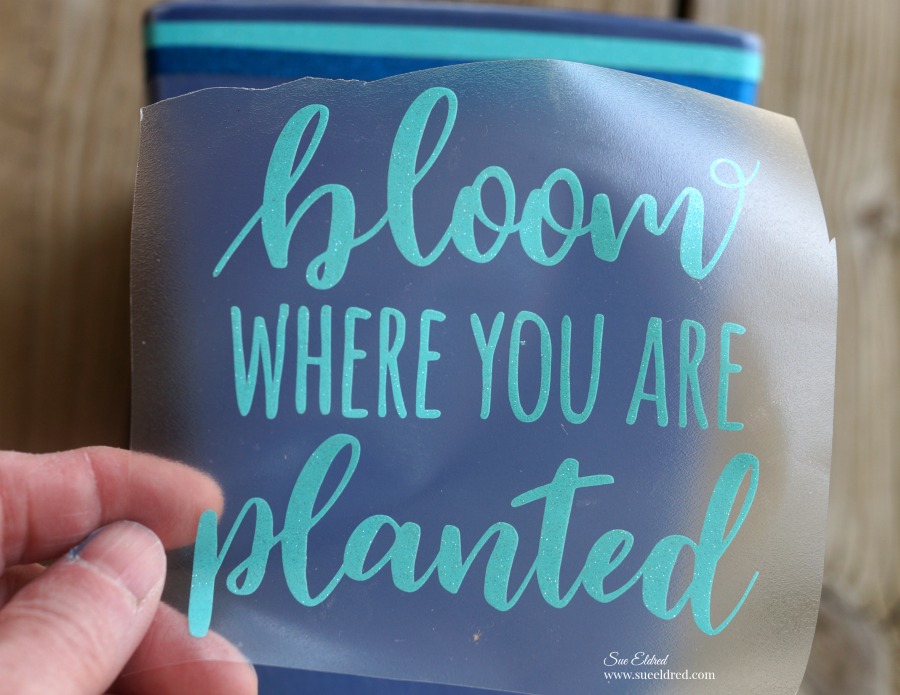
  4. Using a cut file and the Silhouette Cameo*, cut the saying out of the purple glitter vinyl.
  5. Apply the saying onto the pot using transfer paper.  Smooth into place and remove transfer paper.

Shop Your Fav Brands at Scrapbook.com

*Disclosure:  This blog uses ads and affiliate links.  If you choose to make a purchase using one of the links, I receive a small commission (at no additional cost to you) that helps offset the costs of maintaining this blog.  Thanks for your support!
The blue ceramic planter was plain and simple until I added stripes using the glitter vinyl,

and applied the light blue glittered vinyl words using a Vinyl Transfer Tape*.

Perfect decorative accent for my summer front porch.  (or a great gift idea)


Don’t Miss a Thing…Make Sure to Follow me


Ask for Self Adhesive Glitter Vinyl Sheets- by Styletech from Tape Technologies* at your local Scrapbook Store.

“This is a sponsored post.  As a member of the StyleTechCraft Design Team I have been provided product and compensation in exchange for my creative ideas.  The views and opinions are my own.