Family Party Time

I spent this past week-end celebrating with family during our annual

Christmas/ Gift Exchange party on Friday.

I love my Big, Crazy family.

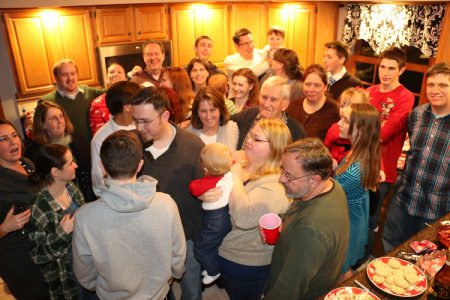
My niece’s husband took this picture.  (you’ve heard the expression like herding cats?)


Then on Sunday, celebrating my birthday with my little birthday Buddy who just turned one.

Birthday Buddies 12-2014

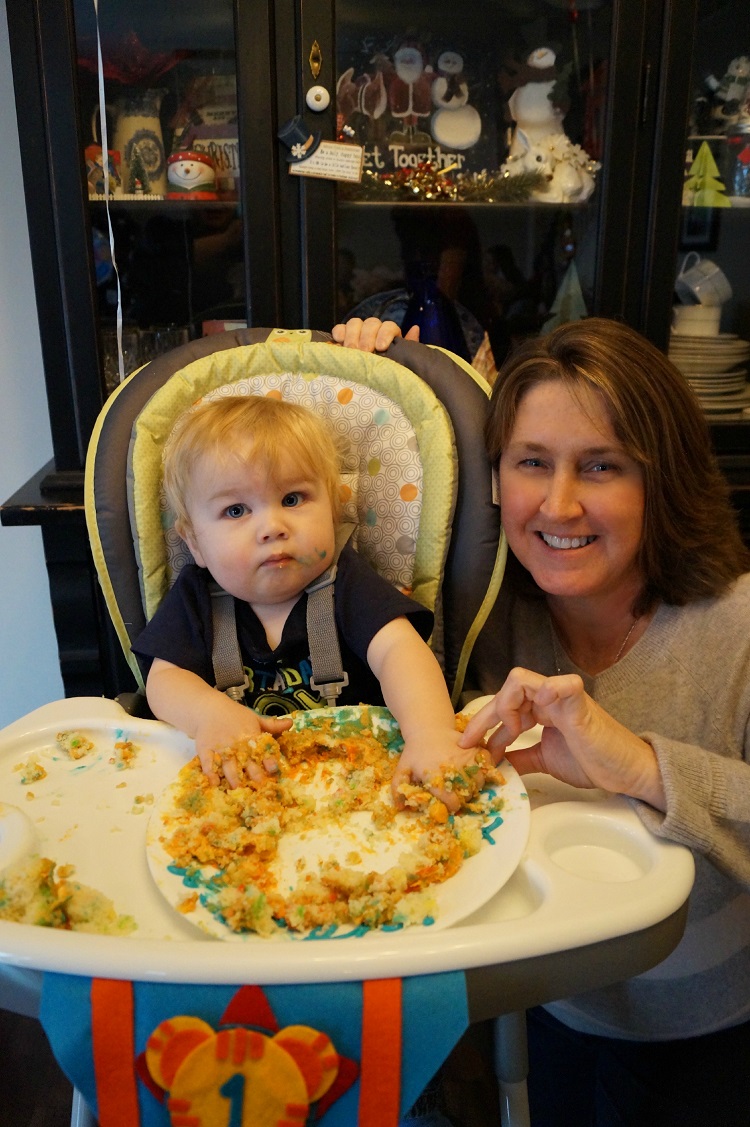
This is him after destroying his birthday cake.

Even though he offered me a bite, I declined.

It’s wonderful to be able to spend time with family over the Holidays.

I’m so excited that my kids will all be home on Christmas Day.

Crunch Time

Wrap it Up 2

Remember November?

When our sites were high and we had so many wonderful plans for the season.

You know…When we had all the time in the world to get it all done.

What happened?

This year was going to be different, there was going to be no stress.

Well… it’s CRUNCH TIME.

With one week left I’m beginning to feel it.

So much done with so much left to do.

With the grocery list started, decorations done and Christmas Shopping almost

finished it’s time to wrap it all up.

Seriously, I’ve got to start wrapping.  So… off the computer I go to start wrapping.

ONE WEEK PEOPLE, ONE WEEK!  (just saying)

Believe in the Magic of the Holidays

Believe in the Magic of the Holidays

Are you taking time to enjoy the magic?

I’m doing my very best to relax and enjoy every moment.

Believe Wreath

I decided to add the large Believe on a Wreath on the front door.

The large Believe was made using Expressions Large Believe from Clear Scraps.  It measures 5″ x 15″.

On the back I adhered “nestled” scrapbook paper from Authentique Paper’s Cozy Collection.

You can’t really see it from the picture, but, it has a great sweater pattern.

After I trimmed around the letters using a craft knife, I used a gold paint pen to accent each letter.

Make sure to check out all the Expressions Large Clear Word Titles from Clear Scraps.

Vintage Christmas Cards

Vintage Christmas Cards 202

I was gifted this year with a large collection of Christmas Cards from the 50’s, 60’s and  70’s.

I love it when someone finds something cool and vintage like this and thinks of me.

I can honestly tell you I looked at everyone of them.

Some of them will go in frames, others I may even cut and use for collaging.

Here a are a few of my favorites…

Vintage Wisemen

Vintage Christmas Cards

gayest christmas tree

Happy Friday Everyone.  Enjoy the week-end.

Joy Tag with a Cool Metal Foil Technique

Impress your friends with an Easy and Elegant Metal Foil Tape project.

I love this technique and thought you might as well.

Start with a small piece of matboard or chipboard approx. 2″ x 2 1/2″ and chipboard letters spelling the word “Joy”.

Joy Tag products used:            (*amazon affiliate link)

*Disclosure:  This blog uses affiliate links.  If you choose to make a purchase using one of the links, I receive a small commission (at no additional cost to you) that helps offset the costs of maintaining this blog.  Thanks for your support!

Shop Your Fav Brands at Scrapbook.com

Directions:

1. Glue letters onto the small chipboard with Beacon Adhesives Zip Dry Paper Glue*.
2. Apply Aluminum Foil Tape* over chipboard. I make the chipboard slightly smaller than the tape so that I don’t have any seams.
3. Using the bone folder, gently go around each letter to bring out the detail.

4. Paint the background with the paint pen. To give it a snowy affect, when
giving a second coat of paint, dot the paint with the tip instead of brushing.
5. Use the pale blue pen to color the letters. Allow both colors to thoroughly
dry.
6. Using a sanding block, lightly sand the letters and edges of the chipboard.
7. For a finishing touch, paint the letters with stickles glitter glue.

The tag also uses:
Prima Flowers (Holiday Celebration Snow Drop)
Vivid Ink: Aqua
Ink Blending Tool*
Scrapbook Paper
Cardstock
Corner Punch, Rounded*
1/8 Inch Round Hole Punch*
Lace, Silver Ribbon and Small Flat Snowflake Ornament
Silver Greenery

Shop Amazon Scrapbooking Supplies*

Christmas Ornaments from Old Kitchen Hardware

Old Kitchen Hardware

I picked up a bag of old kitchen hardware for 50¢ at a Garage Sale.

I can’t resist a good bargain and knew I might even use them someday.

After disassembling and using them on a couple of projects,

I put the rest in a container high on the shelf for another day.


I ran across them again the other day and had an idea…

How would they look with cream spray paint?

I knew I was onto something and let the idea marinate in my head for a day or two.

This is what I came up with and I’m pretty happy with the results.

Shabby Chic Orn 86

For my Ornament:

  • Paint the base plate from old kitchen hardware with cream spray paint.
  • I added silver around the edge using my finger tip and paint from a  Chisel Point Pen Tip Calligraphy Paint Marker, Silver*    (affiliate link)
  • Remove the small wooden base from a small bottle brush tree.  With small pliers bend the remaining wire tip up into the tree.
  • Cut the back of the bottle brush tree to make it flat.
  • Glue tree in place with Beacon Adhesives Zip Dry.*
  • For a little extra sparkle, I rubbed clear glitter glue into the bristles of the tree.  Glue pearl beads and place directly into tree.
  • On the top of the ornament I used a piece cream twill ribbon with an inexpensive plastic star ornament on a silver jump ring.  Tied it in place with a piece of burlap twine and small cream button.
  • I added a silver jingle bell that I painted and distressed with sandpaper and tied on with a satin ribbon.
  • Place the word sticker onto a thin piece of chipboard, trim around sticker, lightly sand the edges for a distressed look and glue into place.

Berry Ornament 91

Here’s a simpler idea.  I love this one too.

I bet your going to start rummaging through that junk drawer in the garage and see what you can find.

Shop Amazon Scrapbooking Supplies*

*Disclaimer:  This post uses ads and affiliate links.  If you choose to make a purchase using one of the links, I receive a small commission (at no additional cost to you) that helps offset the costs of maintaining this blog.  Thanks for your support!

Snowflake Wreath

Smoothfoam Snowflake Wreath 2535

When it comes to Holiday Decorating, I love anything with a Snowflake on it.

Make it a Red or Cream Snowflake and I’m a happy girl.

So when I found these Large Snowflakes from Smoothfoam, I fell in love.

Smoothfoam Snowflake

To make my Snowflake Wreath you’ll need:

  1. Paint 6″ Snowflake cream and the 12″ Snowflake red; let both dry.
  2. Glue the two snowflakes together using craft glue.
  3. Glue red button onto the center of the cream snowflake.
  4. Poke a hole on the side of the top of the snowflake with needle and thread.  Pull thread through and tie snowflake onto wreath.
  5. Hang wreath with large piece of ribbon.

This project was created for and sponsored by Smoothfoam.

Sue’s Holiday Give-Away Time

October Afternoon Silent Night Assortment

One of my daily quirks is to look at my blog stats.

Would you believe I have people all over the world that visits me.

It amazes me too.

As you can imagine, it goes as no surprise that USA is the number one visiting country…

The other day, one thing popped out and kind of surprised me.

Guess which country was consistent all year at the number two spot?

Hmmmm… I’m not going to tell you just yet.  (I’m going to make you wait)

I think I’ll do a Holiday Give-away instead.

How would you like to win the Silent Night Scrapbook Assortment from October Afternoon?

Here’s what you’ll need to do…

Leave me a comment here on this post or on my Facebook Page and tell me

which country you think is at the number two spot.

I will pick one lucky winner from all the guesses.  (you don’t even have to be correct)

Bonus…..if you’re picked and you happen to have the correct guess I’ll include a bonus prize.

Contest ends Friday 12-12-14. 

Good Luck and Happy Holidays.


Gingerbread House Party

Armed with cans of frosting and happy, smiling faces…

We arrived at Church for our very first Gingerbread House Party.

The kids had a blast and really got into working on their houses.

Everyone had a good time.

What a great way to spend a Saturday morning.

Gingerbread House Party Collage

As you can probably tell Warren really got into his house. ⇑  (Yum)

a little Christmas Home Décor

Stenciled Burlap Outside

This Christmas has been the year of Holiday Stenciling for me.  (I just can’t seem to get enough)

This time I’m making a Quick & Easy Home Décor piece for a Blog Hop with Fairfield World

using Foamology Stickybase Tiles™.

What’s Foamology?

Well…. I could try to explain this cool product to you, but. this video explains it much better.

For my project, I decided to try my hand at stenciling on Burlap.

I used a large piece of burlap about 14″ wide and the 12″ Christmas Bulbs stencil

and the 12″ Word Xmas Tree stencil from Clear Scraps.

After I stenciled on the burlap, I wrapped it around the 12″ foam square as shown in the

video and inserted it into a shadow box frame.

Stenciled Burlap

Some of the products used on this project were generously donated by Fairfield World and Clear Scraps.