“Be the Change” Journal

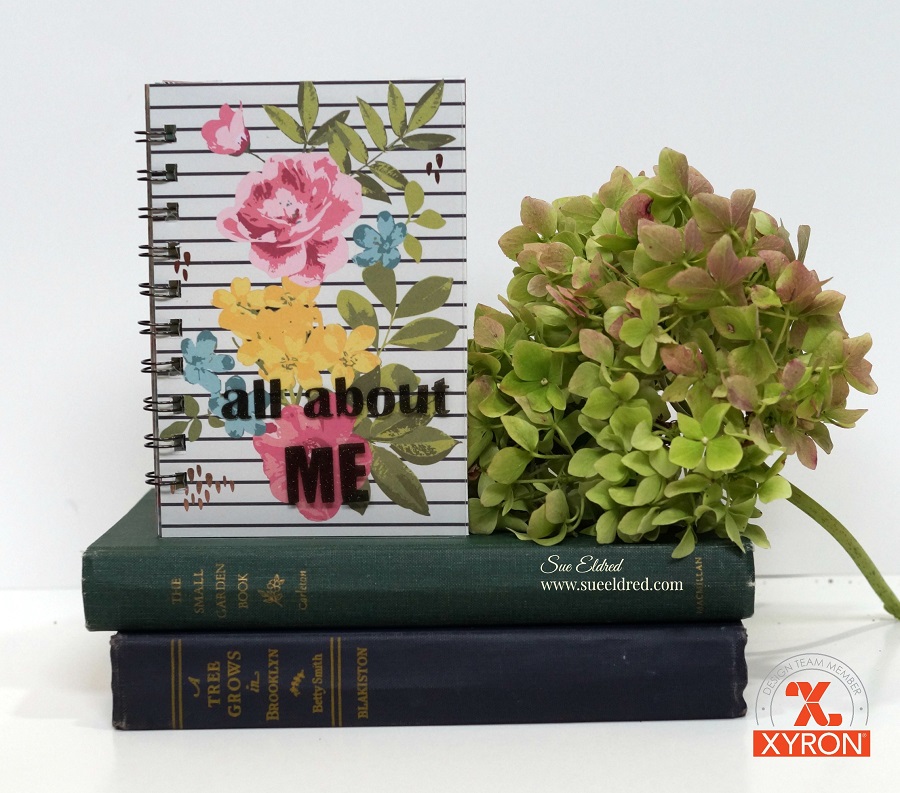
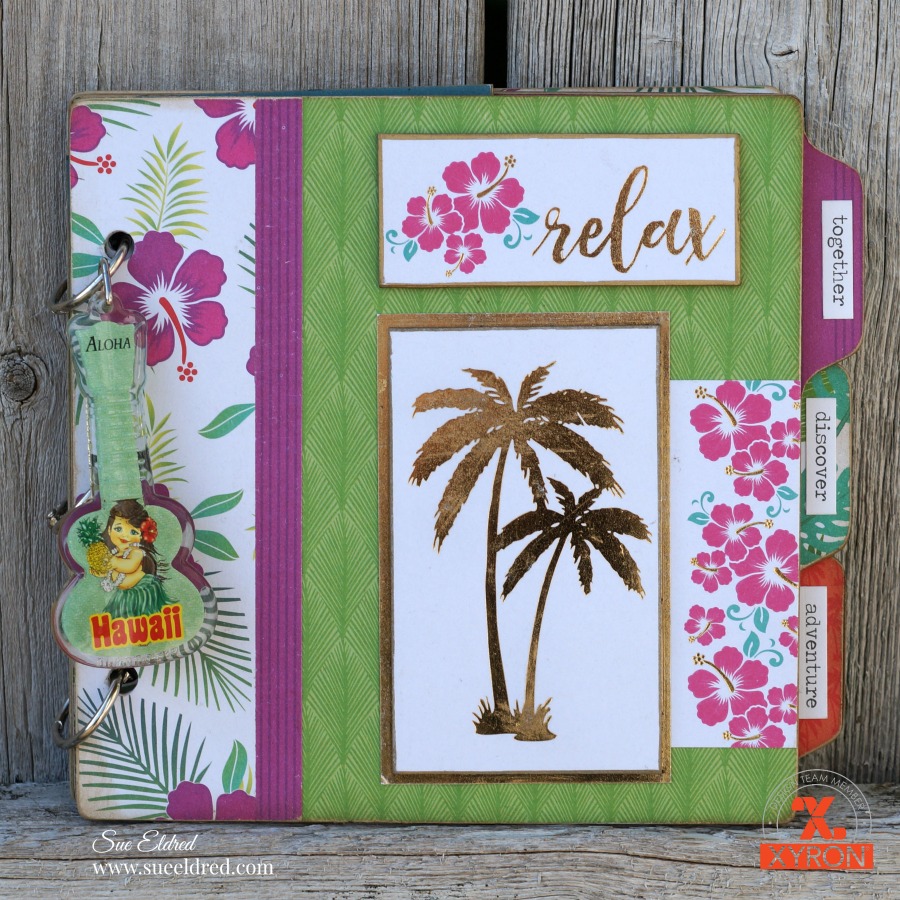
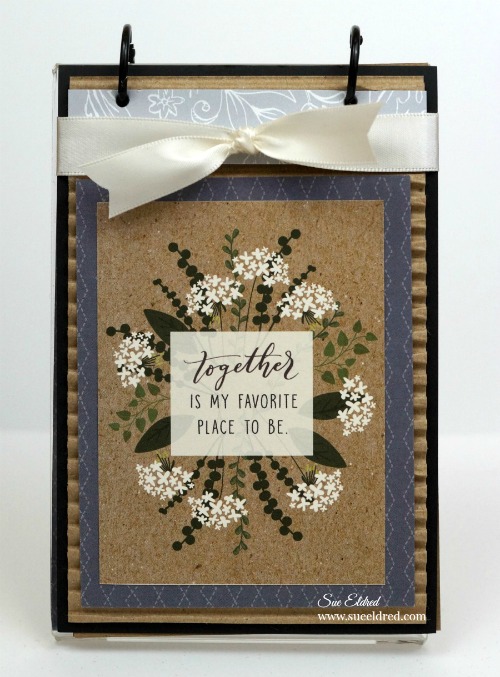
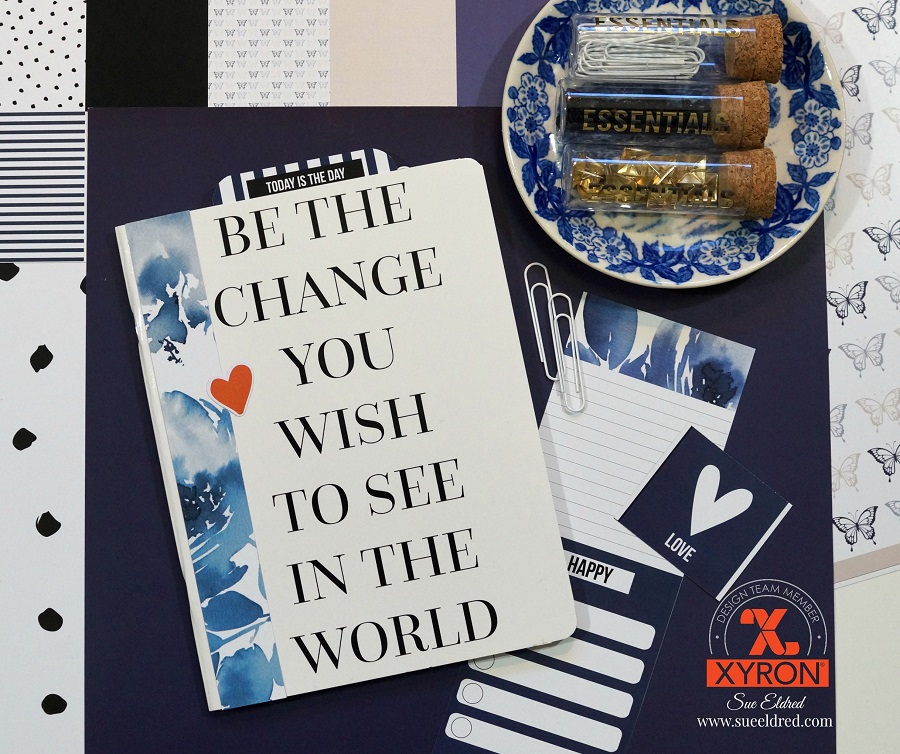
Be the CHANGE you wish to see in the World

A little motivational pickup to start your day…

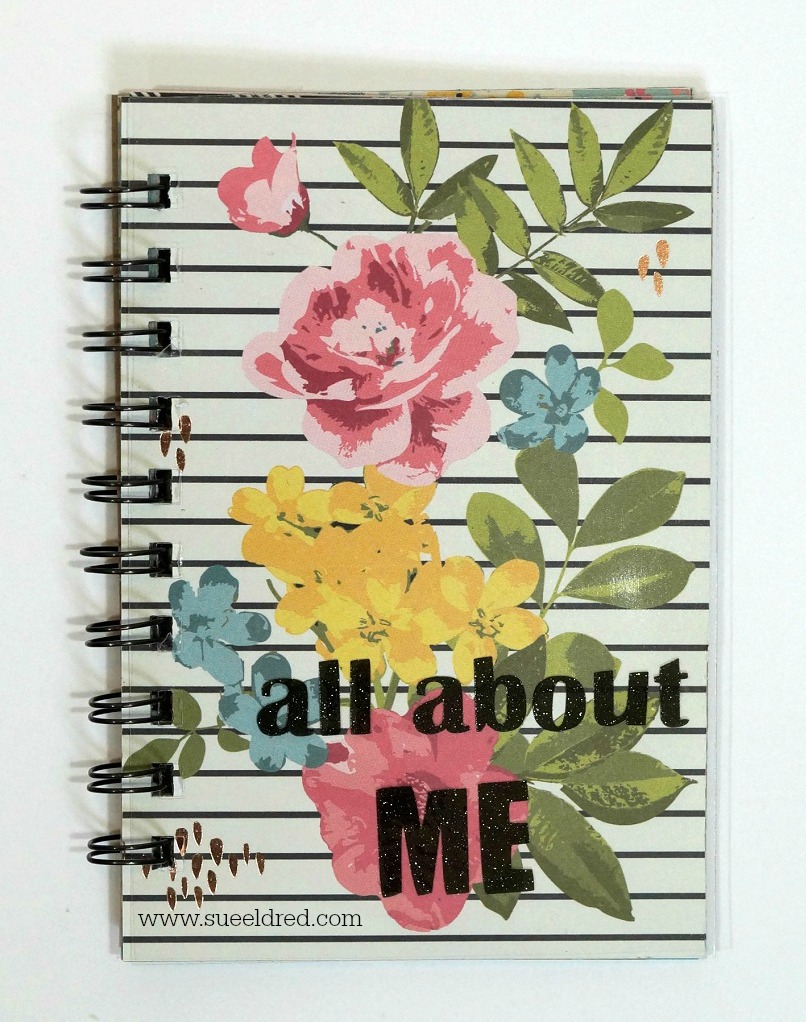
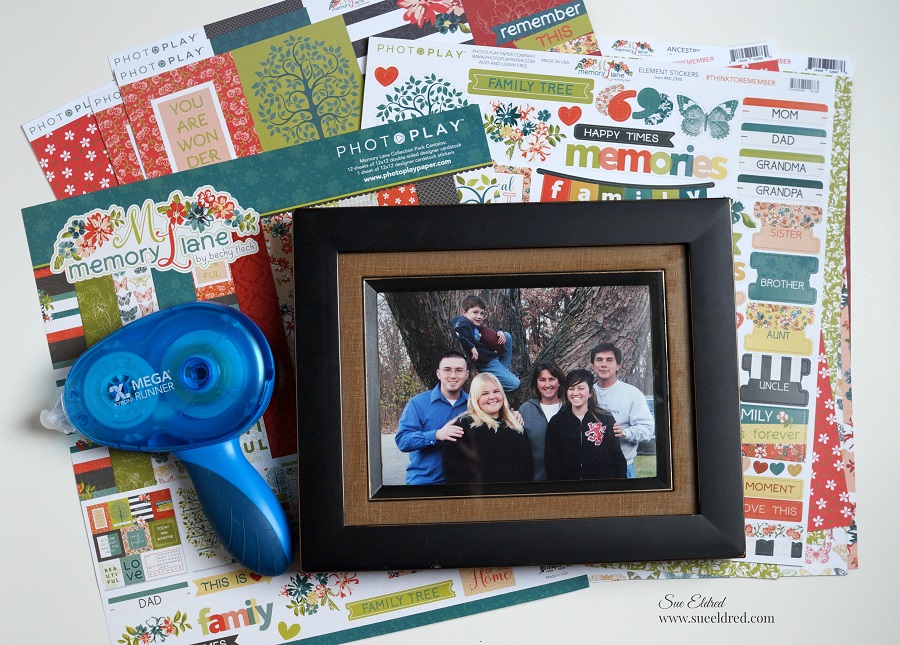
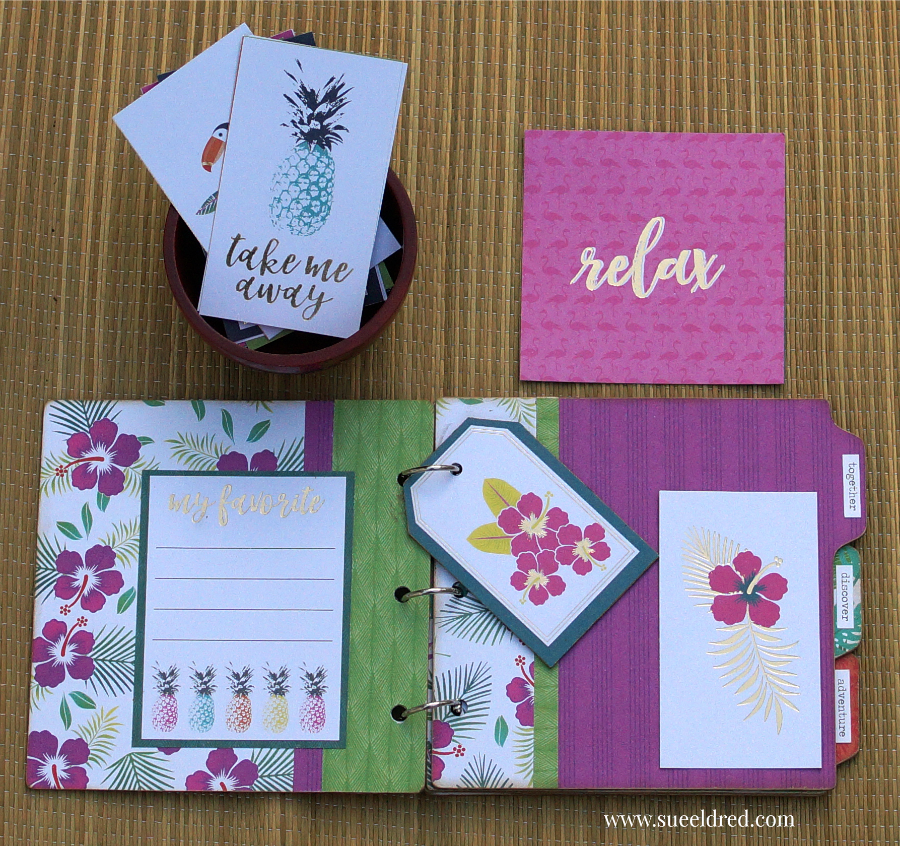
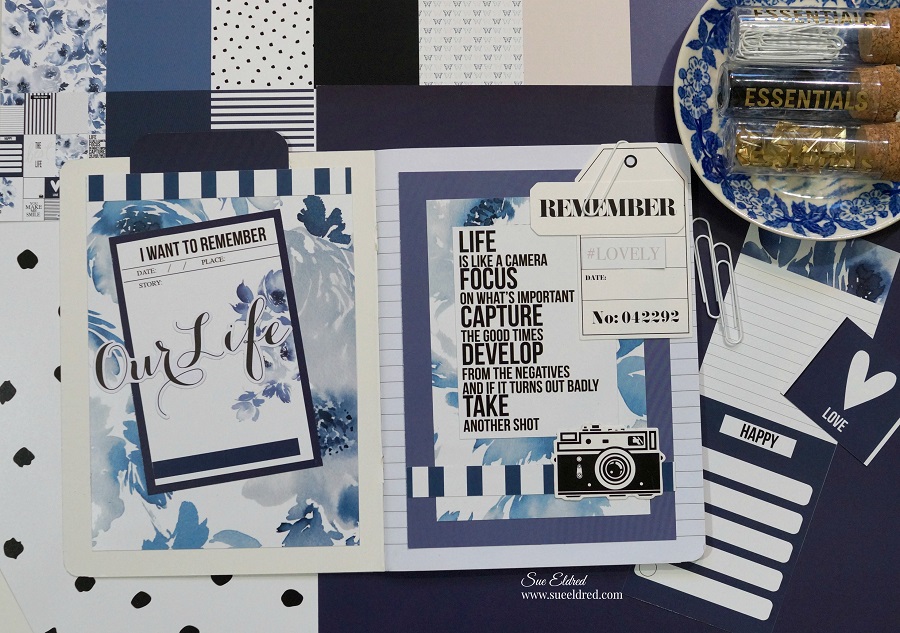
made using this sweet and simple 6″ x 8″ Teresa Collins notebook.

This week the Xyron Design Team has partnered with the lovely Teresa Collins .

I’ve been a fan and follower of Teresa’s Blog and Instagram for years.

(I almost feel like I know her and her family.)

For my design team project…

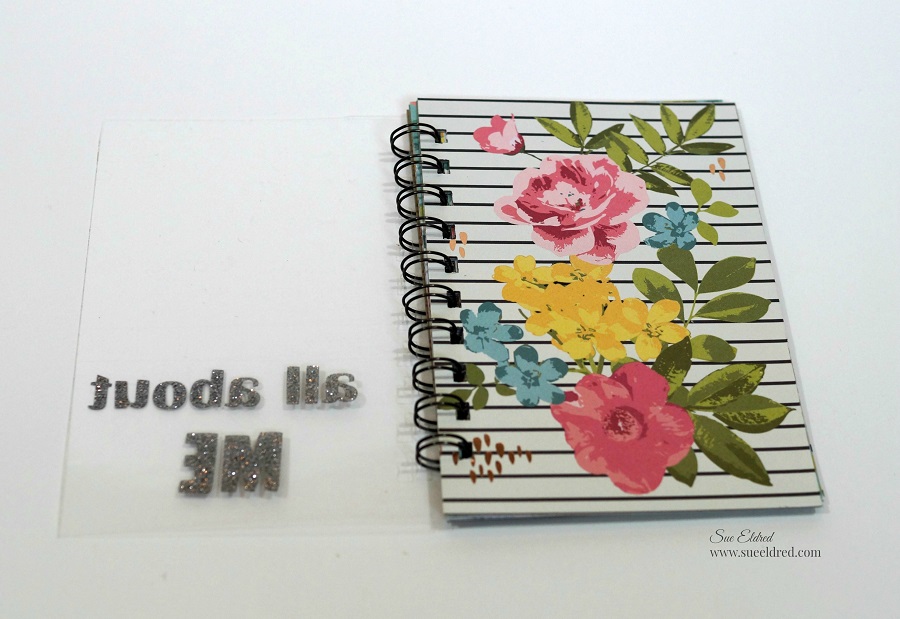
I was really torn between embellishing the front cover of the notebook or keeping it simple.

I decided to keep it simple.

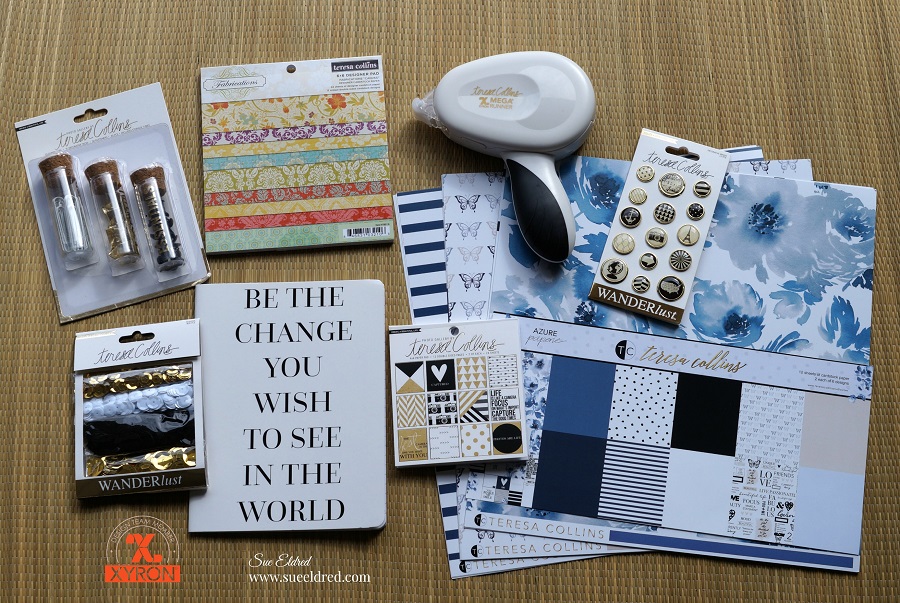
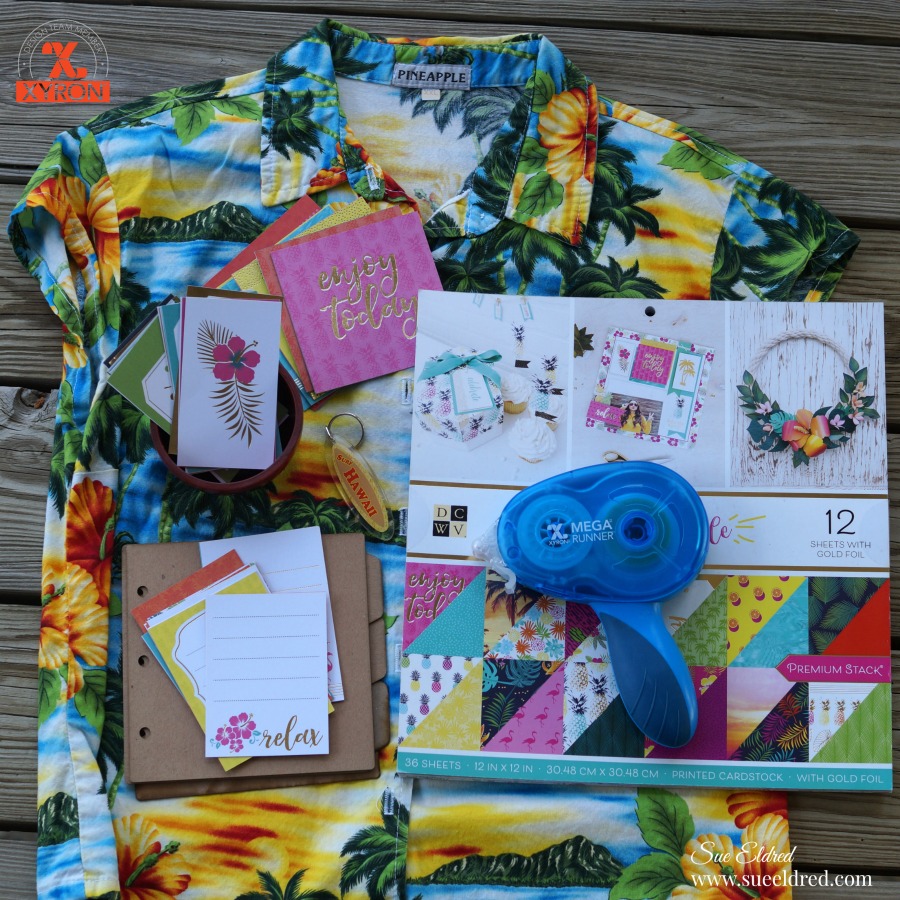
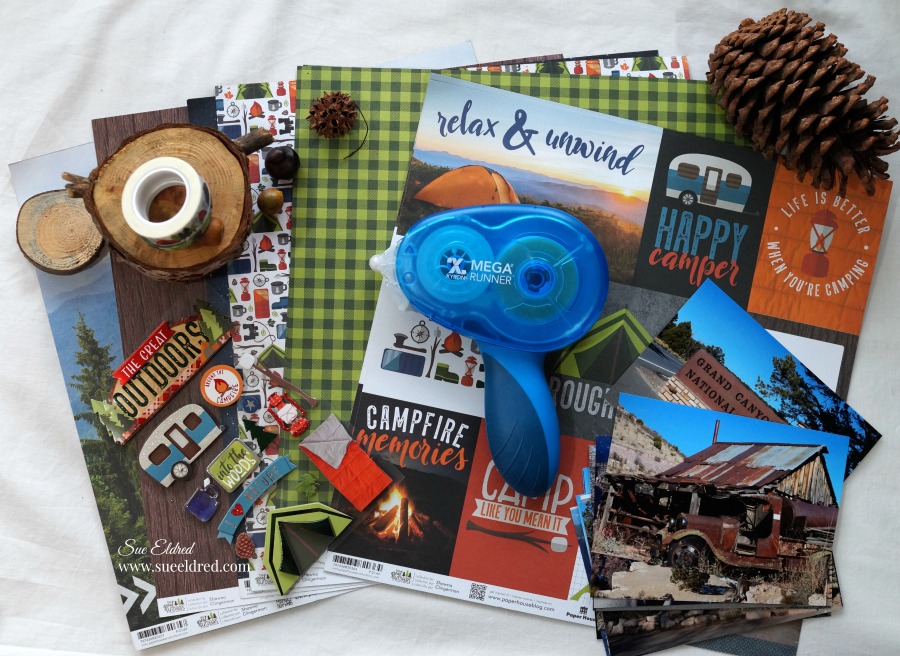
Xyron and Teresa Collins Products Used:                       (*affiliate link)

FYI…Teresa’s new paper line and planner products with be available at Hobby Lobby.

*Disclosure:  This blog uses affiliate links.  If you choose to make a purchase using one of the links, I receive a small commission (at no additional cost to you) that helps offset the costs of maintaining this blog.  Thanks for your support!

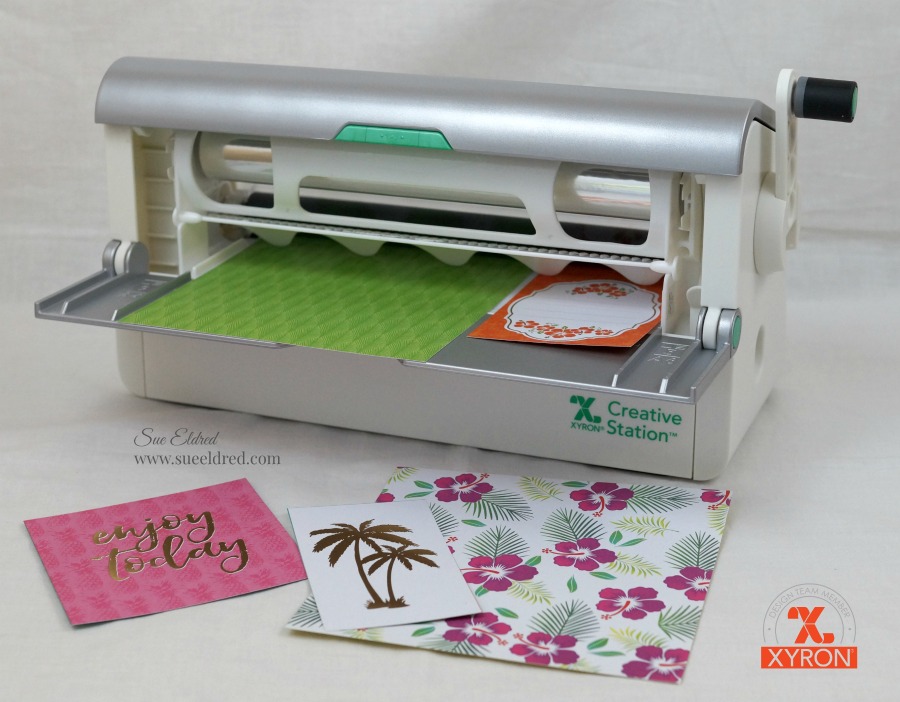
I used both the Xyron Creative Station* and the Teresa Collins Mega Runner*

to quickly put my notebook together.

For die cuts and smaller pieces I like to run those through the Creative Station*.

To use the *Xyron Creative Station* crank the handle to run the paper through the

machine.  As it moves through the Xyron Creative Station it adds adhesive to the back side

of the paper.  Easy to use and it doesn’t need any electricity.

       You get complete coverage, no gluing, no wrinkling, no bubbles!

I used the Teresa Collins Mega Runner by Xyron* for the inside pages.

I think this notebook would make a great scrapbook or journal.

A special thanks to Xyron and Teresa Collins for providing the wonderful products used.

“This is a sponsored post.  As a member of the Xyron Design Team I have been provided product and compensation in exchange for my creative ideas.  The views and opinions are my own.

So many reasons to Laminate…

Laminating with Xyron…

When Xyron sent me the Double Sided Lamination Refill Cartridge* to use in my

Xyron Creative Station* you might say I got a little carried away.

There are so many uses and things to laminate I couldn’t stop at just one project.

My favorite project and one of the easiest was using the laminating as an overlay…

I cranked the handle of my Xyron Creative Station* with the Laminate Cartridge* inserted

and actually laminated nothing.                              (*affiliate link)

I wanted a clear sheet of laminate to use as an overlay on my “all about ME” mini album*

I added glitter vinyl letters on top my laminated sheet before putting the album together.  

After creating the overlay, I inserted the Xyron Permanent Adhesive Refill Cartridge*

back into the Xyron Creative Station*  to add adhesive on the paper used to cover my album.

Complete coverage and no wrinkling!

I also wanted to make a bookmark using freshly pressed flowers.

I grabbed a few blooms from the garden and stuck them into a heavy book overnight.

Ideally, you’re supposed to leave them alone for 2-3 weeks.

Since I’m an impatient crafter,

I found online that you can speed up the process with a low temp iron.

I used craft glue to lightly and gently glue the flowers onto cream cardstock.

Insert the cardstock in the Creative Station with the Laminating Cartridge.

Laminate, trim, punch a small hole for twine and your ready to read.

Almost every one in the airport has a black suitcase.  (am I right?)

I’m getting ready for vacation in a few weeks and I want my bag to stand out for easy

recognition.   I created a small 3″ x 4″ decorated name tag and added my business card

to the back of the tag.  Then I laminated it.  (so easy)

Technically, this could almost be chalked up to a craft fail…

There’s always the question floating around my house, is the dishwasher clean or dirty?

To solve the problem, I decided to create laminated signs to put on the front of the dishwasher

and added magnets to the back.  Smart?  Right?

I forgot that magnets do not stick to stainless steel dishwashers.

My Mom worked at a middle school for several years before she retired.

One of her jobs, among many others, was laminating things for the teachers.

When we went through her things this summer, we found…

  • Laminated Brochures
  • Laminated Maps
  • Laminated Ticket Stubs
  • Laminated Cartoon Strips
  • Laminated Newspaper Clippings
  • Laminated Recipes

I guess Mom liked laminating too.

“This is a sponsored post.  As a member of the Xyron Design Team I have been provided product and compensation in exchange for my creative ideas.  The views and opinions are my own.

*Disclosure:  This blog uses affiliate links.  If you choose to make a purchase using one of the links, I receive a small commission (at no additional cost to you) that helps offset the costs of maintaining this blog.  Thanks for your support!

“The Family Tree”

The Family Tree…

In the backyard of my childhood home stands a ginormous Silver Maple tree.

That gigantic tree has been the backdrop for tons of family pictures during it’s 40 plus years.

I’d always thought of it as “my tree” because I was the one who drug it up from the woods

and had planted it.  Up until recently, possibly last year, I found out that it wasn’t my tree.

Dad told me that my tree didn’t make it and he had replaced it with this one.   (Sigh!)

One of my favorite pictures was this one taken on Thanksgiving Day 2006.

The guys were out in the yard playing catch with the football and I asked my sister-in-law

to snap a family picture.  The guys lifted my youngest up in the tree, football still in hand.

As we get my parents house ready to sell, it dawned on me that I need to get another

family picture by “my tree” while we still have the chance.

This past week-end, we had one last large family get-together at the home

and took one enormous family picture around that old tree.  (35 in all with only 3 missing.)

We also took this one of my family…Just as we were, sweaty and all.

It was a beautiful evening spent celebrating family.

It was also a little bittersweet as I know Mom and Dad would have loved it.

For my Xyron Design Team project this week, the team got the opportunity to pick any

collection we wanted from Photoplay Paper.

The moment I saw the Memory Lane Collection I knew it was perfect for my pictures.

I received the collection which included 12 sheets of beautiful double-sided paper and a full

sheet of beautiful cardstock stickers and a package of the ephemera cardstock die cuts.

Everything went together smoothly with the help of my trusty Xyron Mega Runner*.

“This is a sponsored post.  As a member of the Xyron Design Team I have been provided product and compensation in exchange for my creative ideas.  The views and opinions are my own.

*Disclosure:  This blog uses affiliate links.  If you choose to make a purchase using one of the links, I receive a small commission (at no additional cost to you) that helps offset the costs of maintaining this blog.  Thanks for your support!

Tropical Vacation Mini Album

Who’s ready for a Tropical Vacation?  

Many, many years ago, I met my sweetie while visiting the island of Oahu.

Twelve years ago we went back.  (I’m thinking we’re long overdue.)

I need a tropical vacation!

This week, the Xyron Design Team teamed up with Die Cuts with a View.

I received the Electric Jungle Paper Pad, a bright and colorful collection.  

For my project, I decided to make a mini album.  I’m not sure if I’ll use the really old, kind of old

or wait until I get new pictures to place inside the album.  (hint, hint!)

Tropical Vacation Mini Album Supplies Used:                     (*affiliate links)

*Disclosure:  This blog uses affiliate links.  If you choose to make a purchase using one of the links, I receive a small commission (at no additional cost to you) that helps offset the costs of maintaining this blog.  Thanks for your support!

  • Cut paper to fit the pages of the chipboard album.
  • Lay decorative scrapbook paper (design side up) on the  *Xyron Creative Station, 9″ crank the handle to run the paper through the machine.  As it moves through the Xyron Creative Station it adds adhesive to the back side of the paper.
  • Easy to use and it doesn’t need any electricity.
  • I like using the Xyron Creative Station* when making mini books because you get complete coverage, no wrinkling, no bubbles!

  • Once the pages are covered with the paper, use a craft knife and cutting mat to trim around the edges of the chipboard.
  • Use the XYRON Adhesive Eraser* to remove any extra adhesive from the edges.
  • Gently sand away rough cut edges on the paper using a extra fine sanding block.
  • Because the chipboard is tan and the core of the paper is white, I inked the edges of the pages with a light tan ink and a ink blending tool.
  • I created thick tags by using a tag cut from the paper pad and adhering it onto a small piece of chipboard.  I used a gold calligraphy paint marker to create a gold border around the edge of the tag.
  • The “Palm Tree” and “Relax” on the front of the mini album both have chipboard underneath to create added dimension.

“This is a sponsored post.  As a member of the Xyron Design Team I have been provided product and compensation in exchange for my creative ideas.  The views and opinions are my own.

Splatter Painting

Splatter Painting

When you get an opportunity to look absolutely ridiculous…

have a little fun and make a really big creative mess, well…you just need to take it!

Last year at the Creativation Show, there was a clear acrylic booth set up called

the “Splatter Room”.  As the name suggests, splatter painting is extremely messy.

So…dressed in a hazmat suit and goggles,

I went to town choosing paint and splattering it all over my canvas.

Oh, what a glorious mess! 

It was so much fun and the highlight of my day.

The Shimelle “Box of Crayons” collection from American Crafts was the perfect collection

for my crazy, colorful pictures taken on my Splatter Day.

Last Saturday, National Scrapbooking Day, I spent my day divided between playing with

paper and playing in the dirt.  (I do love a glorious mess.)

The “let’s be friends” card was another project that I made using the “box of crayons” collection

and my Xyron Tape Runner*.

“This is a sponsored post. As a member of the Xyron Design Team I have been provided product and compensation in exchange for my creative ideas.  The views and opinions are my own.”

*Disclosure:  This blog uses affiliate links.  If you choose to make a purchase using one of the links, I receive a small commission (at no additional cost to you) that helps offset the costs of maintaining this blog.  Thanks for your support!

American Crafts… Shimelle “box of crayons” collection. 

Grand Canyon Adventure & “Roughin’ It” Shadowbox Frame

In January, after the Creativation Show in Phoenix, we took a little mini vacation.

We had decided earlier to visit Sedona and in a spur of the moment decision

decided to take a day trip to the Grand Canyon.

Neither of us had been and it was on our bucket list.

The day was beautiful and the views were AMAZING!

If you ever get the opportunity to visit the Grand Canyon, I suggest you go.

You won’t be disappointed.

For my Xyron Design Team Project this week, we partnered up with Paper House Productions.

I picked the Paper House Productions Great Outdoors Camping Kit*.        (*affiliate link)

I knew it’d be perfect for my Grand Canyon pictures.

Interesting Fact… I’ve never camped a day in my entire life. (and proud of it)           

Even it you don’t go camping, you’ve got to admit this Great Outdoors Washi Tape Set is cute.

“My idea of roughing it is a bad hotel room!”

This what I tell people whenever they talk about camping.  (it’s not for me)

To make the “ROUGHIN’ IT” shadow box frame…

Products Used:     (*affiliate link)

Directions…

  1. Remove the glass from the shadowbox frame to create a ledge for adding small found treasures.  (removing glass is optional…just a personal preference)
  2. Print the saying “My idea is…”  onto one of the scenic papers from the “Great Outdoors” kit and cut it to 6″ x 6″.  For extra dimension, I used my  Xyron Mega Runner* to adhere the layer onto green mat-board.
  3. Cut a 9″ x 9″ green gingham background from the paper crafting kit and adhere the printed paper to the center of the green gingham background.
  4. Use the 4″ x 4″ “ROUGHIN’ IT” square from the “Great Outdoor Tags” scrapbook paper and adhere it onto mat-board for extra dimension.  Adhere to center of the printed scenic square.
  5. Add the 3D tent sticker over the tent pictured in the “roughin’ it square” .
  6. Add 3D lamp and leaf to embellish.
  7. Insert into shadow box frame.

“This is a sponsored post. As a member of the Xyron Design Team I have been provided product and compensation in exchange for my creative ideas.  The views and opinions are my own.”

*Disclosure:  This blog post uses affiliate links.  If you choose to make a purchase using one of the links, I receive a small commission (at no additional cost to you) that helps offset the costs of maintaining this blog.  Thanks for your support!

DIY Bloom Floral Plaque

Bloom into Spring with this DIY Bloom Floral Plaque.

I admit it…I’m an adhesive snob.

There’s nothing worse than spending hours on a project and then it  comes undone

from using the wrong adhesives.

I tell people all the time “not all adhesives are created equal”.

That’s one reason why I was so excited to be on the Xyron 2018 Design Team.

Xyron has Good Adhesive!

The DIY Bloom Floral Plaque is the first of many projects to come using Xyron.

DIY Bloom Floral Plaque Products Used:    (*Affiliate Links)

*Disclosure:  This blog post uses affiliate links.  If you choose to make a purchase using one of the links, I receive a small commission (at no additional cost to you) that helps offset the costs of maintaining this blog.  Thanks for your support!

How to make a DIY Bloom Floral Plaque…

  • Lay a piece of a 8 1/2″ x 8 1/2″ piece of decorative scrapbook paper (design side up) on the Xyron Creative Station, 9″* crank the handle to run the paper through the machine.  As it moves through the Xyron Creative Station it adds adhesive to the back side of the paper.
  • Easy to use and it doesn’t need any electricity.

       You get complete coverage, no gluing, no wrinkling, no bubbles!

  • Lay Wood Flower Shaped Plaque onto the adhesive side of the paper.
  • Carefully cut around the wood shape with a craft knife and craft cutting mat.

  • Gently sand away rough-cut edges on the paper using an extra fine sanding block.

  • I used my electronic die cutting machine and cut files to create pieces for my background.  The Xyron Creative Station* is great for adding adhesive to the back of intricate pieces.

  • After the layers are adhered together, I use the XYRON Adhesive Eraser* to remove any extra adhesive from the edges of my pieces.  Remember to use a gentle touch.

The XYRON Adhesive Eraser* is one of my favorites must have tools.  I keep it on my desk at all times.

I think every paper crafter should carry one in their supply box.

  • For added detail…use a gold paint pen to edge around the outside of the Wood Flower Shaped Plaque and the decorative scrapbook paper oval.

  • My Xyron Creative Station* makes quick work of assembling all the pieces of my DIY Bloom Floral Plaque.
  • Finish embellishing the plaque with a few paper flowers glued into place with craft glue.

 “This is a sponsored post. As a member of the Xyron Design Team I have been provided product and compensation in exchange for my creative ideas.  The views and opinions are my own.”

Together… Mini Flip Album

Together is my Favorite Place to Be…

This cute little flip album is one of the “make and take” projects that I taught

in the Deflecto Craft Solutions Booth at Creativation in January.

Shop Your Fav Brands at Scrapbook.com

“Together is my Favorite Place to Be” Supplies Used…          (*affiliate link)

Directions:

  1. Make two marks on the top of the frame approximately 3/4″ in on each side.  The marks need to be approx. 1/2″ down from the top of the frame.  (If the holes go down too far the pages won’t flip correctly.)  Drill two holes in the top of the frame with a 3/16″ drill bit.
  2. For the mini album cover…Adhere a 3/4″ x 4 3/4″ scrapbook paper strip onto the top of the corrugated paper leaving a 1/8″ margin on the top.  Adhere the 3″ x 4″ journaling card (cut from the scrapbook paper) onto a 3 1/2″ x 4 1/2″ piece of blue scrapbook paper layer, add those layers onto the corrugated paper and then onto a 4″ x 6″ black cardstock layer.
  3. Using the drilled holes on the craft frame as a guide, mark the cover and the kraft cardstock pages and punch two holes on the top.
  4. Mark and punch holes into a piece of 4″ x 6″ decorative scrapbook paper and insert into frame.
  5. Attach cover and pages to the craft frame with book rings.
  6. Tie ivory ribbon around cover.

“This is a sponsored post. As a member of the Deflecto Design Team I have been provided product in exchange for my creative ideas, views and opinions.”

*Disclaimer:  This blog uses ads and affiliate links.  If you choose to make a purchase using one of the links, I receive a small commission (at no additional cost to you) that helps offset the costs of maintaining this blog.  Thanks for your support!

Shop Amazon Scrapbooking Supplies*

Top Ten Blog Posts of 2017

As 2017 winds to an end…

It’s fun to look back through the year and pick which posts were your favorite (and mine too).

As a special treat, this year, I’m joining along in with a group of 40 awesome

Creative Bloggers in a Blog Hop sharing their top 10 favorite posts.

Prepare yourself for Creative Goodness Overload.


Shop Your Fav Brands at Scrapbook.com

If you’ve come from Tifany DeGough  your next stop would be  Melissa Elsner.

As promised here is the full list of the Top Ten Blog Hop…. (enjoy!)

Shop Amazon Scrapbooking Supplies*

*Disclaimer:  This post uses ads and affiliate links.  If you choose to make a purchase using one of the links, I receive a small commission (at no additional cost to you) that helps offset the costs of maintaining this blog.  Thanks for your support!

How to make a last minute gift bag from a 12″ x 12″ piece of scrapbook paper.

love-at-christmas-gift-bag-sues-creative-workshop

It’s getting to be crunch time… Need a cute little gift bag?

This gift bag measures 4″ x 6′ and is made from one 12″ x 12″ piece of double sided

scrapbook paper.   (The paper used on my bags are from Paper House Productions.)

How to make a last minute Gift Bag…

  • Cut paper to 8 ¼” x 11 ¾”.
  • Score the top of the paper ¾”.
  • Score the bottom of the paper 1 ½”.
  • Score the paper at ¾”, 4 ¾”, 5 ½”, 6 ¼”, 10 ¼” and 11″

  • Fold paper along score lines using mountain and valley folds.
  • Make cuts as indicated on the diagram below.
  • Fold over the top scored section to expose the reverse side of the double sided paper.
  • Glue the top 1/2″ scored section down first before assembling the rest of the bag.

  • Glue sides together and then glue bottom flaps.
  • Punch holes on the top of the newly assembled bag.
  • Cut white sheer ribbon in half.  Insert into holes, tie not on the inside of the bag.
  • Embellish your bag with additional images and tag.

*Disclaimer:  This post uses ads and affiliate links.  If you choose to make a purchase using one of the links, I receive a small commission (at no additional cost to you) that helps offset the costs of maintaining this blog.  Thanks for your support!

Shop Amazon Scrapbooking Supplies*