
Love, Joy, Peace, Patience, Kindness, Goodness and Faithfulness.
That is my prayer.
To have more of this in my life and in my heart.
To Live Inspired.
The card was made using the Faith Paper Collection from Paper House Productions.
That is my prayer.
To have more of this in my life and in my heart.
To Live Inspired.
The card was made using the Faith Paper Collection from Paper House Productions.

This marks the third summer since Nicholas and I started the tradition of creating our
Mini Garden. And…as we exclaim every year… “this one’s our favorite”. (it really is!)
Each year we like to add something new and different for our garden.
It has been noted, that at some point, we may have to get a bigger wagon.

Our Garden has never had an official occupant.
So, this year we added Mr. Elfsnail. (named by Nicholas for obvious reasons)
We picked him up along with a wishing well and a pair frogs at our local Hobby Lobby.
Nick and I (mostly Nick) spent the evening before laying out the garden on the kitchen counter.
We like having a plan and being prepared.
Nick had me outside working on the garden by 7:45 a.m. the next morning.
Have I ever mentioned I’m not a morning person?

For those of you that may not know about our garden, you can read about
the original garden here.
For our garden…we start with an old broken rusty wagon.
After arranging the fence and arbor, Nick quickly set off to work adding a new water feature
using a small, round, black dish (from a microwave desert) into the dirt.

Now that he’s five and a very confident gardener….he didn’t need any help placing the plants.

The “plan” was to add a small path to the new wishing well using crushed shells.

And because more is always better… MORE CRUSHED SHELLS.
It’s starting to look a little more like a beach.
We added cocoa bean shells around the plants to make it looks nice. (love the smell)
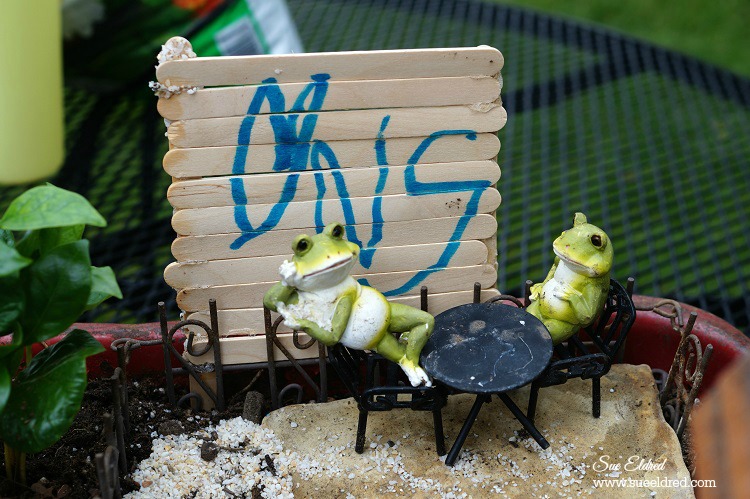
That just warms my heart.
Even though it should be Nick loves Grandma instead of Nick loves Sue.
(Maybe he named the frogs after us?)

Nick loved adding water to the wishing well and making sure it worked.


This really is such a fun project to do with kids.
You don’t need anything fancy to use for a container.
And you know what? I enjoy making it as much as him and maybe even more.
It’s important to take time and do something together. (Planting the gardening seed.)
Making memories… My buddy and me.
For more summer fun… click on ad below ↓

Disclaimer: This blog uses ads and affiliate links. If you choose to make a purchase using one of the links, I receive a small commission (at no additional cost to you) that helps offset the costs of maintaining this blog. Thanks for your support!

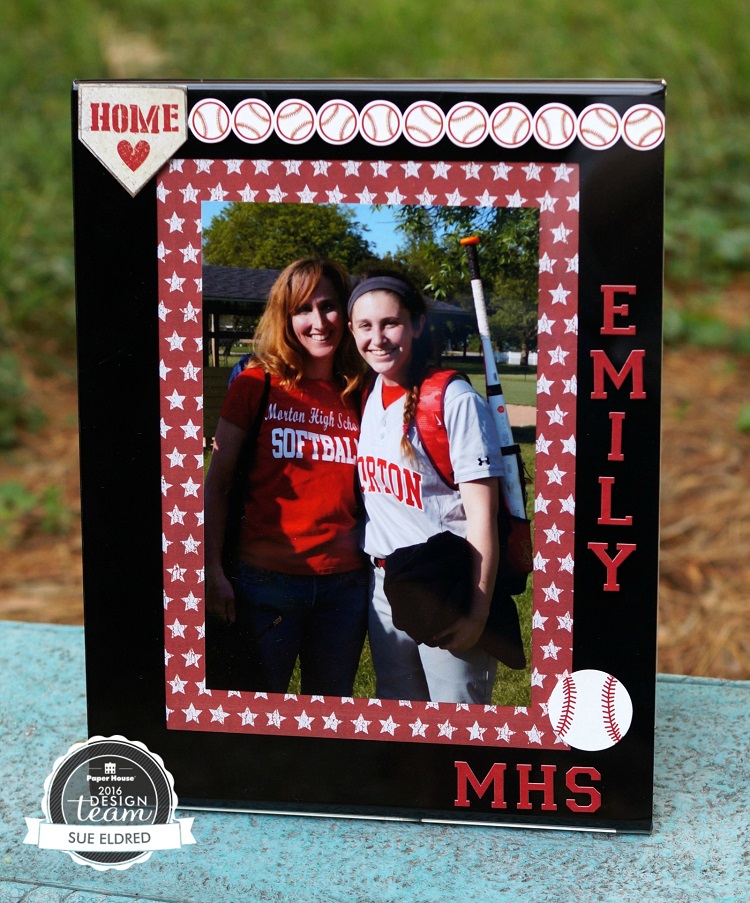
This is my niece Emily and her no#1 fan. (her mom)
I recently went to one of Emily’s High School Softball games to watch her pitch and take pictures.
I asked Emily if it would be ok to use one of her pictures for one my Design Team Projects.
I’ve used Paper House Productions “Sports Collections” for Guys but it’s also great for girls too.

For Emily’s frame I used a 5 x 7 Black Border Acrylic Frame from Deflecto Craft Solutions.
Deflecto Craft Frame, 5 x 7 Inches, Black Border (69575CR)
I embellished the frame with Paper and Stickers from Paper House Productions:
“This is a sponsored post. As a member of the Paper House Productions and Deflecto Design Team I have been provided product in exchange for my creative ideas, views and opinions.”
*This post uses Amazon Affiliate links. I am an Amazon Affiliate.
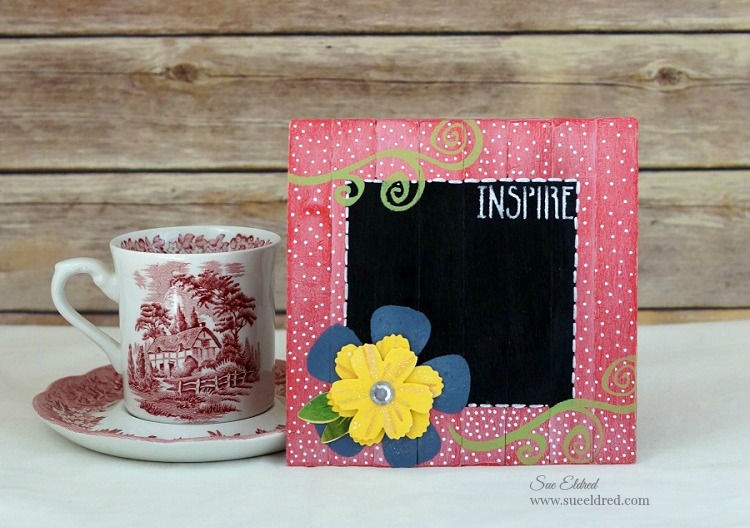
Who knew the craft medium we used as kids could produce a grown-up look.
I was messing around one day, looking for something different to stencil on.
Inspired by my favorite “Fixer Upper” show, I decided to create my own mini shiplap.
The projects below are the result of my “playtime”.


This one’s for anyone who loves Americana, old signs, topography and the look of old shiplap.
Or for anyone who loves playing with wood craft sticks.
How to make the Americana Sign: (*Amazon Affiliate Links)
Finished Size: 6” x 6”
*Disclosure: This blog uses ads and affiliate links. If you choose to make a purchase using one of the links, I receive a small commission (at no additional cost to you) that helps offset the costs of maintaining this blog. Thanks for your support!


Directions:
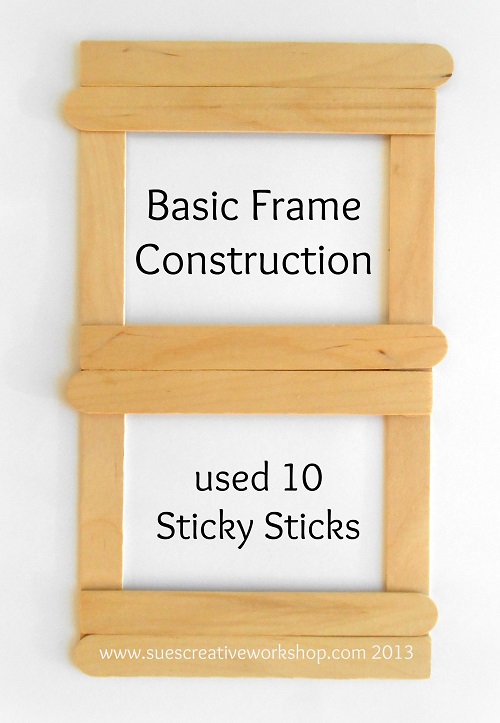
Here’s a project I did a few years ago using a product called sticky sticks.
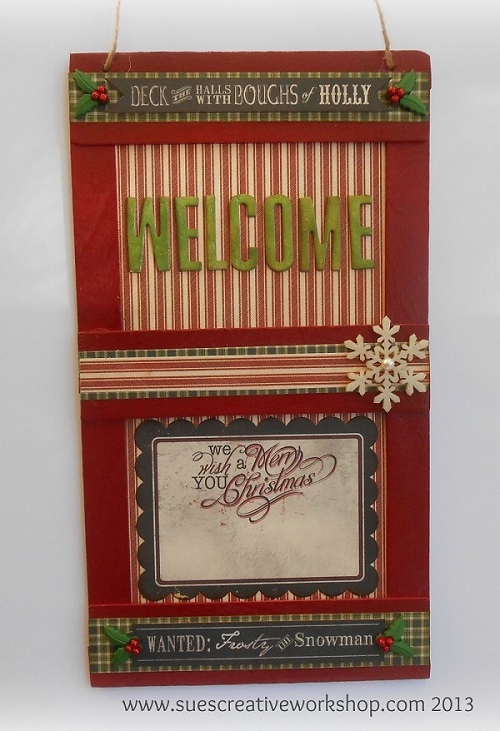
The paint and stencils used in these projects were sponsored by DecoArts.

I’m really starting to love this new summer schedule.
Everything seems a little more laid back.
I feel like I’m getting lazier by the minute.
But honestly, I’ve been busier this week than I have in a while.
This week has been full of gardening, cooking out, a couple of really cold dips in the pool,
movies, shopping, a soft ball game and to end out the week…
dance recitals and a retirement party.
And… I don’t want to miss a thing.
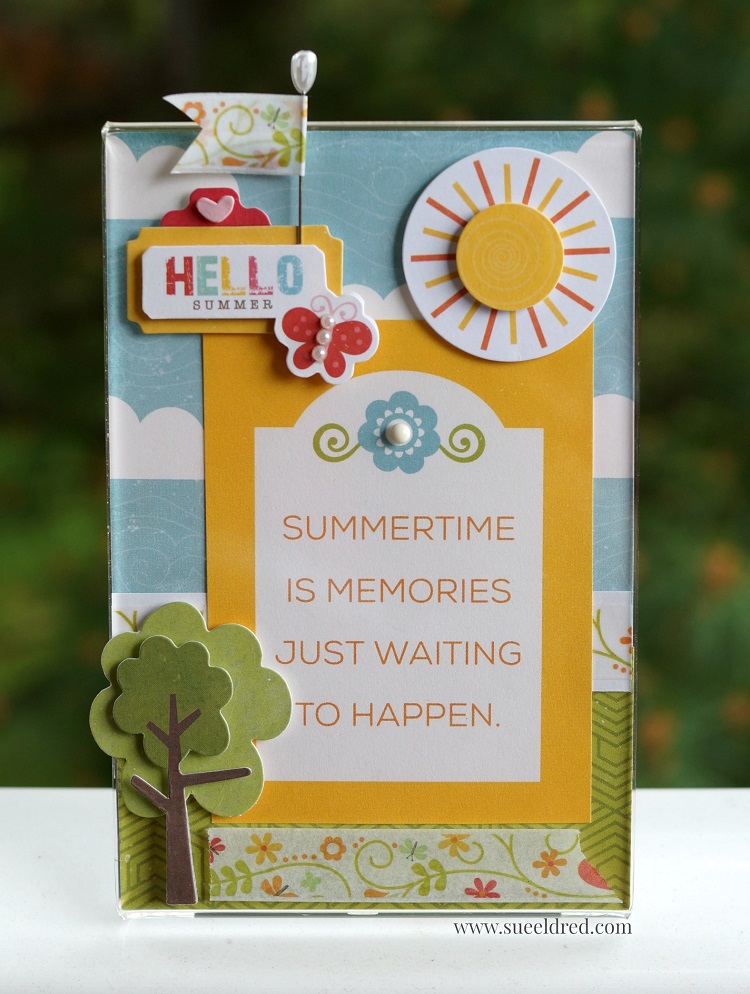
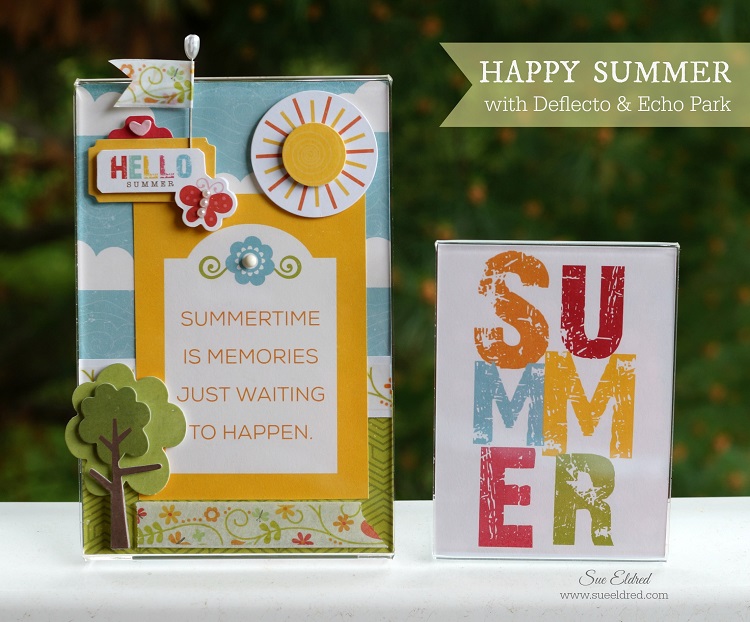
In case your wondering…
The Happy Summer Frame was made using clear acrylic frames from Deflecto Craft Solutions
and the “Echo Park Collection Kit 12″”X12″”-Happy Summer”*.
(affiliate link)
“This is a sponsored post. As a member of the Deflecto Design Team I have been
provided product in exchange for my creative ideas, views and opinions.”
Join Amazon Kindle Unlimited 30-Day Free Trial
Disclaimer: This blog uses ads and affiliate links. If you choose to make a purchase using one of the links, I receive a small commission (at no additional cost to you) that helps offset the costs of maintaining this blog. Thanks for your support!

When she asked me to make her a tote bag similar to the ones she’d seen online.
I knew exactly where to start. I used a large canvas bag from Canvas Corp Brands
and ironed on a fun saying using Joy® embroidered letters.

It’s quick and easy – just preheat your iron to the cotton setting, then remove the paper liner
on back of each letter (exposing the temporary adhesive) and press into place on your tote bag
to spell out your quote. Cover the letters with a cotton cloth and iron for about 30 seconds.
I ironed it again from the back of the fabric for another 30 seconds.

We’re thinking of adding “take me to a flea market” on the other side.
This project was created and sponsored by Joy SA.
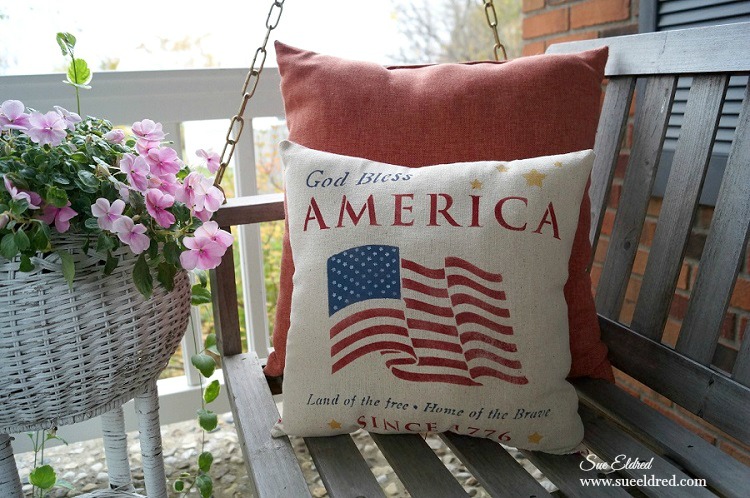
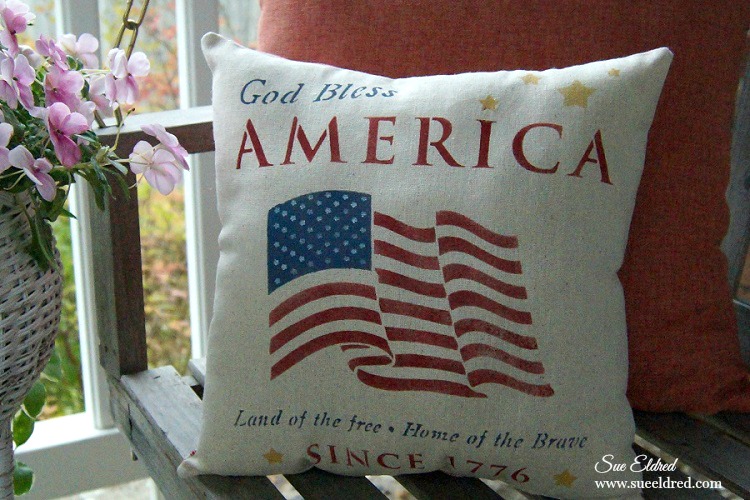
The quickest way to spruce up the front porch swing for summer is with new pillows.
And if your a little bit handy and have a sewing machine why not try making a few of your own.
When it comes to sewing I’m very simple and it doesn’t get much easier than this.
A simple stenciled and stitched pillow.
Deco Arts has so many 12″ stencils in a variety of patterns, you’re sure to find one you’d love.

DecoArts® Products Used: (*affiliate link)
Additional Products:
Directions:
This project was sponsored by DecoArts.

Disclosure: This blog uses ads and affiliate links. If you choose to make a purchase using one of the links, I receive a small commission (at no additional cost to you) that helps offset the costs of maintaining this blog. Thanks for your support!

was to create something using their 3D stickers. They have so many beautiful dimensional stickers
it was hard to choose.

The inspiration for this card came from a small picture frame picked up at Michael’s one spot.
The frame spoke to my soft feminine “girly” side.
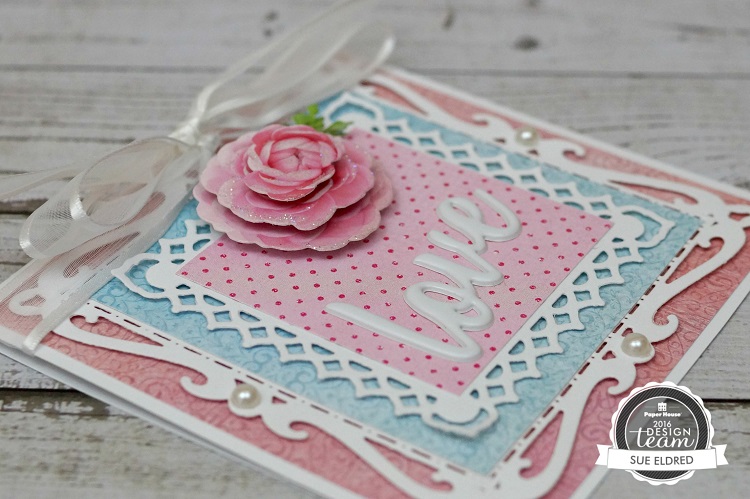
The pretty pink rose used on my card comes from the Sisters 3D sticker sheet.
Finished Card Size: 4 1/2″ x 4 1/2″
Additional Product Used:
“This is a sponsored post. As a member of the Paper House Productions Design Team I have been
provided product in exchange for my creative ideas, views and opinions.”

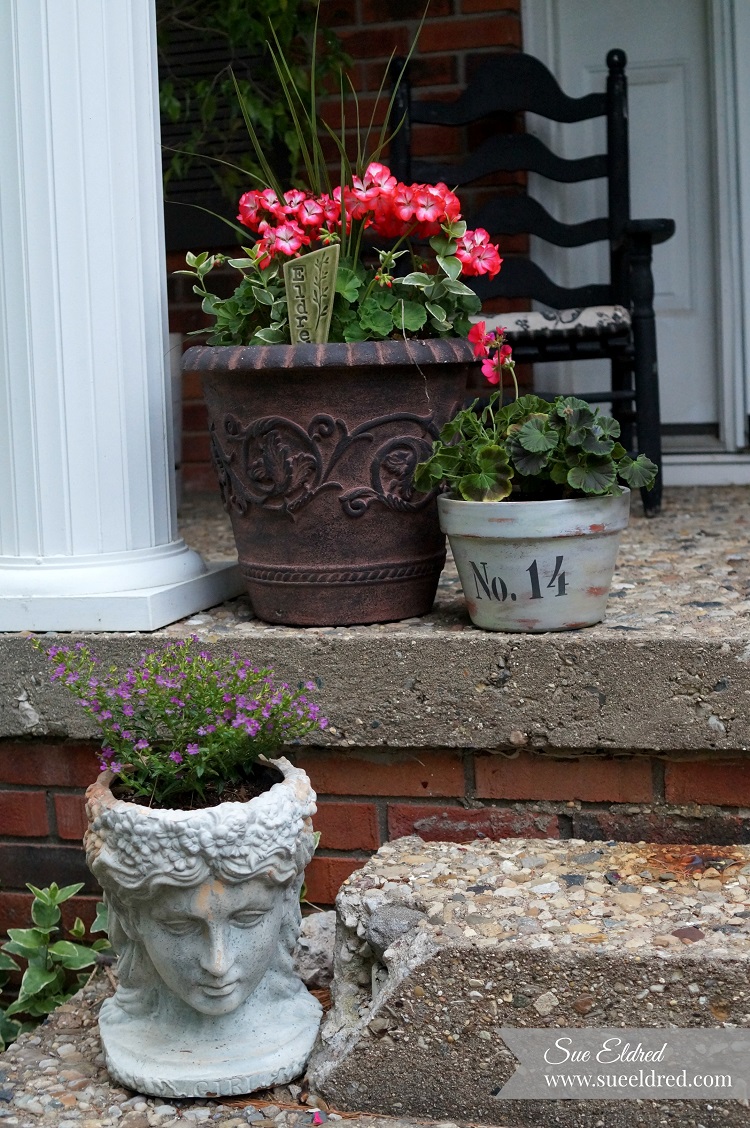
I’ve been concentrating a lot on sprucing up my front porch for Summer.
To complete the look, my front door needed a fresh fun new wreath.

I created a Summer themed Americana Wreath using one of the ruled wreaths* from Smoothfoam. (*affiliate link)
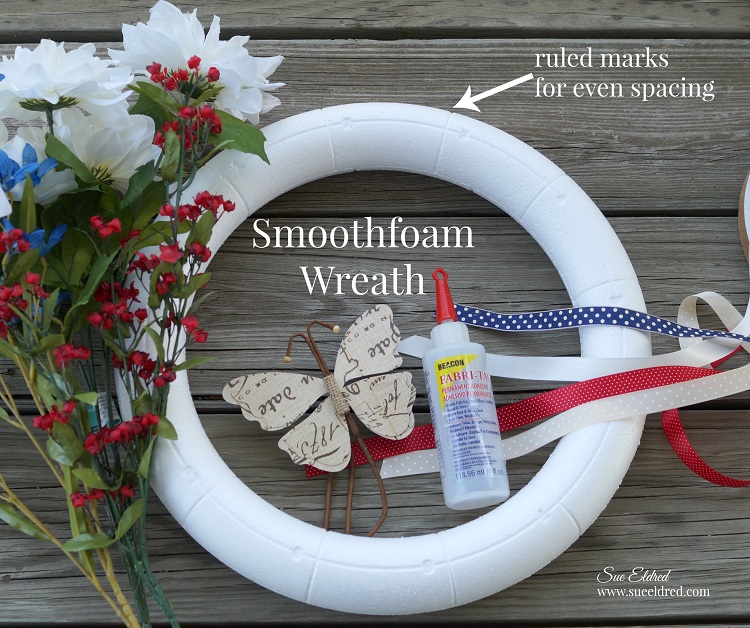
They molded lines and numbers into the foam to make design and layout simple.
Even on one side, odd on the other.
The wreaths come in several sizes… 8″, 10″, 12″, 14″.
Proudly Made in the USA

So many possibilities.

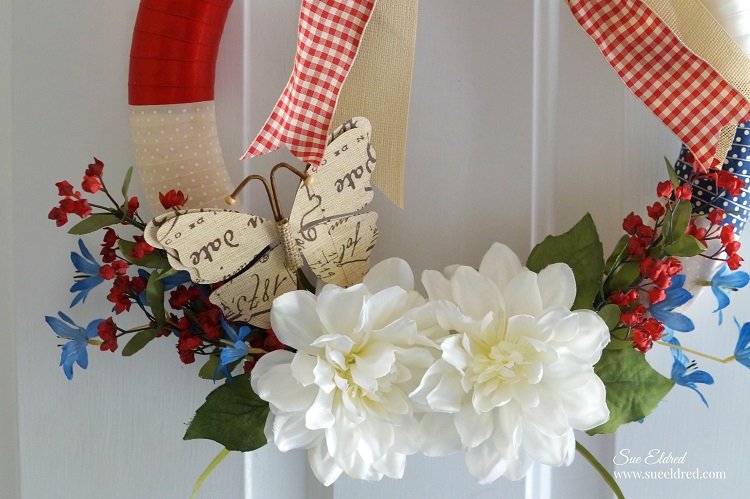
The Americana Wreath was sponsored by Smoothfoam™, the crafter’s foam.

*Disclosure: This blog uses ads and affiliate links. If you choose to make a purchase using one of the links, I receive a small commission (at no additional cost to you) that helps offset the costs of maintaining this blog. Thanks for your support!

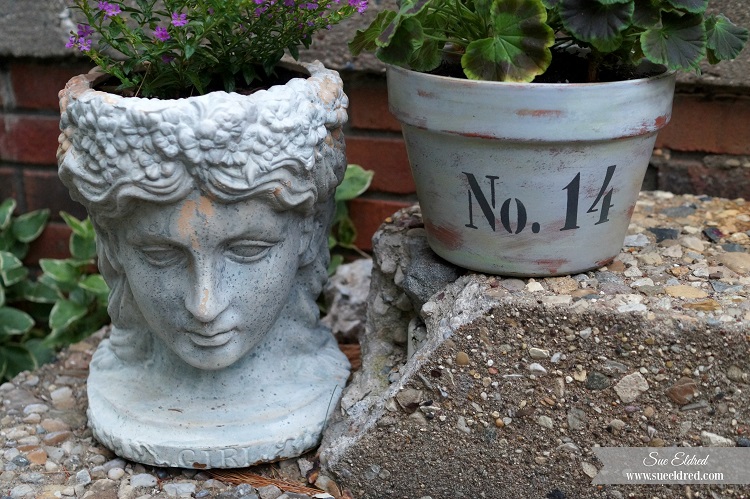
Time for sitting on the porch swing, sipping a glass of iced tea and relaxing the evening away.
But before I can relax, I need to finish putting flowers in containers and I need to give a couple
of old boring terra cotta pots a little sprucing up with a little paint and stencils.
I decided to give this plain terra cotta pot an aged looked with
Americana Décor Chalky Finish Paint from DecoArt.
Supplies Used: (*affiliate link)

Directions:
This post was sponsored by the good folks at DecoArt.
Join Amazon Kindle Unlimited 30-Day Free Trial
Disclosure: This blog uses ads and affiliate links. If you choose to make a purchase using one of the links, I receive a small commission (at no additional cost to you) that helps offset the costs of maintaining this blog. Thanks for your support!


