Craft Ideas Fall 2015

Craft Ideas Fall 2015 cover

I’m So excited….

I have two projects in the latest issue of Craft Ideas magazine.

A Back to School Announcement Board on page 11 and a simple Back to School Card on page 53.

You can see the instructions for the Back to School Announcement board here on Craft Ideas.

Craft Ideas Fall 2015 8474

Make sure to pick up your copy.


Colorful Chalkboard Frame for Kids and grownups

Funky Pallet Frame 8798

A simple paint and stencil project, fun for kids or grown ups.

I decided to finish painting this colorful Rustic Pallet Frame* that I started working on

yesterday evening.  As the name suggests, the frame is rustic and somewhat rough.

Because I was planning on stenciling on it…  I sanded the front of the frame to make it smoother.

I wasn’t worried about making it completely smooth.

The Colorful Chalkboard Frame would be a great project to make with the kiddos.

Funky Pallet Frame painted 8792

Directions to make the Colorful Chalkboard Frame:

  1. Sand the front of the frame.
  2. Paint the frame with white acrylic paint.
  3. Paint the top of each pallet section with different acrylic colors.  Sort of a modified rainbow.
  4. Because the stencil had four unique patterns, I decided each color needed its own pattern.
  5. Mask off each section of the wood before stenciling.
  6. Stencil using a stipple brush and white acrylic paint.
  7. Allow to dry completely
  8. To mute to colors:  Lightly sand the frame with a sanding block.  (optional)
  9. For an added sheen:  Apply clear crème wax to front of frame, allow to sit for one hour and buff.
  10. I added a small chalkboard to the inside of the frame.

Funky Pallet Frame Supplies

Supplies Used:                                          (*affiliate link)

*Thanks to Walnut Hollow and DecoArt for providing the materials used on this frame.

For more Summer fun with the kids…click on SIime Ad below.

Slimer

Disclaimer:  This blog uses ads and affiliate links.  If you choose to make a purchase using one of the links, I receive a small commission (at no additional cost to you) that helps offset the costs of maintaining this blog.  Thanks for your support!

Join Amazon Kindle Unlimited 30-Day Free Trial

Are you on Instagram?

Instagram

Sue’s Creative Workshop is now on Instragram.

It always seems like it takes me a little longer to catch up with the rest of the world.

But… now you actually can follow me on Instragram.  (really you can!)

instagram

view on instragram

If you’re on Instagram, would you please follow me?

(Did you notice my numbers?  I need help.)


My Fabulous Thrift Store Make-Over

I almost passed on this plain 8 drawer cabinet last April while visiting my daughter in Madison.

I didn’t really need it, I have too much stuff, would there be room in the car?  (geez!)

It was sitting there in the Thrift Store for only $8.  They had just put it out that day.

I had to take it home.  (I just had too.)

Stenciling the drawer 8355

As soon as I got it home, I painted it with a couple coats of black paint and gave

it a clear wax coat.  It sat in my office that way for the next four months.

(I’m starting to notice a pattern here.)  Anyway…. I decided that the cabinet needed more.

After receiving these cool number stencil,

Deco Art Americana Decor Stencil, Old World Numbers*    (*affiliate link)

and Whisper Chalky Finish Paint* from DecoArt as part of their Blogger Outreach Program,

I stenciled each drawer 1-8.

To keep the numbers from looking too new or bright, I lightly sanded over the letters with a

extra fine sanding block and applied another coat of clear wax.

Drawer Close Up 8446

My hubby helped me put on these vintage looking drawer pulls I’d found on Etsy.

I spent more than twice as much on the drawer pulls than I did the cabinet.

Black Cabinet 8444

I’m so happy with the way it turned out.  Doesn’t it look beautiful?

Join Amazon Kindle Unlimited 30-Day Free Trial

Disclaimer:  This blog uses ads and affiliate links.  If you choose to make a purchase using one of the links, I receive a small commission (at no additional cost to you) that helps offset the costs of maintaining this blog.  Thanks for your support!

Getting Creative with Resin

Getting Creative with Resin 8181

I’ve always wanted to use resin in a project but have always felt somewhat intimidated.

Thanks to an opportunity with Environmental Technology Inc., the makers of

jewelry resin and much more, I finally got my chance.


EnviroTex Jewelry Resin

And… after watching this video.  I felt confident to start.

I couldn’t believe how easy it was and how happy I was with the results.

The hardest part was deciding what to make and what to fill.

Halloween before the resin 2880 Creative before the resin 2883

For my Projects:

  • I started with some over-sized bottle caps from Maya Road which I spray painted black.
  • I used a circle punch to make a background from scrapbook paper.
  • I used dimensional stickers, metal pieces, regular stickers and glued everything in place using  white craft glue.
  • I measured and mixed the resin according to the instructions and filled the bottle caps.
  • Then it was time to wait for the resin to cure.

waiting for the resin to cure

The original plan was to add a hanger on the back, and use them as a decoration.

But… I had a better idea and decided to add a magnet to the back instead.

I really, really like them.

Resin Work in Progress 2908

Now that I’ve seen how easy it is, I’ve got a few more things in the works.

Shop Amazon Scrapbooking Supplies*

*Disclaimer:  This post uses ads and affiliate links.  If you choose to make a purchase using one of the links, I receive a small commission (at no additional cost to you) that helps offset the costs of maintaining this blog.  Thanks for your support!

My Summer Vacation…

When the Jimmy Buffett tune came across the radio…

I was immediately filled with a combination of jealousy and sadness.

My husband’s vacation was just a few days away and we had no plans.

I mean none other than work in the garage and scrape and paint the deck.  (yay!)

Hilton Head 2013

Every other summer we try to plan a “beach vacation” and this was that summer.

For months, I’ve endured everyone’s Facebook vacation pictures while longing for the beach.

(Insert dramatic sigh!)

But…being practical people, this summer, we’d opted for a “Garage Make-Over” instead.

Don’t get me wrong… I love our new garage.  (another post for another day)

I just love the beach too.

Truth is…  I have a teen-ager.

The thought of him being stuck with two boring parents away from his friends,

his music and games for a whole week sounded like torture to him.

He was not interested in the least.

I know we should of made him go.

But… I wasn’t sure that I wanted to spend all that money to take a sulky teen.

So, we opted for practical instead.

But… when I heard the song on the radio, it reminded me of our favorite Mini Golf place

the one on Myrtle Beach where they play nothing but Jimmy Buffett songs.

I told my husband when I got home, and…being the good man that he is…

he checked for last minute cheap airfare and hotels.  (what a guy!)

But… practicality won out again and we decided for something closer.

A trip to Lake of the Ozarks.  (romantic I know)

Lake of the Ozarks 08088

When we opened the door to our room, on the Marina, we were struck by the amazing view.

Our son, who’d refused to bring his swim trunks was now having second thoughts.

fishing off the patio 8089

Seriously, you could fish off the patio.  (Which he immediately did.)

the cave 8101

Neither one of the guys had been in a cave before.  So we did that.

on the boat 8111

The real highlight of the trip was when we rented the boat and took it out on the lake.

Justin 8127

Driving a boat for the first time, girls waving from the other boats, actually brought a smile

to his face.  I didn’t catch it on camera, but it was definitely there.

It was a great trip, a great memory and I’m so glad we went even if it was for just a few days.

Painting on Acrylic Frames

Painting on Acrylic Frames

With all this new Home Décor chalk paint out on the market…

with it’s claims of being able to paint on most anything.  I decided to give it a test.

I’ve used it on wood, old frames, stuff like that.

Acrylic frames?  It was worth a try.

Creating a mask 5889

I created a mask using blue painters tape and applied it onto the front of a

Mini 3″ x 4″ Sign Holder* (*affiliate link) from Deflecto Craft Solutions.

Make sure to burnish the edges of the tape.

adding red paint 5890

I painted the surface of the frame with:

FolkArt Home Decor Chalk Furniture & Craft Paint in Imperial*

I used 3 coats of paint.  Make sure to allow good drying time in between coats.

adding black paint 5897

After allowing plenty of time for the red paint to dry and cure.

I gave the frame an aged look by applying a layer of Tattered Angels Decor and DIY Paint*

I wiped it off with a damp paper towel.  Leaving bits of the black streaks.

Crackle Stamp 5899

I stamped around the edges of the frame with a crackle background stamp

and  Tsukineko StazOn Ink Pad, Jet Black*

Carefully remove the blue painter’s tape mask.

At this point, I stopped and admired my frame for almost a month.

Just waiting for inspiration….

Rachael Cunningham Parr 7560

Meet Rachael Cunningham Parr. 

I found Rachel, a tin type, years ago while hunting for treasures.

If Rachael is your relative, I’m pretty sure she wasn’t really a gypsy.

(She really is a beautiful woman.)

I embellished the frame with some vintage rickrack, key, and a tiny flower.

“R is for Racheal” was made with Metal Type Charms by Tim Holtz*

Once inspired…  I created a couple more frames.

The frames uses charms and hardware from Canvas Corps Brands 

and Chitchat Word Stickers by Tim Holtz*.

Now to try this on a bigger frame!

 “This is a sponsored post. As a member of the Deflecto Design Team I have been provided product in exchange for my creative ideas, views and opinions.”

*Disclaimer:  This blog uses ads and affiliate links.  If you choose to make a purchase using one of the links, I receive a small commission (at no additional cost to you) that helps offset the costs of maintaining this blog.  Thanks for your support!

Creating a Decorative Display Board for all my Little Pretties

Smoothfoam Display Board 07114

My project started as a Memo Board and… 

While I was looking for some push pins I stumbled across a collection of little pretties.

Tucked away in a cabinet along with a lot of other embellishments were these little

metal frames.  Something that I’d been hoarding since my K & Company days.

I added those frames along with some other little pretties onto my board.  (Love!)

Memo Board Products

To make my Memo/Display Board I used:            (*amazon affiliate link)

Directions:

  1. Paint wood frame with cream acrylic paint.
  2. Cut the Smoothfoam sheet a 1/4″ larger than the center opening of the frame.
  3. Apply spray adhesive to the front of the Smoothfoam and lay onto the fabric.
  4. Wrap and glue the fabric around the back of the Smoothfoam.
  5. Glue the frame onto the front of the covered Smoothfoam.
  6. Decorate the top and bottom of the frame with dimensional flowers.

*My little pretties are stuck into the display board with decorative garment pins.

A really fast and easy project.

This project was created for and sponsored by Smoothfoam.

Shop Amazon Scrapbooking Supplies*

Disclaimer:  This blog uses ads and affiliate links.  If you choose to make a purchase using one of the links, I receive a small commission (at no additional cost to you) that helps offset the costs of maintaining this blog.  Thanks for your support!

My trip to CHA Paper Arts in Chicago

Last week, I got the opportunity to attend CHA Paper Arts in Schaumburg, IL.

I hadn’t been able to attend a CHA Show (Craft Hobby Association) since the last time

it was in Chicago a few years ago.

As you can imagine I was excited to go.  (any excuse for a get-a-way)

I knew going in that it was going to be a small show.

But…by being a small show, it gave me the opportunity to mix, mingle and really get to know people.

I got to meet, in person, a few online friends, was able to make a few more and make some really

great connections.  All in all I was satisfied.

Back in it’s hey day, when I had my store, I remember spending three days walking the show

and still not being able to see everything.  (those were the days…)

On the first day of the two day show, I did remember to take a few pictures.

I wish I had taken more.   Enjoy!

Stephanie Ackerman 2813

First off in the Sizzix Booth was dies from Stephanie Ackerman. 

I’ve been following Stephanie’s blog, Homegrown Hospitality, for years.

She’s a real Superstar in my books.

Tim Holtz 2809

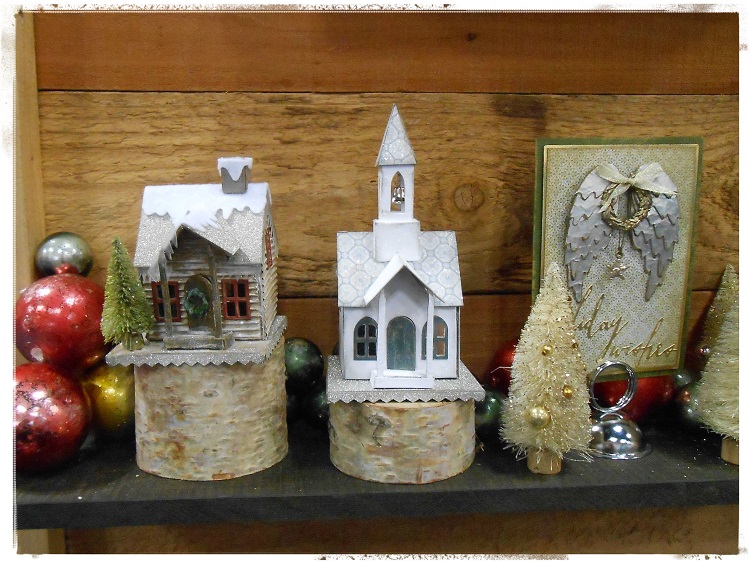
 New House Dies from Tim Holtz and Sizzix

I love the little house dies from the always popular Tim Holtz.

Tim Holtz 2810

Tim Holtz Holiday Canvas

Ken Oliver and the Girls 2846

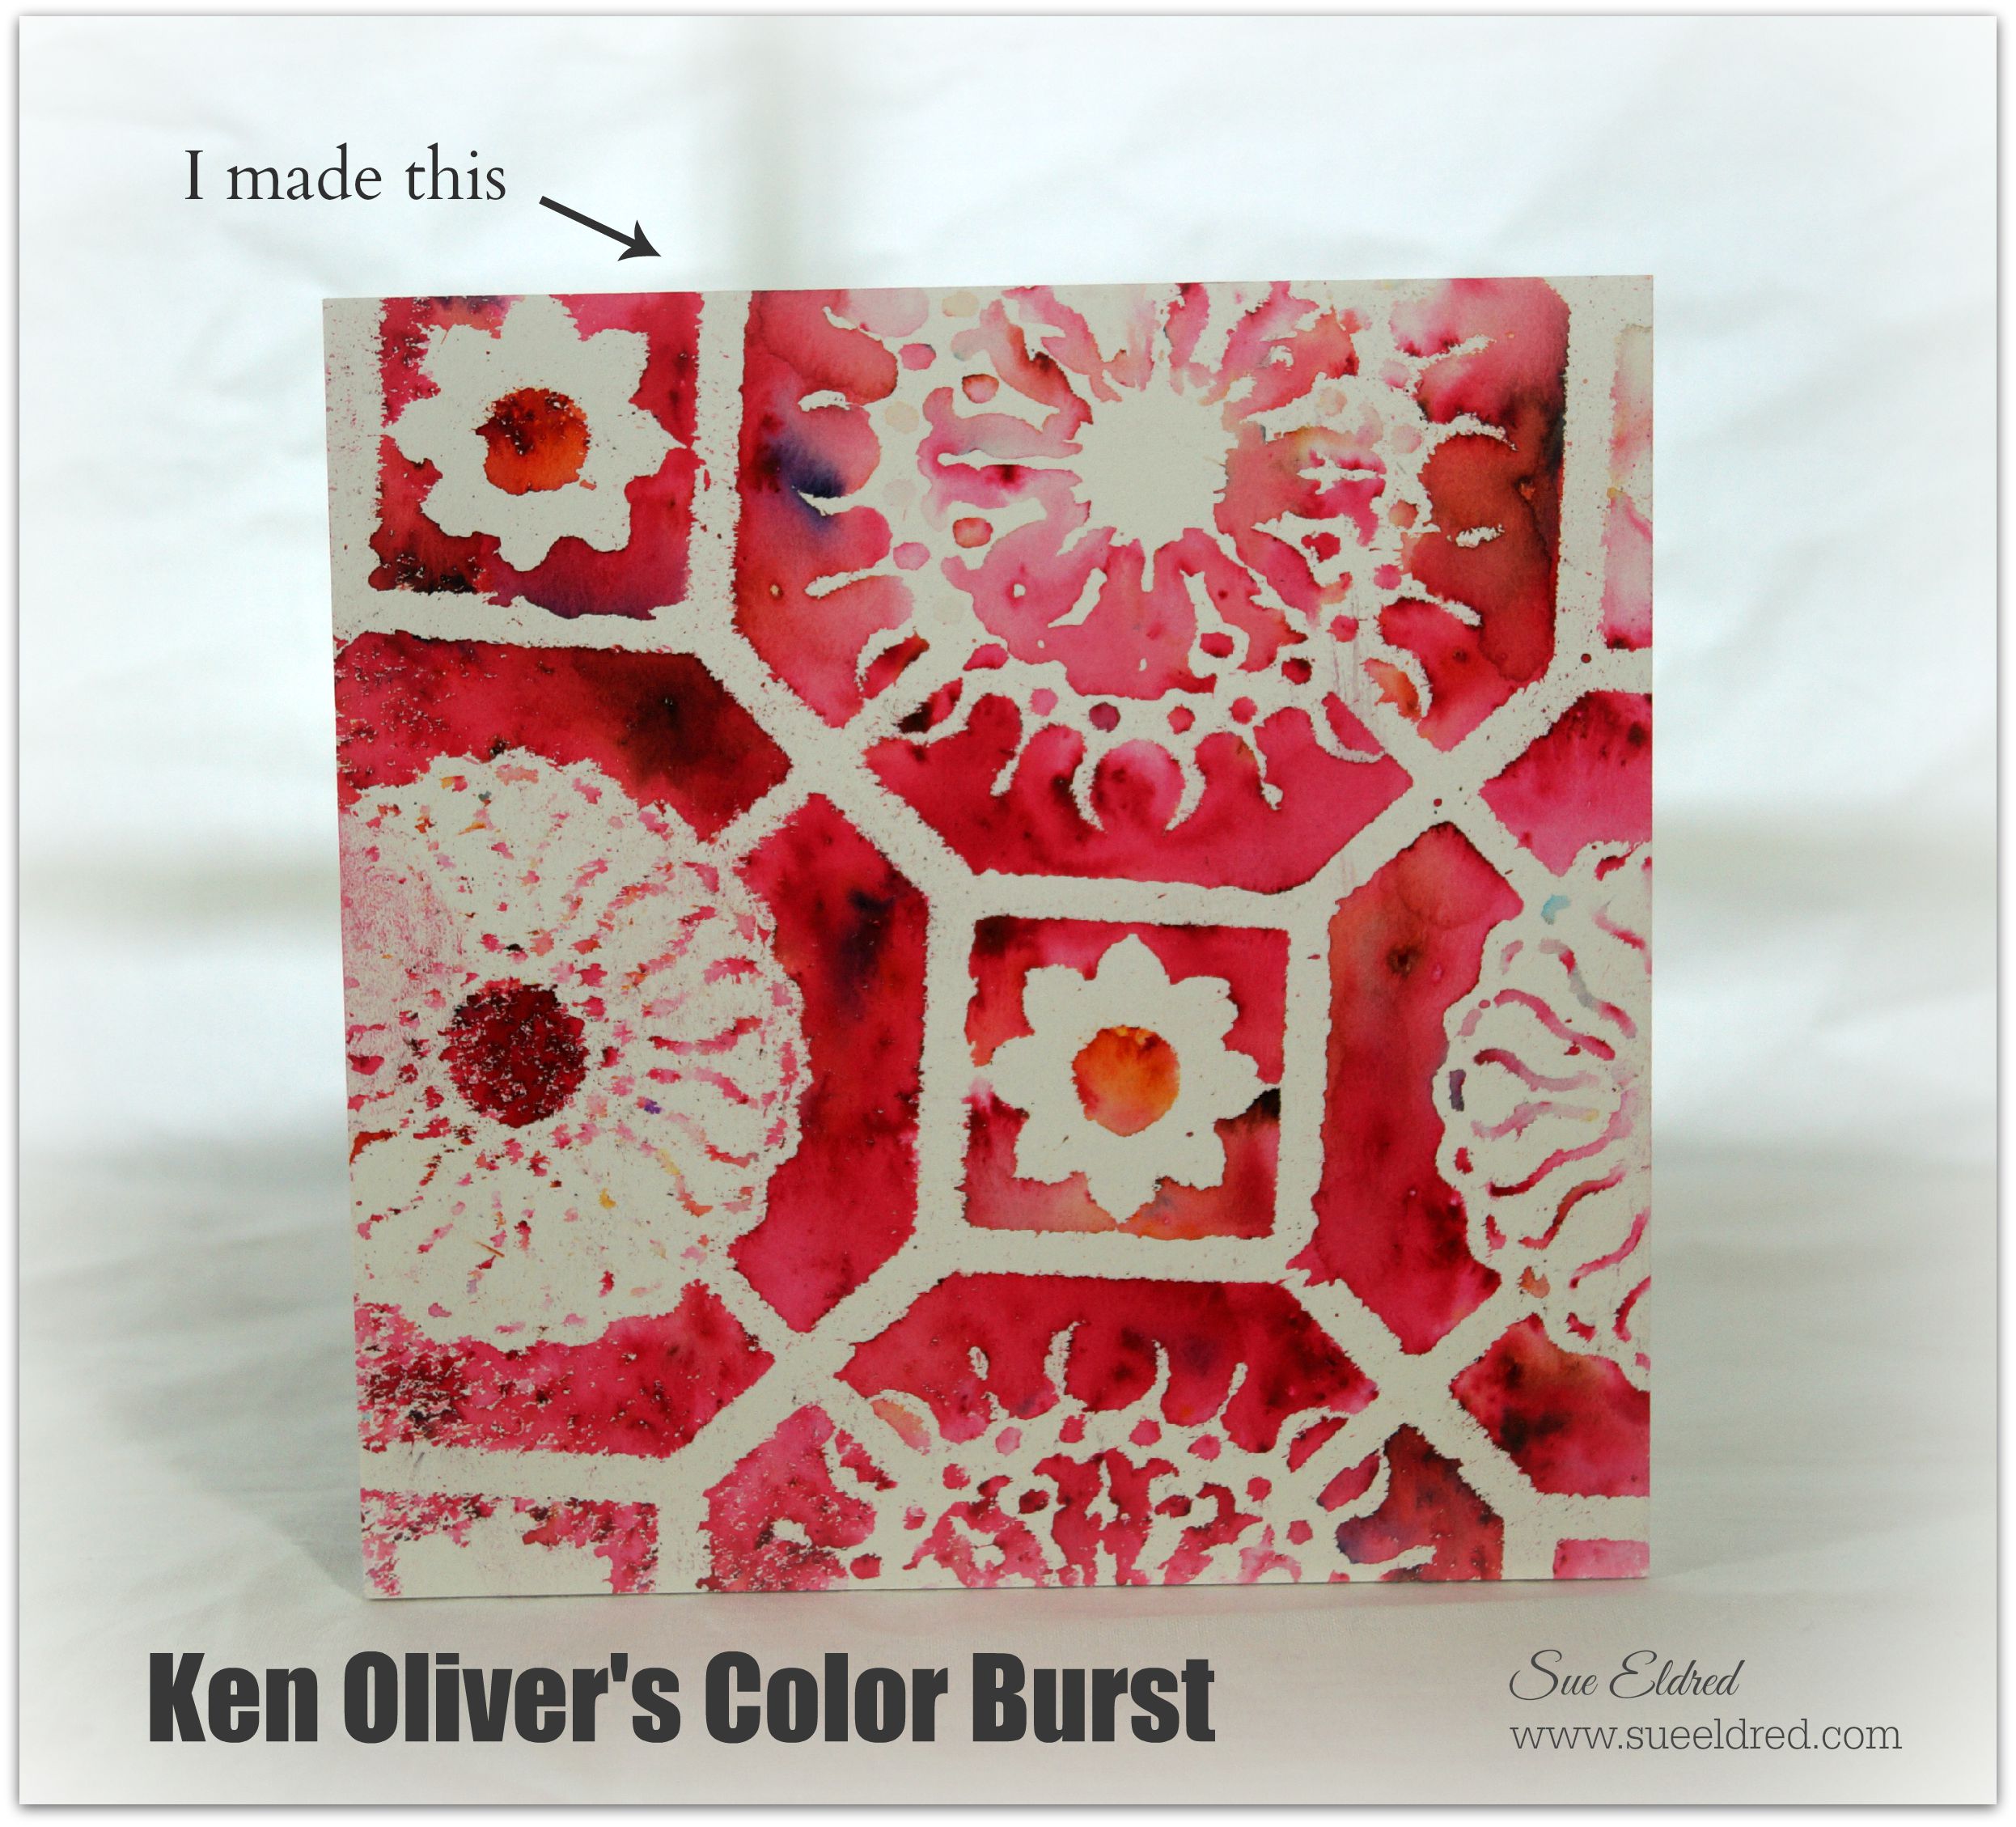
Ken Oliver of Ken Oliver Crafts

Ken’s another one of my Favorite Superstars.  Here I am with Ken and The Paper Forest girls.

They had just taken a picture with Ken and was rubbing it in my face.

So… I made them take another.

Ken Oliver's Color Burst

I finally got the opportunity to play with Ken’s Color Bursts. 

It only took a few minutes to create this masterpiece.

Eileen Hull 2845

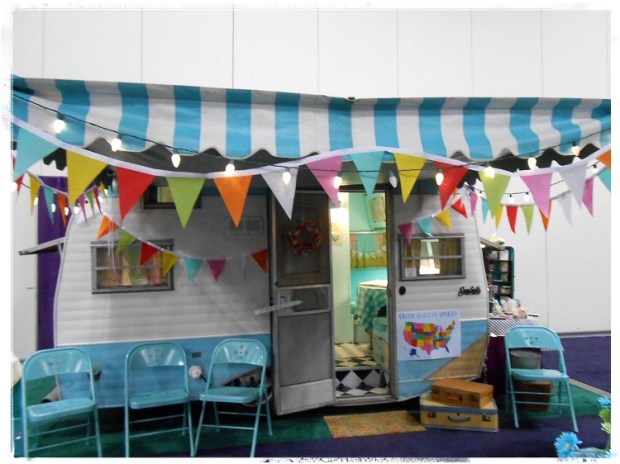
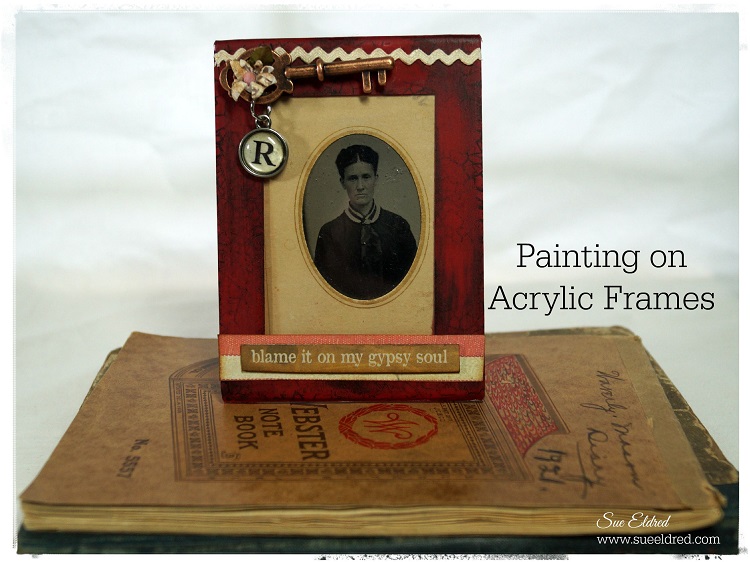
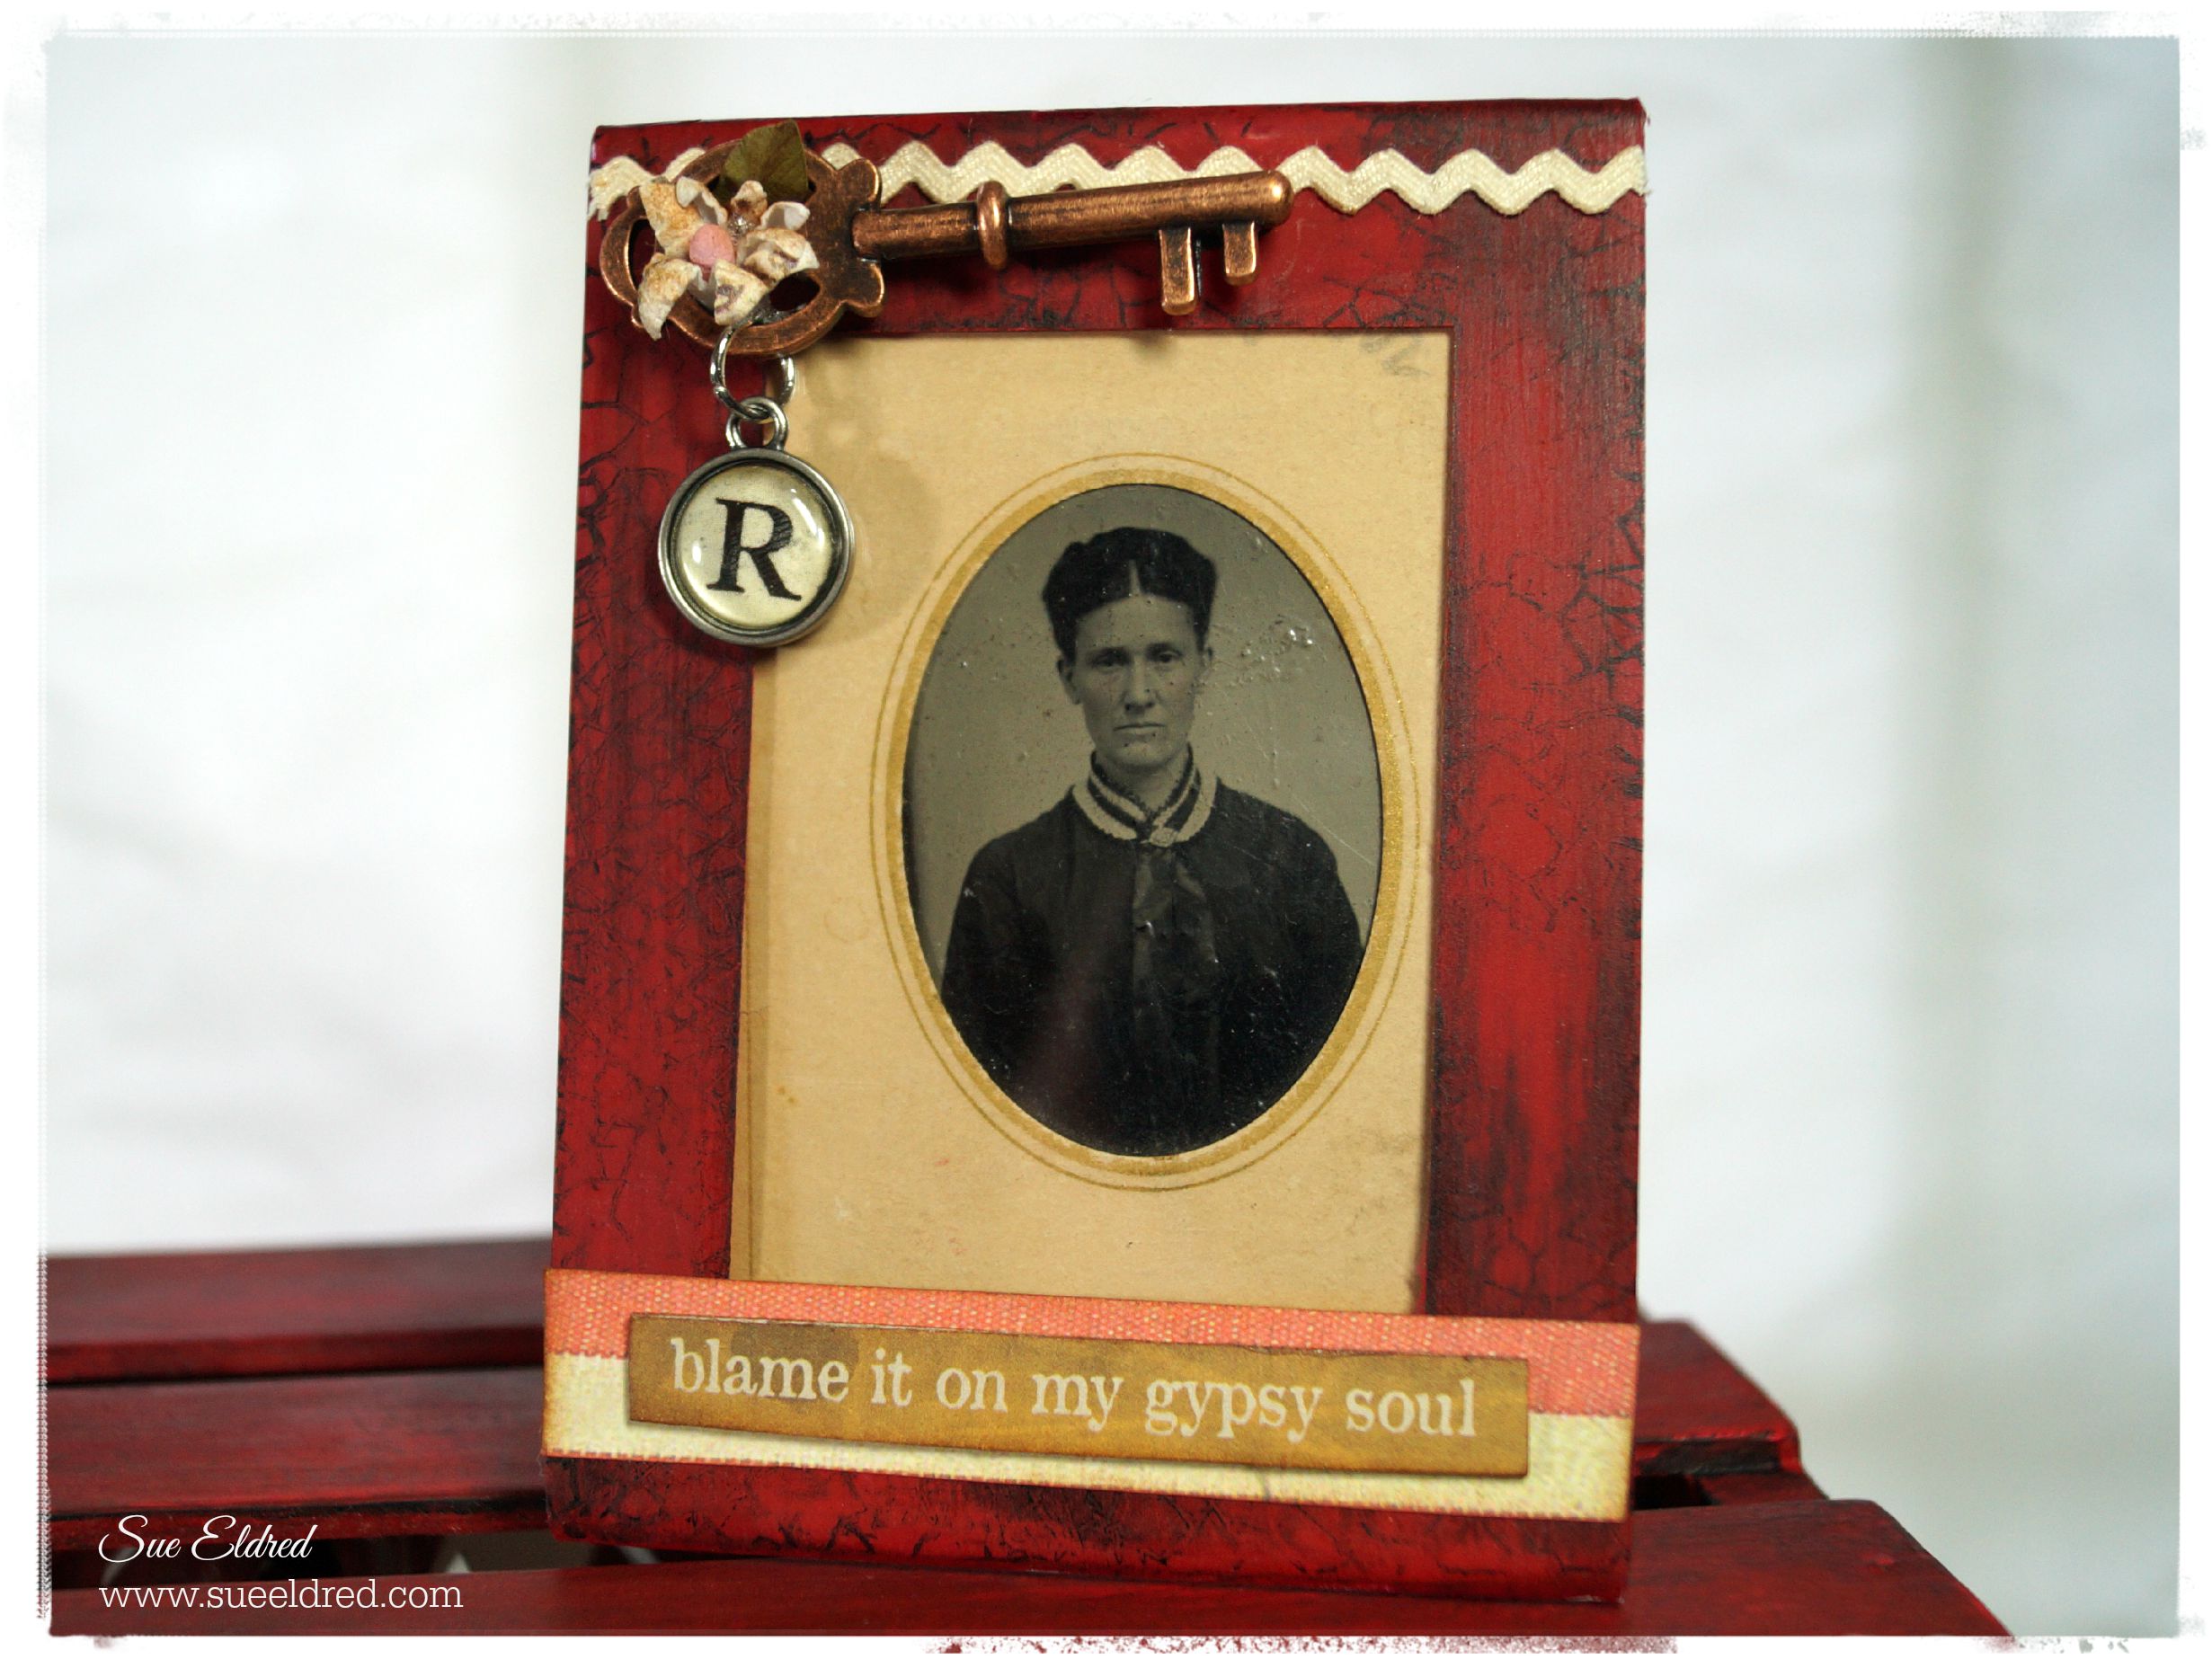
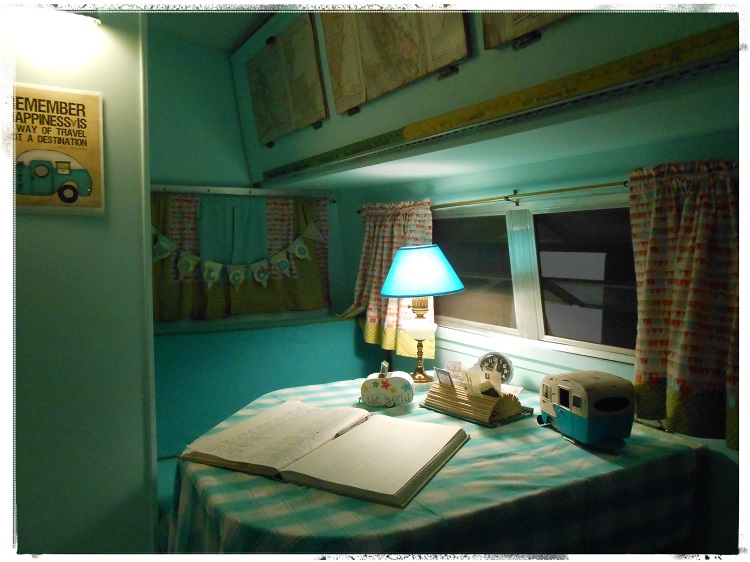
Eileen Hull’s Vintage Camper, Scotty on The Paper Trail at CHA.

Eileen Hull 2840Eileen Hull 2841

Such a cute little camper.  You can read about Eileen and Scotty’s Adventure here.

Eileen Hull 2842

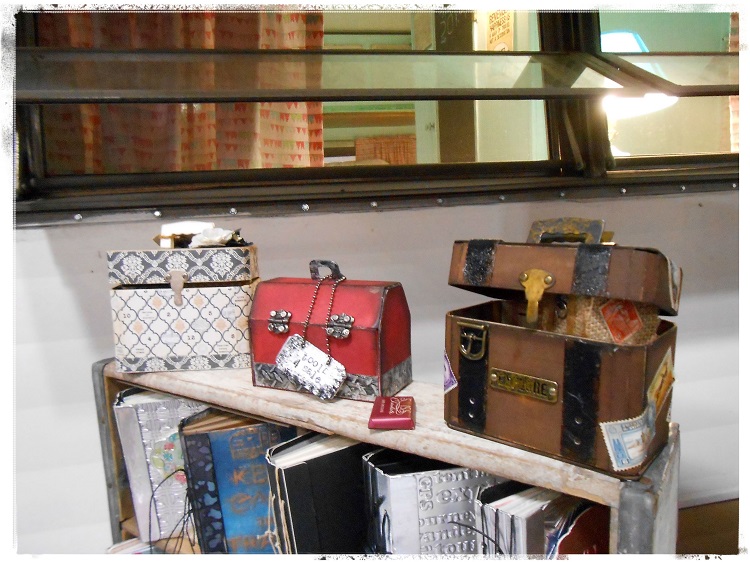
Eileen Hull’s Samples made using Sizzix Dies.

Eileen Hull 2843

More samples from Eileen.

I met Eileen a few years back and she’s such a sweet and personable lady.

You can’t help but love her.  And her dies… they are just too cute.

If I had her camper, I just might enjoy camping.  (well maybe)

Graphic 45 2823

Another picture with The Paper Forest girls at the Graphic 45 booth.

Graphic 45 2829

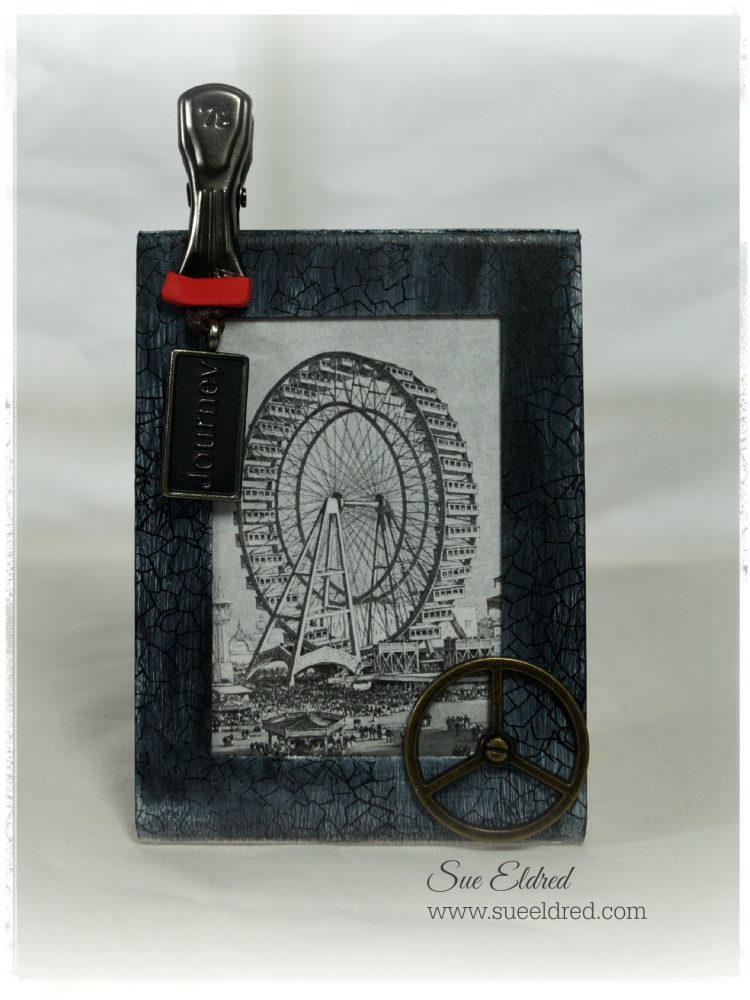
Graphic 45 World’s Fair

Graphic 45 2832

Graphic 45 Mon Amour
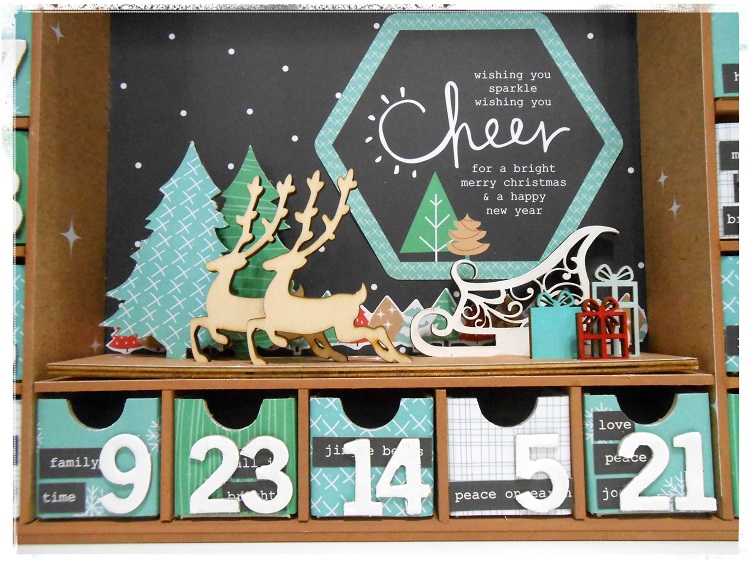
Kaisercraft 2861

Kaisercraft

Ready for Christmas Crafting?  I am!

Kaisercraft 2863

More Kaisercraft Christmas…

Kaisercraft 2862

Kaisercraft

Little B 2852

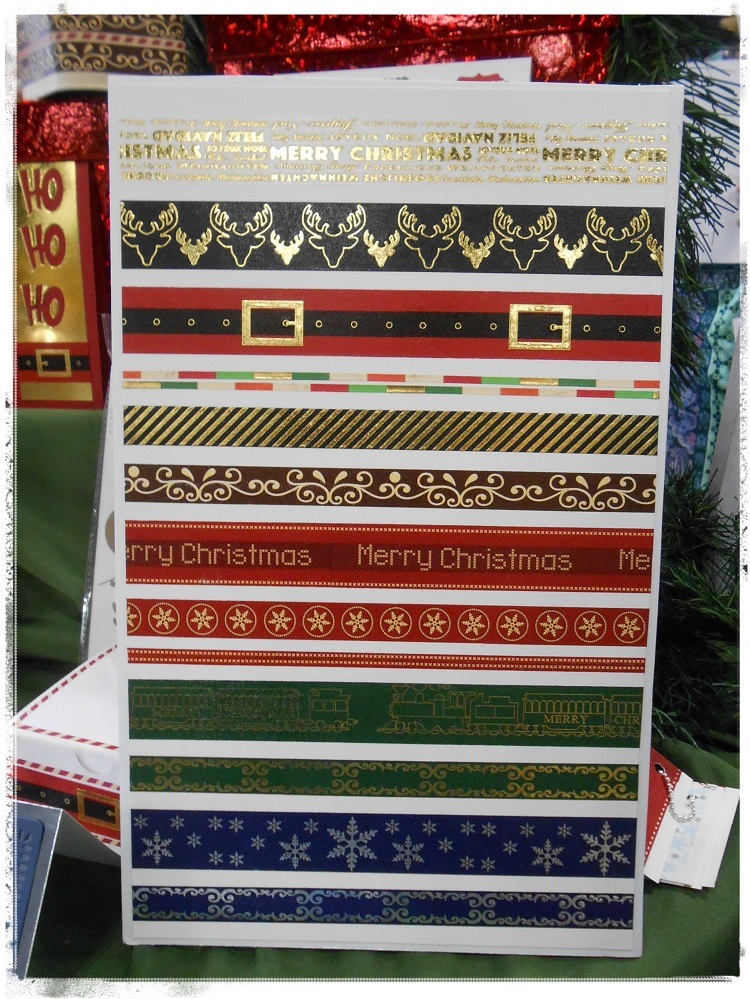
Little B LLC Christmas

Little B 2858  I fell in love with Little B’s New Christmas Washi Tape.

This is another one of those booths where I got talking and forgot to take more pictures.

Ikea

As a reward for all my work (aka…having fun).  

I ended my adventure with a trip to my favorite Big Blue Store, IKEA.