How to Create Quick and Easy Bows

This one’s for my “Bow Challenged” friends…  (you know who you are)

Learn How to Create Quick and Easy Bows using the DecoFun Bowmaker.

Tying beautiful bows doesn’t have to be a challenge anymore…

Thanks to the DecoFun Bowmaker I received to participate in this month’s

Designer Crafts Connection Blog Hop I can now make big beautiful bows
For my project…I decided to give my plain wreath a seasonal update with a new bow.

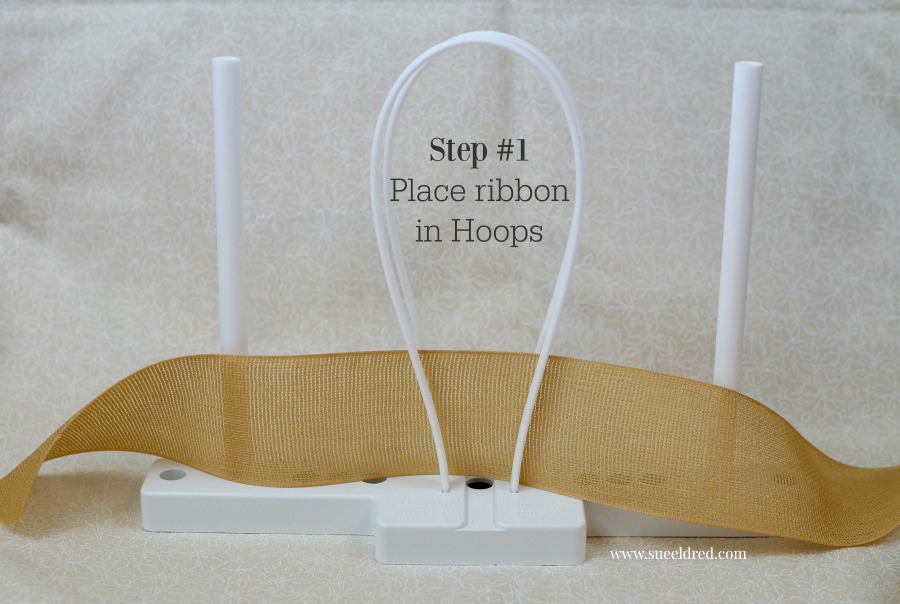
Step#1  Place Ribbon in Hoops

Step #2  Bring Ribbon Around Rods

I used approx. 3 yards of ribbon, so keep on wrapping.

Step #3 Pinch Ribbon Center & Tie with Wire

For Seasonal Fun…add berries under wire
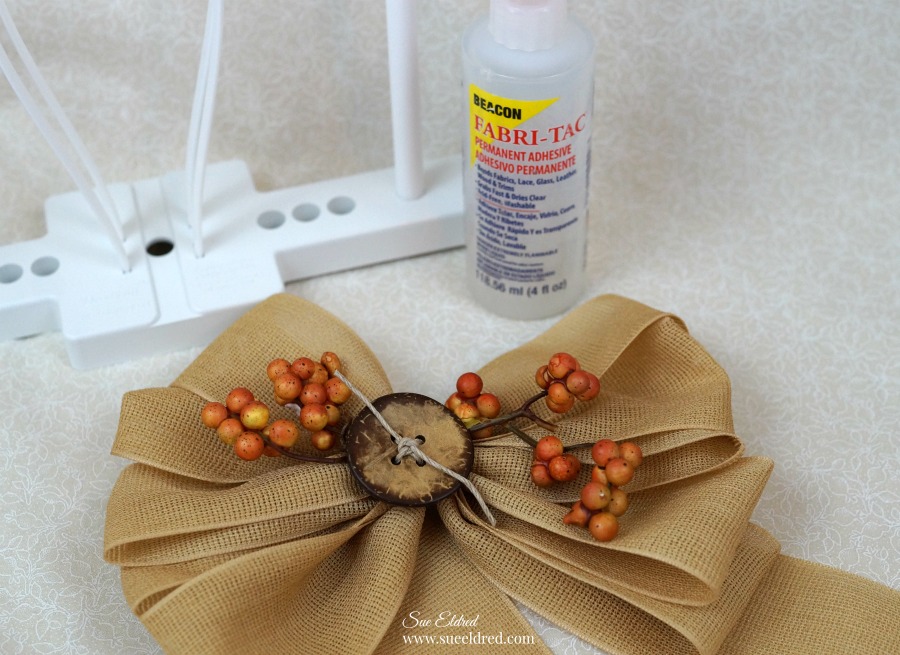
Glue a Big Wood Button to the center of the bow with Fabri-Tac Permanent Adhesive*.

A Quick and Easy way to add a Big Beautiful Bow to a simple wreath.

The Bowmaker is adjustable and great for weddings, parties, birthdays, holidays and more.

For more DecoFun Bowmaker projects click here.

*Disclaimer:  This post uses ads and affiliate links.  If you choose to make a purchase using one of the links, I receive a small commission (at no additional cost to you) that helps offset the costs of maintaining this blog.  Thanks for your support!

Try Amazon Prime 30-Day Free Trial

Sue and Nick’s Deflecto Craft Caddy Challenge

Deflecto Craft Caddy Challenge…

When I worked in the Deflecto Booth last January at the Creativation Show,

each day of the show Deflecto held a Craft Caddy Challenge.

The challenge was to see who could fill their craft caddy the fastest.

It quickly became extremely competitive.  (but fun!)

The challenge looked like so much fun, I decided to create one of my own.

Of course, I wanted to race someone closer to my own speed.

Nick enjoyed the caddy challenge so much that when my nieces came over to swim later,

he challenged them.  He was a lot faster by then.

Here’s a quick video I made last year showing all the features of the caddy.


The Deflecto Caddy Organizer* is made by Deflecto Craft Solutions are available at Amazon

and now in Target Stores.

 “This is a sponsored post. As a member of the Deflecto Design Team I have been provided product in exchange for my creative ideas, views and opinions.”

Shop Amazon Scrapbooking Supplies*

Disclaimer:  This blog uses ads and affiliate links.  If you choose to make a purchase using one of the links, I receive a small commission (at no additional cost to you) that helps offset the costs of maintaining this blog.  Thanks for your support!

Sharing the Adornit Love…

As my time as an Adornit Ambassador comes to a close at the end of this month…

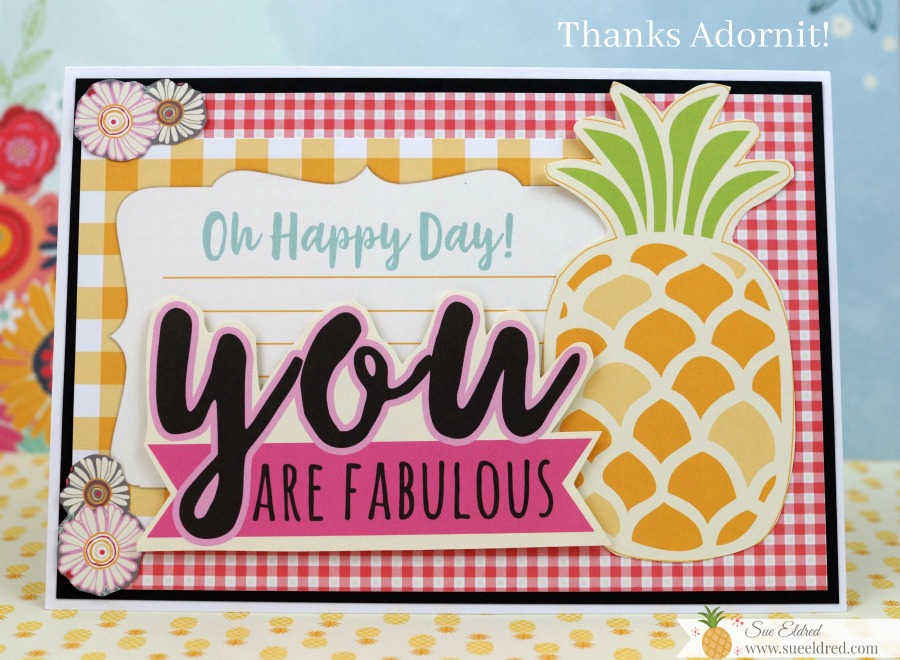
I wanted to make them a card to let them know how I feel.

Working with them the last few months has been a fun and positive experience.

Thanks, Adornit for the opportunity to work with your wonderful products.

FYI…the card was made with Adornit’s Flamingo Fever Collection.)

Try Amazon Prime 30-Day Free Trial

Disclaimer:  This blog uses ads and affiliate links.  If you choose to make a purchase using one of the links, I receive a small commission (at no additional cost to you) that helps offset the costs of maintaining this blog.  Thanks for your support!

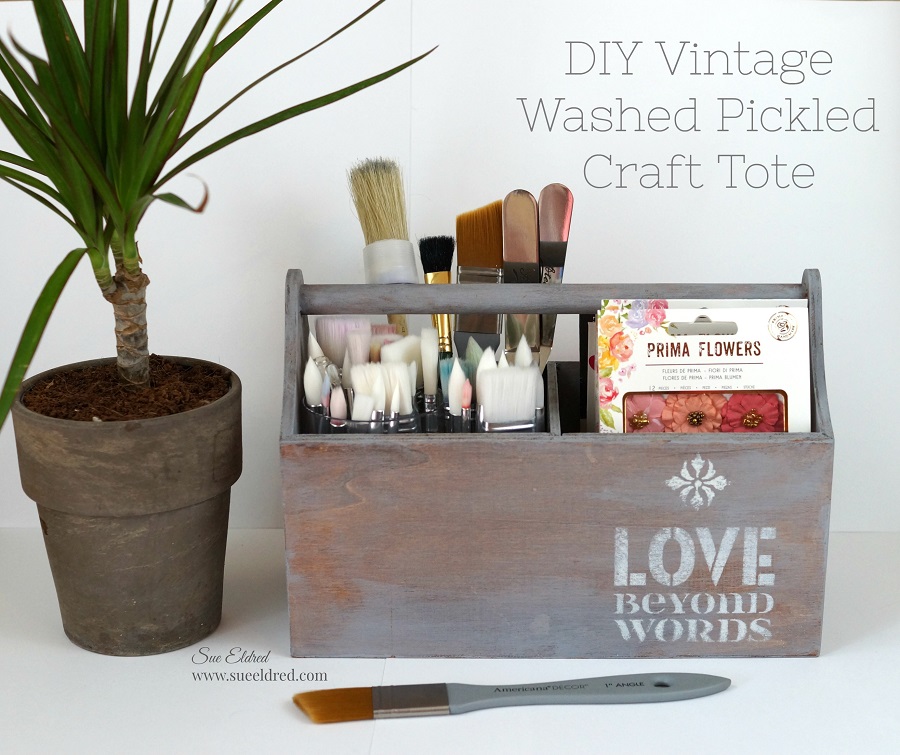
How to Create an Easy Pickled Finish with Vintage Effect Wash

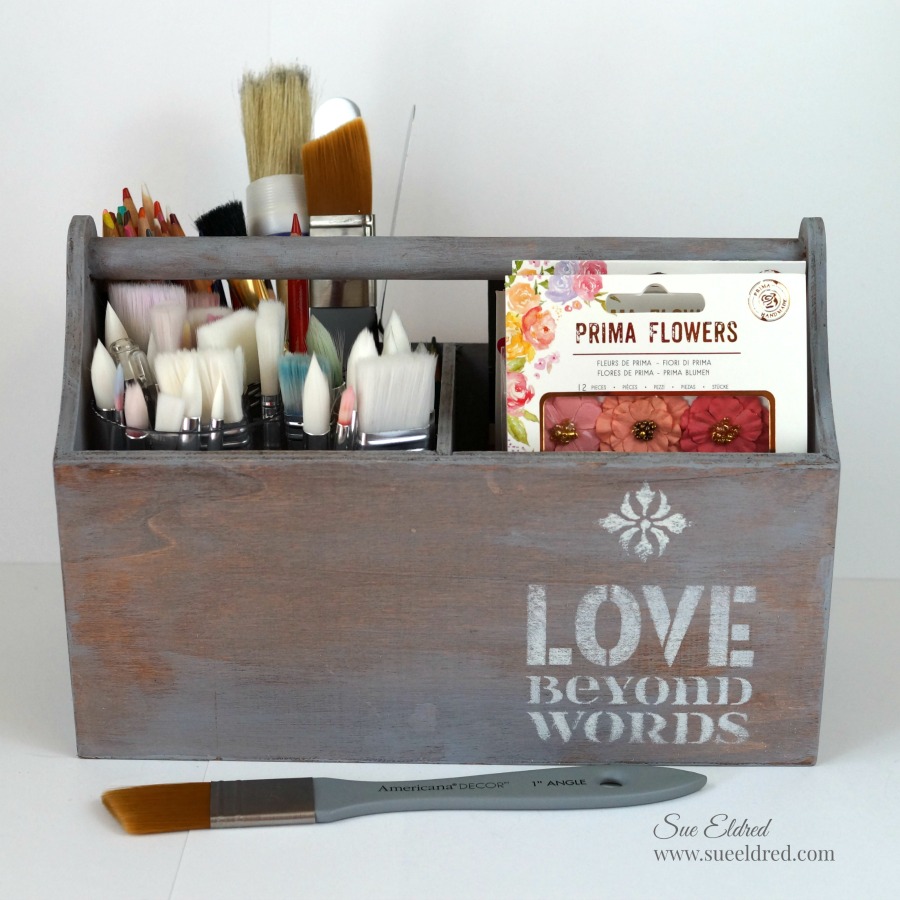
How to create an Easy Pickled Finish with Vintage Effect Wash from Deco Arts.

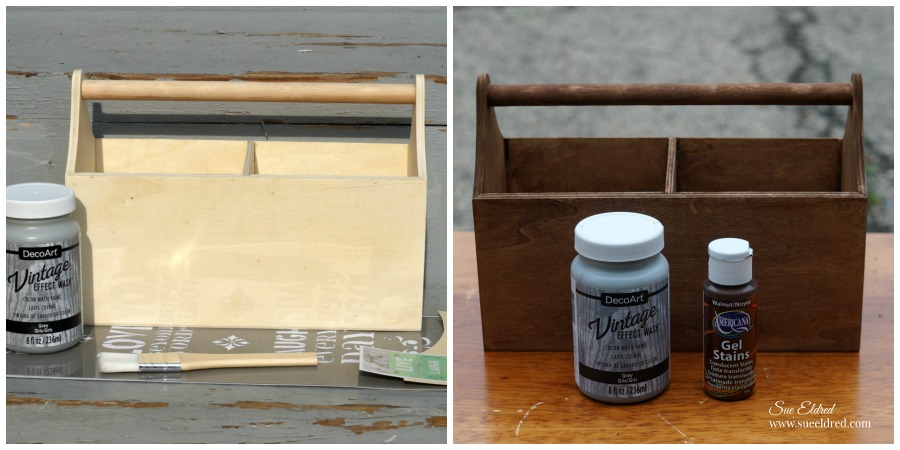
I had this unfinished wood tote that I wanted to use the new Vintage Effect Wash on.

My first thought was to just give the tote a cool white wash using the paint.

But after further thought and a little experimentation, I decided to warm up the look by

staining it with a Walnut Gel Stain first.  I love the way it turned out.

This would make a great garden tool holder, picnic caddy, or my favorite…a Craft Tote.

DIY Pickled Crate

Supplies Used:                (*affiliate link)

 Directions:

  1. Lightly sand the wood crate if necessary.
  2. Paint or brush crate with DecoArt Americana Walnut Gel Stains Paint*.
  3. Rub off excess stain with soft clean rag.  Allow stain to dry.
  4. Apply Decoart Vintage Effect Wash Grey* onto crate with brush allowing the stain to show through.   Wipe with clean soft rag if necessary.  (It’s that easy!)
  5. If desired, add stenciling onto the crate.
  6. Apply a sealer to protect the finish.

The Love Beyond Words Pickled Crate was sponsored by DecoArts.

Try Amazon Prime 30-Day Free Trial

Disclaimer:  This blog uses ads and affiliate links.  If you choose to make a purchase using one of the links, I receive a small commission (at no additional cost to you) that helps offset the costs of maintaining this blog.  Thanks for your support!
Painting Basics

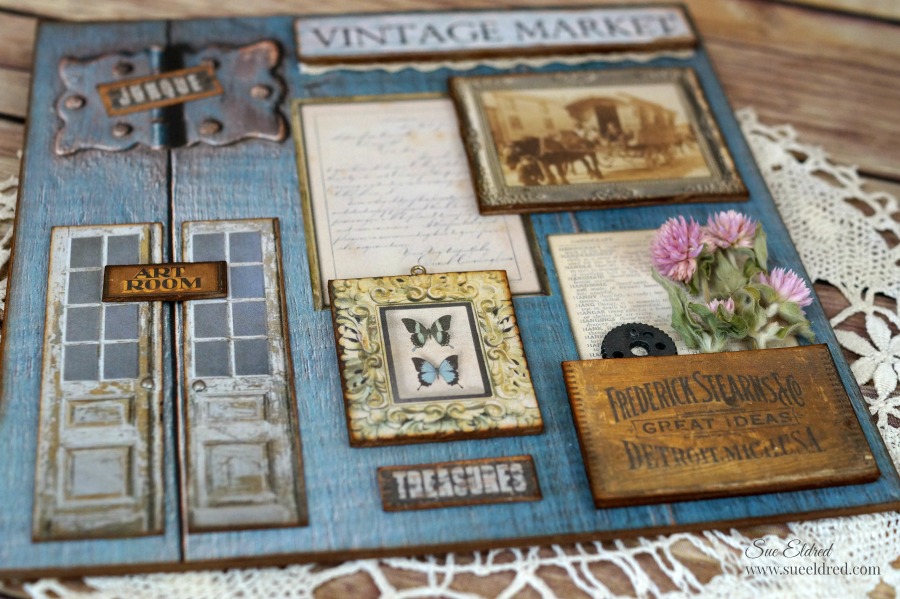
Architextures Vintage Market Collage

Vintage Market Collage

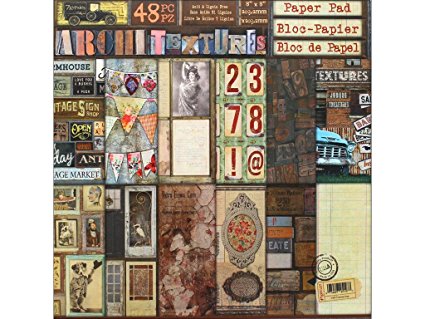
I had so much fun playing around with the 7 Gypsies Architext Paper Pad*

It’s my new favorite.  It reminds me of going to the Flea Market with my daughter.

So much Vintage Goodness.

The project was basically put together with paper, glue and chipboard.

To begin…I glued the background paper to a thick piece of chipboard for stability.

I can easily add it to an 8″ x 8″  frame later if I want too.

I added several layers of chipboard on the back of each of the images to give dimension.

I also aged each piece by rubbing Vintage Photo Distress Ink* to the edges using a

Ink Blending Tool*.    (*amazon affiliate link)

My favorite piece is the vintage crate.  I added the second layer of chipboard with three small

strips, so that I could leave an opening on the top to add dried flowers from last years garden.

So realistic, it looks like a teeny tiny crate.  I just love it.


                  7 Gypsies Architextures Paper Pad

The Architextures™ Paper Collection was inspired by the all the wonder of found objects, displays, signs, sayings, artwork, creative bliss and sheer beauty found at vintage fairs, flea markets, salvage yards, barn sales, antique shops, old book stores, garage sales, market days and more.

Such a fun collection.  Makes me want to go treasure hunting.

Notice the 7 Gypsies Mini Library Drawer* in the background of the picture?    (so stinkin cute)

The Vintage Market Collage was sponsored by Canvas Corp Brands.

Shop Your Fav Brands at Scrapbook.com

Disclaimer:  This blog uses ads and affiliate links.  If you choose to make a purchase using one of the links, I receive a small commission (at no additional cost to you) that helps offset the costs of maintaining this blog.  Thanks for your support!

 

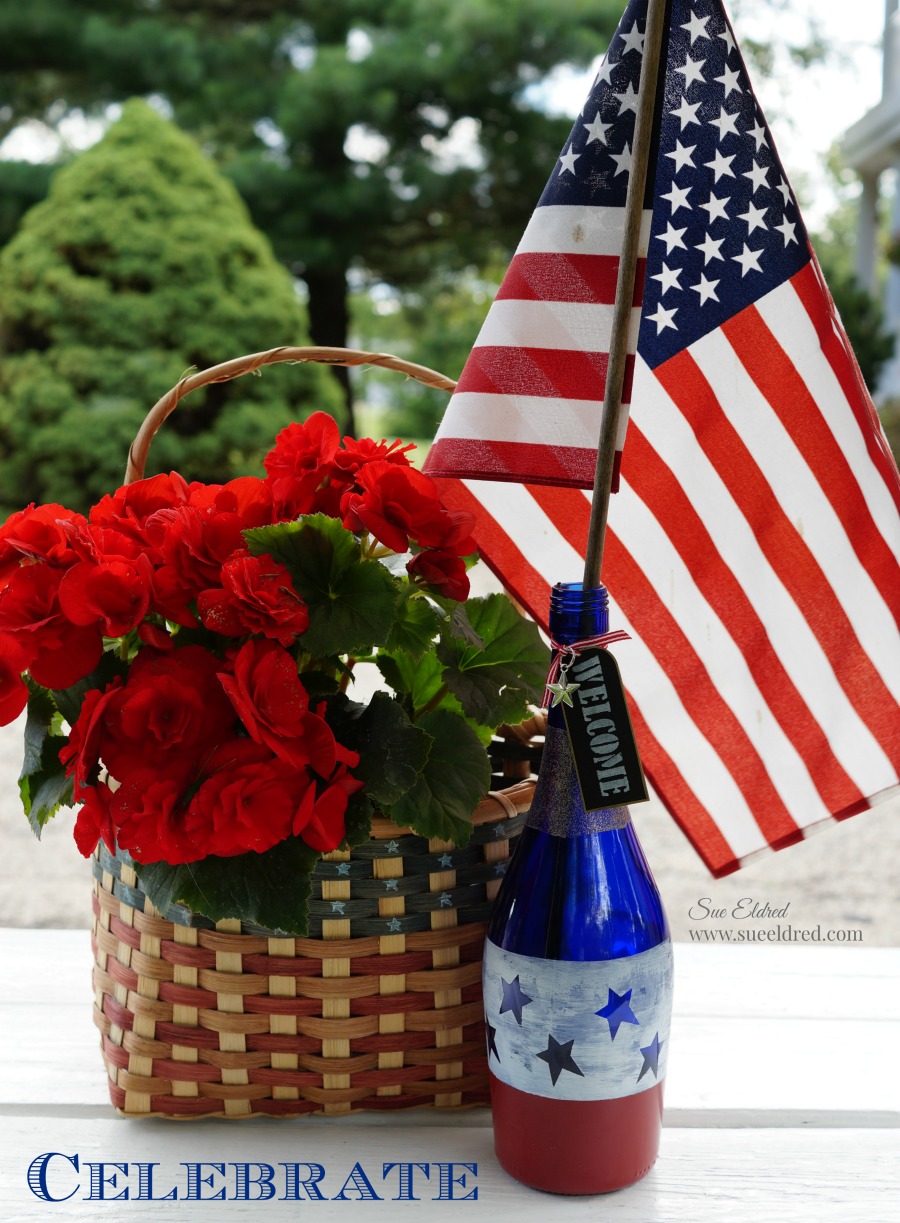
How to make a Patriotic Red, White and Blue Etched Wine Bottle

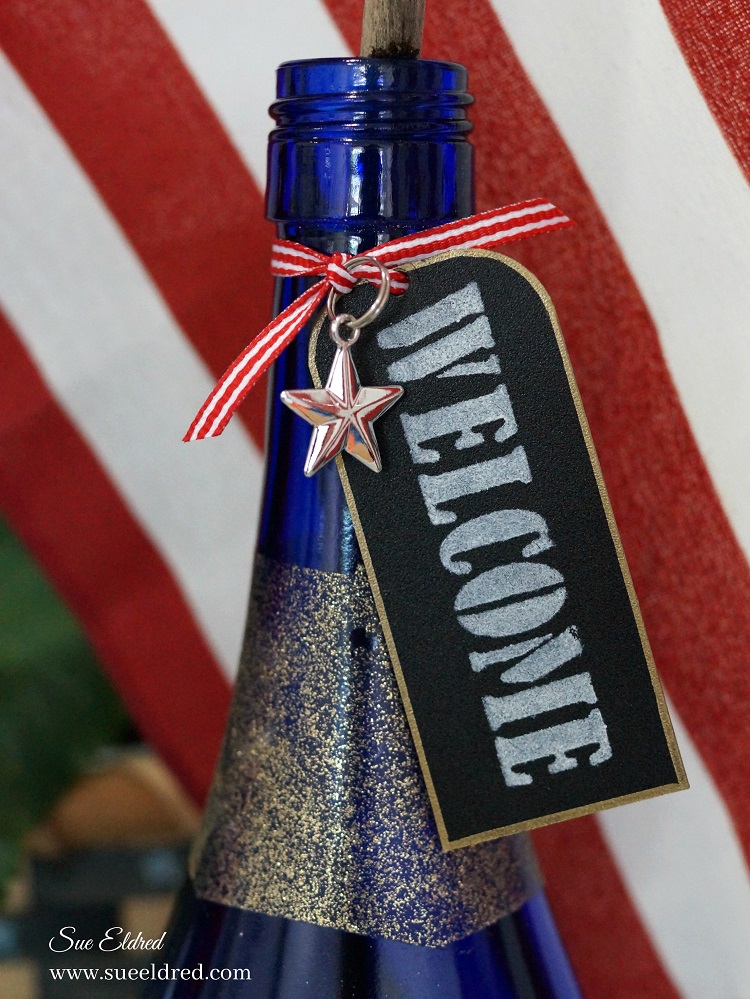
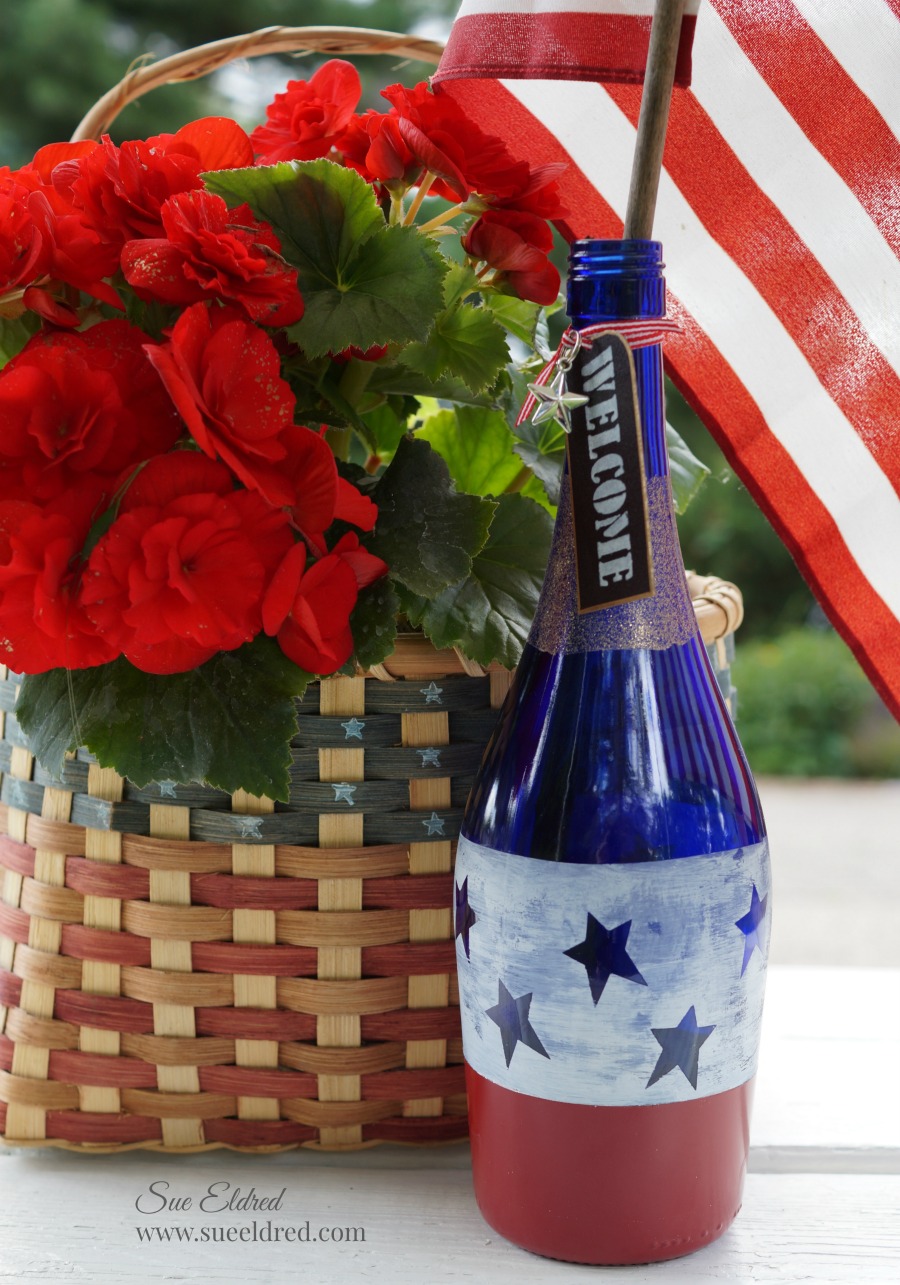
Celebrate the holidays with a Red, White and Blue Etched Wine Bottle.

I’m getting ready for a Americana Crafternoon this week-end with a fun group of ladies

and thought I’d make up a few decorations.  As luck would have it, I just happened to

have an empty blue wine bottle.   I thought to myself, that would make a perfect vase.

I added red flowers to a 50 cent Garage Sale-Flag Basket and now I have a festive display.

Shop Dollar Tree for Red White & Blue Party Supplies*                      (*affiliate link)

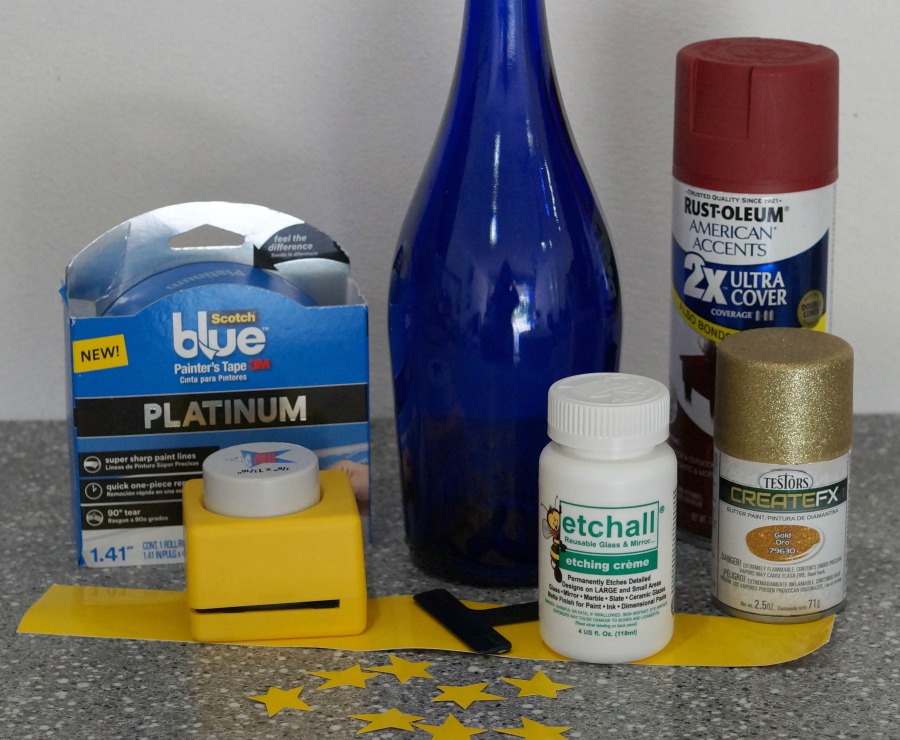
To make the Red, White and Blue Etched Wine Bottle I used…             (*amazon affiliate links)

Directions:

  1.  Clean and remove the label off a blue glass wine bottle with warm soapy water.  (Dry)


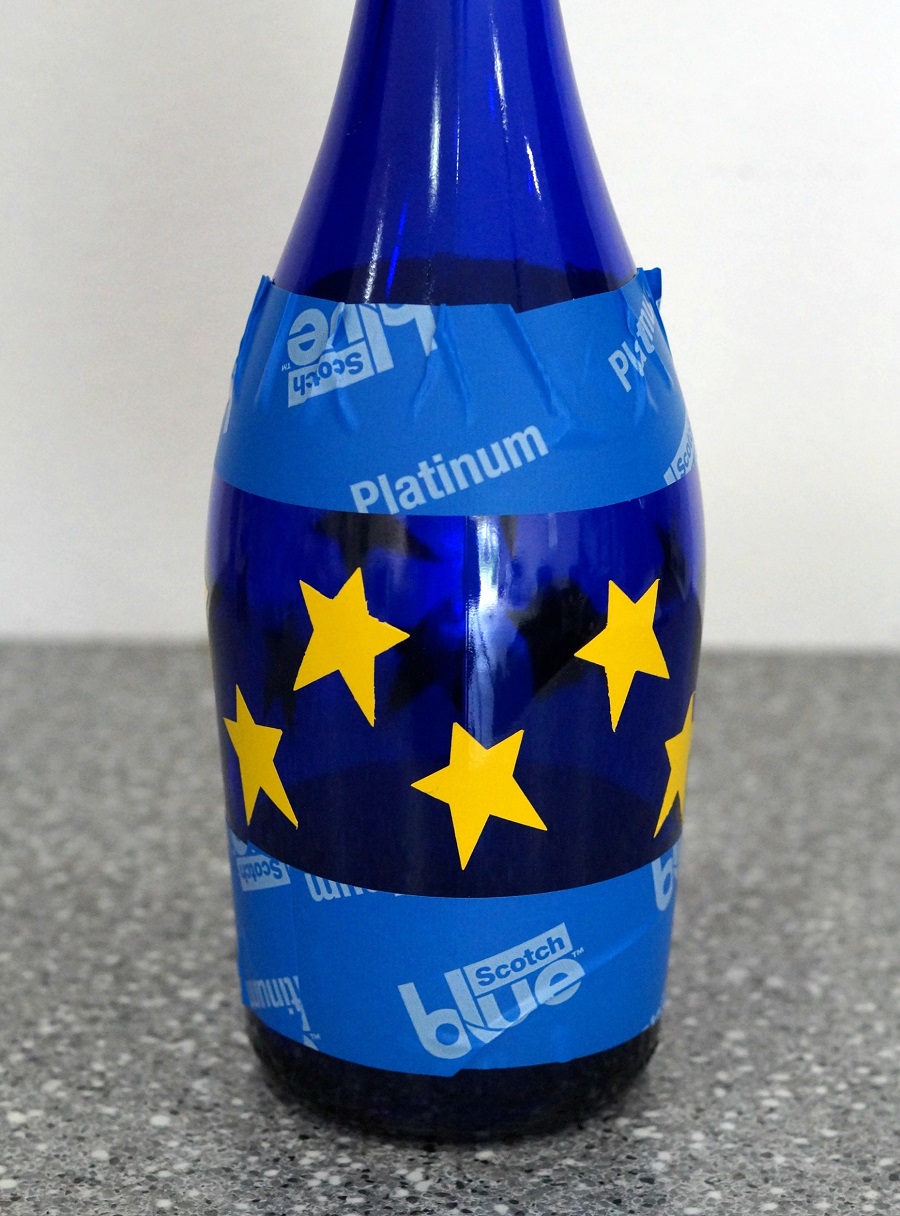
2.  Mask off a 2 ½ to 3 inch section on the center of the wine bottle with blue painter’s tape.  Burnish the edges of the tape with your fingertip, the tape should lay flat against the bottle.

3.  Punch stars out of the etchall etchmask*.  Remove backing from the stars and stick randomly on the bottle.  Burnish the stars with your fingertips onto the bottle.

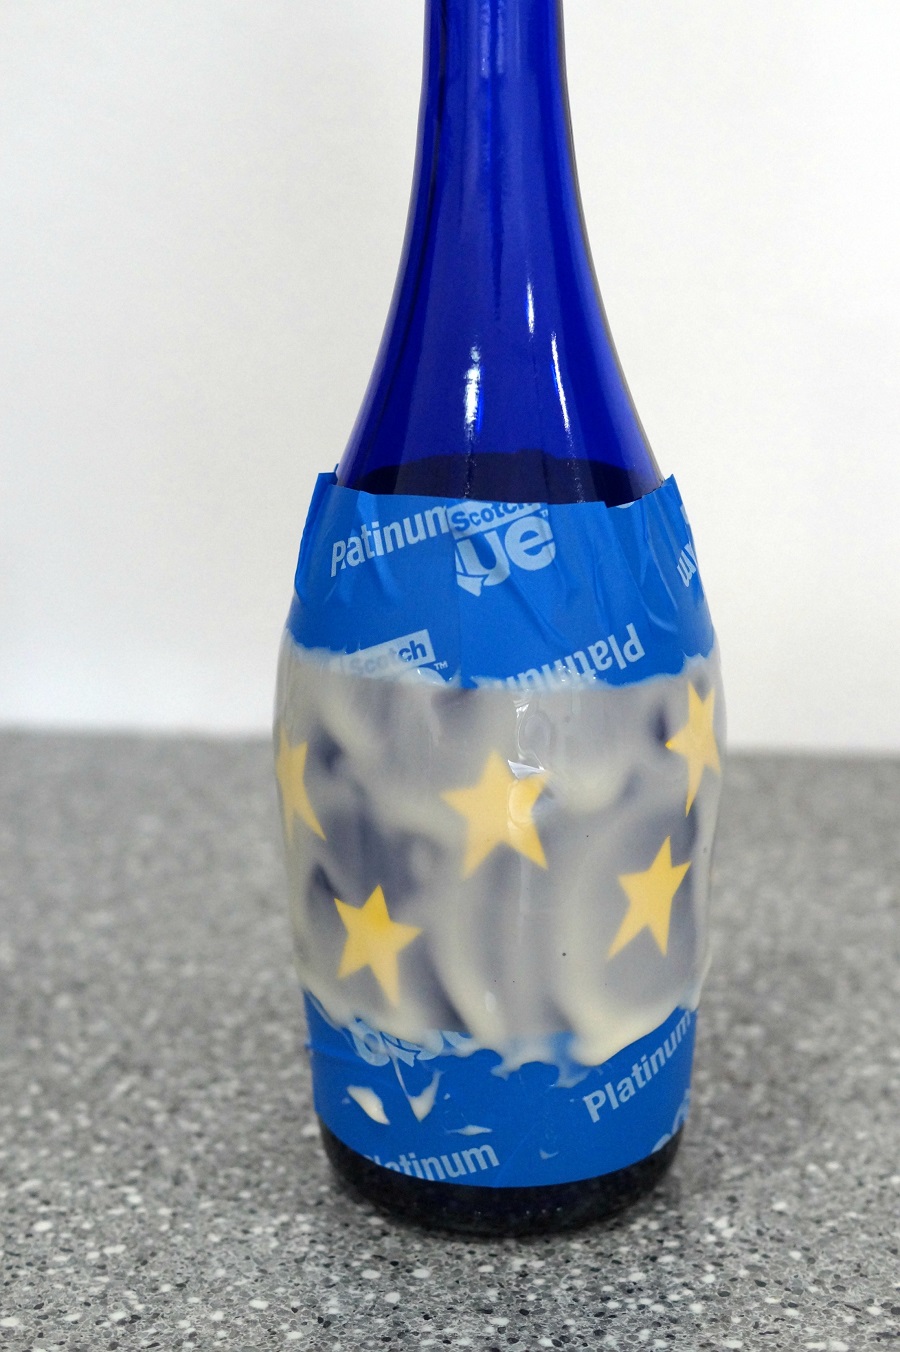
4.  Apply a heavy coat of etchall Etching Crème*   onto the bottle using the squeegee.

5.  Let crème sit for 15 minutes.  (You will need to keep an eye on the bottle to make sure etching crème doesn’t run past the blue painter’s tape.)  Scrape excess etching crème from the bottle and return the extra etching crème back into the bottle. It’s reusable.

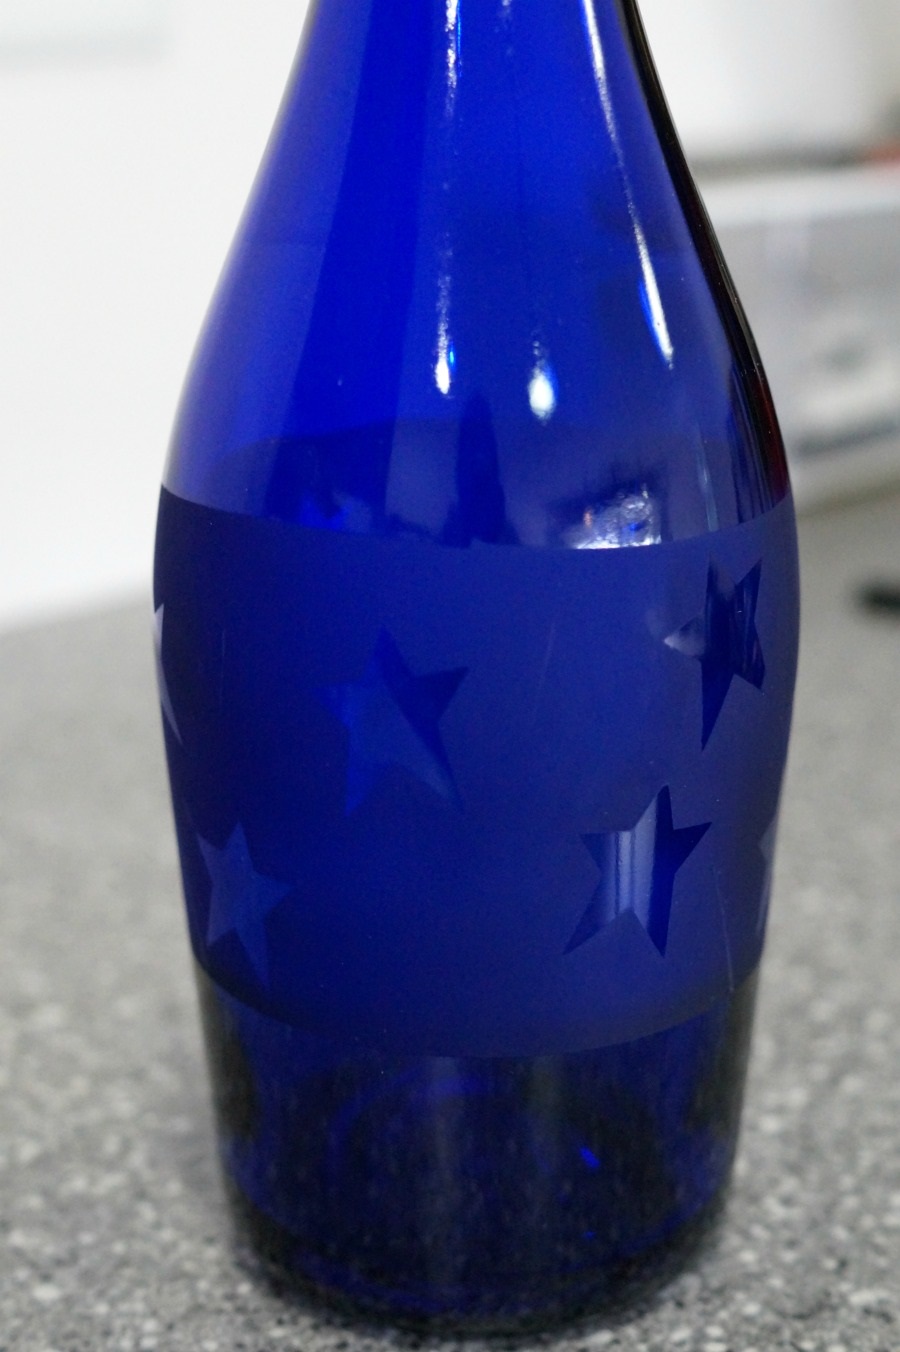
6.  Rinse bottle with warm water to clean.  Remember to keep crème away from porcelain or ceramic tiles.  Remove tape and stars and dry.  The bottle will have a nice subtle etching.

7.  While I liked the subtle look… I decided I wanted something a little bit brighter for my patriotic bottle.   I dried brushed white acrylic paint over the etched surface.  Wipe off excess paint with a damp cloth for a white washed look.  The paint only sticks to the etched surface.  (How cool it that.)  It really makes the stars pop.

8.  Re-mask the bottle with the blue painter’s tape, this time covering the etched surface.  Paint the bottom of the bottle with the colonial red spray paint.

10.  Mask a small section on the top of the bottle and spray with gold spray paint.

11.  Cut a small black vinyl rectangle and round two of the corners with the corner punch.

12.  Stencil the word “welcome” from the family words stencil onto the black vinyl using a stencil brush and the multi-surface acrylic paint.

13.  Use the gold paint pen to add a thin border around the black vinyl tag.  Punch a small hole on the top of the tag and tie onto the neck of the bottle with ribbon.

Enjoy the party with friends.  (maybe even empty another blue wine bottle)


Don’t Miss a Thing…Make Sure to Follow me.

Shop Your Fav Brands at Scrapbook.com

Disclaimer:  This blog uses ads and affiliate links.  If you choose to make a purchase using one of the links, I receive a small commission (at no additional cost to you) that helps offset the costs of maintaining this blog.  Thanks for your support!
How to make a Floral Chalkboard

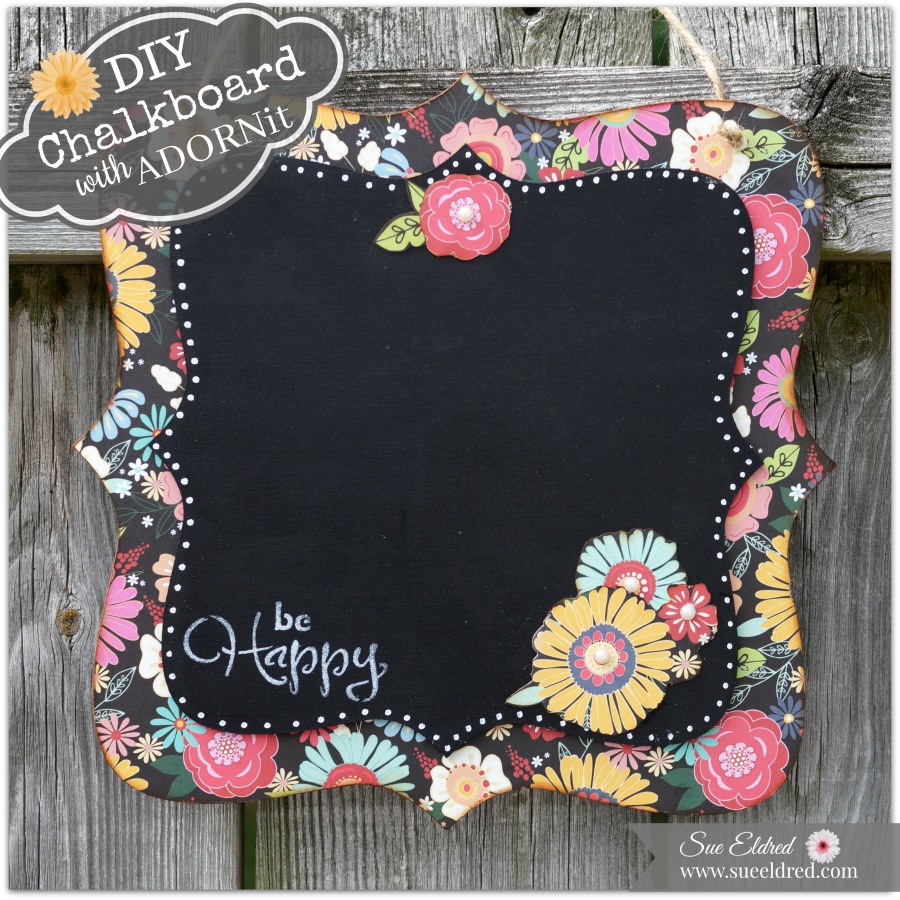
DIY Chalkboard with Adornit…

The Floral Chalkboard makes a fun decorative Home Décor piece and is really easy to make.

To make the Floral Chalkboard you’ll need…        (*affiliate links)

Shop Your Fav Brands at Scrapbook.com

Directions:

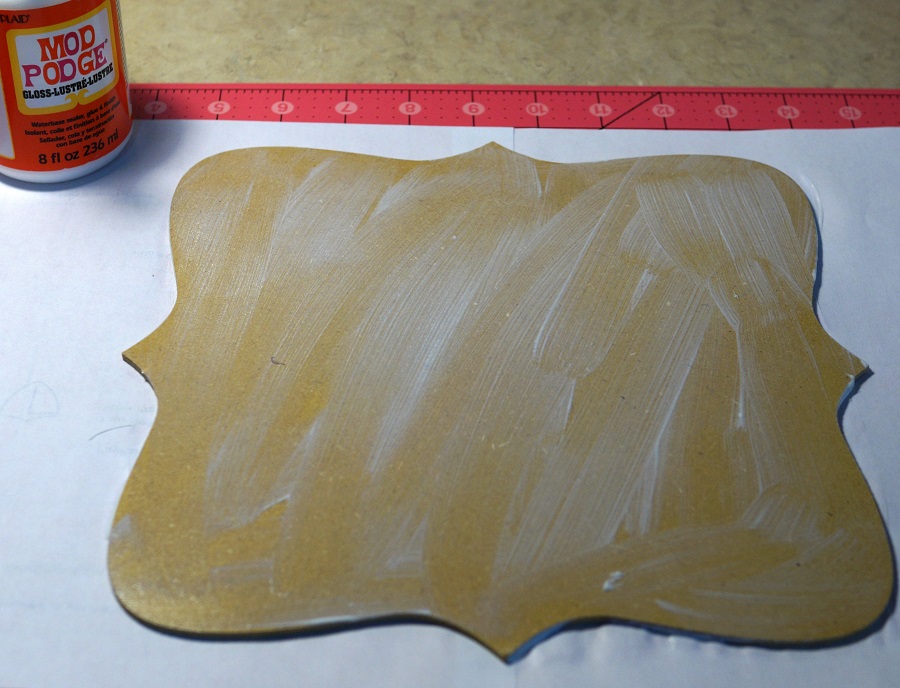
  1. Apply an even coat of Mod Podge* over the larger Wood Bracket shape.  Lay decorative scrapbook paper over shape and smooth with your hand.

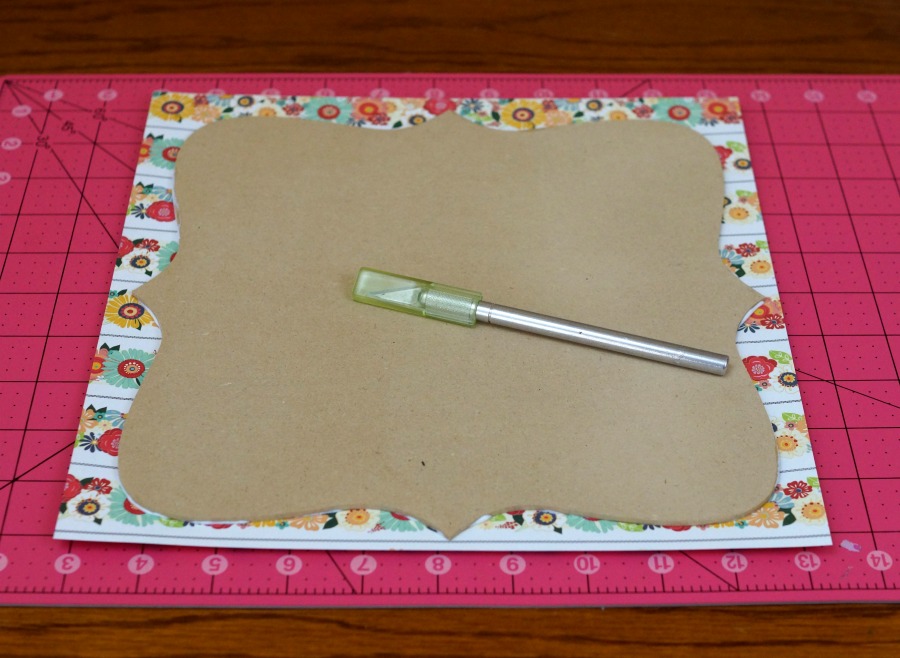
2.  Using an x-acto knife and cutting mat, cut excess paper away from the Wood Bracket.

3.  Rub Vintage Photo Distress Ink*onto the outside edges of the wood shape using the Ink Blending Tool*.

4.   Paint the smaller wood shape with the Black Chalkboard Paint*.  Add small white dots around the outside of the wood shape with the white paint marker*.

5.  Stencil the words “be Happy” onto the chalkboard using white acrylic paint and the Deco Art Americana Decor Stencil, Inspiration*.

6.  Cut a few flower shapes using the second sheet of scrapbook paper.  Apply a thin coat of Mod Podge* to the back of the flowers and glue to the front of the chalkboard.  Add decorative pearl embellishments to the inside of the flowers.

7.  Glue chalkboard to the front of the floral base using Beacon’s Quick Grip All-Purpose Permanent Adhesive*.

8.  Drill two holes on the top of the chalkboard and add Twine* for hanging.


This Chalkboard was sponsored by Adornit as an“it girl” Ambassador.

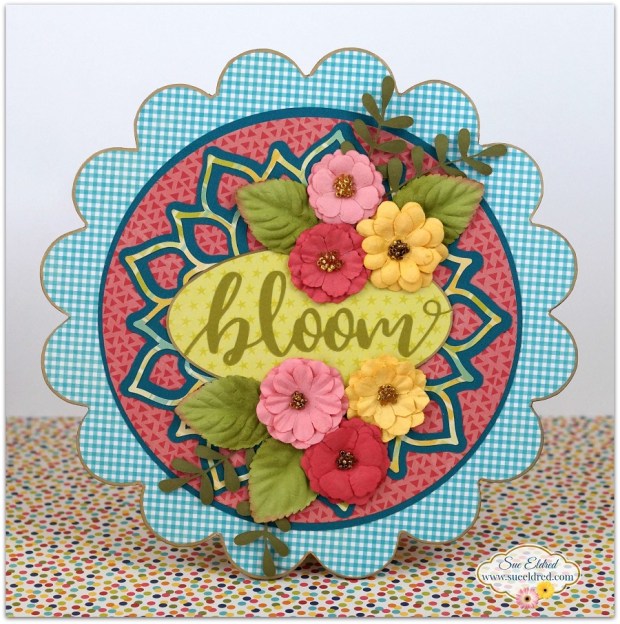
If you liked the Floral Chalkboard, you might also like the DIY Bloom Floral Plaque.

You can see the full tutorial here.


Don’t Miss a Thing…Make Sure to Follow me

Shop Amazon Scrapbooking Supplies*

*Disclosure:  This blog uses ads and affiliate links.  If you choose to make a purchase using one of the links, I receive a small commission (at no additional cost to you) that helps offset the costs of maintaining this blog.  Thanks for your support!
 

Heartbreaker Sweatshirt

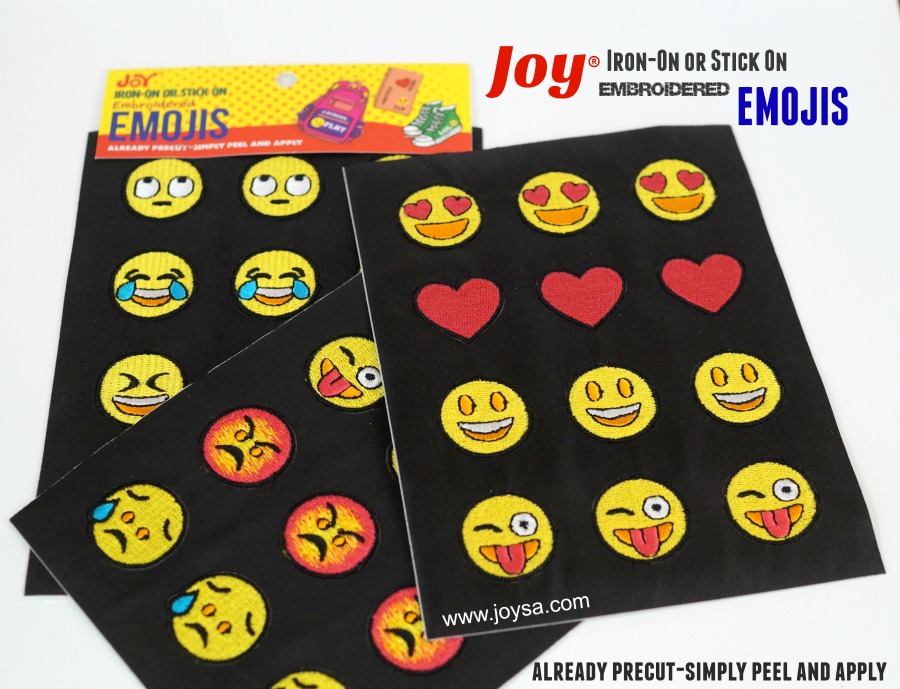
My teenage son was intrigued when I showed him my stack of new Emoji iron-on patches.

“Can I use one?”,  he asked.

Curious to what was in his head, I said “yes” on one condition.

He had to let me photograph what ever he made.  (He agreed.)

After deciding  on the perfect placement, he even ironed on the patches himself.

I have to admit it turned out real cute.

Ask for Emoji iron-on patches at your local craft store.

 *As a member of the Creating with Joy Design Team, this post was sponsored by JOY® SA.

DIY a Colorful Garden Chair for your Gnome

diy-a-colorful-garden-chair-for-your-gnome-2

A Colorful Chair for Colorful Little Gnome…

Every year around this time, my Grandson and I start making our mini gardens.

It’s our special annual tradition.

Last year, we added a Gnome named Mr. Elfsnail.

This year, I decided to create a chair for him to sit on while working in the garden.

We take our gardening seriously.   Read about Mr. Elfsnail’s garden.

For Mr. Elfsnails chair…

I found this cute little wooden chair in the toy area of Dollar Tree and knew it’d be a cute

mini garden chair for my gnome.

How to make a Colorful Gnome Chair

Supplies Used:
  • Miniature Wood Doll Chair
  • DecoArt Americana Paint:  Watermelon Slice, Marigold, Olive Green
  • DecoArt Multi-Surface Satin Acrylic Paint:  Night Sky, Cotton Ball
  • Paint Brush
  • Sand Paper
  1. Lightly sand any rough spots off the chair.
  2. Paint the chair in a variety of colors.
  3. Create small flowers on the top of the chair by dipping the end of the paintbrush in paint and adding small dots as the petals.

Chair measures 3″ tall.

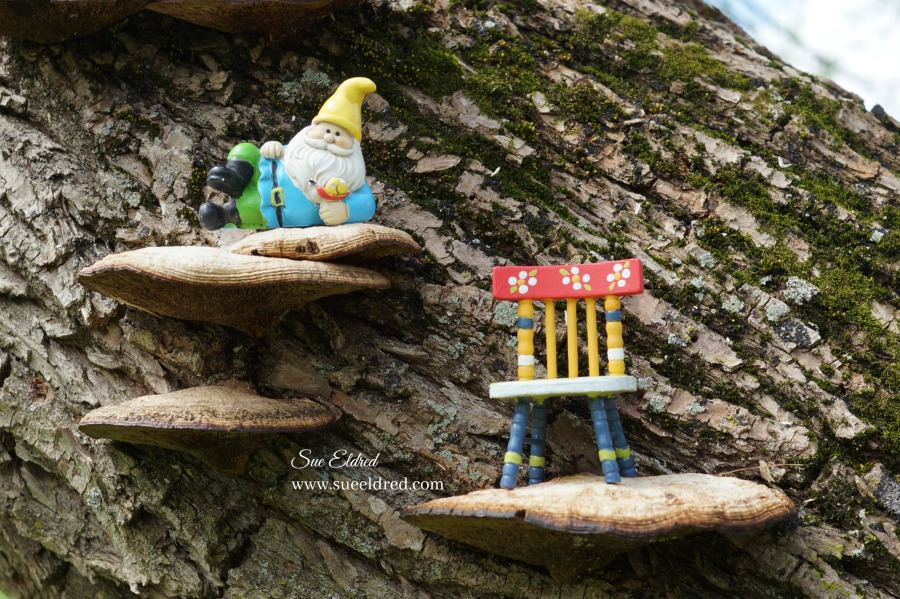
I might have even left it here (glued to the tree) if I didn’t think it’d drive the boys crazy.

A little fun and whimsy. 

For a dollar and some paint, it might be fun to let the boys paint a chair of their own.

For more summer fun… click on ad below ↓

Slimer

Disclaimer:  This blog uses ads and affiliate links.  If you choose to make a purchase using one of the links, I receive a small commission (at no additional cost to you) that helps offset the costs of maintaining this blog.  Thanks for your support!
Join Amazon Kindle Unlimited 30-Day Free Trial

Easy Photo Transfer on Wood Slices with Mod Podge

Easy DIY Photo Transfer project using Mod Podge Photo Transfer Medium…

I’ve used Mod Podge® several times over the years, but had never tried

Mod Podge Photo Transfer Medium*.     (*affiliate link)

I was surprised at how easy the process was and how well the project turned out.

For my project…

I used a color copy of my son in his favorite Woody pajamas and favorite Woody toy.

It’s hard to believe that this sweet faced boy is now graduating from High School.

I also used a wood slice from Walnut Hollow* for my project.

The wood slice had been previously kiln dried, sanded and was ready to use.

Directions:

  1. Do not use actual photographs, you must use photo copies made from a dry toner type copier.
  2. Lay wood slice over picture and trace around wood slice.  Cut around traced lines.
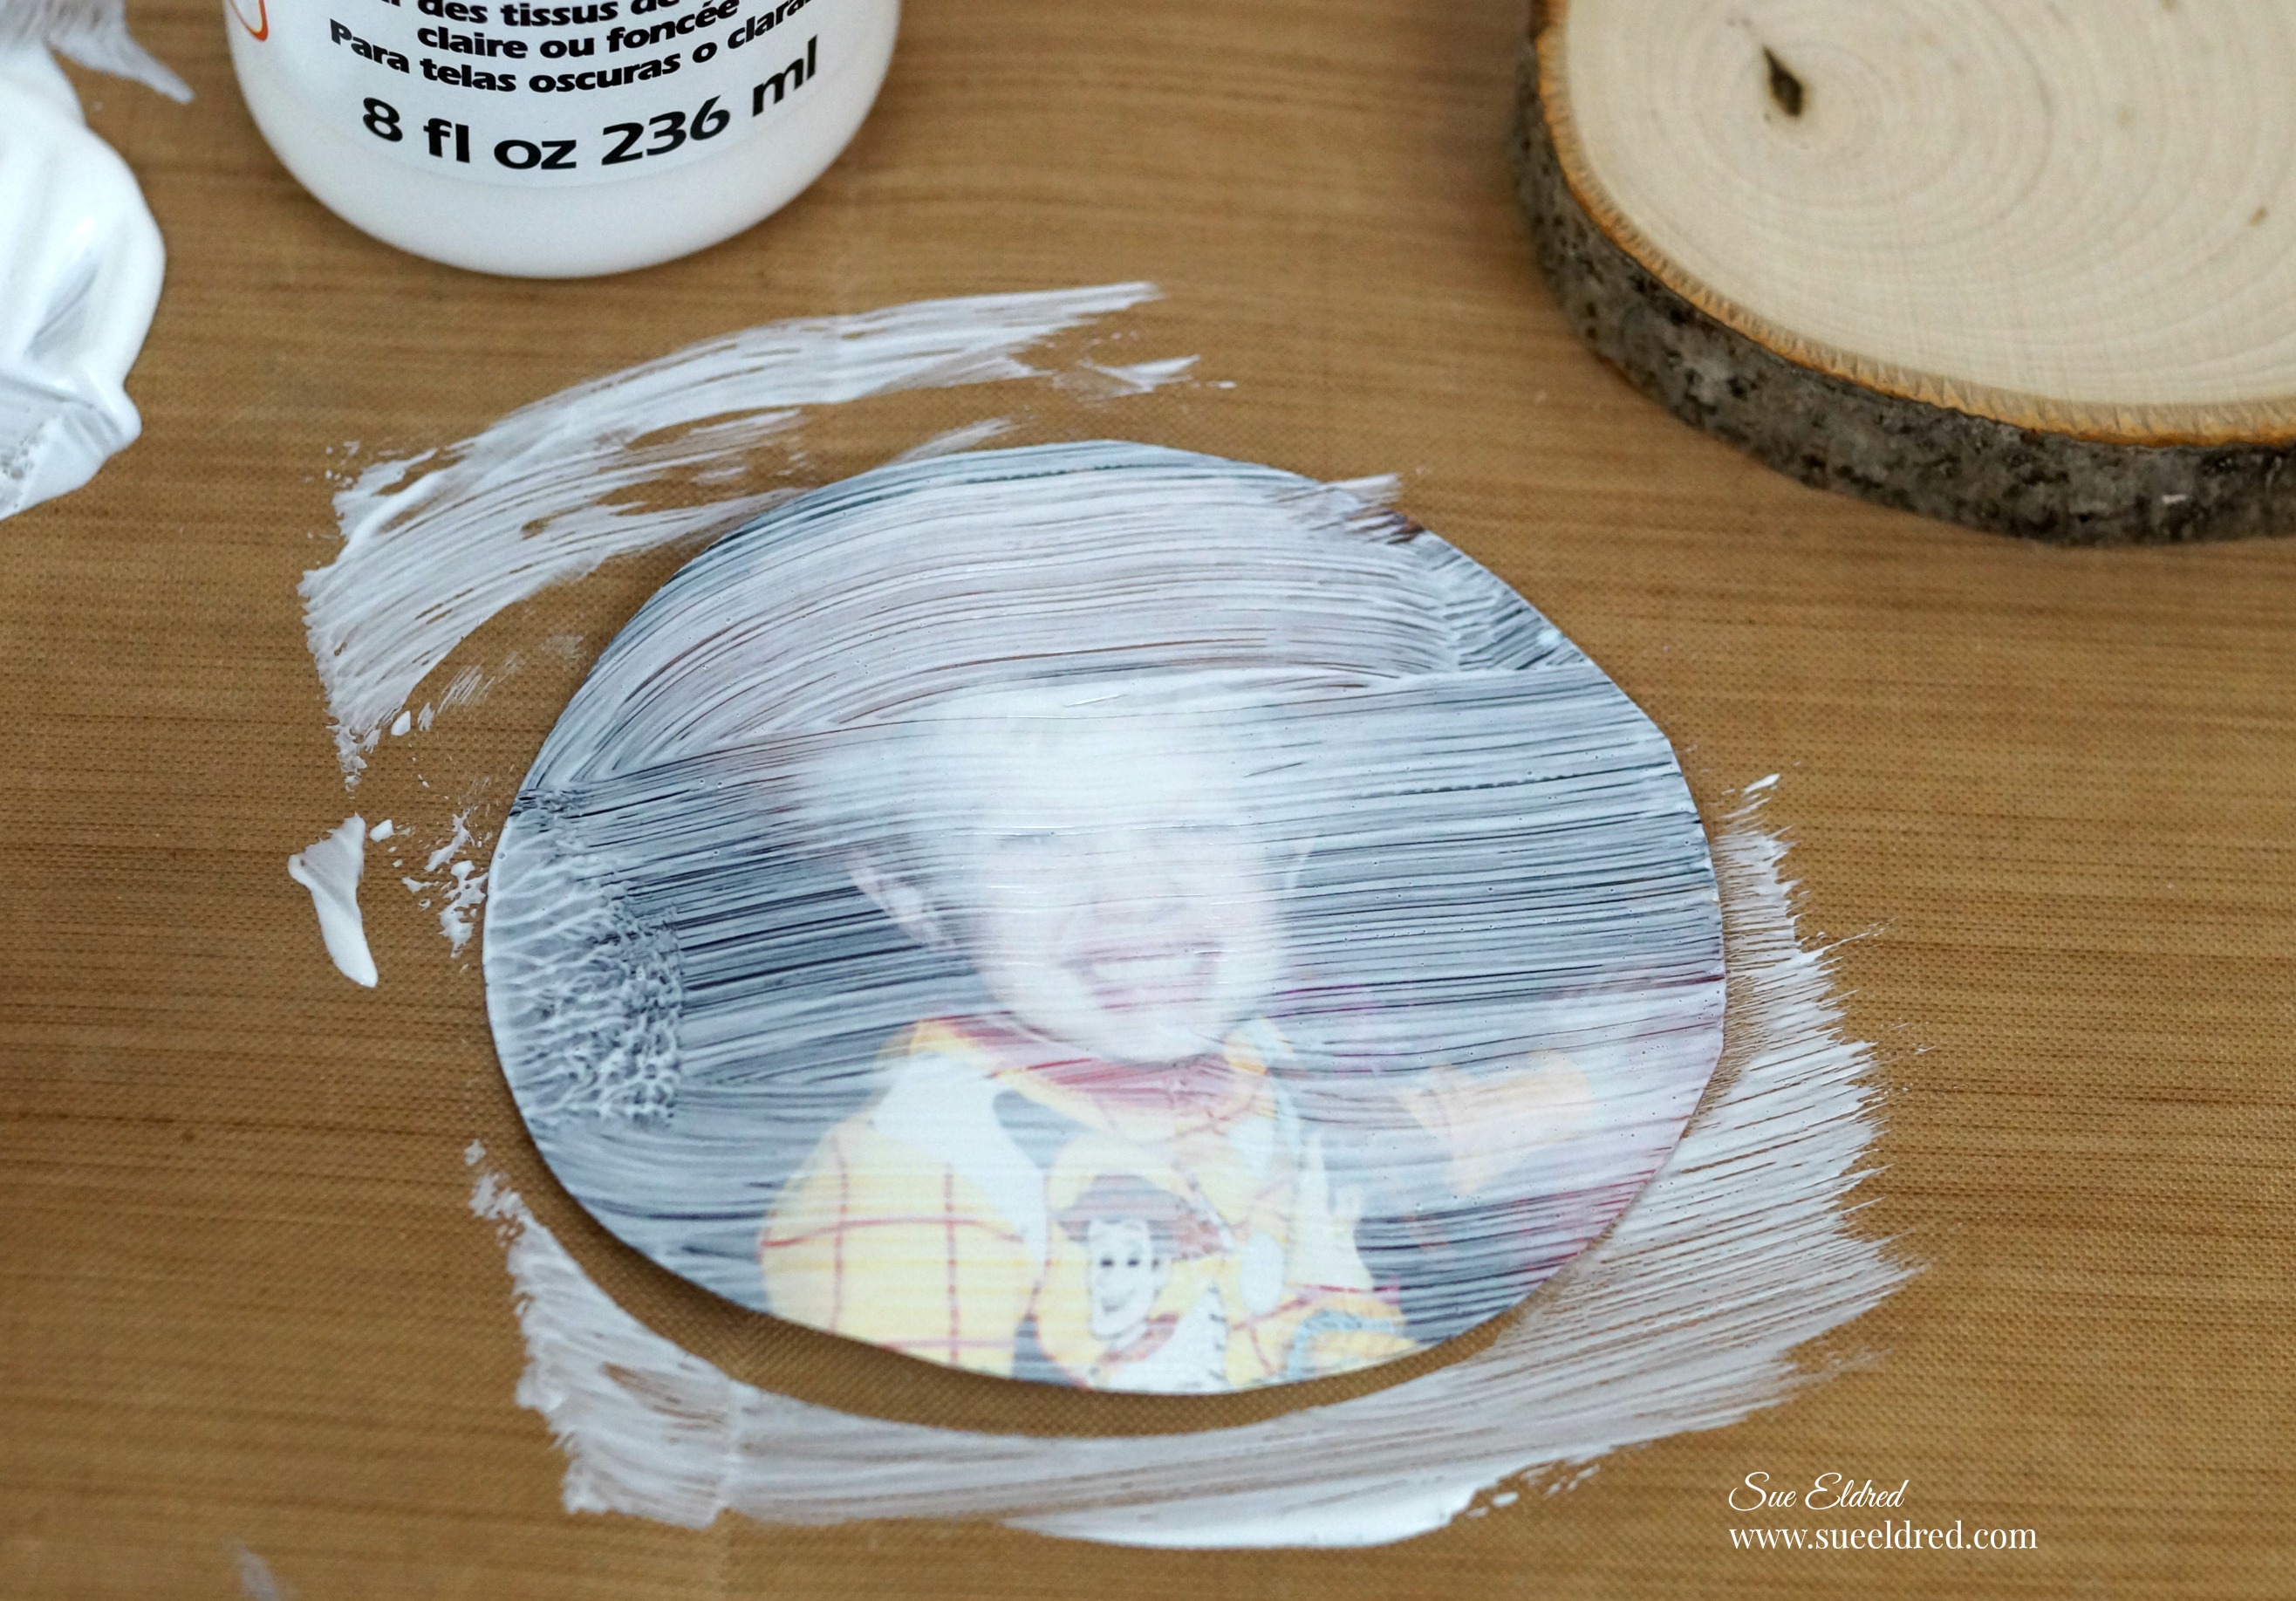
  3. Using a 1″ Foam Brush*, brush over image with a medium application of Mod Podge Photo Transfer Medium*. The medium will be opaque.
  4. Carefully lift image off, making contact only slightly with the image edge. Flip the coated image over and position over the wood slice.   Lightly press from the center out to release any air bubbles.   Wipe away any excess medium that may have been squeezed out from the image. Allow to dry overnight.
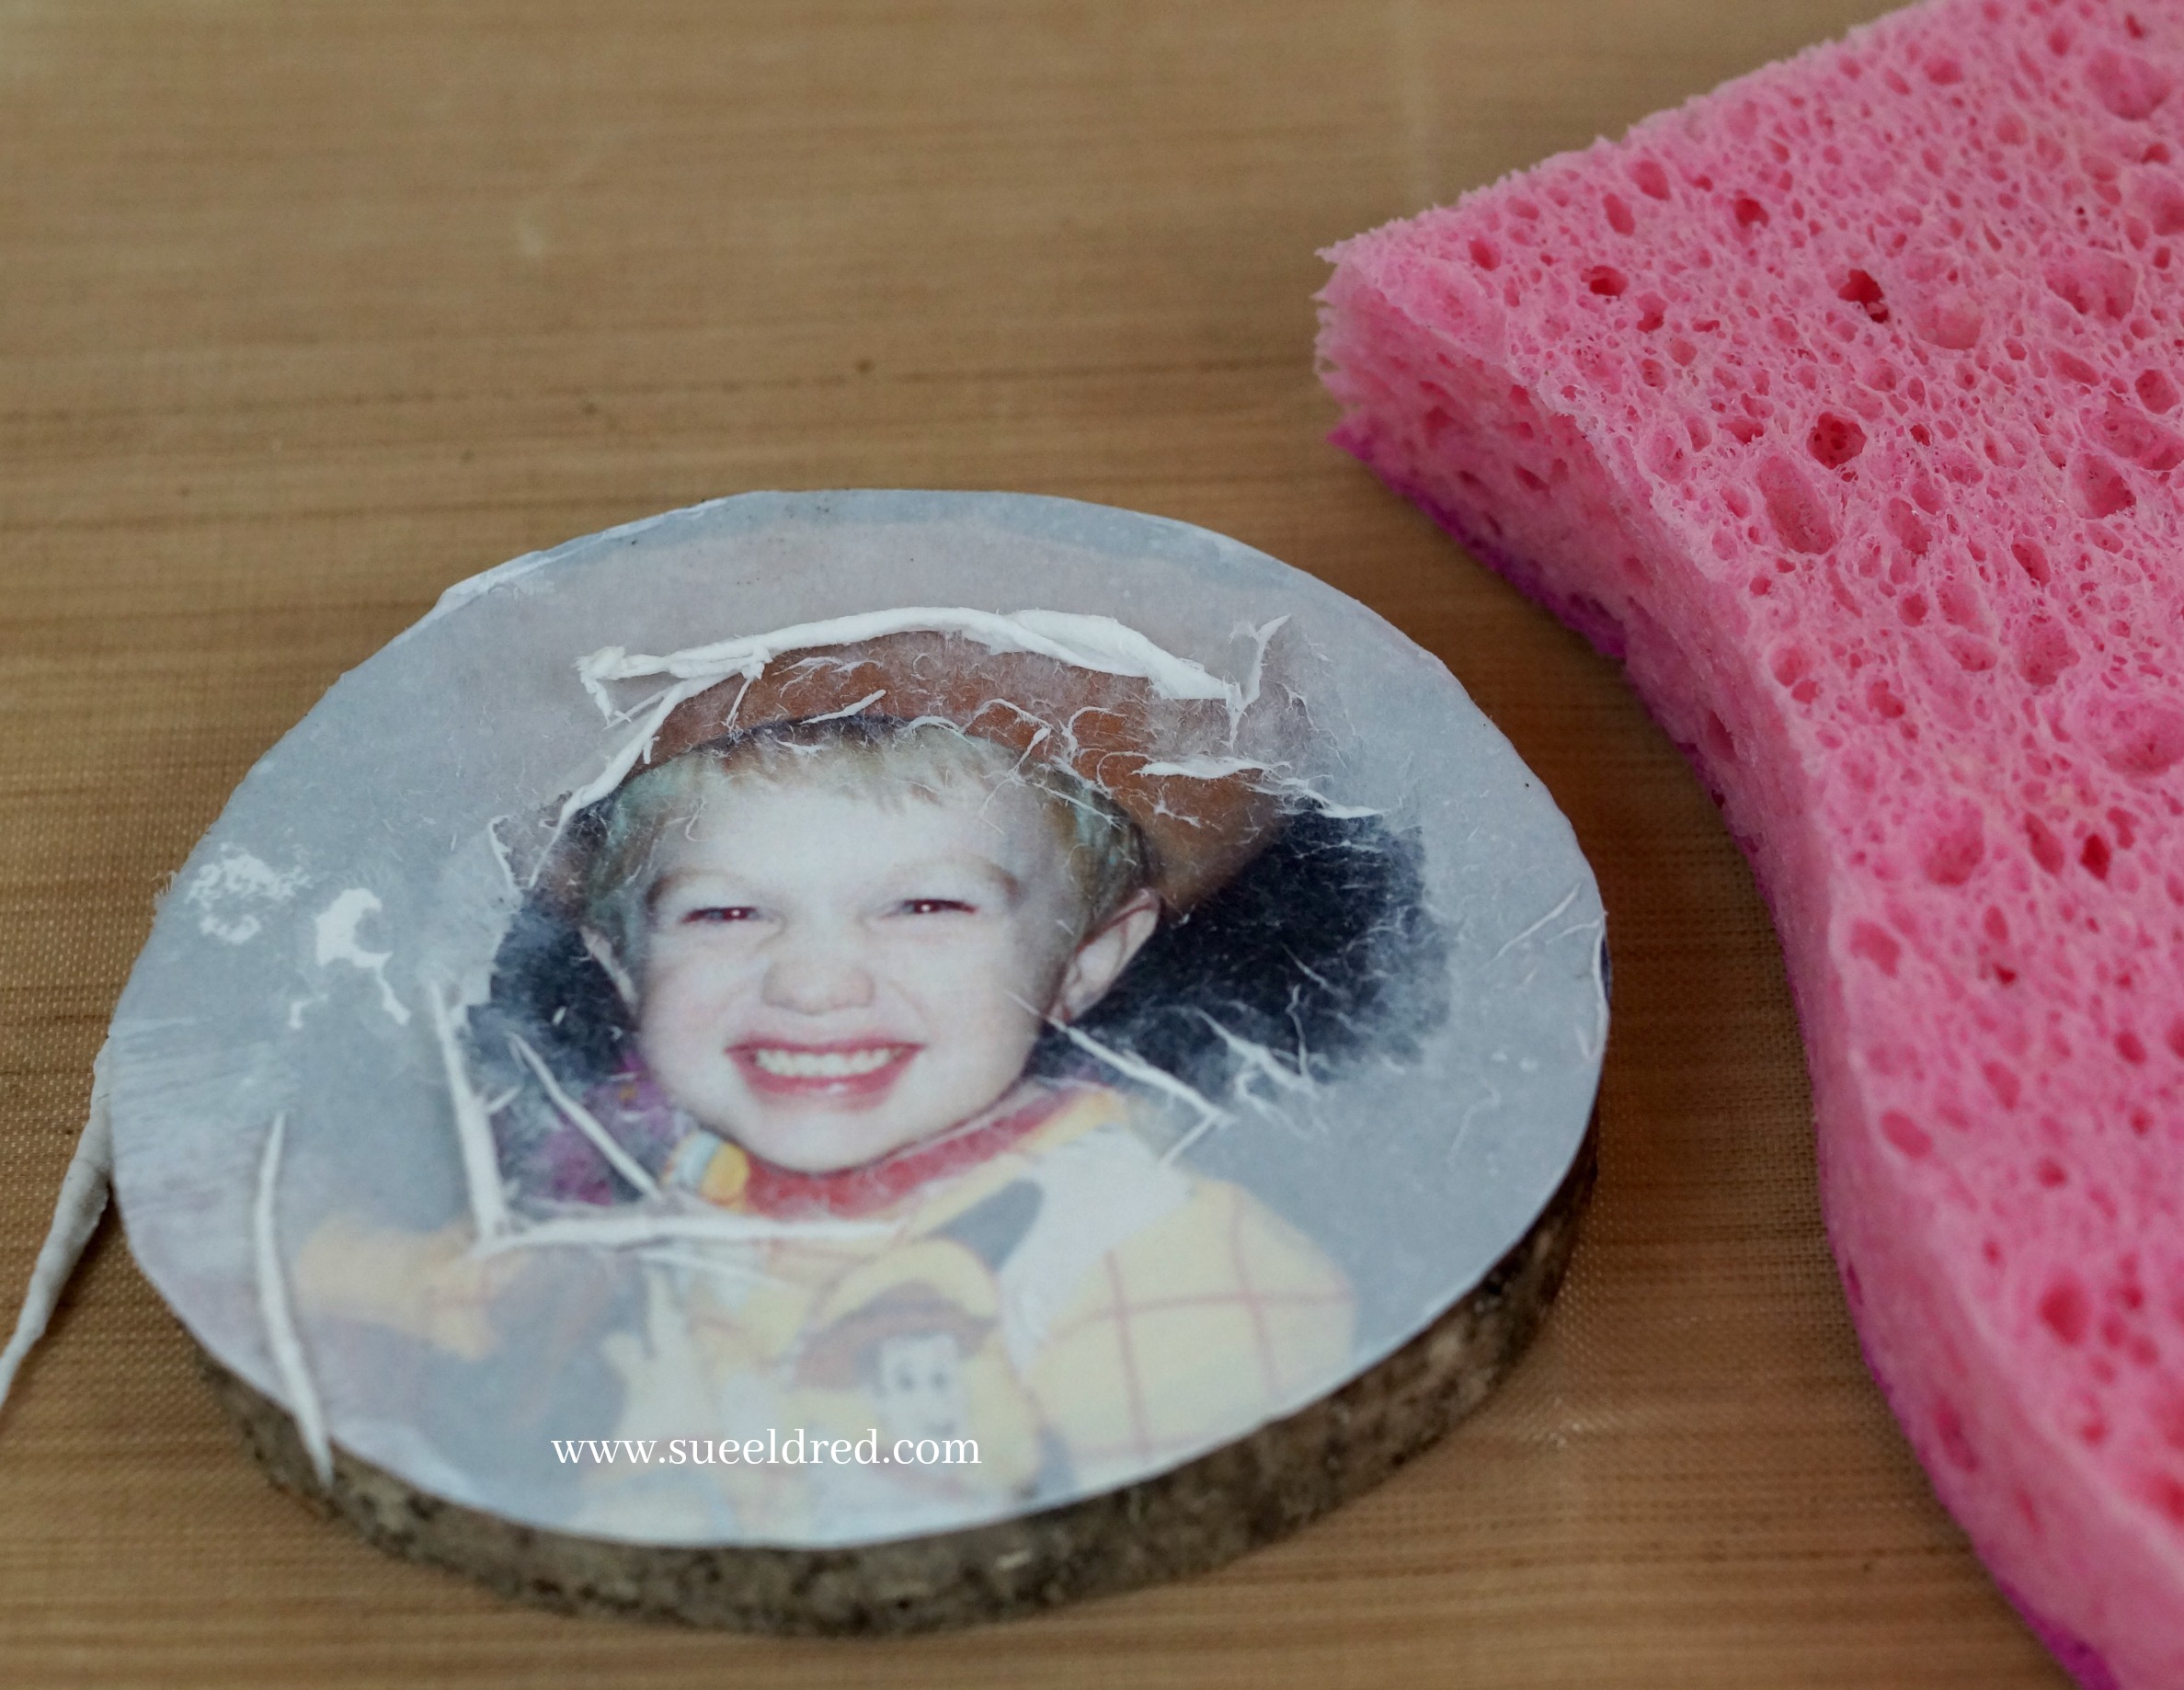
  5. Wet a sponge with water, squeeze excess water from sponge then dampen the exposed backside of the image transfer. Immediately as the paper is wet, an image will appear. Allow the wet image to rest a couple moments to soften the paper.

Shop Your Fav Brands at Scrapbook.com

5.  Using your damp sponge or a fingertip, begin to lightly rub over the damp paper to peel away layers. Be careful not to be rough with the wet paper as it may be fragile. After removing several layers of paper, stop and allow transferred image to dry. Once dry, white areas will appear where paper remains. Repeat steps to moisten and lightly rub the surface to remove the remaining paper layers. Allow to dry.

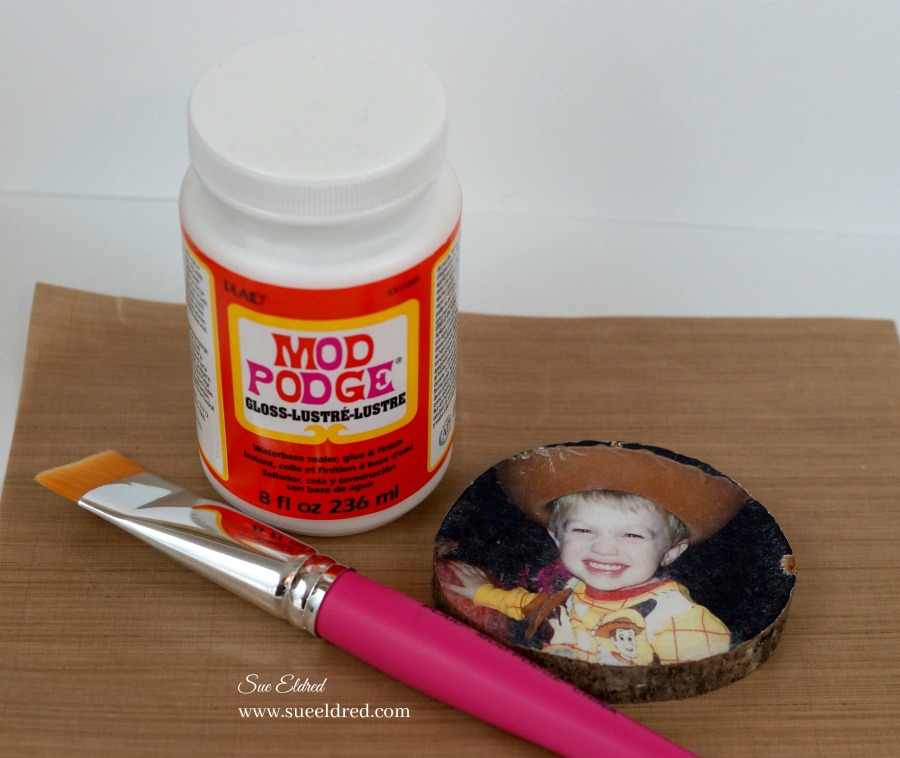
6.  If desired, brush a coat of Mod Podge Matte Finish* or Mod Podge Gloss Finish* over the project surface to seal and protect.

Basic Directions from plaidonline.com

Did you Know…

In 1967, Jan Wetstone created Mod Podge in her garage as an easy-to-use decoupage solution for crafting enthusiasts. Since then, the brand has gone beyond just decoupage with 17 different formulas that include Matte, Gloss, Dishwasher safe, and Sparkle as well as top coats for Brushstrokes and Chalkboard. The introduction of the Mod Melter made embellishing your craft projects a breeze, along with the endless creative options found in Dimensional Magic, Photo Transfer Medium, and Collage Clay.


*Disclosure:  This blog uses ads and affiliate links.  If you choose to make a purchase using one of the links, I receive a small commission (at no additional cost to you) that helps offset the costs of maintaining this blog.  Thanks for your support!