Summer Blooms Mini Album

Summer Bloom Mini Album

How to make a Summer Blooms Mini Album…

I love Summer Blooms and fell in love with the new Bloom Collection*

from Echo Park as soon as I saw it.

Using the Sizzix Notebook Die by Eileen Hull* and the Bloom Collection*,

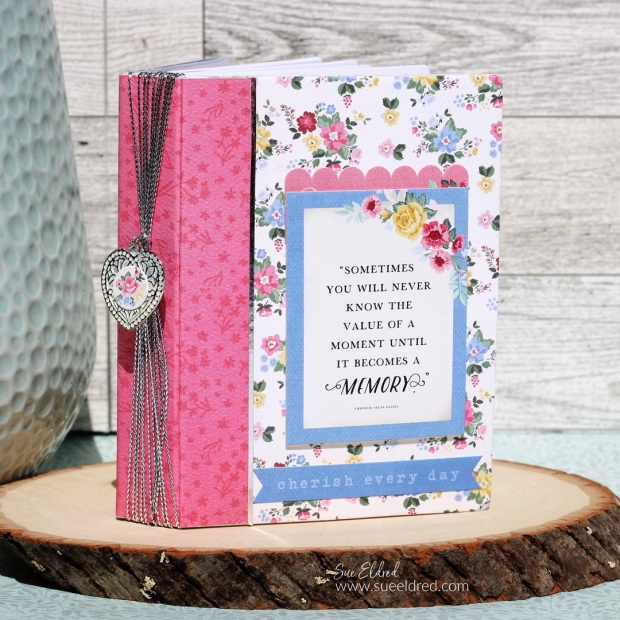
I made this cute little pocket-sized mini album.
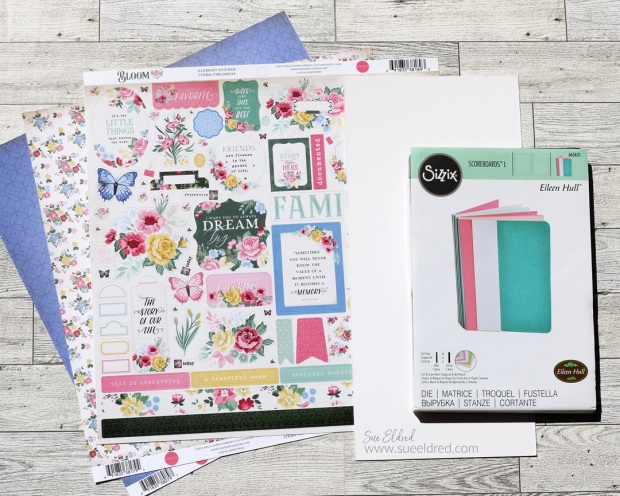
Summer Bloom Mini Album

Materials Used:    (*affiliate links)

*Disclosure:  This blog uses ads and affiliate links.  If you choose to make a purchase using one of the links, I receive a small commission (at no additional cost to you) that helps offset the costs of maintaining this blog.  Thanks for your support!
Summer Bloom Mini Album

Directions:

  • Cut two 6″ x 8-1/2″pieces of decorative scrapbook paper for the front and inside of the cover.
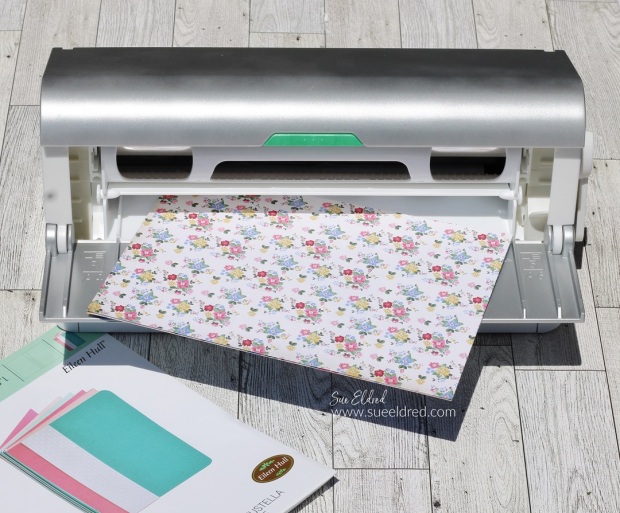
  • Lay decorative scrapbook paper (design side up) on the Xyron Creative Station* crank the handle to run the paper through the machine.  As it moves through the Xyron Creative Station it adds adhesive to the back side of the paper.
  • Easy to use and it doesn’t need any electricity.
  • I like using the Xyron Creative Station* when making mini books because you get complete coverage, no wrinkling, no bubbles!
Summer Bloom Mini Album

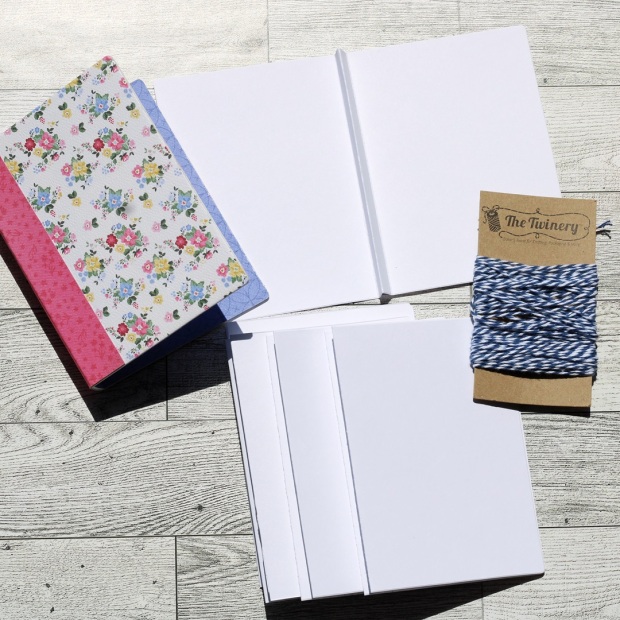
  • Cut a piece of mat board 6″ x 8-1/2″.
  • Adhere the decorative paper on each side of the mat board.
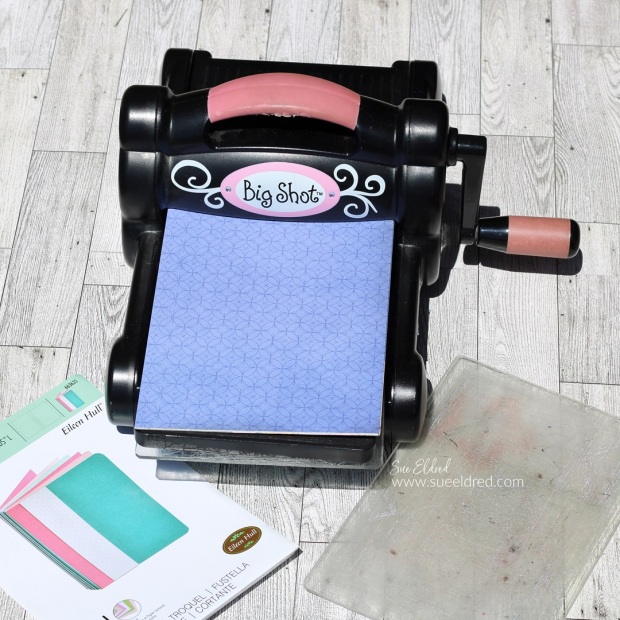
  • Lay the covered mat board over the notebook die* sandwiched between two cutting plates.
  • Crank the handle of the Sizzix Big Shot Die Cutting Machine* and run the die through the machine.  The Big Shot will cut and score the mat board.
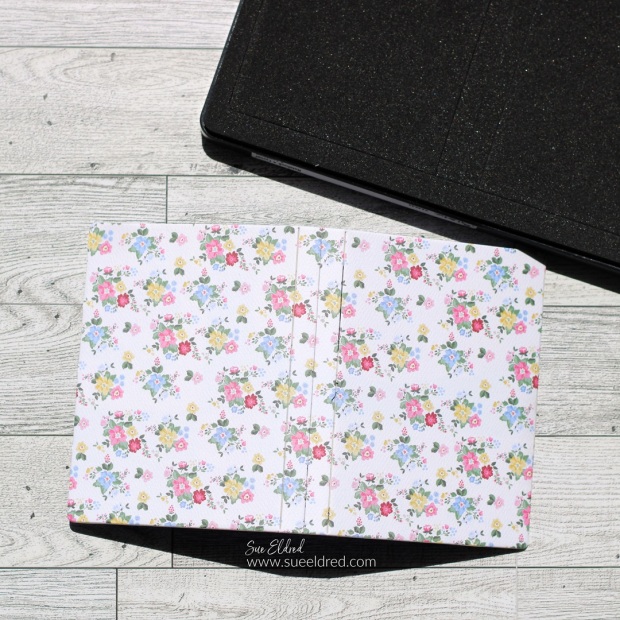
Summer Bloom Mini Album-Sue's Creative Workshop www.sueeldred.com 4717

  • The notebook die creases the center of mat board as it goes through the Big Shot Die Cutting Machine* making it easy to fold the cover for your mini album.
Summer Bloom Mini Album-Sue's Creative Workshop www.sueeldred.com 4734

  • Cut a 2 1/4″ x 5″ strip of decorative paper to use for the spine and run it through the Xyron Creative Station*.  Adhere the strip to the spine of the book.
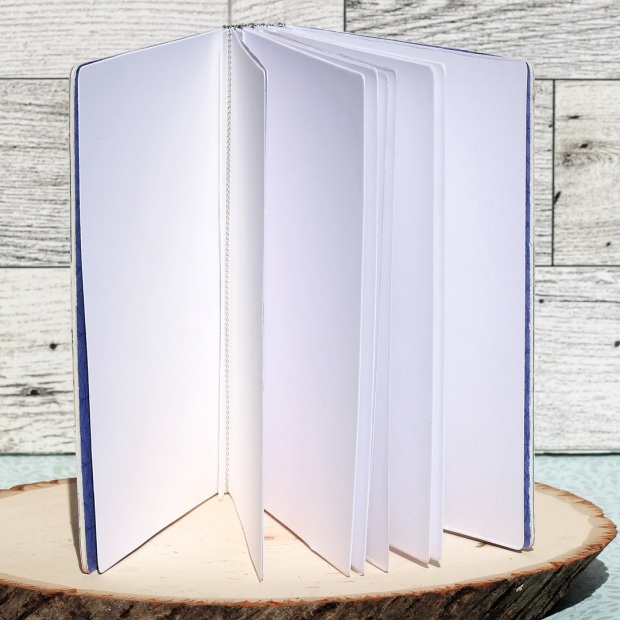
  • Cut 5 cardstock pages using the notebook die.
  • Crease the cardstock on the center score lines.
Summer Bloom Mini Album

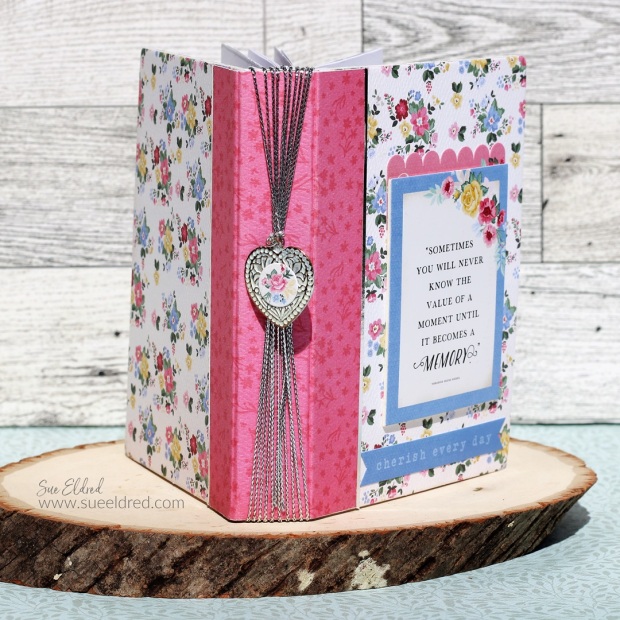
  • Wrap the twine around the inside creases and around the outside of the book cover to secure the pages.
  • FYI…I wanted this Mini Album to be all about the pictures, so I kept the pages white. There are no fancy embellishments or special pages inside this album.
Summer Bloom Mini Album-Sue's Creative Workshop www.sueeldred.com 4776

  • After I had all my pages together, I tied the pieces of twine together in one knot on the spine and added a small metal heart charm.   I placed a small floral sticker from the Bloom Collection* to the center of the heart.
  • As an afterthought, after I took the above pictures, I added Sizzix Effects™ Liquid Gloss* over the heart. The Liquid Gloss gives the heart a clear domed look and will seal in the sticker.
Summer Bloom Mini Album

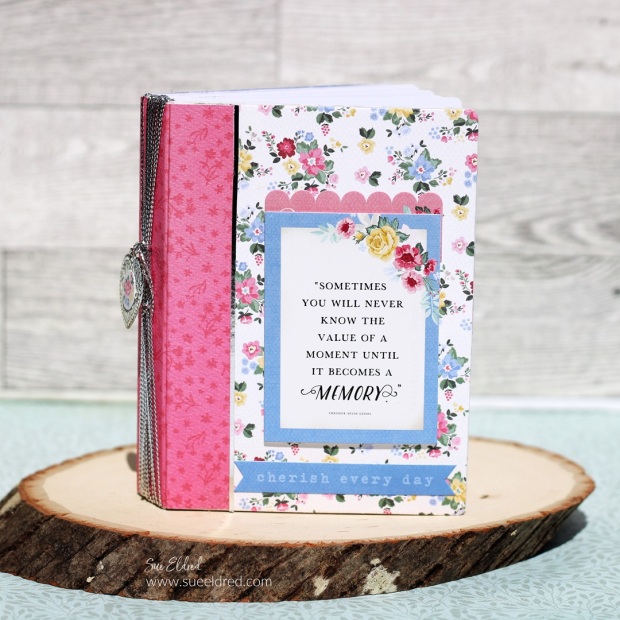
  • Decorate the front of the album with Stickers from the Bloom Collection*.
  • For added dimension, place the sticker on a small piece of matboard.

Eileen Hull Educator Logo

Disclosure:  This is a sponsored post.  As a member of the Eileen Hull Educator Team, I have been provided product in exchange for my creative ideas.  The view and opinions are my own. 

Love Notes Tag Album

Love Notes Tag Album

Creating a Love Notes Tag Album for Valentine’s Day.

My husband and I are not particularly gushy or romantic people.

But we have, on a rare occasion, left a love note or two.

One year for Valentine’s Day, he declared he would write me a love letter

for each day of the week. I think he made it to day #3.

Love Notes Tag Album for Valentine's Day

For Valentine’s Day this year…

I thought I would pull out my Valentine’s Stash and create a small Love Notes

Tag Album using the Sizzix Library Pocket Die by Eileen Hull*.

I think I need to “Craft My Stash” more often.

It’s amazing the misc. things I found in my Valentine’s drawer and how well

they all went together.

Love Notes Tag Album for Valentine's Day

Materials Used for the Love Notes Tag Album:  (*affiliate links)

*Disclosure:  This blog uses ads and affiliate links.  If you choose to make a purchase using one of the links, I receive a small commission (at no additional cost to you) that helps offset the costs of maintaining this blog.  Thanks for your support!

Love Notes Tag Album for Valentine's Day

To create the Mini Tag Album:

  • I used the Library Pocket Die* and a variety of double-sided paper to create several pocket pages.
  • I decorated the pockets with Valentine stickers, ephemera, and hearts.
  • On the front cover, I used a library pocket cut from red cardstock and two from scrapbook paper.  I cut off the pocket portion of each one to make them into tags.  For quick assembly, I used a Xyron 3″ Disposable Sticker Maker* to add adhesive to the back of the scrapbook paper tags.  I adhered the scrapbook paper to the front and back of the cardstock tag.  I created a second layered tag for the back cover.
  • I added a gold edge to the sides of the front and back cover using a DecoColor Chisel Point Gold Leaf Pen*.
  • I created letter stickers using the inside letters of the Tile Alphanumeric Die, and white cardstock ran through the Xyron Sticker Maker.

Love Notes Tag Album for Valentine's Day

  • The Mini Tag Album is bound together using a ¾” Mini Book Ring*.
  • The little Valentine’s coupons are from a very old “Authentique Papers” scrapbooking paper.

Love Notes Tag Album for Valentine's Day

  • To finish my album, I might add a few sweet love notes.
  • And I may even fill out those Valentine’s Day coupons.

Eileen Hull Educator Logo

Disclosure:  This is a sponsored post.  As a member of the Eileen Hull Educator Team, I have been provided product in exchange for my creative ideas.  The view and opinions are my own. 

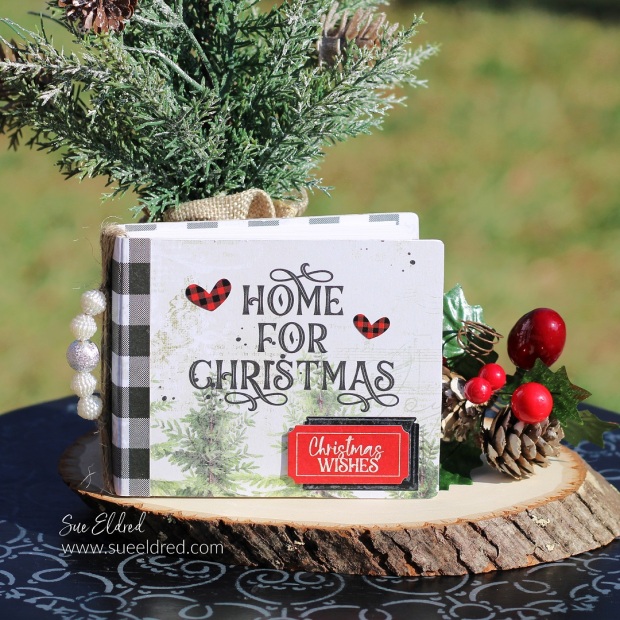
Home for Christmas Mini Album

Home for Christmas Mini Album

How to make a Holiday Mini Album…

I wanted to share with you a Simple little Christmas Album that I made for

the Eileen Hull Comfort & Joy Event over on Eileen’s Facebook Fan Page.

Sizzix Notepad Scoreboards Die by Eileen Hull

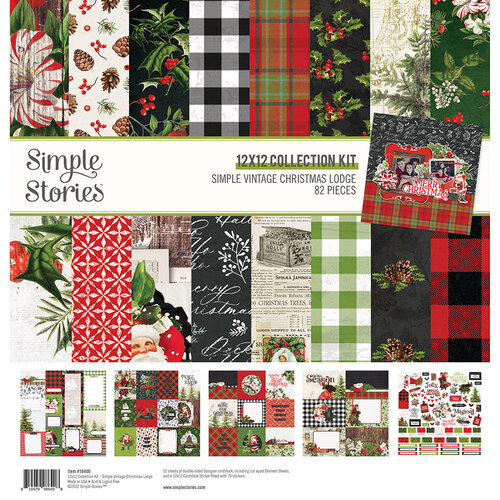
I used the Sizzix Notepad Scoreboard Die by Eileen Hull* and paper from

Simple Stories Simple Vintage Christmas Lodge Collection* to create the mini album.

Materials Used:  (*affiliate links)

*Disclosure:  This blog uses ads and affiliate links.  If you choose to make a purchase using one of the links, I receive a small commission (at no additional cost to you) that helps offset the costs of maintaining this blog.  Thanks for your support!

Home for Christmas Mini Album

The album may be small, but it has plenty of room for Holiday pictures.

It measures approximately 3 1/2″ x 4 1/2″.

Home for Christmas Mini Album

Sue’s Tips for Making the Home for Christmas Mini Album:

  • I used the Xyron Creative Station* to add adhesive to the back of the paper before adhering it to the mat board and die-cutting the pieces to make the notepad.
  • I adhered the spine of the front and back cover using Rapid Fuse Adhesive*.
  • For the inside of the album, I created four small “signatures” to place inside the album.
  • To secure the “signatures” inside the album, wrap thin twine around the spine and the paper.

Home for Christmas Mini Album

Home for Christmas Mini Album

When it comes to family, Home is the best place to be.

Eileen Hull Educator Logo

Disclosure:  This is a sponsored post.  As a member of the Eileen Hull Educator Team, I have been provided product in exchange for my creative ideas.  The view and opinions are my own. 

Tulla & Norbert’s Love Story Album

Tulla & Norbert's Love Story Album

Tulla & Norbert’s Love Story Album

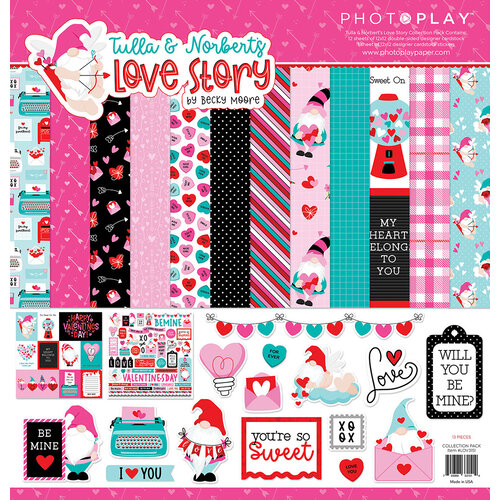
I thought I would share with you a fun little album I made for Xyron using

Tulla & Norbert’s Love Story Collection by Photo Play Paper.

A great album to add your photos.

Xyron® is your official site for all your crafting needs
“This post is sponsored for Xyron I have been provided product and compensation in exchange for my creative ideas.  The views and opinions are my own.

Tulla & Norbert's Love Story Album

Materials Used:

*Disclosure:  This blog uses ads and affiliate links.  If you choose to make a purchase using one of the links, I receive a small commission (at no additional cost to you) that helps offset the costs of maintaining this blog.  Thanks for your support!

Tulla & Norbert's Love Story Album

Directions:

  • For the cover, cut the matboard into two 5” x 7” pieces.
  • Cut two 5” x 7” pieces of black dot scrapbook paper and two 5” x 7” pieces of diagonal stripe paper.
  • Place the scrapbook paper into the Xyron Creative Station®* design side up. Crank the handle to run the scrapbook paper through the machine. As the scrapbook paper goes through the Xyron Creative Station, it adds a complete layer of adhesive to the back of the scrapbook paper. (You will need to add adhesive to all four pieces of scrapbook paper.)
  • Remove the clear protective coating. Peel the paper from the white backing and stick it directly onto the matboard. Each piece of the mat board* will have black dots on one side and diagonal stripes on the other.
  • The Black Dot Scrapbook paper will be on the front and back cover with the diagonal stripe paper on the inside.
  • Cut two 1 ½” x 7” strips of diagonal striped paper. Run the strips through the Xyron Creative Station®* to add adhesive to the back.
  • Stick onto the edge of the front and back cover. Pay special attention to the placement on the back cover so that the pieces line up on the right side.

Tulla & Norbert's Love Story Album-Sue's Creative Workshop www.sueeldred.com 709

  • For the inside pages, cut six 5” x 7” pieces of black cardstock.
  • Cut two 9¼” x 7” pieces of black cardstock. Score the cardstock at 5” lengthwise to create a page that has a flap.
  • Adhere a variety of Tulla & Norbert Love Story scrapbook paper onto the front and back of each section of the black cardstock using the Xyron Tape Runner*.
  • Using a Book Binding Machine*, bind the album together.
  • Cut apart the 3” x 4” journaling cards to adorn the front cover and some of the inside pages.

Tulla & Norbert's Love Story Album

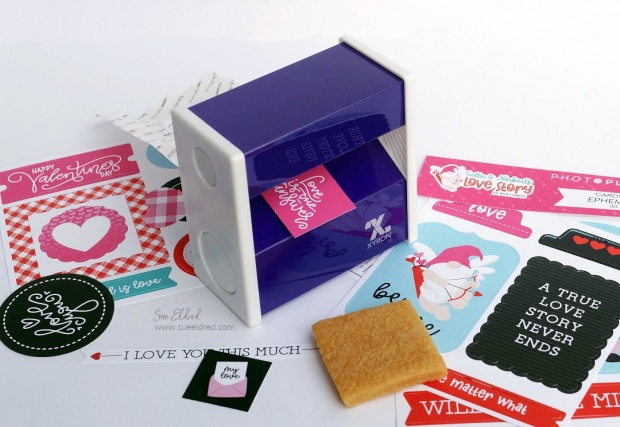
  • A great way to add adhesive to the Tulla & Norbert’s Love Story Ephemera is to place them into the 3″ Xyron Disposable Sticker Maker*. Just pull, rub, and stick. To remove any excess adhesive around the die-cut pieces, use the Xyron Adhesive Eraser*.
  • Create fun page flaps and pockets to add your album using stickers, die-cuts, ribbon, and twine*.

Tulla & Norbert's Love Story Album

Tulla & Norbert's Love Story AlbumTulla & Norbert's Love Story Album-Sue's Creative Workshop www.sueeldred.com 738Tulla & Norbert's Love Story Album-Sue's Creative Workshop www.sueeldred.com 756Tulla & Norbert's Love Story Album-Sue's Creative Workshop www.sueeldred.com 765Tulla & Norbert's Love Story Album-Sue's Creative Workshop www.sueeldred.com 786

Simple Vintage Fall Memories Album

Simple Vintage Fall Memories Scrapbook Album

The Simple Vintage Fall Memories Album is the perfect place for your Fall Memories.

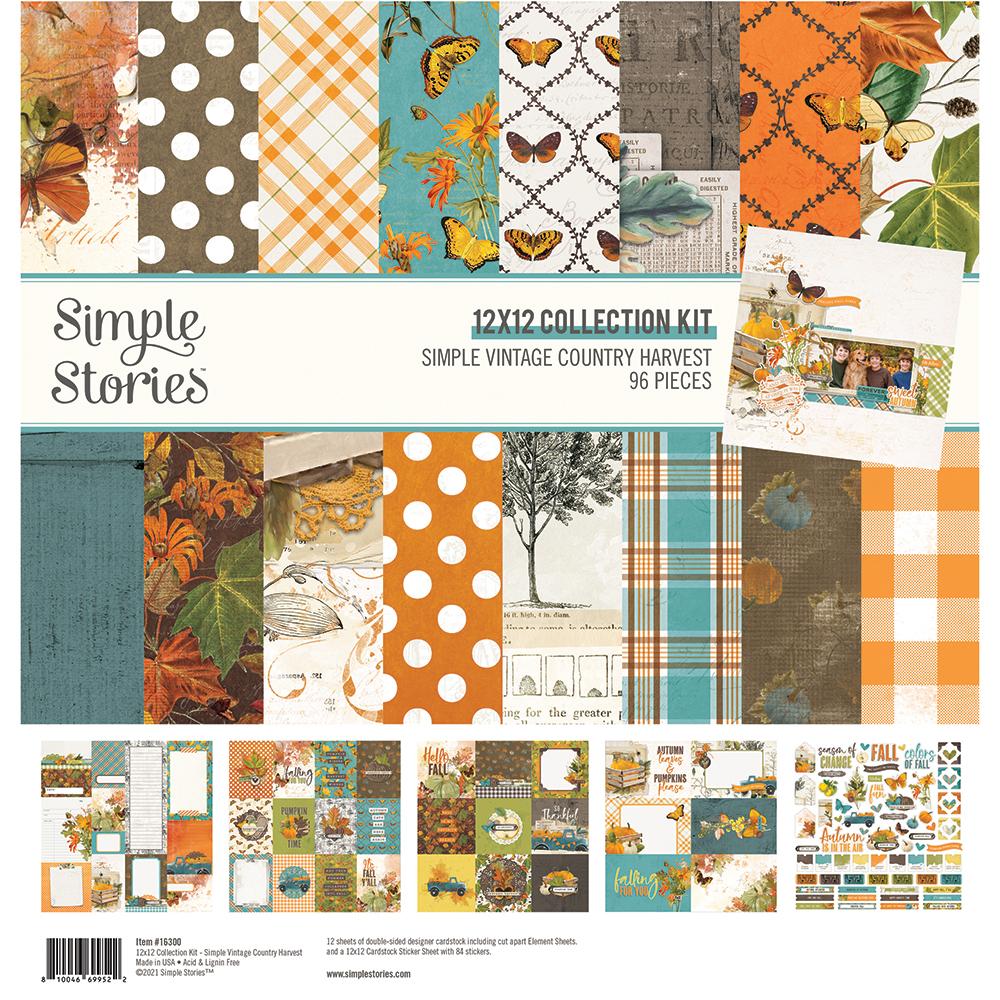
The album uses Simple Stories Simple Vintage Country Harvest Collection*

and the New Full-Sized Journal Die* from Eileen Hull and Sizzix.

Simple Vintage Fall Memories Album

Materials Used:     (*affiliate links)

*Disclosure:  This blog uses ads and affiliate links.  If you choose to make a purchase using one of the links, I receive a small commission (at no additional cost to you) that helps offset the costs of maintaining this blog.  Thanks for your support!

Simple Vintage Fall Memories Album

One Important Thing to Note…

Simple Stories Simple Vintage Country Harvest Collection Kit

Simple Vintage Fall Memories Album

  • I folded six 8 1/2″ x 11″ pieces of cardstock in half to create little “stories” to insert inside your album.  
  • I used thin twine to add my “stories” to the spine.

Simple Vintage Fall Memories Album

Simple Vintage Fall Memories Album

I’m happy with the way the album turned out…

and I love the size of the New Eileen Hull Full-Sized Journal. 

Now I’m off to take More Fall Photos.


Crafting with Candy Wrappers

The Sweet Life Tiny Book

The Sweet Life Tiny Book.

The theme for Eileen Hull’s teams this month was “Crafting with Unconventional Materials”.

I do love a crafty challenge. I’ll admit this one stumped for a minute or two.

Crafting with Candy Wrappers

This challenge had my waistline taking one for the team.

The mini Reese’s Peanut Butter Cups were leftover from Easter.

I can’t think of a better way to use them up.

Crafting with Candy Wrappers

Materials Used:

*Disclosure:  This blog uses ads and affiliate links.  If you choose to make a purchase using one of the links, I receive a small commission (at no additional cost to you) that helps offset the costs of maintaining this blog.  Thanks for your support!

Crafting with Candy Wrappers

Directions:

  • Carefully unwrap the peanut butter cup wrappers.  Smooth out the wrinkles using your fingernail.
  • Place the wrappers into the opening of the disposable sticker maker.  Pull the wrappers through on the back of the machine, tear.

Crafting with Candy Wrappers

  • Cut the wrappers into smaller strips and pieces.

Crafting with Candy Wrappers

  • Carefully peel the wrappers from the adhesive backing and place them randomly onto a 3 1/2″ x 5 1/2″ piece of matboard.
  • Lay the matboard on the Sizzix Tiny Book Die facedown.
  • Run the die through the Big Shot Die-Cutting Machine* to cut out the Tiny Book cover.

Crafting with Candy Wrappers

  • Carefully fold the book on the score lines.
  • Cut two pieces of white cardstock 2 3/4″ x 11″.  Score both pieces of cardstock every 2 1/8″ to create a long accordion piece.  You will end up with a small tab at the end of both strips.  Use the first tab to connect the strips.  Cut the second tab off.  Refold to make a long accordion strip.
  • Adhere both ends of the cardstock into the front and back cover.

Crafting with Candy Wrappers

Kaisercraft’s Flower Shoppe Accordion Book and Card

How to make an Accordion Album

How to make an Accordion Album using Kaisercraft’s Flower Shoppe Collection.

A quick way to make a mini album to showcase a few memorable pictures.

The album would make a great gift for someone special.

How to make an Accordion Album

Materials Used:         (*affiliate link)


*Disclosure:  This blog uses affiliate links.  If you choose to make a purchase using one of the links, I receive a small commission (at no additional cost to you) that helps offset the costs of maintaining this blog.  Thanks for your support!

Accordion Album made with Kaisercrafts's Flower Shopped Collection.

Directions:

  • Cut two 4″ x 6″ matboard panels.
  • Cut two 5″ x 7″ green polka dot paper pieces.  You will need to generously apply adhesive to the back of the paper.  I like to use my Xyron Creative Station to add adhesive.  Run the paper design side up through the machine to add a “complete layer” of adhesive on the paper.  (no wrinkles, no electricity)
  • Lay matboard on center back of polka dot paper.  Miter paper edges by cutting diagonal triangle off each edge of four corners, leaving 1/8″ space between cut and matboard.  (TIP…save triangles to cover edges if corners don’t meet)  Fold edges over the matboard and adhere.  Repeat with the second set of panels.
  • Decorate the front of the album using designs from the “Arrangement” paper.  I layered the “bloom where you are planted” 3″ x 4″ section onto a 3 1/4″ x 4 1/4″ piece of cardstock.  For added dimension, I adhered the layers onto a 3 1/4″ x 4 1/4″ piece of matboard.
  • Paint four metal corners with white multi-media paint.  After the paint has fully dried, lightly sand over the corners to reveal the embossed design.  Fold around edges of the matboard layer.  Adhere layered matboard to the front of the album cover.

Kaisercraft Flower Shoppe-Accordion Album

  • Cut two 5-7/8″ x 12″ strips of “sunroom” scrapbook paper.  Score lengthwise every 3-7/8″.  You will end up with 3 panels and a small narrow section at the end of each strip approximately a 1/2″ inch.  On one panel, cut the extra 1/2″ strip off.  Adhere the 1/2″ tab onto the back of the other panel to create one long 6-panel accordion strip.  Refold the panel if necessary.
  • Adhere each end of the accordion strip to the 4″ x 6″ covered chipboard panels.
  • Create pockets and flaps using extra scrapbook paper pieces.

Kaisercraft Flower Shoppe Card-Sue's Creative Workshop www.sueeldred.com 8

And for the Card Makers…

I also made a card using the left over paper from the Flower Shoppe Collection.

Flower Garden Notecard Folio

Flower Garden Notecard Folio-Sue's Creative Workshop www.sueeldred.com 3854

How to Create a Flower Garden Notecard Folio

To Celebrate Spring and all things Flowers, I decided to make a Notecard Folio using paper from

Carta Bella’s Flower Garden Collection and Eileen Hull’s New Folio Journal Die from Sizzix*.  

      NEW Folio Journal at Sizzix

Materials Used:         (*Affiliate Links)

*Disclosure:  This blog uses affiliate links.  If you choose to make a purchase using one of the links, I receive a small commission (at no additional cost to you) that helps offset the costs of maintaining this blog.  Thanks for your support!

Flower Garden Notecard Folio-Sue's Creative Workshop www.sueeldred.com 3858

Album Details:

  • The album pieces are die-cut using Sizzix White Matboard Sheets*, which is the perfect size for cutting long pieces.  (You will need to cut the album pieces twice.)
  • There is a smaller rectangle die-cut piece that comes with the die. (cut two)  You will use the piece to create a pocket with the outer flap.  
  • Align and adhere both ends of the spine together using Tear It! Double-Sided Crafter’s Tape*.
  • Cover the front and inside of the album with decorative scrapbook paper.  (see album making tip below)
  • Album Making Tip:  I use my Xyron Creative Station* to add adhesive to my paper before sticking it onto the matboard.  It adds a complete adhesive layer without puckering or wrinkles.
  • Using a craft knife and cutting mat, I cut both ends of the flaps down to create 2 1/2″ pockets.  Adhere the “pocket pieces” (the small scored pieces that come with the die) to finish the bottom of the pockets.
  • I used Carta Bella Farmhouse Market Collections Stickers* to embellish the pocket fronts.

Flower Garden Notecard Folio-Sue's Creative Workshop www.sueeldred.com 3782

  • Create simple 3 1/2″ x 4 1/2″  layered cards using the Carta Bella Flower Garden:  3″ x 4″ Journaling Cards*.
  • After using one of the Journaling Cards for my front and back cover and another section for my green spine, I was able to create 8 small notecards to fill my notecard folio.  

Flower Garden Notecard Folio-Sue's Creative Workshop www.sueeldred.com 3898

  • The ribbon was added around the album before adding the front and back cover.
  • I created a small chipboard tag for the spine and punched the holes using a Crop-A-Dile Power Punch*.  
  • On the inside center binding, I hung a pen on the loop of ribbon that was added for the tag.

Flower Garden Notecard Folio-Sue's Creative Workshop www.sueeldred.com 3816

Wouldn’t this make a nice Birthday or Mother’s gift for someone special?

Winter Fun Folio Album

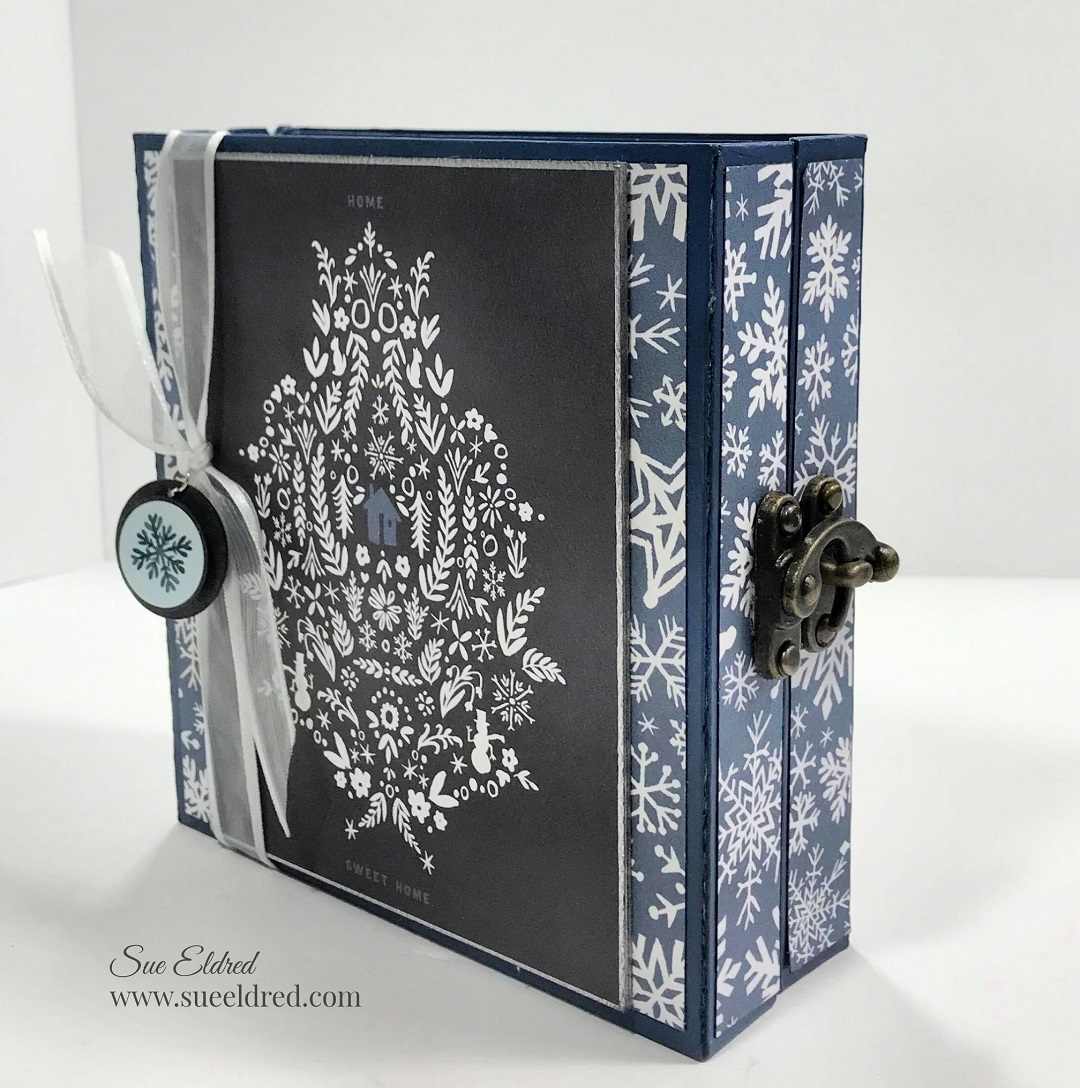
The Winter Fun Folio Album made using Eileen Hull’s New Folio Journal Die from Sizzix*

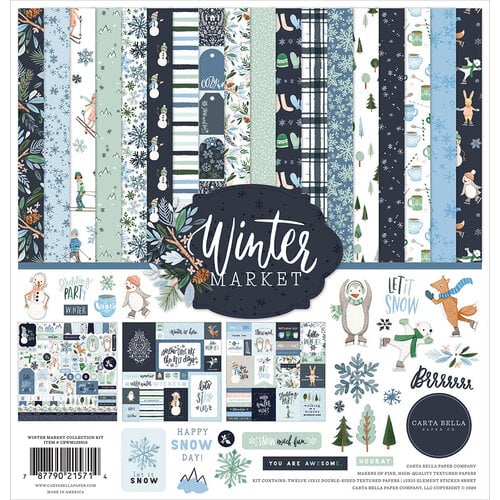
and the Carta Bella Paper Company Winter Market Collection*.

Hi Everyone!

Today, I’m participating with Eileen Hull and Teams for a Chapter 1 Release Party Blog Hop using

the New Folio Journal Die*.  Just wait till you see all of the fun options the New Folio Journal Die* has in store for you!

Here is my Album using the New Folio Journal Die*

It is a fun Winter Themed album with four smaller albums tucked inside.

It’s the perfect album for adding little nooks and crannies.  This album was fun to make.

I even added an Antique Bronze Hasp Latch Hook* to keep everything securely in place.

For fun, I will be giving my album away to one lucky commenter.

(Information on the Hop and chances to win prizes at the bottom of the post.)

Materials Used:   (*affiliate links)

*Disclosure:  This blog uses affiliate links.  If you choose to make a purchase using one of the links, I receive a small commission (at no additional cost to you) that helps offset the costs of maintaining this blog.  Thanks for your support!

Album Details:

  • The album pieces are die-cut using Sizzix White Matboard Sheets*, which is the perfect size for cutting long pieces.  (You will need to cut the album pieces twice.)
  • Before I assembled my album, I painted both sides of the album pieces with DecoArt Multi-Surface Acrylic Paint in Night Sky.
  • The two smaller rectangle die-cut pieces shown in the bottom right corner of the picture comes with the die. They are used for creating pockets with the outer flaps.  I painted them dark blue as well.

Album Making Tip:  I like to use my Xyron Creative Station* to add adhesive to my paper before sticking it onto the matboard.  It adds a complete adhesive layer with puckering or wrinkles.

Here’s a picture of the album when it’s open.

  • On one end, I left the flap in tack, I use it to corral the mini-albums in the center of the spine.
  • On the other end, I cut the flap down and created a pocket to hold a small removable album.
  • I used Rapid Fuse Adhesive* with the matboard to adhere to the pocket pieces. It not only dries extremely fast, but it holds well too.

(I apologize, there are too many details to write a full tutorial on the album.)

  • I used Blue and White Twine to attach the three small albums to the spine.

  • Each little album has several blank pages to add pictures and journaling.

Here is a close up picture of the back pocket. 

The Mini-Album easily slips in and out of the pocket.

There is plenty of room in the pocket for adding pictures or a second small album.

Would you like to Win my Winter Fun Folio Album?

There are several ways to enter.  

  • Leave a comment on this post telling me you’d like to win.
  • Follow, Like and Comment on my Facebook Page
  • Follow, Like and Comment on my Instagram Page.
  • US Addresses Only.

Winner will be chosen:  Wednesday, February 9, 2021

Welcome to the Chapter 1 Eileen Hull/Sizzix Release Party Blog Hop!

Please hop through the blogs and be inspired by the work of the talented Inspiration and Educator teams.  Leave a comment for each designer (list below) and, you could win a Folio Journal die (as soon as it arrives!)

Join Eileen and special guests for a Facebook Live on Wednesday, February 3rd at noon Eastern.  Comment on the Facebook Live and be eligible to win either the Mandala Die or the Folio Pages, Pockets and Flowers Die.  (two winners!)

Winners will be announced on Eileen’s Facebook Live show on February 9th at 6:00 EST.

We appreciate your love and support, friends!

Simple Vintage Garden Tag Album

How to make a Simple Vintage Garden Tag Album.

In keeping with the pretty in pink theme, I created

a sweet little tag album made with the Simple Vintage Garden District Collection

from Simple Stories and several tags dies from The Maker’s Movement.

(To say I love this collection would be an understatement.)

*FTC Disclosure… “This is a sponsored post for The Maker’s Movement.  I have been provided product and compensation in exchange for my creative ideas.  The views and opinions are my own.”

Here’s what I used:                        (*affiliate link)


*Disclosure:  This blog uses ads and affiliate links.  If you choose to make a purchase using one of the links, I receive a small commission (at no additional cost to you) that helps offset the costs of maintaining this blog.  Thanks for your support!

Directions:

  • Cut two large tags out of thin chipboard using the Crossover II Die Cut Machine for the front and back cover of the tag album.
  • You may need to run it through the roller twice before picking it up the tag to make sure it cut all the way through.
  • Cut additional tags using decorative scrapbook paper for the inside pages.

The Crossover II Fabric & Paper Cutting System* has adjustable rollers and pressure settings.  It adjusts for multiple layers and allows you to be able to cut a variety of thicknesses.  It can cut fabric, faux leather, craft foam, chipboard, felt and, several other materials.

  • You will need to use four tags for the front and back of the tag album cover.
  • Place the tag design side up on the Xyron Creative Station* crank the handle to run the tag through the machine.  As it moves through the Xyron Creative Station it adds adhesive to the back of the tag.
  • Remove tag from the protective liners and adhere to the front and back of each chipboard tag.

(FYI…I used the 5″ Permanent Adhesive Refill Cartridge* in the Xyron Creative Station.)

I used a lot of dimensions to create the front cover.

  • Cut a small banner from thin chipboard, cover it with decorative scrapbook paper the same way as the front and back covers.
  • Cover the small metal rimmed tag with circles cut from scrapbook paper.
  • Use twine to tie around the banner and a small teapot charm to hang from the book ring.
  • Create a “bloom” word sticker using the Xyron Creative Station and a small piece of off white scrapbook paper.  Use the bloom word die from the “In Full Bloom” stamp and die set and cut it using the adhesive paper.

  • Decorate and embellish the inside pages using pieces from the ephemera set, and banners.

  • This page was created using the Library Pocket Die Set and the Nested Square Tags Die Set.

Fill your tag album full of fun memories and use it as a sweet gift for someone special.

Save