Red Buffalo Plaid Hot Chocolate Bar

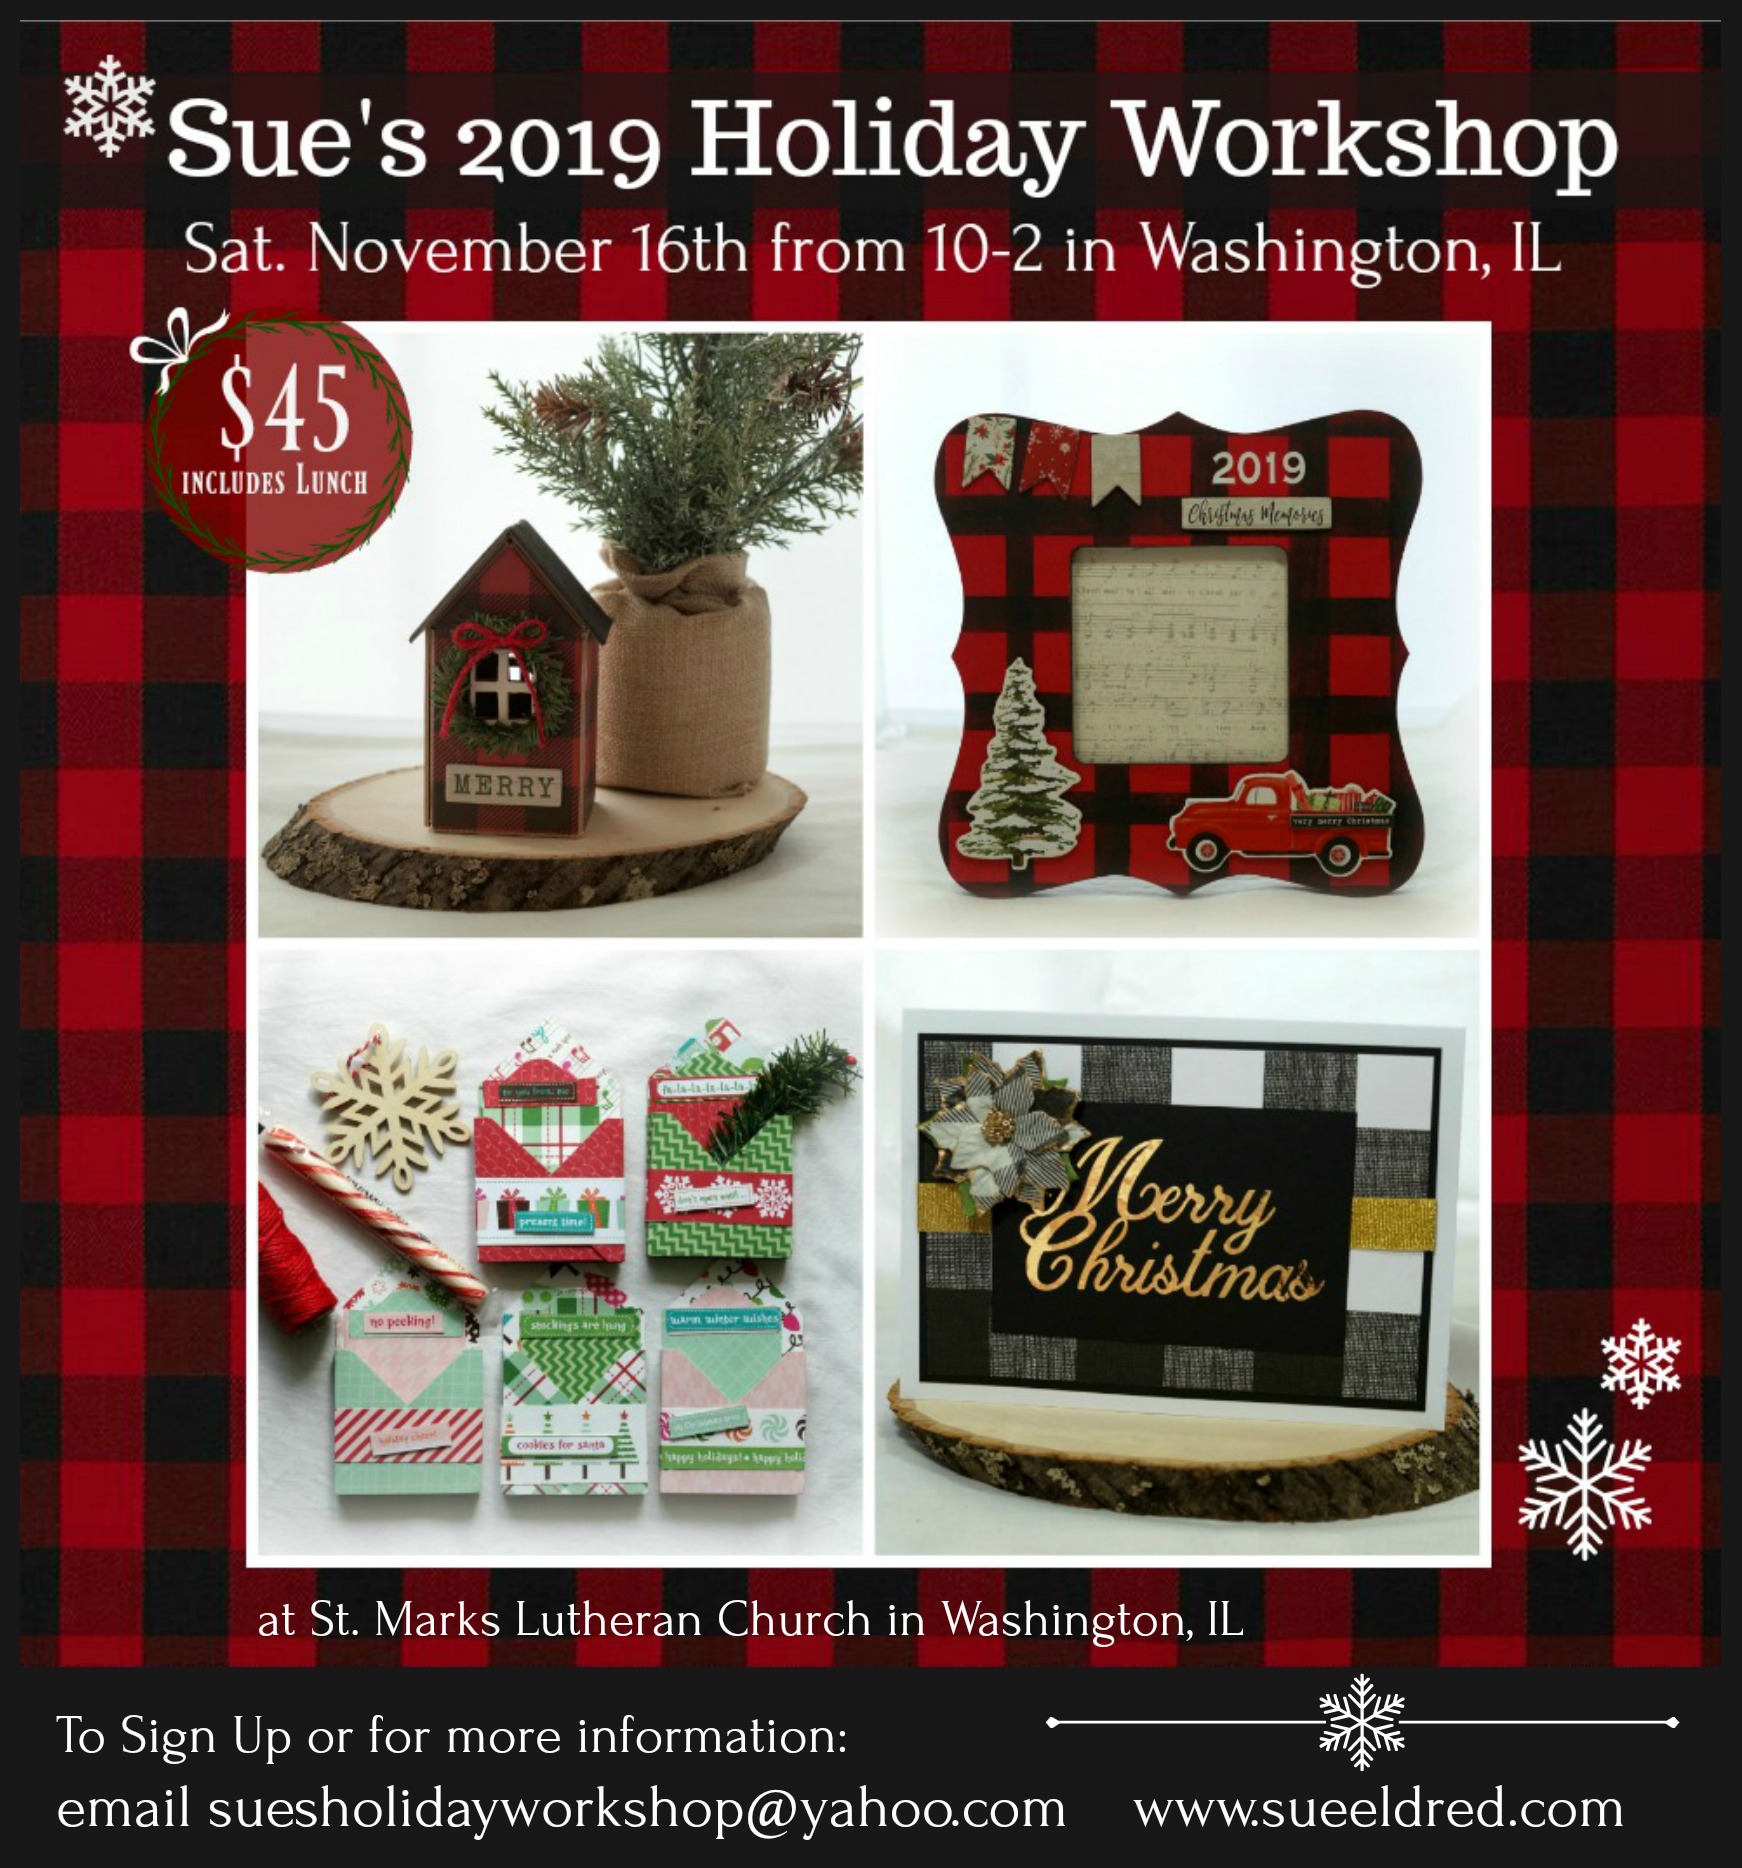
Fun and Easy Red Buffalo Plaid Party Ideas

The theme for this year’s Sue’s Holiday Workshop was “Mad for Plaid”.

To add to the fun of the event, I created a Red Buffalo Plaid Hot Chocolate Bar.

The Hot Chocolate Bar was simple to put together and was a big hit.

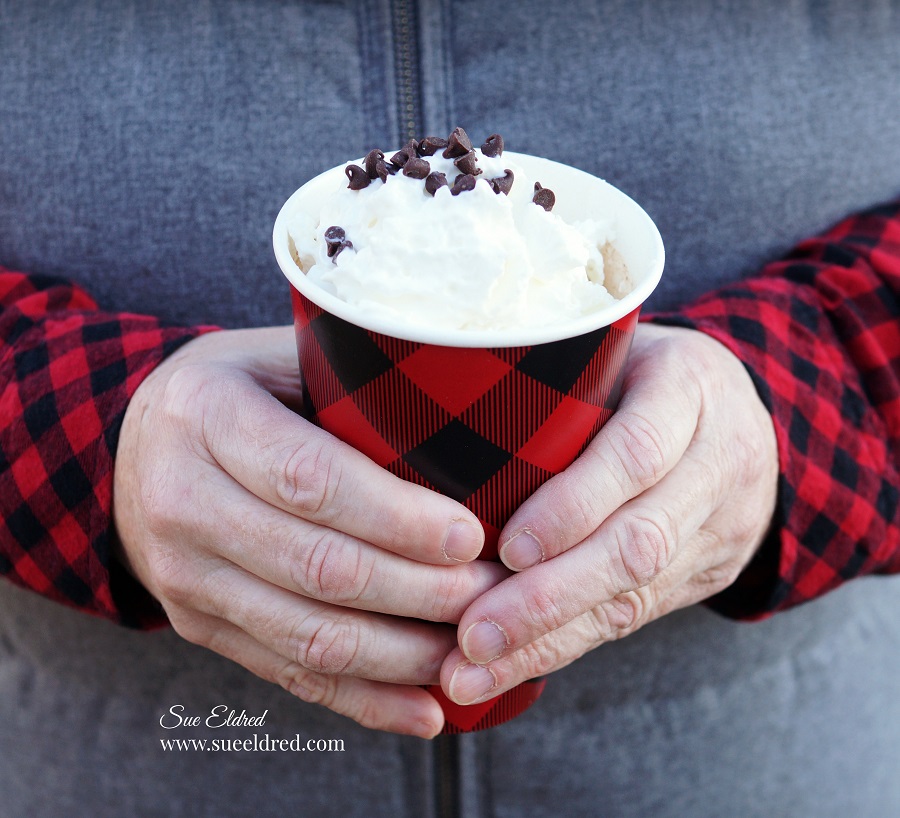
The most important part of the Hot Chocolate bar is the Hot Chocolate.

I went back and forth trying to decide on how I wanted to present the Hot Chocolate.

There are so many recipes online for delicious hot chocolate.

Because this was a “creative event”, I went with a little more creative approach.  (and simple)

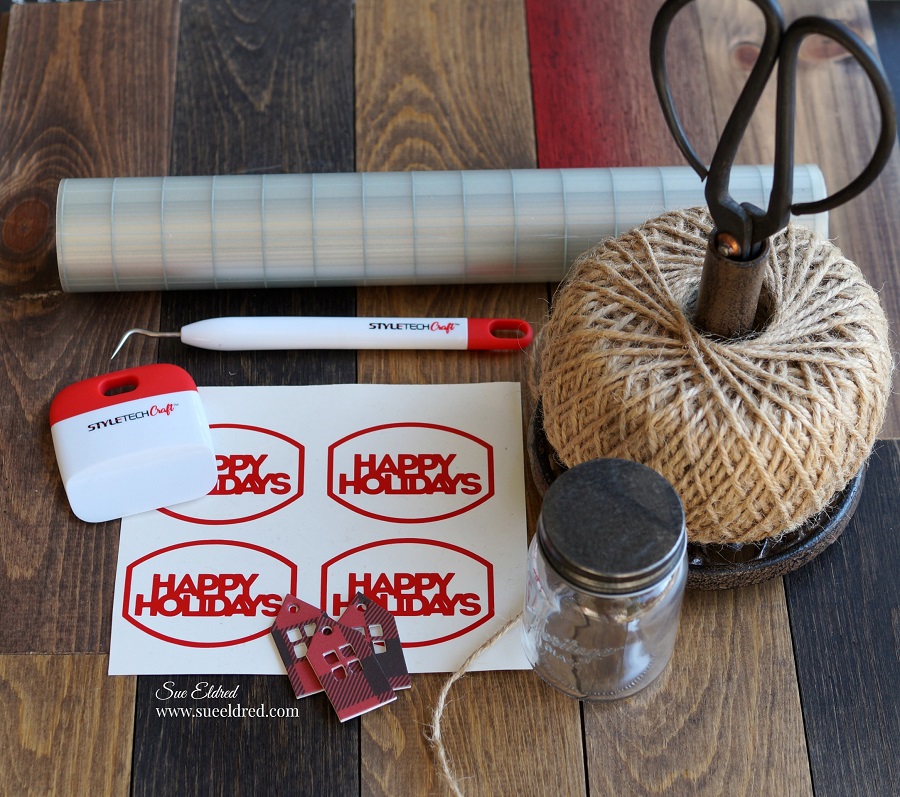
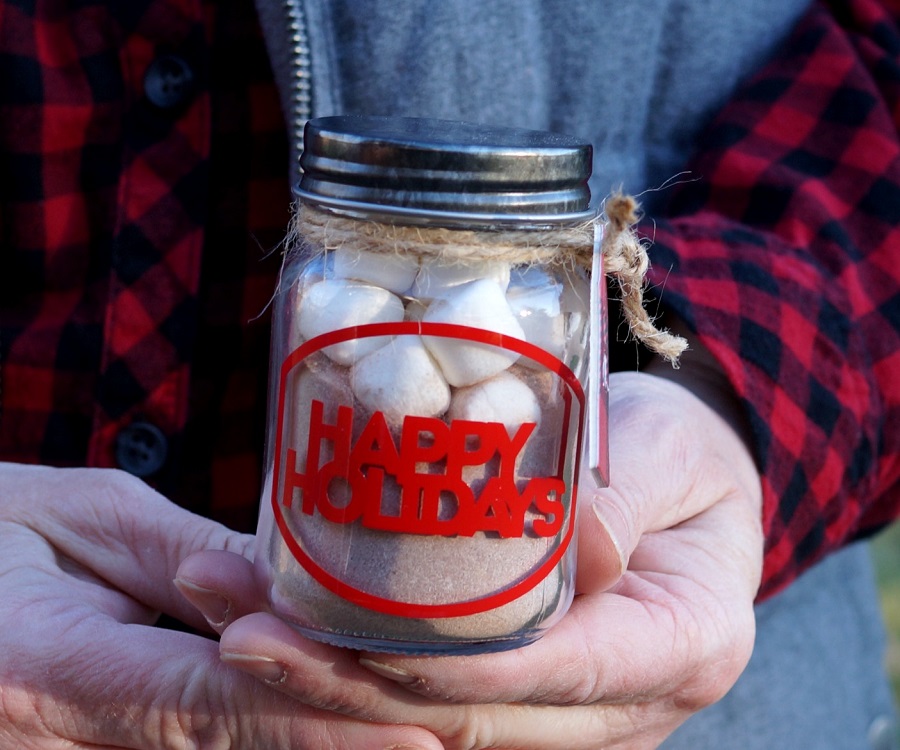
For my Hot Chocolate Jars…

I found little tiny mason jars at Michaels Craft Store.  I created labels for the jars using a

Silhouette Cameo Electronic Die Cutting Machine* and Red Glossy Craft Vinyl from

StyleTechCraft.  I applied my labels onto the jars using Vinyl Transfer Tape* .

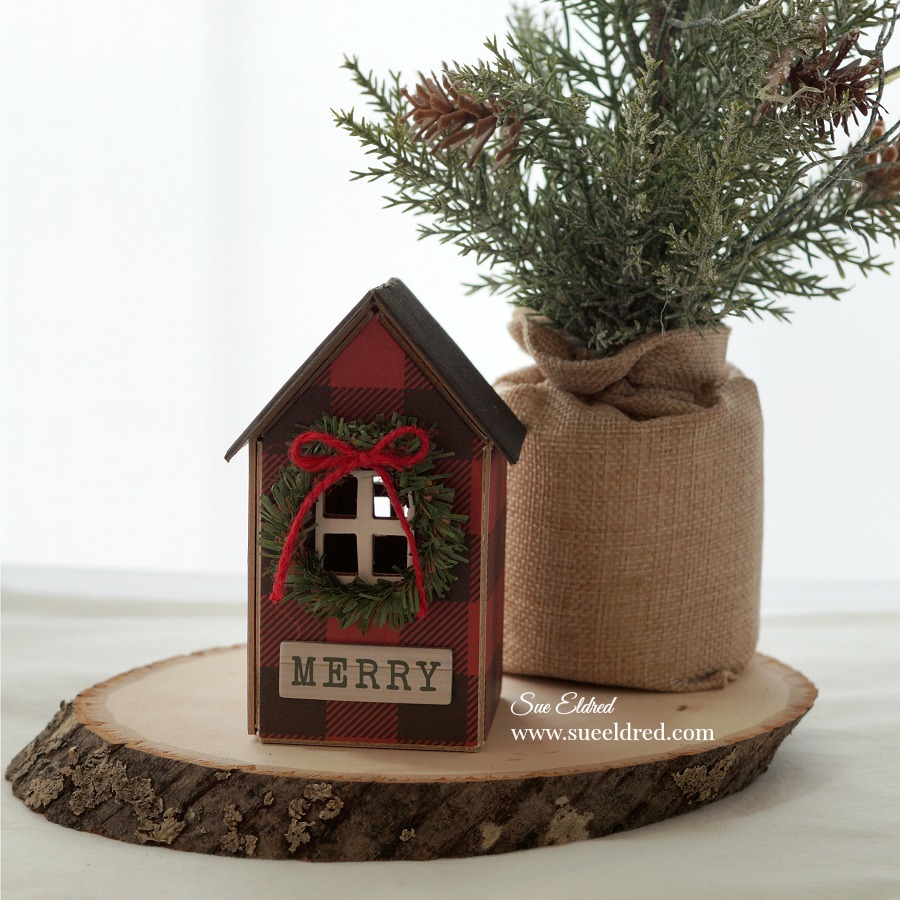
I tied a small plaid chipboard house made from Eileen Hull’s House Ornament Die*

with twine around the neck of the jar.

*Disclosure:  This blog uses affiliate links.  If you choose to make a purchase using one of the links, I receive a small commission (at no additional cost to you) that helps offset the costs of maintaining this blog.  Thanks for your support! 

The jars were filled with enough Hot Chocolate mix for one individual serving.  

They make a great party favor, and the guest gets to take home a cute little jar.

I put all the jars on the bottom of a plain black two-tiered metal stand.

I applied Red Buffalo Plaid Washi Tape* around the rim.

This little detail helped make it stand out and added to the theme.

On the top of the metal stand I added spoons, mini chocolate chips, candy canes.

I also left a place for a can of whipped cream (not yet added to this picture).

For the Table…

I used a black tablecloth for the base of my table and cut a red buffalo plaid runner from

plaid flannel.  (Sew Simple…I didn’t even sew the edges.)

It’s a really quick and inexpensive way to create the look

Air Pots filled with Hot Water made making the Hot Chocolate easy and mess-free.

For a vintage feel, I used large mason jars filled with extra hot chocolate mix,

extra marshmallows, and caramels.

I picked up the Buffalo Plaid Insulated Coffee Cups* and Red Buffalo Plaid Party Supplies* online.

A Hot Chocolate Bar would not be complete without frosted sugar cookies.

My sweet daughter in law baked these sugar cookies from my favorite sugar cookie recipe.

You can see the sugar cookie recipe here.

(The little red bird was made using an Easter Chick cookie cutter.)

I made the Holiday Hot Chocolate Sign by painting a wood bracket sign with black chalkboard

paint.  I used a Silhouette Cut SVG file from the Silhouette Store and my Silhouette Cameo

Electronic Die Cutting Machine* and resized the image to fit my sign.

I used red and white glossy craft vinyl from StyleTechCraft.

To complete the fun, I had fun Red Buffalo Plaid Themed Photo Props*.

I used Red and Black Buffalo Plaid wrapping paper on the background wall.

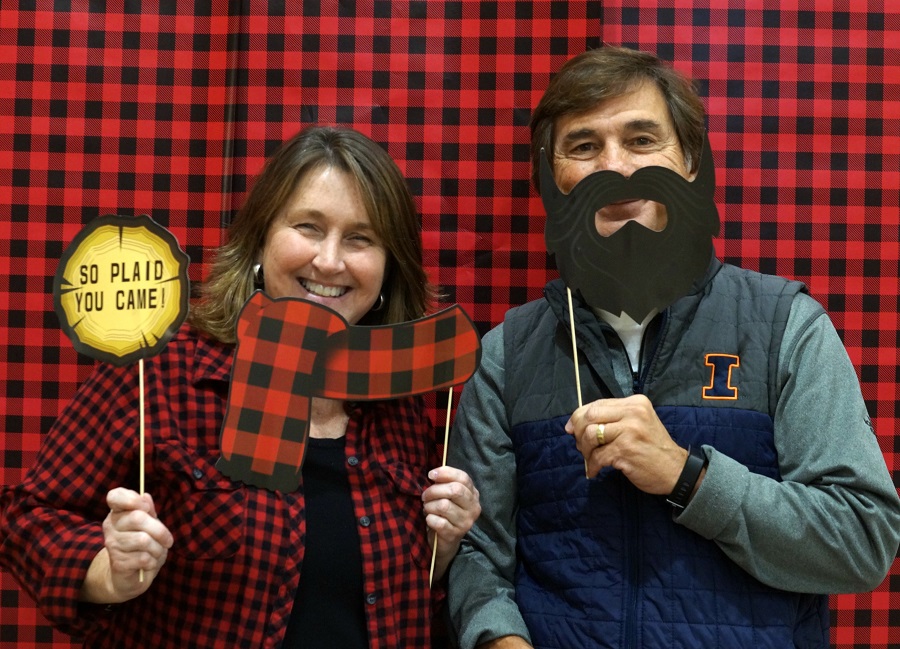
A fun way to break the ice and get the party started.

Red Buffalo Plaid Party Supplies Available on Amazon.

How to make a Red Buffalo Plaid Frame


How to Make a Red Buffalo Plaid Frame

Products Used:

Shop Your Fav Brands at Scrapbook.com

*Disclosure:  This blog uses affiliate links.  If you choose to make a purchase using one of the links, I receive a small commission (at no additional cost to you) that helps offset the costs of maintaining this blog.  Thanks for your support!

Directions:

  • Add strips of painter’s tape onto the frame to make stripes.  Rub your finger over the tape to make sure that the tape is securely on the frame and has no gaps.
  • Paint inside the stripes with black paint.  Be careful not to apply the paint too thick.   Only one thin coat of paint is needed.

  • Remove painter’s tape.
  • Allow black paint to fully dry before continuing to the next step.

  • Rotate the frame and apply the tape in the opposite direction.  Make sure the tape is securely on the frame.
  • Paint additional stripes.

  • Lightly sand the frame after dry.  Sanding brings out the woodgrain and helps to hide any little imperfection.
  • Wipe the frame smooth with a clean cloth.
  • Apply the Carta Bella Christmas Market Chipboard Accents to front of frame.

The Red Buffalo Plaid Frame was made in Sue’s 2019 Holiday Workshop.

 The Carta Bella Christmas Market Collection*

Give the Gift of Amazon Prime*

Sue’s 2019 Holiday Workshop

Registration is Open for Sue’s 2019 Holiday WorkshoP

The theme for this years Holiday Workshop is Mad for Plaid

We will be making several plaid themed projects along a few other non-plaid items.
Plaid Attire is not required but highly encouraged.

Here’s what to Expect…

  • Christmas Cards We will be making several Christmas Cards and Tags including the Merry Christmas Black Buffalo Plaid card pictured above.  (more samples to come)

  • NEW this year… a  Buffalo Plaid Hot Cocoa bar with yummy toppings to warm you up.   (Hopefully… Snow Not Included!)

      • I’ll also have fun Buffalo Plaid Party Props perfect for a picture or two with friends.  (party props from Oriental Trading)

The cost of the Holiday Workshop is $45…
which includes your workshop supplies*, hot lunch, Hot Cocoa Bar, yummy cookies and lots of prizes.  Did I mention every wins a prize?

Sue’s Holiday Workshop will be held at St. Mark’s Lutheran Church
200 S. Main St., Washington, IL  in the church’s large Family Life Center.
Great lighting and plenty of space.  It’s going to be a fun day.

The Workshop is limited to 20 spots.
So…Invite a friend and reserve your spot today.

RSVP: suesholidayworkshop@yahoo.com
Payment is due by Nov. 1st.

Disclosure:  This blog uses affiliate links.  If you choose to make a purchase using one of the links, I receive a small commission (at no additional cost to you) that helps offset the costs of maintaining this blog.  Thanks for your support!

A Very Merry Christmas Frame

Everyone in my family thinks of me whenever they see red buffalo plaid…

I’m not sure why?

But seriously… what’s not to love?

To make my Very Merry Christmas Frame…

I picked up a few sheets of the Simple Stories Very Merry line of scrapbook paper

from my local Scrapbook Store.   Along with a few embellishments and a

Deflecto Clear Frame, 8″ x 10″ (597901CR)*     (*affiliate link)

I made a cute and simple Very Merry Christmas frame.

If I decide to change the look next year, I have a great start to an awesome scrapbook layout.

“This is a sponsored post. As a member of the Deflecto Design Team I have been provided product in exchange for my creative ideas, views and opinions.”

Shop Amazon Scrapbooking Supplies*

*Disclaimer:  This post uses ads and affiliate links.  If you choose to make a purchase using one of the links, I receive a small commission (at no additional cost to you) that helps offset the costs of maintaining this blog.  Thanks for your support!

Making More Sock Snowmen

It looks like everyone’s in love with making sock snowman.

They’re really easy to make, with so many ways to add personality

And…I just can’t seem to stop making these cute little guys.

This year, to add to the mix,  I decided to create a Snow family.

Mom, Dad, a couple kids, all made from socks.

Shop Your Fav Brands at Scrapbook.com

Disclaimer:  This blog uses ads and affiliate links.  If you choose to make a purchase using one of the links, I receive a small commission (at no additional cost to you) that helps offset the costs of maintaining this blog.  Thanks for your support!

snow-family-close-up-sues-creative-workshop

Here’s What You’ll Need:                    (*affiliate Links)

Here’s how I made my Snowman:

  1. Tea dye a new white sock, crew length or bigger.  Or if you have boys you could use one of their dingy ones.  (It’s better not to use a sock with the grey toe and heel.)
  2. Cut the top of the sock off, right around the heel.
  3. Turn the sock inside out and attach a rubber-band tightly around the top of the sock.  Because rubber bands wear out with time, I added a good squirt of Beacon Fabri-Tac Permanent Adhesive* in and around the rubber band.  (I left the rubber band on)
  4. Turn the sock right side out and fill sock about 1/2 way with rice.
  5. Fill the remaining portion of the sock with fiber-fill.
  6. Wrap a piece of twine or string tightly around the top of the sock to close the sock.
  7. Tie a piece of twine about 1/3 down around sock to create the head.
  8. I used mini black buttons for his eyes, the tip of a bamboo skewer colored orange for his nose and a simple sewn black thread for his mouth.  I purchased a small felt hat from JoAnn’s Fabrics for Dad’s hat.  I added a band around the hat using a small folded piece of flannel.
  9.  For the flannel hat… Cut a piece of flannel that will go around the head of the snowman.  Create a band on the hat by adding and gluing a fold on the long end of the flannel.  Glue flannel together to create a “tube”.  Allow to fully dry.  Glue onto snowman.  Tie top of the tube with twine to create hat. Trim if needed.
  10. Dress with Snowman with part of an old sock.  Add a couple of buttons for added detail.  A  fringed piece of fabric works great for the scarf.
  11. For the kids… I used the left over piece of sock from the original snowman to create a smaller version.

snowman-couple-with-red-buffalo-plaid-sues-creative-workshop

And because I’m really into Red Buffalo Plaid again this year…

I made this cute little Snow Couple too.

The Snowmen measure approximately 7 1/2″ .

Try Amazon Prime 30-Day Free Trial

Save