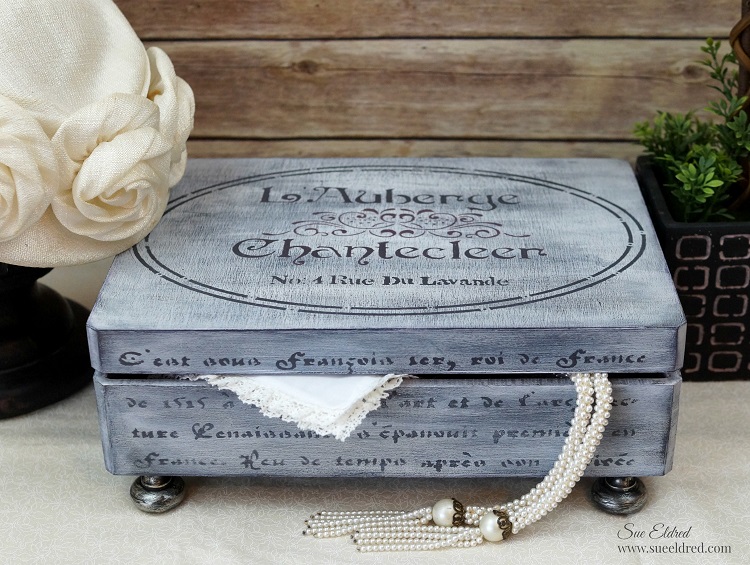
Vintage Inspired Memento Box
This Vintage Inspired Box is the perfect place to store special mementos for years to come.
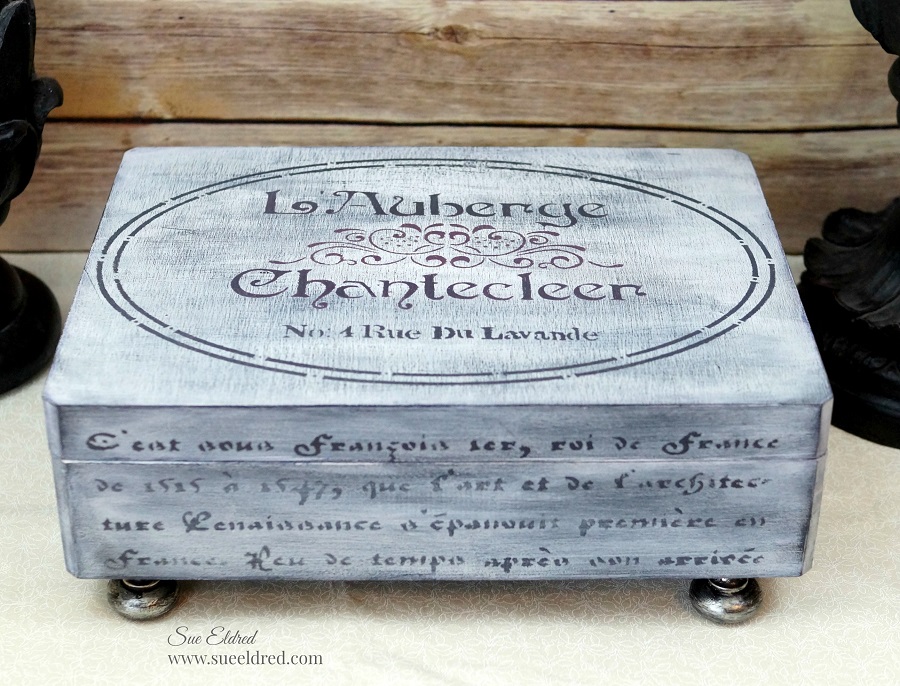
For this project, I started with a Unfinished Cornice Box from Walnut Hollow*
which I lightly white washed with a soft gray chalky finish, stenciled and slightly distressed,
for a warm vintage-feel home décor piece with a soft timeless finish.
![]()
The Vintage Inspired Memento Box was sponsored by Walnut Hollow and DecoArts.
*Disclosure: This blog uses ads and affiliate links. If you choose to make a purchase using one of the links, I receive a small commission (at no additional cost to you) that helps offset the costs of maintaining this blog. Thanks for your support!
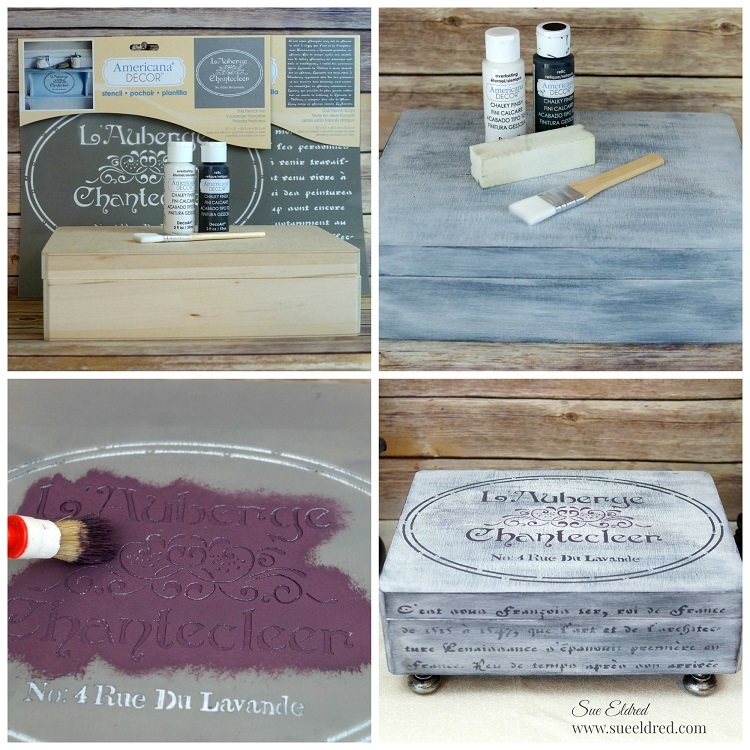
Supplies Used on the Vintage Inspired Memento Box… (*affiliate links)
- Walnut Hollow Unfinished Cornice Box*
- Deco Art Americana Decor Stencil, The French Inn*
- Deco Art Americana Decor Stencil, Old French Script*
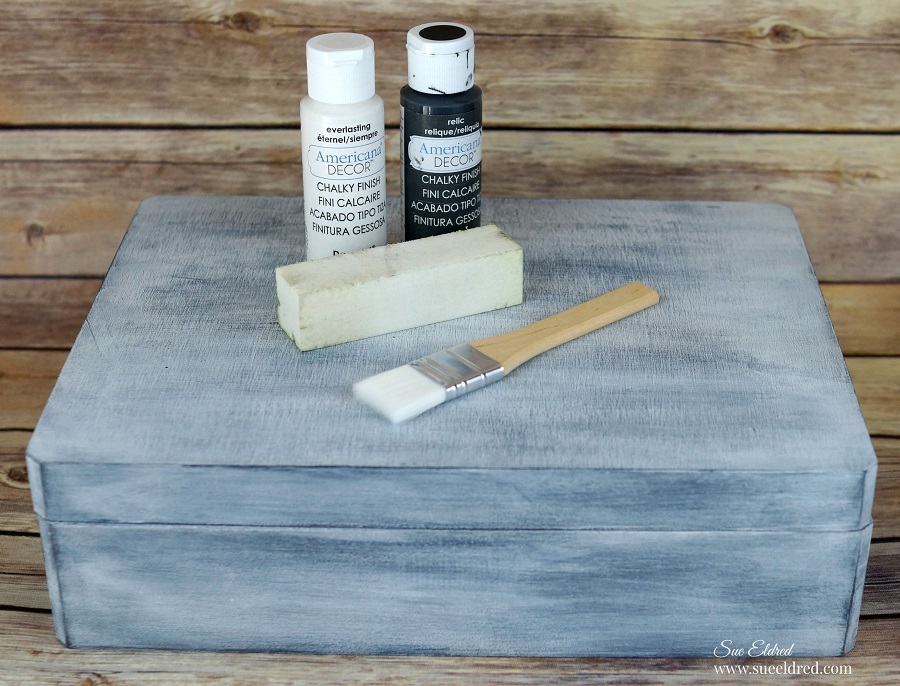
- Deco Art Americana Chalky Finish Paint, Relic*
- Deco Art Americana Chalky Finish Paint, Everlasting*
- DecoArt Metallic Lustre Wax, Champagne Ice*
- Brass Knobs*
(similar to one used)
- Paint Brush and Stencil Brush*
- Very Fine Sanding Block*
- Black Spray Paint*
- Clean Soft Rag
- Removable Painters Tape*
- Decorative Scrapbook Paper
- Craft Glue
How to Create a Vintage Inspired Memento Box…
Directions:
-
- Paint the Cornice Box* with Relic Chalky Finish Paint*
(inside and out).
- Lightly sand the box to smooth out the finish.
- Add a small bit of water to Everlasting* paint and give the box a quick white wash.
- Rub excess paint off the box with a clean soft rag for a slightly distressed look.
- Paint the Cornice Box* with Relic Chalky Finish Paint*

5. Position The French Inn stencil over the top of the box. Secure the stencil in place with the painters tape to prevent slipping. Use stipple brush to apply a mix of Relic, Romance & Everlasting paint to the decorative element in the center of the stencil.
6. Stencil the remaining open stencil areas with “Relic” paint.
7. Position and stencil Old French Script pattern onto the sides of box.
8. Allow paint to dry for a few hours and lightly sand over the stenciled area to give a slightly worn look.
9. Apply Clear Crème Wax onto the inside and outside of the box. Wait one hour and buff box using a soft clean rag.
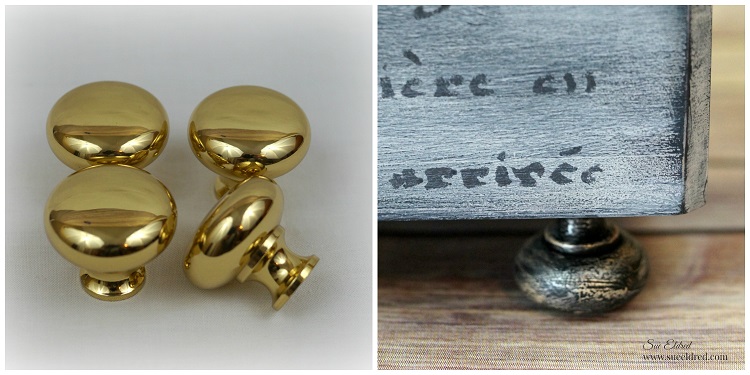
10. Spray the brass knobs with black spray paint.
11. Rub the knobs with Champagne Metallic Lustre Wax and buff.
12. Glue or Screw knobs in place.
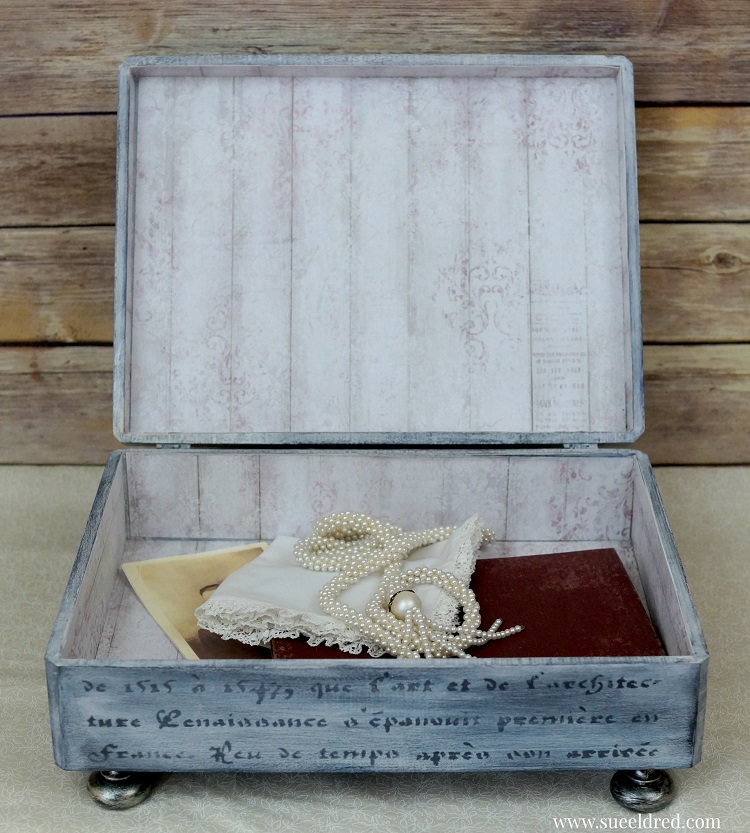
13. Measure decorative scrapbook paper or wallpaper scraps to fit inside the box.
14. Apply a thin layer of craft glue on the back of the paper and stick to the sides and bottom of the box.

