
Happy Haunts Pop-Up Card
Add a little dimension to your Halloween season with this sweet and simple pop up card.

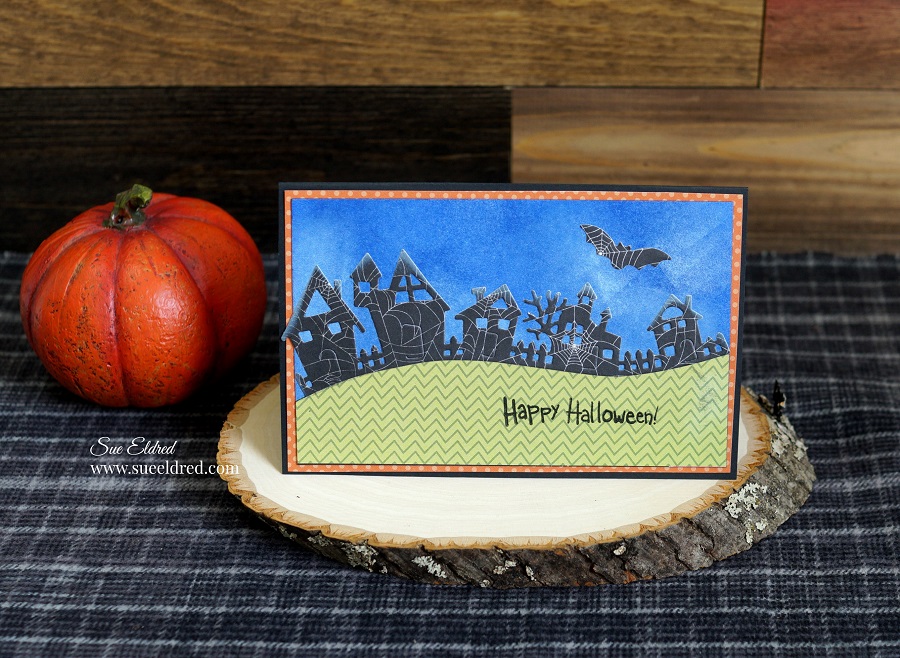
The Happy Haunts stamp and die set from Maker’s Movement.
The stamp set comes with three adorable pumpkin stamps and 12 spooky and sweet faces
to match any Halloween mood. The die set comes with a whimsical Halloween neighborhood,
a cute little bat and three perfect pumpkin dies to cut out your stamped pumpkins.
A HALLOWEEN STAMP AND DIE SET THIS FUN DESERVES A PLAYFUL CARD.

*Disclosure… “This is a sponsored post. I have been provided product and compensation in exchange for my creative ideas. The views and opinions are my own.”
Happy Haunts Pop-Up Supplies Used:
- Happy Haunts Stamp Set
- Happy Haunts Die Set
- Crossover II Fabric & Paper Cutting System*
- Xyron Create a Sticker Mini*
- Dye Inkpads: Black, Blue, White
- Ranger Inkssentials Ink Blending Tool*
- Mini Mister*
- Thin Foam Mounting Squares from Scrapbook Adhesives by 3L*
- Bella Blvd SS1997 Watching You (reverse side-green zig zag)
- Authentique NGT002 Nightfall Two (black spider web)
- Authentique PLE004 Pleasant Four (wood background)
- Orange Polka Dot Paper (Hobby Lobby)
- Orange Plaid Paper (from my paper hoard)
- Black Cardstock and Watercolor Paper

*Disclosure… This blog uses ads and affiliate links. If you choose to make a purchase using one of the links, I receive a small commission (at no additional cost to you) that helps offset the costs of maintaining this blog. Thanks for your support!

How to make a Happy Haunts Pop Up Card:
- First, pick out some fun patterned paper. There are so many cute patterns available to choose from it really doesn’t matter if it’s the same as mine.
- Stamp your pumpkins on orange patterned paper. If your paper is thin, run the strip of orange paper through the Xyron Create a Sticker Mini*
and place it onto black cardstock.

- One pumpkin stamp has a hole in the center with space to add a face. Perfect for stamping multiples.
- You’ll need to stamp 7 pumpkins.
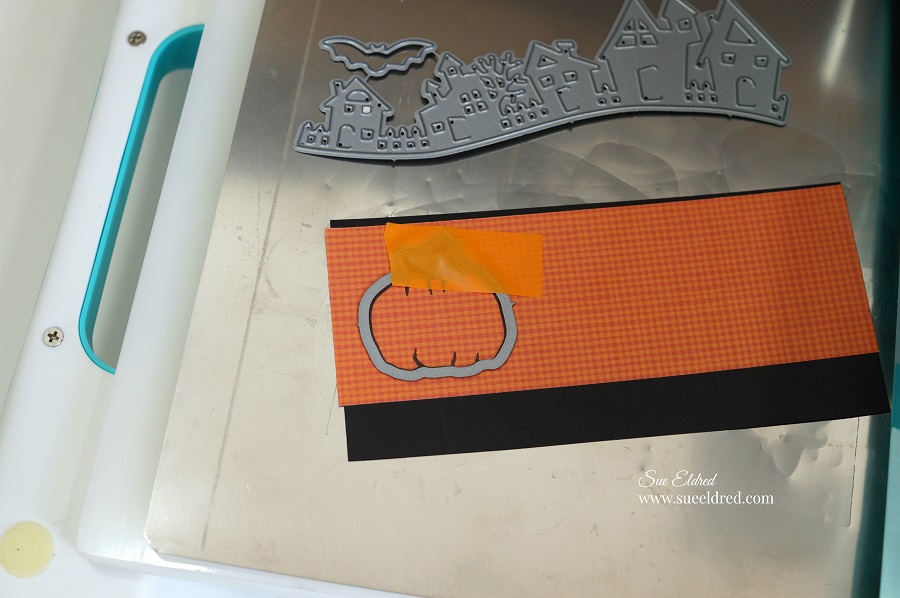
- Line up die with the stamped image. (cutting side down) I use a piece of washi tape on my die to hold it in place as I run in through the Crossover II Fabric & Paper Cutting System*

- Cut two 2 1/2″ x 6 strips of black patterned paper.
- Tip: Run both pieces of paper, pattern side up, through the Xyron Create a Sticker Mini* to add adhesive to the back of the paper. This is really helpful when die-cutting intricate shapes.
- Adhere one strip onto a piece of black cardstock before die-cutting. (this will be used for the inside of card.)
- Die-cut both strips of paper using the house die. (one is a sticker for the front of the card.)
- Add thin foam mounting squares*
to the back of the die-cut houses with the black cardstock. (Tip: cut a few foam mounting squares in half before applying.)
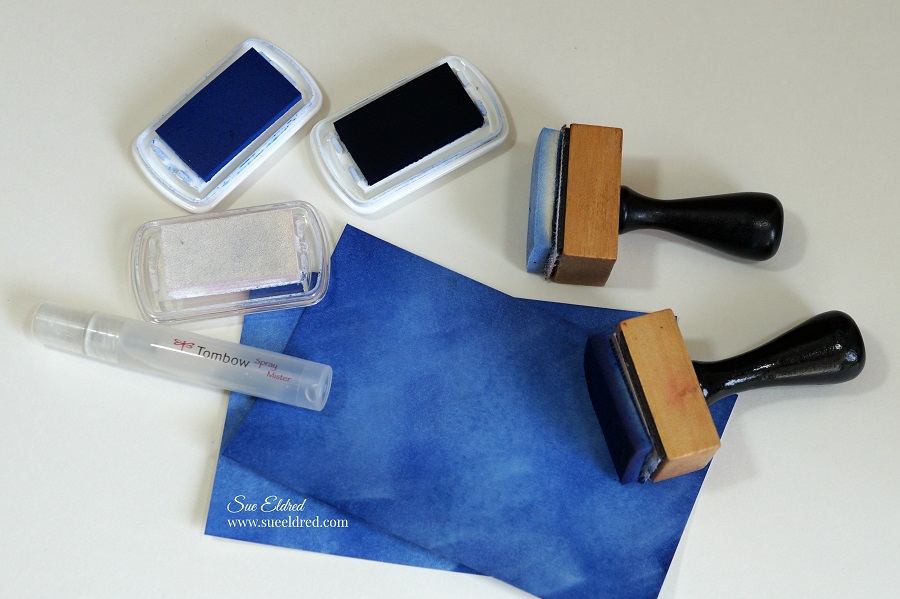
I couldn’t find the perfect night sky background for my card so I created my own.
- Cut a 3 3/4″ x 5 3/4″ piece of watercolor paper.
- Using an ink applicator, rub blue dye ink onto the surface of the paper.
- Add a few swirls of white ink onto the paper.
- Using a mini spray bottle, lightly mist the paper with water. The water will allow the inks to blend leaving a soft speckled appearance on the paper.
- Dry with hair dryer.
If you have the perfect background paper, you can eliminate these steps.↑
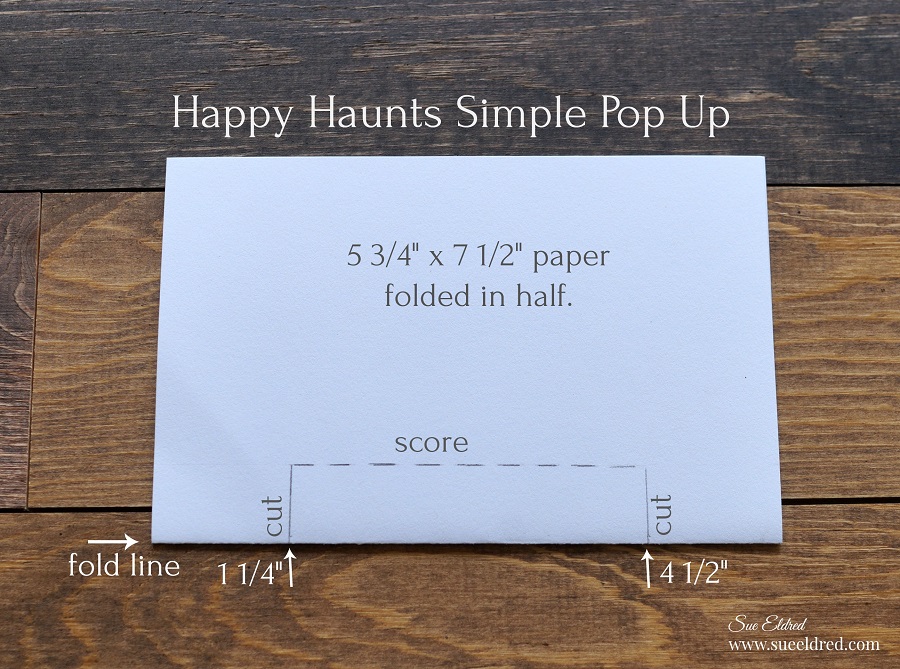
- Cut a piece of green patterned paper 5 3/4″ x 7 1/2″ and fold in half lengthwise.
- Cut a piece of patterned paper (mine was woodgrain) 3 3/4″ x 5 3/4″. Adhere this paper onto one half of the green patterned paper.
- On the outside folded edge, make a pencil mark at 1 1/4″ and 4 1/2″. (see diagram)
- Cut a 3/4″ line up on each measurement.
- Score and fold paper between cuts. (Use a bone folder for crisper folds.)

- Open card and push folded and scored section into middle of the card.
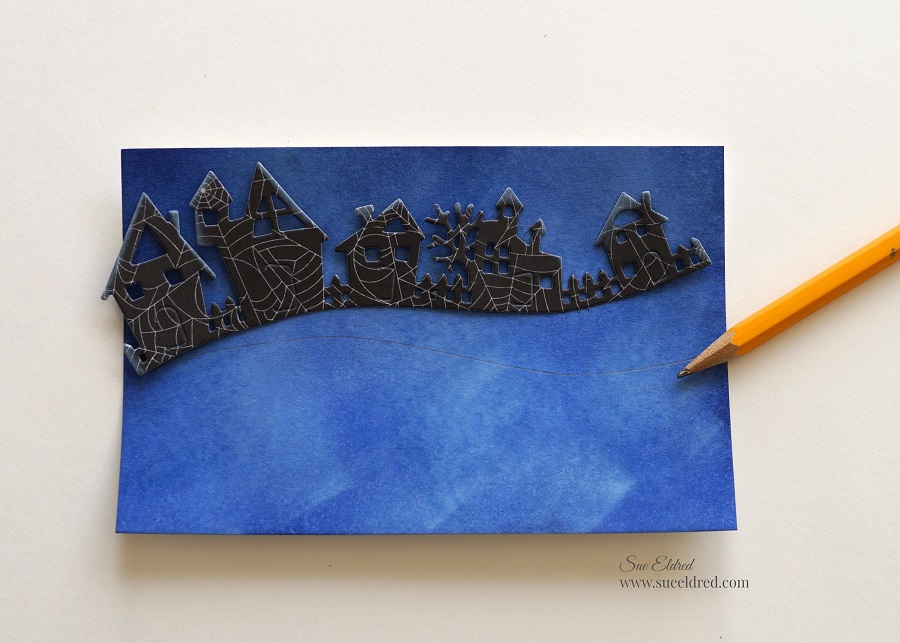
- Lay the neighborhood die-cut onto your blue background. Use a pencil to trace the bottom swirl of the die-cut.
- Cut paper along pencil line.
- Adhere the cut top of the blue background paper onto the top of the brown woodgrain paper on the inside of your card.
- Using the house die-cut with the black cardstock and foam mounting squares, adhere the neighborhood over the edge of the blue background paper.

- Add three pumpkins to the front of the center pop-up. On the middle pumpkin add a foam mounting square for extra dimension.
- Adhere a couple pumpkins to the background.

- Add black die-cut bat with a foam mounting square to the sky background.
- Add an extra pumpkin or two and stamp the words “Trick or Treat” to finish off the inside.
- Cut a piece of black cardstock 6″ x 7 3/4″. Fold in half to create outside card.
- Center and adhere the pop-up section into the center of the black card. Adhere one half section at a time.)
- Decorate front of the card similar to the inside of the card.

For a completely different look, a simple water colored card made with the same pumpkins.


Sue, this is adorable!! I think I have to give it a try! Thanks for sharing!!! It’s been a while since I’ve been card making
Mary…I’m glad you liked it. I’m glad to hear you’re thinking of getting back into cardmaking.
If you need a boost, I’m planning my Holiday Workshop for November 16th. We’d love to have you.