
How to make a Snowman Santa Wood Bead Ornament
Every year I like to make a new ornament or two for my Christmas Tree.
The Snowman Santa Ornament is an easy project that the whole family can make.

Materials Used: (*affiliate link)
- 25 mm Natural Wood Beads*
- White Acrylic Paint
- Mini Santa Hat from Hobby Lobby
- 16″ Natural Jute Twine*
- Red and White Twine*
- Large Eye Needle
- Red and White Felt
- Paint Markers or Permanent Markers
- 6″ Piece of Thin Wire
- Scissors
- Beacon Fabri-Tac Permanent Adhesive*
*Disclosure: This blog uses affiliate links. If you choose to make a purchase using one of the links, I receive a small commission (at no additional cost to you) that helps offset the costs of maintaining this blog. Thanks for your support!

Directions:
- Paint three wood beads with white acrylic paint.
- Tie the ends of the Natural Twine together to create a loop.
- Bend the small wire at the top of the looped twine to help you pull the wood beads. String all three beads onto the natural twine.

- Tie a knot at the top of the beads and trim off the excess twine.

- Place the Santa Hat on the top of the beads to determine glue placement. Remove the hat and add a small amount of glue on each side of the bead. Add Santa Hat.
- Give the Santa Hat a bend and glue in place with glue.
- Thread the red and white twine through the needle, insert it into the top of the Santa Hat to create a hanger to hang the Snowman.
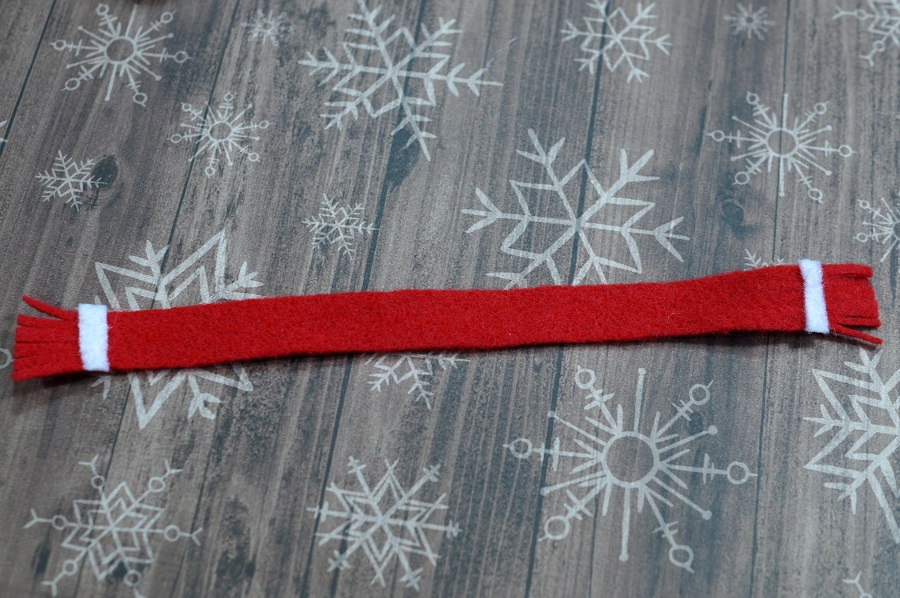
- To Make the Scarf: Cut a small thin piece of red felt. (approx. 1/2″ x 7″) Cut two small strips of white felt and glue them on each end of the red felt strip. Fringe the ends of the red felt.
- Tie the scarf around the top bead. Add a small dab of glue to keep the scarf in place.

- Use a paint marker to draw a simple face on the Snowman.

A Cute Little Snowman Ornament to hang on your Christmas Tree.

