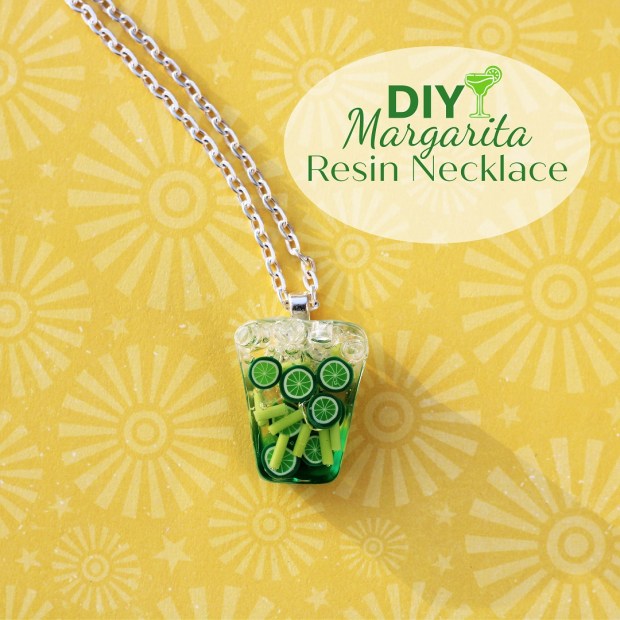
How to Make a Resin Margarita Necklace…
When I was in Orlando last month for the Namta Trade Show, I received a box
of YouV Art Resin to try. With Summer coming, I decided to have a little fun
and make a Margarita Necklace. (I needed it last week for Cinco de Mayo.)
![]()
Disclaimer: This is a sponsored post. I have been provided product in exchange for my creative ideas. The views and opinions are my own.

DIY Resin Margarita Materials Used: (*affiliate links)
- Mixed Drink Shaker Sprinkles: Margarita, Lime, and Ice Cube Shaker Sprinkles*
- Easy Cast Resin Jewelry Mold*
- YouV Art Yellow Jewelry Resin
- YouV Art Green Jewelry Resin
- YouV Art Clear Jewelry Resin
- YouV Art UV Flashlight
- Silver Necklace Bail*
- Rapid Fuse Adhesive*
- Silver Chain*

*Disclosure: This blog uses ads and affiliate links. If you choose to make a purchase using one of the links, I receive a small commission (at no additional cost to you) that helps offset the costs of maintaining this blog. Thanks for your support!

Directions:
- YouV Art resin is easy to use. No mixing or pouring and with minimal bubbles.
- Squeeze a small amount of green jewelry resin from the tube onto the bottom of the mold. (Do not fill the mold.)
- Add a small amount of yellow jewelry resin on top of the green. Swirl with a toothpick if desired.
- Add a small layer of clear jewelry resin on the top of the mold and add the tiny ice cubes.
- Use the UV flashlight to cure the resin for 10 seconds.
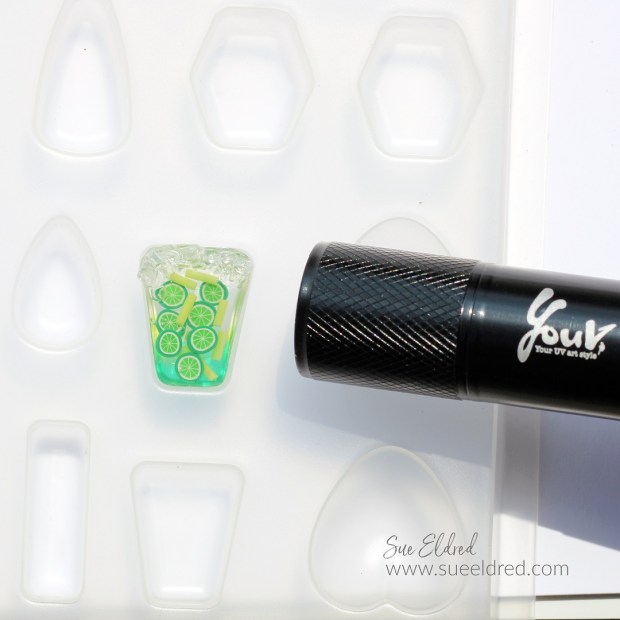
- Squeeze additional clear jewelry resin into the mold. Add slices of limes and margarita sprinkles from the Mixed Drinks Shaker Sprinkles*. Cure using the UV Flashlight for an additional 10 seconds.
- Add a thin line of resin over the ice cubes and add more ice cubes so that the cubes are higher than the mold. Cure using the UV Flashlight.
- After you finish layering your margarita, fill the mold with clear jewelry resin.
- Use the UV Flashlight to finish curing the remaining resin for 30-60 seconds.
- It easily pops out of the mold without the need of a releasing agent. (No need to wait.)

- Glue a Silver Necklace Bail* using Rapid Fuse Adhesive* onto the back of the resin. Slip the chain into the top of the jewelry bail and you are ready to wear. (How easy is that?)

This was so much fun to make. Especially since I am an impatient person.
It is quick and easy to use. It is great for layering because you can use
a little at a time, cure it, and then keep adding more as you go.

While I had the resin out, I decided to play a little more.
I used Clear Jewelry Gel and eyes from the Witches Brew Shaker Sprinkles* and the Hex Jewelry Mold to make dimensional eyes that I can use on a later project.

- To make the Heart Embellishment, squeeze a small amount of Clear Jewelry Resin into the bottom of the mold. Add a small pink heart on top the resin using the Sweetheart Shaker Sprinkles*.
- Cure the resin with the UV flashlight for 10 seconds.
- Finish filling the mold with Red Jewelry Resin.
- Use the UV flashlight for 30-60 seconds to finish curing the resin.