Making a Playhouse Banner with oly*fun

Making a Playhouse Banner with Oly Fun 9634My grandson Nicholas is celebrating his 5th birthday in just a few days.  (but who’s counting?)

He’s having two parties this Saturday.  One for the kids and the other for family.

Such a lucky little guy.  (Born on his Daddy’s birthday.)

Since the family party is at his house, I had an idea to make a bright colorful banner to decorate

the new playhouse.

I had recently received a selection of oly*fun to work with and thought it would be perfect to use.

It was super easy to put together.

Playhouse 9651

What exactly IS oly*fun? 

oly*fun is a specially engineered material that features some of the best things about fabrics AND

papers.  Easy to cut or die-cut and it will not fray.  It is great for outdoors

Supplies 9625

 Here’s what I used:

Supplies 9631

Directions:

  1. Stencil the check pattern using the black acrylic paint on the orange oly*fun.
  2. Create a banner pattern on cardstock.
  3. Cut out the banner pattern and trace onto the stenciled oly*fun.
  4. Trace and cut several banners out of the black and green oly*fun.
  5. Cut strips and circles to decorate the banners.  Glue onto banner with Fabri Tac Glue.
  6. Fold top of the banner and staple onto the piece of twine.
  7. Tie the banner onto the top of the playhouse and watch the kids play.

Playhouse 9644

A Special Thanks to Fairfield World for generously providing the oly*fun for this project.


Creating a Garden Stepping Stone

Creating a Garden Stepping Stone 08274

Every one in my family thinks of me when they see Red Toile dishes.

It’s my thing.  (one can never have too many right?)

So… when my daughter saw a set of Red Toile dishes on clearance for $25 at her local thrift store

she immediately called me to see if I wanted them.   (um, yes!)

While packing the car for their visit home, my son in law picked up the box to rearrange the car

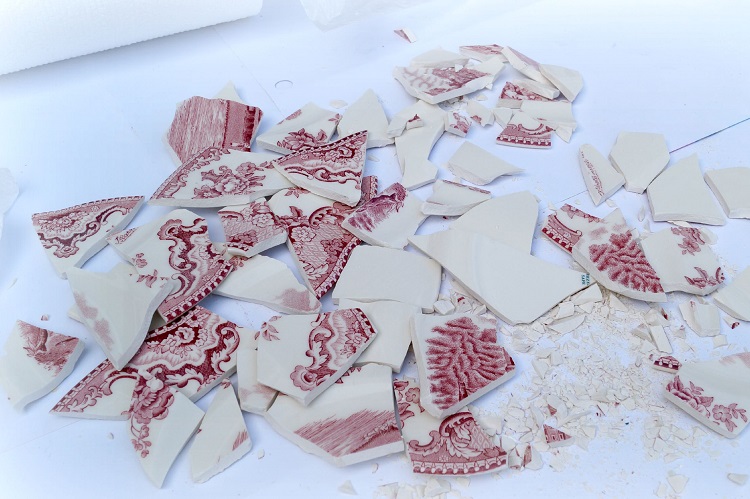
and the bottom fell out.  Most of the dishes survived.  Five of the large plates did not.

Broken China 08190

Deciding to turn lemons into Lemonade…

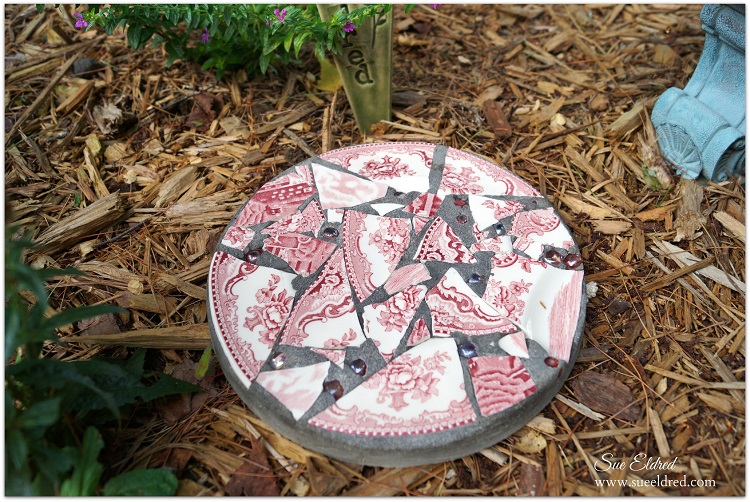
I kept the broken plates to make a few garden stones.

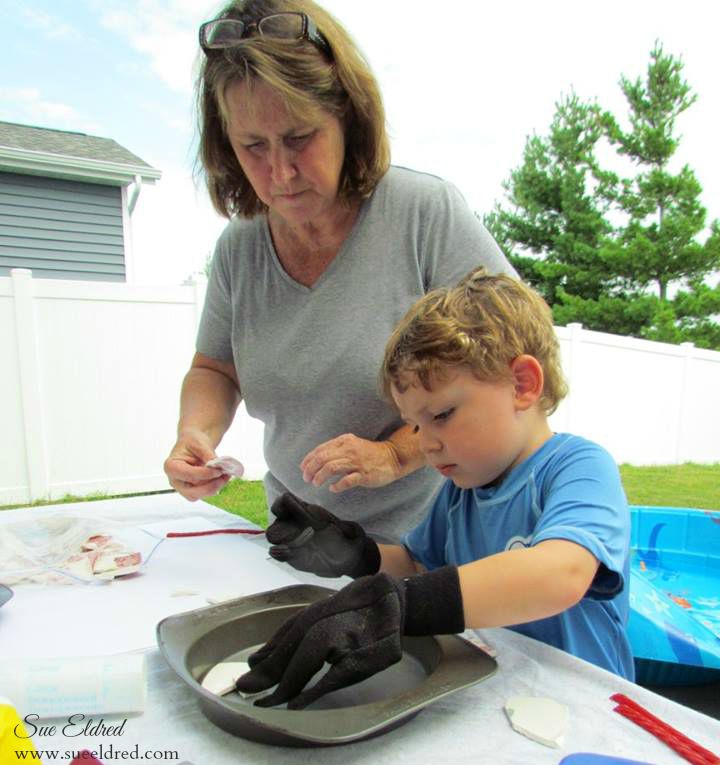
Nick and I making Garden Stones 2

I enlisted the help of my little buddy.  He was eager to lend a hand.  (with gloves of course)

Laying out the pieces in the pan 8187

Creating a Garden Stepping Stone:

  • Cover the sides and bottom of an old cake pan with Petroleum Jelly for easy removal.
  • Arrange the pieces of the broke china pattern side down in the bottom of the pan.  Make sure to use the flattest pieces.
  • Add glass stones in between the pieces for added color and interest.

Smoothing out the cement 8199

  • Mix a quick setting cement according to the directions on the package.
  • Fill pan with cement approx. an 1″ thick.
  • Shake pan a little to fill in the gaps and smooth.
  • Allow a couple hours for the stones to set.
  • Remove stepping stones from the pans and clean excess cement from the top of the stones with a stiff wire brush and water.
  • Allow a few days for the cement to cure before sitting outside in your garden.

close up of stone 8267

*Disclaimer:  This blog uses ads and affiliate links.  If you choose to make a purchase using one of the links, I receive a small commission (at no additional cost to you) that helps offset the costs of maintaining this blog.  Thanks for your support.

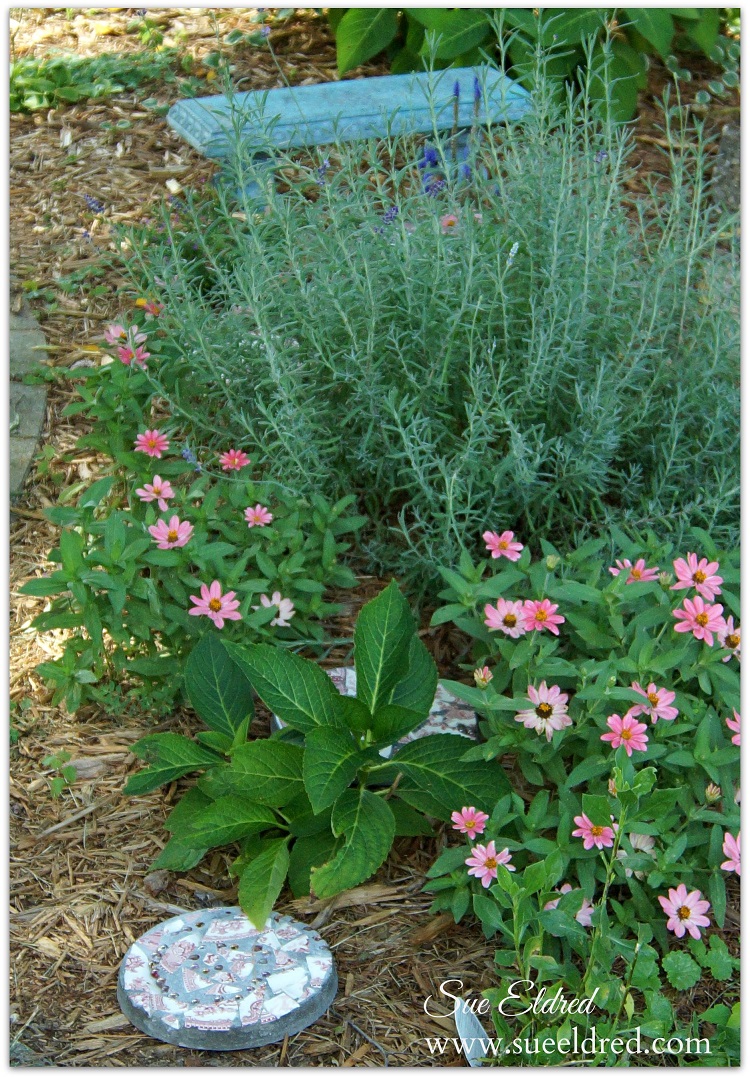
my flowers 8329

Any content on this website is created for inspiration purposed only.  Creating with my suggested methods, products used, and tools is under your own risk.


Try Amazon Prime 30-Day Free Trial

Etched Family Frame

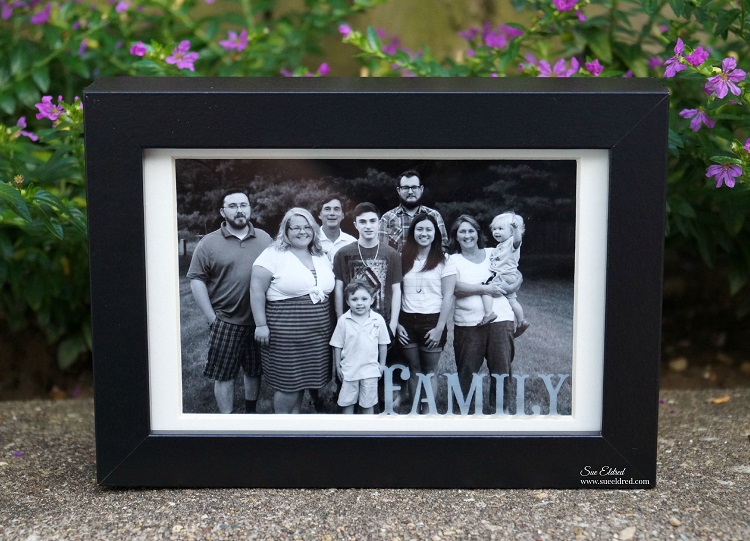
Etched Family Frame 09191

Whenever I get a chance…

Whenever they’re all home together…

I try to get a family picture.

It only seems to happen a few times per year.

When we’re all together, there’s so much excitement, talking and laughter that I  forget.

Like this summer, after swimming and naps….

I set up the tri-pod, gathered the kids and set up the self timer.

(it’s always good for a few laughs)  All 18 eyes were open,

all those who were running away were captured and everyone was looking.

Phew… not an easy task.  But always worth it in the end.

It was starting to get dark, so the picture’s not as clear as I’d like it.

I decided to print it in black and white and put it in a simple black frame.

Family close up 09196

To capture the sentiment of the picture I etched the word “family” on the glass.

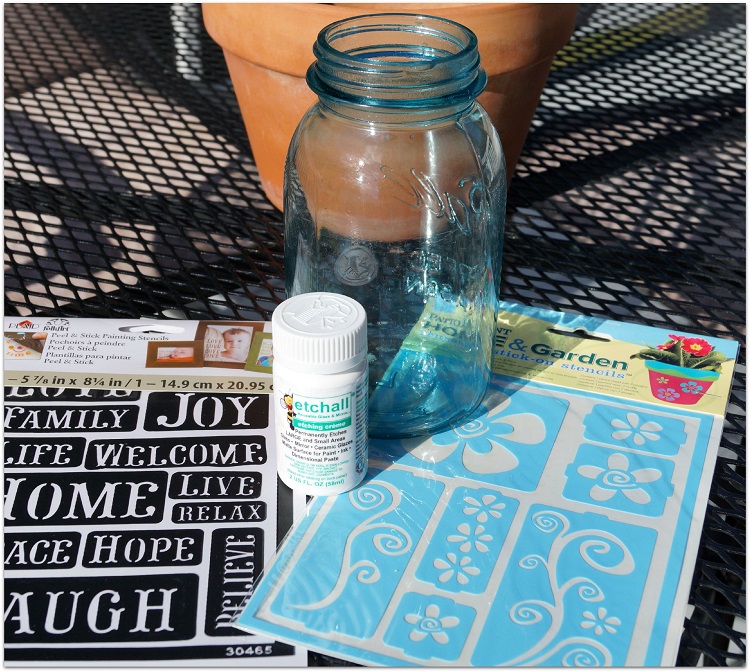
Etched Frame Supplies 08943

Etched Family Frame Products Used:               (*affiliate links)

Directions:

  1. Remove glass from frame.  Clean glass to remove all dirt, fingerprints and oil.  Dry with a coffee filter, paper towel, or lint-free cloth.
  2. Apply “Family” stencil to glass.  Burnish the edges of the stencil.  You want to make sure no edges are coming up.
  3. Mask around the stencil with removable painters tape for extra surface protection.
  4. Apply a heavy coat of etchall® etching crème to the masked area of the stencil.
  5. Leave etching crème on design for 15 minutes.  After etching time has elapsed, use the squeegee to return the crème back into the original container for later re-use.
  6. Rinse etched surface with hot water to remove any remaining crème. Remember to keep crème away from porcelain sinks or ceramic tiles.
  7. To make the etched letters stand out more, apply picket fence distress paint over the letters.  Wipe surrounding area of the glass clean.

Poof and he's gone

and for your viewing pleasure…

Shop Your Fav Brands at Scrapbook.com

*Disclaimer:  This post uses ads and affiliate links.  If you choose to make a purchase using one of the links, I receive a small commission (at no additional cost to you) that helps offset the costs of maintaining this blog.  Thanks for your support!

Try Amazon Prime 30-Day Free Trial

Preserving Summer Memories

Summer Layout 9108

I’m holding on to Summer as long as I can.

This summer Nicholas learned how to swim the entire length of the pool without the aid

of a floatie and he learned how to float on his back.

Warren learned how to jump off the side of the pool.

Pretty impressive when you consider they’re only 4 and 1 1/2.

Nicholas loves the water, we call him a polar bear because it doesn’t matter how

cold the water is.

Yesterday… we had our last pool party of the season.  Thanks to a little 95º heat wave.

I’m going to miss summer.

My Summer Layout uses:

  • Simple Stories Collections: Summer Vibes and Freedom
  • Bo Bunny’s Boardwalk

Join Amazon Kindle Unlimited 30-Day Free Trial

Disclaimer:  This blog uses ads and affiliate links.  If you choose to make a purchase using one of the links, I receive a small commission (at no additional cost to you) that helps offset the costs of maintaining this blog.  Thanks for your support!

How to Etch a Mason Jar…

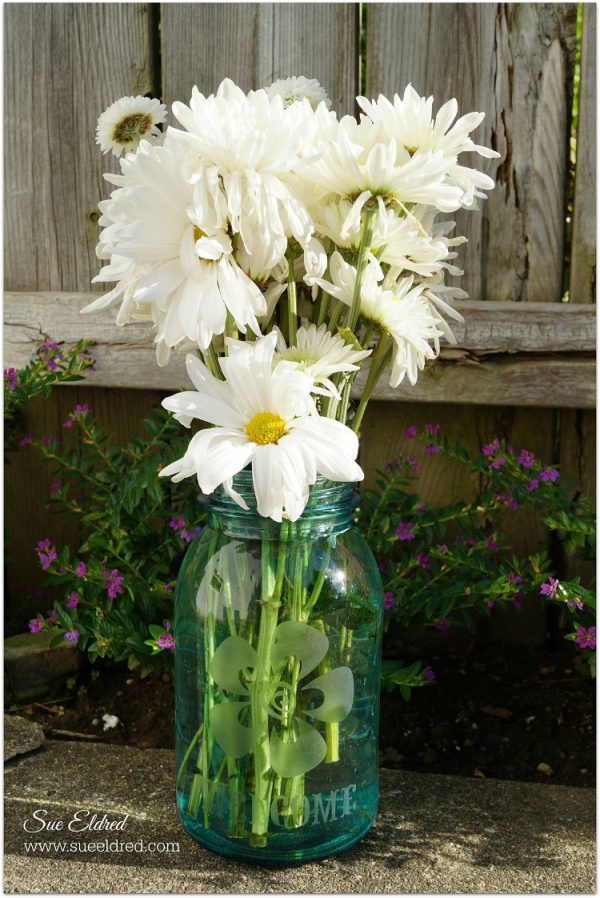
I love the look of daisies in old blue canning jars.  It just says summertime.

It’s simple, beautiful and it makes me happy.

I recently got the opportunity to work with a new product, etching crème from Etchall®.

While looking around for something to etch, I noticed the daisies sitting on the table.

Hmmm…Wouldn’t that look great with a etched flower and a greeting?

It’s a super simple project.  (just how I like it)

Here’s what you’ll need:                                   (*affiliate link)

Shop Your Fav Brands at Scrapbook.com

Directions:

  1. Clean jar to remove all dirt, fingerprints and oil.  Dry with a coffee filter, paper towel, or lint-free cloth.
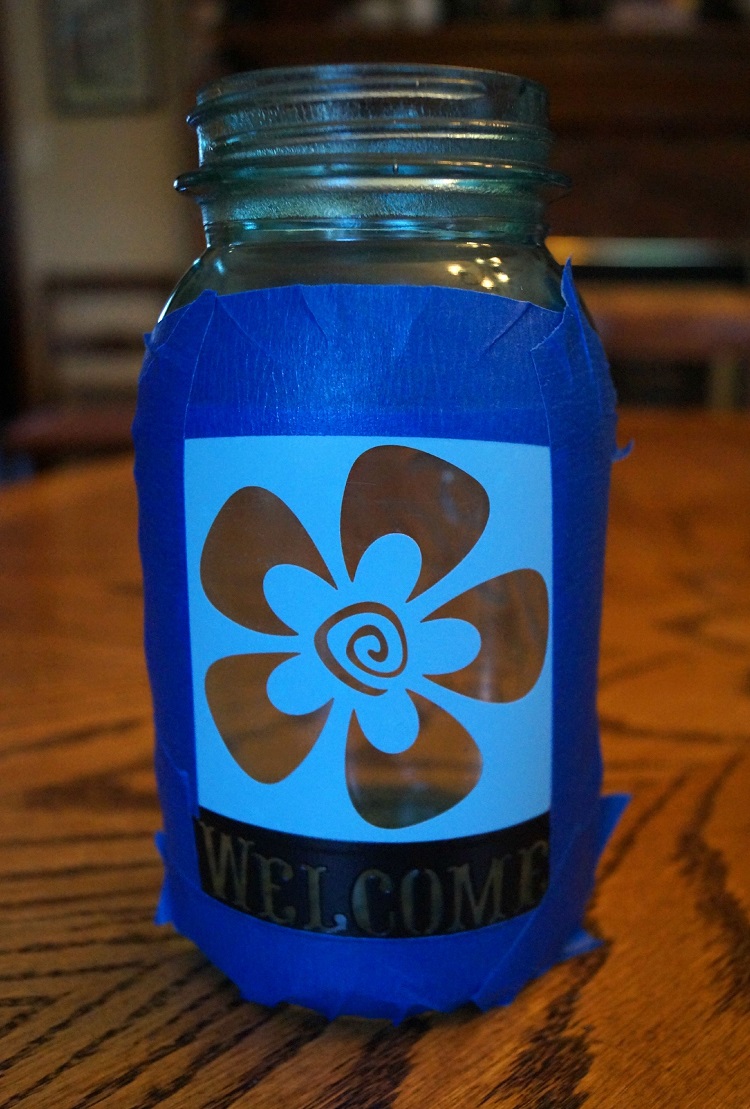
  2. Apply Stencils to jar.  Burnish the edges of the stencil.  You’ll want to make sure no edges are coming up.
  3. Mask around the stencil with removable painters tape for extra surface protection.
  4. Apply a heavy coat of etchall® etching crème to the masked area of the stencil.
  5. Leave etching crème on design for 15 minutes.  After etching time has elapsed, use the squeegee to return the crème back into the original container for later re-use.
  6. Rinse etched surface with hot water to remove any remaining crème. Remember to keep crème away from porcelain sinks or ceramic tiles.

Mason Jar with Stencils 8839Mason Jar with Stencils and Masks 08841Mason Jar with Etching Creme 8842

             Step #2                                        Step #3                                      Step #4

The etched flower looks subtle against the water in the blue jar.   

“This is a sponsored post.  As a member of the Etchall Design Team I have been provided product and compensation in exchange for my creative ideas.  The views and opinions are my own.”

Join Amazon Kindle Unlimited 30-Day Free Trial

Disclosure:  This blog uses ads and affiliate links.  If you choose to make a purchase using one of the links, I receive a small commission (at no additional cost to you) that helps offset the costs of maintaining this blog.  Thanks for your support!


Don’t Miss a Thing…Make Sure to Follow me.

Crafting with Office Supplies

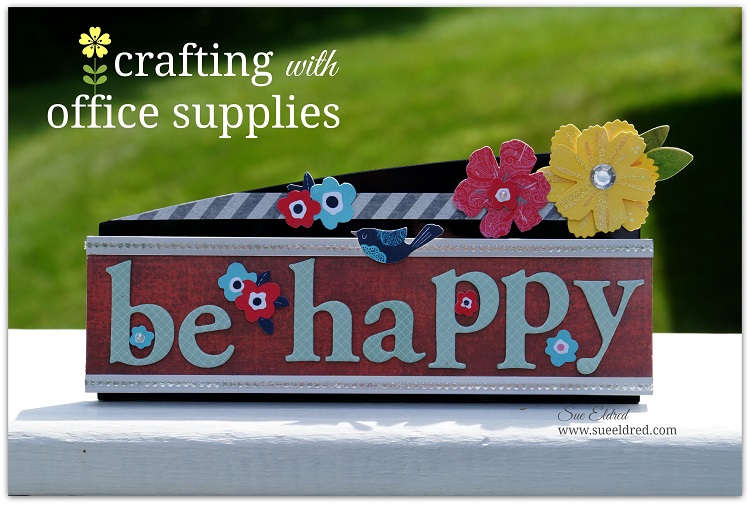
crafting with office supplies 2 07793

When you think of crafting do you ever think office supplies?

Would you believe…

the “be happy” sign, which is now sitting happily on my fireplace mantel,

started out as a office name plate holder

A few stickers, chipboard letters, washi tape and voila a happy little reminder.

There are surfaces everywhere just waiting to be embellished.

Name plate 2

Deflecto Interior Image Sign Holder, 8.5 x 2 Inches, Nameplate (89105) (affiliate link)

“This is a sponsored post. As a member of the Deflecto Design Team I have been provided product in exchange for my creative ideas, views and opinions.”

Join Amazon Kindle Unlimited 30-Day Free Trial

Disclaimer:  This blog uses ads and affiliate links.  If you choose to make a purchase using one of the links, I receive a small commission (at no additional cost to you) that helps offset the costs of maintaining this blog.  Thanks for your support!

Colorful Chalkboard Frame for Kids and grownups

Funky Pallet Frame 8798

A simple paint and stencil project, fun for kids or grown ups.

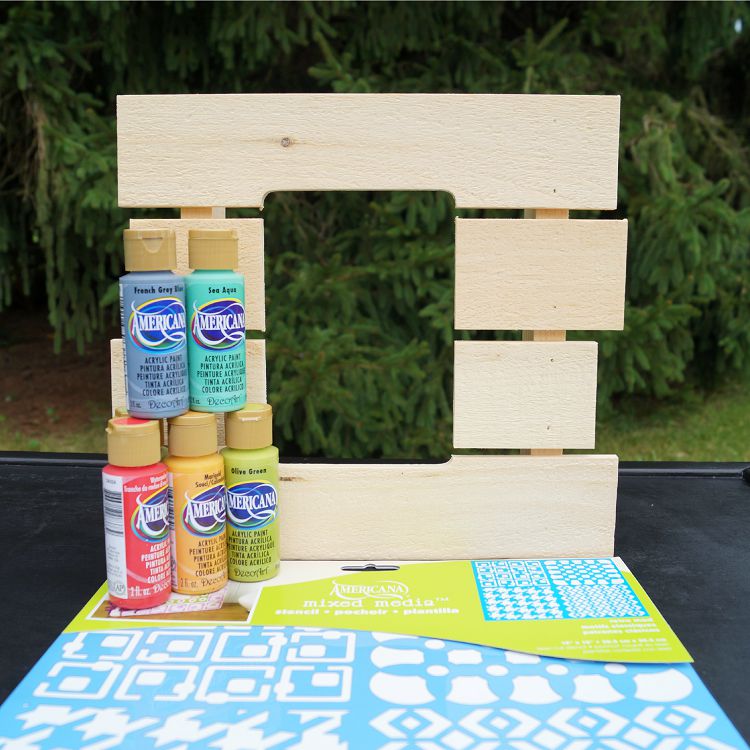
I decided to finish painting this colorful Rustic Pallet Frame* that I started working on

yesterday evening.  As the name suggests, the frame is rustic and somewhat rough.

Because I was planning on stenciling on it…  I sanded the front of the frame to make it smoother.

I wasn’t worried about making it completely smooth.

The Colorful Chalkboard Frame would be a great project to make with the kiddos.

Funky Pallet Frame painted 8792

Directions to make the Colorful Chalkboard Frame:

  1. Sand the front of the frame.
  2. Paint the frame with white acrylic paint.
  3. Paint the top of each pallet section with different acrylic colors.  Sort of a modified rainbow.
  4. Because the stencil had four unique patterns, I decided each color needed its own pattern.
  5. Mask off each section of the wood before stenciling.
  6. Stencil using a stipple brush and white acrylic paint.
  7. Allow to dry completely
  8. To mute to colors:  Lightly sand the frame with a sanding block.  (optional)
  9. For an added sheen:  Apply clear crème wax to front of frame, allow to sit for one hour and buff.
  10. I added a small chalkboard to the inside of the frame.

Funky Pallet Frame Supplies

Supplies Used:                                          (*affiliate link)

*Thanks to Walnut Hollow and DecoArt for providing the materials used on this frame.

For more Summer fun with the kids…click on SIime Ad below.

Slimer

Disclaimer:  This blog uses ads and affiliate links.  If you choose to make a purchase using one of the links, I receive a small commission (at no additional cost to you) that helps offset the costs of maintaining this blog.  Thanks for your support!

Join Amazon Kindle Unlimited 30-Day Free Trial

My Fabulous Thrift Store Make-Over

I almost passed on this plain 8 drawer cabinet last April while visiting my daughter in Madison.

I didn’t really need it, I have too much stuff, would there be room in the car?  (geez!)

It was sitting there in the Thrift Store for only $8.  They had just put it out that day.

I had to take it home.  (I just had too.)

Stenciling the drawer 8355

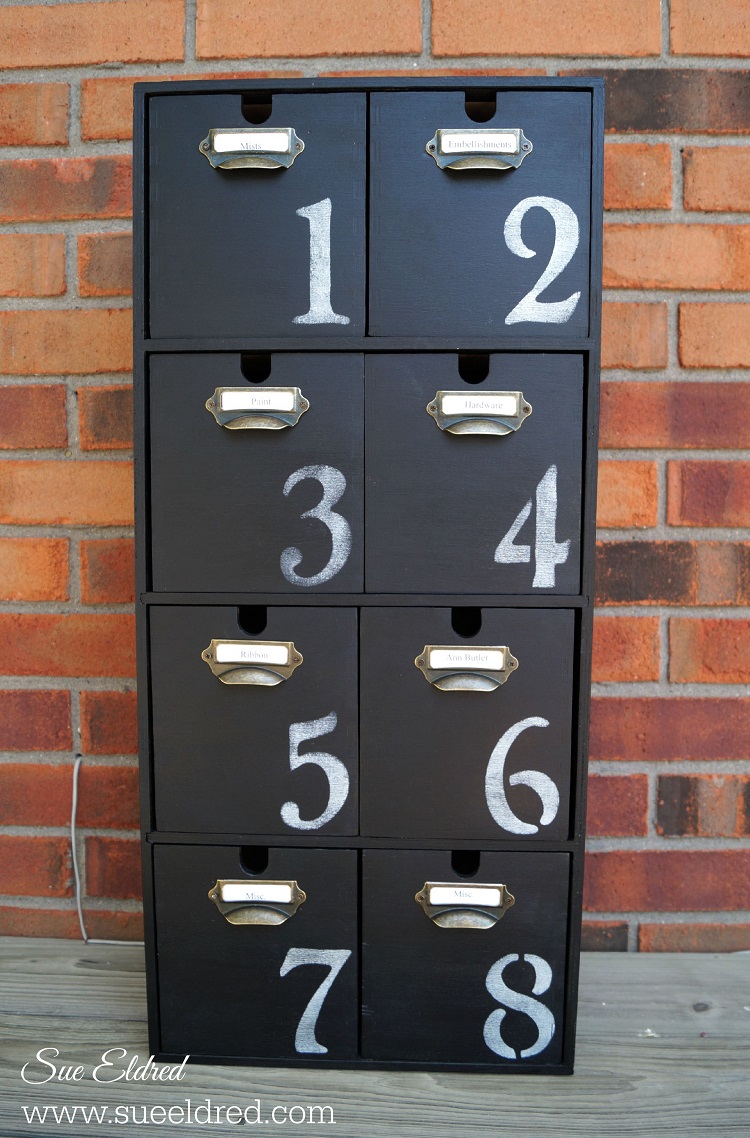
As soon as I got it home, I painted it with a couple coats of black paint and gave

it a clear wax coat.  It sat in my office that way for the next four months.

(I’m starting to notice a pattern here.)  Anyway…. I decided that the cabinet needed more.

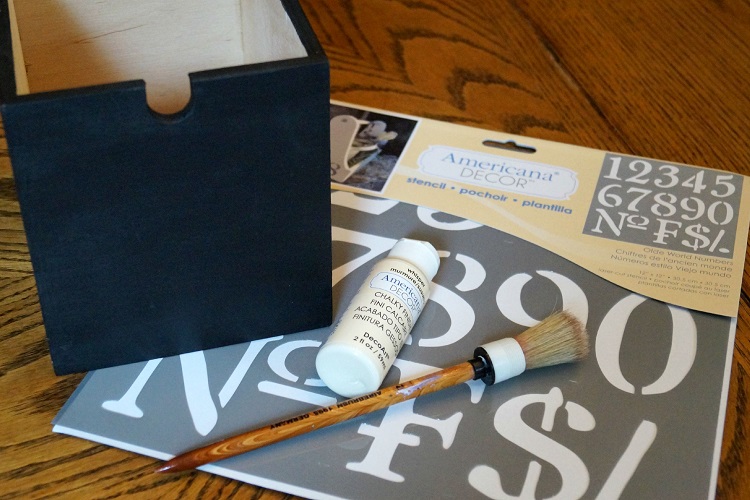
After receiving these cool number stencil,

Deco Art Americana Decor Stencil, Old World Numbers*    (*affiliate link)

and Whisper Chalky Finish Paint* from DecoArt as part of their Blogger Outreach Program,

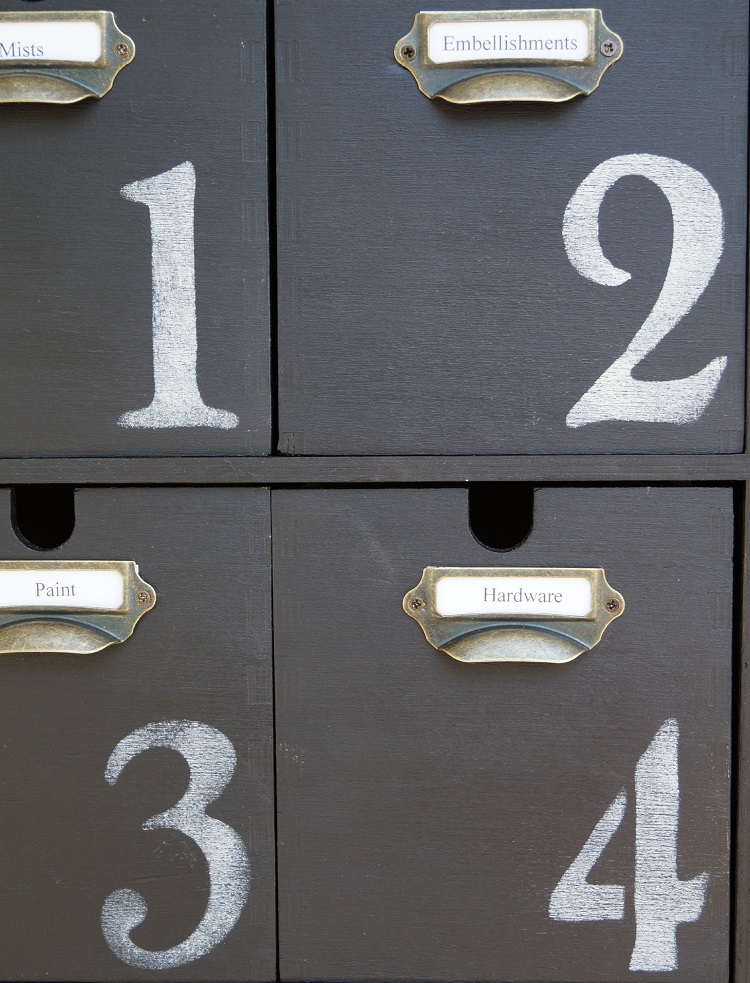
I stenciled each drawer 1-8.

To keep the numbers from looking too new or bright, I lightly sanded over the letters with a

extra fine sanding block and applied another coat of clear wax.

Drawer Close Up 8446

My hubby helped me put on these vintage looking drawer pulls I’d found on Etsy.

I spent more than twice as much on the drawer pulls than I did the cabinet.

Black Cabinet 8444

I’m so happy with the way it turned out.  Doesn’t it look beautiful?

Join Amazon Kindle Unlimited 30-Day Free Trial

Disclaimer:  This blog uses ads and affiliate links.  If you choose to make a purchase using one of the links, I receive a small commission (at no additional cost to you) that helps offset the costs of maintaining this blog.  Thanks for your support!

Painting on Acrylic Frames

Painting on Acrylic Frames

With all this new Home Décor chalk paint out on the market…

with it’s claims of being able to paint on most anything.  I decided to give it a test.

I’ve used it on wood, old frames, stuff like that.

Acrylic frames?  It was worth a try.

Creating a mask 5889

I created a mask using blue painters tape and applied it onto the front of a

Mini 3″ x 4″ Sign Holder* (*affiliate link) from Deflecto Craft Solutions.

Make sure to burnish the edges of the tape.

adding red paint 5890

I painted the surface of the frame with:

FolkArt Home Decor Chalk Furniture & Craft Paint in Imperial*

I used 3 coats of paint.  Make sure to allow good drying time in between coats.

adding black paint 5897

After allowing plenty of time for the red paint to dry and cure.

I gave the frame an aged look by applying a layer of Tattered Angels Decor and DIY Paint*

I wiped it off with a damp paper towel.  Leaving bits of the black streaks.

Crackle Stamp 5899

I stamped around the edges of the frame with a crackle background stamp

and  Tsukineko StazOn Ink Pad, Jet Black*

Carefully remove the blue painter’s tape mask.

At this point, I stopped and admired my frame for almost a month.

Just waiting for inspiration….

Rachael Cunningham Parr 7560

Meet Rachael Cunningham Parr. 

I found Rachel, a tin type, years ago while hunting for treasures.

If Rachael is your relative, I’m pretty sure she wasn’t really a gypsy.

(She really is a beautiful woman.)

I embellished the frame with some vintage rickrack, key, and a tiny flower.

“R is for Racheal” was made with Metal Type Charms by Tim Holtz*

Once inspired…  I created a couple more frames.

The frames uses charms and hardware from Canvas Corps Brands 

and Chitchat Word Stickers by Tim Holtz*.

Now to try this on a bigger frame!

 “This is a sponsored post. As a member of the Deflecto Design Team I have been provided product in exchange for my creative ideas, views and opinions.”

*Disclaimer:  This blog uses ads and affiliate links.  If you choose to make a purchase using one of the links, I receive a small commission (at no additional cost to you) that helps offset the costs of maintaining this blog.  Thanks for your support!

Creating a Decorative Display Board for all my Little Pretties

Smoothfoam Display Board 07114

My project started as a Memo Board and… 

While I was looking for some push pins I stumbled across a collection of little pretties.

Tucked away in a cabinet along with a lot of other embellishments were these little

metal frames.  Something that I’d been hoarding since my K & Company days.

I added those frames along with some other little pretties onto my board.  (Love!)

Memo Board Products

To make my Memo/Display Board I used:            (*amazon affiliate link)

Directions:

  1. Paint wood frame with cream acrylic paint.
  2. Cut the Smoothfoam sheet a 1/4″ larger than the center opening of the frame.
  3. Apply spray adhesive to the front of the Smoothfoam and lay onto the fabric.
  4. Wrap and glue the fabric around the back of the Smoothfoam.
  5. Glue the frame onto the front of the covered Smoothfoam.
  6. Decorate the top and bottom of the frame with dimensional flowers.

*My little pretties are stuck into the display board with decorative garment pins.

A really fast and easy project.

This project was created for and sponsored by Smoothfoam.

Shop Amazon Scrapbooking Supplies*

Disclaimer:  This blog uses ads and affiliate links.  If you choose to make a purchase using one of the links, I receive a small commission (at no additional cost to you) that helps offset the costs of maintaining this blog.  Thanks for your support!