DIY Wedding Projects Day #4: Wedding Album

Wedding Album 2

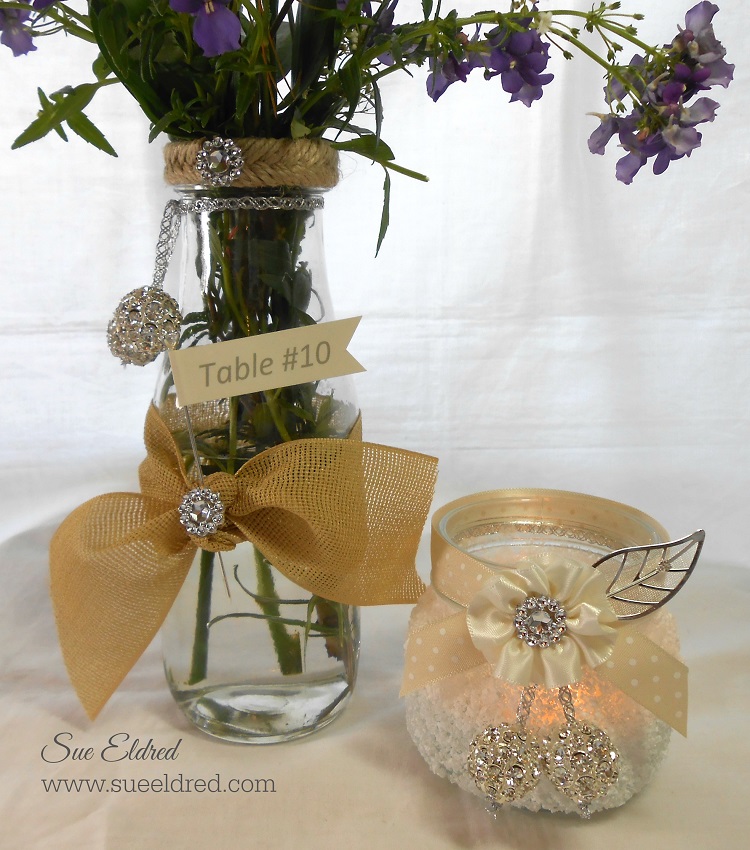
Preserve your memories from weddings, anniversaries, and more, in this beautiful burlap covered scrapbook or photo album. Embellish the cover with ribbon, gems, twine and more for a personalized look you will love.

Supplies Needed:

  • 1 yd. Gazette 2” Ribbon: Raw Silk
  • ½ yd. Antique White Double Faced Satin 7/8”
  • ½ yd. Lucy Ivory Lace
  • 2 Gems from Design Chain Tracy-Silver
  • Twine
  • Chic Silver Leaves
  • Pre-Made 5” x 7” Burlap Covered Scrapbook Album
  • 3” Chipboard Heart
  • Beacon Fabri-Tac Permanent Adhesive*  (affiliate link)
  • Needle and Thread

Wedding Album Directions:

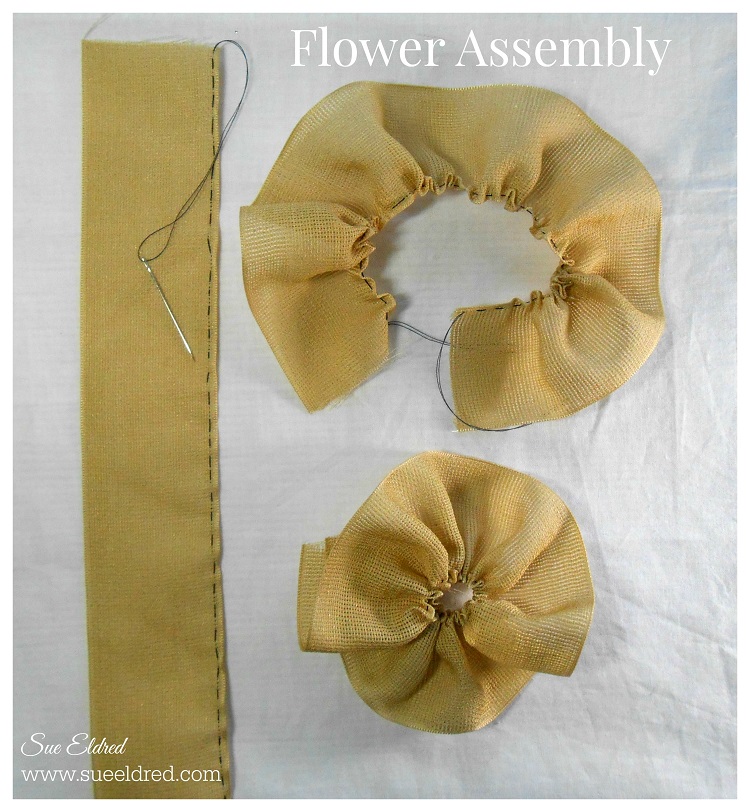
  1. Cut approx. 16-18” of Gazette Raw Silk Ribbon. Using the needle and thread with a long tail, make a simple running stitch down one side of the ribbon.
  2. Gather ribbon together with thread and tie in the center to form the ribbon rosette.
  3. Create a second ribbon rosette using 12” of 7/8” Antique White Double-Faced Satin Ribbon.
  4. Glue Antique White rosette onto the center of the Raw Silk rosette.
  5. Cut a gem from the Design Chain Tracy-Silver and glue to the center of the rosette flower.
  6. Wrap 12” piece of Gazette Raw Silk Ribbon with the ends meeting centered on the front of the album. Glue ends to the album.
  7. Wrap a 12” piece of Lucy Ivory Lace around album, again meeting centered on the front of the album. Glue ends to album.
  8. Glue Ribbon flower onto front of the album cover the ends of the lace and ribbon.
  9. Bend slightly the ends of the Chic Silver Leaves and glue onto the album with the ends underneath the flower.
  10. Wrap twine around the chipboard a couple of times and tie with a bow.
  11. Glue a small gem cut from the Design Chain Tracy-Silver onto the center of the twine bow.
  12. Glue chipboard heart onto the front of the album.

Shop Handmade – The Wedding Store

Disclaimer:  This blog uses ads and affiliate links.  If you choose to make a purchase using one of the links, I receive a small commission (at no additional cost to you) that helps offset the costs of maintaining this blog.  Thanks for your support!

DIY Wedding Projects Day #3: Wedding Votive

DIY Wedding Votive

Make a statement with Soft and Elegant candle lights on each table. 

This frosted votive will make quite the impact and will fit with several types of wedding décor.

It’s super quick and easy to make.

Tip…Pair with the DIY Vase Table Maker from Day #1

DIY Wedding Votive Supplies Needed:                                       (*Affiliate Link)

Time Needed for Completion: 1 hour plus drying time

Shop Your Fav Brands at Scrapbook.com

*Disclosure:  “This is a sponsored post.  I have been provided product in exchange for my creative ideas.  The views and opinions are my own.”  This blog uses ads and affiliate links.  If you choose to make a purchase using one of the links, I receive a small commission (at no additional cost to you) that helps offset the costs of maintaining this blog.  Thanks for your support!

wedding votive applying glue

  • Generously apply Tacky Glue around the side of the jar. Do not put glue on the top neck or bottom of jar.

Wedding Votive Applying Epson Salt

  •   Cover jar with Epson Salt. Allow to dry.

Directions for decorating the votive:

  1. Thread two Blingella Beads onto a length of Quasar ribbon. Tie ribbon around neck of the jar with a knot. Trim and knot ends of Quasar ribbon to hold the beads in place. A little bit of glue on the ends of each knot will add extra security to the beads.
  2. Tie Pierre Ivory Ribbon around the neck of the jar with a knot. Trim ends.
  3. Cut approx. 12” of Antique White Satin ribbon.
  4. With the needle and thread with long tail, make a simple running stitch down one side of the ribbon.  (*see basic flower assembly picture)
  5. Gather ribbon together with thread and tie in the center to form the ribbon rosette.
  6. Glue gem to center of ribbon flower and glue finished flower onto the knot of the Pierre Ribbon.
  7. Glue gleaming leaf behind flower.
  8. Add Tea Light Candle.

Basic Flower Assembly from Wedding Frame (Day #2)

Make sure to check all the 5 days of the DIY Wedding Projects.

Shop Handmade – The Wedding Store

This project was sponsored by Offray Ribbon.

DIY Wedding Projects Day 2: Love Frame

Offray Wedding Frame 2056

 Make a special frame for a wedding day gift or another special event.

This DIY frame has a soft, shabby chic feel that is perfect for a spring or summer wedding.

Supplies Needed

Wedding Love Frame Directions:

  1. Paint the Plain Wooden Frame with Antique White acrylic paint. Once the frame is dry, lightly sand the edges of the frame to give a distressed look.
  2. Spray paint chipboard letters with Cream Spray paint.
  3. Adhere chipboard letters to the frame with Fabri Tac Glue.
  4. Cut approx. 18” of Gazette Raw Silk Ribbon. With the needle and thread with long tail, make a simple running stitch down one side of the ribbon. Ribbon Flower Assembly 2123
  5. Gather ribbon together with thread and tie in the center to form the ribbon rosette.
  6. Create a second ribbon rosette using 12” of 7/8” Antique White Double Faced Satin Ribbon.
  7. Glue Antique White rosette onto the center of the Raw Silk rosette.
  8. Glue Dazzle Radiance Pin onto the center of both flowers.
  9. Wrap 25” piece of Gazette Raw Silk Ribbon around the frame, meeting the two ends near the top of the frame. Glue ends to the frame.
  10. Glue Flower onto ribbon cover the two ends of the wrapped ribbon.
  11. Adhere Design Chain Tracy-Silver down center of the ribbon and underneath the flower.  Glue Gleaming Leaves Dazzle onto frame.

Click on the pictures below for links of Offray Products Used:

gazette_rawsilkdfs_antiquewhiteradiance

gleaming_leaves_24karatdesignchain_tracy

Shop Handmade – The Wedding Store

Disclaimer:  This blog uses ads and affiliate links.  If you choose to make a purchase using one of the links, I receive a small commission (at no additional cost to you) that helps offset the costs of maintaining this blog.  Thanks for your support!

DIY Wedding Projects Day #1: Vase Table Marker

Offray Wedding Vase 2

Make your own table markers for your wedding day or another special event.

This DIY table marker features a pretty butterfly theme that is perfect for a

Spring or Summer wedding.

Butterfly 2255  Wedding Table Marker Vase

Supplies Needed:

Wedding Vase Instructions:

  1. Measure the distance around the top of your jar. Cut and remove the wire from the Natural Jute Cord.
  2. Apply a little bit of glue on each end of the Jute Cord to prevent fraying.
  3. Glue cord around top of the jar. Glue on gem to cover seam.
  4. Thread two Blingella Beads onto a length of Quasar ribbon. Tie ribbon around neck of the jar with a knot. Trim and knot ends of Quasar ribbon to hold the beads in place. A little bit of glue on the ends of each knot will add extra security.
  5. Tie Gazette Ribbon around the center of the vase with a knot. Add a small amount of glue underneath the knot to hold the ribbon in place.
  6. Glue small gem onto knot.
  7. Print a computer generated table number or greeting onto cream card-stock.
  8. Trim and cut card stock. Cut the end with a “v” to create the banner. Leave enough card-stock on the left side of the banner so that it can be folded around the Deco Ice stick pin.
  9. Attach banner around the Deco Ice stick pin and insert into the Gazette Ribbon knot.
  10. Fill vase with flowers and add the Fabrique Butterfly.

Shop Handmade – The Wedding Store

Disclaimer:  This blog uses ads and affiliate links.  If you choose to make a purchase using one of the links, I receive a small commission (at no additional cost to you) that helps offset the costs of maintaining this blog.  Thanks for your support!

Crazy Quilt Card

Crazy Quilt Card 2

I am fascinated by quilts.  Old ones, new ones, it doesn’t matter…

I love all the colors and patterns.

I once thought I might enjoy making a quilt.

But… I knew I’d never have the patience to finish the job.  (So I quit before I even started.)

Crafter's Ink 87508-Canyon

I recently received some new stamps and inkpads from Ann Butler Designs and

Clearsnap to use for a Blog Hop with a few other designers.

The stamps I received are quilt themed stamps and the Crafter’s ink is perfect for fabric, wood and

more.  Being a paper crafter… my first thought was a quilt card.  (Now that’s a quilt I can make.)

Crazy quilt card Collage

Quilt Card Supplies Used:

  • ColorBox® Background Basics by Ann Butler  Basket 1 and Picnic 1
  • ColorBox Crafter’s® by Ann Butler Canyon, Ocean Breeze, Desert Sand, Evergreen, Deep Woods
  • Blender Basics Paper Pack from Adorn It

Here’s how I made the card:

  1. Cut 1″ squares from the pre-stamped colored paper.  Make extra so that some of them can be cut in 1/2 diagonally.  I stamped the “basket” stamp several times on a 5 1/2″ x 5 1/2″ piece of paper to create my background piece.
  2. I made a 5″ x 5″ scored grid to glue my 1″ squares on.  You don’t necessarily need to make a grid; you could actually glue it right onto the background piece.  I found it easier to arrange and re-arrange my squares on the grid before gluing.   It also helped me keep the squares straight when gluing.
  3. Once pattern is glued down, create secondary pattern by adding cut 1/2″ squares.
  4. Adhere quilt card onto 5 1/2″ stamped square and additional layers.  Finished card is 6″ x 6″.

Shop Amazon Scrapbooking Supplies*

Disclaimer:  This blog uses ads and affiliate links.  If you choose to make a purchase using one of the links, I receive a small commission (at no additional cost to you) that helps offset the costs of maintaining this blog.  Thanks for your support!

DIY Graduation Frame with Tassel

DIY Graduation Frame 5398

Some years I don’t have any Graduations to celebrate. 

This year there are three.  One from High School, Two from Junior High.  (not mine!)

I decided to make a Graduation Frame to use as one of the gifts.

After the ceremony the Graduate can take out the greeting and add a picture.

DIY Graduation Frame Collage

For my frame I used:                                                                                    (*affiliate link)

  1. To make the tassel:  Wrap the red twine around a piece of chipboard several times.  The size of the chipboard determines the length of the tassel.
  2. Cut a piece of twine to gather and tie tightly around the twine at the top of the wrapped chipboard.
  3. Cut open the bottom loops from the chipboard.
  4. Wrap thin gold wire around the top of the tassel to imitate the look of a gold band.
  5. Trim the bottom of the tassel to even the length.
  6. Create computer generated greeting and insert inside the frame.
  7. Ink white chipboard numbers gray using the ink applicator.  Stick on front of the frame.
  8. Make a small garland from small 1/2″ strips of paper adhered to a piece of red twine.
  9. Adhere the tassel to the back of the frame with a small piece of tape.  That way the Graduate can reposition the tassel if needed after adding photo.

FYI:  When my oldest graduated from High school his younger sister also graduated from Junior High.  Four years later when it was time for her to graduate High School he was graduating from College.

SO….for all you young people thinking of starting a family. 

Don’t space your kids 4 years apart.  (The magic number is three.)  Just saying!

“This is a sponsored post. As a member of the Deflecto Design Team I have been provided product in exchange for my creative ideas, views and opinions.”

Shop Your Fav Brands at Scrapbook.com

*Disclosure:  This post uses ads and affiliate links.  If you choose to make a purchase using one of the links, I receive a small commission (at no additional cost to you) that helps offset the costs of maintaining this blog.  Thanks for your support!

Eco Friendly Projects with Walnut Hollow and Kunin Felt

Eco Friendly Projects with Walnut Hollow and Kunin Felts

Today, I’ve teamed up with Walnut Hollow and Kunin Felt, both eco friendly companies,

with some fun projects for Spring.

For my projects I used Walnut Hollow’s:     (*affiliate links)

Earth Day Step Out Collage

Earth Day Projects Collage

Walnut Hollow Earth Day Project 04385

I added Eco-Friendly tableware consisting of Bio-degradable cutlery and Bamboo plates.

Did you know?

Walnut Hollow has always been a huge advocate of environmental sustainability within the art, craft and hobby industry. Walnut Hollow has a strong commitment to environmental initiatives by preserving natural resources through their raw material consumption practices, production processes and recycling activities as well as maintaining an active involvement in the community.

Kunin Felt is made from Eco-fi,® a high-quality fiber made from 100% post-consumer recycled and BPA-free plastic bottles.

Earth Day is April 22nd.  Let’s make a difference.

Disclaimer:  This blog uses ads and affiliate links.  If you choose to make a purchase using one of the links, I receive a small commission (at no additional cost to you) that helps offset the costs of maintaining this blog.  Thanks for your support!

Join Amazon Kindle Unlimited 30-Day Free Trial

Simply Beautiful Handmade Flower

Learn how to make a Simply Beautiful Handmade Flower in a few easy steps.

To make the flower you’ll need:      (*affiliate link)

Disclosure:  This blog uses affiliate links.  If you choose to make a purchase using one of the links, I receive a small commission (at no additional cost to you) that helps offset the costs of maintaining this blog.  Thanks for your support!

Directions:

  1. Punch 3 daisies from each one of the punches for a total of 12 punch outs.
  2. Using the end of a pencil or skewer, round each of the petals up.
  3. Turn the punched shaped over and press down into the center.
  4. Glue two of the largest flowers together slightly off centered.  Add the third flower.
  5. Continue adding and gluing the next size flower and glue on top.  Repeat with the third size.
  6. Pinch the smallest flowers up tight and stagger and glue onto the center of the flower.
  7. Spray the finished flower with Glimmer Mist until you get the desired shade of color.
  8. Once the flower is dry add a small adhesive pearl in the center of the flower.
  9. Create card using Captivating Squares shapes and layers misted with Glimmer Mist

*FTC Disclosure… “This is a sponsored post.  I have been provided product in exchange for my creative ideas.  The views and opinions are my own.”

Glittered Bunny Egg

Are you ready for Spring?

Warm Weather, Pretty Flowers and Sweet Little Bunnies and Easter Eggs.

My project today is a Sweet Glittery Little Bunny made from a Smoothfoam Egg.

Bunny Parts and Supplies 3178 Glittered Bunny Egg 3224

To Make the Glittered you’ll need:        (*affiliate links)

  1. Cut two bunny ears from the smoothfoam sheet
  2. Lightly sand Smoothfoam egg and bunny ears.
  3. Glue ears onto Smoothfoam egg.
  4. Paint with cream paint.  Paint inside of the bunny ears pink.
  5. Cover the entire bunny with a thin coat of mod podge and sprinkle with glitter.
  6. Insert micro brads for the eyes and heart brad for the nose.
  7. Draw small mouth with fine black marker.

This project was created for and sponsored by Smoothfoam.

Shop Your Fav Brands at Scrapbook.com

*Disclosure:  This blog uses ads and affiliate links.  If you choose to make a purchase using one of the links, I receive a small commission (at no additional cost to you) that helps offset the costs of maintaining this blog.  Thanks for your support!

How to make an Up-cycled Watering Can Wind Chime…

Up-cycled Watering Can Windchimes 3679

My Version of turning Lemons into Lemonade.  (sorry Jim)

Christmas Water Can 1233

On my Birthday, a couple of years ago, my husband wanted to make my day special and

shower me with lots of little gifts.  Of all the places to shop, he choose to shop at a outlet

store in Southern Missouri that was filled with things that I wouldn’t have sold even when

I had my gift store in the 90’s.  (he’s no longer allowed to shop there)

This Christmas watering can was one of those gifts.

I honestly thought it was a gag gift.  (I may or may not have laughed)

I ran across it again when putting away my Christmas Decorations this past year.

Instead of throwing it out or giving it to Goodwill I thought I’d re-purpose it into

something I would use.

Shabby Watering Can Supplies 01328

My Shabby Watering Can Wind-chime                            (*affiliate link)

Supplies:

 Directions:
  1. Re-purpose a old decorative watering can by taking off the paper covering. Soak in water if necessary.
  2. Sand to remove any additional paper and to make smooth for painting.
  3. Spray-paint watering can and keys with cream paint.
  4. Puddle silver ink onto a piece of scratch paper by pumping the nib. Use the tip of your finger to rub ink directly onto watering can around edges to highlight and distress.
  5. Mask off the center of decorative stencil with blue painter’s tape, lay onto watering can.
  6. Rub silver paint onto stencil as in step #4.
  7. Wind thin wire around the end of a piece of twine. Insert wire into the holes in the spout and pull through to the inside of the can. Repeat for however many keys you plan on using.
  8. Gather the ends from inside the can and tie them altogether in a knot. Pull the opposite ends to bring the knot back through the spout. (The ends will now be hidden.)
  9. Tie keys on to end of each piece of twine.
  10. Glue bird inside of nest.
  11. Glue bird-nest inside of the watering can.
  12. Add adhesive pearl to decorative accent on side of the can.

Best for covered porches or decorative use.

Keys 3699  Bird's Nest 3701

Before you throw me under the bus…

I’m really not an ungrateful, insensitive person.  (really I’m not)

I love and appreciate my husband very much.  He’s the greatest!

(Phew…these are the days I’m glad he doesn’t read my blog)

*Disclaimer:  This post uses ads and affiliate links.  If you choose to make a purchase using one of the links, I receive a small commission (at no additional cost to you) that helps offset the costs of maintaining this blog.  Thanks for your support!

AD→ Zots Adhesive Dots

Save