Barn Art

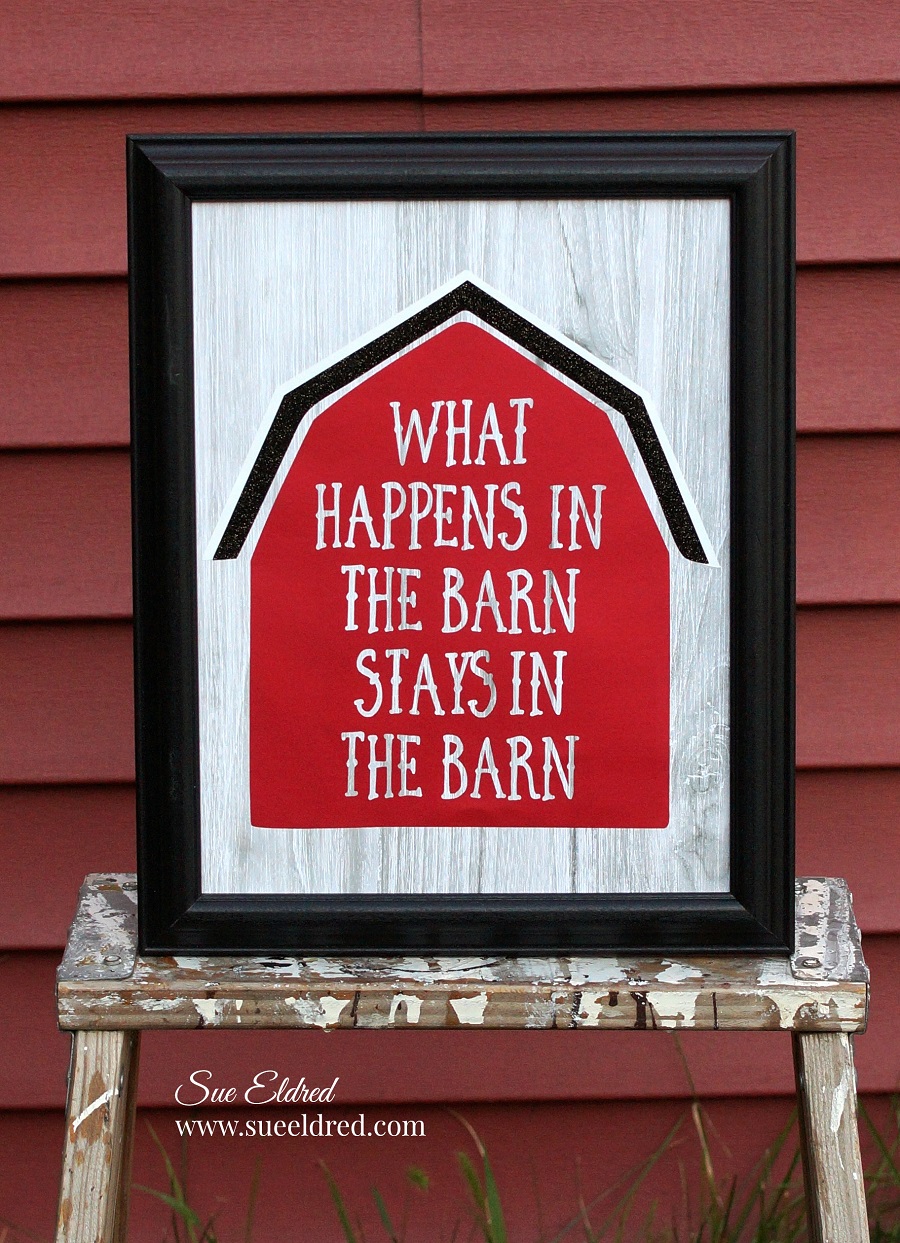
If you had a newly remodeled little red barn…

would you make Barn Art for its newly painted walls?

Our newly remodeled little red barn is finally done and it’s looking really good. 

(maybe even cute)

So…I decided to make it some art using my Silhouette Cameo Electronic Die Cutting

Machine* and luster vinyl from StyleTechCraft.  A simple little project and fun sign that’ll

adorn the barn walls along with the old personalized license plates that I found.

*Disclosure:  This blog uses affiliate links.  If you choose to make a purchase using one of the links, I receive a small commission (at no additional cost to you) that helps offset the costs of maintaining this blog.  Thanks for your support!
I will be posting the complete barn remodel in the next week or two.

Here’s a sneak peek until I do.

Don’t you just love this old weathervane?

It had been sitting in the barn for years just waiting to be polished up good as new.

“This is a sponsored post.  As a member of the StyleTechCraft Design Team I have been provided product and compensation in exchange for my creative ideas.  The views and opinions are my own.

Shop Your Fav Brands at Scrapbook.com

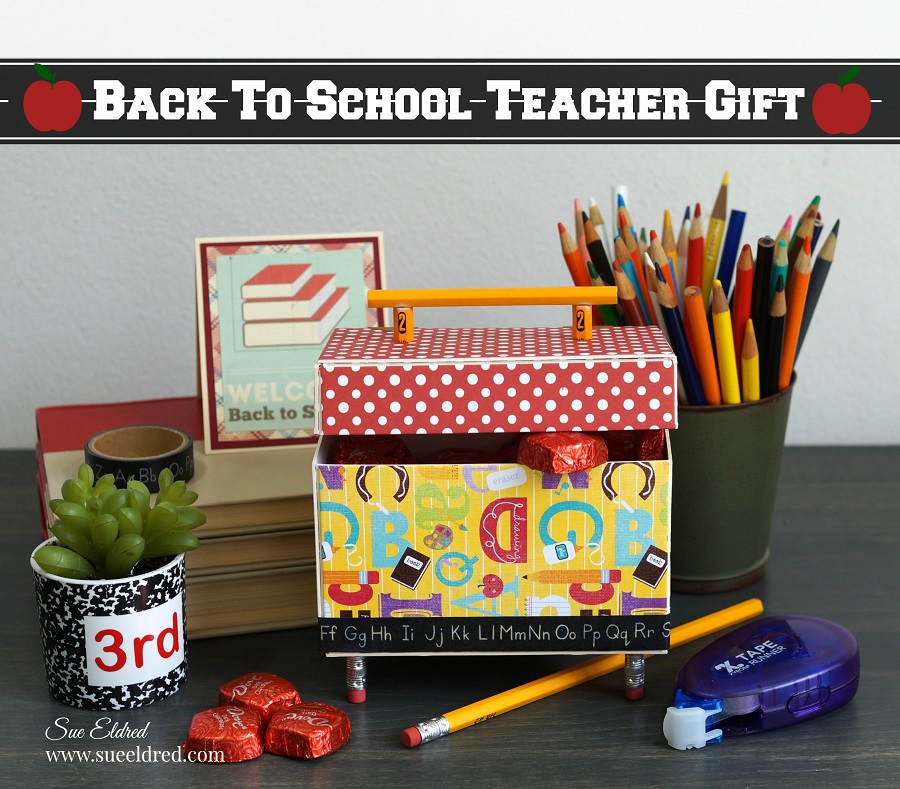
Back to School Teacher Gift

As the new school year begins…

Don’t forget about the teachers in your life.

We all know your child’s teacher is over the moon to have your wonderful child in her class,

but just remember, she still has to deal with “you know who’s” kid.

And while she may “need” school supplies…

what she really wants is CHOCOLATE.  (and maybe wine)

Believe me…she’s not ready for summer to be over either.

To bribe entice your child’s teacher…

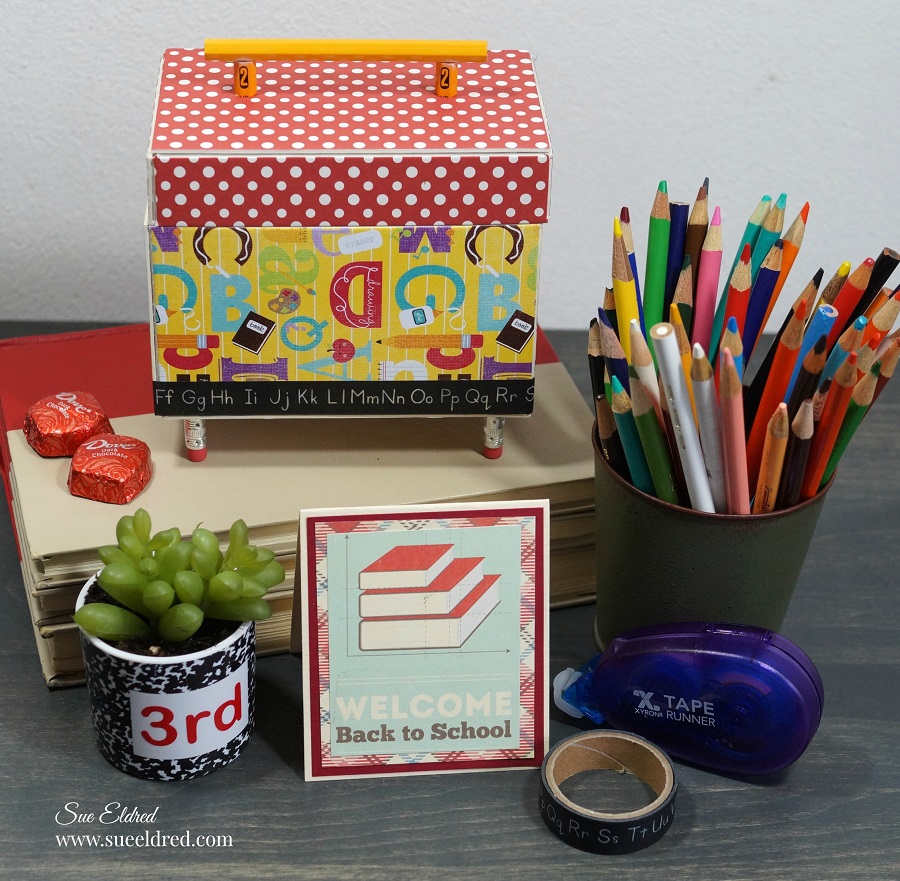
You might want to create a Back to School Teacher’s Gift Box using the

Xyron 9″ Creative Station* and the Eileen Hull Treasure Box Die*.   


Back to School Teacher Gift Box Supplies Used:

*Disclosure:  This blog uses ads and affiliate links.  If you choose to make a purchase using one of the links, I receive a small commission (at no additional cost to you) that helps offset the costs of maintaining this blog.  Thanks for your support!

To Create the Back to School Teacher Gift Box:

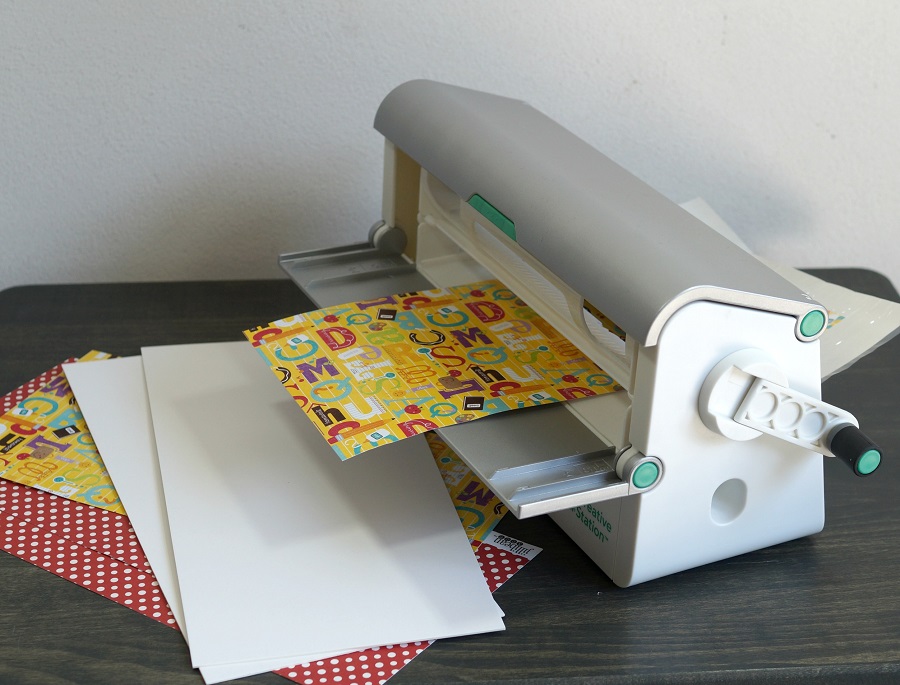
  • Lay decorative scrapbook paper (design side up) on the  Xyron 9″ Creative Station* crank the handle to run the paper through the machine.  As it moves through the Xyron Creative Station it adds adhesive to the back side of the paper.  The Xyron Creative Station is easy to use and it doesn’t need electricity.
  • Adhere the paper onto the chipboard.  If you would like a design on the inside of the box, adhere coordinating paper on the other side of the chipboard.

I love using the Xyron Creative Station* when making larger projects like this because you get complete coverage, great adhesion, no wrinkling and no bubbles!

  • Lay the covered mat board over the Treasure Box Die* sandwiched between two cutting plates.  (for larger dies use the Sizzix Extender Cutting Plates)
  • Crank the handle of the Sizzix Big Shot Die Cutting Machine*and run the die through the machine.  The Big Shot will cut and score the mat board.

  • You will need to cut two of each piece to create the treasure box.

  • Fold chipboard along creased lines and attach matching pieces together.  Because the  chipboard is thick, you will need a strong adhesive to bond the pieces together.
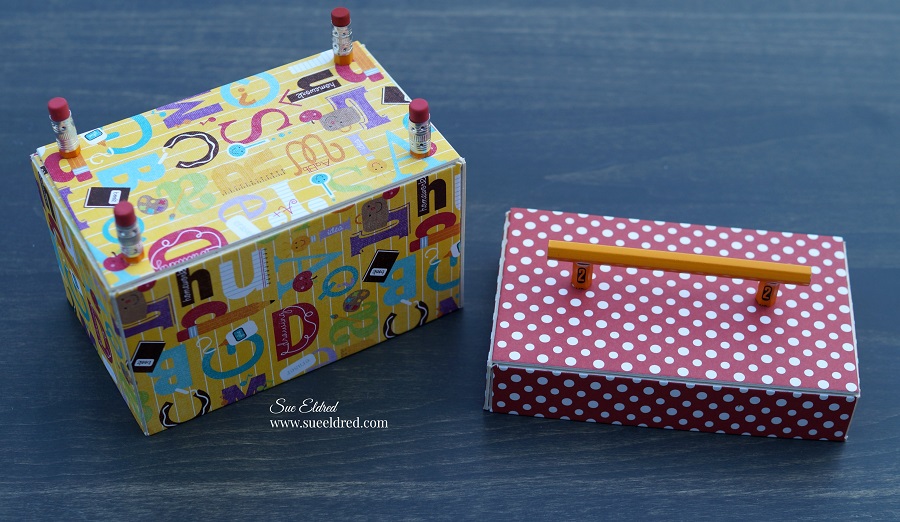
  • Glue the two rectangle pieces on the top and bottom of the box and lid.

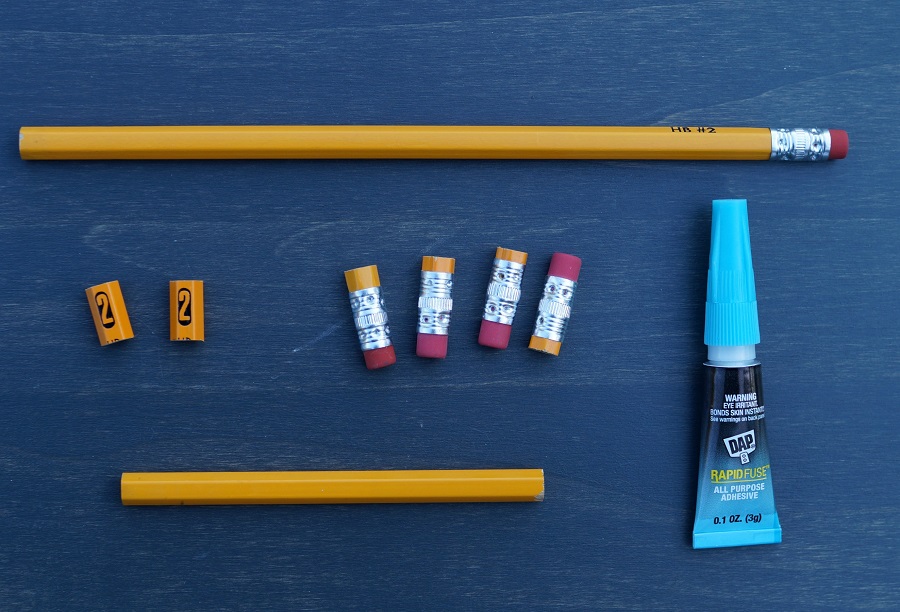
  • Cut the tops off 4 pencils approx. 3/4″.
  • Cut one long 3-3/4″ pencil piece.
  • Cut two pieces of pencil 1/2″.

  • Glue the 4 pencil tops to the bottom of the box to create feet.
  • Glue the two small pencil pieces onto the larger pencil piece to create a handle.

To create the hinges…

  • Add adhesive on a piece of faux leather paper by running it through the Xyron Creative Station.
  • Adhere it to a second piece of faux leather paper so that it’s double sided.
  • Die cut two hinges using  the hinge part of the Treasure Box die.
  • Adhere onto back of the box.

Fill the box with chocolates or other goodies and give to your favorite teacher.

“This is a sponsored post.  As a member of the Xyron Makers Program I have been provided product and compensation in exchange for my creative ideas.  The views and opinions are my own.

Cardmaking with Jillibean Soup’s Rainbow Roux

Cardmaking with Jillibean Soup’s Rainbow Roux

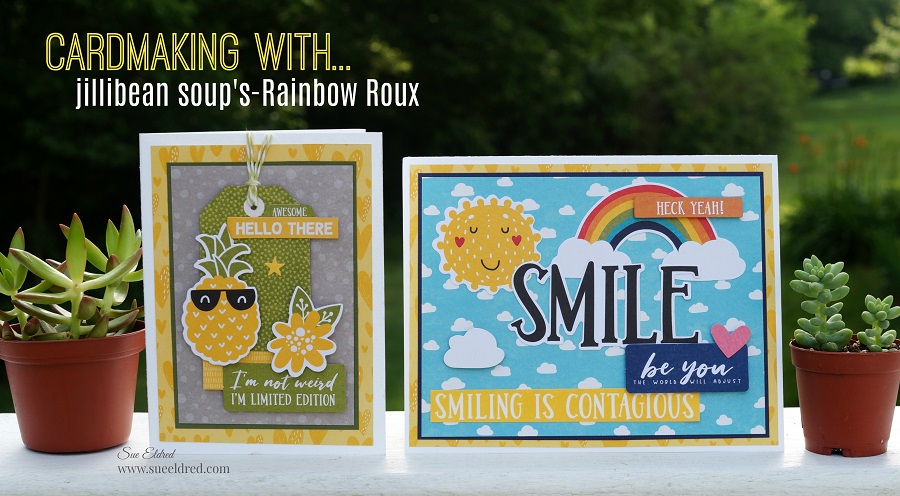
Last month, I had the honor of being a Guest Designer on the Jillibean Soup Blog.

As you may know, Jillibean Soup is one of my favorite companies so I was pretty excited.

Here is a link to the post on the Jillibean Soup Blog.

“This is a sponsored post.  I have been provided product in exchange for my creative ideas.  The views and opinions are my own.”

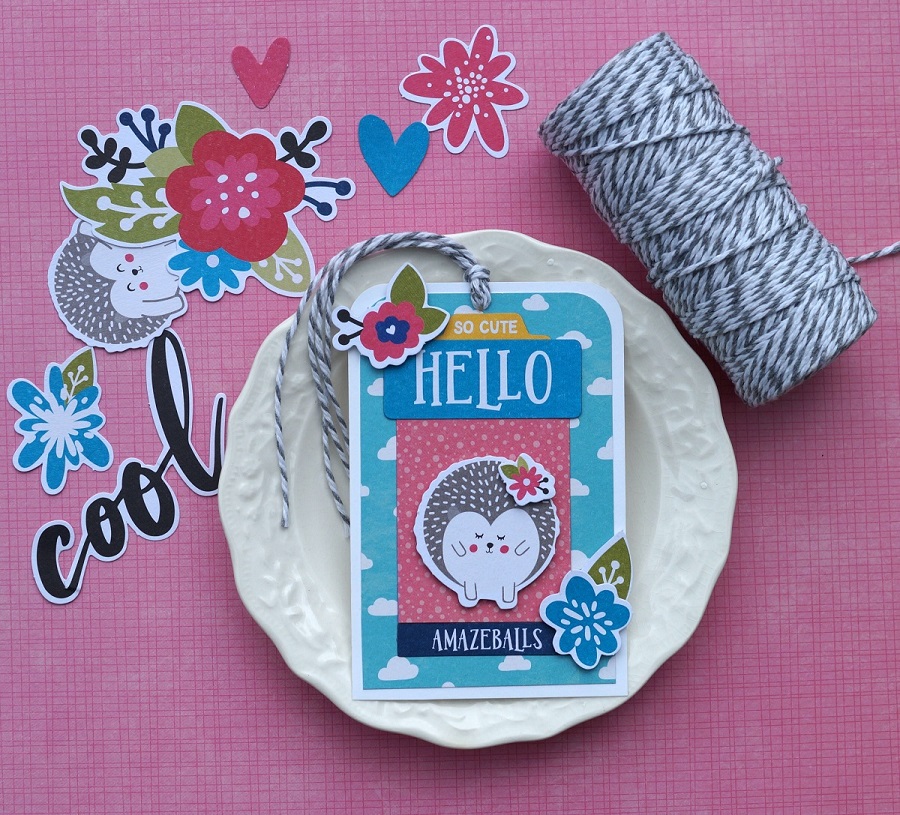
Being chosen as a Guest Designer was Amazeballs.  (get it?)

I was given a nice box of goodies including the Rainbow Roux Collection* to work with.

I was told have fun and make 3-4 projects using the products in the box.  (not hard to do)

*Disclosure:  This blog uses affiliate links.  If you choose to make a purchase using one of the links, I receive a small commission (at no additional cost to you) that helps offset the costs of maintaining this blog.  Thanks for your support!

I used the Rainbow Roux Pea Pod Parts Die-Cuts* and my Xyron Create a Sticker Mini*

to make quick work of assembling the cards.

This collection was so much fun to work with.

I think the Rainbow Roux Collection* is such a sweet and feel good collection.

Thank You, Thank You, Thank You to Jillibean Soup for picking this “Limited Edition” gal.

This was one of my favorite projects using Jillibean Soups Mix the Media products. 

“May your Journey Always Lead You Home” supplies used:

Grand Haven

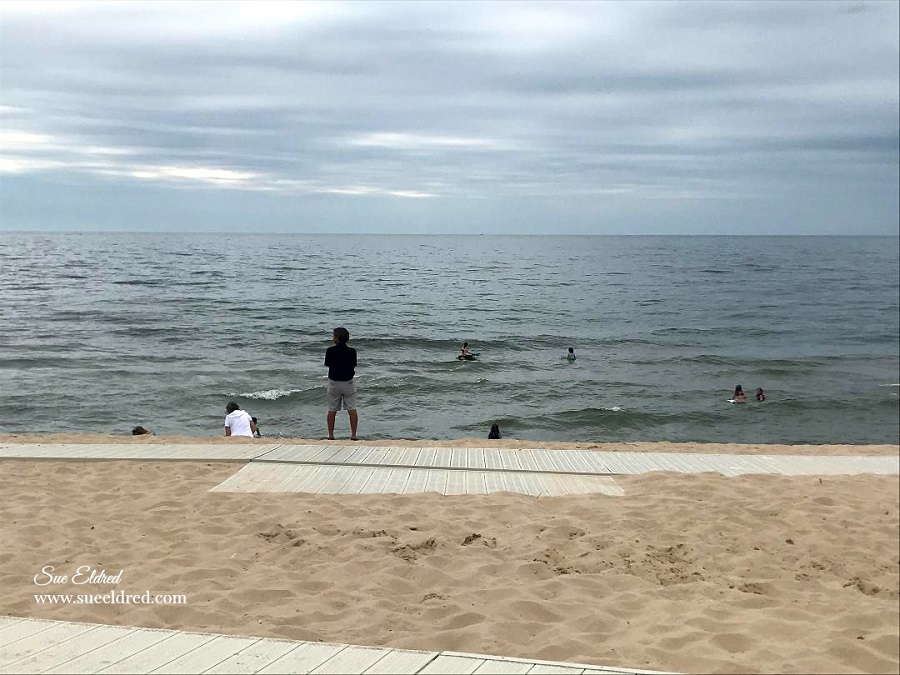
When you can’t get to the ocean a trip to the lake is the next best thing.

I love the sounds of the ocean, toes in the sand with not a care in the world.  (I really do!)

Sometimes it’s just not in the cards.  When that happens, the lake is a pretty close second.

We took a few days to unwind, relax and enjoy the scenery.

We’ve been to several towns around Lake Michigan but this was our first trip to Grand Haven.

It’s a pretty little place with a quaint downtown and plenty of great places to eat.

On Sunday night we happened upon a free concert downtown by the water

and then on Monday night a free musical water light show.

For a small town there’s a lot to do.

On Tuesday, I didn’t quite have my fill of water so we stopped in South Haven on our way home

for a bite to eat and another lighthouse to explore.

South Haven Lighthouse.

I could sit and watch the sailboats for hours.  Not a bad way to recharge the old batteries.  (I almost got my recommended dose of vitamin sea.)

*Disclosure:  This blog uses ads and affiliate links.  If you choose to make a purchase using one of the links, I receive a small commission (at no additional cost to you) that helps offset the costs of maintaining this blog.  Thanks for your support!

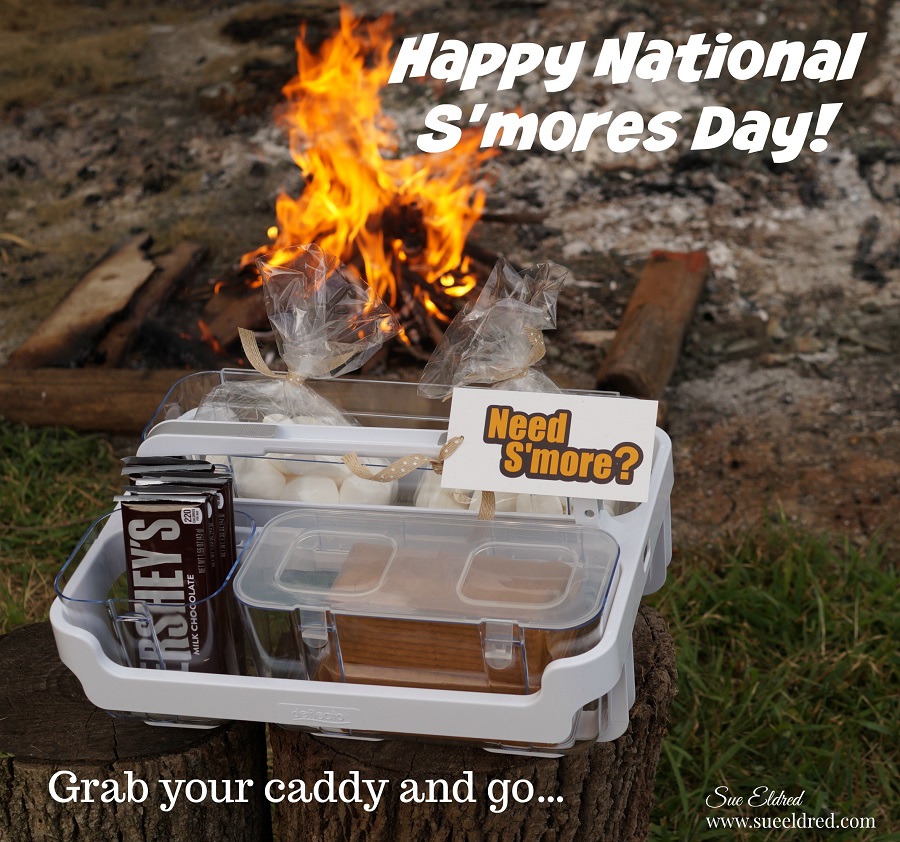
Happy National S’mores Day

Did you know today was National S’mores Day?

This is the last week-end before school starts, sounds like a perfect way to spend a week-end.

So grab your S’mores caddy and enjoy.

You can find Deflecto’s Caddy Organizer* on Amazon.

*Disclosure… “This is a sponsored post.  As a member of the Deflecto Design Team I have been provided product in exchange for my creative ideas.  The views and opinions are my own.”

This blog uses affiliate links.  If you choose to make a purchase using one of the links, I receive a small commission (at no additional cost to you) that helps offset the costs of maintaining this blog.  Thanks for your support!

Little Red Barn

The Little Red Barn…

Every summer we take on a new project and this summer has been all about the barn.

Our old barn was built in two sections and one of the sections was in pretty bad shape.

We tore down the rickety part and have been rebuilding the other half.

My only requirement for the new barn was that I wanted it red.  (and maybe a few other changes)

I’ll save the Barn Make-Over for another post.

*Disclosure… “This is a sponsored post.  I have been provided product in exchange for my creative ideas.  The views and opinions are my own.”

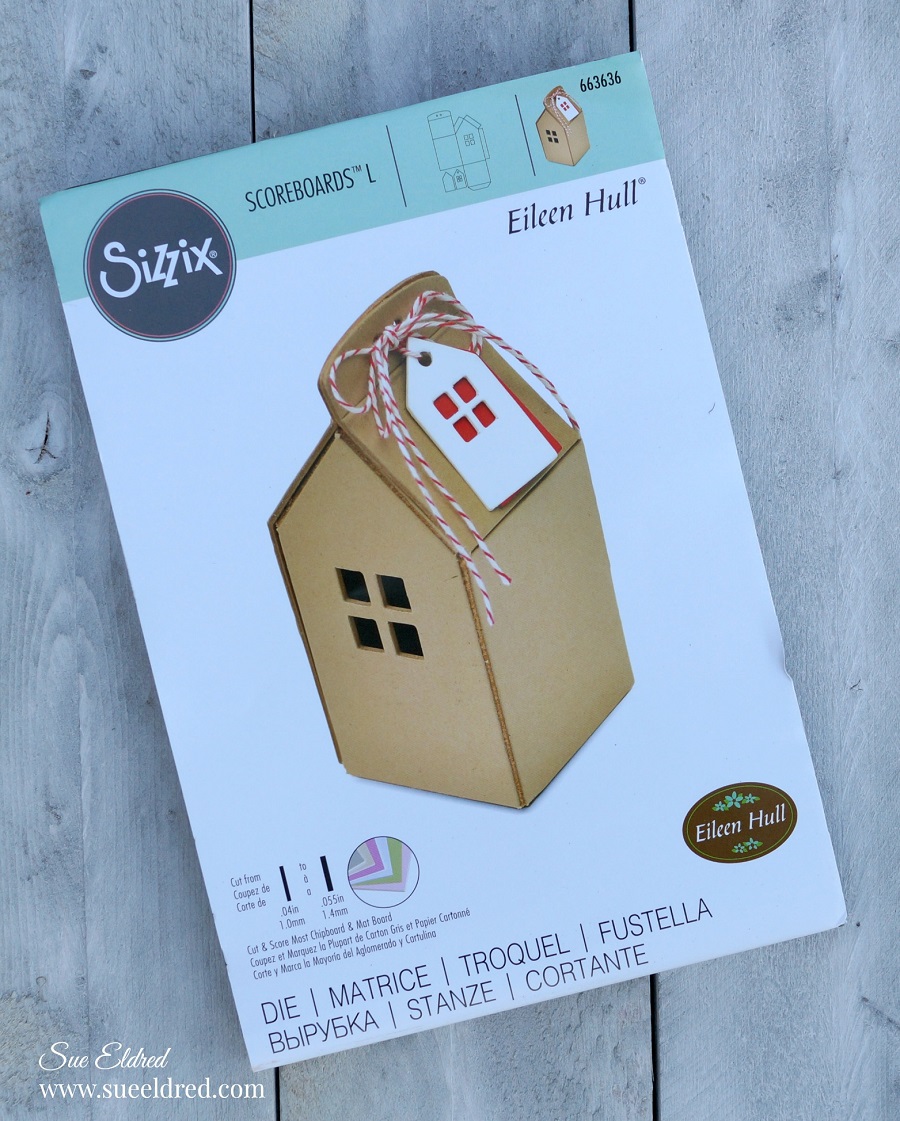
So… when I received Eileen Hull’s House Ornament Die* naturally I saw a barn.   

I guess I’m in full barn mode.

I made a few adjustments to the die-cut house, like removing the top section for tying and

adding a roof made from black corrugated paper.

I added a couple barn doors cut from chipboard and added a thin piece of corrugated

paper over top for an awning.

The bottom of the house opens up and would look cute with a tea light glowing inside.

*Disclosure:  This blog uses affiliate links.  If you choose to make a purchase using one of the links, I receive a small commission (at no additional cost to you) that helps offset the costs of maintaining this blog.  Thanks for your support!

The die also comes with a little tag to hang from the top of the house.

I added a little awning over the window.  So many possibilities.

This house die* is quickly becoming my new favorite die.

I can’t wait to create another house (or two) all decked out  for Christmas.

Annie’s Sweet Dreams Bedroom

Annie’s Sweet Dream Bedroom

I love working with miniatures and creating little rooms.

I guess…I’m creating the doll house I always imagined as a kid.

For this room, I wanted to create a “mini makeover” for Annie’s Bedroom.

This little room won me third place in the 2019 Fave Crafts Best Blogger Contest.

And now, I can finally share it all with you.

“This is a sponsored post.  I have been provided product and compensation in exchange for my creative ideas.  The views and opinions are my own.”

Annie’s Sweet Dreams Bedroom Products Used:                 (*Affiliate Links)

*Disclosure:  This blog uses affiliate links.  If you choose to make a purchase using one of the links, I receive a small commission (at no additional cost to you) that helps offset the costs of maintaining this blog.  Thanks for your support!

How to make Annie’s Sweet Dreams Bedroom…

The Bedroom measures 7 1/2″ wide, 7 1/2″ tall and 5 1/2″ deep. 

  • Cut 3 pieces of chipboard 5 3/4″ x 7 1/2″.
  • Cut 1 piece of chipboard 7 1/2″ x 7 1/2″ to use as the back wall.

  • Cut decorative scrapbook paper from the Graphic 45 Garden Goddess 8×8 Paper Pad* to use on the floor, walls and outside walls of the room.  I like to cut my paper slightly wider than I need so I can trim the edges with a craft knife.
  • I used both cardstock and scrapbook paper to cover my walls.  For my walls…cut both papers into 3 3/4″ strips.
  • I cut a small strip of paper from the paper pad for a decorative border.
  • I ran each of my strips through the Xyron Creative Station*.
  • Adhere paper to the chipboard.
  • Cover back of the chipboard with coordinating scrapbook paper.

The Xyron Creative Station* is perfect for projects like this.  I wanted complete adhesive coverage on every corner and edge of the paper.  (No wrinkles, no bubbles, easy to use.)

Finished Inside Walls

For the Mural on the Wall…

  • I used an SVG file and my Silhouette Cameo Wireless Cutting Machine* to cut and create the words “follow your dreams” using StyleTechCraft Dark Red Ultra Metallic Glitter Vinyl.
  • Using the weeding tool, I carefully removed the negative spaces in and around the letters.
  • Place a piece of Vinyl Transfer Tape* over the letters.
  • Apply words onto the back wall.
  • Remove transfer tape.

  • Glue the walls together using a good craft glue. I like to use Beacon 3 in 1 Glue*.  I used wood boxes to hold my wall up while the glue dried.

  •  I added small strips of paper on the back corners for added support.

  • To make a mini lamp shade…punch a 3″ scallop circle.
  • Trace around a button in the center of the circle.
  • Cut out the small circle as shown in the above picture.
  • Glue ends of the circle together to form shade.
  • Glue shade onto a small painted wood spool.

  • Cut small pieces of ribbon and glue them onto a piece of twine to create a small ribbon banner to hang onto the wall.
  • Glue Banner onto back wall.
  • The Deflecto Ribbon Dispenser* is great for organizing my ribbon spools.

  • The mirror was made using a small piece of StyleTechCraft Chrome Metallic Vinyl* I placed onto a small piece of chipboard.
  • Cut 1/4″ strips of chipboard and paint brown.
  • To create a wood look, ink to the edges of the chipboard with vintage photo distress ink. 
  • Glue strip onto the front of the Chrome Metallic Vinyl* to create the frame.
  • I used small Christmas ornaments for the toys.

Creating Annie’s Sweet Dreams Bedroom was a labor of love.

With a little imagination and some basic construction, it’s really not hard to do.

Crossover II Fabric & Paper Cutting System

Recently, I was asked by The Maker’s Movement to try out the Crossover II Fabric & Paper Cutting System* to see how I liked it.  (Always anxious to try something new, I quickly agreed.)

*Disclosure… “This is a sponsored post.  I have been provided product in exchange for my creative ideas.  The views and opinions are my own.”

The machine is compact and portable.  Easy to store and carry.

You can use the Crossover II* with thin metal paper dies, fabric dies and steel rule dies.

The Crossover II Fabric and Paper Cutting System*is similar to other manual cutting systems and uses a “sandwich” configuration with three plates.  (included with the machine)

  • White Base Plate
  • Metal Adapter Plate
  • Clear Top Plate

This is my favorite part of the machine, the adjustable rollers and pressure settings. 

This was the real game changer for me.

It adjusts for multiple layers and allows you to be able to cut a variety of thicknesses.

Not just for paper…

the Crossover II Fabric & Paper Cutting System* can cut fabric, faux leather, craft foam,

chipboard, felt and several other materials.

Here’s a quick little video showing the Crossover II Fabric & Paper Cutting System*in action.

Along with the Crossover II Fabric & Paper Cutting System* I received a few dies from

Maker’s Movement to play with as well.

  • MSD205  Hello Spring Stamp & Die Set
  • MOD203  Stitched Rectangles Nested Essentials Die Set
  • SF6  Stacker Flower 6

I created this quick card using paper scraps from Graphic 45 and a combination of the dies

I received from The Maker’s Movement.   I love the tiny foliage stamp I used on the background.

It’s from the Hello Spring Collection.

I liked using the Crossover II Fabric & Paper Cutting System*especially it’s versatility.

Quick and Easy Summer Mini Album

Quick and Easy Summer Vacation Mini Album

You don’t have to take an expensive Summer Vacation to have fun when your a kid.

Between Baseball games, Swim Lessons, Swim Team, Carnivals, Pie Eating Contests,

Fireworks, Drive In Movies, Swimming, Summer Reading Program, Mini Gardens,

Tie-Dyeing and just playing outside….there’s always something to do.

Because we have so many great pictures, I decided to make my grandsons a

Summer Vacation Mini Album to remember all the good times they’ve had this summer.

To Create my Summer Vacation Mini Album I used:                            (*affiliate links)

*Disclosure:  This blog uses ads and affiliate links.  If you choose to make a purchase using one of the links, I receive a small commission (at no additional cost to you) that helps offset the costs of maintaining this blog.  Thanks for your support!

With the help of my Xyron Creative Station* putting the album together was super easy.

  • Cut two 6″ x 8-1/2″pieces of decorative scrapbook paper for the front and inside of the cover.
  • Lay decorative scrapbook paper (design side up) on the Xyron Creative Station* crank the handle to run the paper through the machine.  As it moves through the Xyron Creative Station it adds adhesive to the back side of the paper.
  • Easy to use and it doesn’t need any electricity.
  • I like using the Xyron Creative Station* when making mini books because you get complete coverage, no wrinkling, no bubbles!

  • Cut a piece of mat board 6″ x 8-1/2″.
  • Adhere the decorative paper on each side of the mat board.

  • The notebook die creases the center of mat board as it goes through the Big Shot Die Cutting Machine making it easy to fold the cover for your mini album.

  • Cut a 2 1/4″ x 5″ strip of decorative paper to use for the spine and run it through the Xyron Creative Station*.
  • The small “hello summer” graphic is from an old Bo Bunny collection that I hoarded and never used.  It was perfect for this album.  (sorry I don’t think you can find it anymore)

  • Cut 5 white cardstock pages using the notebook die.
  • Crease the cardstock on the center score lines.
  • Using blue and white twine, wrap the twine around the inside creases and around the outside of the book cover to secure the pages.
  • I did one page at a time tying the twine in a knot on the outside after each page.

  • After I had all my pages together, I tied the pieces of twine together in one knot on the spine and let the ends of the twine hang loose.

I wanted this Summer Mini Album to be all about the pictures. 

There are no fancy embellishments or special pages inside this album.

(just lots of fun pictures of my boys)

The hardest part about making this album was choosing which pictures I wanted to use.

I printed my pictures 4″ x 5.3″ instead of the usual 4″ x 6″.

I cut each picture 3 1/4″ x 4 3/4″ which left a nice white border around my picture when added

to the album.  I used my Xyron Mega Runner* to add adhesive on the back of the pictures.

I had all 21 pictures added to my album in no time.  (one on the inside back cover)

These are three busy little boys. 

They’ve had a great summer so far and they still have another month to go before school starts. 

Who says summer is about lazy days.  

The Summer Vacation Mini Album measures 3 3/4″ x 5″.

“This is a sponsored post.  As a member of the Xyron Makers Program I have been provided product and compensation in exchange for my creative ideas.  The views and opinions are my own.

Indigo Shibori Dyeing

Indigo Shibori Dyeing

We had a little fun this past week-end and tried something new….

My daughter asked me to purchase a Indigo Dye Kit* for her birthday.

She wanted to use it when she came home.  (I’m always up for trying something different.)

Shibori is a Japanese term for methods of dyeing cloth.  Similar to tie-dyeing you create patterns by binding, stitching, folding, twisting, and compressing.  In Japan, the earliest known example of cloth dyed with the shibori technique dates back to the 8th century where indigo was the main dye used.

Shibori Indigo Dye Kit from Made Kits by One-OneThousand*

The kit came with everything we would need:

  • Thiox
  • Soda Ash
  • Pre-reduced Indigo
  • Rubber Gloves
  • Rubber Bands
  • Acrylic Plates
  • Great Instructions

Everything except a very large bucket and items to dye.

It said right on the front of the box…”no chemistry degree needed”.

*Disclosure:  This blog uses ads and affiliate links.  If you choose to make a purchase using one of the links, I receive a small commission (at no additional cost to you) that helps offset the costs of maintaining this blog.  Thanks for your support!

My daughter had purchased a few new items to dye and we quickly added other items like…

pillowcases, old doilies, vintage linens, old jeans and other miscellaneous items.

The kit comes with great instructions on how to mix the Thiox, Indigo and Soda Ash with water.

It is recommended to use a 5 gallon bucket with lid.

After everything is mixed cover the bucket tightly with the lid and let it rest for one hour.

When you are ready to start dyeing, remove the cover.

The liquid will be a greenish-yellow in color and you will see a cluster of bubbles called

“the flower” and a film on top.  (It will have a smell, that’s normal, they said)

Carefully scoop out the bubbles “the flower” and set aside with a little of the dye liquid.

The instructions say that you can put “the flower” back in the bucket after your done

dyeing to keep the dye bucket going for future dye projects.  (hmmm.)

The dye can be used for several dye sessions if carefully stored.

It’s always a good idea to pre-wash new items with a mild detergent.

We used several different twisting and rubber banding techniques on the fabric.

FYI…The dye reacts best if your item is wet first.

When you lift your item out of the dye mixture it will be a yellow greenish color.  

As the air hits the dyed item, the indigo will gradually oxidize and the dyed item will turn blue.

The longer the item is in the dye, the darker it becomes once it hits the air.

They suggest ringing the item and letting it sit for 15 minutes and then re-dipping the item

in the dye for deeper hues.

Creating a Wax Resist

My daughter and her husband created dots on their shoes by using melted wax and the end

of a paintbrush.  (We kept the melted wax hot in a old mini crock pot.)

The melted wax creates a resist that will repel the dye.

They covered the souls of the shoes with removable painters tape to protect it from the dye.

A large brush was used to paint the dye on the shoes instead of dipping them.

Once dyed…we hung the items on a clothesline tied between two trees in the front yard.

My husband said it looked real classy.  I thought it looked beautiful.

We left them hanging overnight as they need 24-48 hours to dry and oxidize.

As with a lot of new techniques…there is a little bit of a learning curve.

We were pleased with the results and can’t wait until she’s home again to dye some more.

FYI…We used Shibori Indigo Dye Kit from Made Kits by One-OneThousand*