Dream Create Inspire Wall Décor
I have been working diligently for the last couple of months on my new craft room.
Moving, purging, organizing and very slowly decorating. (so much stuff!)
I’m almost ready for a “craft room reveal” but not quite yet.

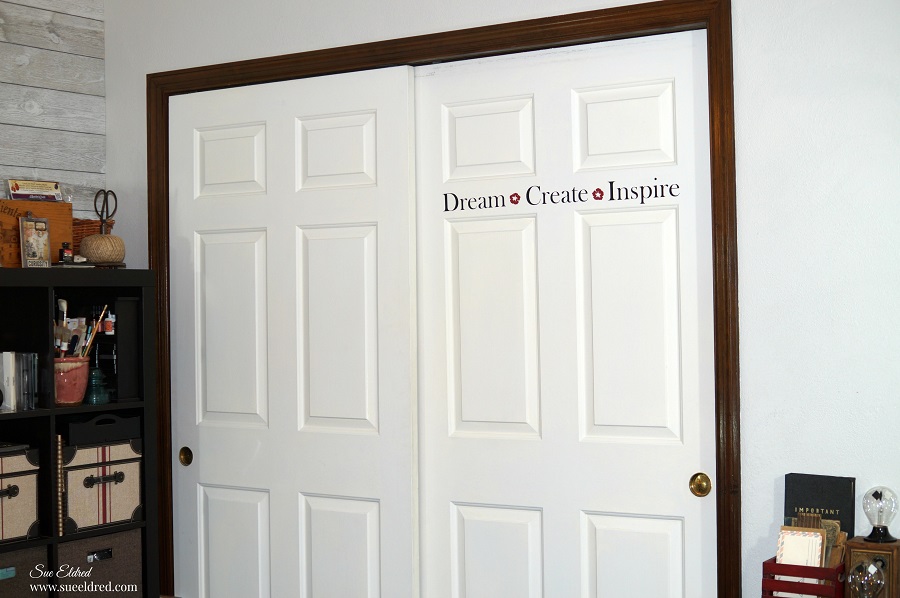
This past week-end I decided to add a little inspiration to my freshly painted closet doors.
I like the look of inspirational quotes on walls and decided to create one of my own.

With the help of my Silhouette Cameo Wireless Cutting Machine* and
Matte Removable Adhesive Vinyl* from Styletechcraft the project was real easy to create.
(getting a good picture of the final project not so easy)
*Disclosure: This blog uses ads and affiliate links. If you choose to make a purchase using one of the links, I receive a small commission (at no additional cost to you) that helps offset the costs of maintaining this blog. Thanks for your support!

- I measured the space on the door where I wanted the words to go and decided where the best spacing would be for all three words.
- I cut the Gridded Vinyl Transfer Tape* to fit inside the space.
- I used the bottom line of the grid and line on the door inset to line up my words.
- Once you place your word onto your surface, smooth over word with the vinyl tool.

- I found it easier to place the words Dream and Inspire first and then center the word Create in between the two.
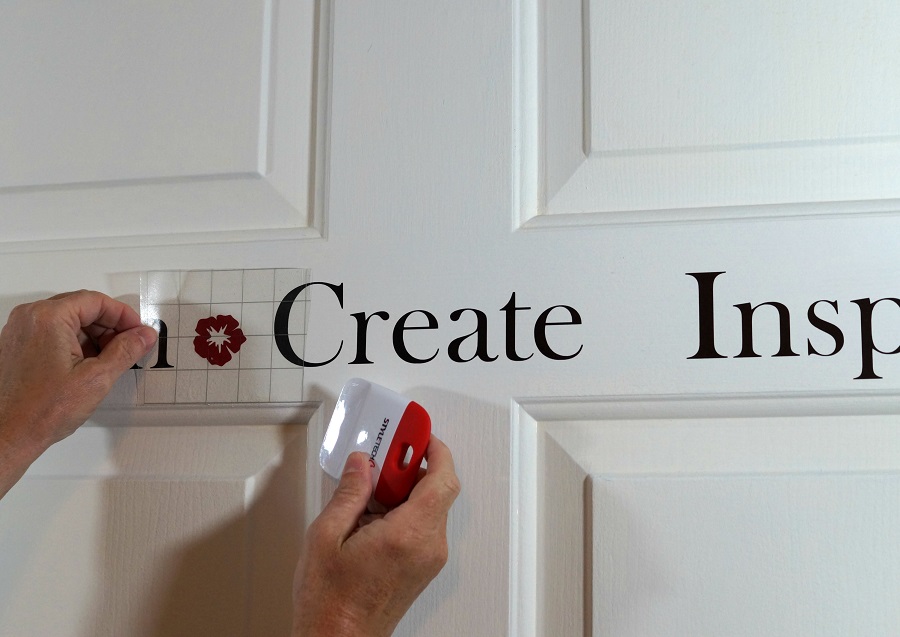
- I cut two small flowers using dark red removeable vinyl and placed them in between the words.
Did you know that Matte Removable Vinyl will remove cleanly for up to two years?
This vinyl film is great for decorating a kid’s room, a classroom or just about anywhere
you just need a temporary graphic.
![]()
“This is a sponsored post. As a member of the StyleTechCraft Design Team I have been provided product and compensation in exchange for my creative ideas. The views and opinions are my own.
![]()
You can now find the full line of StyletechCraft online at ATSM.