Saturday Morning Memo Board

Making Saturdays Special..

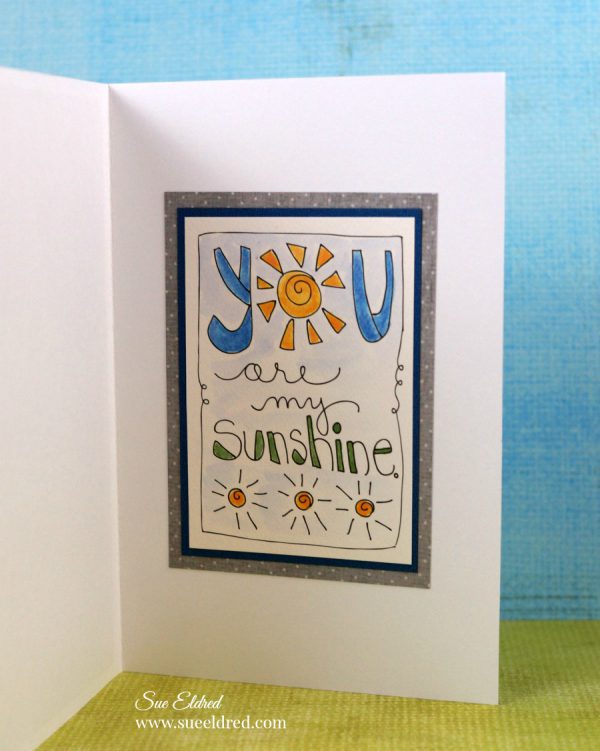
Make family time more special with this cute memo board.

Now that the kids are starting to head back to school, weekends are more important than ever.

It’s nice just being together.

Whether I post a reminder about a fun event or a special note to say “I love you,”

this memo board helps me remember that Saturdays should be a little more laid back –

just the way I like it.

To make the Memo board I used…                     (*amazon affiliate link)

Directions:

  1.  Measure and cut the cork tiles to fit inside the frame.
  2. Because my frame was deep, I cut a piece of foam board the same size.  I glued the cork tiles to the foam board using liquid glue.

3.  Lay fabric over cork to determine letter placement.  Gently slide cork from underneath fabric and iron letters.
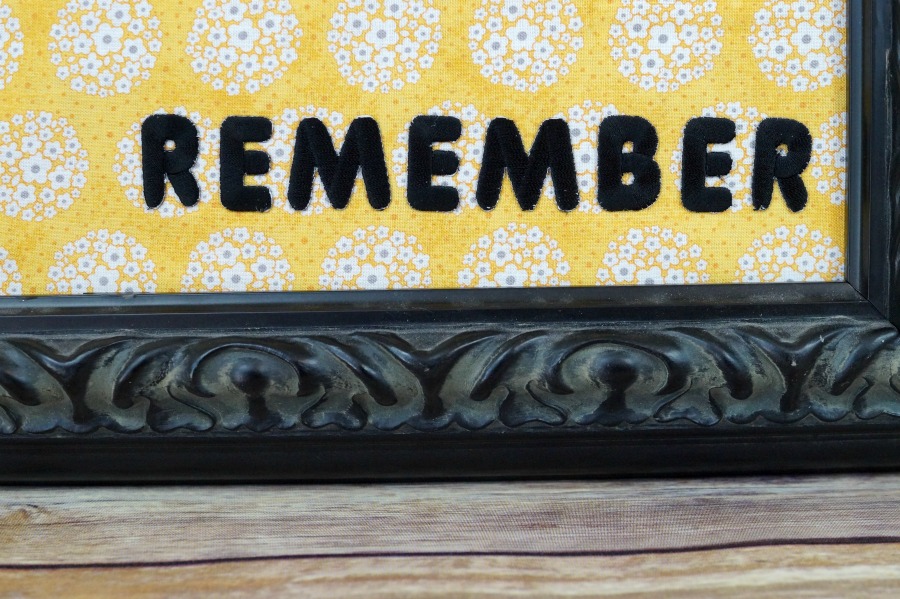
4. Spray the cork with adhesive and smooth the fabric over it.
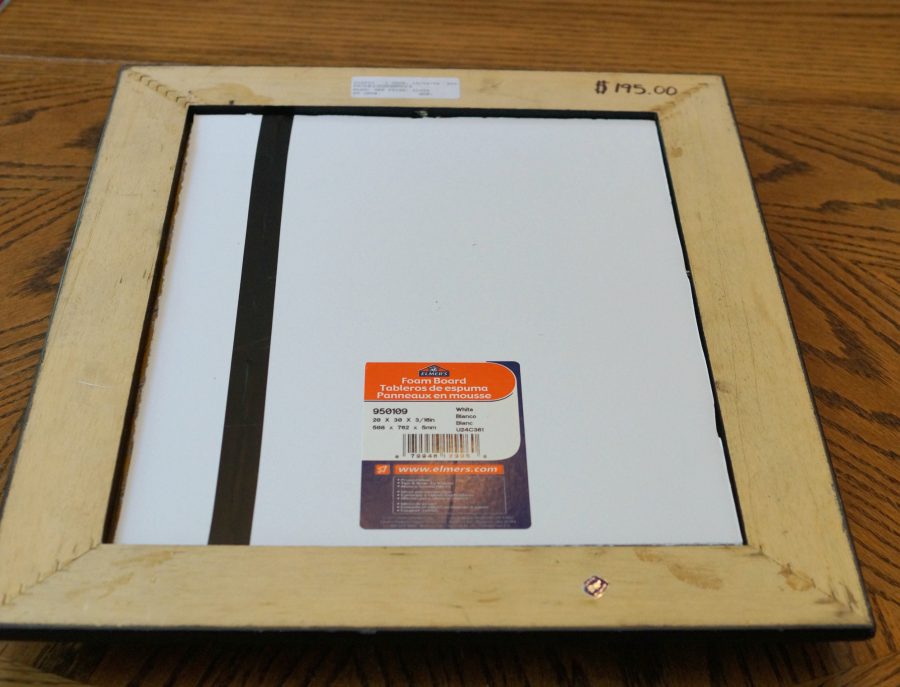
5. Tap in a few tack nails inside the back of the frame to hold everything in place.

This project was created for and sponsored by Joy, SA.
Shop Amazon Scrapbooking Supplies*

Disclaimer:  This blog uses ads and affiliate links.  If you choose to make a purchase using one of the links, I receive a small commission (at no additional cost to you) that helps offset the costs of maintaining this blog.  Thanks for your support!


How to Create Quick and Easy Bows

This one’s for my “Bow Challenged” friends…  (you know who you are)

Learn How to Create Quick and Easy Bows using the DecoFun Bowmaker.

Tying beautiful bows doesn’t have to be a challenge anymore…

Thanks to the DecoFun Bowmaker I received to participate in this month’s

Designer Crafts Connection Blog Hop I can now make big beautiful bows

For my project…I decided to give my plain wreath a seasonal update with a new bow.

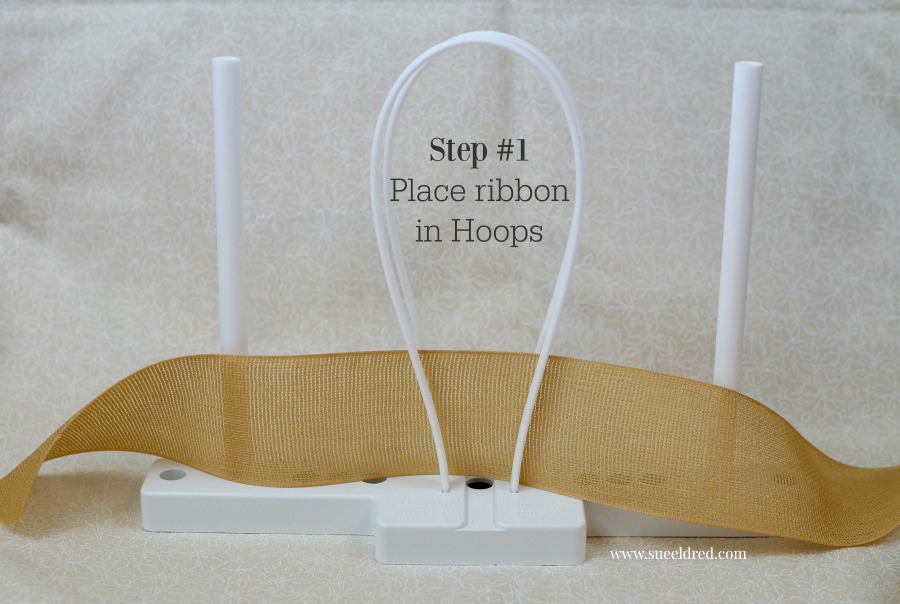
Step#1  Place Ribbon in Hoops

Step #2  Bring Ribbon Around Rods

I used approx. 3 yards of ribbon, so keep on wrapping.

Step #3 Pinch Ribbon Center & Tie with Wire

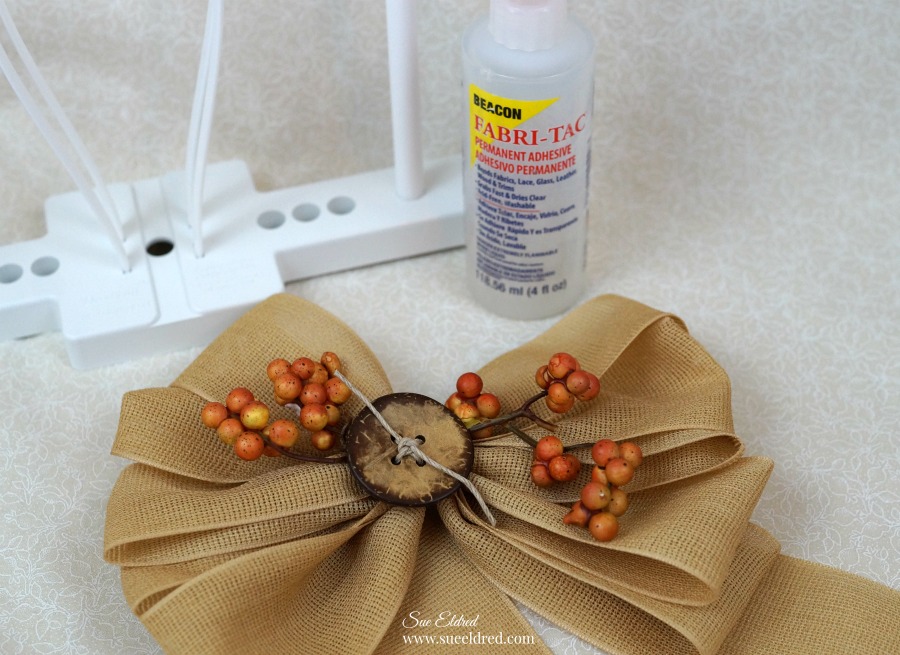
For Seasonal Fun…add berries under wire

Glue a Big Wood Button to the center of the bow with Fabri-Tac Permanent Adhesive*.

A Quick and Easy way to add a Big Beautiful Bow to a simple wreath.

The Bowmaker is adjustable and great for weddings, parties, birthdays, holidays and more.

For more DecoFun Bowmaker projects click here.

*Disclaimer:  This post uses ads and affiliate links.  If you choose to make a purchase using one of the links, I receive a small commission (at no additional cost to you) that helps offset the costs of maintaining this blog.  Thanks for your support!

Try Amazon Prime 30-Day Free Trial

Tie Dyed Emoji Socks

Looking for a fun Summer project to do with the kids?

How about one of a kind Tie-Dyed Emoji socks?

This kids are going to love this!

To make the Tie-Dyed Emoji Socks this is what you’ll need…

I tried three different ways to dye my socks.

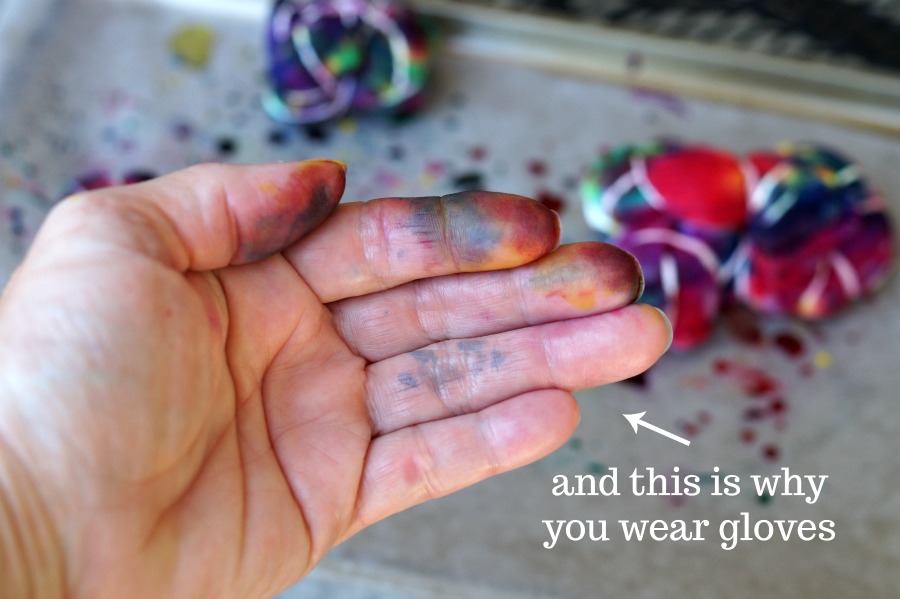
  • First, I just squirted dye directly onto the socks.  (red and blue pair)
  • Next, I rubber banded two socks together.  (yellowish pair)
  • Then, I tried rubber banding the socks separately.  (purplish  pair)

I think I like the socks rubber banded together best.  (yellowish pair)

To Dye the Socks…

  1. Add water to the pre-measured squirt bottles.
  2. Rubber-band socks and apply dye.
  3. Let set for 6-8 hours, then rinse – waiting is the hardest part!
  4. Make sure to wear gloves!  (I didn’t)
  5. Wash and Dry socks.

6.  Iron On Emoji patches on opposite sides of the socks.    Very COOL Socks!

The Tie-Dyed Emoji Socks were created for and sponsored by Joy.

Disclaimer:  This blog uses ads and affiliate links.  If you choose to make a purchase using one of the links, I receive a small commission (at no additional cost to you) that helps offset the costs of maintaining this blog.  Thanks for your support!
Shop Amazon Scrapbooking Supplies*

Sue and Nick’s Deflecto Craft Caddy Challenge

Deflecto Craft Caddy Challenge…

When I worked in the Deflecto Booth last January at the Creativation Show,

each day of the show Deflecto held a Craft Caddy Challenge.

The challenge was to see who could fill their craft caddy the fastest.

It quickly became extremely competitive.  (but fun!)

The challenge looked like so much fun, I decided to create one of my own.

Of course, I wanted to race someone closer to my own speed.

Nick enjoyed the caddy challenge so much that when my nieces came over to swim later,

he challenged them.  He was a lot faster by then.

Here’s a quick video I made last year showing all the features of the caddy.


The Deflecto Caddy Organizer* is made by Deflecto Craft Solutions are available at Amazon

and now in Target Stores.

 “This is a sponsored post. As a member of the Deflecto Design Team I have been provided product in exchange for my creative ideas, views and opinions.”

Shop Amazon Scrapbooking Supplies*

Disclaimer:  This blog uses ads and affiliate links.  If you choose to make a purchase using one of the links, I receive a small commission (at no additional cost to you) that helps offset the costs of maintaining this blog.  Thanks for your support!

DIY…Christmas Chalkboard

DIY…Christmas Chalkboard

Christmas in July…

Last week it was so hot that when I went out at 9:00 in the evening to water my flowers it

was hard to breath.  It was so hot that our unheated pool felt like bath water.

Summer’s in full swing and vacation (for me) is fast approaching.

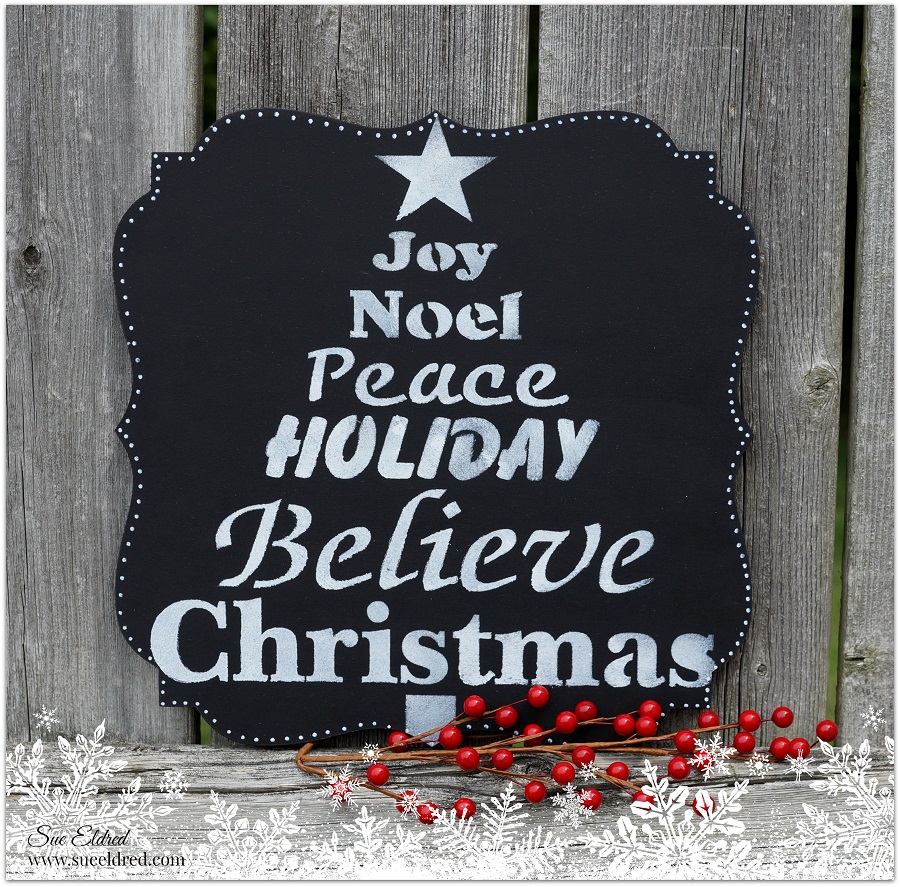
And with all the things I could or should be doing, I felt like making a Christmas Chalkboard.

It’s not too early?  Is it?

The Christmas Chalkboard is really easy to make…

and would be a wonderful gift for those of you thinking ahead.

And if you’d like…you could make it a two sided chalkboard and really get creative.


Here’s how I made the Christmas Chalkboard…  

Disclaimer:  This blog uses ads and affiliate links.  If you choose to make a purchase using one of the links, I receive a small commission (at no additional cost to you) that helps offset the costs of maintaining this blog.  Thanks for your support!

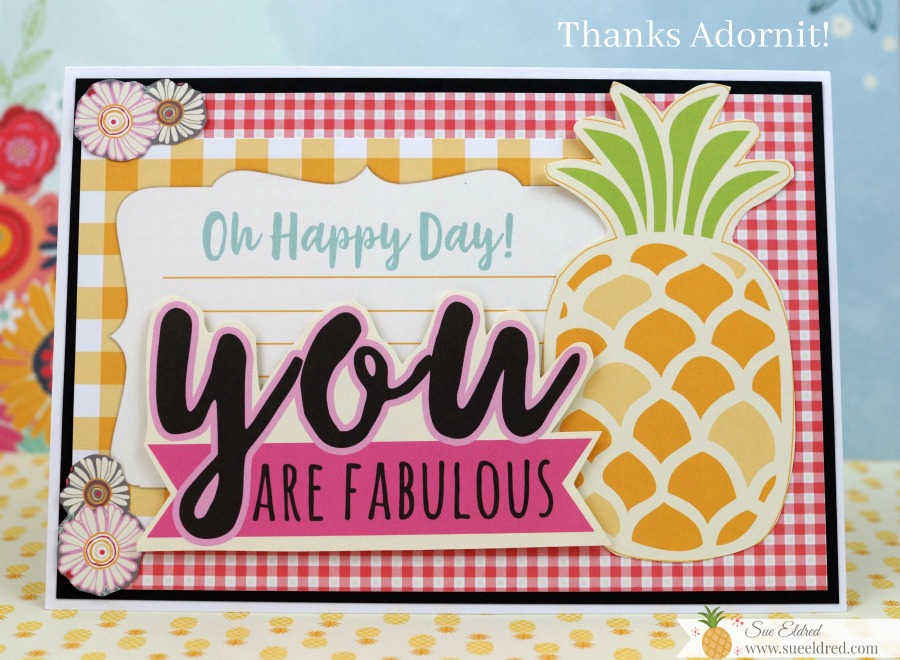
Sharing the Adornit Love…

As my time as an Adornit Ambassador comes to a close at the end of this month…

I wanted to make them a card to let them know how I feel.

Working with them the last few months has been a fun and positive experience.

Thanks, Adornit for the opportunity to work with your wonderful products.

FYI…the card was made with Adornit’s Flamingo Fever Collection.)

Try Amazon Prime 30-Day Free Trial

Disclaimer:  This blog uses ads and affiliate links.  If you choose to make a purchase using one of the links, I receive a small commission (at no additional cost to you) that helps offset the costs of maintaining this blog.  Thanks for your support!

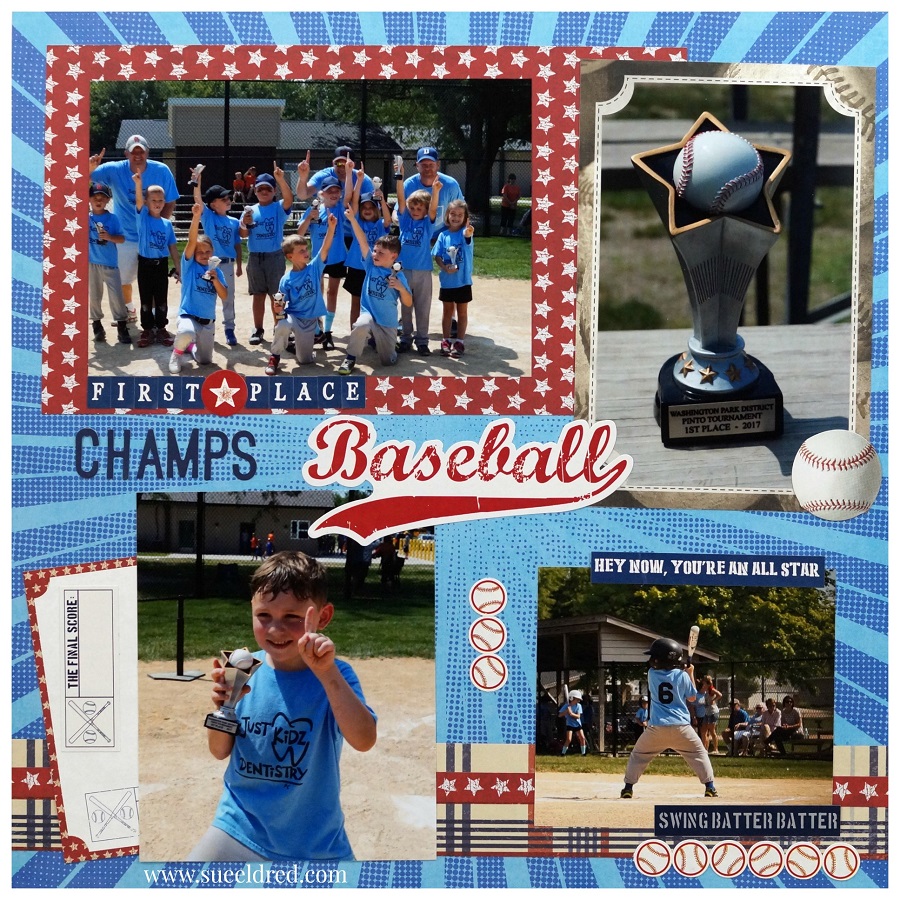
Little League Champs

Watching Little League Baseball games are fun…

When they move up from tee ball to coach pitch, it’s a really big jump.

They go from playing in the dirt to actually making some good plays.

Watching the growth from the first games to the last is amazing.

This adorable group of 6 year olds made it all the way to the final championship.

And won 1st place.  I couldn’t be  prouder.

(FYI…My layout was made using paper and stickers from Paper House Productions.)

Shop Amazon Scrapbooking Supplies*

Disclaimer:  This blog uses ads and affiliate links.  If you choose to make a purchase using one of the links, I receive a small commission (at no additional cost to you) that helps offset the costs of maintaining this blog.  Thanks for your support!
For summer fun…click on Slimer ad below

Slimer

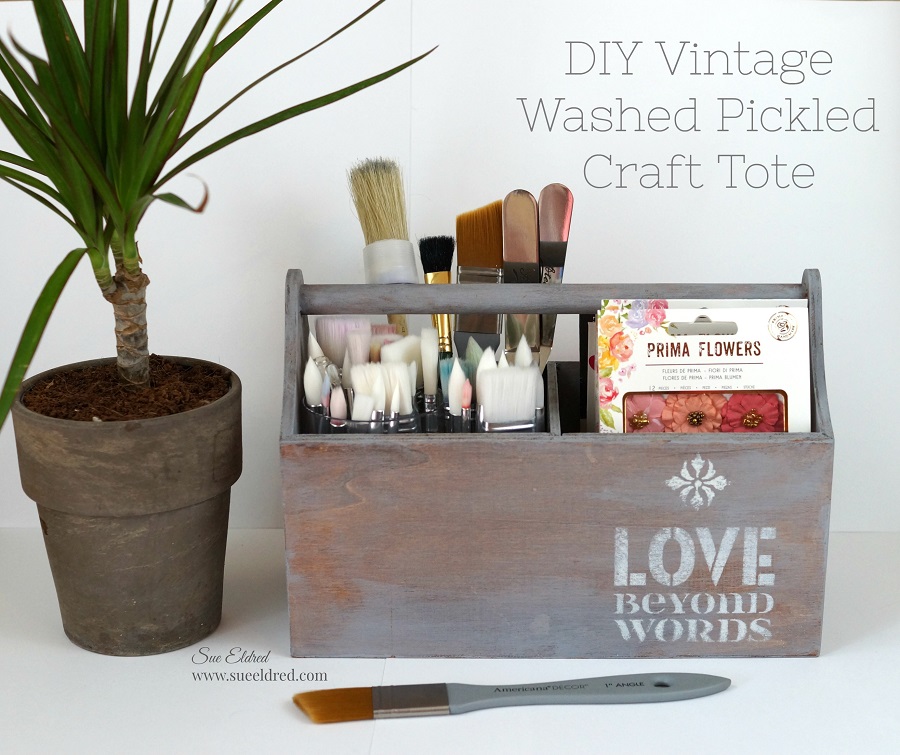
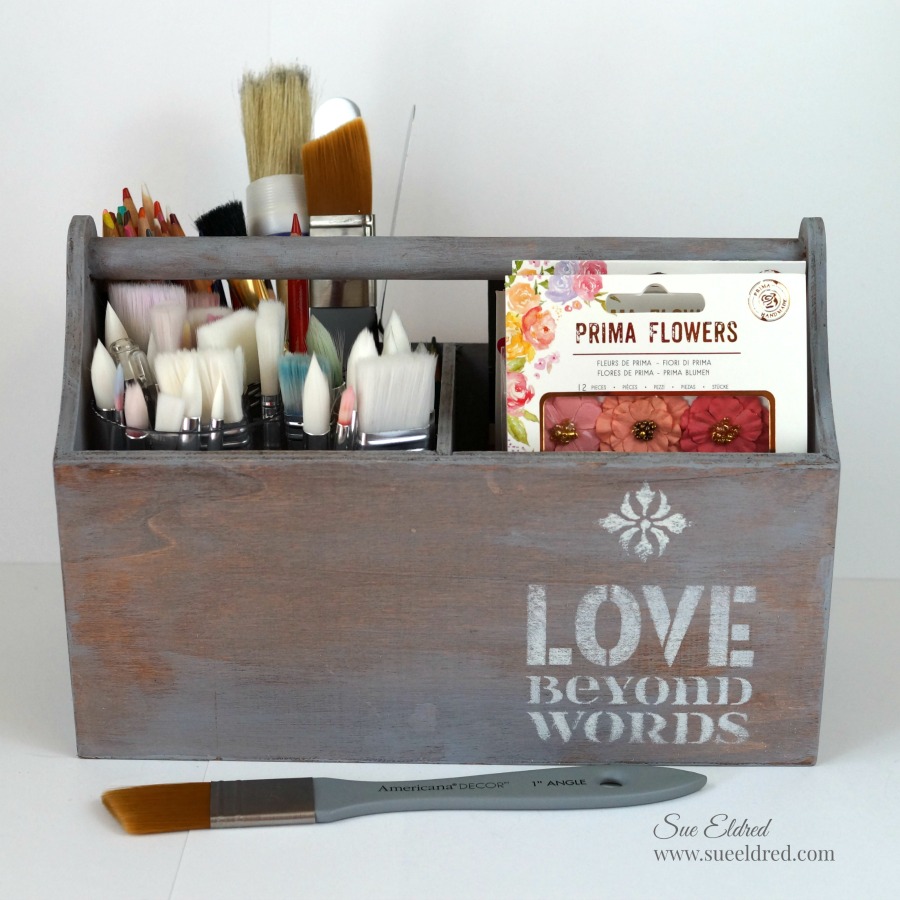
How to Create an Easy Pickled Finish with Vintage Effect Wash

How to create an Easy Pickled Finish with Vintage Effect Wash from Deco Arts.

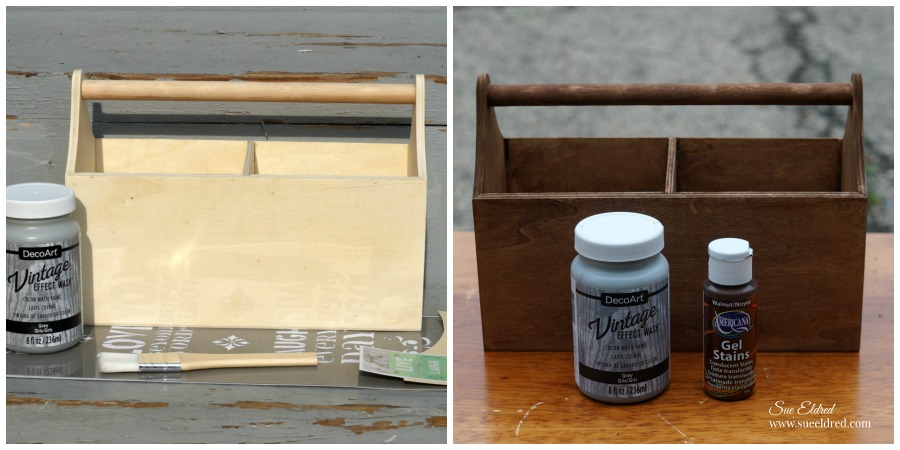
I had this unfinished wood tote that I wanted to use the new Vintage Effect Wash on.

My first thought was to just give the tote a cool white wash using the paint.

But after further thought and a little experimentation, I decided to warm up the look by

staining it with a Walnut Gel Stain first.  I love the way it turned out.

This would make a great garden tool holder, picnic caddy, or my favorite…a Craft Tote.

DIY Pickled Crate

Supplies Used:                (*affiliate link)

 Directions:

  1. Lightly sand the wood crate if necessary.
  2. Paint or brush crate with DecoArt Americana Walnut Gel Stains Paint*.
  3. Rub off excess stain with soft clean rag.  Allow stain to dry.
  4. Apply Decoart Vintage Effect Wash Grey* onto crate with brush allowing the stain to show through.   Wipe with clean soft rag if necessary.  (It’s that easy!)
  5. If desired, add stenciling onto the crate.
  6. Apply a sealer to protect the finish.

The Love Beyond Words Pickled Crate was sponsored by DecoArts.

Try Amazon Prime 30-Day Free Trial

Disclaimer:  This blog uses ads and affiliate links.  If you choose to make a purchase using one of the links, I receive a small commission (at no additional cost to you) that helps offset the costs of maintaining this blog.  Thanks for your support!

Painting Basics

A Gnome Hello

The sun is shining…it’s a perfect day for a Gnome Hello.

My sweet little gnome was made using a page from my Gnome Life Mini Coloring Book.

I water colored the images using my dye inkpads.

Tip…I apply the ink onto a piece of acetate and pick up the ink with my Water Brush*.

Here’s what I used: to make the card…    (*amazon affiliate link)

  • Gnome Life Mini Coloring Book*
  • 22737 Art Play Paintables-Occasions (ADORNit)
  • 22747 Art Play Paintables-Wish on Stars (ADORNit)
  • 22496 Mustard Pixie Dots 12” x 12” paper (ADORNit)
  • 22487 Gray Pixie Dots 12” x 12” paper (ADORNit)
  • Cardstock:  White, Blue Metallic
  • Mini White Brads*
  • Water Brush* or Paintbrush
  • Various Inkpads

The Gnome Hello card was sponsored by Adornit.

Shop Amazon Scrapbooking Supplies*

Disclaimer:  This blog uses ads and affiliate links.  If you choose to make a purchase using one of the links, I receive a small commission (at no additional cost to you) that helps offset the costs of maintaining this blog.  Thanks for your support!

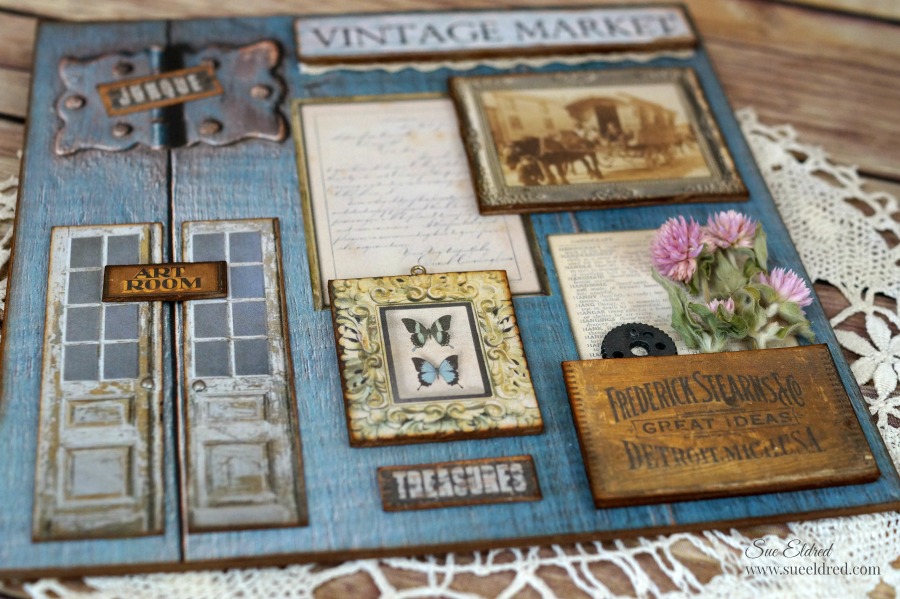
Architextures Vintage Market Collage

Vintage Market Collage

I had so much fun playing around with the 7 Gypsies Architext Paper Pad*

It’s my new favorite.  It reminds me of going to the Flea Market with my daughter.

So much Vintage Goodness.

The project was basically put together with paper, glue and chipboard.

To begin…I glued the background paper to a thick piece of chipboard for stability.

I can easily add it to an 8″ x 8″  frame later if I want too.

I added several layers of chipboard on the back of each of the images to give dimension.

I also aged each piece by rubbing Vintage Photo Distress Ink* to the edges using a

Ink Blending Tool*.    (*amazon affiliate link)

My favorite piece is the vintage crate.  I added the second layer of chipboard with three small

strips, so that I could leave an opening on the top to add dried flowers from last years garden.

So realistic, it looks like a teeny tiny crate.  I just love it.


                  7 Gypsies Architextures Paper Pad

The Architextures™ Paper Collection was inspired by the all the wonder of found objects, displays, signs, sayings, artwork, creative bliss and sheer beauty found at vintage fairs, flea markets, salvage yards, barn sales, antique shops, old book stores, garage sales, market days and more.

Such a fun collection.  Makes me want to go treasure hunting.

Notice the 7 Gypsies Mini Library Drawer* in the background of the picture?    (so stinkin cute)

The Vintage Market Collage was sponsored by Canvas Corp Brands.

Shop Your Fav Brands at Scrapbook.com

Disclaimer:  This blog uses ads and affiliate links.  If you choose to make a purchase using one of the links, I receive a small commission (at no additional cost to you) that helps offset the costs of maintaining this blog.  Thanks for your support!