Nick’s Garden Caddy (for Easter)

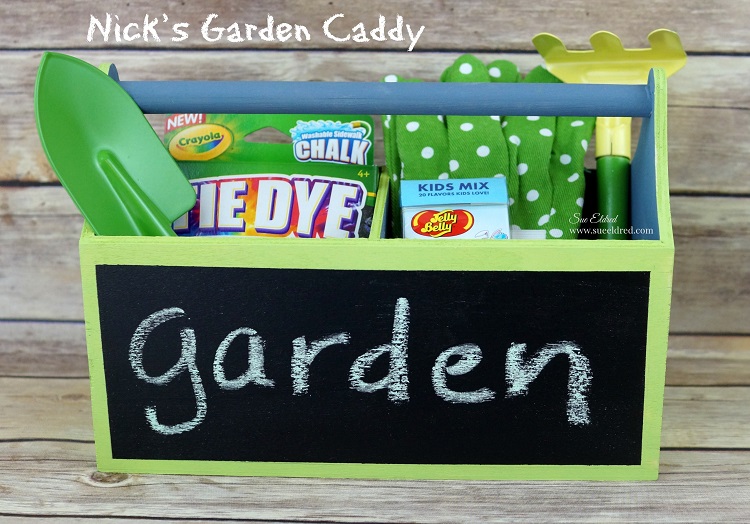
Nick's Garden Caddy 5510

As soon I walked into Target, a few weeks ago, I was stopped in my tracks by their adorable gardening

supplies for kids.  (in the one spot area)  I am a sucker for cute little things.

Sweet little metal tools and polka dot gardening gloves (oh my) and when I found the plain wood

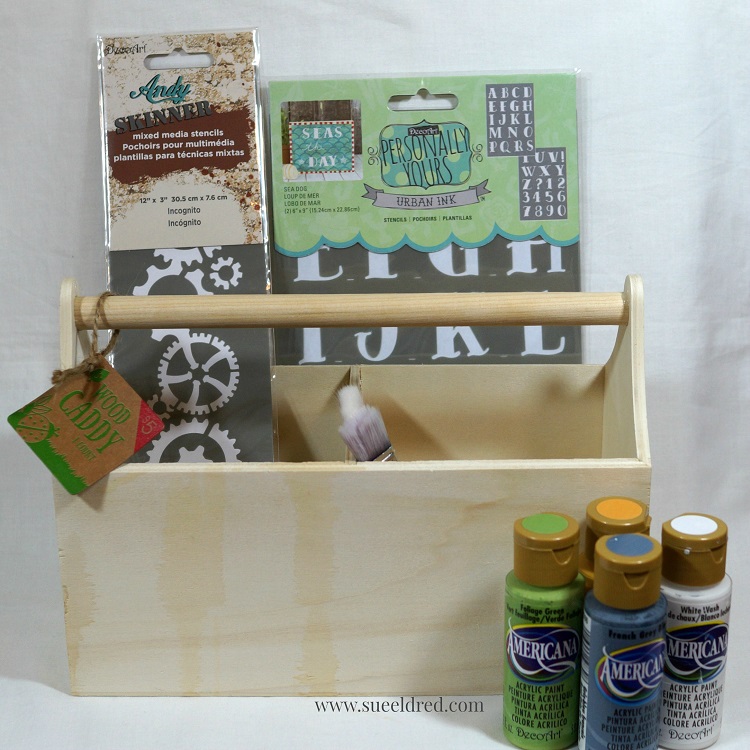
caddy…  I knew exactly what I wanted to use for Nicholas’ Easter basket.

Nicholas, as you may know, is my gardening buddy.

Wood Caddy 5459 2

Instead of leaving the caddy plain (what fun would that be), I decided to paint and personalize the

caddy with a chalkboard on one side and his name on the other.

(I used Deco Art Urban Ink Stencil, 6″ by 9″, Sea Dogto stencil on his name.)

Back of Nick's Garden Caddy 5538

I went back to Target last week to see if I could find another wood caddy but sadly they were all out.

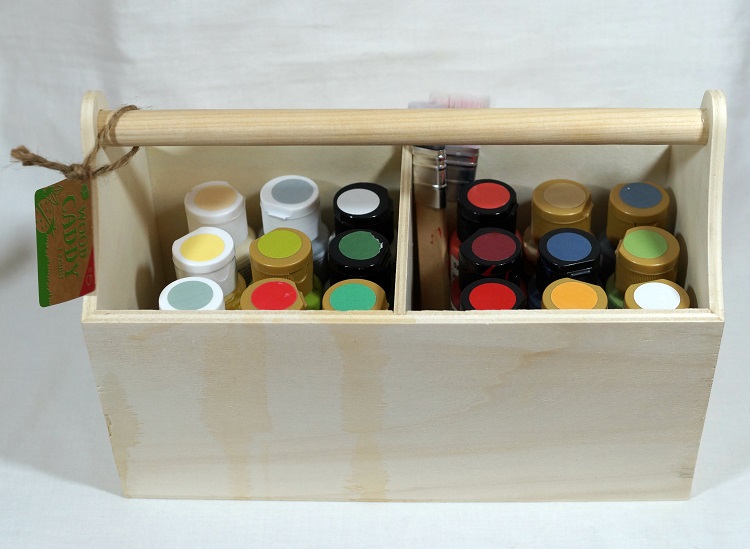
If you happen to spy one at your Target make sure to grab one, they make wonderful paint caddies.

Wood Caddy with Paint 5462

Along with the Gardening supplies, I added tie-dye chalk (for the chalkboard), jelly bellys, a light up

ball and of course marshmallow peeps.

Nick's Garden Caddy Haul 5493

And… I didn’t forget little brother Warren.  (I picked up all these goodies at Target)

Warren's Easter Bucket 5545

In case your wondering… No this isn’t a sponsored post for Target.  (but I wish it was)


*This post uses Amazon Affiliate links.  I am a Amazon affiliate.

Paper Sculpting made easy…

Another Fun Blog Hop!

As a Deflecto Design Team member, I am super excited this week to play with our friends over at Stampendous.  With two amazing teams joining in the fun you will want to check in everyday of the hop.  There will be some fabulous projects and we’re going to be showing them off all week long.

Make sure to scroll all the way to the bottom for a chance to win some awesome prizes.

Deflecto Stampendous Blog Hop Logo 2

 Paper Sculpting made easy…

Deflecto Stampendous Blog Hop 5022 1

Years ago, when I still had my store, we had a Paper Sculpting Card Class

using of all things a sunflower stamp.  (oh, my…cutting all those petals!!!)

While the end look was beautiful, I thought the ladies were going to revolt.

They held that card over my head for years.  (it was not for the faint of heart)

Matter of fact, I was reminded of that card not that long ago.


Do you love the look of paper sculpting but hate all that fussy cutting?

With this stamp and die set from Stampendous, there is minimal cutting and the flower assembly

goes together very quickly.

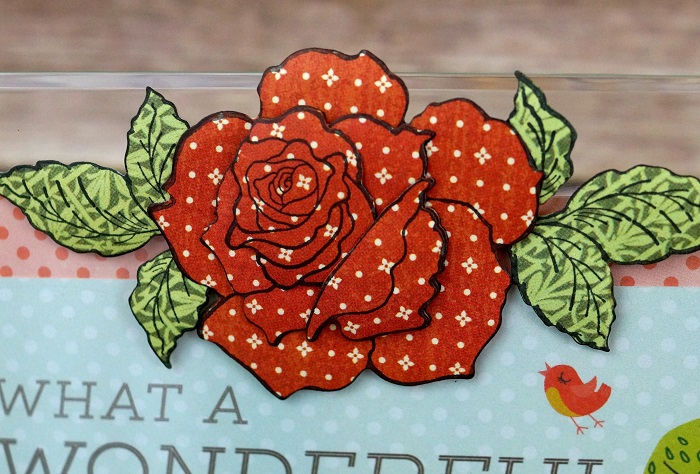
The Cling Rose Bouquet Rubber Stamp Set from Stampendous comes with various sizes

of flowers each meant to be used separately or layered together to create one large dimensional flower.

When used with the matching die set, you get amazing results.
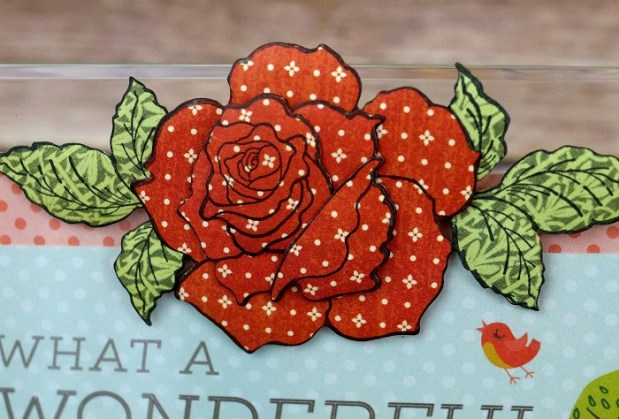
Flower Close Up 5015

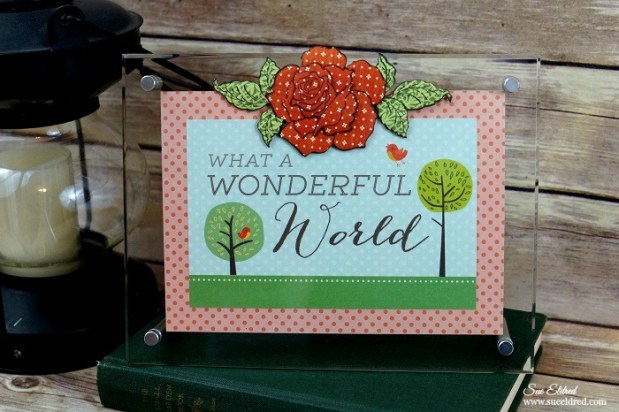
Here’s what I used on my frame:

Paper Sculpting made easy

Directions:

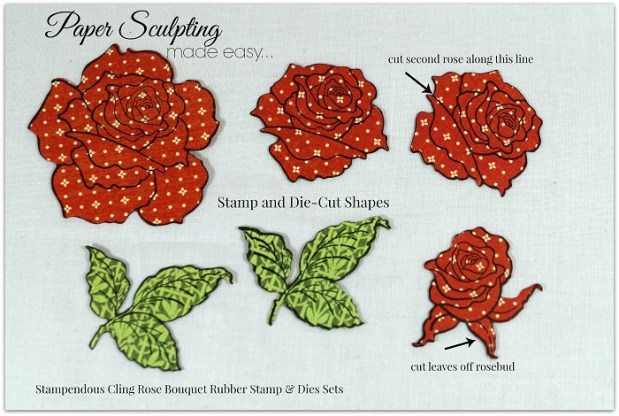
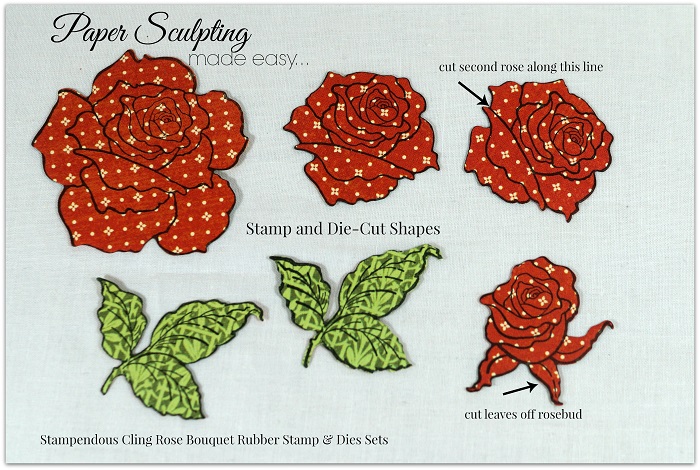
  1. Stamp the flowers and leaves onto the patterned paper.  (see above image)
  2. Die-cut the shapes using the thin dies and big shot die-cutting machine.
  3. Cut the leaves off the rosebud and the bottom portion of the second stamped rose image.
  4. Use a gray marker to go around the outside edge of each image to hide the white core of the patterned paper.
  5. Using a foam mat or mouse pad and a large ball stylus, turn the shapes over onto the mat and gently rub the shapes with medium pressure on the back of the shapes.  This will give the shapes added dimension.
  6. Using thin foam mounting squares, adhere the flower sections together in this order: large rose, medium rose, rosebud and bottom section of medium rose to create one large rose.
  7. Cut out the 4″ x 6″ What a Wonderful World section and adhere onto a 5″ x 7″ polka dot paper layer.
  8. Add layers inside the clear acrylic beveled frame from Deflecto.
  9. Mount dimensional flowers and leaves onto the front of the frame using thin foam mounting squares.

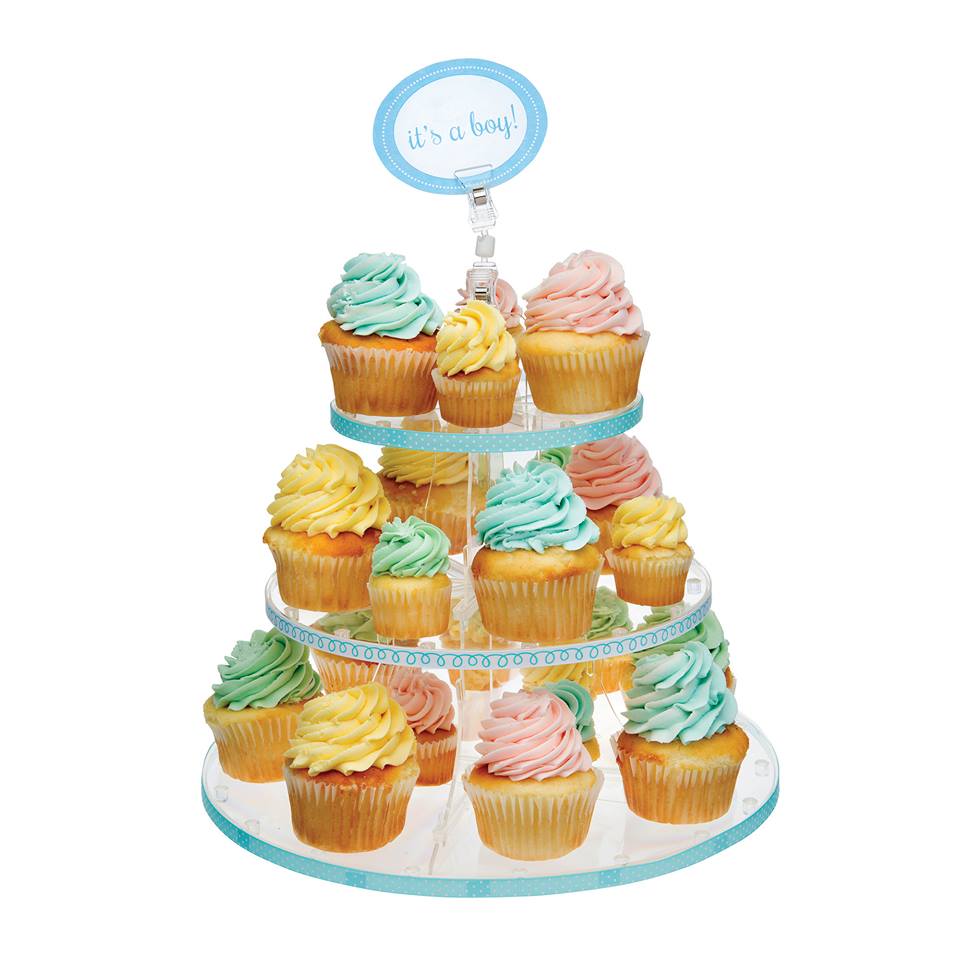
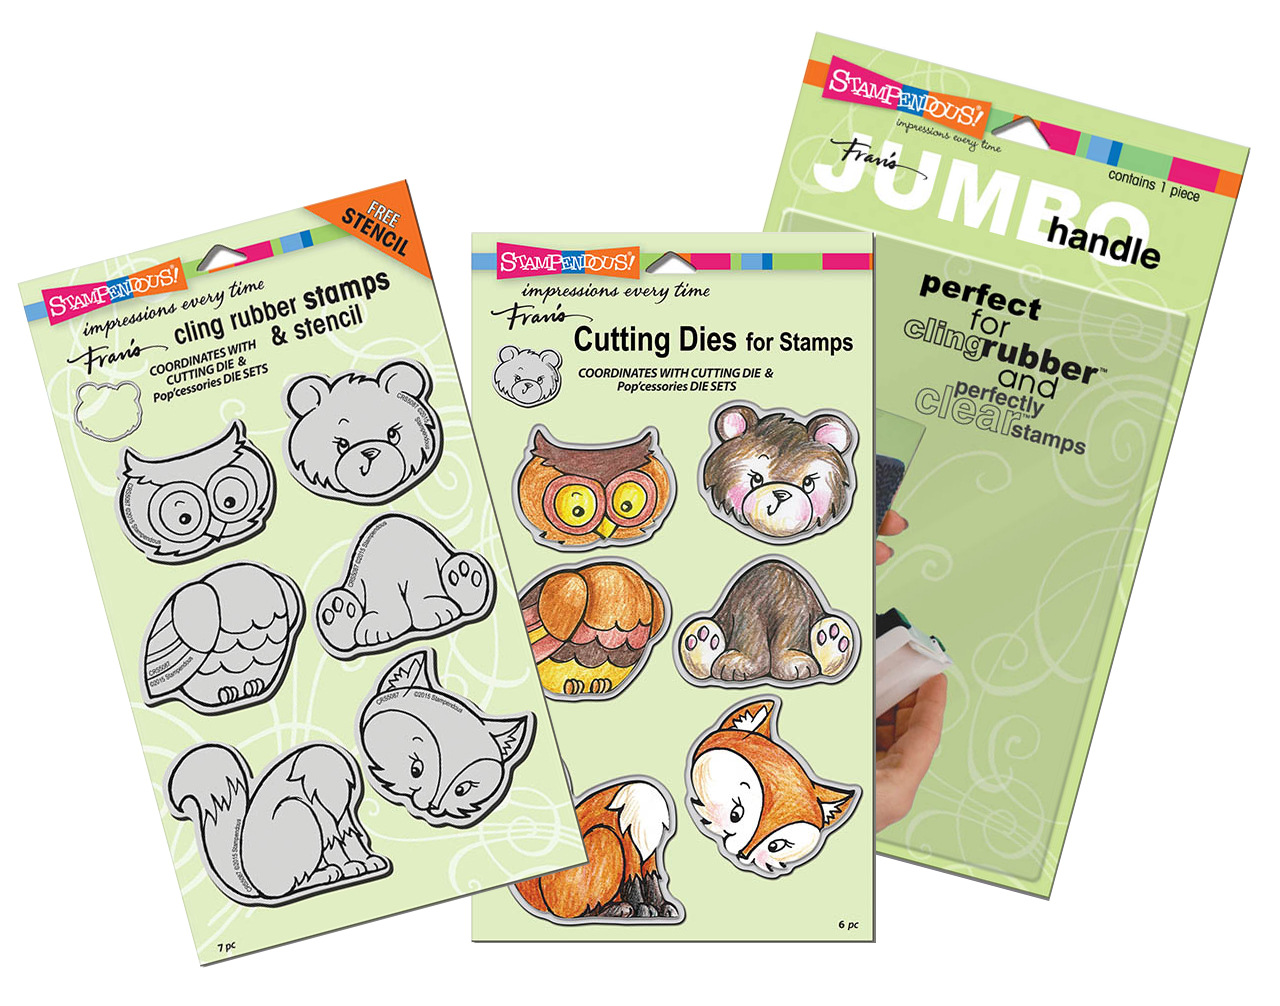
You’ll want to get your commenting fingers ready!  Each comment on a post this week will enter you to win a fabulous prize package! (one comment per post, per person)  Contest open to USA residents only.  We have three prizes, and each will have a 3 Tiered Cake Stand from Deflecto AND the Stamp and Die Sets from Stampendous.

Cupcake StandCRS5087_DCS5087_SSH57

Now click on the links below and get to hoppin’!  Remember to comment on each blog and then return to the Deflecto Blog and leave a comment there for your chance to win.

Are you social? We are too! Please check us out at the following locations…


This is a sponsored post. As a member of the Deflecto Design Team I have been
provided product in exchange for my creative ideas, views and opinions.”

*This post uses Amazon Affiliate links.  I am an Amazon Affiliate

all things are possible if you believe…

EasterBlogHop

Today, I’m joining the Paper House Design Team for a Easter Blog Hop.

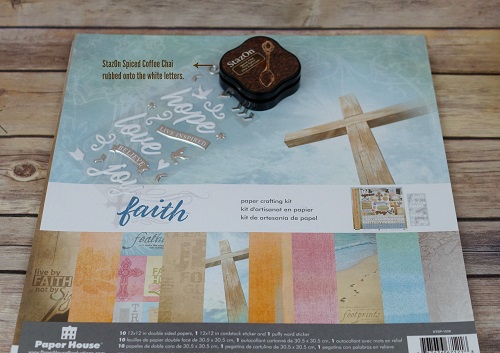
For this hop, we were all given adorable Easter stickers along with the Faith Paper Crafting Kit.

Easter Card materials 5225

I was racking my brain trying to come up with a cute Easter Bunny layout

(ready to steal pictures from my daughter-in-laws Facebook page) when it hit me.

Why not make a card instead.

Easter Card 5237

Easter’s so much more than candy and eggs.

Easter Card Close Up 5243

The Faith kit came with lovely white puffy words that wasn’t quite right for this card.

So…. I used my Tsukineko StazOn Midi Ink Pad, Spiced Chai(which is permanent)

along with an ink applicator and rubbed brown ink onto the white letters.

I used the “HOPE anchors the soul” sticker and stuck it onto a small scalloped

circle.  I mounted the circle onto the corner of the card.

A simple card of encouragement.  (who doesn’t need that?)

PH_25_Gift_Card

Would you like a chance to win a $25 gift certificate to Paper House?

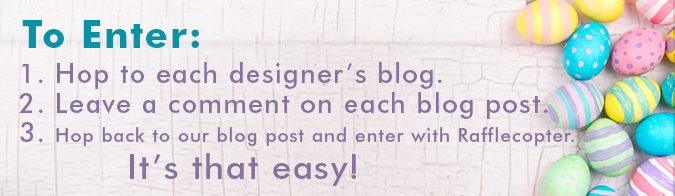
EasterBlogHopTOENTER2

Good Luck and Happy Hopping!


*This project was created for and sponsored by Paper House Productions.


Graphic 45… A Time to Celebrate Frame

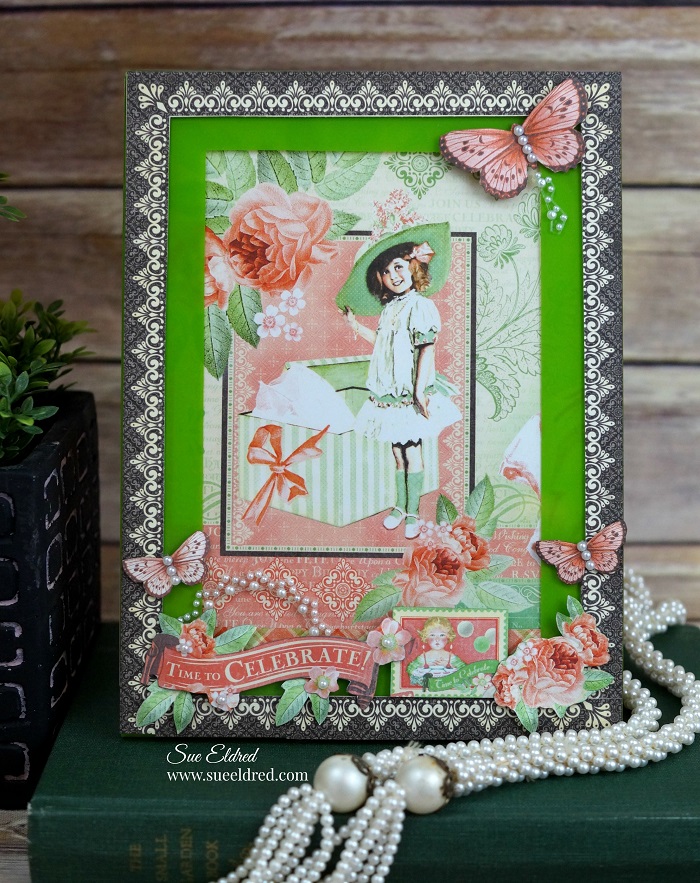
Time to Celebrate 4599

I have a hard time resisting the beautiful patterns of Graphic 45 paper and love using

it in my creations whenever possible. The other day, while I was shopping at my local

Scrapbook Store  I picked up a few sheets of the “Time to Celebrate Collection”.

I thought it would be perfect for a Spring Frame I wanted to make.  I couldn’t decide on

which way I wanted to go with the frame so I created two looks for the same frame.

Time to Celebrate Frame 4709

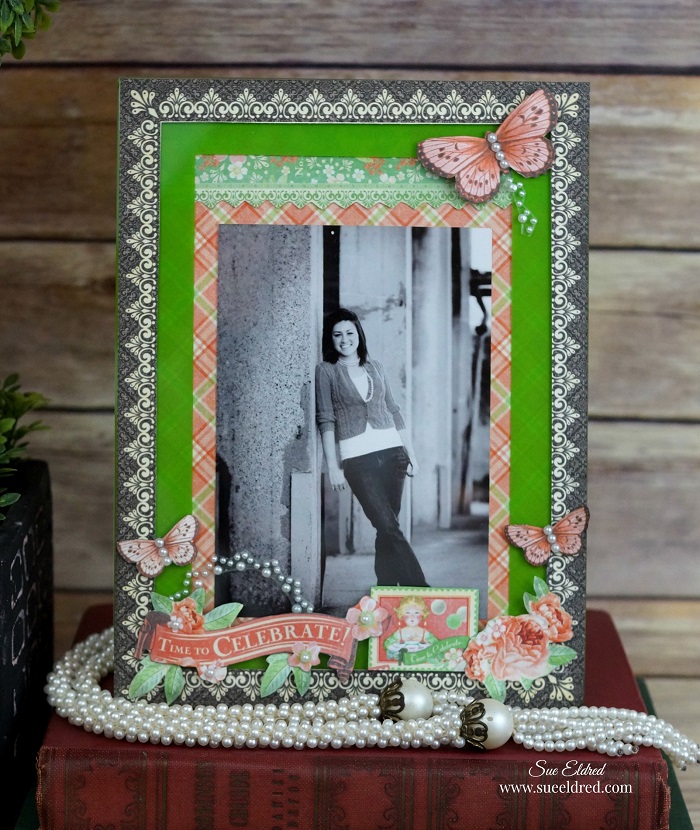
For a slightly more contemporary look….

I used a older black and white picture of my daughter.  (I love the contract.)

Time to Celebrate Frame Close Up 4835

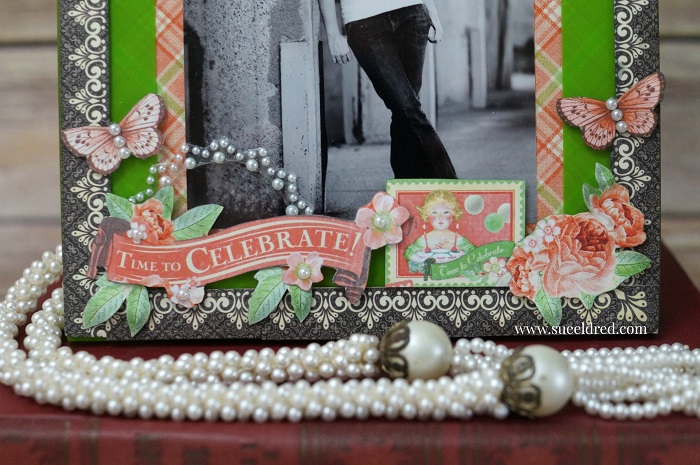
There’s a bit of fussy cutting involved with this frame.

I used the border on the Time to Celebrate paper to create a border around my green frame.

Then, I started cutting out the butterflies and flowers, giving them slight bends with my fingers

before layering them onto the frame with foam mounting squares.

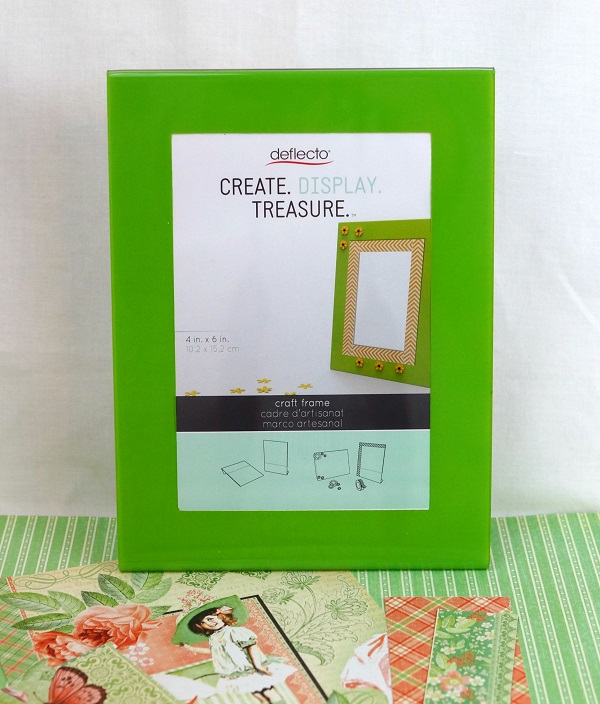
The finished frame is 6″ x 8″ and is made to hold a 4″ x 6″ picture.

Green Craft Frame 2

Here’s what I used:

Deflecto Craft Frame, Green Border, 4x 6 Inches (69574CR)

I used two sheets of paper from Graphic 45’s “Time to Celebrate” collection.


Graphic 45 Time To Celebrate Paper Pad, 12 by 12-Inch(available on Amazon*)


“This is a sponsored post. As a member of the Deflecto Design Team I have been
provided product in exchange for my creative ideas, views and opinions.”

*This post uses Amazon Affiliate links.  I am an Amazon Affiliate


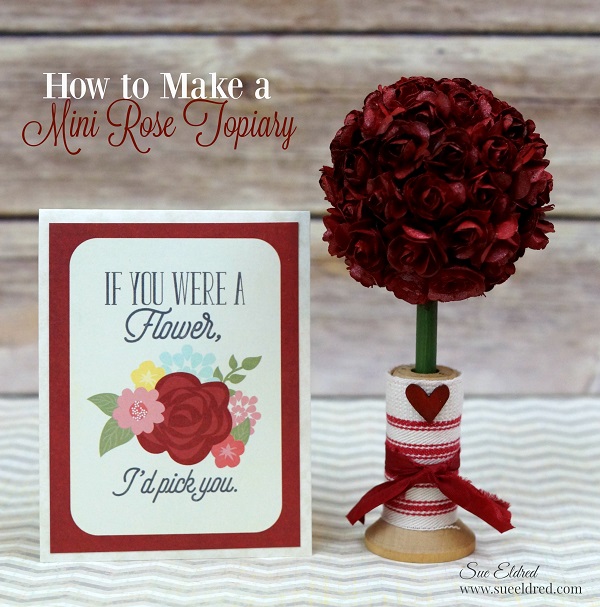
How to Make a Mini Rose Topiary

How to Make a Mini Rose Topiary 04034

Maybe it has something to do with my short stature, but, I have always had a thing for

miniatures.  My momma always told me “Good things come in small packages”.

(which I whole-heartily believed)

The Mini Rose Topiary is a project that can be easily adapted to make larger topiaries.

I just happen to like mine mini.

How to make a Mini Rose Topiary

How to make a Mini Rose Topiary

Here’s what I used:                                                                    (*affiliate link)


Directions:

  1. Spray Roses and small wood heart with the Mistable Paint.   Allow plenty of time to dry.
  2. Paint the 2″ Smoothfoam Ball  and the wood dowel with the green acrylic paint.
  3. Poke hole into the end of the 2″ ball.  Squirt a little glue in the hole and insert the painted dowel.
  4. Starting at the top of the ball.  Glue roses, one by one, onto the ball with a fast drying glue until covered.  After the rose ball is formed, you may want to go back and re-mist the flowers for additional coverage.
  5. Cover the wood spool with the ticking material and glue the end in place.  Tie a small piece of crinkle ribbon around the ticking and glue the wood heart on top.
  6. Insert rose topiary into the small wood spool.

TIP:  Try making a topiary using larger Smoothfoam balls and silk flowers inserted into a pail, vase or containers.

The Mini Rose Topiary was created for and sponsored by Smoothfoam™ The Crafter’s Foam.

"Painting

*Disclaimer:  This post uses ads and affiliate links.  If you choose to make a purchase using one of the links, I receive a small commission (at no additional cost to you) that helps offset the costs of maintaining this blog.  Thanks for your support!


How to Create a Wedding Memories Card Box

I am honored to have had my Wedding Memories Card Box featured as a special project in

DIY Wedding Magazine’s Holiday Issue.

Wedding Memories Keepsake Cards Box 1

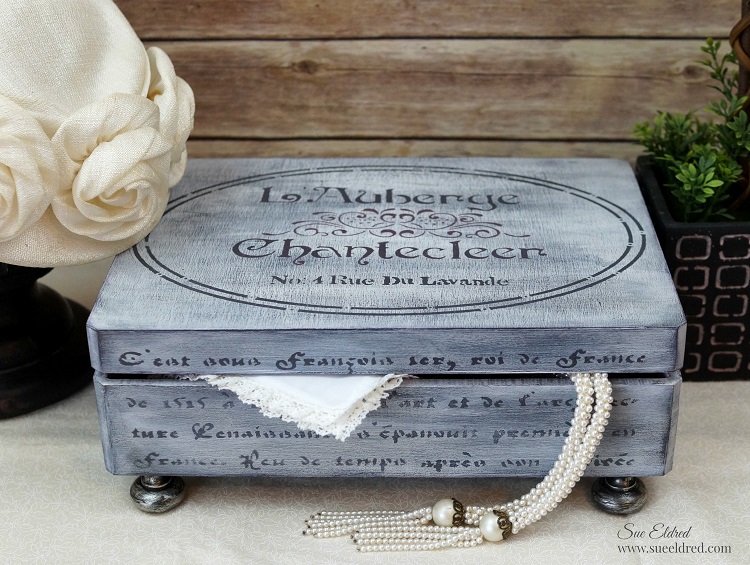
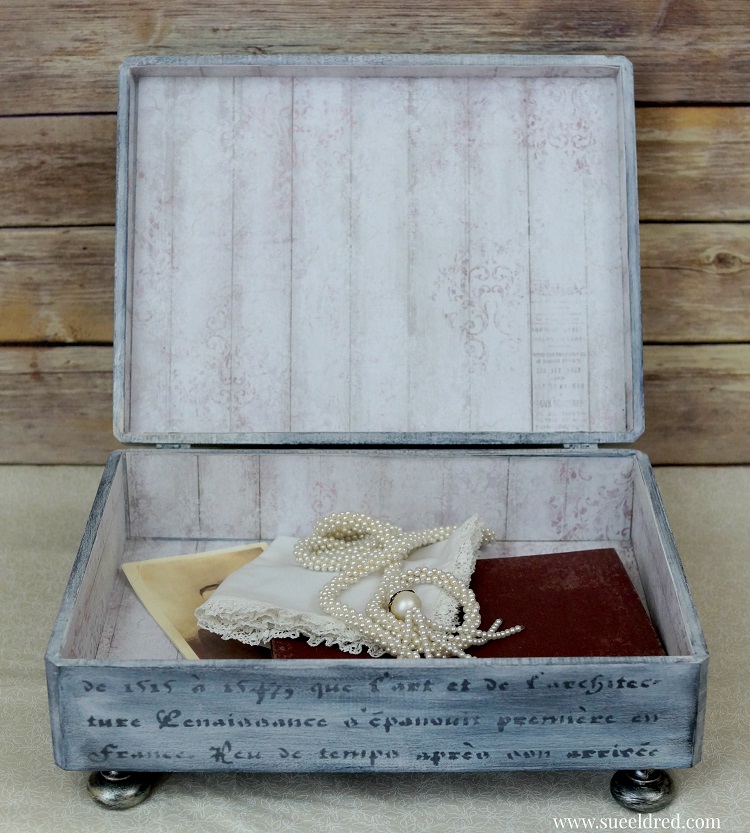
The Wedding Memories Cards Box is a dual-purpose box to hold cards at the Reception

and then to be used later to store the Wedding Memories to be cherished for years to come.

Wedding Memories Card Box 8032

I started with a plain wood box from Walnut Hollow and Chalky Finish Paint from Deco Art to create a soft timeless finish.

Supplies Used:    (*amazon affiliate links)

Finished Size: 9” x 12” x 3 1/2”

Wedding Memories Card Box Collage

Directions:

  1. Paint the top portion of the cornice box with “Vintage” Chalky Finish paint and the bottom portion of the box with “Timeless” Chalky Finish paint. (Inside and out)
  2. Lightly sand the box to smooth out the finish.
  3. Position “Mod Quatrefoil” stencil over the top of the box. Secure the stencil in place with the painter’s tape to prevent slipping. Use stipple brush to apply “Whisper” Chalky Finish paint inside open stencil areas.
  4. Remove stencil.
  5. Position and stencil “Mod Quatrefoil” pattern onto the sides of box.
  6. Allow paint to dry for a few hours and lightly sand over the stenciled area to give a slightly worn look.
  7. Apply clear crème wax onto the inside and outside of the box.
  8. Wait one hour and buff box using a soft, clean rag.
  9. Measure and apply decorative paper onto the inside of the box.
  10. Tie a long length of Antique White Satin ribbon around the top of the box, tying a bow on the top.
  11. Cut cream cardstock into five 2 1/4” x 3 1/2” pieces.
  12. Stencil the letters to spell “CARDS” onto cream cardstock using the 3” Simple Script Alphabet.
  13. On the inside of the box: Clip the letters onto the ribbon using the mini clothespins.

Wedding Memories Card Box closed

This project was sponsored by Deco Arts and Walnut Hollow. 

Shop Handmade – The Wedding Store

Disclaimer:  This blog uses ads and affiliate links.  If you choose to make a purchase using one of the links, I receive a small commission (at no additional cost to you) that helps offset the costs of maintaining this blog.  Thanks for your support!

Pretty Pink Birthday Party Sign

Pink Birthday Party Frame 4299

A quick share today of a Pretty Pink Birthday Party Sign…

I made the sign using the Deflecto Craft Frame, Pink Border, 8.5 x 11 Inches (69771CR)

from Deflecto Craft Solutions and the new Flamingo ColorWay paper and stickers from

Paper House Productions.  I love the way they look like they were made for each other.

After the Party is over, add a couple cute photo’s of the birthday girl for a fun memory.

Happy Monday Everybody! 


“This is a sponsored post. As a member of the Deflecto Design Team I have been
provided product in exchange for my creative ideas, views and opinions.”

This post uses Amazon Affiliate links.  I am an Amazon Affiliate

You & Me Valentine’s Frame

Valentine's Frame

With Valentine’s Day right around the corner…

I wanted to share a simple little project that’s really quick and easy to put together.

A Valentine’s Frame using the You & Me Collection from Simple Stories.

This cute little frame, from Canvas Corp Brands, is only 6″ x 6″ and I love how versatile

it is to decorate.  The larger section is perfect for a 4″ x 6″ picture and if white’s not your

style it’s available in wood stained.  I added dimension to the frame by adding

cubes made from cardstock behind the “love you lots” and “pail of flowers”.

I dressed it up by gluing on metal corners from Tim Holtz.

Click on the pictures below for ordering information.  (affiliate links)


Disclaimer:   This post uses affiliate links.  If you choose to place an order using one of the links, I will get a small commission that helps maintain the cost of running this blog.  Thanks!

Snowball Fight

Snowball Fight 2

Ready for some good old fashioned fun?

How about a snowball fight?

Snowball Fight 3249

If you’re not loving the cold…

Here’s a snowball fight you can have while snuggling up inside.

Snowball Fight Supplies

Here’s what’s you’ll need:                            (*amazon affiliate link)

Directions:

  1. Cut the 2″ Smoothfoam ball in half.  Cut the top off the rounded side of one of the balls.
  2. Poke two holes into the bottom of the Snowman body using the craft pick.  Break a toothpick in half, dip ends into craft glue and insert in holes.  Attach the sliced ball onto the Snowman body.
  3. Apply Snow-tex with palette knife over the newly formed Snowman and the 6″ disc.  Allow both to dry fully.
  4. To Create a Snowball Wall… Poke holes into the 1″ balls with the craft pick.  Insert toothpick halves with craft glue on the ends into balls.   Build wall by sticking the balls together.
  5. Apply Snow-tex onto wall using the palette knife.  (Allow to dry.)
  6. Create scene by attaching snowman and wall onto the disc.  Reinforce the pieces with toothpicks and craft glue.
  7. For a shimmery snowy glow…paint all the pieces with Crystal Craft Twinkles paint.  (Allow to fully dry.)
  8. Add shadows to the snowman and snowballs by gently applying vintage photo ink using a stipple brush.
  9. To Create the Snowman Hat… Measure and cut fabric to fit around snowman head.  Fold over and glue one of the long edges of the fabric to create a brim.  Glue fabric ends together to create a tube.  Tie top of the tube with a piece of string, cut excess fabric off top of the tube and fray the ends by making small cuts with the scissors.  Glue to the top of the Snowman head.
  10. Add arms to the Snowman using small twigs.  Warm him up with a fabric scarf and mittens cut from the fabric scraps.
  11. For the Snowman’s Face… Use two small black micro brads inserted into the snowman face for the eyes.  Paint the tip of a bamboo skewer with orange paint, cut and insert into the face for the nose.  Add a smile to the snowman’s face using a extra fine black paint marker.
  12. Make a small snowball using a small pieced of paper wadded up and covered with Snow-tex.  Glue finished and dried snowball onto mitten.

Snowball Fight Close Up 3194

This project was created for and sponsored by Smoothfoam the crafter’s foam.

Shop Amazon Scrapbooking Supplies*

Disclaimer:  This blog uses ads and affiliate links.  If you choose to make a purchase using one of the links, I receive a small commission (at no additional cost to you) that helps offset the costs of maintaining this blog.  Thanks for your support!

Cupcake Stand or Craft Supply Storage?

Cupcake Stand or Craft Supply Storage 3310

Deflecto Craft Solutions has several new items debuting at CHA this week in Anaheim, California.

(CHA being the annual Craft and Hobby Association Trade Show.)

One of my favorites products being shown is this Three Tier Desert Stand.

Acrylic Stand and Supplies

The stand features adjustable heights and a easy knock down compact design for storage.

It is perfect for holding cupcakes and even comes with little holes to insert cake pops.  (Pretty Clever.)

The Cupcake Stand will be available January 2016 through local art, craft and educational stores.


Because I don’t make a lot of cupcakes, I decided to use mine for storage instead.

tracing circles

This is what I used to personalize the stand:

  1. Trace each of the tiers onto the back of the kraft paper.
  2. Loosely cut around each circle.
  3. Liberally apply the glue-stick onto the back of the paper around and inside the circle.
  4. Lay tier onto the glued circle and trim excess paper with craft knife.
  5. Smooth paper onto tier.
  6. Cut out the center channels of the tiers with a craft knife.

Washi Tape Border

Apply washi tape around the outside lip.

decorated stand with out paint

Assemble stand and fill craft supplies.  (or maybe even your favorite cupcakes)


“This is a sponsored post. As a member of the Deflecto Design Team I have been
provided product in exchange for my creative ideas, views and opinions.”

This post uses Amazon links if you choose to purchase from Amazon, I get a very small commission.