Architextures Vintage Market Collage

Vintage Market Collage

I had so much fun playing around with the 7 Gypsies Architext Paper Pad*

It’s my new favorite.  It reminds me of going to the Flea Market with my daughter.

So much Vintage Goodness.

The project was basically put together with paper, glue and chipboard.

To begin…I glued the background paper to a thick piece of chipboard for stability.

I can easily add it to an 8″ x 8″  frame later if I want too.

I added several layers of chipboard on the back of each of the images to give dimension.

I also aged each piece by rubbing Vintage Photo Distress Ink* to the edges using a

Ink Blending Tool*.    (*amazon affiliate link)

My favorite piece is the vintage crate.  I added the second layer of chipboard with three small

strips, so that I could leave an opening on the top to add dried flowers from last years garden.

So realistic, it looks like a teeny tiny crate.  I just love it.


                  7 Gypsies Architextures Paper Pad

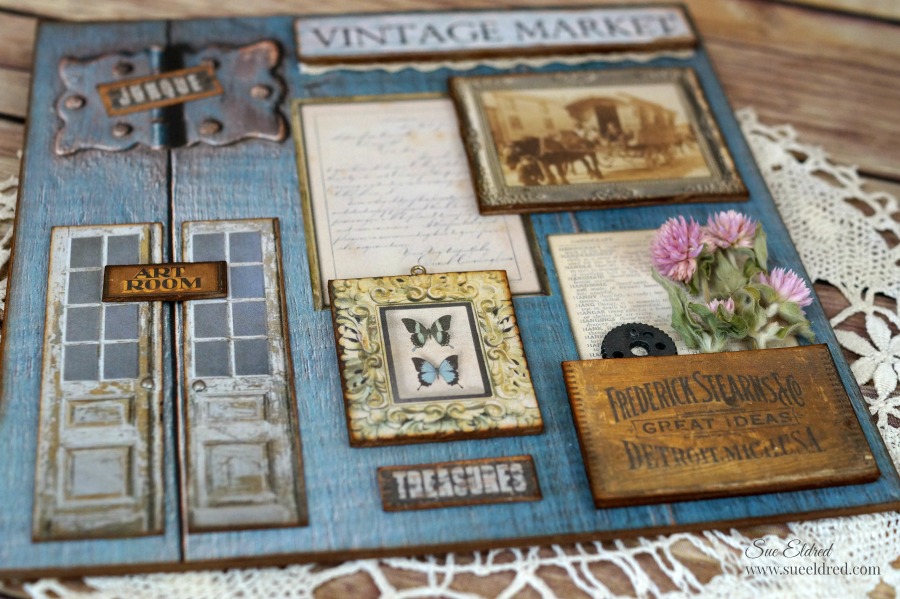
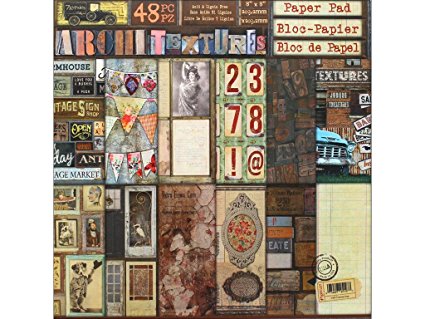
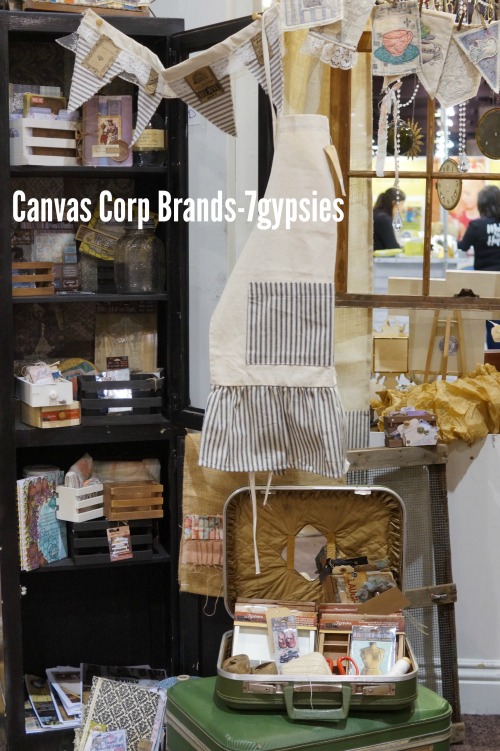
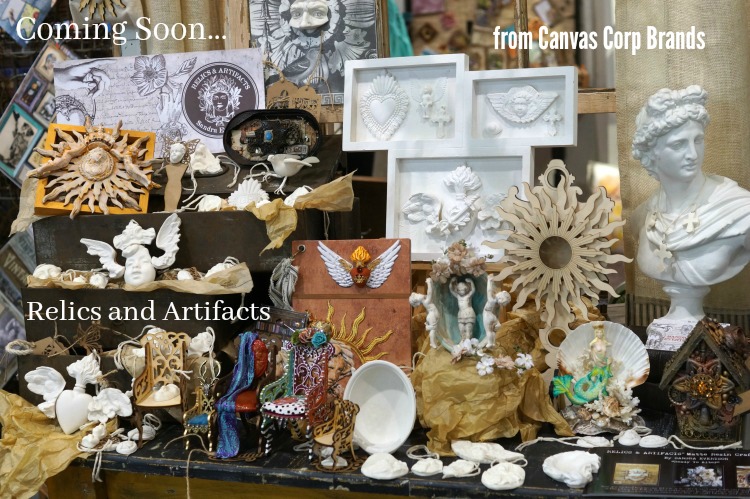
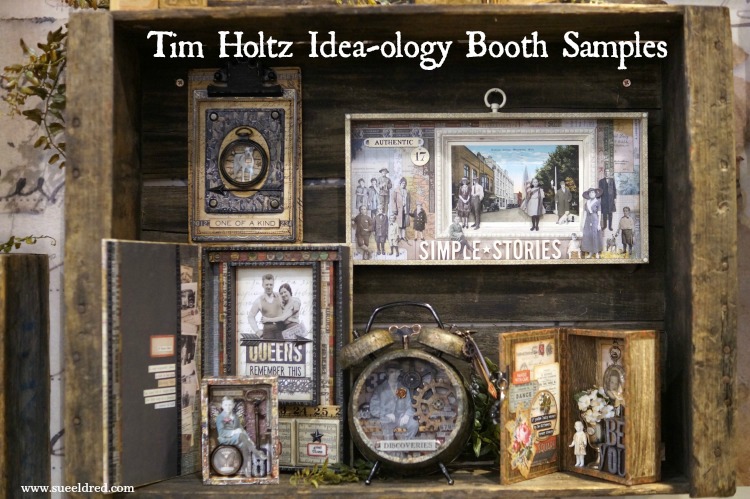
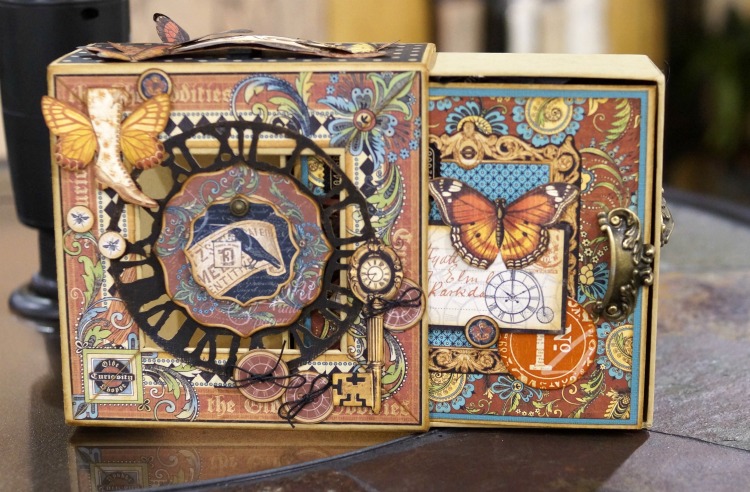
The Architextures™ Paper Collection was inspired by the all the wonder of found objects, displays, signs, sayings, artwork, creative bliss and sheer beauty found at vintage fairs, flea markets, salvage yards, barn sales, antique shops, old book stores, garage sales, market days and more.

Such a fun collection.  Makes me want to go treasure hunting.

Notice the 7 Gypsies Mini Library Drawer* in the background of the picture?    (so stinkin cute)

The Vintage Market Collage was sponsored by Canvas Corp Brands.

Shop Your Fav Brands at Scrapbook.com

Disclaimer:  This blog uses ads and affiliate links.  If you choose to make a purchase using one of the links, I receive a small commission (at no additional cost to you) that helps offset the costs of maintaining this blog.  Thanks for your support!


How to make a Chippy Window for Spring

Happy Spring!

To celebrate the first day of Spring I’m sharing how I made this cute little Chippy Window.

To make the Chippy Window…

I started with a 7gypsies 8×8 Shadowbox Insert that I painted with white acrylic paint


To achieve the look of an aged, worn, old chipped painted window…

I alternated layers of Deco Art Media White Crackle Paint* and

Deco Art Media White Crackle Paste* from DecoArt.

Allow plenty of drying time between each coat.

*Disclosure:  This blog uses ads and affiliate links.  If you choose to make a purchase using one of the links, I receive a small commission (at no additional cost to you) that helps offset the costs of maintaining this blog.  Thanks for your support!

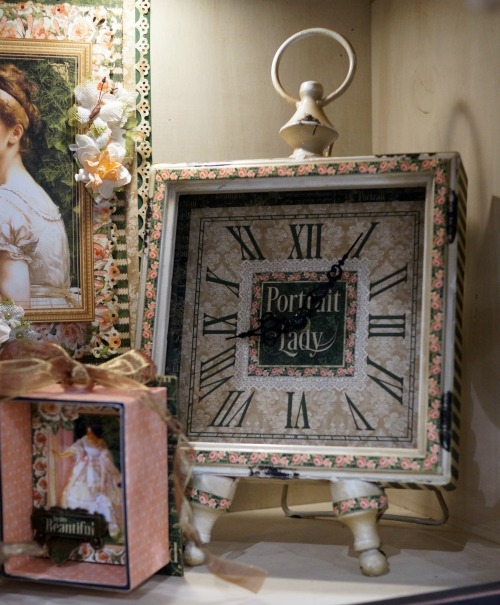
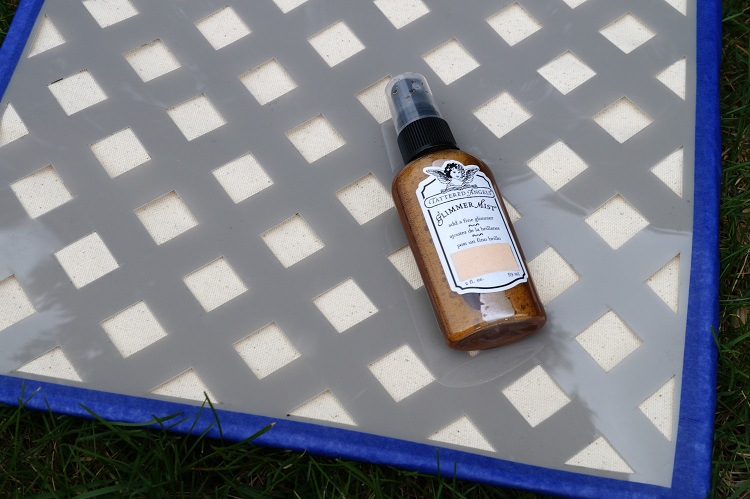
For the background of the window…                                                                          

I cut a piece of 7 3/4″ x 7 3/4″ decorative scrapbook paper and adhered it to a thick piece of

mat-board.  I cut down  a couple of 3″ x 4″ journaling cards from the

“Tealightful” collection from Pebbles Inc. and adhered it to the back of the window

frame before attaching the covered mat-board.  Because the mat board is heavy,

I used a Beacon Adhesive Quick Grip Glue* to attach it to the frame.

I added loop screws onto each side of the window frame approx. 1/2″ in and added a thin chain

to the loop screws for hanging.  Ribbon would also work.

To create the floral swag

I snipped a few sprigs of artificial flowers and attached them together in the center with

a thin floral wire.  I tied a simple bow to cover the wire.

I attached the floral swag and wood embellishments to the front of the frame with

Beacon Adhesive Quick Grip Glue*   

FYI…I found the “Welcome” and “Butterfly” embellishments at Michaels.

I added the Spring Window to the center of a wreath and hung it on the front door.

I found the greenery wreath yesterday at Homegoods.  It was just what I was looking for,

the perfect backdrop for my Chippy Spring Window.

FYI…Having a problem finding a window pane to use or would like one that’s even bigger?

  (*affiliate link)

Hampton Art Jillibean Soup Mix The Media Window Frame-14 X16 White* 

Shop Your Fav Brands at Scrapbook.com


Quick and Easy Make Up Bag Make-Over

It’s the little things in life that make me happy…

I was packing and getting ready for my last trip when I noticed how dingy my make up bag

was.  Yuck!   It was time for a change.  (My make up needed a make-over.)

Looking around, I found this cute little pink ticking canvas bag from Canvas Corp Brands.

The bag was the perfect size, but kind of simple.  It needed a little make-over, too.

To add a little extra personality, I used iron-on letters from Joy with lace and buttons.

I glued the lace trim and buttons on my bag using Beacon Fabri-Tac Adhesive*.

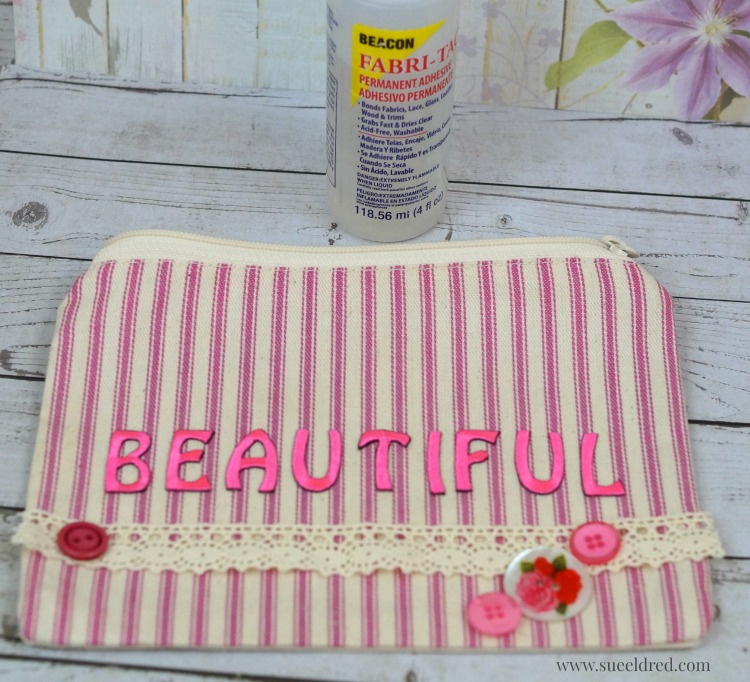
A very quick and easy project to do and now my makeup bag is “BEAUTIFUL”.

Shop Your Fav Brands at Scrapbook.com

*Disclosure:  This blog uses ads and affiliate links.  If you choose to make a purchase using one of the links, I receive a small commission (at no additional cost to you) that helps offset the costs of maintaining this blog.  Thanks for your support!

beautiful-make-up-bag-3951

A cute and easy make-over done in minutes.   (If only getting ready was that easy!)

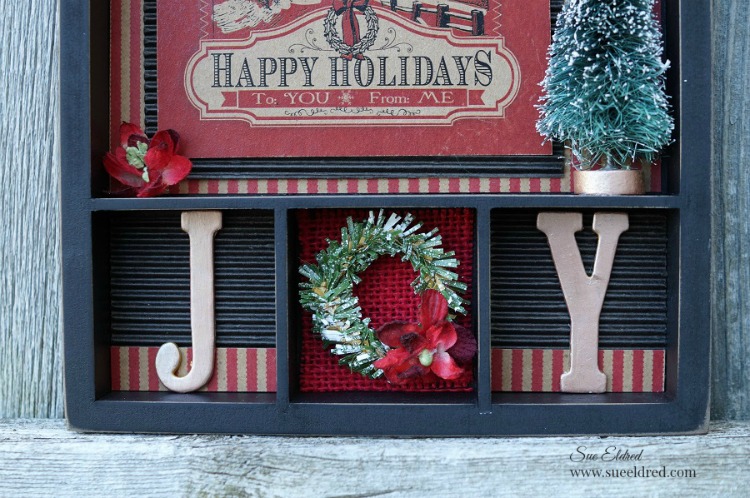
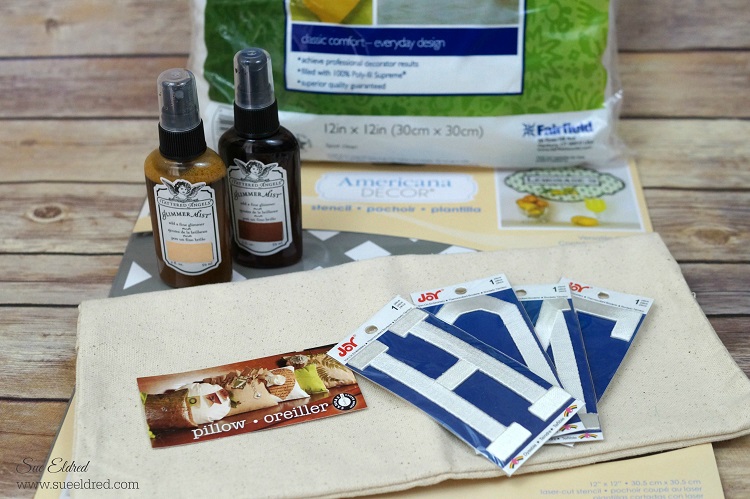
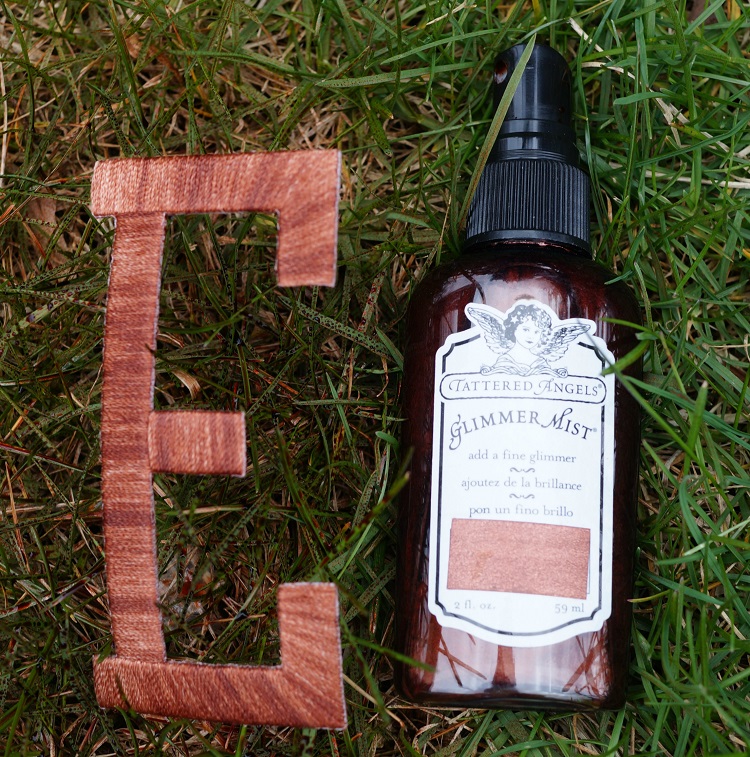
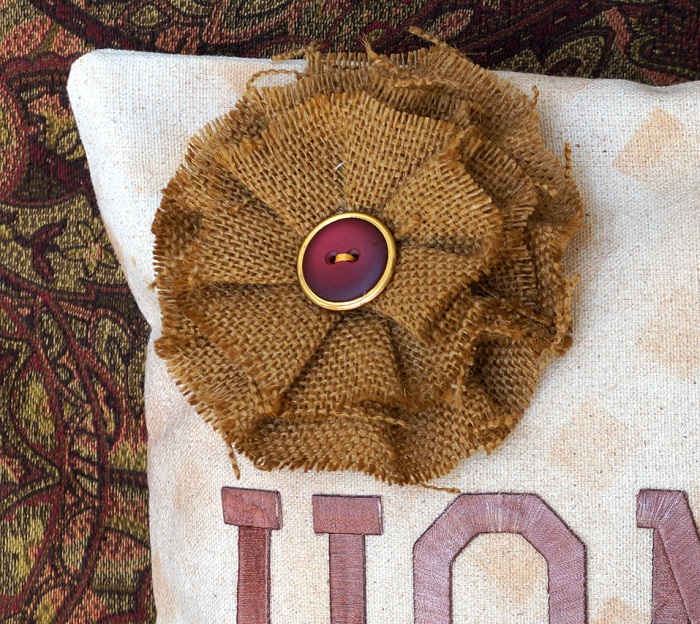
JOY Embroidered letters can be found at your local craft stores in a variety of sizes, colors, simple and decorative fonts.

“This is a sponsored post.  As a member of the Joy® Design Team I have been provided product and compensation in exchange for my creative ideas.  The views and opinions are my own.

FREE Shipping & FREE Returns Every Day on Fine Art Prints & Wall Murals with code SHIPFREE at Minted!

Sue’s Favorite Projects of 2016

best-of-2016

Do you ever wonder which of my projects are my favorite?

Like most DIY people, I try really hard with all (or most all) of my projects…

some of my projects are a hit and some are a miss.

And some are just my favorite…

So… I decided to share them again with you.  (just in case you might have missed one)

Enjoy!

Click on post titles for project instructions

Ad→ CreateForLess.com - Create More, Spend Less

My Creativation Adventure 2017

my-adventure-to-creativation-2017-sues-creative-workshop

It’s been a few weeks since the Creativation Trade Show in Phoenix…

and I’m finally getting around to sharing.

You might want to sit back and grab a cup of coffee.  (it’s a long one)

The Creativation Show was a fast, busy few days.

Getting the opportunity to see old friends, meeting in person online friends you’ve known for years.

creativation-friends

And the best part making new friends. 

Creativation, for me, is more than seeing the latest and greatest in the Creative Industry

(although that’s great too)

it’s about the opportunity to meet and network with people from all over the world.

When you’re at a show like this, you sit by a stranger on the convention bus and talk the whole way.

You go to lunch by yourself and instead of looking for a empty table, you sit with a group or

a table of one and the conversations flow.  That’s where we share ideas and inspiration.

We ask… “what did you see that excited you?”

During one of those conversations I heard someone say this is where our “tribe” is.

cactus-3984

(The cactus in front of my hotel.)

This was my first trip to Phoenix and the first time this Midwest gal saw cactus this large.

Can you tell I was impressed?

I wish I would of been able to see more of Phoenix, it poured the first evening I was there

and the sun didn’t come out until the last day.  Most of the time, it really didn’t matter as it was

dark outside when I left and it was dark when I got back to the hotel.

I didn’t even notice the mountains out my hotel window until the second day.

sue-working-the-deflecto-booth

I left the hotel before 7:00 on Saturday morning to take a class before working all day

in the Deflecto booth.  We made mini desk calendars using Deflecto’s 3″ x 4″ clear acrylic

frames, paper from Paper House Productions “One Big Happy Family” collection and cute

little calendars from Taylored Expressions.

Also in the booth was the “Caddy Challenge”.   ↓

deflecto-caddy-challenge-3970

Each challenger was given two empty caddies and a variety of craft supplies.

Every caddy container had to have at least one craft item and put back into the caddy,

each layer had to be locked and put on the base.

The whole thing was timed and the timer stopped when the caddy was lifted.

It was so much fun watching how competitive it became.  (there were Visa gift cards at stake)

Co-worker against co-worker, friend against friend, husband against wife.

deflecto-caddy-landing-page-cha-2017-02

SO…What’s NEW at Deflecto?

An interlocking wheel base for the craft caddy and the Interlocking Marker Organizer.

deflecto-caddy-landing-page-cha-2017-03

Right next to the Deflecto Booth were my good friends at

Canvas Corp Brands, 7Gypsies and Tattered Angels.

canvas-corp-brands-7gypsies

So many new things there.  They introduced their new line called “Architextures”.

I can’t wait to get my hands on all that vintage inspired goodness.

7-gypsies-new-architextures-books-ledgers-sues-creative-workshop

Coming Soon from Canvas Corp Brands… Relics and Artifacts.

A lot of mixed media potential.

canvas-corp-brands-relics-and-artifacts-sues-creative-workshop

On Sunday afternoon, I got to hang out in the Paper House booth where I helped attendees make

the Discover USA travel mini book project.  I’m so lucky to work in such a fun industry.

For full Discover USA project instructions click here.

paper-house-miti-at-creativation

Monday was the last day of the show and a half day for me.

After working in the booths all day on Saturday and Sunday,

I decided I needed to take some time to do something fun.

splatter-painting-4001

DecoArt, 3M and Pinspiration had a clear acrylic booth set up called the “Splatter Room”.

Dressed in a hazmat suit and goggles…

I went to town choosing paint and splattering onto a 12″ x 12″ canvas.

Oh, what a glorious mess.  It was the highlight of my day.

After painting and splattering…

I walked the show floor, taking pictures and making connections.

I always wish that I would have taken more pictures and maybe even a video or two.

Time at these shows go fast and I needed to make the most of that time.

Below are a few of the booths that I remembered to take pictures of.  (Enjoy!)

tim-holtz-suitcase-display-sues-creative-workshop

Probably one of the most photographed booths is the Tim Holtz Idea-ology booth.

For Vintage lovers this is serious eye-candy.

tim-holtz-idea-ology-booth-samples-sues-creative-workshop-3959

tim-holtz-idea-ology-booth-samples-sues-creative-workshop

tim-holtz-ideaolgy-booth-samples-sues-creative-workshop-3962

rebekah-meier-designs

Lovely Mixed Media from Rebekah Meier Designs.

sizzix-jen-long-in-bloom-creativation-2017-sues-creative-workshop

Somehow my camera setting got changed and I didn’t get a lot of sharable pictures of the Sizzix booth.

sizzix-david-tutera-creativation-2017-sues-creative-workshop

And the always impressive Graphic 45 Booth.  ↓

graphic-45-booth-samples-4037

graphic-45-booth-samples-4035

graphic-45-booth-samples-4030

graphic-45-booth-samples-4036

graphic-45-album-4049

graphic-45-booth-samples-4046

Of all the wonderful things I saw, do you want to know what impressed me the most?

Let me start by saying, I’ve been a stamper for 20 years and it takes a lot to impress me…

the clear animated stamps from Uchis Design did just that.  (it’s the simple things)

Below is the business card they gave me.

I hoped you enjoyed my adventure to Creativation.

I just want to say…

I am very thankful that I have the opportunity to work with all the wonderful and talented people

and companies in the Creative Industry.  I am one lucky girl.

Joy Shadow Box Tray

joy-shadow-box-tray-8609

A simple Shadow Box that would be cute as Holiday Décor or used as a gift.

The “Happy Holidays” graphic would be cute replaced with a Holiday photo.

This project also uses a simple paint technique for old hardware.


Here’s what I used for my Shadow Box Tray:   

(*including amazon affiliate links)


Tips to make your project easier:

flicking-paint-8566

  • Add Snowy effect by flicking white acrylic paint onto the pine craft stem using an old paintbrush.

hardware-8570

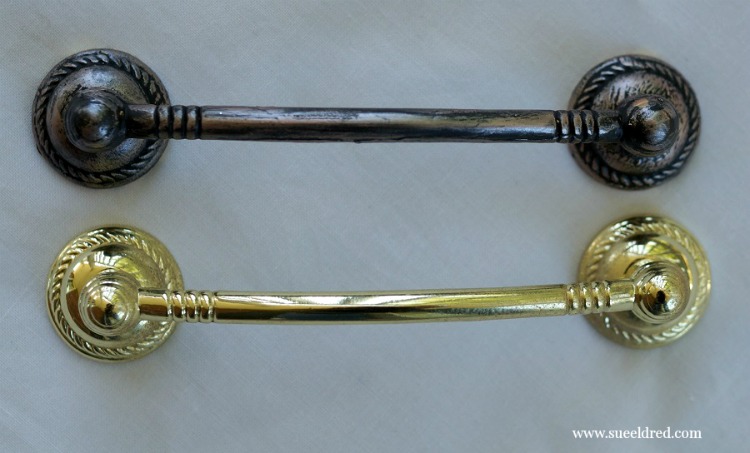
  • Paint the brass hardware with black spray paint.  Once the paint is dry, rub Rose Gold Metallic Lustre over hardware for an aged vintage look.

joy-shadow-box-tray-close-up-sues-creative-workshop

  • For a cohesive look…rub Rose Gold Metallic Lustre onto the chipboard letters and the wood disc on the tree.
  • Cut the back of the bottle brush tree flat so that it fits snuggly into the tray.


This project was sponsored by Canvas Corp Brands and DecoArts.

I am an Amazon Affiliate.  If you choose to make a purchase using an Amazon link, I receive a small commission that helps offset the cost of running this blog.  Thank You!

The last time I cooked, hardly anyone got sick.

For some people, cooking defines them.

I AM NOT that person.

Ask me to bring chips and soda to a potluck and I’m totally fine with that.

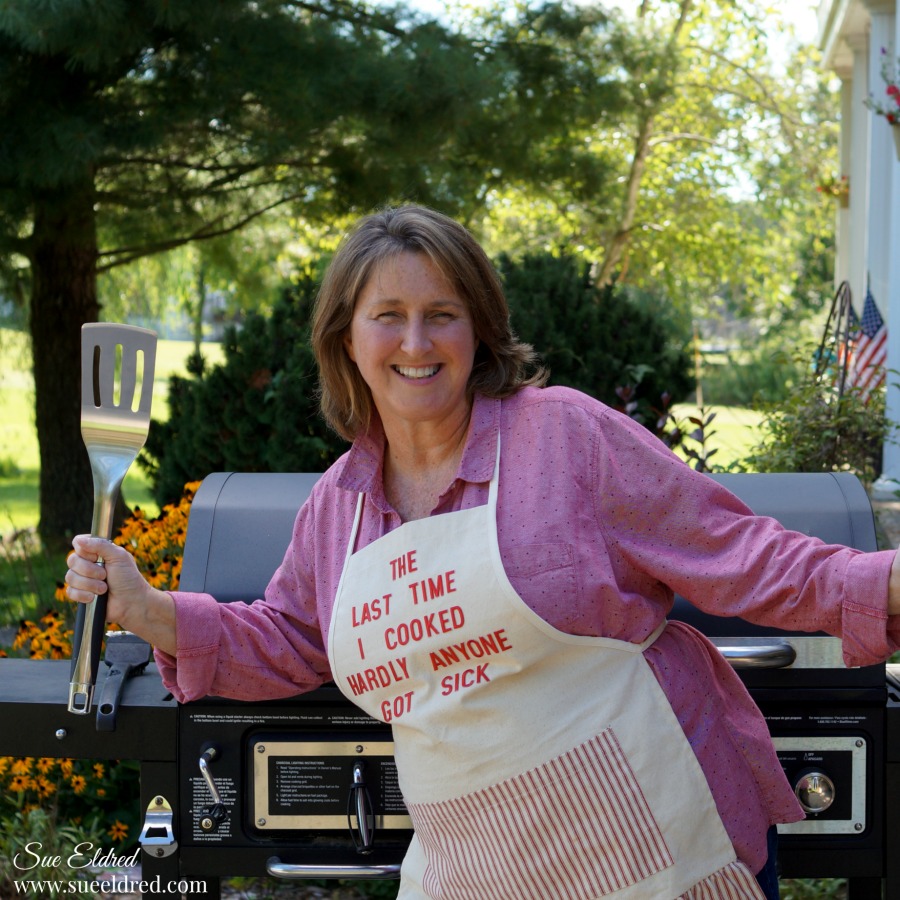
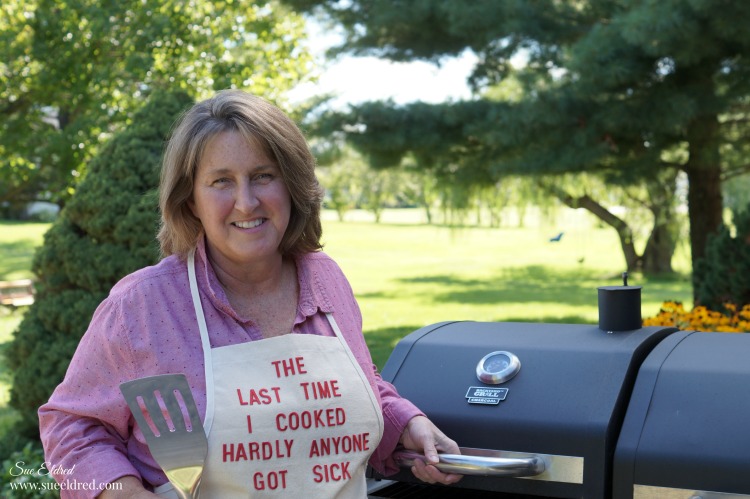
But… don’t let the apron fool you.

It’s not that I can’t cook.  I just don’t like too.

If I had a personal chef, I’d be one happy girl.

So… If I’ve got to do it, I might as well have a little fun.  (and keep the expectations low)

This apron should do the job.

Red Ticking Apron

Want an apron like mine?

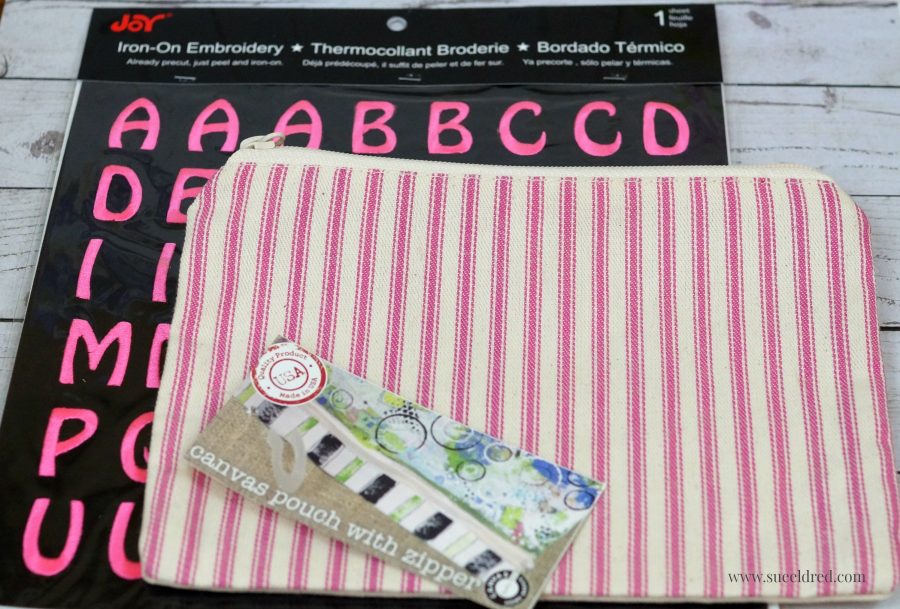
A while back, I asked the good folks at Canvas Corp Brands if they made an

apron with Red Ticking (they only had blue) and they made this apron special just for me.

Last Time I Cooked 9942

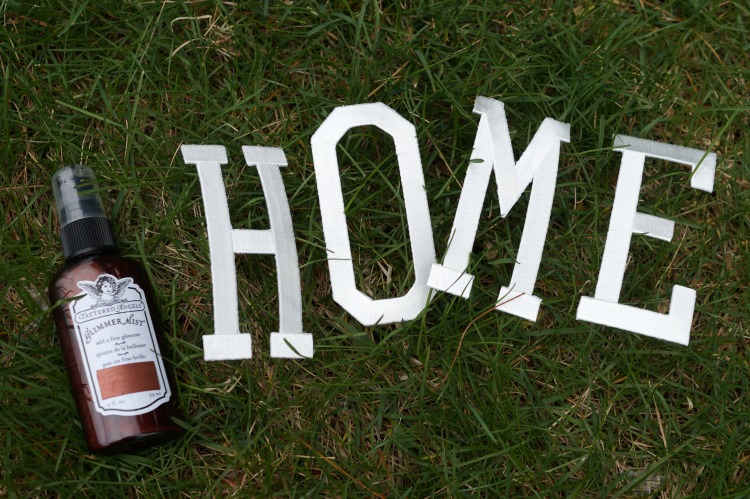
The lovely lettering is Iron-on Embroidered Letters from Joy SA.

Look for them at your local Hobby Lobby and Michaels craft stores.

“This is a sponsored post.  As a member of the Joy® Design Team I have been provided product and compensation in exchange for my creative ideas.  The views and opinions are my own.

Shop Your Fav Brands at Scrapbook.com

*Disclosure:  This blog uses ads and affiliate links.  If you choose to make a purchase using one of the links, I receive a small commission (at no additional cost to you) that helps offset the costs of maintaining this blog.  Thanks for your support!

How to Mist and Stencil a Mixed Media Pillow

Home Pillow for Joy 6602

I enjoy making pillows.

Especially when it’s a quick and easy “no sew” pillow with a twist.

How about a little misting and stenciling with Tattered Angels Glimmer Mists?

Home Pillow for Joy Project Supplies Close Up 5805

I started my project off with a 12″ plain canvas pillow cover, versatile check stencil (see end of post),

Tattered Angels Glimmer Mists and large iron-on embroidered letters from Joy.

masking the stencil 5818

Using removable painter’s tape, I taped the stencil onto the canvas.

I wanted my pillow to have a subtle background so I lightly sprayed with Tattered Angels

Crushed Shells Glimmer Mist.

Because the pillow is decorative, I’m not worried about the spray being washable.

Home 5820

I used large Iron-on letters from Joy to spell out the word “Home”.

Spraying the letters5824

To customize the plain white letters, I sprayed them with Coffee Shop Glimmer Mist for contrast.

ironing 6395

Allow the letters to fully dry before arranging onto the pillow.  Cover the letters with a cotton cloth

and iron for about 30 seconds.  I ironed it again from the back of the fabric for another 30 seconds.

Burlap Flower

I added an old button to the center of a burlap flower from Canvas Corp Brands

and glued it onto the corner of my pillow with Fabri Tac Glue.

I used a 12″ pillow form from Fairfield World to stuff the pillow.


Deco Art DECADS.20 Americana Decor Stencil Versatile Checks*


This project was created for the Creating with Joy Blog and was sponsored by Canvas Corp Brands, Deco Arts, Fairfield World, Beacon Adhesives and Joy SA.

*This post uses affiliate links.

Remembering Birthdays 7gypsies Style

Remembering Birthdays 7gypsies style

A Clever and Creative Way to Remember Birthdays.

I come from a large and always expanding close knit family.  With all that family,

there’s a lot of birthdays to remember.  As a solution, I decided to make a small desk

top monthly reminder with a funky vintage vibe.

months 9141

I started with these cute little Heirloom Calendar Months that come on one 12″ x 12″

sheet of paper.  You can cut them up and add them to your journals, fold them to make

a mini calendar or birthday book or cut the month artwork to make your own daily or

monthly journal.  Each month features a little piece of art and you can color them to

match your style and journal theme.

Sideview 9156

I used the Heirloom Months along with a variety of Tags, Printed Paper and Ephemera

from Canvas Corp Brands Seven Gypsies Collections.

top of the frame 9163

The base for my Birthday Reminder is a 4″ x 6″ clear craft frame from Deflecto Craft Solutions.

I drilled two holes in the top of the craft frame to hold the antique silver binder rings and

gather everything together.

months 9177

This project was created for and sponsored by Canvas Corp Brands and Deflecto Craft Solutions.

How to Create a Relaxing Sunset Pillow

How to create a Relaxing Sunset Pillow 9318

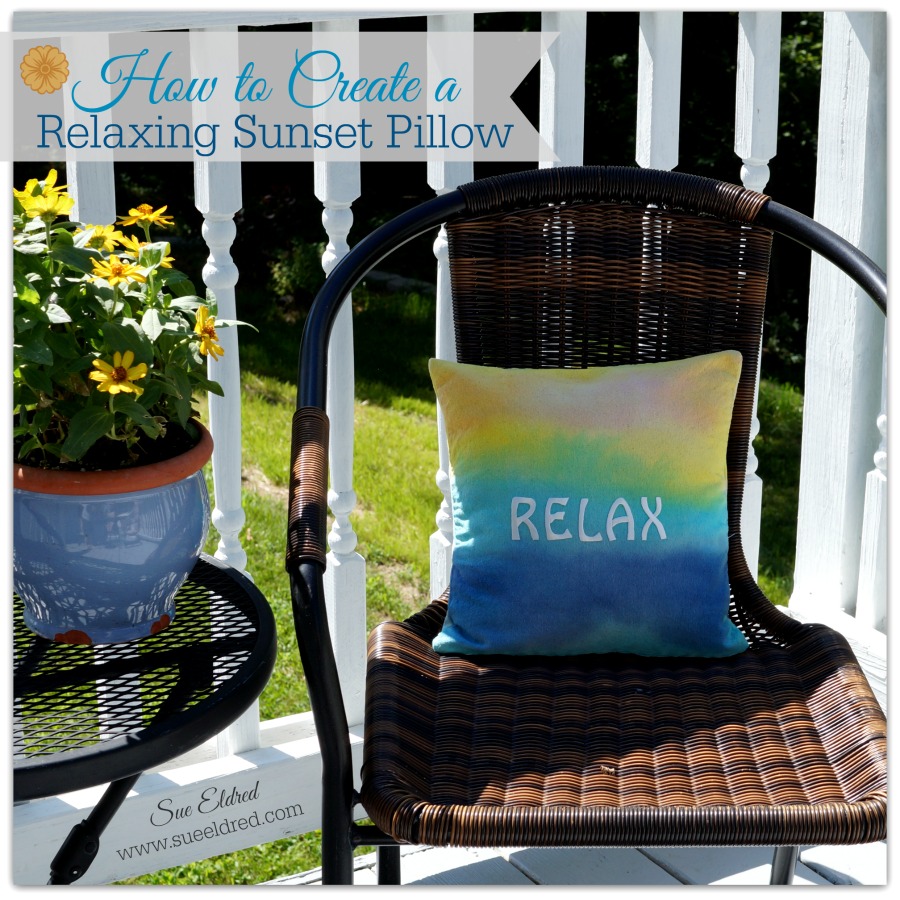
There’s something about a beautiful sunset that always stops me in my tracks.

No matter how many I’ve seen, I still marvel at all the vibrant, beautiful colors.

How to make a Relaxing Sunset Pillow Collage

After all the fun we had making the Patriotic Tied Dyed Shirts for the 4th of July…

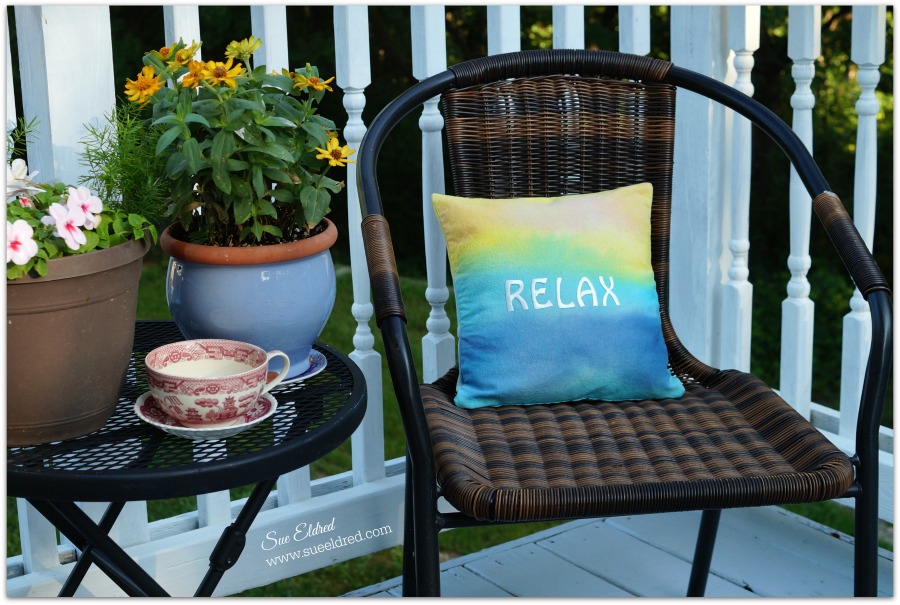
I decided to create a color wash dyed pillow with the colors you might see during a beautiful sunset.

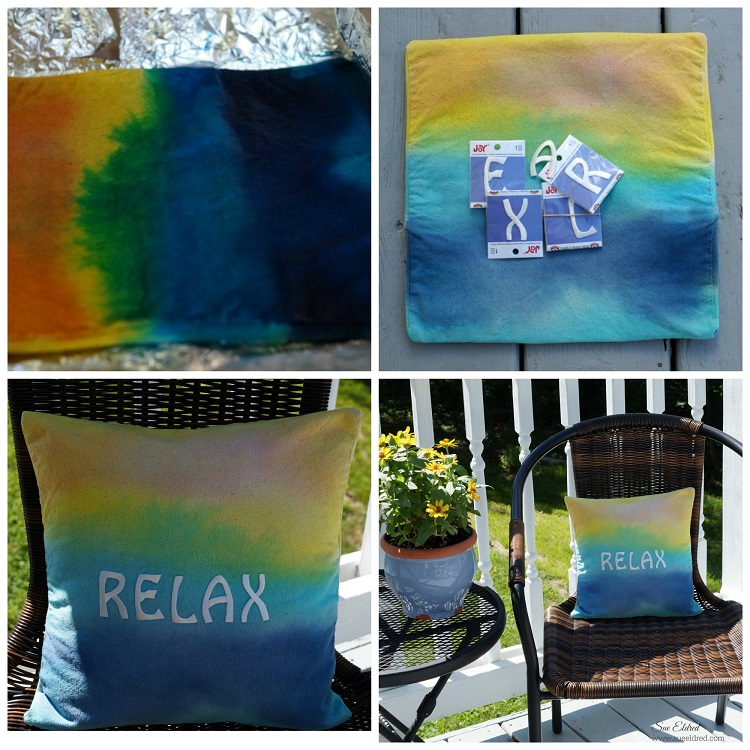
With the help of my 2 year old Grandson this is how we made the pillow:

  1. We used the Rainbow Tie Dye Kit from Tulip that comes with pre-measured squirt bottles.  All you need to do is add water to the bottles and shake to mix.
  2. Squirt dye onto 12″ canvas pillow square one color at a time starting at the top.
  3. Dip medium/large paintbrush into water and brush the dye to spread the color.
  4. Continue with the others colors until canvas pillow square is covered.
  5. Note:  When using a helper who’s only 2 1/2 things can get really wet.  (he had fun)
  6. Cover dyed fabric with plastic wrap to keep damp.
  7. Let set for 6-8 hours or longer for intense colors.  (we waited around 2 hours)
  8. Rinse well with water until excess dye is removed.
  9. Fill washer to “large load” setting with hottest water suitable for fabric and a small amount of laundry soap.  Wash and dry separately.  (Wash separately for the first few washes.)
  10. Iron the canvas pillow square to get out excess wrinkles.
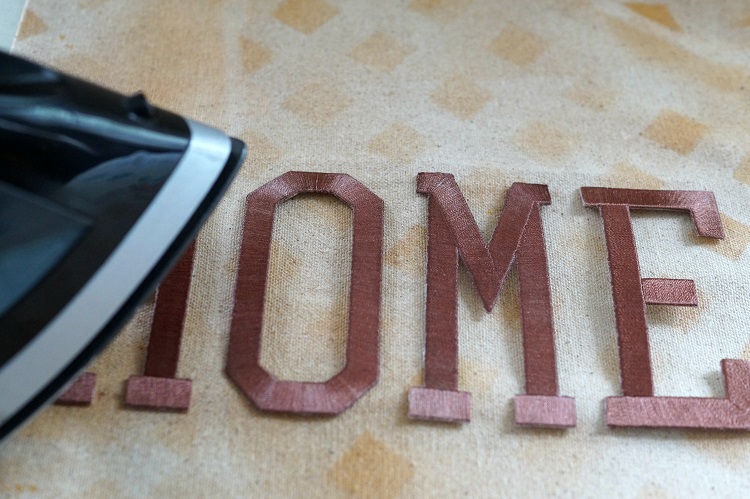
  11. To add the word “relax”, I used iron-on embroidered letters from Joy.  It’s quick and easy – just preheat your iron to the cotton setting, cover the letters with a cotton cloth and iron for about 30 seconds.  I ironed it again from the back of the fabric for another 30 seconds.
  12. Stuff pillow with a 12″ pillow form.


Tulip One-Step 5 Color Tie-Dye Kits Rainbow*   (affiliate link)

Relaxing Sunset pillow 9321

*Disclaimer:  This post uses ads and affiliate links.  If you choose to make a purchase using one of the links, I receive a small commission (at no additional cost to you) that helps offset the costs of maintaining this blog.  Thanks for your support!