You & Me Valentine’s Frame

Valentine's Frame

With Valentine’s Day right around the corner…

I wanted to share a simple little project that’s really quick and easy to put together.

A Valentine’s Frame using the You & Me Collection from Simple Stories.

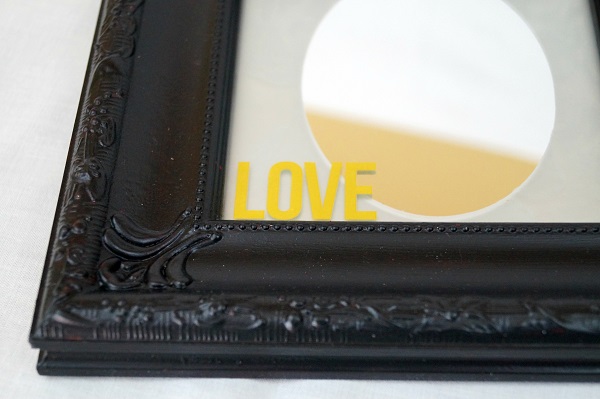
This cute little frame, from Canvas Corp Brands, is only 6″ x 6″ and I love how versatile

it is to decorate.  The larger section is perfect for a 4″ x 6″ picture and if white’s not your

style it’s available in wood stained.  I added dimension to the frame by adding

cubes made from cardstock behind the “love you lots” and “pail of flowers”.

I dressed it up by gluing on metal corners from Tim Holtz.

Click on the pictures below for ordering information.  (affiliate links)


Disclaimer:   This post uses affiliate links.  If you choose to place an order using one of the links, I will get a small commission that helps maintain the cost of running this blog.  Thanks!

Let it Snow Canvas…

Sue Eldred's Let It Snow

After all the Holiday Decorations are down, I like to decorate the house with a Winter theme.

Even though I may not like the cold winter months.

I still find beauty in a blanket of newly fallen snow.

So “Let it Snow”.  (just not too much)

Let it Snow Supplies 1724

Supplies Used:

  • 12 x 12 Denim Canvas (or painted blue canvas)
  • White Acrylic Paint
  • White Embroidered Iron Letters from Joy S.A.
  • Old Firm Toothbrush
  • Snowflake Embellishments
  • Lace and Ribbon
  • Silver Berry Sprig and Greenery
  • Jingle Bells
  • Fabri Tac Glue

Directions:

  1. Squirt a small bit of white acrylic paint on to a piece of scrap paper.  Lightly apply paint to the bristles of an old toothbrush.  Wipe excess paint off.  Gently flick paint spraying paint over the canvas.
  2. Glue embroidered letters and snowflake embellishments onto the canvas.
  3. Glue lace and ribbon onto the canvas, wrapping and gluing ends around on the back of the canvas.
  4. Gather up silver berries and greenery, tie them together with a jingle bell and satin ribbon and glue to the bottom corner of the canvas.

DSC03353

This project was created for and sponsored by Joy SA.

Snowball Fight

Snowball Fight 2

Ready for some good old fashioned fun?

How about a snowball fight?

Snowball Fight 3249

If you’re not loving the cold…

Here’s a snowball fight you can have while snuggling up inside.

Snowball Fight Supplies

Here’s what’s you’ll need:                            (*amazon affiliate link)

Directions:

  1. Cut the 2″ Smoothfoam ball in half.  Cut the top off the rounded side of one of the balls.
  2. Poke two holes into the bottom of the Snowman body using the craft pick.  Break a toothpick in half, dip ends into craft glue and insert in holes.  Attach the sliced ball onto the Snowman body.
  3. Apply Snow-tex with palette knife over the newly formed Snowman and the 6″ disc.  Allow both to dry fully.
  4. To Create a Snowball Wall… Poke holes into the 1″ balls with the craft pick.  Insert toothpick halves with craft glue on the ends into balls.   Build wall by sticking the balls together.
  5. Apply Snow-tex onto wall using the palette knife.  (Allow to dry.)
  6. Create scene by attaching snowman and wall onto the disc.  Reinforce the pieces with toothpicks and craft glue.
  7. For a shimmery snowy glow…paint all the pieces with Crystal Craft Twinkles paint.  (Allow to fully dry.)
  8. Add shadows to the snowman and snowballs by gently applying vintage photo ink using a stipple brush.
  9. To Create the Snowman Hat… Measure and cut fabric to fit around snowman head.  Fold over and glue one of the long edges of the fabric to create a brim.  Glue fabric ends together to create a tube.  Tie top of the tube with a piece of string, cut excess fabric off top of the tube and fray the ends by making small cuts with the scissors.  Glue to the top of the Snowman head.
  10. Add arms to the Snowman using small twigs.  Warm him up with a fabric scarf and mittens cut from the fabric scraps.
  11. For the Snowman’s Face… Use two small black micro brads inserted into the snowman face for the eyes.  Paint the tip of a bamboo skewer with orange paint, cut and insert into the face for the nose.  Add a smile to the snowman’s face using a extra fine black paint marker.
  12. Make a small snowball using a small pieced of paper wadded up and covered with Snow-tex.  Glue finished and dried snowball onto mitten.

Snowball Fight Close Up 3194

This project was created for and sponsored by Smoothfoam the crafter’s foam.

Shop Amazon Scrapbooking Supplies*

Disclaimer:  This blog uses ads and affiliate links.  If you choose to make a purchase using one of the links, I receive a small commission (at no additional cost to you) that helps offset the costs of maintaining this blog.  Thanks for your support!

Cupcake Stand or Craft Supply Storage?

Cupcake Stand or Craft Supply Storage 3310

Deflecto Craft Solutions has several new items debuting at CHA this week in Anaheim, California.

(CHA being the annual Craft and Hobby Association Trade Show.)

One of my favorites products being shown is this Three Tier Desert Stand.

Acrylic Stand and Supplies

The stand features adjustable heights and a easy knock down compact design for storage.

It is perfect for holding cupcakes and even comes with little holes to insert cake pops.  (Pretty Clever.)

The Cupcake Stand will be available January 2016 through local art, craft and educational stores.


Because I don’t make a lot of cupcakes, I decided to use mine for storage instead.

tracing circles

This is what I used to personalize the stand:

  1. Trace each of the tiers onto the back of the kraft paper.
  2. Loosely cut around each circle.
  3. Liberally apply the glue-stick onto the back of the paper around and inside the circle.
  4. Lay tier onto the glued circle and trim excess paper with craft knife.
  5. Smooth paper onto tier.
  6. Cut out the center channels of the tiers with a craft knife.

Washi Tape Border

Apply washi tape around the outside lip.

decorated stand with out paint

Assemble stand and fill craft supplies.  (or maybe even your favorite cupcakes)


“This is a sponsored post. As a member of the Deflecto Design Team I have been
provided product in exchange for my creative ideas, views and opinions.”

This post uses Amazon links if you choose to purchase from Amazon, I get a very small commission.

Homespun Rag Ball Ornaments

This year, I wanted to do a small little tree for the dining room.

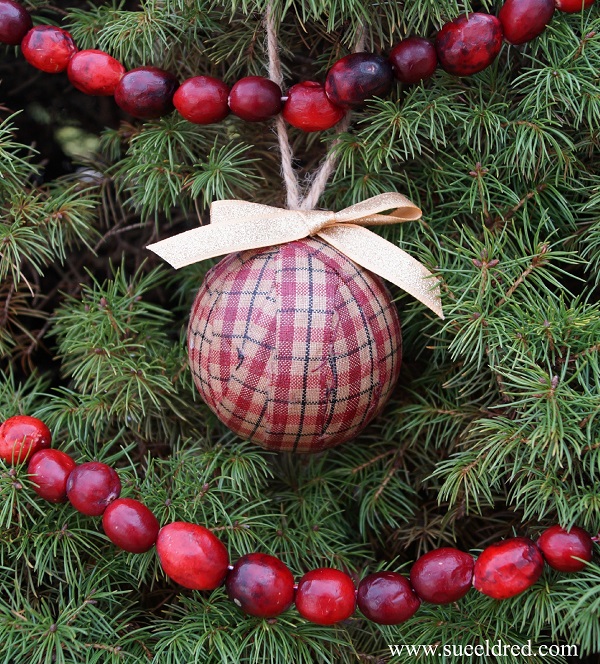
A simple homespun tree with strung cranberries and hand-made ornaments.

I had grand ideas and a galvanized pail.

But reality hit, a long with the cold and flu, which knocked me out for a week.

It took my creativity level down to a one.

And sad to say… My small little tree didn’t get done.

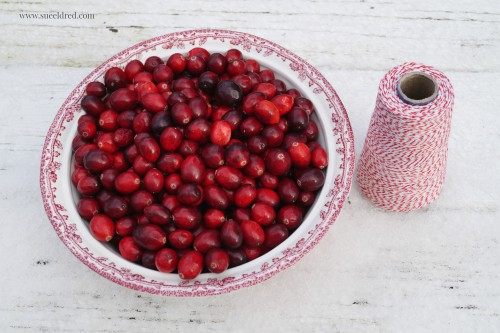
I did string the cranberries…  (a first for me)

They were so bright and colorful.  I loved the look and took lots of pictures.

After a week or so, the cranberries started getting a mushy.

So… I put them out on the tree in the front yard for the birds to eat.

It looks pretty out there too.

Next time, I’ll make them last minute.

For the Rag Ball Ornaments…

Instead of just wrapping the strips of fabric until it formed a ball,

I made the rag ball using a Smoothfoam 2-Inch ball*.

Supplies used:                     (*affiliate link)

Shop Your Fav Brands at Scrapbook.com

Directions:

  1. Lightly sand the ridge around the ball.
  2. Cut the fabric into 3/4″ strips.
  3. Apply Mod Podge onto the back of the fabric and adhere to the ball.
  4. Continue until the ball is fully covered.
  5. Add an additional coat of Mod Podge over the ball to finish and seal.
  6. Poke a hole on the top of the ball and add a dab or glue into the hole.
  7. Insert twine into the hole to use as the ornament hanger.
  8. Embellish ornament by gluing a bow on top.

Wouldn’t a whole bowl of rag balls would be cute?  (maybe next year)

Shop Amazon Scrapbooking Supplies*

*Disclosure:  This post is sponsored by Smoothfoam and uses ads and affiliate links.  If you choose to make a purchase using one of the links, I receive a small commission (at no additional cost to you) that helps offset the costs of maintaining this blog.  Thanks for your support!

Merry Christmas Gift Bag

Merry Christmas Gift Bag 1186

Make your Christmas Gift Bags a little more special with iron-on letters from Joy.

Merry Christmas Gift Bag Supplies

Start with a plain drawstring bag.  (Mine was from Canvas Corp.)

Replace the drawstring cording on the bag with red and white gingham ribbon and add iron-on

letters in red and neon yellow.  (in person the neon yellow looked lime to me)

Merry Christmas Gift Bag Flat 1140

Glue white lace, rick rack, buttons and a small wreath to the front of the bag.

For a truly personalized gift add a name instead of Merry Christmas.


This project was created for and sponsored by Joy SA.

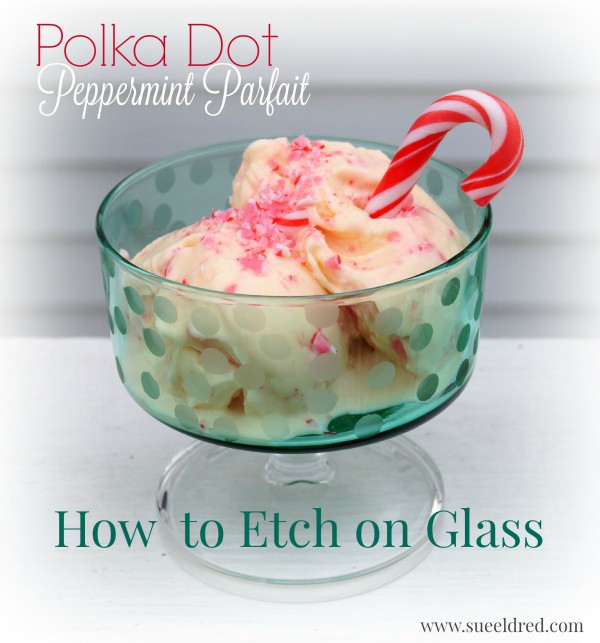
Polka Dot Peppermint Parfait

A Quick and Easy Etched Glass Project

I picked up some sweet green parfait glasses at a estate sale awhile back.

I’ve been wanting to do something special with them and thought they’d look cute

with some polka dots.  (I mean who doesn’t like polka dots?)

The Polka Dot Parfait glass is a project you can make in under a half hour.

*FTC Disclosure… “This is a sponsored post.  I have been provided product and compensation in exchange for my creative ideas.  The views and opinions are my own.”

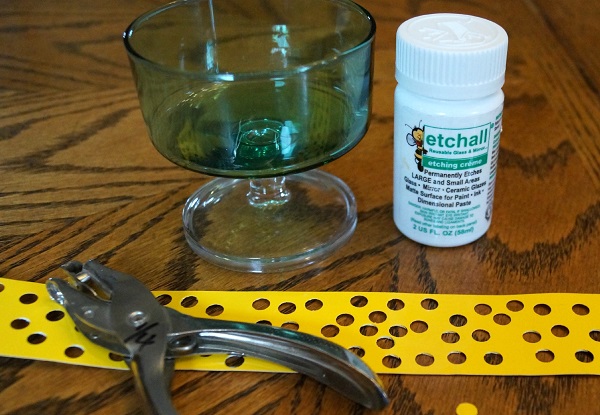
Here’s what you’ll need:

Shop Your Fav Brands at Scrapbook.com

*Disclosure… This blog uses ads and affiliate links.  If you choose to make a purchase using one of the links, I receive a small commission (at no additional cost to you) that helps offset the costs of maintaining this blog.  Thanks for your support!

etched polka dot parfait with maskEtched Polka Dot Parfait covered with Etching Creme

Directions:

  1. Measure the width of your parfait glass.  Cut the vinyl to fit around glass.
  2. Using a standard hole punch, punch random holes onto the vinyl to create a polka dot pattern.
  3. Wrap the vinyl around the side of the parfait glass.
  4. Make sure to burnish the vinyl to get out air bubbles and to make sure the all edges all down.
  5. Wrap additional areas around the glass with removable painters tape to protect the area from splatters.
  6. Apply a thick coat of Etchall® etching crème over the polka dots using the squeegee.  (more is better)
  7. Wait 15 minutes.  Scrape excess etching crème from the side of the glass and return extra etching crème back into the bottle. (it’s reusable)
  8. Rinse glass with warm water to clean.
  9. Remove Stencil and dry.
  10. Wash glass thoroughly before using.

For a Light and Festive Holiday Treat try adding crushed Candy Canes to vanilla ice cream. 

  • Place ice cream back into freezer to set up.
  • Don’t forget to save some crushed candy canes to sprinkle on top.

Holiday Diamond Art

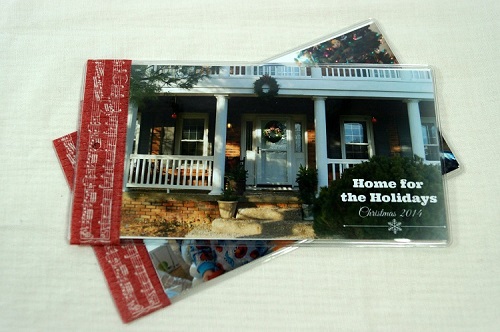
Christmas Brag Book

Christmas Brag Book

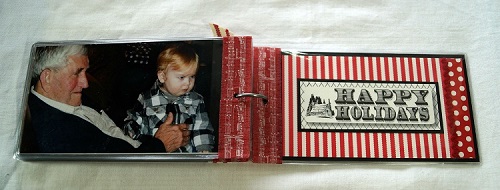
This year make a Christmas Brag Book for all your fun Holiday Memories.

For my brag book I used clear flexible pouches from Deflecto Craft Solutions and paper

from Canvas Corp Brands Farmhouse Christmas Collection for a Quick and Easy project.

A Great Gift Idea for the Grandparents.

Christmas Mini Album Stephanie and Zach 7413

A fun way to share Holiday Silliness and the Sweet Little Moments shared between generations.

Christmas Mini Album Inside Back Cover 7414

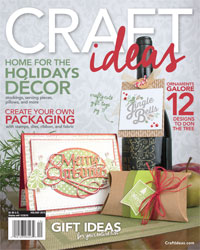
The Christmas Brag Book was created for Craft Ideas Magazine’s Holiday Issue

and has my Christmas photo’s from last year.

Craft Ideas Holiday 2015

Craft Ideas is a great magazine for creative inspiration.

Christmas Mini Album Inside Pages 7411

Finished Size: 3 1/4” x 6”

Christmas Mini Album Supplies 7388

Materials:

  • Deflecto 20019CR Flexible Pouch (1 package of 10)
  • Canvas Corp Brands CCP2827 Farmhouse Christmas Tags on Ivory 12 x 12 paper
  • Canvas Corp Brands CCP2826 Farmhouse Christmas Stripe on Ivory 12 x 12 paper
  • Canvas Corp Brands CCP2638 Red & Ivory Mini Dot Reverse 12 x 12 paper
  • Canvas Corp Brands CCP2639 Red & Ivory Ribbon Stripe 12 x 12 paper
  • Canvas Corp Brands Binding Ring-Small Antique Silver
  • Canvas Corp Brands Optical Lens Antique Brass
  • Canvas Corp Brands PaperTape: Christmas Wrap
  • Paper Source 5/8” Ivory/Red Striped Ribbon
  • Red Mini Rick Rack
  • Small Red Button
  • Photos
  • Black Cardstock

Basic Supplies:

  • Paper Cutter
  • 1 11/16” Circle Punch
  • Scissors
  • 1/8” Hole Punch
  • Double Stick Tape Runner
  • Glue Stick
  • Craft Glue
  • Thermo Web Mini Glue Dot

Directions:

  1. For the Cover: Cut a piece of black cardstock 3” x 5 1/4”. Cut “It’s the most Wonderful Time…” from the Farm House Christmas Tags just slightly smaller than 3” x 5 1/4” and adhere to the black cardstock. Add a 1/2” x 3” strip of Red and Ivory Dots to the left side of the tag. Glue a 3” piece of red mini rick rack onto the right side of the tag.
  2. On the Inside Front Cover: Cut a piece of black cardstock 3” x 5 1/4”. Cut a 3” x 5 1/4” piece of Red & Ivory Ribbon Stripe just slightly smaller than the 3” x 5 1/4” and adhere to the black cardstock. Adhere two strips of 1/2” x 5 1/4” Red and Ivory Dots to the top and bottom of the striped paper. Adhere “I’ll be Home…” from the Farmhouse Christmas Stripe layered on black cardstock onto the center of the striped paper.
  3. Insert Cover and Inside Front Cover into the Flexible Pouch.
  4. Add Paper Tape around the plain end of the Flexible Pouch.
  5. Punch a 1 11/16” Snowflake Circle from the Farmhouse Christmas Tags and glue onto the back of the Optical Lens by adding craft glue along the outside edges of the lens. Glue small red button onto front of the lens in the middle of the snowflake.
  6. Cut a 10” piece of Ivory Red Striped Ribbon. Tie onto front cover adding the Optical Lens.
  7. Choose pictures that can easily be cut down to 3” x 5 1/4”. Add to inside of flexible pouches.
  8. Create Back Cover using the Red & Ivory Mini Dot Paper, Red & Ivory Striped Paper and Farmhouse Christmas Strip.
  9. Add Paper Tape to each of the pouches.
  10. Mark and re-punch the holes using 1/8” hole punch on each of the pouches and gather the mini album together using a small book ring.

Christmas Mini Album Inside front cover 7412

Christmas Mini Album Back Cover 7417

This project was created for Craft Ideas and was sponsored by Deflecto Craft Solutions

and Canvas Corp Brands.

A little Holiday Sparkle…

Sue Eldred's Holiday Sparkle Frame

Thinking of adding a little Holiday Sparkle this year?

Adding a little Holiday Sparkle doesn’t get much easier than this.

Holiday Sparkle Bow 2007

Gather up a few sparkly holiday sprigs…

tie them together with a jingle bell and satin ribbon and then glue them onto

your favorite frame.  Your frame will be dressed to impress.

Holiday Sparkle Frame in the Snow

I loved the way this frame turned out, so sweet and simple. 

But let me tell you… I really struggled trying to get a good picture to show you.

Taking good pictures of clear acrylic frames is really hard.

I took over 150 pictures of this frame.  (no joke)

When it started snowing yesterday morning, I decided to try again.

It was such a beautiful snow, I didn’t even mind getting cold.

Holiday Sparkle Supplies 1808

For my Holiday Sparkle Frame I used the NEW Clear Magnetic Curved frame

that will be available from Deflecto Craft Solutions in January 2016.

I love the original curved magnetic frame* and I am so happy that they decided to

make it in a smaller size without a border.  (can’t wait to get my hands on a few more)

This new frame measures 5″ x 7″ and is perfect for a 4″ x 6″ picture or graphic.

(you can find the larger size here*)

“Tis the Season to Sparkle” comes from the 4×6 Horizontal Journaling Card Elements

from Simple Stories “Claus & Co.” collection layered on red glitter cardstock.

*Disclaimer: “This is a sponsored post. As a member of the Deflecto Design Team I have been provided product in exchange for my creative ideas, views and opinions.” This post uses Affiliate links if you choose to make a purchase, I receive a very small commission that helps maintain this site.  Thank You for your support!

How to build a Snowman with Smoothfoam…

How to make a Snowman Using Smoothfoam balls and snowtex

Making a Snowman is pretty easy.  All it takes is a little patience and time.

(and a few ingredients)

Here’s what you’ll need to make a Snowman:                  (*amazon affiliate link)

*Disclosure:  This blog uses ads and affiliate links.  If you choose to make a purchase using one of the links, I receive a small commission (at no additional cost to you) that helps offset the costs of maintaining this blog.  Thanks for your support!

Shop Your Fav Brands at Scrapbook.com

Directions:

  1. Cut a small section off the bottom of the 4″ Smoothfoam ball so that it sits flat.
  2. Cut a couple of 3″ sections from the bamboo skewer.  Stick the skewer into the center of the 2″ and 3″ Smoothfoam balls.
  3. Add craft glue to the ends of the skewers before sticking the three balls together to form the snowman base.  (Allow glue to fully dry before continuing to the next step)
  4. Using a palette knife, smooth Snow-tex over Snowman base.  Here’s where the patience comes in… Allow a couple of hours for the Snow-tex to completely dry.
  5. Paint the entire Snowman base with white acrylic paint.  This fills in and helps cover any area missed by the Snow-tex.
  6. For a Frosty Look…paint the Snowman base with Craft Twinkles Glitter Paint.
  7. Cut a thin strip of grey felt and glue around the base of the hat to create a band.  Glue holly embellishment onto band to cover seam.  Glue to the top of the Snowman head.
  8. Cut a strip of gingham fabric and tie around neck.  Cut small slits into the ends of fabric for fringe.
  9. Use two small black brads inserted into the head for the eyes.  Use five micro black brads insert as the mouth.
  10. Cut the pointed end from a bamboo skewer and paint with orange paint.  Stick into head for the nose.

Here’s a Close up of Mr. Snowman.  Isn’t he Handsome?

This project was created for Smoothfoam and sponsored by Smoothfoam and DecoArt.

Love Snowmen?  Create your own “Snowball Fight” here.

Shop Amazon Scrapbooking Supplies*