Holiday DIY with Old Kitchen Hardware

old-jar-of-hardware-sues-creative-workshop-3257

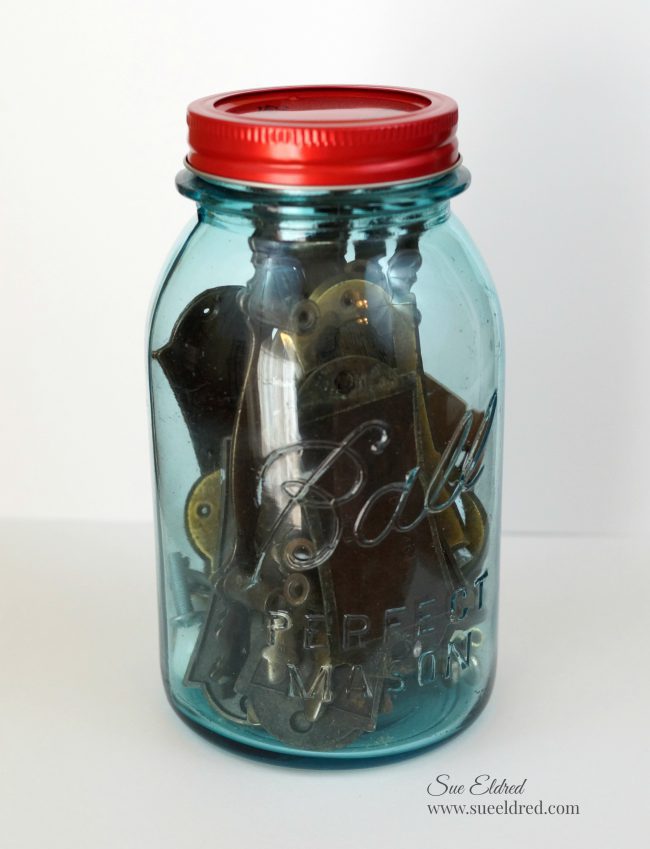
I have this old jar of assorted hardware on my shelf in my workshop.

I keep it just in case.  (Why you ask?)

Because I’m a “you never know” type of crafter.

old-hardware-before-sues-creative-workshop-3261

I had picked up a bag of old kitchen hardware at a garage sale a couple years ago

for fifty cents and used it on a few projects and even made a couple of ornaments.

(you can see them here)


While it may be too late for you to make this year…

it’s an idea that you can put away on the shelf, so to speak, for next year.

old-kitchen-hardware-spray-painted-cream-sues-creative-workshop-3263

Here’s how I made my ornament…

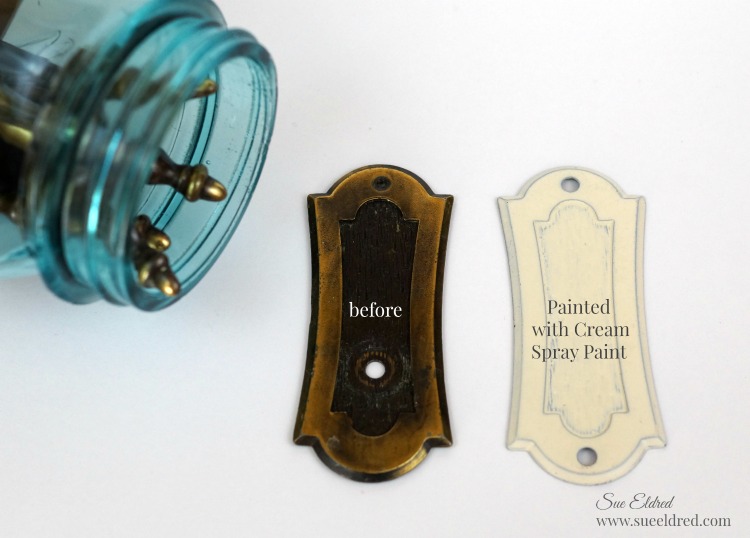
After disassembling the hardware, I spray painted the base plate cream.

What a difference spray paint makes.

go-around-edge-of-the-hardware-with-silver-leaf-paint-pen-sues-creative-workshop-3266

I added silver around the edge using a  Chisel Point Calligraphy Paint Marker, Silver*    (*affiliate link)

embellish-the-top-of-the-ornament-with-pine-stem-and-glitter-berry-sues-creative-workshop-3267

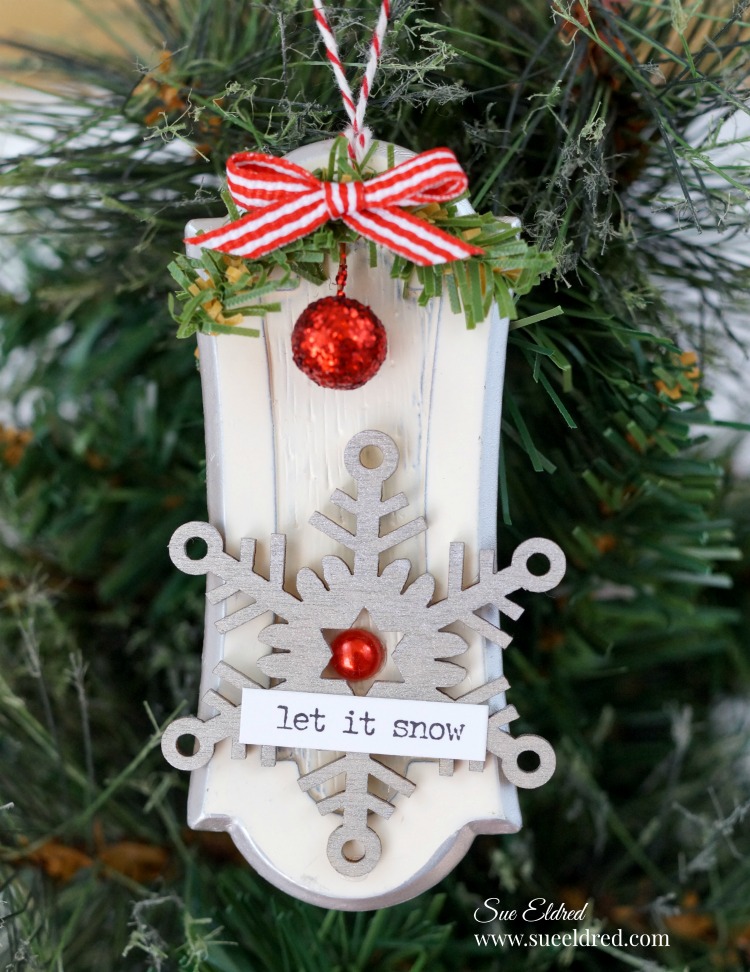
I used the small hole at the top of the hardware plate to string red and white twine.

I embellished it with a glitter berry cut from a glitter berry sprig (see previous picture)

wrapped around a small craft pine stem to form a small swag.

I glued the pine swag and small red and white bow to the hardware with

Beacon Adhesives Zip Dry.*

painted-snowflake-sues-creative-workshop-3271   let-it-snow-christmas-ornament-made-from-old-kitchen-hardware-close-up-sues-creative-workshop

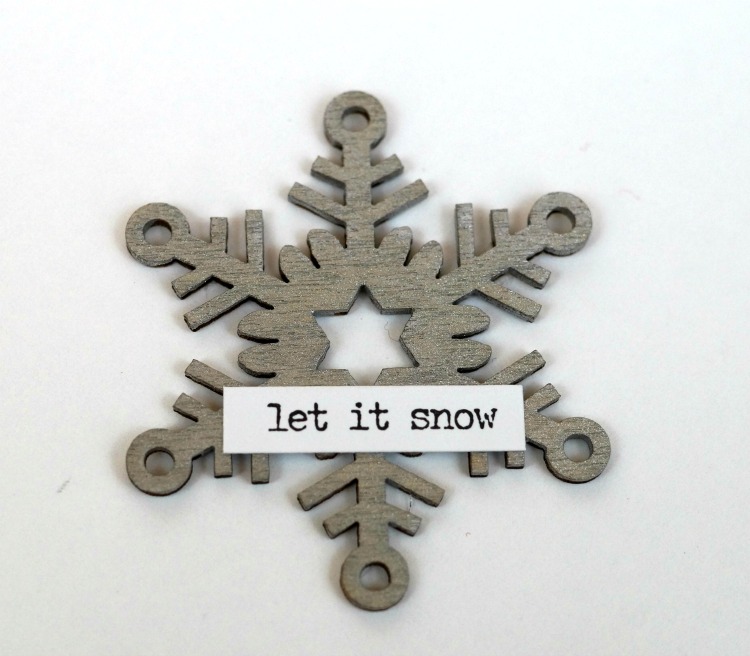
I painted a small wood snowflake, found at the craft store, with silver acrylic paint and added

the “let it snow” sticker from Small Talk Stickers by Tim Holtz Idea-ology*.

I added a small red pearl to cover the bottom hole in the hardware and glued the

snowflake on top.

let-it-snow-ornament-made-from-old-kitchen-hardware-sues-creative-workshop-3290

A quick and easy upcycled ornament for the Christmas Tree.

Join Amazon Kindle Unlimited 30-Day Free Trial

Disclaimer:  This blog uses ads and affiliate links.  If you choose to make a purchase using one of the links, I receive a small commission (at no additional cost to you) that helps offset the costs of maintaining this blog.  Thanks for your support!

Two of my Favorite Snowman Projects

Snowball Fight 2

Sharing two of my all time favorite Snowman Projects…

This little guy is perfect for those times when it’s too cold to go outside and play.

Snowball Fight 3249

If you’re not loving the cold…

Here’s a snowball fight you can have while snuggling up inside.

Snowball Fight Supplies

Here’s what’s you’ll need:                                                 (*affiliate link)

Directions:

  1. Cut the 2″ Smoothfoam ball in half.  Cut the top off the rounded side of one of the balls.
  2. Poke two holes into the bottom of the Snowman body using the craft pick.  Break a toothpick in half, dip ends into craft glue and insert in holes.  Attach the sliced ball onto the Snowman body.
  3. Apply Snow-tex with palette knife over the newly formed Snowman and the 6″ disc.  Allow both to dry fully.
  4. To Create a Snowball Wall… Poke holes into the 1″ balls with the craft pick.  Insert toothpick halves with craft glue on the ends into balls.   Build wall by sticking the balls together.
  5. Apply Snow-tex onto wall using the palette knife.  (Allow to dry.)
  6. Create scene by attaching snowman and wall onto the disc.  Reinforce the pieces with toothpicks and craft glue.
  7. For a shimmery snowy glow…paint all the pieces with Crystal Craft Twinkles paint.  (Allow to fully dry.)
  8. Add shadows to the snowman and snowballs by gently applying vintage photo ink using a stipple brush.
  9. To Create the Snowman Hat… Measure and cut fabric to fit around snowman head.  Fold over and glue one of the long edges of the fabric to create a brim.  Glue fabric ends together to create a tube.  Tie top of the tube with a piece of string, cut excess fabric off top of the tube and fray the ends by making small cuts with the scissors.  Glue to the top of the Snowman head.
  10. Add arms to the Snowman using small twigs.  Warm him up with a fabric scarf and mittens cut from the fabric scraps.
  11. For the Snowman’s Face… Use two small black micro brads inserted into the snowman face for the eyes.  Paint the tip of a bamboo skewer with orange paint, cut and insert into the face for the nose.  Add a smile to the snowman’s face using a extra fine black paint marker.
  12. Make a small snowball using a small pieced of paper wadded up and covered with Snow-tex.  Glue finished and dried snowball onto mitten.

Snowball Fight Close Up 3194

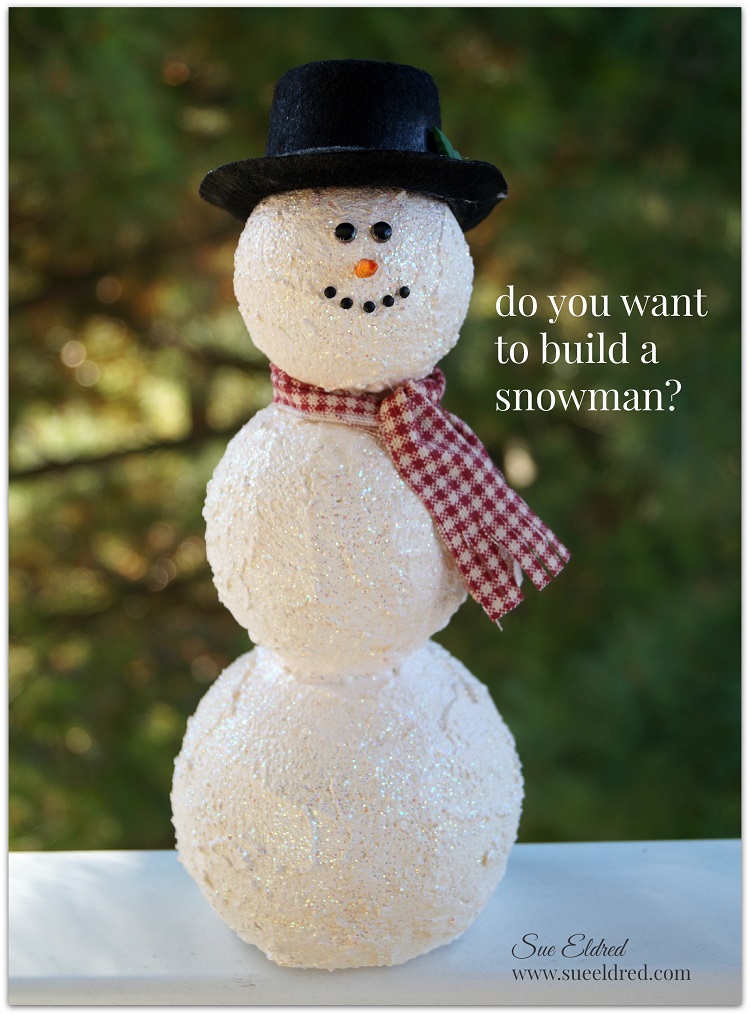
Another one of my Favorite Snowman Projects was titled “How to make a Snowman”.

Smoothfoam Snowman 887

Making a Snowman is pretty easy.  All it takes is a little patience and time.

(and a few ingredients)

snowman parts

Here’s what you’ll need to make a Snowman:                               (*affiliate link)

Directions:

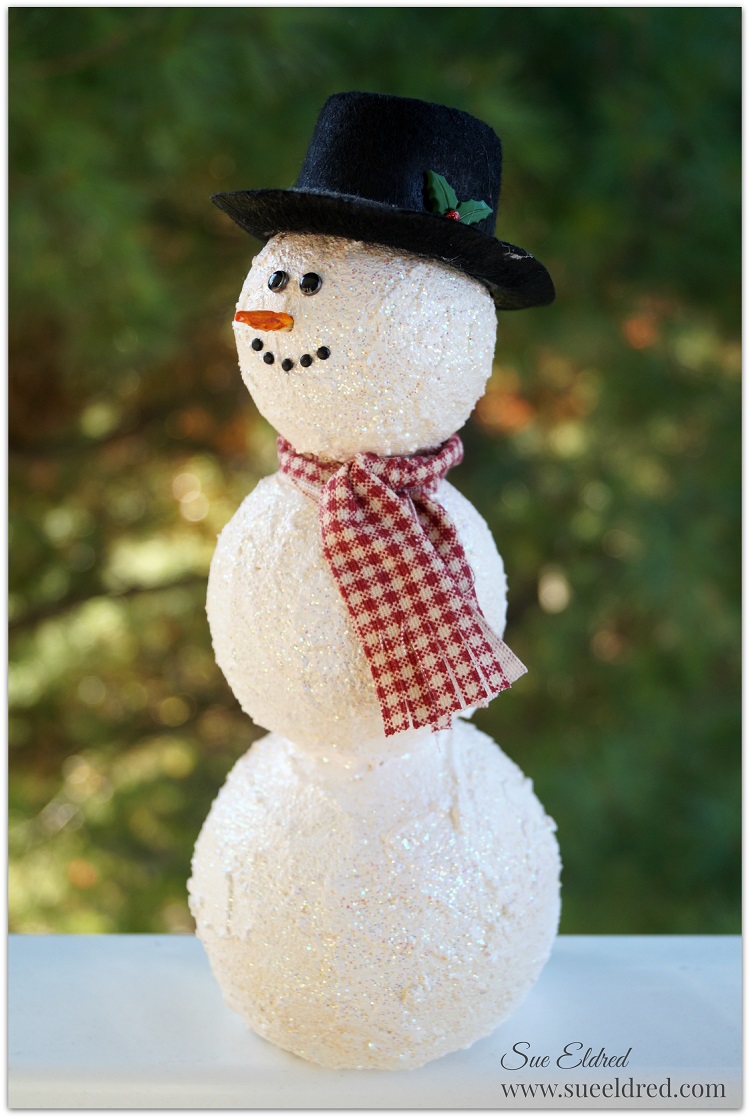
  1. Cut a small section off the bottom of the 4″ Smoothfoam ball so that it sits flat.
  2. Cut a couple of 3″ sections from the bamboo skewer.  Stick the skewer into the center of the 2″ and 3″ Smoothfoam balls.
  3. Add craft glue to the ends of the skewers before sticking the three balls together to form the snowman base.  (Allow glue to fully dry before continuing to the next step)
  4. Using a palette knife, smooth Snow-tex over Snowman base.  Here’s where the patience comes in… Allow a couple of hours for the Snow-tex to completely dry.
  5. Paint the entire Snowman base with white acrylic paint.  This fills in and helps cover any area missed by the Snow-tex.
  6. For a Frosty Look…paint the Snowman base with Craft Twinkles Glitter Paint.
  7. Cut a thin strip of grey felt and glue around the base of the hat to create a band.  Glue holly embellishment onto band to cover seam.  Glue to the top of the Snowman head.
  8. Cut a strip of gingham fabric and tie around neck.  Cut small slits into the ends of fabric for fringe.
  9. Use two small black brads inserted into the head for the eyes.  Use five micro black brads insert as the mouth.
  10. Cut the pointed end from a bamboo skewer and paint with orange paint.  Stick into head for the nose.

put a stick in it

Here’s a Close up of Mr. Snowman.  Isn’t he Handsome?

Snoman Face

These projects was created for and sponsored by Smoothfoam and also sponsored by DecoArt.

Smoothfoam Snowman Side view

*Disclaimer:  This post uses ads and affiliate links.  If you choose to make a purchase using one of the links, I receive a small commission (at no additional cost to you) that helps offset the costs of maintaining this blog.  Thanks for your support!

Try Amazon Prime 30-Day Free Trial

Reindeer Star Card

reindeer-star-card-sues-creative-workshop

Impress your friends and family this Holiday…

with a gatefold card that looks a lot harder than it really is.

This may not be a beginner card for some, but, I promise it really is not hard.

A few layers and a few simple steps and you’ll be done in no time.

The supply list may seem long…

but you can easily adapt the card with supplies you have on hand.


This is what I Used to make the Reindeer Star Card:                                           (*affiliate link)

Directions:

  1. Cut a piece of cream cardstock 7 1/2″ x 5″.  Score and fold on the 2 1/2″ mark to create a 5″ x 5″ card base with flap.
  2. Cut a piece of red patterned paper 2 1/4″ x 4 3/4″ and adhere to the front of the flap.
  3. Cut a 2 1/4″ x 2 1/4″ piece of light green patterned paper and adhere onto the bottom of the red patterned paper.  Repeat for the inside flap.
  4. Cut a piece of dark green patterned paper 4 3/4″ x 4 3/4″.  Adhere to the inside of the card.
  5. Cut a piece of red plaid paper 2 1/4″ x 4 3/4″ and adhere onto the bottom of the dark green patterned paper.
  6. Add a strip of thin washi tape to the seam of the patterned papers.
  7. Apply White and Gold Foil washi tape to a piece of white cardstock.reindeer-star-card-creating-a-washi-tape-background-sues-creative-workshop
  8. Cut two medium washi tape stars using the star die and Big Shot Cutting/Embossing Machine*.reindeer-star-card-cutting-the-star-dies-sues-creative-workshop
  9. Cut two larger stars from the gold metallic cardstock.reindeer-star-card-opened-sues-creative-workshop
  10. Adhere the first star halfway onto the flap (with the other half hanging over)  Adhere second star directly onto the back of the first star.
  11. Adhere medium washi tape stars onto the middle of the large gold stars.
  12. Cut one small gold cardstock and mount it to the middle of the front washi tape star with thin 3D foam mounting squares.reindeer-star-card-close-up-sues-creative-workshop
  13. Add small “white stag” dimensional sticker to center of the smallest star.  Add a small red adhesive rhinestone to the tip of the stags nose.
  14. Adhere a piece of gold cardstock onto the Stick It Adhesive Sheets*.  Die cut the words “Merry Christmas” using the Christmas Phrases die and stick onto card.
  15. Tie a thin gold ribbon around the flap with a small gold jingle bells and you’re done.

Finished Size:  5” x 5”  (may take additional postage to mail)


This project was sponsored by Little B LLC.

I am an Amazon Affiliate.  If you choose to purchase from Amazon using one of the above links, I will get a small commission that helps offset the costs of running this blog.  Thank You!

Try Amazon Prime 30-Day Free Trial*


Making More Sock Snowmen

It looks like everyone’s in love with making sock snowman.

They’re really easy to make, with so many ways to add personality

And…I just can’t seem to stop making these cute little guys.

This year, to add to the mix,  I decided to create a Snow family.

Mom, Dad, a couple kids, all made from socks.

Shop Your Fav Brands at Scrapbook.com

Disclaimer:  This blog uses ads and affiliate links.  If you choose to make a purchase using one of the links, I receive a small commission (at no additional cost to you) that helps offset the costs of maintaining this blog.  Thanks for your support!
snow-family-close-up-sues-creative-workshop

Here’s What You’ll Need:                    (*affiliate Links)

Here’s how I made my Snowman:

  1. Tea dye a new white sock, crew length or bigger.  Or if you have boys you could use one of their dingy ones.  (It’s better not to use a sock with the grey toe and heel.)
  2. Cut the top of the sock off, right around the heel.
  3. Turn the sock inside out and attach a rubber-band tightly around the top of the sock.  Because rubber bands wear out with time, I added a good squirt of Beacon Fabri-Tac Permanent Adhesive* in and around the rubber band.  (I left the rubber band on)
  4. Turn the sock right side out and fill sock about 1/2 way with rice.
  5. Fill the remaining portion of the sock with fiber-fill.
  6. Wrap a piece of twine or string tightly around the top of the sock to close the sock.
  7. Tie a piece of twine about 1/3 down around sock to create the head.
  8. I used mini black buttons for his eyes, the tip of a bamboo skewer colored orange for his nose and a simple sewn black thread for his mouth.  I purchased a small felt hat from JoAnn’s Fabrics for Dad’s hat.  I added a band around the hat using a small folded piece of flannel.
  9.  For the flannel hat… Cut a piece of flannel that will go around the head of the snowman.  Create a band on the hat by adding and gluing a fold on the long end of the flannel.  Glue flannel together to create a “tube”.  Allow to fully dry.  Glue onto snowman.  Tie top of the tube with twine to create hat. Trim if needed.
  10. Dress with Snowman with part of an old sock.  Add a couple of buttons for added detail.  A  fringed piece of fabric works great for the scarf.
  11. For the kids… I used the left over piece of sock from the original snowman to create a smaller version.

snowman-couple-with-red-buffalo-plaid-sues-creative-workshop

And because I’m really into Red Buffalo Plaid again this year…

I made this cute little Snow Couple too.

The Snowmen measure approximately 7 1/2″ .

Try Amazon Prime 30-Day Free Trial

Save

Joy Shadow Box Tray

joy-shadow-box-tray-8609

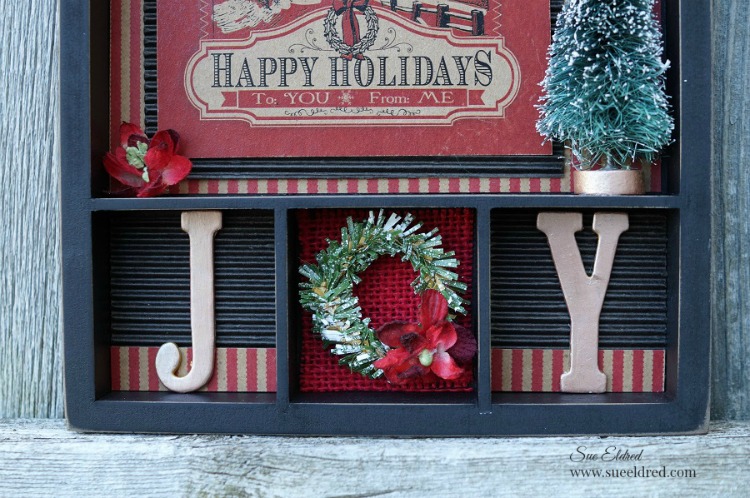
A simple Shadow Box that would be cute as Holiday Décor or used as a gift.

The “Happy Holidays” graphic would be cute replaced with a Holiday photo.

This project also uses a simple paint technique for old hardware.


Here’s what I used for my Shadow Box Tray:   

(*including amazon affiliate links)


Tips to make your project easier:

flicking-paint-8566

  • Add Snowy effect by flicking white acrylic paint onto the pine craft stem using an old paintbrush.

hardware-8570

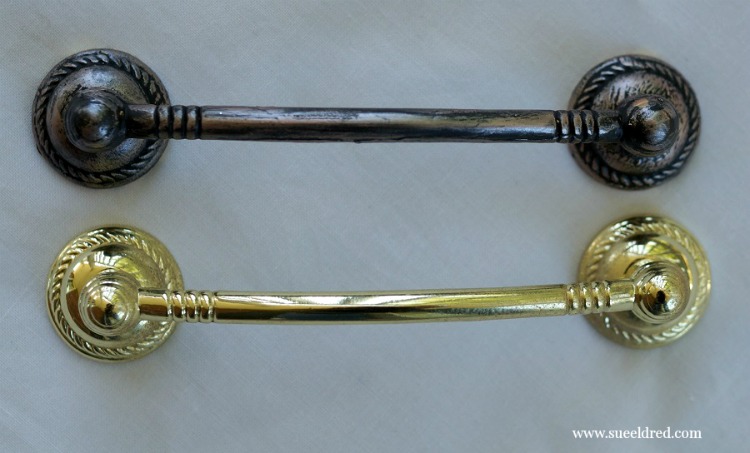
  • Paint the brass hardware with black spray paint.  Once the paint is dry, rub Rose Gold Metallic Lustre over hardware for an aged vintage look.

joy-shadow-box-tray-close-up-sues-creative-workshop

  • For a cohesive look…rub Rose Gold Metallic Lustre onto the chipboard letters and the wood disc on the tree.
  • Cut the back of the bottle brush tree flat so that it fits snuggly into the tray.


This project was sponsored by Canvas Corp Brands and DecoArts.

I am an Amazon Affiliate.  If you choose to make a purchase using an Amazon link, I receive a small commission that helps offset the cost of running this blog.  Thank You!

Boo Door Hanger and Autumn Wreath

autum-wreath-and-boo-door-hanger-sues-creative-workshop-1256

The plan was to make the “Boo Door Hanger” and the “Autumn Wreath”

as two separate projects with two separate blog posts.

But… while I was working on decorating my front porch for Fall,

I tried them together and decided I liked it.

The “Boo Door Hanger” is a separate piece that I can remove after Halloween.

fall-wreath-supplies-sues-creative-workshop

I assembled the wreath using a grapevine wreath, a couple of fall silk floral bouquets, ribbon and my

hot melt glue gun.  After cutting the stems apart from the bouquet, I played around with the

arrangement of the flowers and glued them in place.

A simple bow glued into place finished off the Autumn Wreath.

The entire project took less than a half hour.

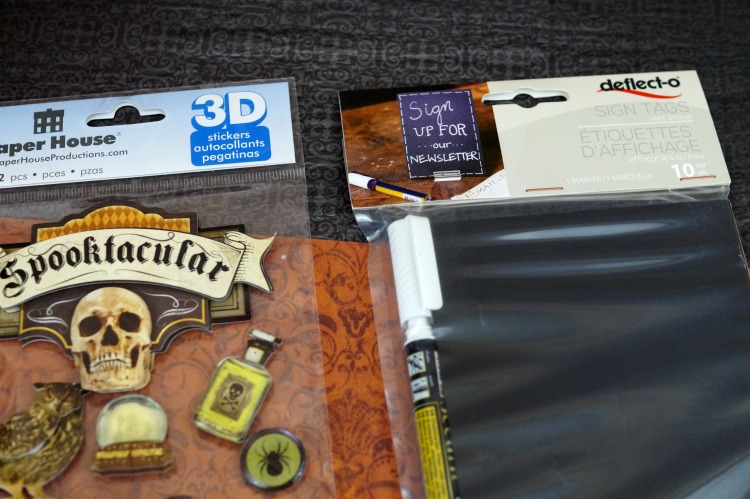
sign-tags-stickers-and-paper-1119

The Boo Door Hanger was a little more involved…

I used Black Sign Tags that come with a White Wet Erase Marker from Deflecto Craft Solutions

and Halloween paper and stickers from Paper House Productions.

die-cut-frames-1124

I applied the Halloween paper onto thin chipboard and cut out three die-cut frames.

I cut the sign tags just slightly bigger than the opening of the frame and adhered it to the back.

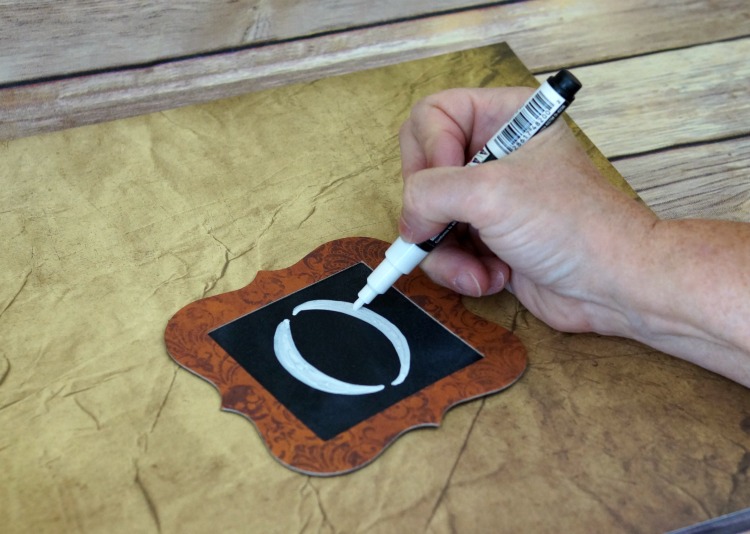
drawing-the-letters-with-the-chalk-marker-1125

I drew in my letters using the white dry erase pen.

Make a mistake?  Just wipe the sign tag with a damp paper towel and start over.

boo-door-hanger-close-up-1127

I punched two holes in the top and bottom of the first two frames and the top only of the last frame.

I added a black eyelet to each hole and connected the frames with small garment pins.

boo-door-hanger-1129

I embellished each frame with Spooktacular 3D Stickers from Paper House Productions.


“This is a sponsored post. As a member of the Paper House Productions and Deflecto Design Team I have been provided product in exchange for my creative ideas, views and opinions.”

Gel Press and the Colors of Autumn

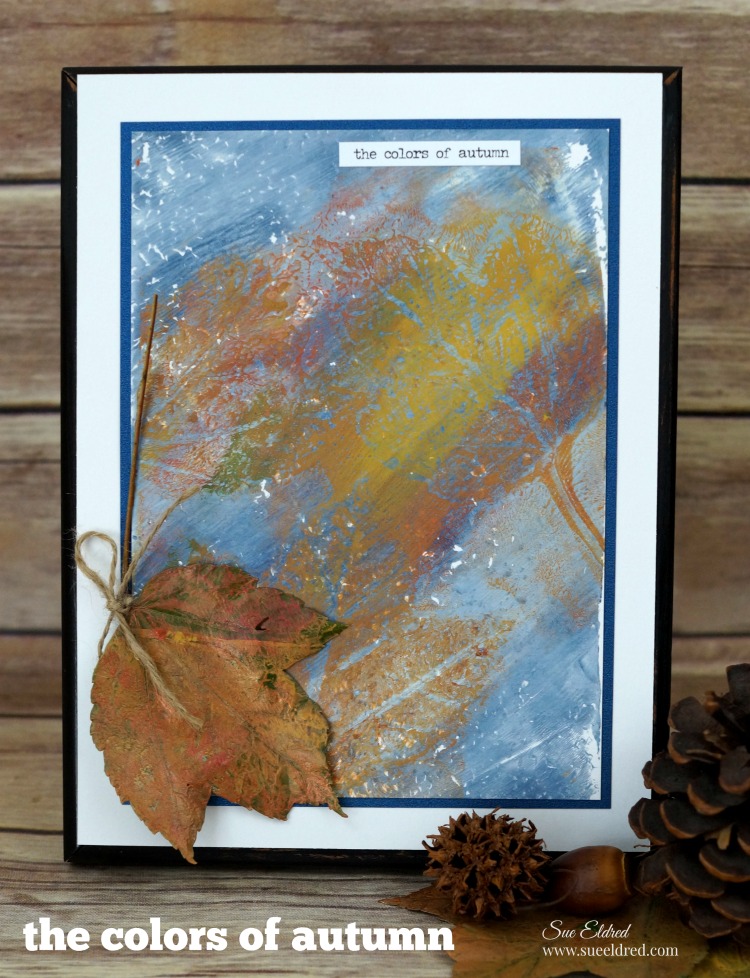
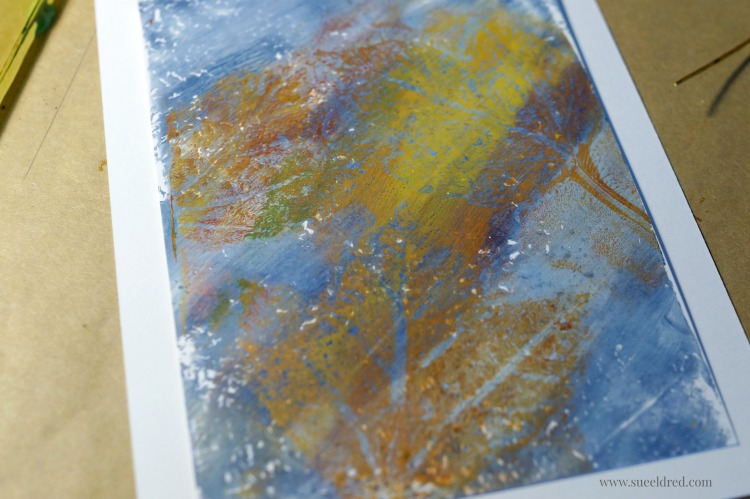
the-colors-of-autumn-print-using-gel-press

The first time I watched a video of someone using a Gel Press I was completely intrigued.

The project they were making was artsy, colorful, very cool and it looked like so much fun.

When I got the chance to participate in the Designer Craft Connection monthly design challenge

and receive a Gel Press plate for “free”… I was more than excited.

gel-press-supplies-sues-creative-workshop

Never heard of a Gel Press?    (Well…It’s just about the coolest thing.)

The Gel Press is a reusable Gel Printing Plate.

Gelatin printing is a form of mono-printing in which a gelatin slab is used as a printing plate to create a variety of images and backgrounds using acrylic paint.  Simple to use.  Ready for Printing.

the-colors-of-autumn

Here’s how I created “The Colors of Autumn Print”…

Supplies Needed:

Directions:

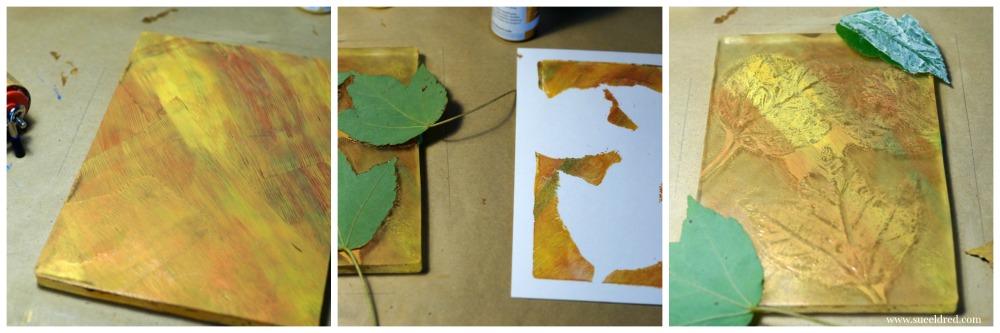
making-a-gel-press-background

  • Remove clear protective film from your gel press.  Apply paint to the exposed Gel Plate.
  • Roll paint on as a thin layer with brayer.
  • Create design by pressing textured item into wet paint.
  • Lay paper onto painted surface.
  • Gently rub paper with hands to create a transfer image onto the paper.
  • I traced guidelines around the paper onto my scratch paper to make it easier to line up the second printing.
  • Pull paper away from printing plate to reveal your background.

creating-the-leaf-background-on-the-gel-press-sues-creative-workshop

  • I created a second background just like the first by using fall colors.
  • I placed 3 leaves into the paint.
  • I place a second piece of white paper over the gel press and pressed.  This removes most of the paint from the background.  Leaving the paint underneath the leaves.
  • Remove leaves from the gel press.  I masked the corners with a couple of additional leaves.
  • Lay the first blue background paper over the press.  Lining the paper up with the guidelines.
  • Gently rub paper with hands to create a transfer image onto the paper.
  • Pull paper away from printing plate to reveal your leaf prints.

autumn-background

  • Mat print and embellish with “the colors of autumn” chit chat sticker.

the-colors-of-autumn-sneak-peek-815

The “Colors of Autumn Print” was created for and sponsored by Gel Press.

gel-press-logo

Make sure to check out the video on the Gel Press site.


*This post uses Amazon Affiliate links.  I am a Amazon Affiliate.  If you choose to purchase an item from Amazon by clinking on the product link, I will receive a small commission that helps offset the cost of running this blog.


How to make a Halloween Hauntings Treat Bag

Halloween Treat Bag 185

You can make a Spooky Halloween Treat bag using only one piece of 12″ x 12″ paper.

That is as long as you’re not afraid of a few measurements… it really is pretty easy.

How to make the Halloween Treat Bag

Here’s what you’ll need:

Directions:

  1. Cut All Hallows Moon double sided Halloween paper to 8 1/4″ x 11 3/4″.
  2. Score the long width of the paper at 3/4″, 4 3/4″, 5 1/2″, 6 1/4″, 10 1/4″ and 11″.
  3. Score the top of the paper at 3/4″.
  4. Score the bottom 1 1/2″.
  5. Fold along score lines
  6. Cut away the first 3/4″ corner piece.
  7. Fold over the top 3/4″ and adhere in place.  (top diagram)
  8. Fold along lines to create a 4″ x 6″ box.
  9. Tape Side and bottom of the box.Taping the Bottom Flap 148
  10. Cut “toad saliva” bottle section from the Apothecary scrapbook paper and adhere to the front   of the bag.
  11. Add 3D foam mounting squares to the back of the “raven” and “bottles” stickers and use to embellish the bag.
  12. Punch two holes on the top of the bag.
  13. Fill with goodies (or NOT) and tie with a black cord.

Halloween Treat Bag 191

The Halloween Treat Bag was created for and sponsored by Paper House Productions.


How to Mist and Stencil a Mixed Media Pillow

Home Pillow for Joy 6602

I enjoy making pillows.

Especially when it’s a quick and easy “no sew” pillow with a twist.

How about a little misting and stenciling with Tattered Angels Glimmer Mists?

Home Pillow for Joy Project Supplies Close Up 5805

I started my project off with a 12″ plain canvas pillow cover, versatile check stencil (see end of post),

Tattered Angels Glimmer Mists and large iron-on embroidered letters from Joy.

masking the stencil 5818

Using removable painter’s tape, I taped the stencil onto the canvas.

I wanted my pillow to have a subtle background so I lightly sprayed with Tattered Angels

Crushed Shells Glimmer Mist.

Because the pillow is decorative, I’m not worried about the spray being washable.

Home 5820

I used large Iron-on letters from Joy to spell out the word “Home”.

Spraying the letters5824

To customize the plain white letters, I sprayed them with Coffee Shop Glimmer Mist for contrast.

ironing 6395

Allow the letters to fully dry before arranging onto the pillow.  Cover the letters with a cotton cloth

and iron for about 30 seconds.  I ironed it again from the back of the fabric for another 30 seconds.

Burlap Flower

I added an old button to the center of a burlap flower from Canvas Corp Brands

and glued it onto the corner of my pillow with Fabri Tac Glue.

I used a 12″ pillow form from Fairfield World to stuff the pillow.


Deco Art DECADS.20 Americana Decor Stencil Versatile Checks*


This project was created for the Creating with Joy Blog and was sponsored by Canvas Corp Brands, Deco Arts, Fairfield World, Beacon Adhesives and Joy SA.

*This post uses affiliate links.

I would cross the Ocean for You…

Cross the Ocean Card 9050

When ever I see a Lighthouse, I think of my sweet Mom.

Mom loved all things Lighthouses.

Knick knack’s, postcards, t-shirts, sweatshirts, you name it.

Card Dimension 9035

And… she’d cross the ocean for you.  She was that kind of Mom.

Card Supplies9011

My Mom was also a card maker and loved using stamps and stickers to make her cards.

Isn’t it great that the supplies we use as Scrapbookers are perfect for creating Quick and Simple cards.

Powdering the sticker 9015

One tip that Mom and I learned at a Mrs. Grossman’s class (back in the 90’s) was…

to make a sticker non-sticky, apply baby powder on the back of the sticker with a paint brush.

My favorite tip for making dimensional cards.

I would cross the ocean card 9021

For this card I used the Nautical Collection from Paper House Productions.

Paper House KTSP-1029E Nautical Paper Crafting Kit, 12″ by 12″, Multicolor**


This card was created for and sponsored by Paper House Productions.

**This post uses Amazon Affliate Links.