How to Create a Relaxing Sunset Pillow

How to create a Relaxing Sunset Pillow 9318

There’s something about a beautiful sunset that always stops me in my tracks.

No matter how many I’ve seen, I still marvel at all the vibrant, beautiful colors.

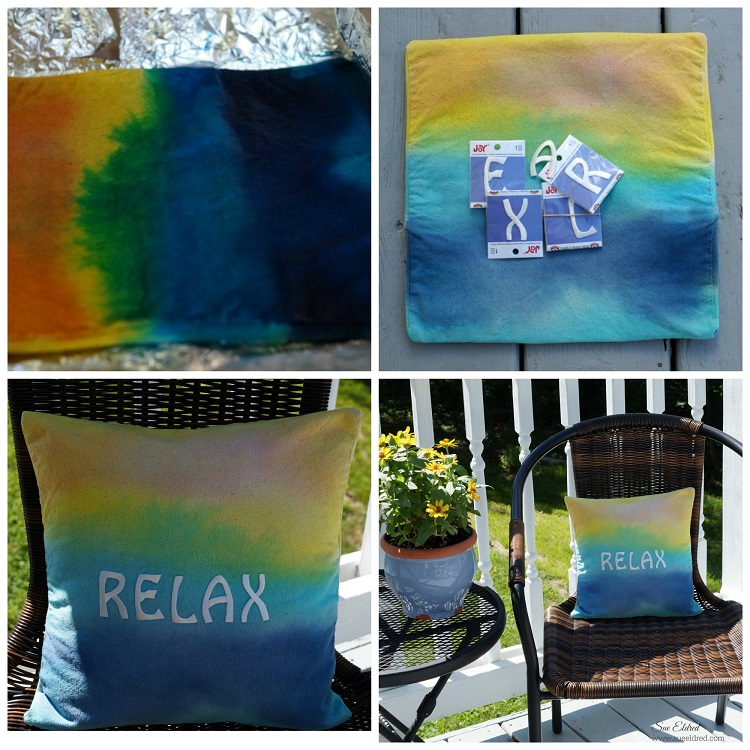
How to make a Relaxing Sunset Pillow Collage

After all the fun we had making the Patriotic Tied Dyed Shirts for the 4th of July…

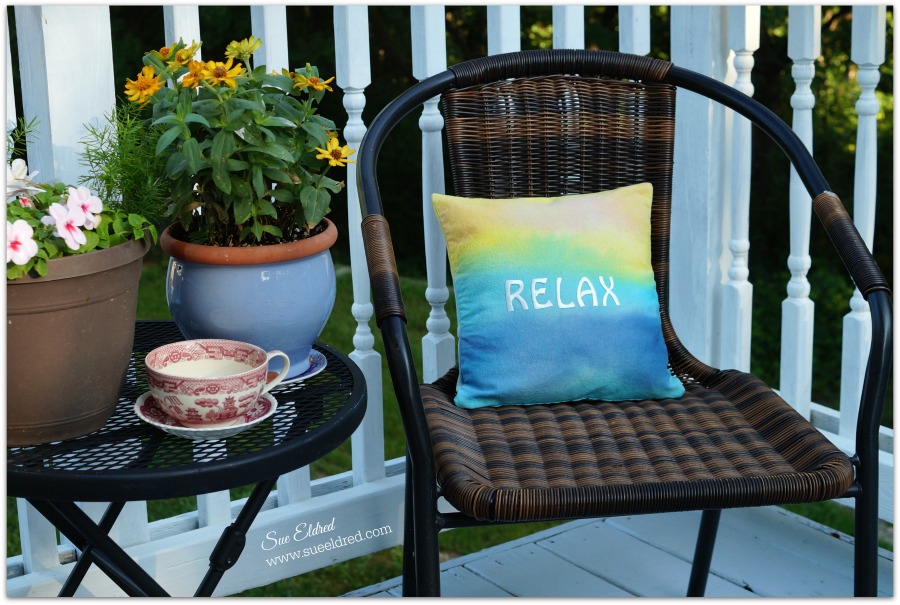
I decided to create a color wash dyed pillow with the colors you might see during a beautiful sunset.

With the help of my 2 year old Grandson this is how we made the pillow:

  1. We used the Rainbow Tie Dye Kit from Tulip that comes with pre-measured squirt bottles.  All you need to do is add water to the bottles and shake to mix.
  2. Squirt dye onto 12″ canvas pillow square one color at a time starting at the top.
  3. Dip medium/large paintbrush into water and brush the dye to spread the color.
  4. Continue with the others colors until canvas pillow square is covered.
  5. Note:  When using a helper who’s only 2 1/2 things can get really wet.  (he had fun)
  6. Cover dyed fabric with plastic wrap to keep damp.
  7. Let set for 6-8 hours or longer for intense colors.  (we waited around 2 hours)
  8. Rinse well with water until excess dye is removed.
  9. Fill washer to “large load” setting with hottest water suitable for fabric and a small amount of laundry soap.  Wash and dry separately.  (Wash separately for the first few washes.)
  10. Iron the canvas pillow square to get out excess wrinkles.
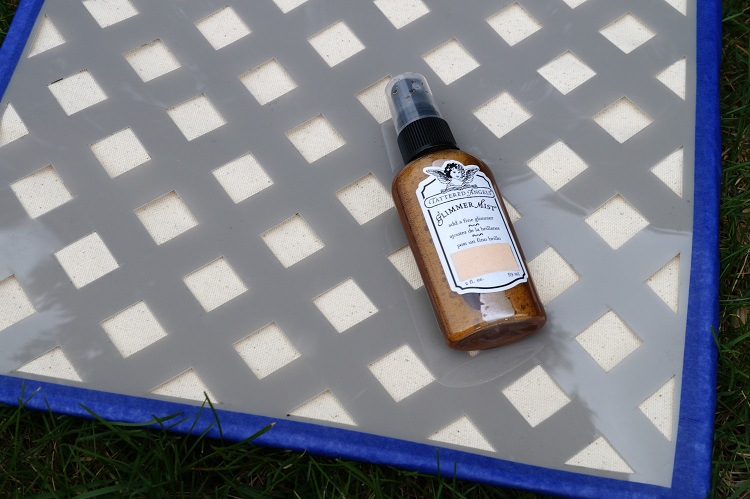
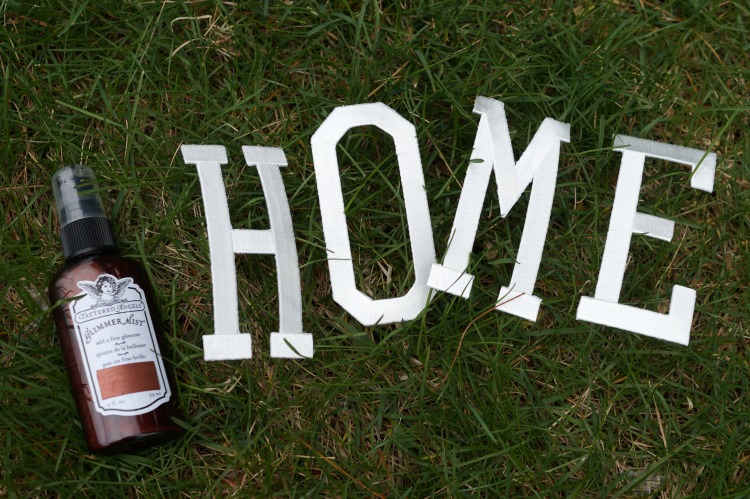
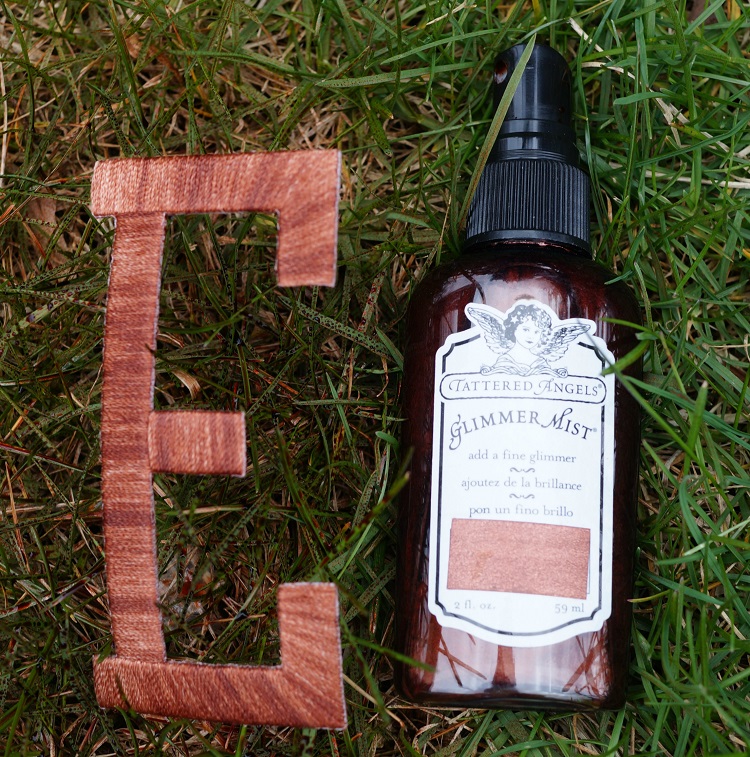
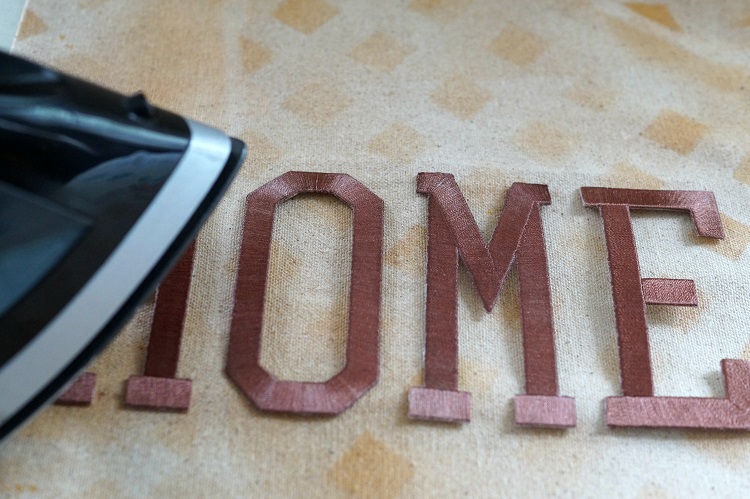
  11. To add the word “relax”, I used iron-on embroidered letters from Joy.  It’s quick and easy – just preheat your iron to the cotton setting, cover the letters with a cotton cloth and iron for about 30 seconds.  I ironed it again from the back of the fabric for another 30 seconds.
  12. Stuff pillow with a 12″ pillow form.


Tulip One-Step 5 Color Tie-Dye Kits Rainbow*   (affiliate link)

Relaxing Sunset pillow 9321

*Disclaimer:  This post uses ads and affiliate links.  If you choose to make a purchase using one of the links, I receive a small commission (at no additional cost to you) that helps offset the costs of maintaining this blog.  Thanks for your support!

DIY for Kids: Doodling on Craft Frames

Doodling on Craft Frames 8769

Doodling on clear acrylic craft frames…

a fun little project to make with the kids this summer that will help keep

the kids Happy and Busy.

Print out a few 4th July or Summer Fun pictures in wallet size and pick up a few

supplies and let their creativity soar.  (my frame is 3″ x 4″)

Trace around picture 4089

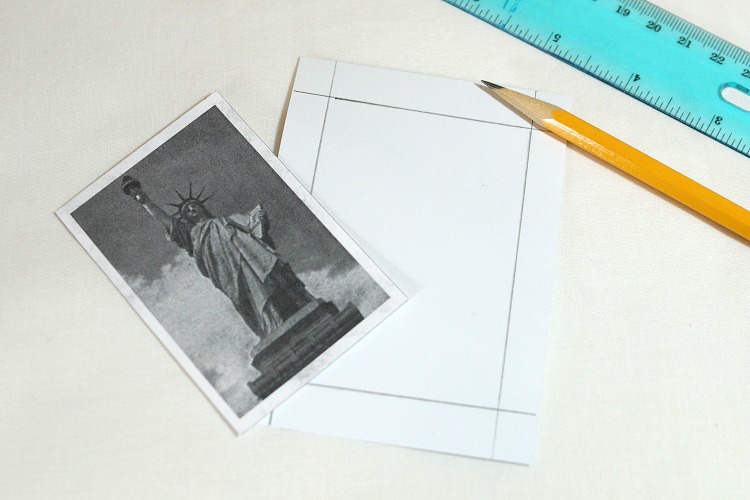
  • Cut a piece of white paper the size of your frame.
  • Center and trace around the picture on your paper.

Tracr around picture with ruler 4091

Using a pencil and ruler draw your grid lines on the paper.

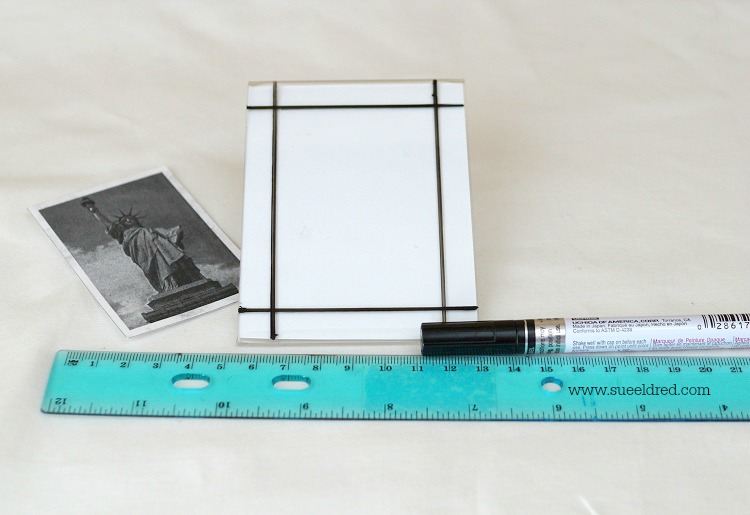
Retrace pencil marks with black paint pen 04111

Reinsert the paper into the clear acrylic craft frame and retrace the lines.

Using paint pens or sharpies, add additional lines and doodles on the frame.

Tip:  When using paint pens, allow drying time in between adding colors.


Deflecto Mini Slanted Sign Holders, 10 Piece, 3 x 4 Inches (20006CR)


“This is a sponsored post. As a member of the Deflecto Design Team I have been
provided product in exchange for my creative ideas, views and opinions.”

*This post uses Amazon Affiliate links.  I am an Amazon Affiliate.

Craft Sticks… not just for Kids!

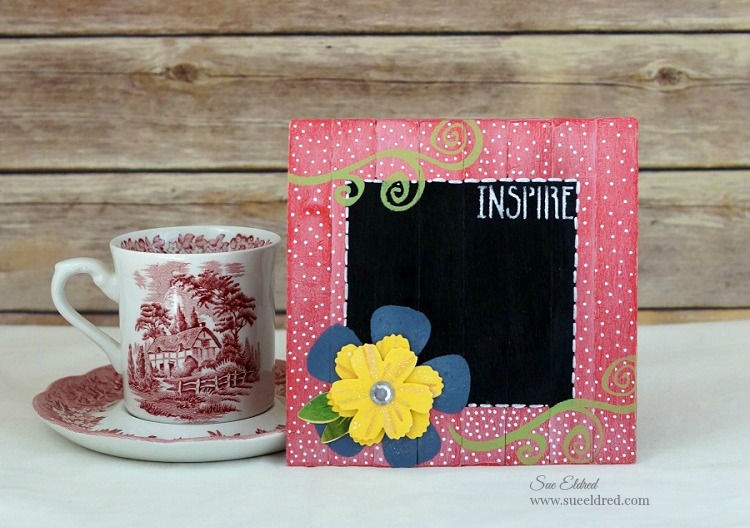
Stenciled Chalkboard Sign

Craft Sticks for Grown-ups?  

Who knew the craft medium we used as kids could produce a grown-up look.

I was messing around one day, looking for something different to stencil on.

Inspired by my favorite “Fixer Upper” show, I decided to create my own mini shiplap.

The projects below are the result of my “playtime”.

Learn More

Americana Sign

This one’s for anyone who loves Americana, old signs, topography and the look of old shiplap.

Or for anyone who loves playing with wood craft sticks.

How to make the Americana Sign:              (*Amazon Affiliate Links)

Finished Size: 6” x 6”

*Disclosure:  This blog uses ads and affiliate links.  If you choose to make a purchase using one of the links, I receive a small commission (at no additional cost to you) that helps offset the costs of maintaining this blog.  Thanks for your support!

Americana Sign Collage

Directions:

  1. Create a sign by gluing together 8 tongue depressors on the front and 4 tongue depressors on the back.
  2. Paint both sides of the sign with blue paint.
  3. Using select sections of the stencil, tape stencil in place using removable painters tape.
  4. Using a stencil brush, dip just the tip of your brush into the paint. Tap off excess paint before applying to prevent the paint from seeping under the edges of the stencil.
  5. Apply paint with stencil brush in a straight up and down motion called stippling.
  6. Drill small hole in the top corners and insert red twine to use as a hanger.
  7. Optional Step: For a distressed look, lightly sand the edges of the sign with extra fine sand paper.

Here’s a project I did a few years ago using a product called sticky sticks. 

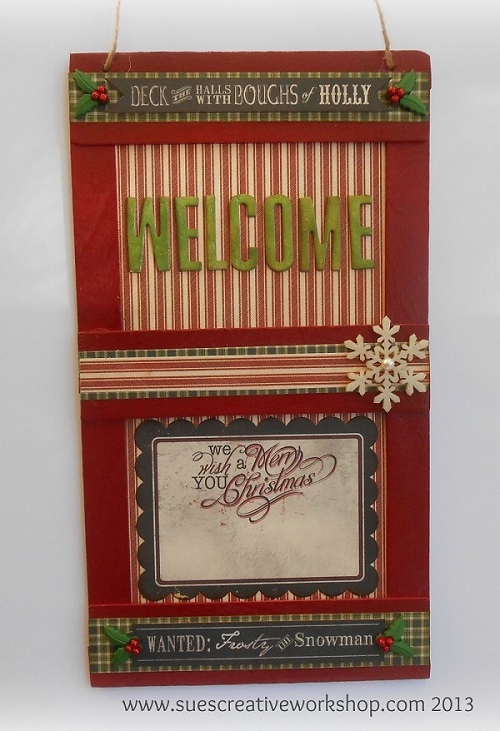
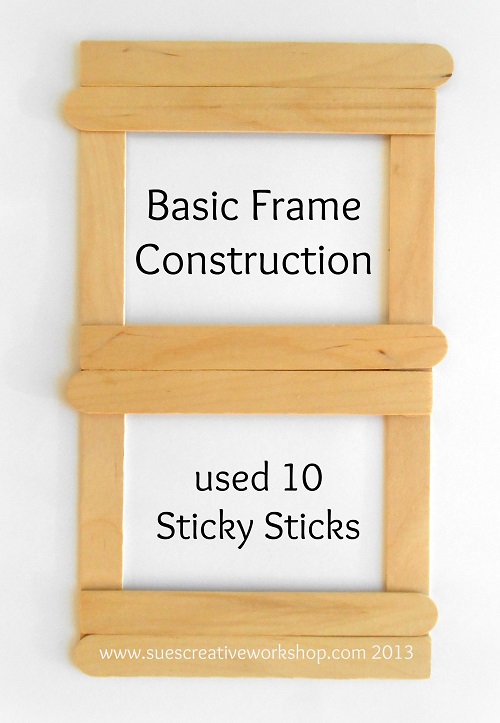
Deck the Halls with Sticky Sticks  Sticky Stick Frame Basic Construction

The paint and stencils used in these projects were sponsored by DecoArts.

Shop Amazon Scrapbooking Supplies*

A little Americana for your front porch swing

The quickest way to spruce up the front porch swing for summer is with new pillows.

And if your a little bit handy and have a sewing machine why not try making a few of your own.

When it comes to sewing I’m very simple and it doesn’t get much easier than this.

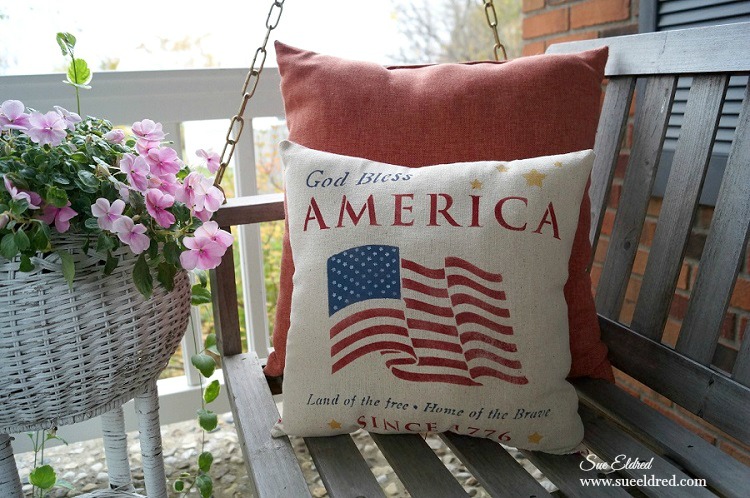
A simple stenciled and stitched pillow.

Deco Arts has so many 12″ stencils in a variety of patterns, you’re sure to find one you’d love.

Supplies 270 2

DecoArts® Products Used:                           (*affiliate link)

  • ADS16 American Tribute Stencil*
  • Americana® Multi-Surface Satin Acrylics: Dark Scarlet, Cotton Ball, Night Sky
  • Splendid Gold Dazzling Metallics® Acrylic Paint

Additional Products:

Directions:

  1. Lay paper under muslin fabric before stenciling.
  2. Center and tape stencil onto muslin with removable painter’s tape so that the stencil won’t move.
  3. Work one color at a time and mask off with painter’s tape the areas that won’t be painted.
  4. Remove the “star section” of the flag using a craft knife and set aside.
  5. Stenciling is a “dry” brush technique. Using a stencil brush, dip just the tip of your brush into the paint. Tap off excess paint before applying to prevent the paint from seeping under the edges of the stencil.
  6. Apply paint with stencil brush in a straight up and down motion called stippling.
  7. Once you’ve added the red, blue and gold colors. Replace the star section of the flag back onto the stencil and stencil the stars with white paint.
  8. Create a simple pillow by sewing the muslin onto the red and cream ticking fabric.
  9. Stuff pillow with Poly-fil®.

God Bless America Pillow 572 2

This project was sponsored by DecoArts.

Disclosure:  This blog uses ads and affiliate links.  If you choose to make a purchase using one of the links, I receive a small commission (at no additional cost to you) that helps offset the costs of maintaining this blog.  Thanks for your support!

Americana Ribbon Wreath

How to Create a Americana Ribbon Wreath…

I’ve been concentrating a lot on sprucing up my front porch for Summer.

To complete the look, my front door needed a fresh fun new wreath.

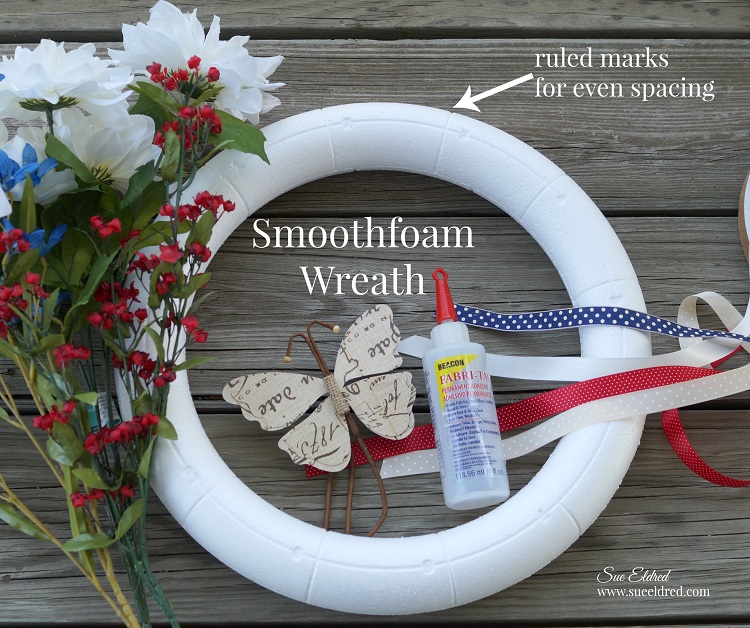
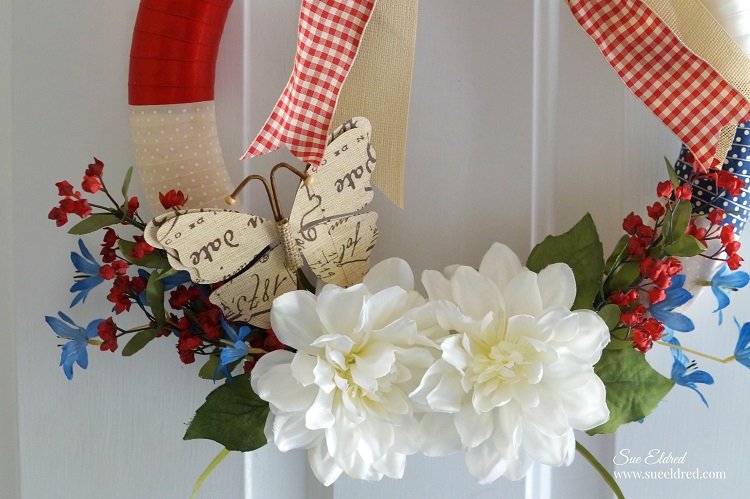
I created a Summer themed Americana Wreath using one of the ruled wreaths* from Smoothfoam.             (*affiliate link)

Smoothfoam Ruled Wreaths make design and layout easy. 

They molded lines and numbers into the foam to make design and layout simple.

Even on one side, odd on the other.

The wreaths come in several sizes… 8″, 10″, 12″, 14″.

Proudly Made in the USA 

wrapped wreath 7502

How to make the Americana Ribbon Wreath

  • I used the 14″ ruled wreath.
  • Glue one end of the ribbon down onto the foam wreath and wrap the ribbon tightly around the first section.  Glue second end of the ribbon in place before starting second color. (I used Beacon Fabri-Tac Permanent Adhesive* to glue my ribbon in place.)
  • Using a thin floral wire, wire the small floral stems onto the base of the wreath.
  • Glue larger flowers and leaves onto the wreath over the wire.
  • Add large stemmed butterfly and ribbon to hang.

So many possibilities.

Close Up 7505

The Americana Wreath was sponsored by Smoothfoam™, the crafter’s foam.

Shop Your Fav Brands at Scrapbook.com

*Disclosure:  This blog uses ads and affiliate links.  If you choose to make a purchase using one of the links, I receive a small commission (at no additional cost to you) that helps offset the costs of maintaining this blog.  Thanks for your support!

Join Amazon Kindle Unlimited 30-Day Free Trial

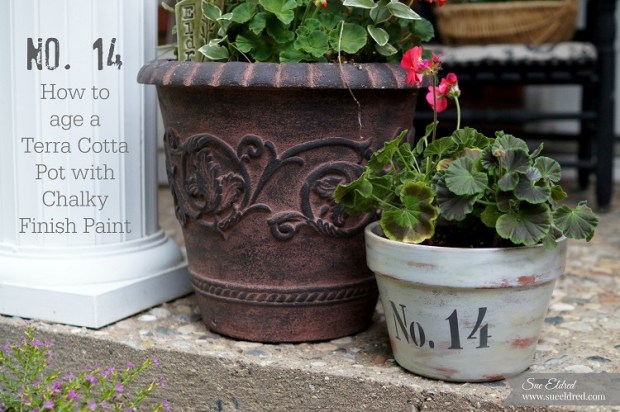
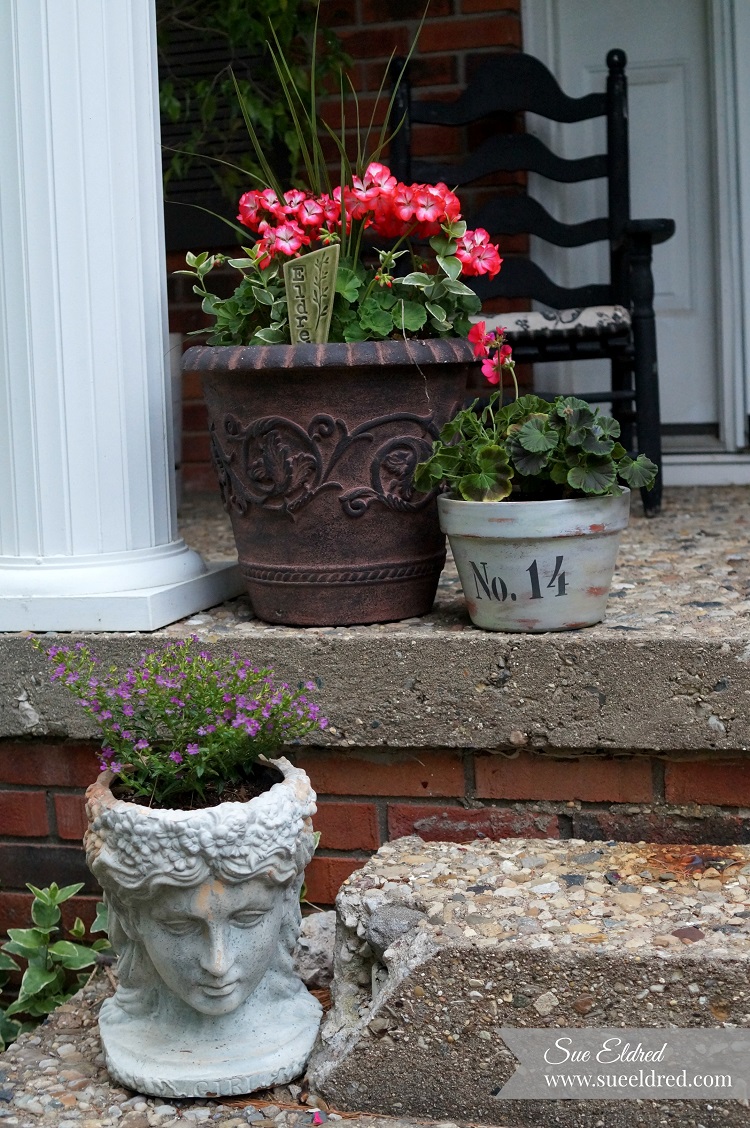
No. 14 How to age a Terra Cotta Pot with Chalky Finish Paint

It’s front porch sitting time…

Time for sitting on the porch swing, sipping a glass of iced tea and relaxing the evening away.

But before I can relax, I need to finish putting flowers in containers and I need to give a couple

of old boring terra cotta pots a little sprucing up with a little paint and stencils.

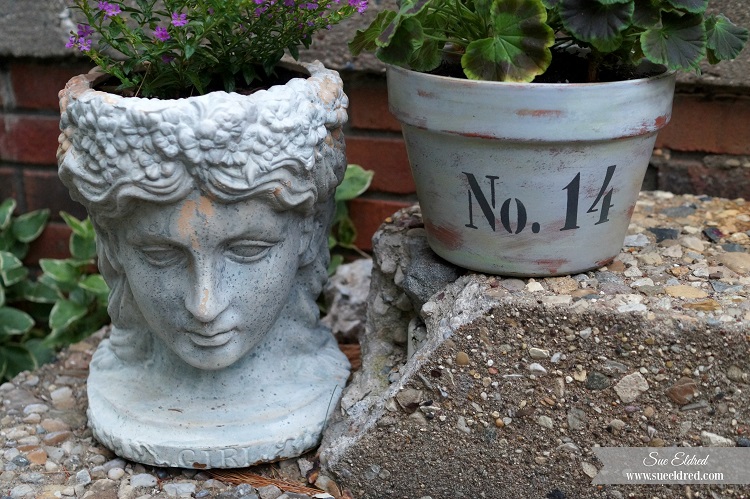
I decided to give this plain terra cotta pot an aged looked with

Americana Décor Chalky Finish Paint from DecoArt.

Terra Cotta Pot Close Up 7478

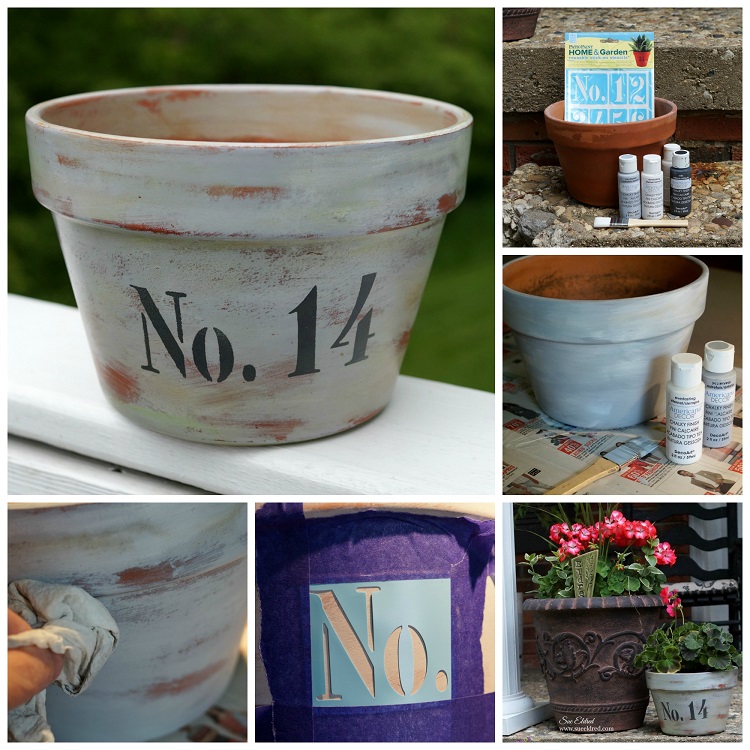
How to age a Terra Cotta Pot with Chalky Finish Paint

Supplies Used:                                                                (*affiliate link)

Terra Cotta Pot Collage

Directions:

  1. Paint the terra cotta pot with “yesteryear” (gray) chalky finish paint.  I gave the pot some white highlights with “everlasting” chalky finish paint.
  2. Wipe the pot with a clean soft damp cloth (or white paper towel) to remove some of the paint.
  3. To give the pot a mossy look… Dry brush “new life” (green) chalky finish paint around the base of the pot, under the ridge and on the top edge.  Soften the green paint by wiping with a damp cloth if needed.
  4. Apply reusable stick on stencils to painted pot.  Mask around the stencil with removable painter’s tape.  Use a stipple brush to apply “relic” Chalky Finish paint inside open stencil area.
  5. Remove stencil.
  6. Lightly sand pot with extra fine sand paper.
  7. Apply Americana® Décor “golden brown” crème wax over pot using a clean lint free cloth.  Wipe with cloth to create an aged look.

Shop Your Fav Brands at Scrapbook.com

Front Porch 2

This post was sponsored by the good folks at DecoArt.

Join Amazon Kindle Unlimited 30-Day Free Trial

Disclosure:  This blog uses ads and affiliate links.  If you choose to make a purchase using one of the links, I receive a small commission (at no additional cost to you) that helps offset the costs of maintaining this blog.  Thanks for your support!

Mini Floral Wreath

Mini Floral Wreath 7122

I get some of my best creative inspiration late at night…

I was planning on making a card using these 3-D puffy stickers from Paper House Productions

when a light bulb moment happened and I decided to make a wreath instead.

I’m really happy with the way it turned out, a little different and very easy to make.

Tip:  Use a good craft glue to adhere the stickers to the ribbon.

Mini Floral Wreath Collage

Paper House Productions Stickers Used:

Additional Supplies:

How to make a Mini Floral Wreath using 3D Puffy Stickers:

  1. Wrap wreath with satin ribbon.
  2. Start with the large pansy flowers and glue evenly around wreath.
  3. Fill in wreath by gluing on the smaller flowers, butterflies and leaves. (The leaves are from the lady bug sticker sheet.)
  4. Tie a thin silver ribbon around wreath to use as a hanger.
  5. Make a bow from the sheer ribbon and glue onto the top of the wreath.

This is a sponsored post. As a member of the Paper House Productions Design Team.

Join Amazon Kindle Unlimited 30-Day Free Trial

Disclaimer:  This blog uses ads and affiliate links.  If you choose to make a purchase using one of the links, I receive a small commission (at no additional cost to you) that helps offset the costs of maintaining this blog.  Thanks for your support!

Making Mini Resin Frames

Resin Frame and Magnet 2788

I had this idea that I’d been wanting to try…

to create little dimensional framed artwork using miniature frames filled with resin.

It really is pretty easy to do.  The only hard part for me was waiting for the resin to cure.

They would be great for weddings or parties.

Customize the frames to use for table numbers, centerpieces, desert tables and more.

There’s a lot of possibilities.

Resin Magnet Supplies 916

To Create a Mini Frame…

Materials:

Directions:

  1. Remove the backing and glass from frame.
  2. Apply Rose Gold Metallic Lustre or paint of choice onto frame.
  3. Adhere decorative paper onto mat-board.   Cut mat-board to fit frame back and adhere.
  4. Embellish the inside of the frame with computer generated words or small embellishments. Make sure embellishments inside the frame is lower than frame top.
  5. Measure and mix resin following manufacturer’s instructions. Pour mix into frame to cover embellishments. Blow air onto the resin using a thin straw to help remove bubbles. Let dry completely.

Resin Frame 0957

The Mr. & Mrs. and LOVE table frames were featured in Craft Ideas Spring Issue. (page 36)

Make sure to check out Craft Ideas Magazine for Craft Ideas for Every Occasion, Every Skill Level.

Craft Ideas Magazine Spring 2016

This project was created for and sponsored by Craft Ideas Magazine.

*This post uses Amazon Affiliate Links.  I am an Amazon Affiliate.

DIY Seashell Lamp

DIY Seashell Lamp 5998

Oh…to be by the ocean listening to the waves and picking up shells.

Lately, I’ve been dreaming of summer vacation and relaxing on the beach.  (it’s my happy place!)

Like most people, I love to walk the beach and collect shells.

During the summer, I like to display my shells in a large clear vase on the mantle.

It reminds me of fun summer family vacations.

Last month, when I received the Lighten Up Kit from Etchall®, I thought…

“wouldn’t it make a cute Seashell Lamp to put on the patio to use on those

warm summer nights?”

I used shells collected during our trips to South Carolina.  (some even from the Isle of Palms)

Lamp Close Up 5992

Here’s what I used to make the DIY Seashell Lamp:        (*affiliate link)

Seashell Lamp Collage 2

The shade measures 4″ x 7″.

Directions:

  1. Clean mason the jar to remove all dirt, fingerprints and oil.  Dry with a coffee filter, paper towel, or lint-free cloth.
  2. Mask off a 1″ area around the mason jar with removable painters tape.
  3. Apply a heavy coat of etchall® etching crème to the masked area using the etchall® squeegee.  Leave etching crème on for 15 minutes.  After etching time has elapsed, use the squeegee to return the crème back into the original container for later re-use.
  4. Rinse etched surface with hot water to remove any remaining crème.  Remember to keep crème away from porcelain or ceramic tiles.
  5. Dry mason jar and apply the “relax” peel and stick stencil onto the middle of the first side.  Mask the sides of the stencil with removable painter’s tape.
  6. Using a stencil brush and the multi surface paint, fill in the open areas of the stencil.
  7. Carefully remove stencil and clean before stenciling on the other three sides of the jar.
  8. Fill Jar with sand and shells.
  9. Using the plastic sleeve template, trace onto a piece of burlap. Cut the burlap leaving a 1/2″ allowance around traced template.  Craft Confession:  I tried using a “stick it adhesive sheet” on the burlap first before cutting it out.  It didn’t work.  (see next step)
  10. Use spray adhesive to coat the back of the burlap.  Apply onto the lampshade and trim.
  11. Glue twine around edge of lampshade.

Optional:  The top of the shade is removable so I spray painted it black.

DIY Seashell Lamp 05959

The Lighten Up Kit is pretty easy to customize.  Lots of possibilities.

It comes with a self-illuminating lampshade with LED lights, template and instructions guide.

It uses 3 AA batteries so it’s portable and can be used almost anywhere.

The DIY Seashell Lamp was created for and sponsored by Etchall®.

Shop Your Fav Brands at Scrapbook.com

*Disclosure  This blog uses ads and affiliate links.  If you choose to make a purchase using one of the links, I receive a small commission (at no additional cost to you) that helps offset the costs of maintaining this blog.  Thanks for your support!

Making a place for Dad’s coffee

Making a place for Dad's Coffee 5605

Dad comes over every Monday, Wednesday and Thursday evenings for dinner.

It’s our weekly ritual.

He arrives at 5:30, sits in the leather chair closest to the television, in time for the evening news.

While he watches the news, I make dinner.  That’s the routine.

Dad sits in that particular chair so he can read the closed captioning.

Unfortunately, that’s the one chair that doesn’t have an end table.

Occasionally… he’ll give me a hard time telling me I need a table so he can put his coffee

cup down.  Problem is there’s no room to put one there.

old stool 5552

Problem Solved…

I noticed this old stool down in the basement, paint splattered and water stained.  (a little ugly)

A make-over was in order and I knew exactly what I wanted to do.

I wish you could of saw the smile when I told him why I did this.  (I had to sneak the first picture)

He thought it was perfect.

Easily put away when not in use.

*Disclosure:  This blog uses ads and affiliate links.  If you choose to make a purchase using one of the links, I receive a small commission (at no additional cost to you) that helps offset the costs of maintaining this blog.  Thanks for your support!

Finished Stool with coffee cup 5592

Old Stool Make-0ver Products Used:                                                   (*affiliate link)

*FTC Disclosure… “This is a sponsored post.  I have been provided product in exchange for my creative ideas.  The views and opinions are my own.”

Old Stool Make Over Steps

Directions:

  1. I gave the top of the table a quick sanding with my palm sander to smooth out the paint splatters.  (I could of sanded the legs but I was lazy.)
  2. I used Tattered Angels Decor and DIY, Ebony*, I love that you don’t need to do any sanding or priming.  I love the smooth matte finish that it gives.  I gave the table 2 coats of paint and some touch ups.
  3. Allow the paint to fully dry and cure before starting the stenciling.
  4. I custom mixed Americana Décor Chalky Finish paint relic and everlasting for a light contrast to the ebony black finish.
  5. Center the stencil onto the middle of the stool and tape down the edges with removable painter’s tape to keep the stencil from moving.
  6. Use stipple brush to apply Chalky Finish paint inside open stencil areas.
  7. Remove Stencil.
  8. For the time being, I’ve decided to leave the stool as is.  You may want to apply a finishing wax to help protect the paint.


Don’t Miss a Thing…Make Sure to Follow me

Shop Amazon Scrapbooking Supplies*