
BTS Pouch made with StyleTech Vinyl…
A little BTS project to make with the bigger kids.
I wanted my project to be bright, fun and colorful so I used
Styletech Fluorescent Craft Vinyl from Tape Technologies.
How to make the BTS Vinyl Pouch… (*affiliate link)
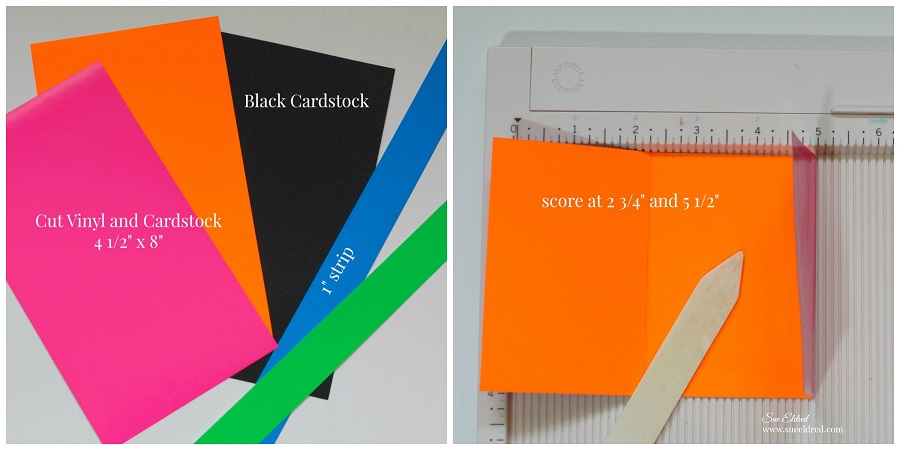
- Cut two pieces of self adhesive vinyl 4 1/2″ x 8″.
- Cut a piece of cardstock the same size.
- Using Vinyl Transfer Tape*, apply vinyl onto cardstock. Turn cardstock over and add second piece of vinyl onto the back of the cardstock.
- Smooth out any air bubbles with Bone Folder*
.
- Trim vinyl and cardstock piece to 4″ x 7 1/2″.
- Score vinyl using a Scoring Board*
2 3/4″ and 5 1/2″. Fold pouch on creases.
- Cut 1″ strips of vinyl.
- Cut vinyl to size and score 1/2″ down the strip. Use strips to cover sides of pouch.
- Cut additional strips to decorate pouch.
- Cut small flowers using Sizzix Triplits Dies ~ Flower 2*
to embellish.
- Add Doodlebug Adhesive Enamel Sprinkles*
in center of flower.

- Punch small hole in top corner and add book ring.
- On the inside add a piece of hook and loop tape.
- Use a corner round punch to round the corners of the flap.
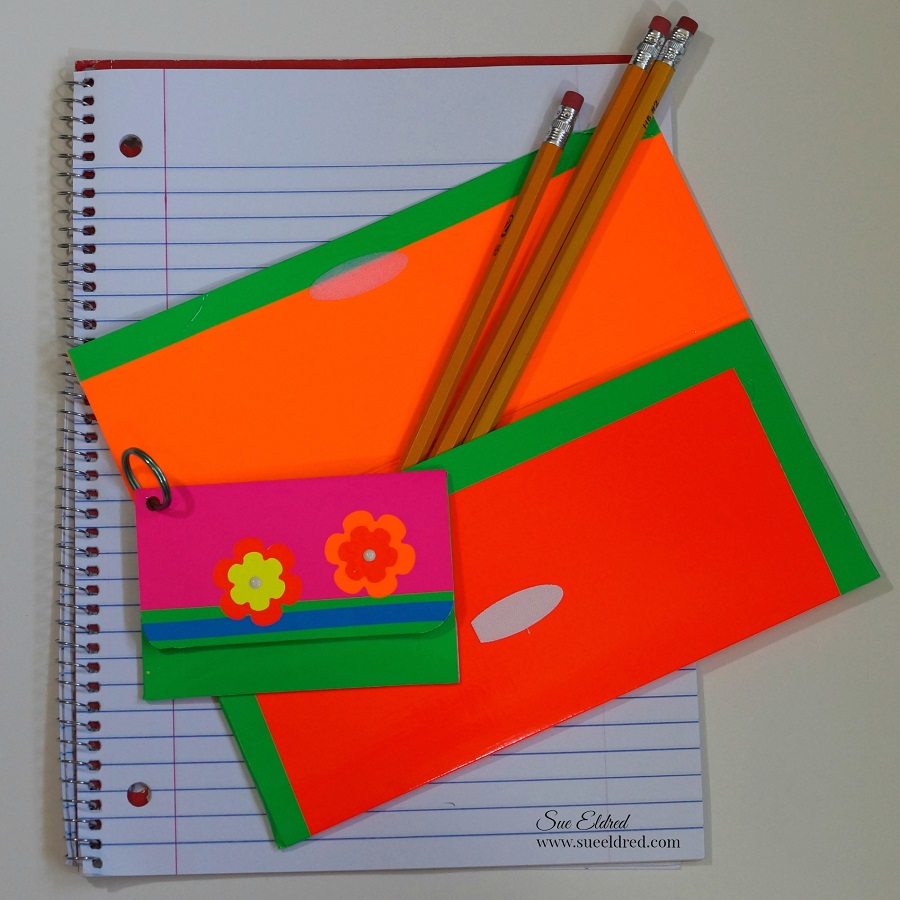
For more fun, try making a larger pencil pouch.
![]()
“This is a sponsored post. As a member of the Tape Technologies Design Team I have been provided product and compensation in exchange for my creative ideas. The views and opinions are my own.

*Disclosure: This blog uses ads and affiliate links. If you choose to make a purchase using one of the links, I receive a small commission (at no additional cost to you) that helps offset the costs of maintaining this blog. Thanks for your support!


