a little Christmas Home Décor

Stenciled Burlap Outside

This Christmas has been the year of Holiday Stenciling for me.  (I just can’t seem to get enough)

This time I’m making a Quick & Easy Home Décor piece for a Blog Hop with Fairfield World

using Foamology Stickybase Tiles™.

What’s Foamology?

Well…. I could try to explain this cool product to you, but. this video explains it much better.

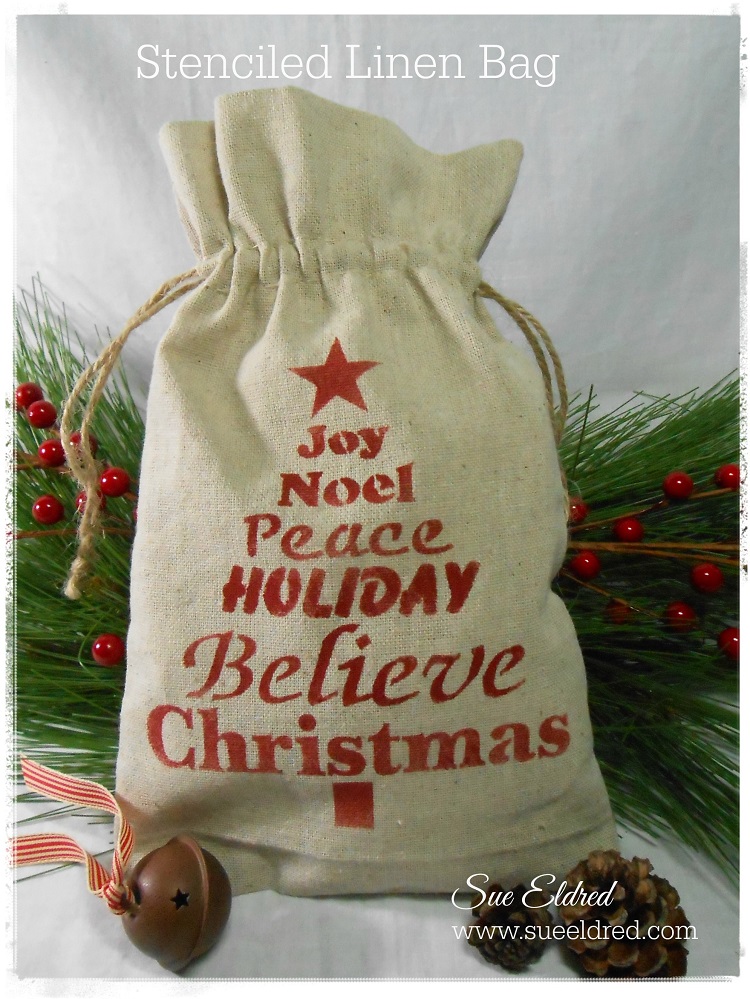
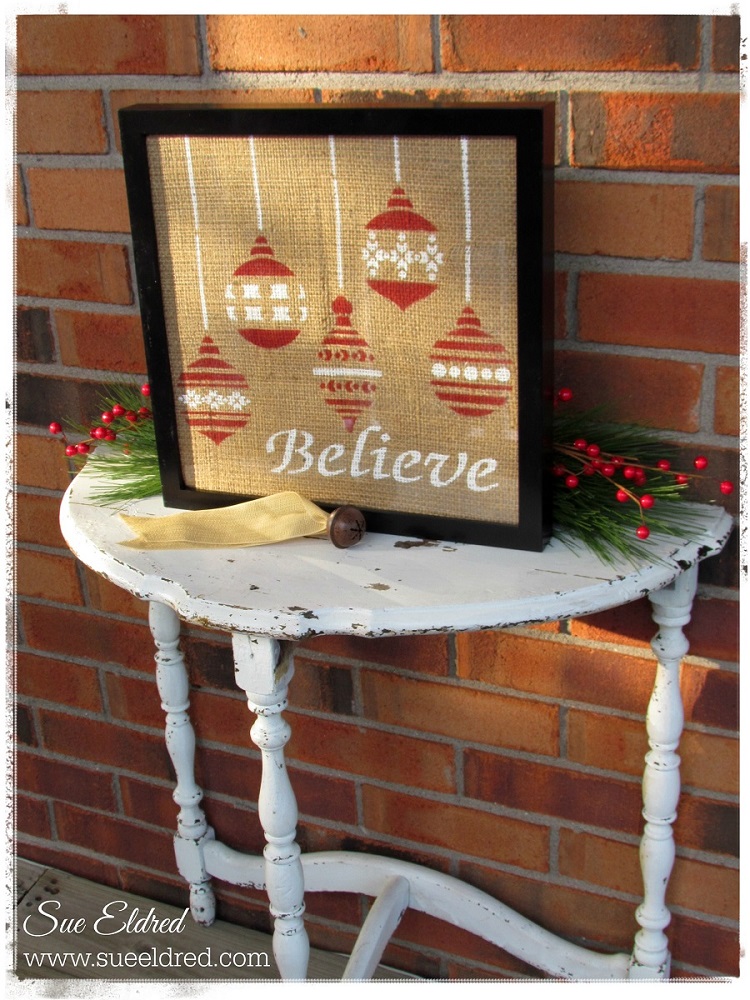
For my project, I decided to try my hand at stenciling on Burlap.

I used a large piece of burlap about 14″ wide and the 12″ Christmas Bulbs stencil

and the 12″ Word Xmas Tree stencil from Clear Scraps.

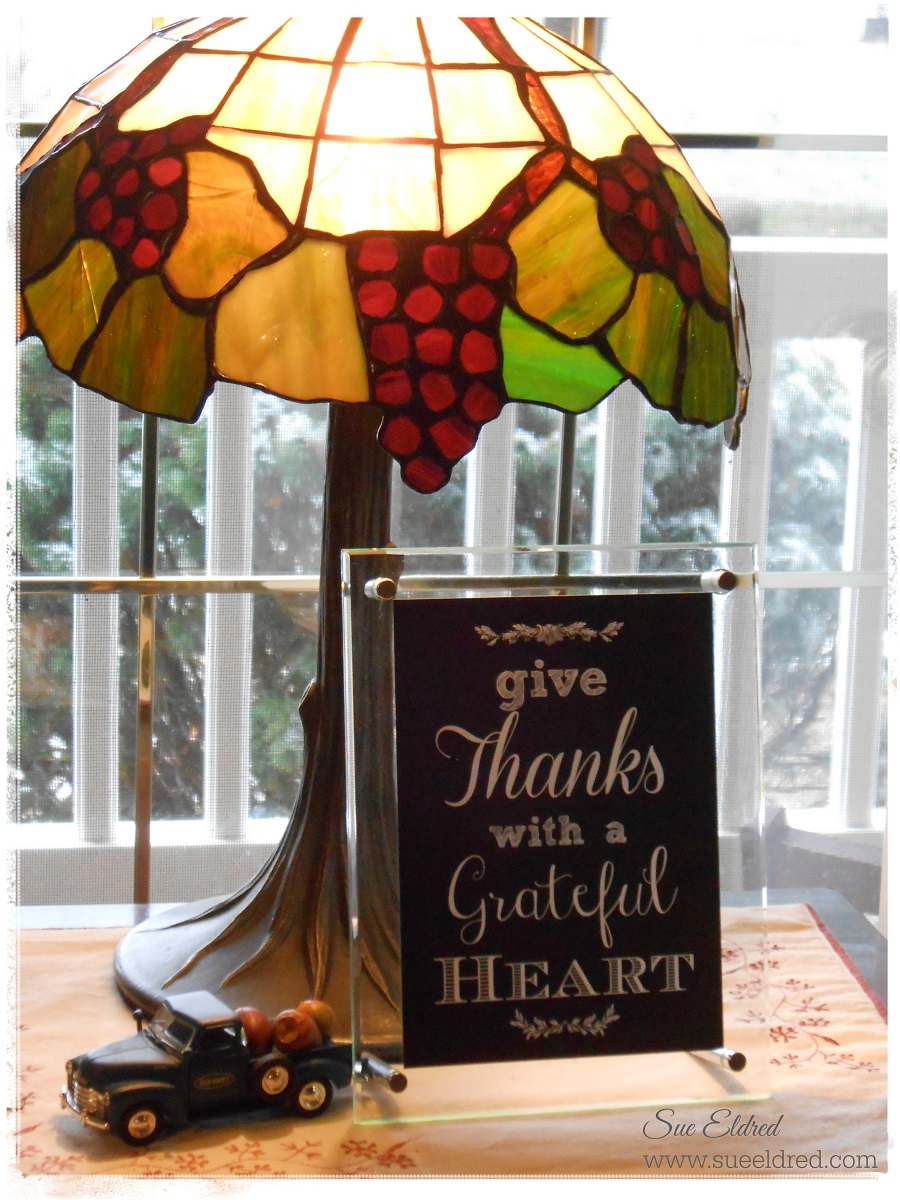
After I stenciled on the burlap, I wrapped it around the 12″ foam square as shown in the

video and inserted it into a shadow box frame.

Stenciled Burlap

Some of the products used on this project were generously donated by Fairfield World and Clear Scraps.

Holiday Joy

I love using the word “JOY” in my holiday decorating.
It’s one of my favorite words.  Who doesn’t need a little more “JOY” in their life.
The Joy Frame is a Quick and Easy Holiday Home Décor Project.


Supplies Needed:                                           (*affiliate link)

Directions:

  1. Remove the backing and glass from an old frame and spray paint it black.  My frame holds an 8 1/2 x 11 picture.
  2. Cut the scrapbook paper to size and add to frame.
  3. Paint the chipboard letters red.
  4. Stencil Snowflake design onto the red letters with cream paint.
  5. Apply a light coat of red paint over the snowflakes.
  6. Antique the letters with Vintage Photo ink and ink applicator.
  7. Glue inside of frame.
  8. Embellish frame with some greenery and a red and cream gingham bow.
Craft Confession:
My original plan was to have cream snowflakes on red letters.  After I got through with the stenciling, I thought the snowflakes looked too bright so I decided to re-paint the letters.   As soon as I put on the first thin layer of paint, I loved the tone on tone result.  Happy Accident!
This project was created for and sponsored by Clear Scraps.

Join Amazon Kindle Unlimited 30-Day Free Trial

Disclaimer:  This blog uses ads and affiliate links.  If you choose to make a purchase using one of the links, I receive a small commission (at no additional cost to you) that helps offset the costs of maintaining this blog.  Thanks for your support!

If I were to make a December Daily….

Simple Stories Album

If I were to make a December Daily Album,

December 1st would of looked something like this….

I HAVE COMMITMENT ISSUES!!!

I spent the better part of the day, yesterday, looking at the dozens,

maybe hundreds of “Cyber Monday Specials” in my Inbox.

Completely overwhelming.  So many things to look at.

At one time last night I had 8 tabs open with items I was considering.

At 11:30 last night, I finally placed an order.

Just one?  Yes, just one, and even that one I’m not sure about.

You see, I have a problem hitting that button, putting the item in the cart,

the whole commitment.  Wondering did I make the right decision?

With all those sales… Is today the best deal?  Or will tomorrow’s be better?

It’s tough for a gal like me.

So if I were to write an entry for December 2, it would be…

Take one day at a time and enjoy the Holidays.  (It always gets done.)


Updated… A New Look for an Old Snowman

Updated Sock Snowman

Last year at my Holiday Workshop we made cute little snowmen out of socks.

They were a big hit.

But… one thing, I noticed when I pulled mine out again this year,

was that they looked a little misshapen.  More like a kidney bean than a snowman.

That was because I used rice for the entire body.  (the rice settled)

My updated snowmen still uses rice in the bottom, it now has fiberfill in the top

so that it doesn’t loose its shape.

I also decided my Snowman was cold, so I re-purposed an old sock for his sweater.

For more Making More Sock Snowmen Ideas you can find them here.

Here’s What You’ll Need:                    (*affiliate Links)

Here’s how I made my Snowman:

  1. Tea dye a new white sock, crew length or bigger.  Or if you have boys you could use one of their dingy ones.  (It’s better not to use a sock with the grey toe and heel.)
  2. Cut the top of the sock off, right around the heel.  (save that for the hat.)
  3. Turn the sock inside out and attach a rubber-band tightly around the top of the sock.  Because rubber bands wear out with time, I added a good squirt of Fabri-Tac Permanent Adhesive* (*affiliate link) in and around the rubber band.  (I left the rubber band on)
  4. Turn the sock right side out and fill sock about 1/2 way with rice.
  5. Fill the remaining portion of the sock with Fairfield Poly-Fil Premium Polyester Fiber*
  6. Use an additional rubber-band to close the sock.  Again, I re-enforced the rubber band with glue.
  7. Tie a piece of twine around sock to create the head.
  8. I used mini black square brads for his eyes, the tip of a bamboo skewer colored orange for his nose and a simple sewn black thread for his mouth.
  9. I used some paper craft sprays to add color to the toe of the sock.  I tied the tip with a piece of red and white twine and finished with a bow.  Roll the edge to create a cuff.  I glued my hat to the top of my snowman with Fabri-Tac Permanent Adhesive*(*affiliate link)
  10. Dress with Snowman with part of an old sock.  Add a couple of buttons for added detail.  A  fringed piece of fabric works great for the scarf.

Shop Your Fav Brands at Scrapbook.com

Disclaimer:  This blog uses ads and affiliate links.  If you choose to make a purchase using one of the links, I receive a small commission (at no additional cost to you) that helps offset the costs of maintaining this blog.  Thanks for your support!

Give the Gift of Amazon Prime*

a little Holiday Stenciling

Stenciled Linen Bag

One of my new found obsessions this Holiday Season is stenciling on Linen.

This stenciled linen bag is one of the projects that we made in my Holiday Workshop.

We used Clear Scraps 6″ Word Xmas Tree stencil, acrylic paint and a stencil brush.

Tip:  I like to use removable tape to keep the stencil from moving and to mask off

any areas where I may go over the stencil with my paint.

The linen bag measures 6″ x 10″ and is available through Nashville Wraps.

Clear Scraps Stenciled Holiday Pillow

I loved using this stencil so much that I also bought the 12″ Word Xmas Tree.

These are Quick and easy Holiday projects to make.

They would also make a great Christmas gifts.

Tip:  I stenciled on a 13″ x 13″ piece of linen.  The next pillow I make would be a little larger so that the entire image shows.  My pillow measures 12″ x 12″.

This project was created for and sponsored by Clear Scraps.

Give Thanks with a Grateful Heart

Deflecto Give Thanks Acrylic Frame

Give Thanks with a Grateful Heart. 

Powerful Words, Great Advice.

Words I need to be reminded of everyday, not just at Thanksgiving time.

As a gift for you, I created the below graphic using a free photo editing site,

with no watermark so that you can save it onto your computer.

I printed the below image out as a 5″ x 7″ photo and put it in one of the Beveled Edged Craft Frames

that I received from Deflecto Craft Solutions.

Enjoy!

Give Thanks 2

“This is a sponsored post. As a member of the Deflecto Design Team I have been provided product in exchange for my creative ideas, views and opinions.”

Pictures from Sue’s Holiday Workshop


2014 Holiday Workshop Group Pic #18

As promised here are the pictures from this years Holidays Workshop.

I must say that I liked all three of the group’s pictures.  (not one eye closed)

2014 Holiday Workshop Group Collage

Thank you, to all the wonderful ladies that came this year to my Holiday Workshop,

I had so much fun.  O.K., I have fun every year.

But…I think this year’s group which included 9 new people was even more fun and enthusiastic

than ever.  I loved spending my Saturday creating with you all.

I was on such an adrenaline high after it was all over that I didn’t fall asleep until well after midnight.

For those of you that couldn’t come this year, we missed you, I hope to see you next year.

2014 Holiday Workshop Deflecto SignHoliday Workshop plates and sign

I love the chalk board frames that I received from my Deflecto Design Team box this month.

They worked wonderfully with my theme.

2014 Holiday Workshop Pic #2 2014 Holiday Workshop Pic #1

I made the Candy Cane Suckers with the help of my adorable grandson, Nick, who got sprinkles

everywhere and my lovely daughter-in-law, Bonnie.

I wouldn’t have been able to pull this all off with out her help.  Thank You, Bonnie!

(The Candy Cane idea is from Pinterest, you can see the pin here)

Thank You Again to everyone who came and helped.  (I kind of wish it wasn’t all over.)

Mom's Sugar Cookies

Sue’s Holiday Workshop Recipes

I promised the ladies last Saturday at my Holiday Workshop that I would post my Sugar Cookie Recipe and Cheese Soup Recipe today.  (So Ladies, here it is)  Tomorrow, I’ll be posting the rest of the pictures from the workshop.

For the rest of you:

I know I’ve shared my favorite Christmas Cookie Recipe here on my blog before.

But, I think the meaning this recipe holds for me bears repeating.

When I was a new bride (32 years ago) I asked my mother for her Sugar Cookie Recipe.

(It was a Tupperware Recipe.)  She wrote it out on a piece of notebook paper.

Sugar Cookies

(I have always loved my mom’s handwriting)

It is now yellowed, stained with vanilla, brittle, ripped and creased.

But it is priceless.

Several years back after my mom was diagnosed with Dementia and she could no longer write

her name, I realized how important that piece of paper really is.  I now keep it in a protective sleeve.

I can help thinking of my mom every time I make them.

Sue’s Sugar Cookies

  • 1- 1/2 c. powdered sugar
  • 1 c. butter or margarine
  • 1 egg
  • 1 tsp. vanilla
  • 2- 1/2 c. all purpose flour
  • 1 tsp. cream of tartar
  • 1 tsp. baking soda
  1. Cream sugar & butter, add egg & flavoring, mix thoroughly.
  2. Sift dry ingredients together and stir in.  (I dump)
  3. Refrigerate 2 to 3 hours.
  4. Heat oven to 375°.
  5. Divide dough in half & roll out on lightly floured Tupperware pastry sheet.
  6. Roll thin, but thick enough to pick up the design with the Tupperware cookie cutters.
  7. Dip cookie cutter into flour before each cutting.  Cut as many cookies from each rolling as possible.  The least amount of working with the dough gives the best cookie.
  8. Place on lightly greased baking sheet.  Bake 7 to 8 min. or until delicately golden.


Cheese Soup

  • 1 Qt. Water
  • 2 Cups Diced Potatoes
  • 1/2 Cup of chopped onions (optional:  I don’t add onions to mine)
  • 4 Chicken Bouillon Cubes
  • 1 Can Cream of Mushroom Soup
  • 1 Bag of Frozen California Mix Vegetables
  • 1 lb. Velvetta Cheese loaf  (also good with a little  extra)
  1. Boil potatoes, onions in water & cook.
  2. Add frozen vegetables & cook.
  3. Add mushroom soup and cheese.
  4. Heat & Serve

Do not allow soup to boil.

* I make this soup every Christmas Night.  After a long day of eating heavy foods it’s nice to have something warm and light to eat.


Upcycled Jewelry, Bags, Belts and more.

I was recently asked by Linda Peterson and Cisco Books to review Linda’s latest book

Upcycled Jewelry, Bags, Belts and More.

As soon as I received the book, I immediately sat down and thumbed through all the pages.

I was amazed at the unique and creative ways that Linda uses everyday found objects.

Have you figured out what she used to make the belt on the front cover?

Soda Can Tabs!

Linda has added beautiful, detailed pictures with easy to follow instructions that makes

recreating these projects a breeze.  If you enjoy Indie crafts and up-cycling everyday

found objects then I highly recommend this book.